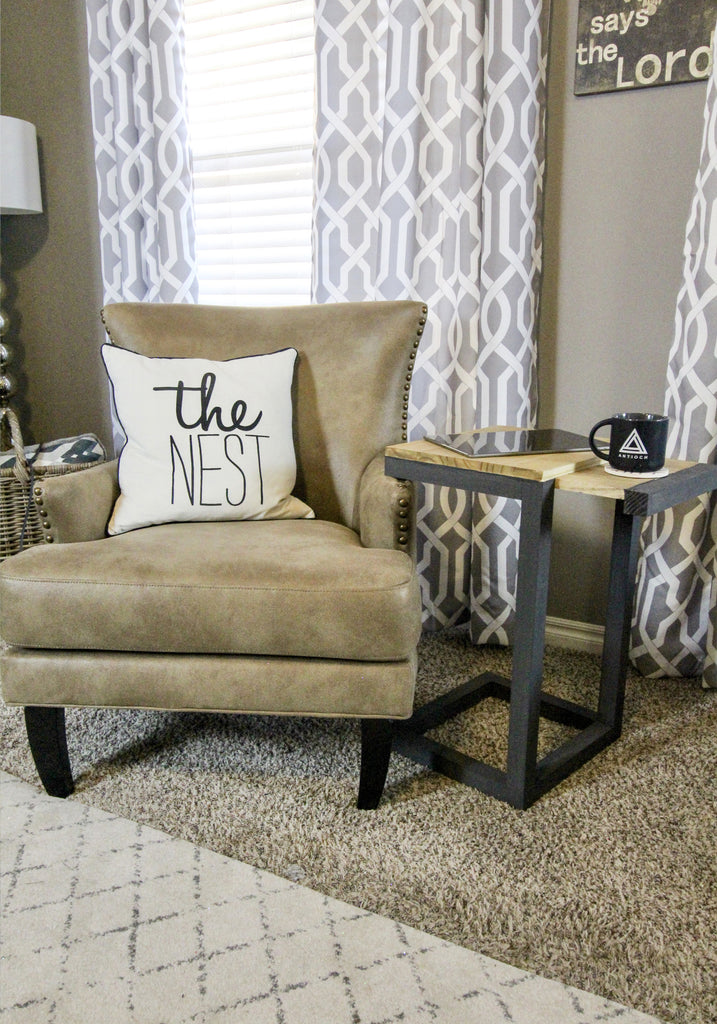
Pull Out Side Table
"A DIY side table with a little something extra"
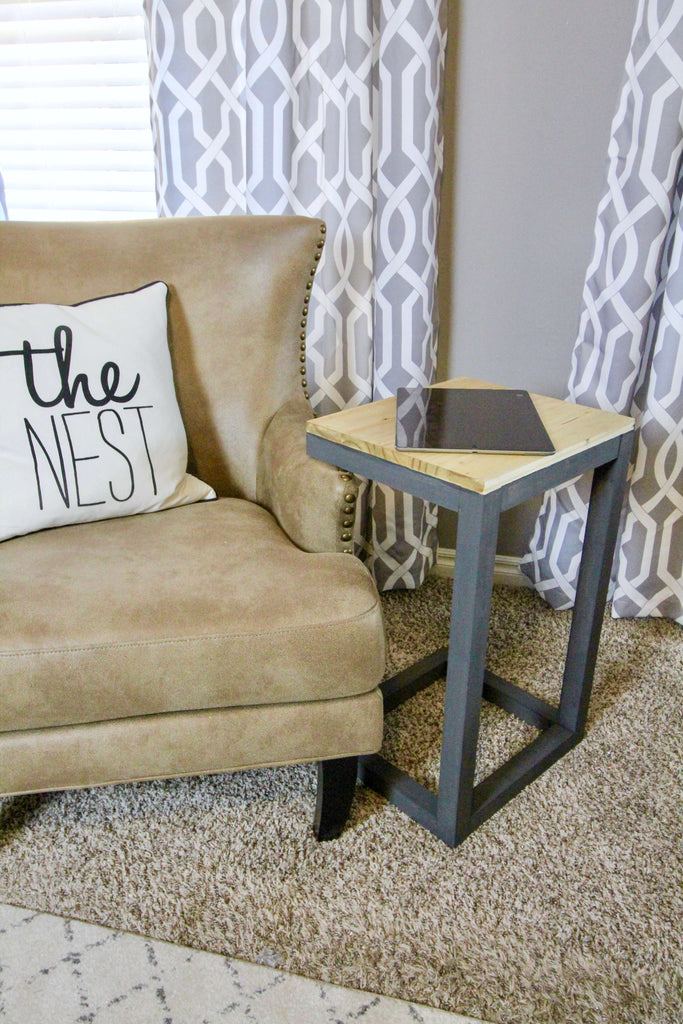
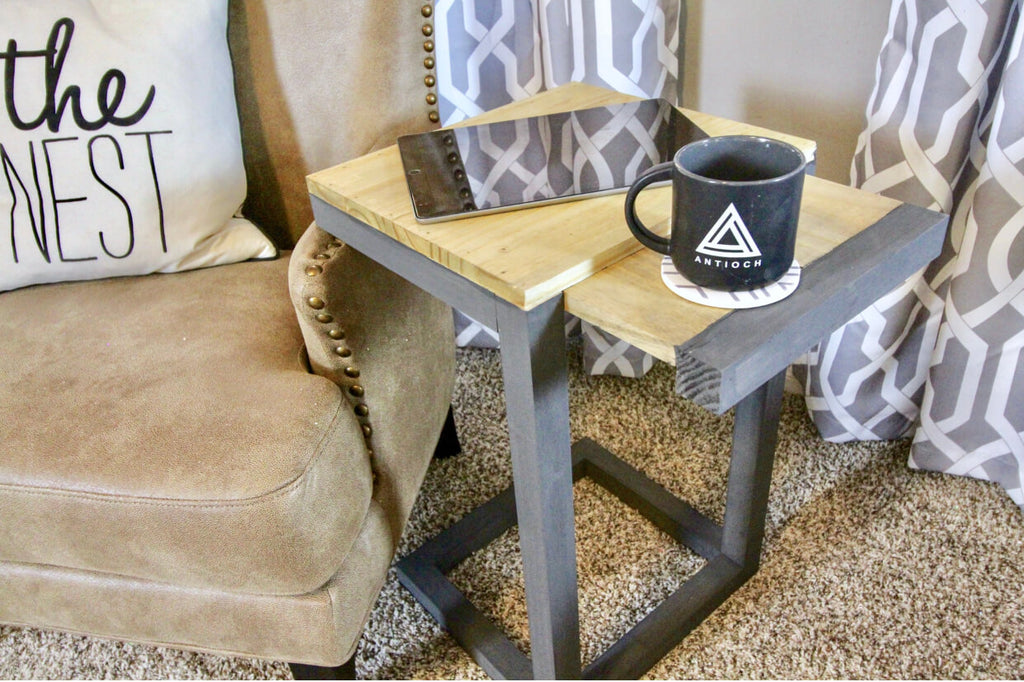
I must admit I am always a huge fan of hidden features, so this DIY side table was a fun build for me. A simplistic build with a cool built in feature, it doesn't get any better than that.
This post is sponsored by the Home Depot as a part of The Home Depot's Pro-Spective Campaign."
There are some affiliate links in this post, meaning I get a small commission if you purchase through these links, at no cost to you. Click Here to read my full disclosure.
Even better than that, I got to use some really cool tools during this build. My new compact DEWALT 20-Volt Cordless Brushless Drill/Driver and Impact Combo Kit was super helpful during this build. The kit also came with two batteries and a tool bag. This drill/driver and impact kit is ideal for most drilling and fastening applications.

I also want to note that I am a fan of DEWALT's Premium battery pack. IT includes a 20-Volt battery and dual-port charger. its protected by a 3 year warranty and comes with a 1-year free service contract. Can't beat that.
Lets get to it!
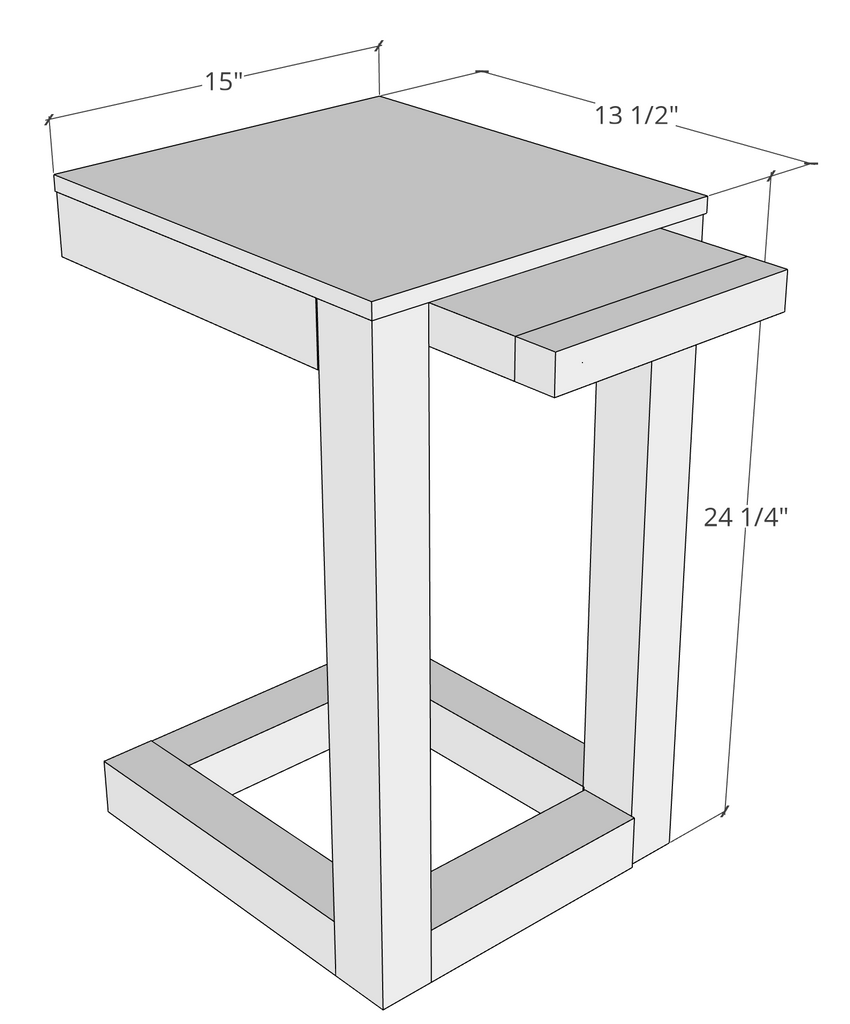
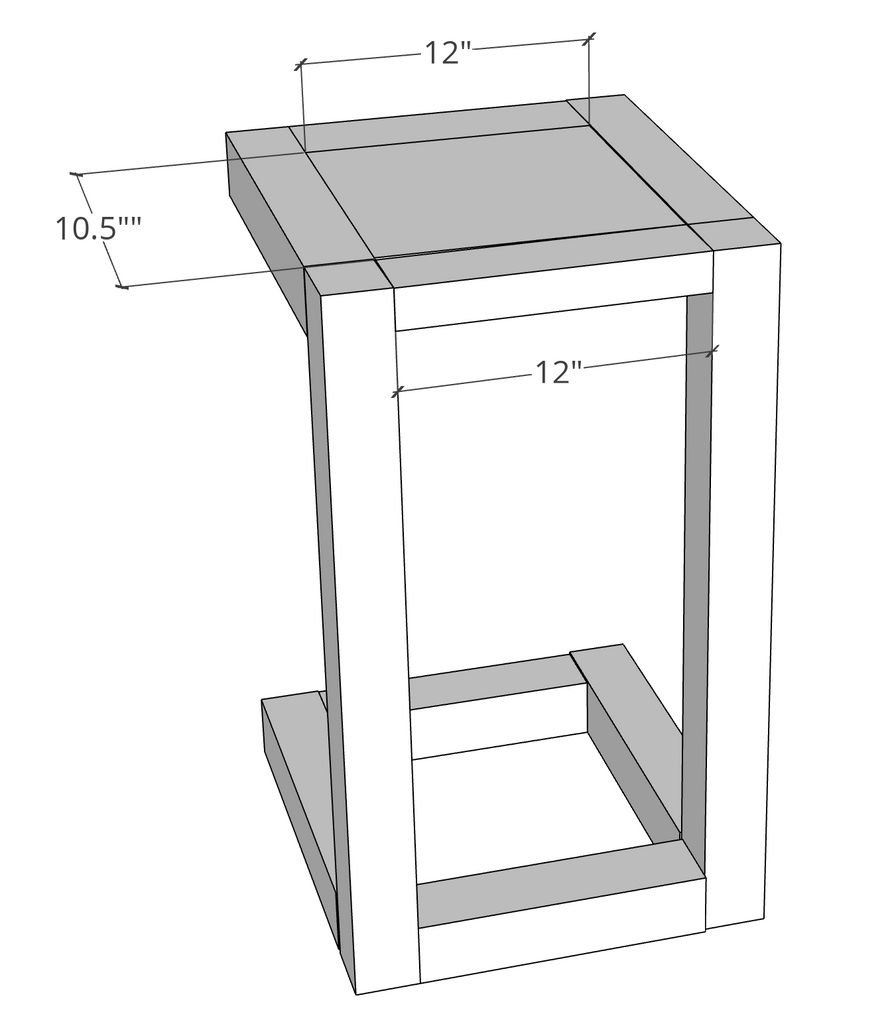
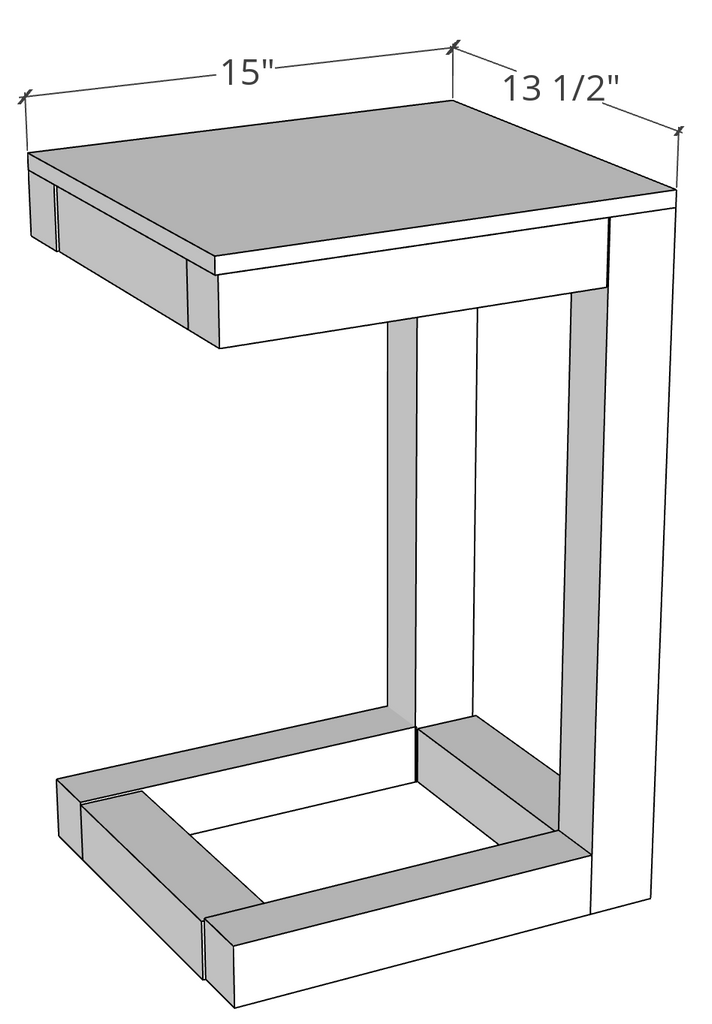
Dimensions
Materiels
2 - 2x2 @ 6ft
1 - 3/4" plywood (2x4)
1 - 1/2" Pocket Hole Screws
Square Dowel
Cut List
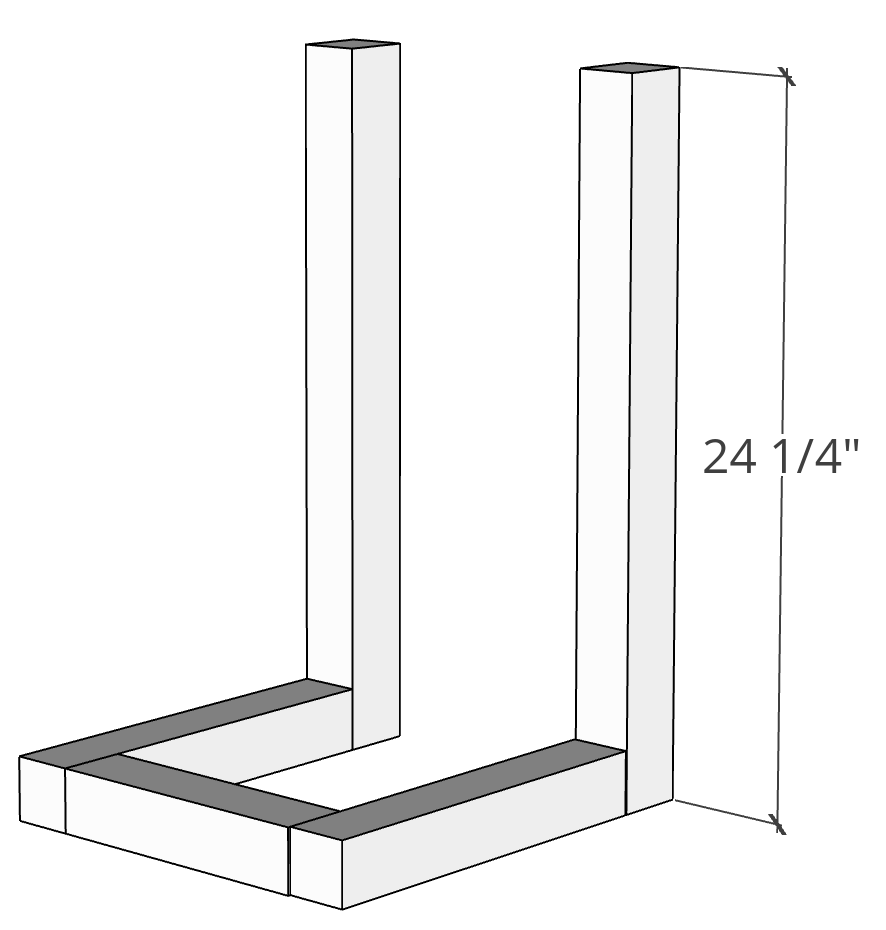
2 - 2x2 @ 24 1/4"
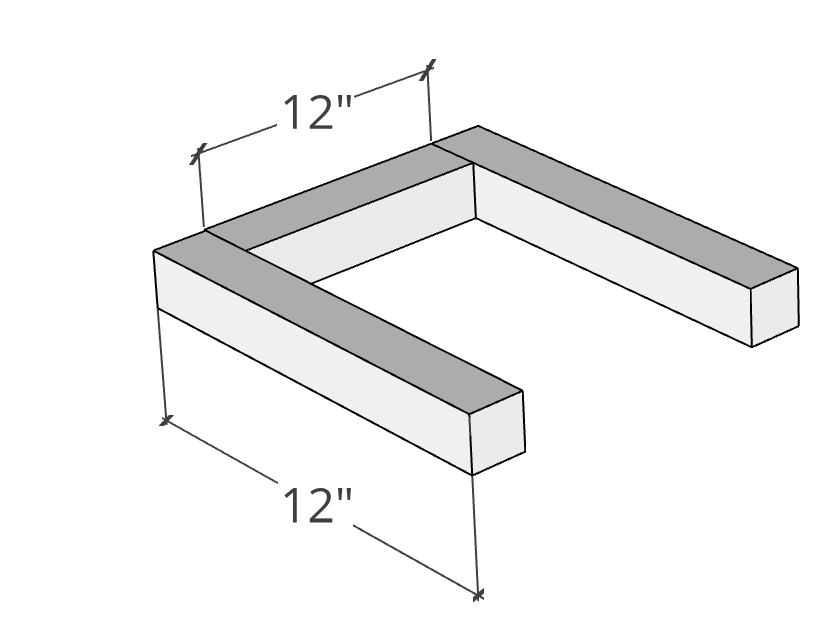
8 - 2x2 @ 12"
1 - 3/4" plywood (13.5"x15")
1 - 3/4" plywood (10.5"X 12")
Tools Used
DEWALT 20-Volt Cordless Brushless Drill/Driver and Impact Combo Kit
Ryobi Brad Nailer
Ridgid Miter Saw
Step 1: Attach the bottom 2x2s together using a Kreg Jig on a 1 1/2" setting, with 2 1/2" pocket hole screws to attach along with wood glue.
I used my DEWALT Drill/Driver to drill in my pocket holes along with my handy dandy Kreg Jig,
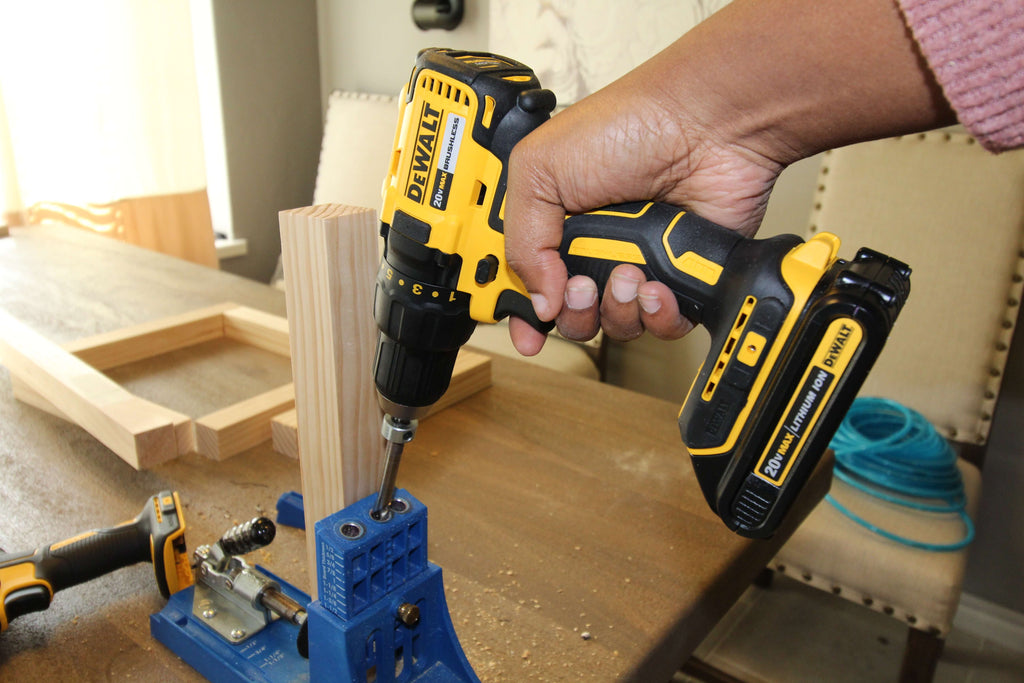
and I used my DEWALT Impact driver to drive in my pocket hole screws into the bottom 2x2 slates.
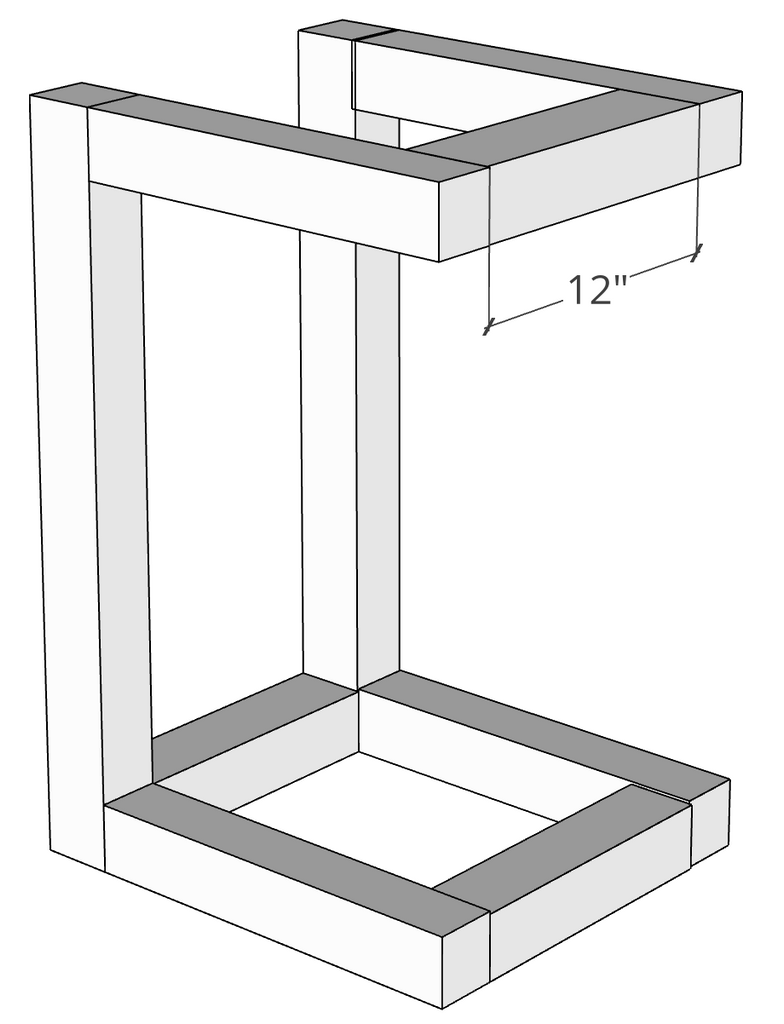
Step 2: Attach the assembled bottom to the (24 1/4") 2x2s using a Kreg Jig on a 1 1/2" setting, with 2 1/2" pocket hole screws to attach along with wood glue.
Step 3: Attach the top (12") 2x2 supports to the assembled pull out table using a Kreg Jig on a 1 1/2" setting, with 2 1/2" pocket hole screws to attach along with wood glue.
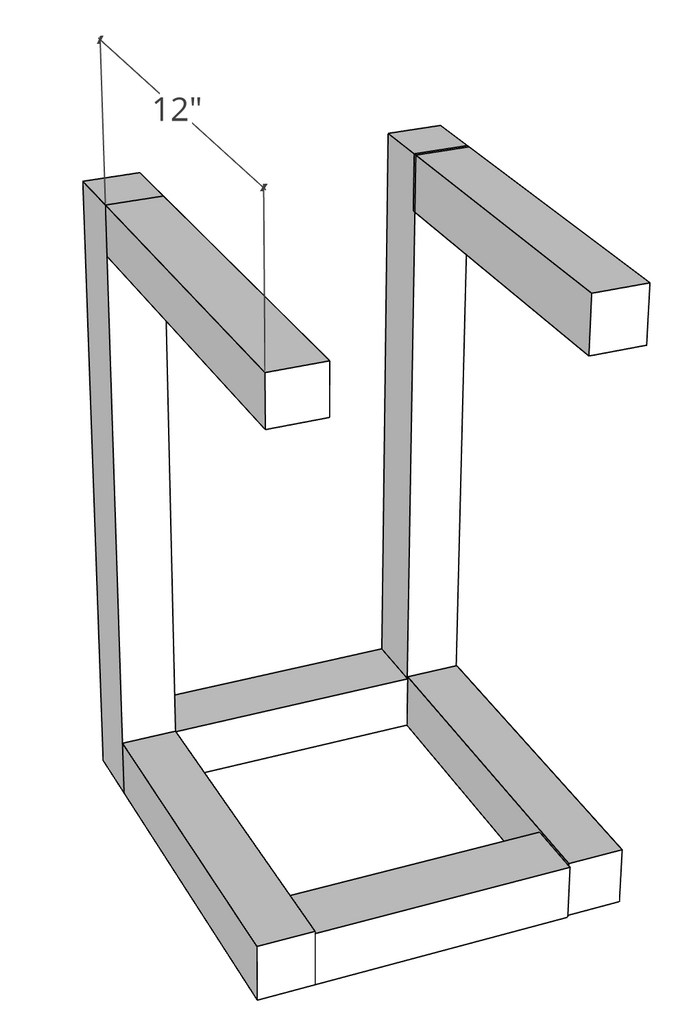
Step 4: Attach the front (12") 2x2 to the assembled pull-out table using a Kreg Jig on a 1 1/2" setting, with 2 1/2" pocket hole screws to attach along with wood glue.
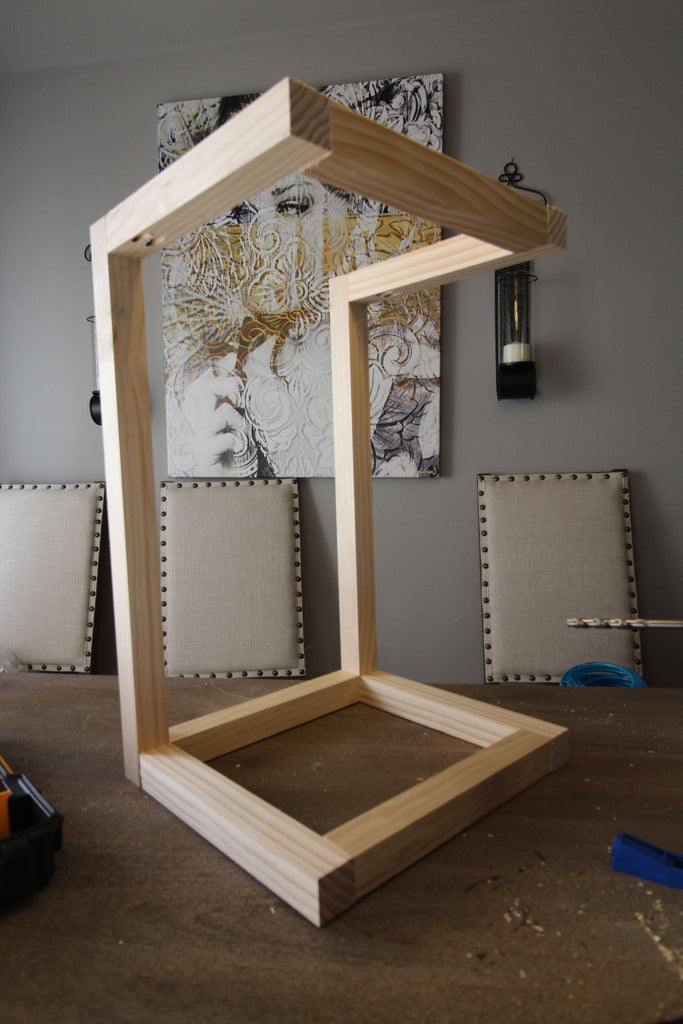
Once the pull out table is assembled it should look a little something like the picture below.
Step 5: Next add the dowels to the assembled pull out table. Attach the dowel with a brad nailer, wood glue and brad nails.
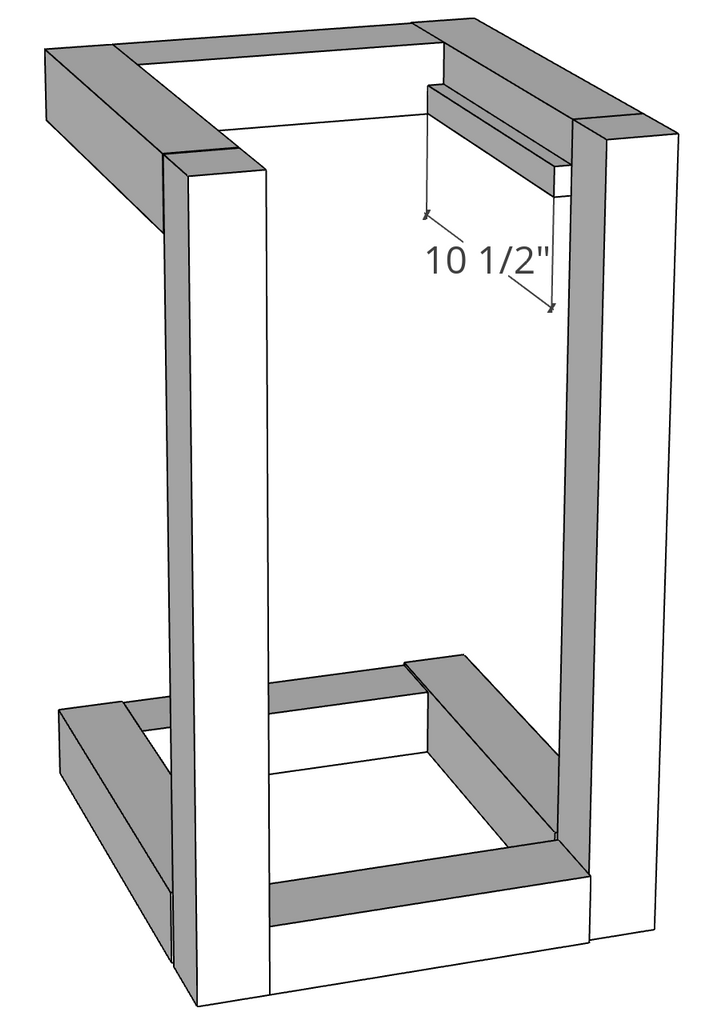
The dowels should be placed so that that 3/4" piece is flush with the top of the assembled base.
Step 6: Next assemble the pull out under table by screwing the smaller 3/4" plywood piece to the (12") 2x2 using a Kreg Jig on a 3/4" setting, with 1 1/4" pocket hole screws to attach along with wood glue.
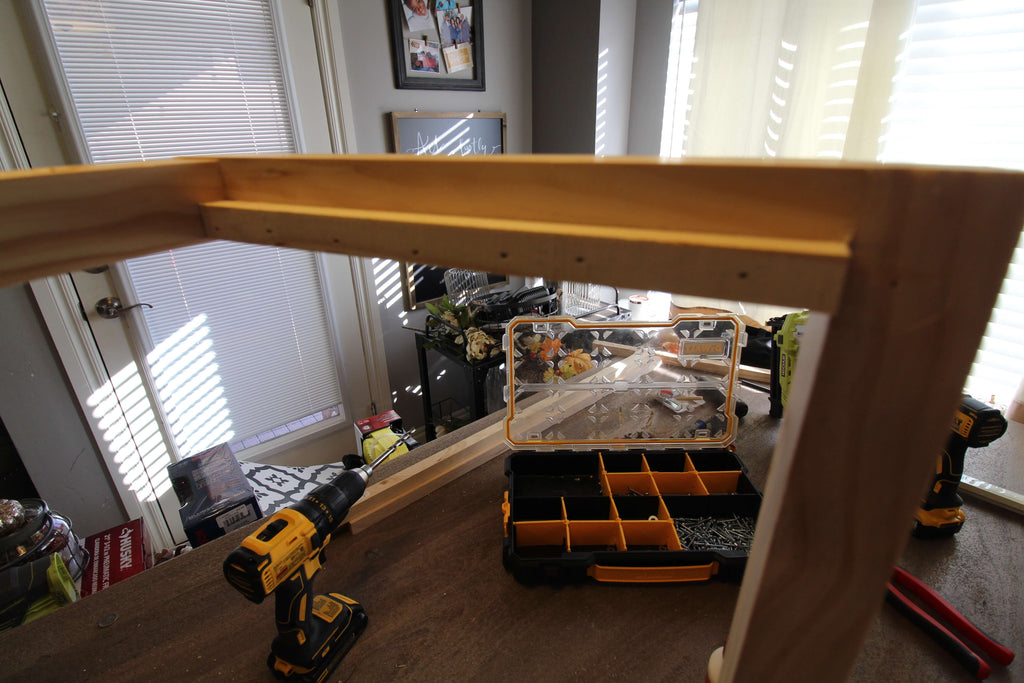
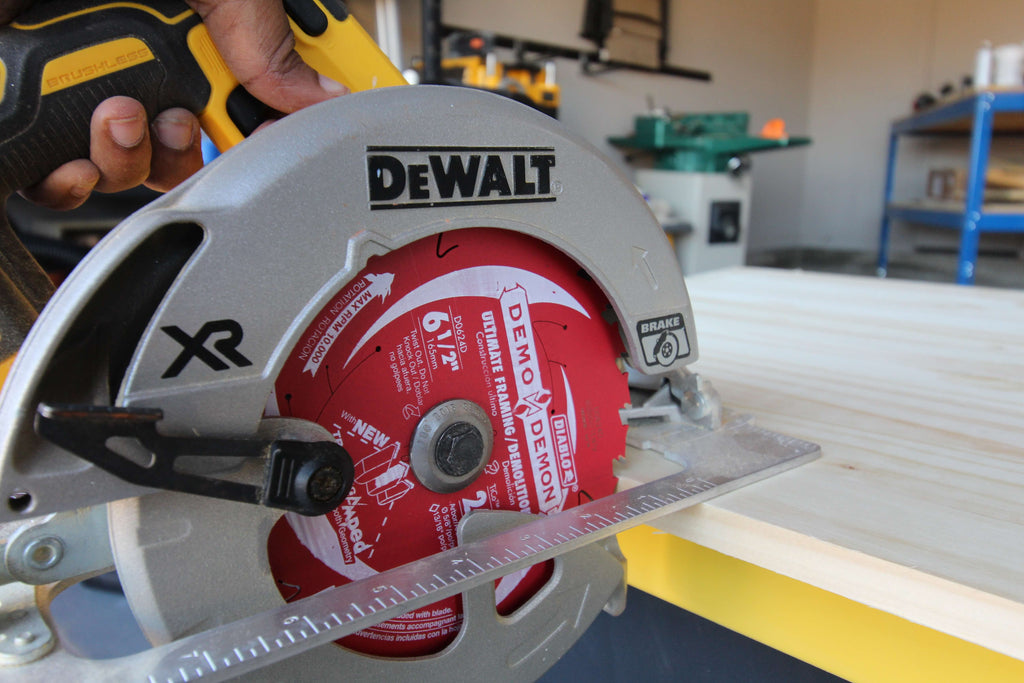
I cut the two 3/4" tabletop pieces using my Circular saw and Demo Demon saw blade. This blade has a lock tooth technology the allows a strong bond between the blade and the carbide tooth allowing deep impact resistance and longer life. It has great tracking control and made a smooth, effortless cut. Out of all the Diablo blades I have used, this by har has been my favorite. The cut was flawless.
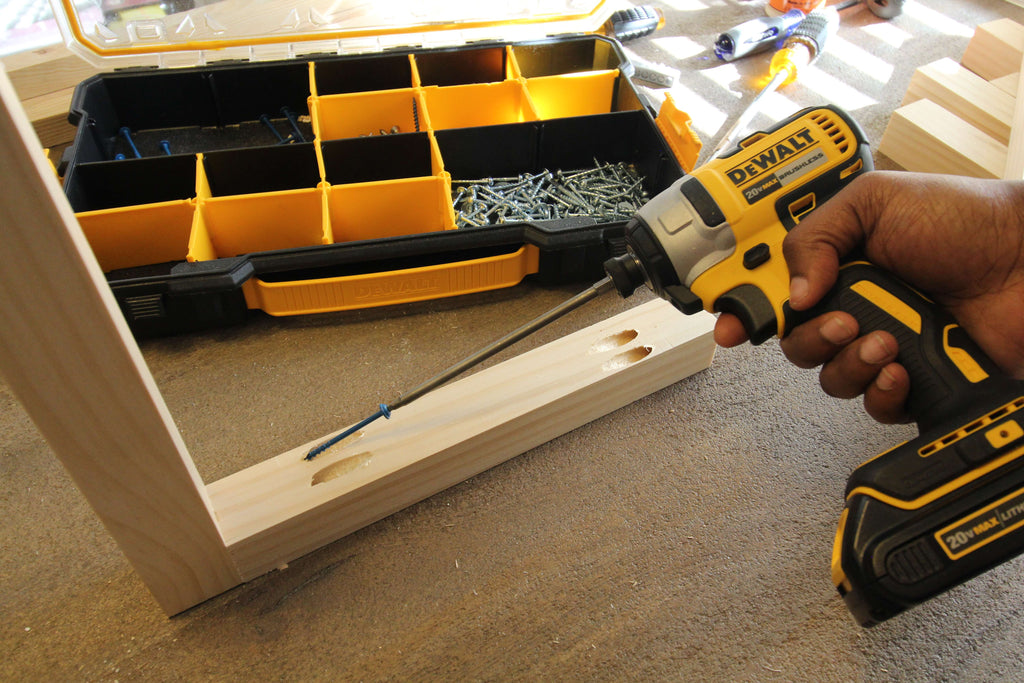
Step 7: Attach the 3/4" top to the assembled pull-out table using a brad nailer and brad nails.
Step 8: Fill all pocket holes using my special technique. See details here.
and WAA-LAHH! There you have it. A DIY Pull Out Table
I am so excited about this build and can't wait to see your go at it!
Thanks for reading! XOXO, Ashley
I acknowledge that the Home Depot is partnering with me to participate in the THD Pro-Spective Tool Review Program. As a part of the program, I am receiving compensation in the form of products and services, for the purposes of promoting The Home Depot. All expressed opinions and experiences are my own. My post complies with the Word of Mouth Marketing Association (WOMMA) Ethics Code and applicable Federal Trade Commission guidelines.