
It’s time to make some quick and easy Christmas decor! In this post we are going to focus on making a small tabletop wooden Christmas tree. All you need is a couple of 1×6 and a 1/4″ wood dowel pin. If you like the of Christmas decor shown in the photo below, be sure to check out our Star Tutorial or the Christmas Tree Shelves tutorial.

If you love this stuff as much as we do, you might want to consider following us on Instagram where we post sneak peeks and behind the scenes stuff in our stories. Also, did you know you can get tons of projects plans from all around the web when you follow us on Facebook and Pinterest!
Full Project Video
Wanna see how these all came together? Check out the full project video below and don’t forget to subscribe on YouTube so you won’t miss future videos!
Time to Complete
1 Day
Estimated Cost
~$10
Skill Level
Beginner
Tools
- Jig, Scroll, or Band Saw
- Circular Saw (optional)
- Forstner Bits (3/4″ and 1/4″)
- Safety Glasses
- Hearing Protection
Materials
- 1 x 6 x 3′ Board
- 1/4″ Wood Dowel Pin
- Spray Adhesive
- Wood Glue (optional)
Disclosure: The links provided in the “materials” and “required tools” sections are affiliate links. If you would like to support our site and help keep our content free come find out more about how we can make money with no extra cost to you.
How to Build Wooden Christmas Tree!
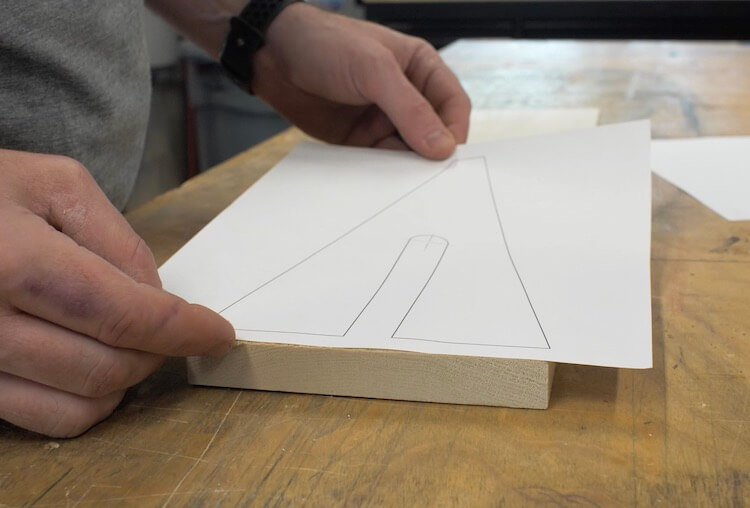
- Apply the Templates
Download Templates and print out at 100% scale. You may need to uncheck any “scale to fit” or similar option. Cut the star off the one template and place to fit between the two tree parts. Then, adhere those templates to your 1×6 with spray adhesive.
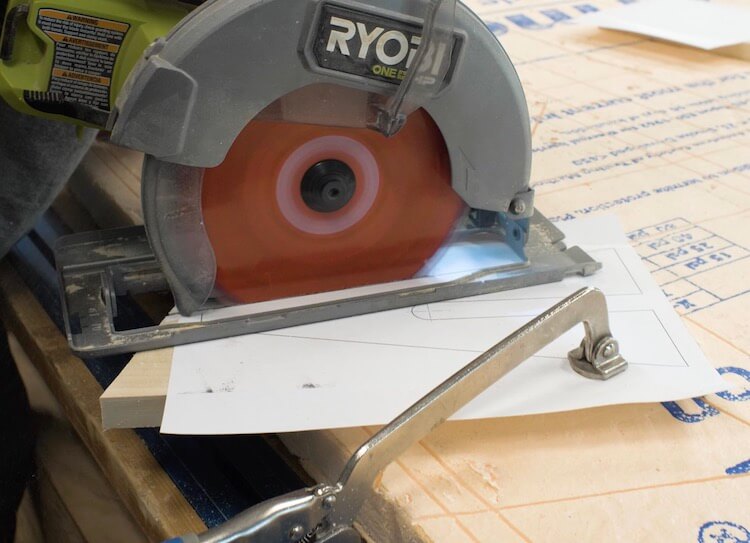
- Cut Out the Parts
To cut the parts out you could do it all with a jig saw, scroll saw or band saw but I used a circular saw for the straight cuts to get a straight, clean cut.
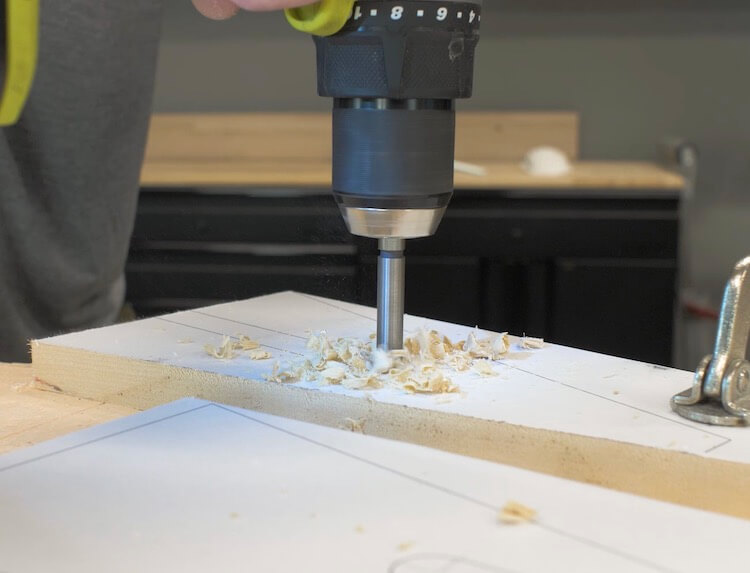
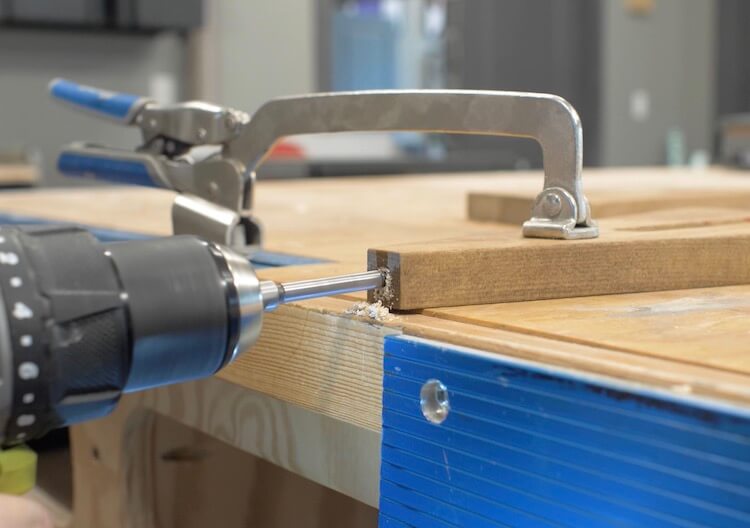
On the templates you will find some crosshairs where you can use a 3/4″ drill bit. I used a forstner bit to get a clean hole.
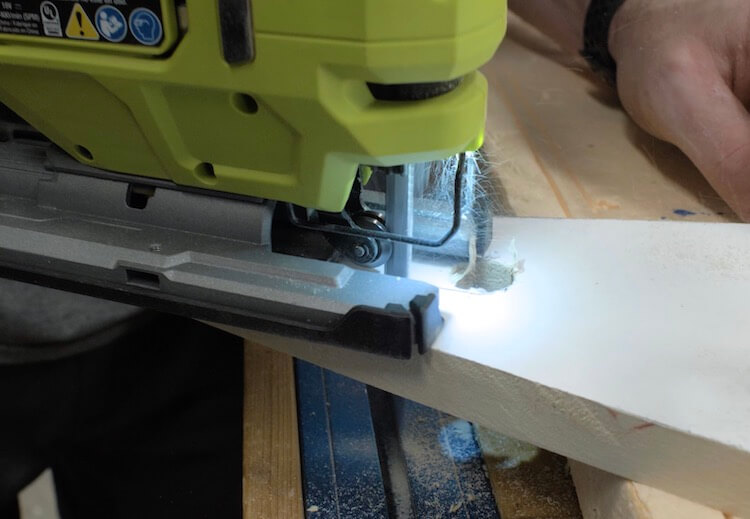
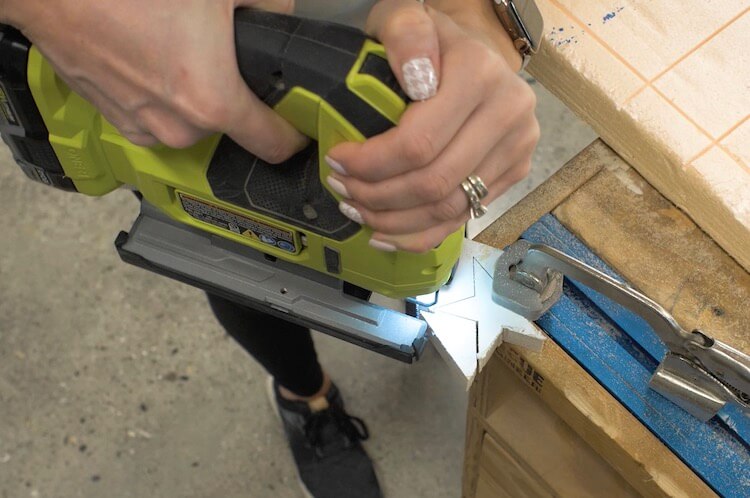
To finish off the half lap joint on the two tree parts I used a jig saw.
The star can get cut out with jig saw, scroll saw or band saw.
- Drill Dowel Holes
After applying finish to each piece, I then used a 1/4″ forstner bit to drill a hole in the bottom of the star.
I also did the same for the top of the tree.
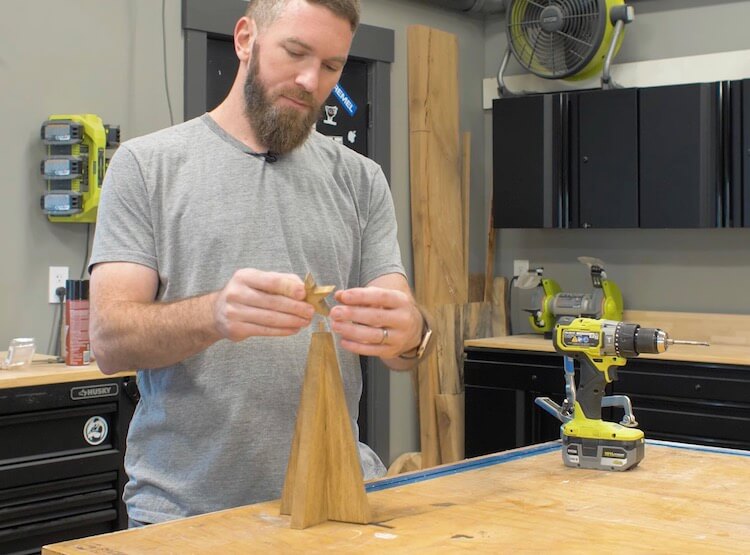
- Assemble
After that, the assembly is pretty straightforward. The two tree parts slide together and the 1/4″ dowel is used to attach the star on the top. Wood glue is not required since everthing fits together pretty snug but can be used for a permanent assembly if desired.

Thats’s it, this is a super simple project that will add to your Christmas decor!


Questions? Comments?
As always, if you have any questions don’t hesitate to comment below and especially don’t forget to post pictures of your finished products in the comments!