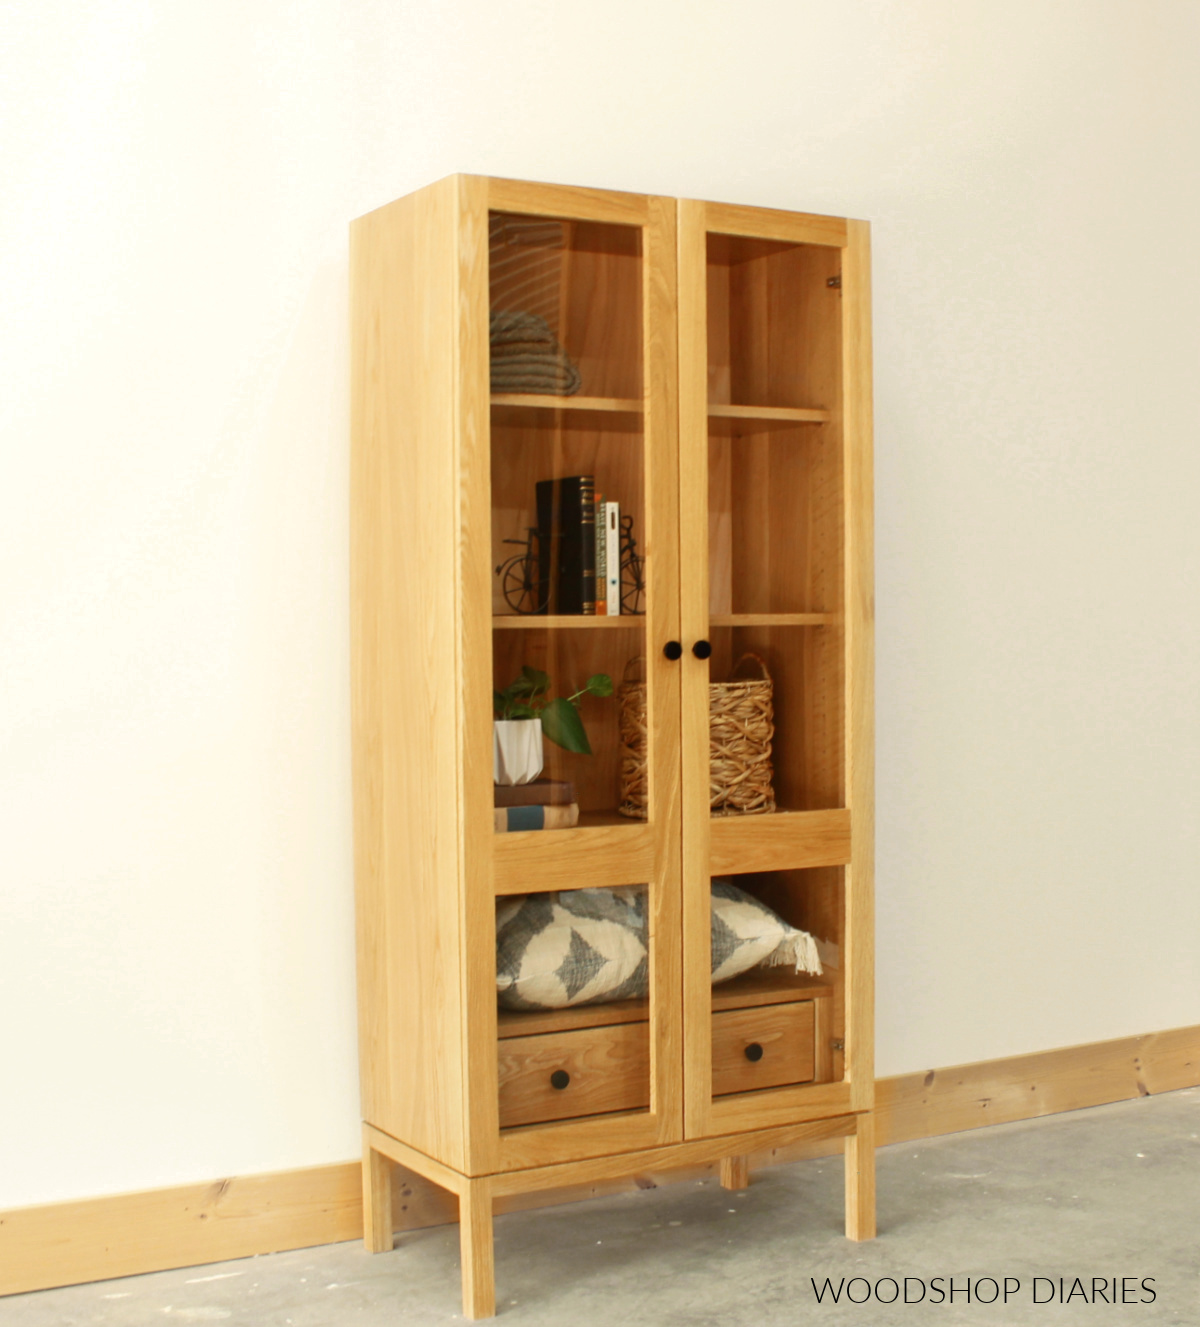
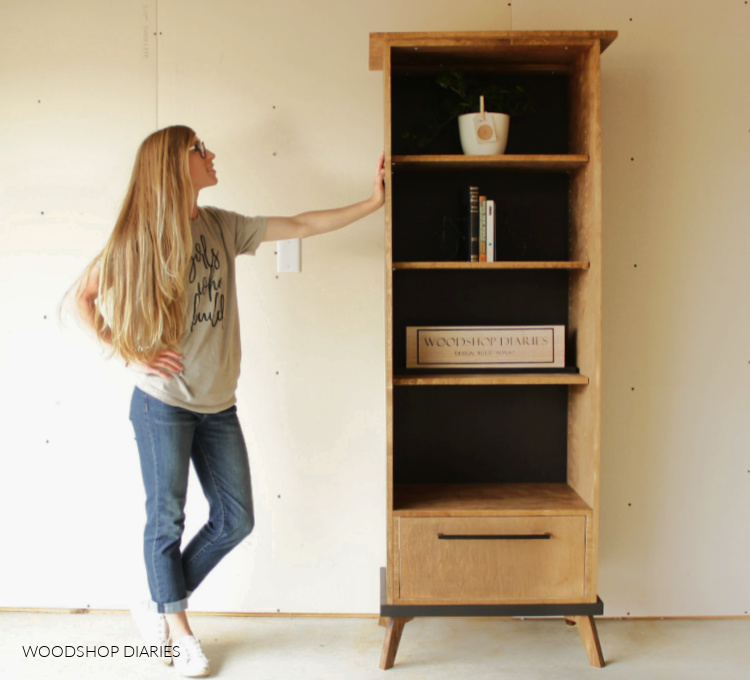
In this post I’m sharing how to build a display cabinet with drawer!
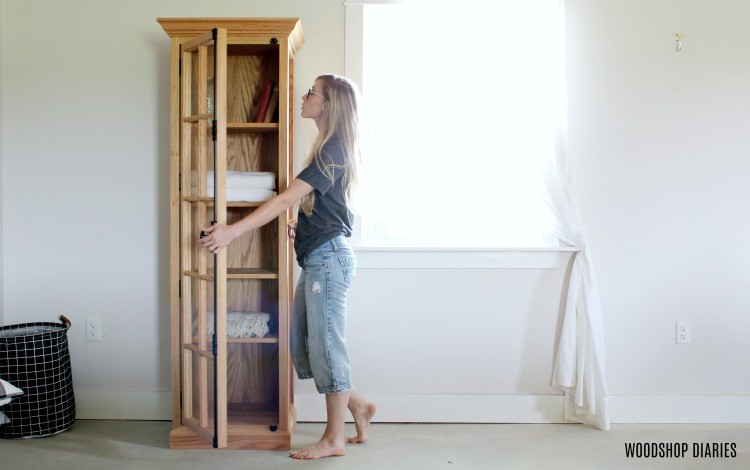
I have had this project on my “to build” list for SO LONG. I built a glass door linen cabinet a while back that we left with our last house when we moved.
.
I really didn’t want to leave it, but it fit so perfectly in our bathroom, it felt like it was just part of the house.
.
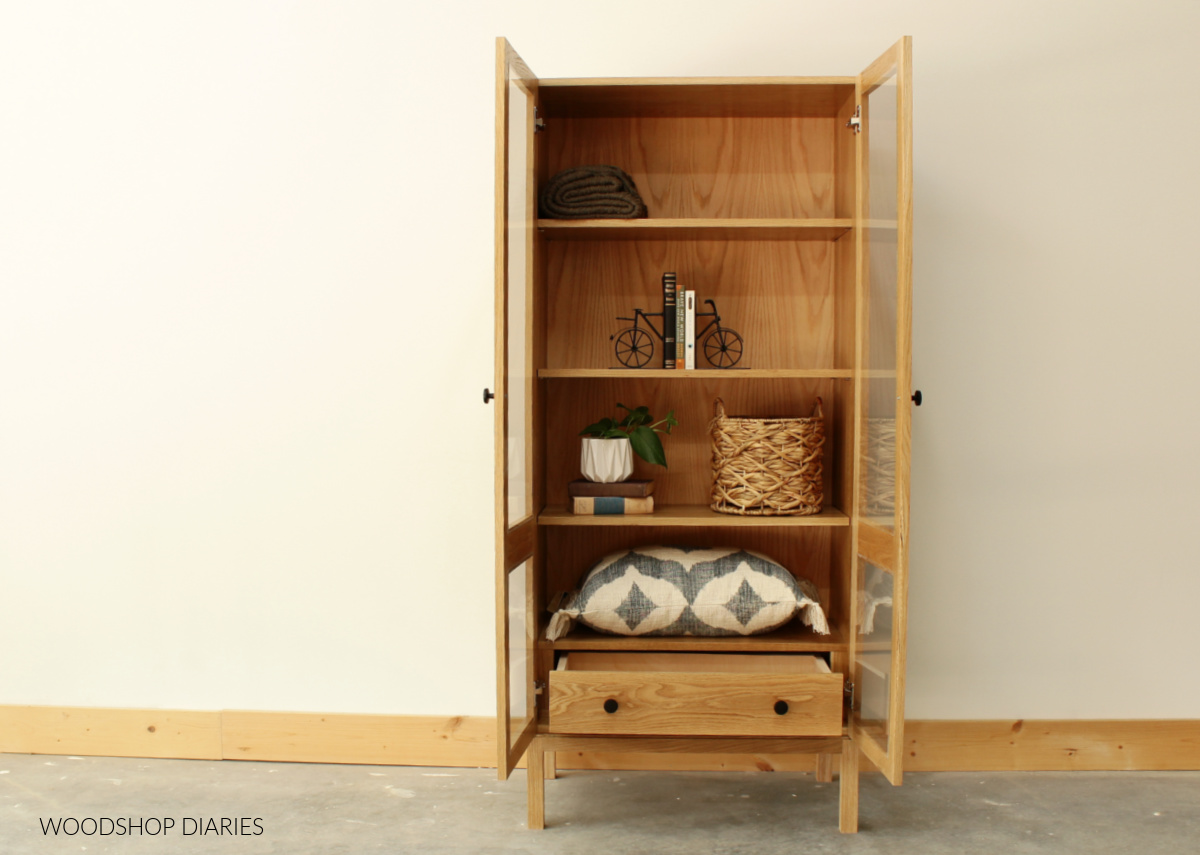
So when we moved to our home now, I wanted to build another display cabinet, but this time, one with a drawer in the bottom!
.
I’m so excited to be sharing this build and the printable plans with you, so if you’re ready to dive into the project, let’s go!
.
Sign up for priority access to new woodworking projects and building plans:
.
First, let’s address some questions and important notes about the build.
Important Notes Before Building this DIY Display Cabinet with Drawer
Using Plywood vs Solid Wood
I built this project from solid white oak lumber provided by Weaber Lumber.
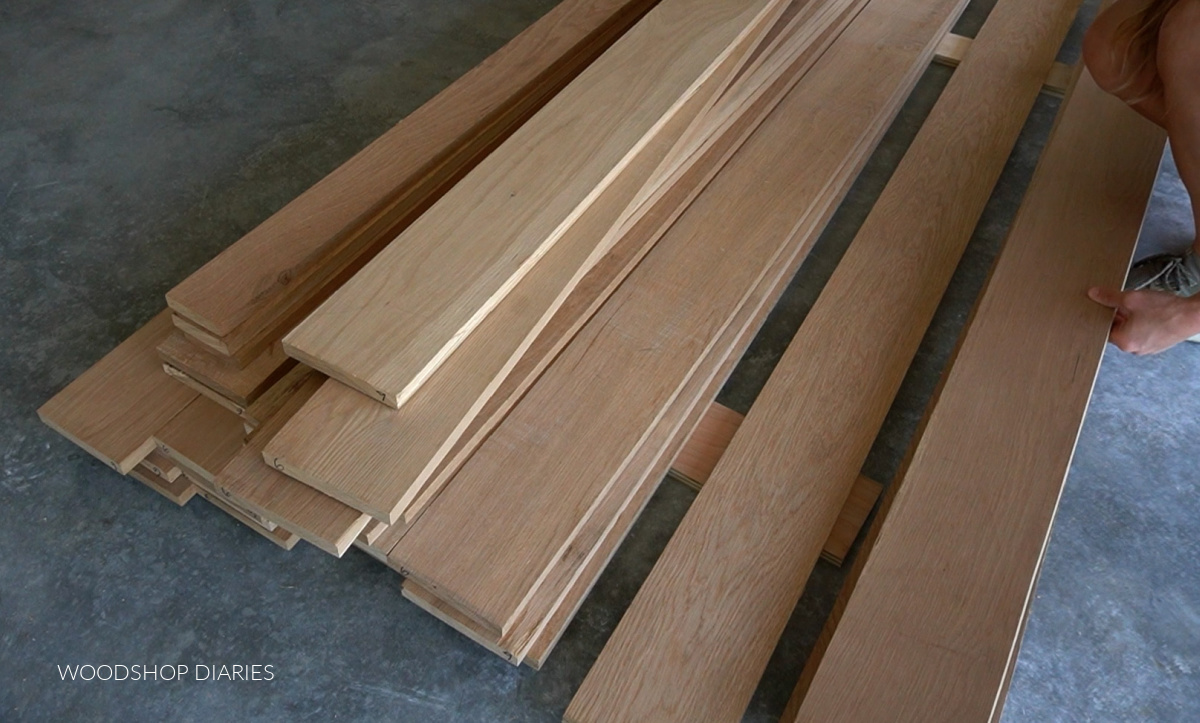
However, this could also be made from hardwood cabinet grade plywood as well. I’ve provided a plywood cut diagram in the building plans if you choose to use plywood for this build.
.
In the diagrams below and in the printable plans, I’m showing overall dimensions of each piece in the build, so if you prefer to use solid wood, you can simply glue up your own solid wood panels the same size.
.
The amount of solid wood lumber you will need will depend on the widths of the pieces you’re working with, so you will need to determine that based on your lumber options and availability.
“Glass” Door Material
You can use glass or acrylic/plexiglass for your doors. I used plexiglass because I can cut it myself with a circular saw.

However, if you prefer real glass, you can check your local glass shops or big box stores as many of them will custom cut glass or you if you need it. I recommend sticking to ⅛″ or slightly thinner for these panels.
.
You can go thicker, but it’s not necessary and will just add to both the cost and the weight of the overall piece.
Back Panel Installation
You can install the back panel several ways. In the plans, I’m showing installing it by rabbeting the back of the cabinet.
.
However, you can also just staple directly onto the back edge OR you can even cut dadoes into the cabinet to install it.
Pocket Holes vs Dowels
I used wood glue and dowels to assemble the cabinet box and the base because I was working with solid wood.
.
However, if using plywood, I recommend using pocket holes and screws instead.
Overall Project Dimensions
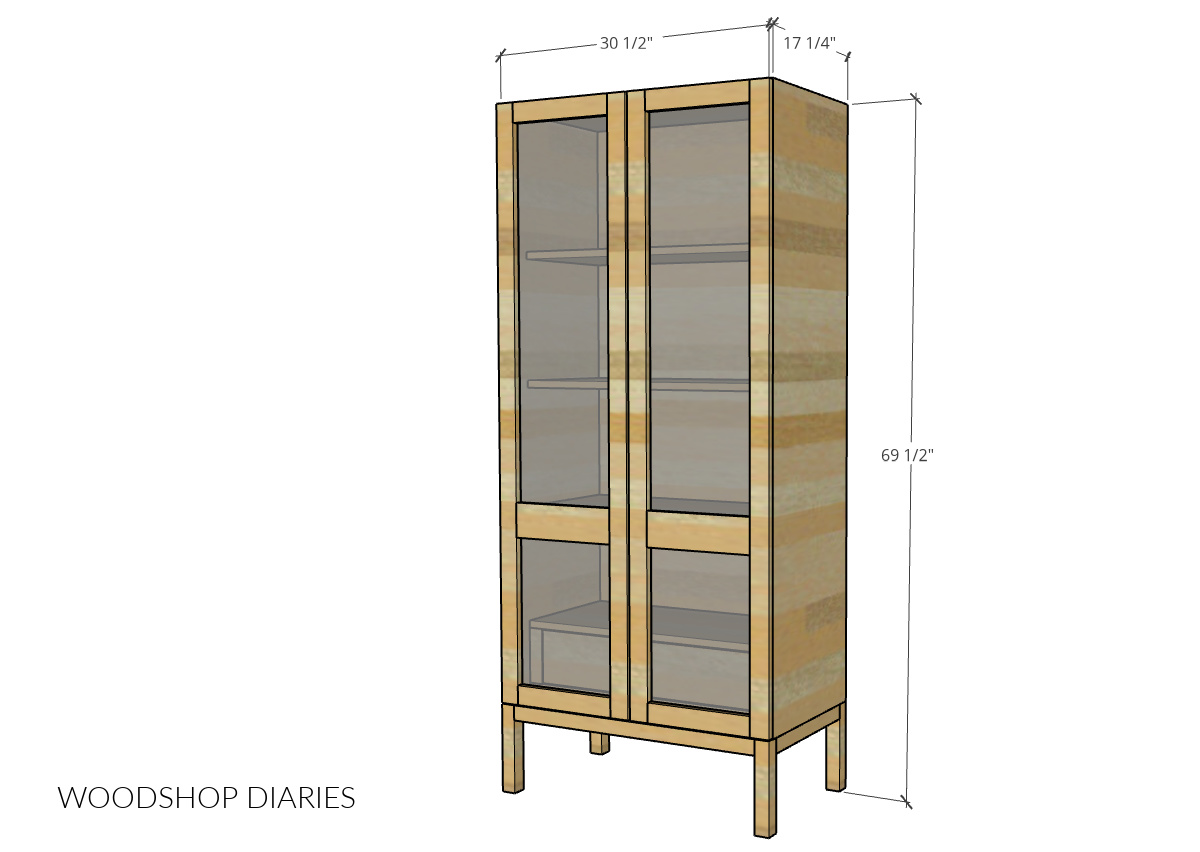
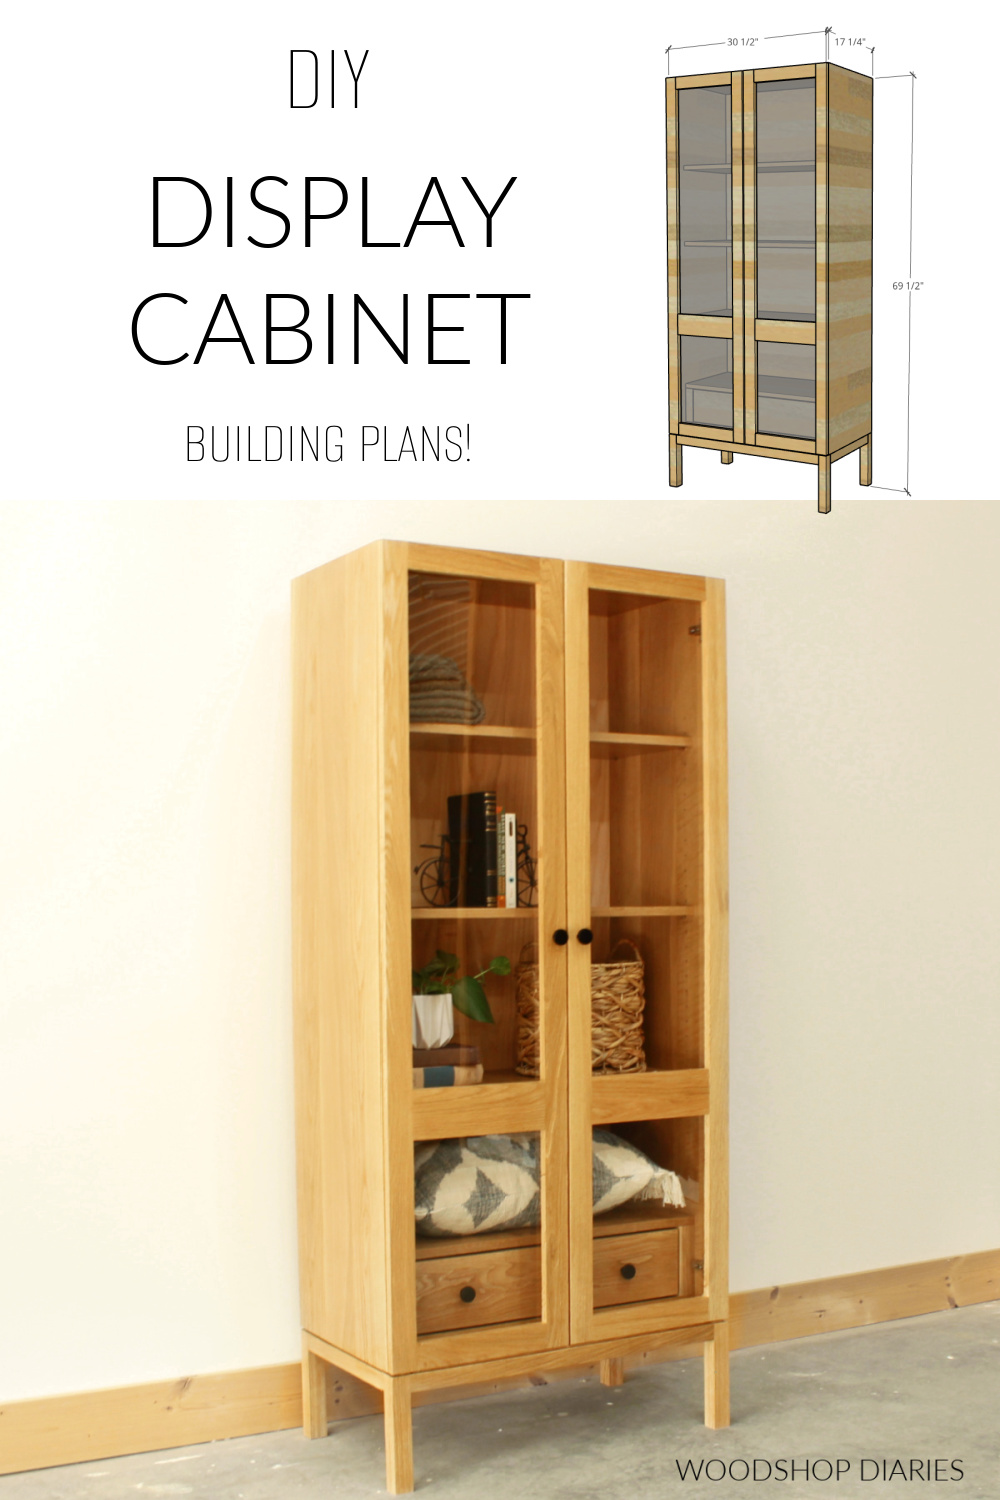
This DIY display cabinet with drawer ended up being about 17 ¼″ deep x 69 ½″ tall x 30 ½″ wide.
Tools & Materials
Tools:
- Circular Saw and straight edge (or cutting guides)
- Miter Saw
- Table Saw
- Drill/Driver
- Stapler/Brad Nailer
- Pocket Hole Jig
- ⅜″ dowel Jig (optional)
- Router and Rabbeting Bit
- Chisel
- Shelf Pin Jig
- Concealed Hinge Jig
- Clamps
- Sander
Materials:
- (1) 1x2x8 board
- (4) 1x3x8 boards
- (1) 1x4x8 board
- (2) 2x2x8 boards
- (2) 4×8 sheets ¾″ plywood (OR glue up solid wood panels instead)
- (1) 4×8 sheet ¼″ plywood
- (1) pair 12″ drawer slides
- (2) pair frameless full overlay concealed hinges
- Shelf Pins
- ⅜″ diameter x 1 ½″ wood dowels (optional)
- Wood Glue
- Super Glue for Plexiglass
- 1 ¼″ pocket hole screws
- 2 ½″ pocket hole screws (optional)
- 2″ wood screws (OR Z clips/Figure 8 clips to attach base to cabinet)
- Wood finish (as desired)
- (2) sheets ⅛″ (or less) 24″ x 48″ acrylic or plexiglass
How to Build a Display Cabinet with Drawer
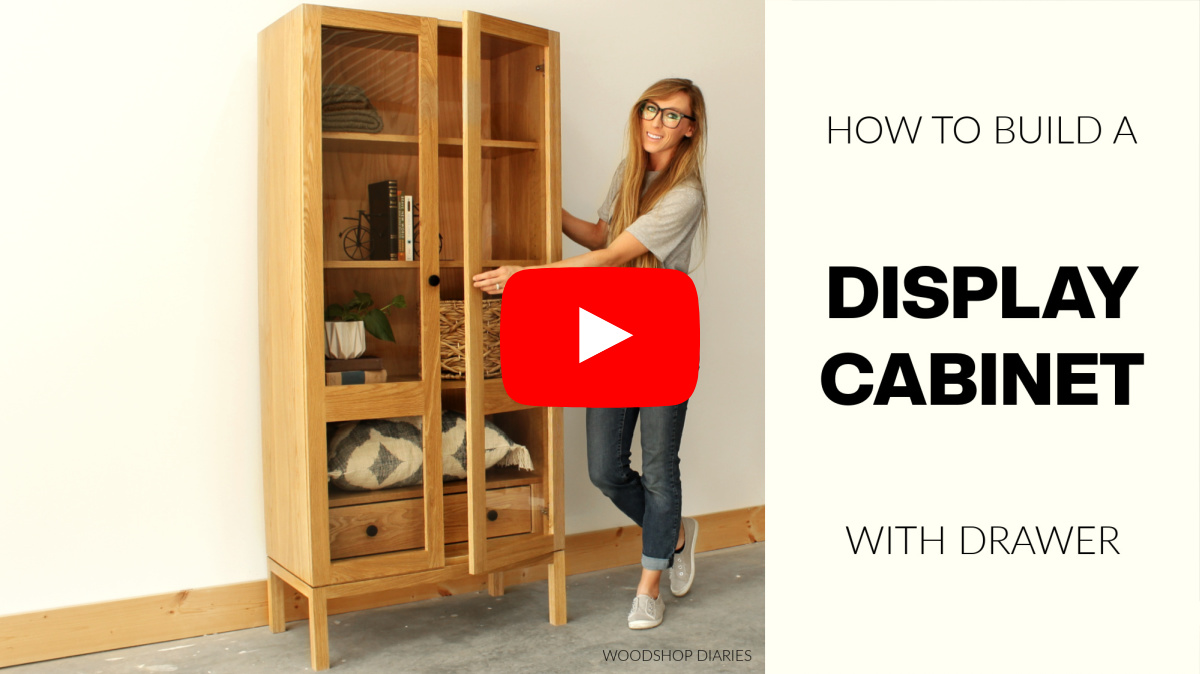
I’m sharing the step by step instructions below, but I also have some videos, too if you prefer to watch!
.
Here’s a quick intro video and the full build video is at the end of this post.
For the complete cut list, and all the dimensions and diagrams, you can grab the printable building plans here:
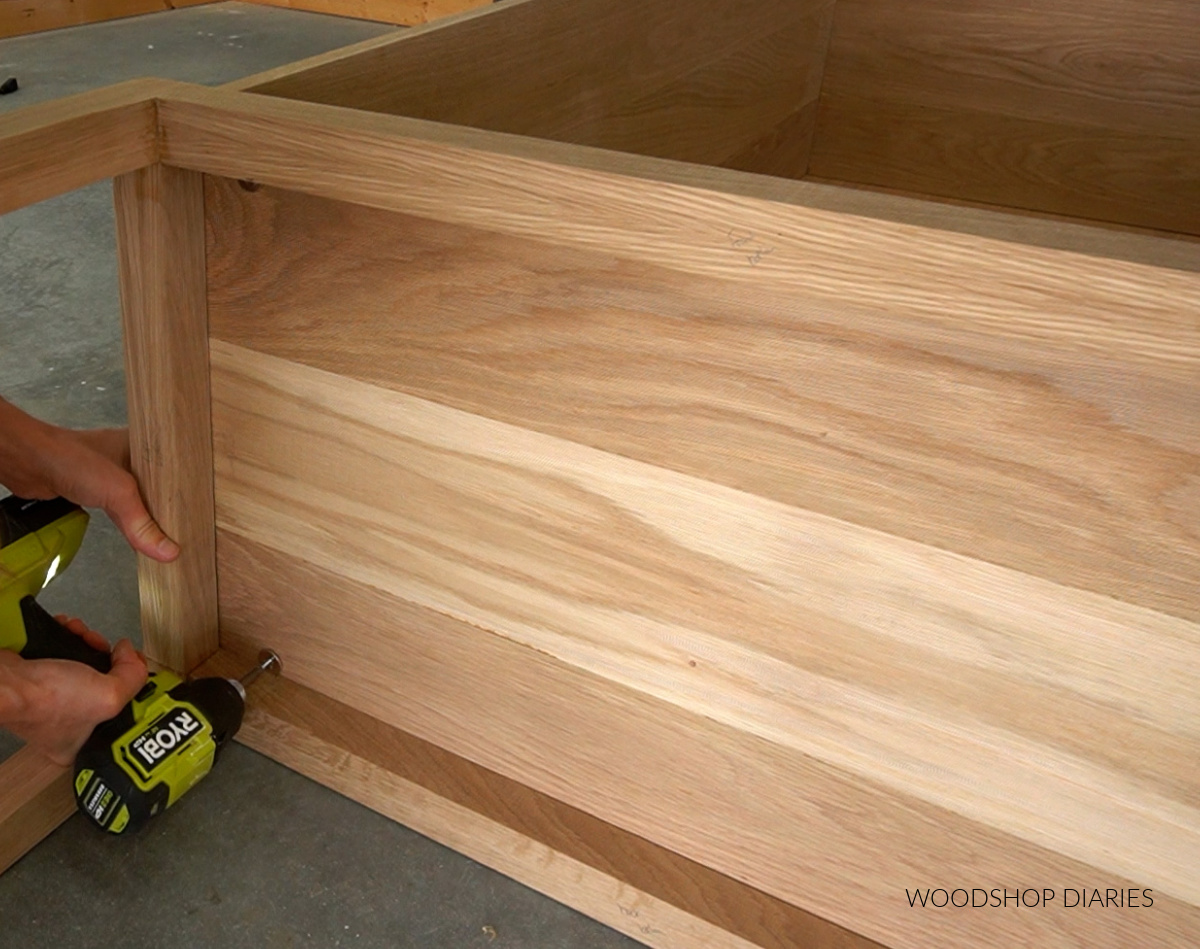
Step 1: Assemble Display Cabinet Box
To kick off the build, let’s start with the main body of the cabinet box.
.
I mentioned earlier that I glued up solid wood panels for this, but ¾″ plywood would also work just as well.
.
Either way, cut the pieces to size, then assemble like shown below.
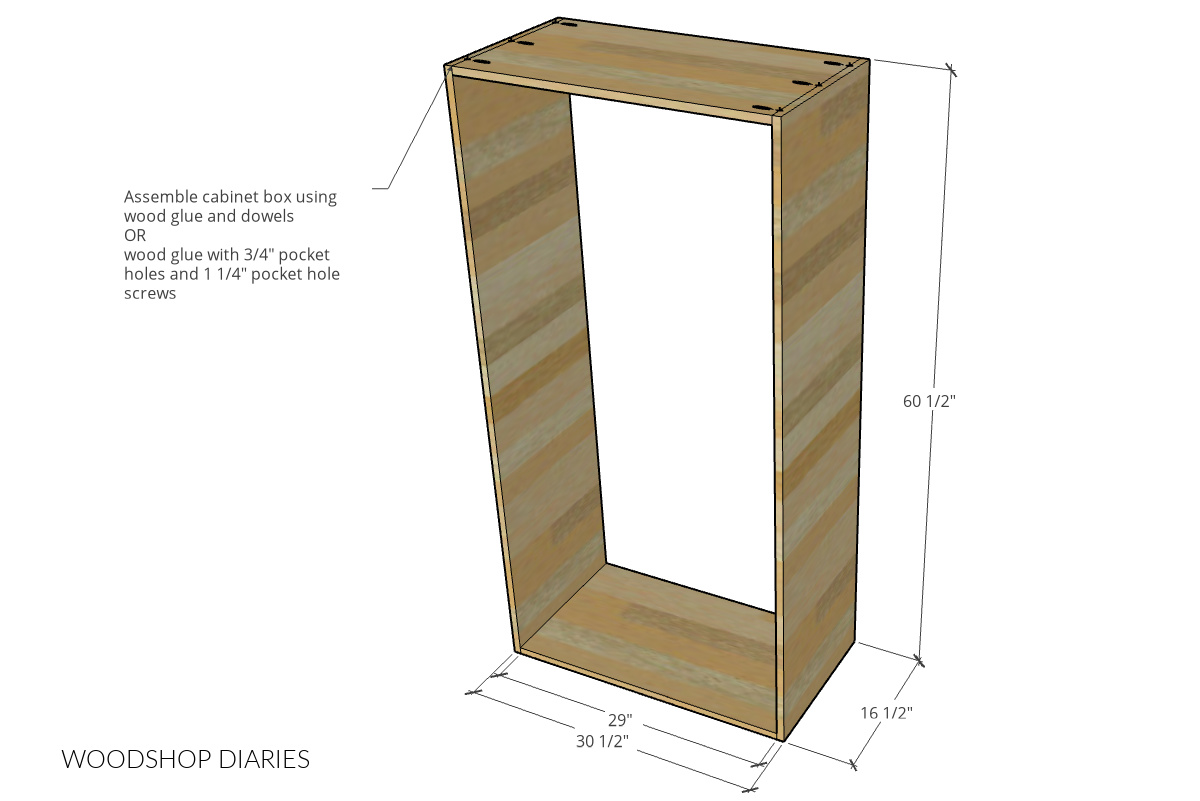
If using plywood, I recommend using wood glue with ¾″ pocket holes and 1 ¼″ pocket hole screws.
.
However, if using solid wood, either pocket holes and screws OR wood glue and dowels are a good option.
Step 2: Add Back Panel
I mentioned in the notes above that you can install the back panel several different ways. If you don’t want to “inset” the panel into the cabinet, you can certainly just staple it onto the back.
.
However, for a little bit cleaner look, you can use a router and rabbeting bit to route the inside of the back edge of the box from step 1 about ¼″ deep.
.
Use a chisel to square off the corners (the bit will leave the corners rounded).
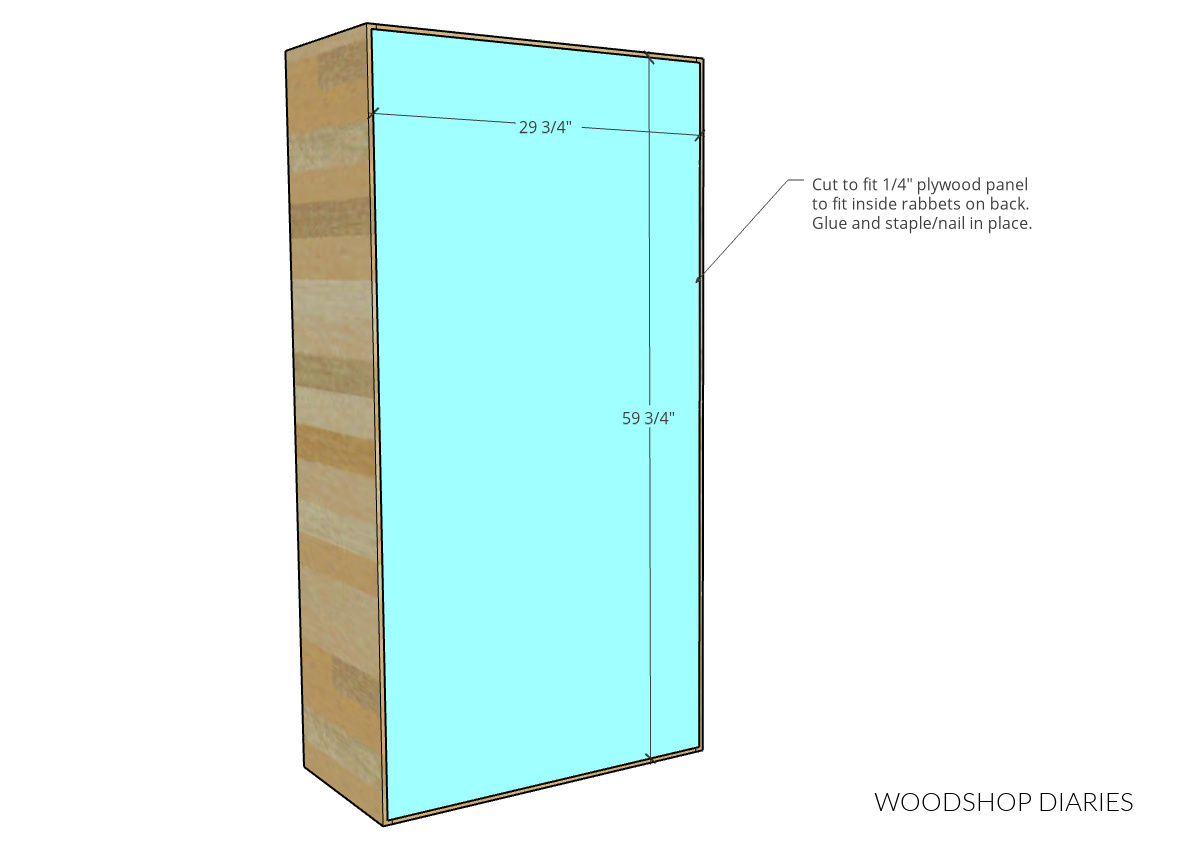
Then, cut ¼″ plywood to fit into the rabbet and staple in place.
Step 3: Assemble Display Cabinet Base
Now that the main box is together, it’s time to make the base.
.
The base is built from 2x2s. You can assemble the base like shown below using 1 ½″ pocket holes and 2 ½″ pocket hole screws. Be sure to use wood glue as well!
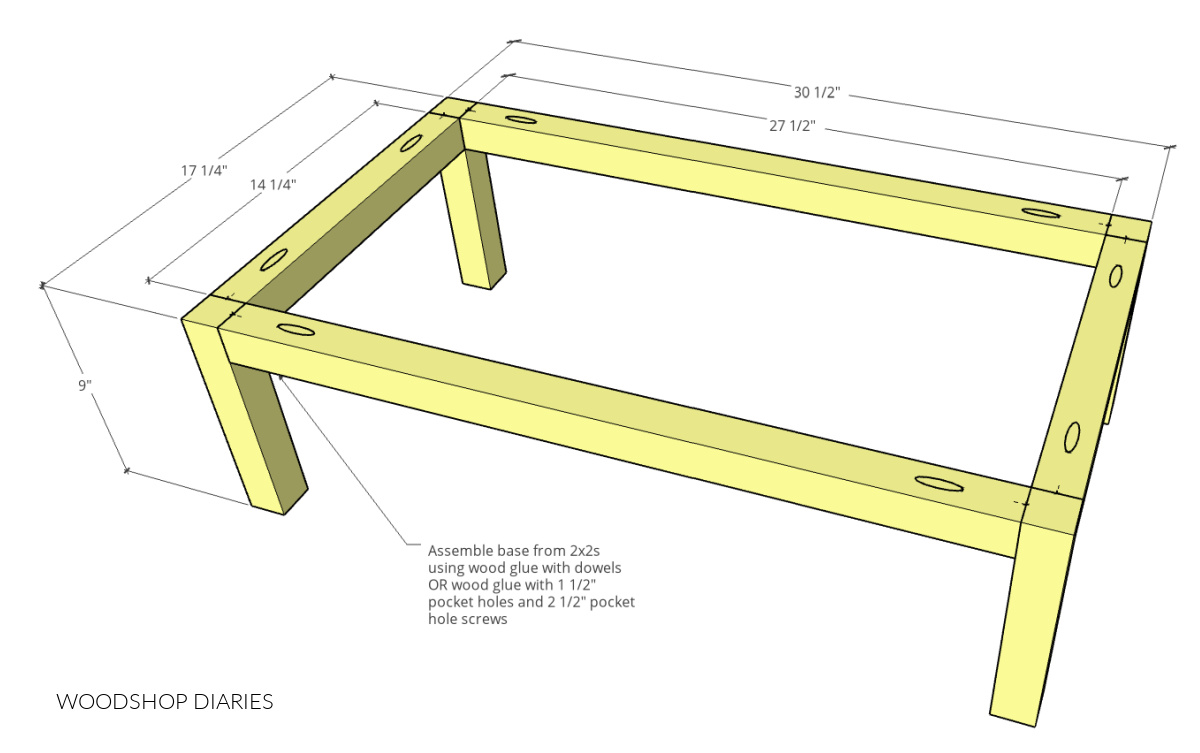
However, I’d recommend using wood glue and dowels for this instead as the screws may tend to run into each other on the corners making assembly quite difficult.
.
After my base was assembled, I sanded it and then used a rabbeting bit on my router to cut a shallow rabbet around the outside top edge of the base.
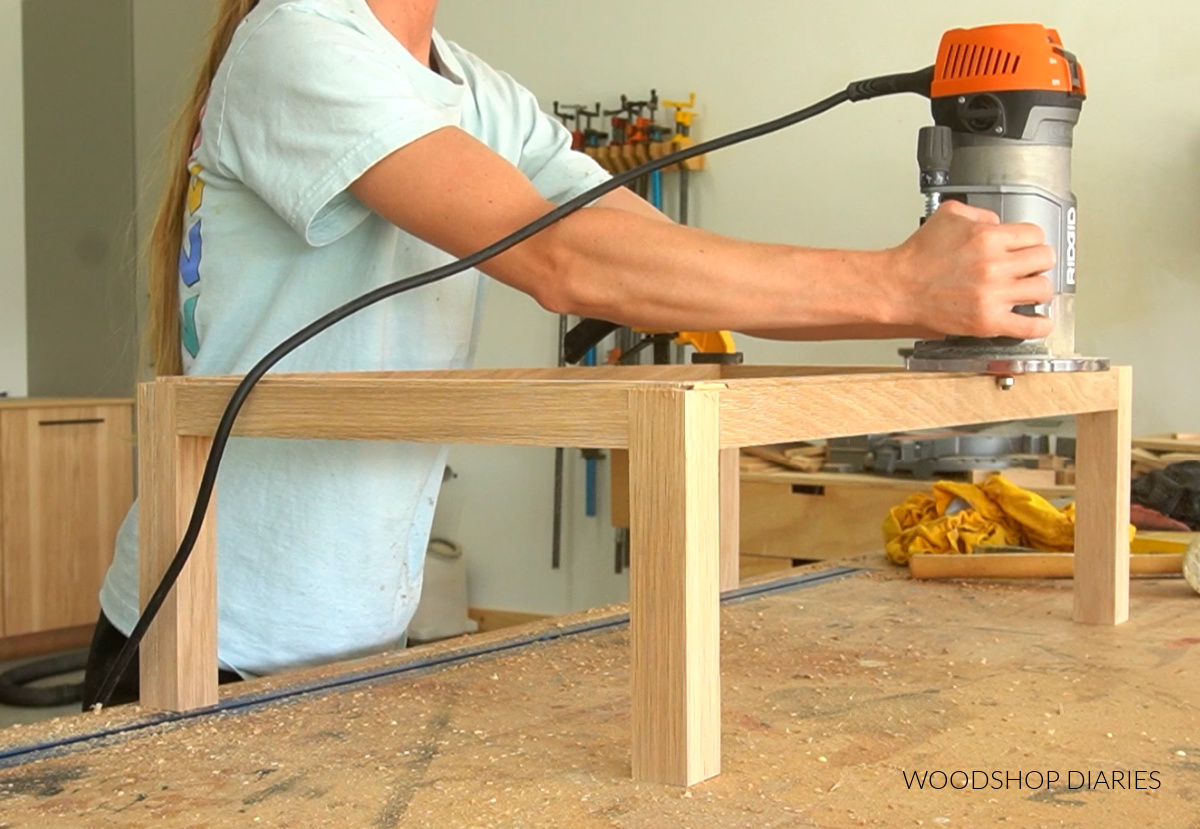
This is totally optional, but it adds a nice detail and leaves kind of a “reveal” between the base and cabinet that will hide any gaps.
Step 4: Install Cabinet Base
If you are using plywood for your cabinet, you can simply attach the base using 2″ long screws through the base frame up into the cabinet.
.
However, if you’re using solid wood for your cabinet, I recommend using these figure 8 brackets or Z clips. These will allow for wood movement.
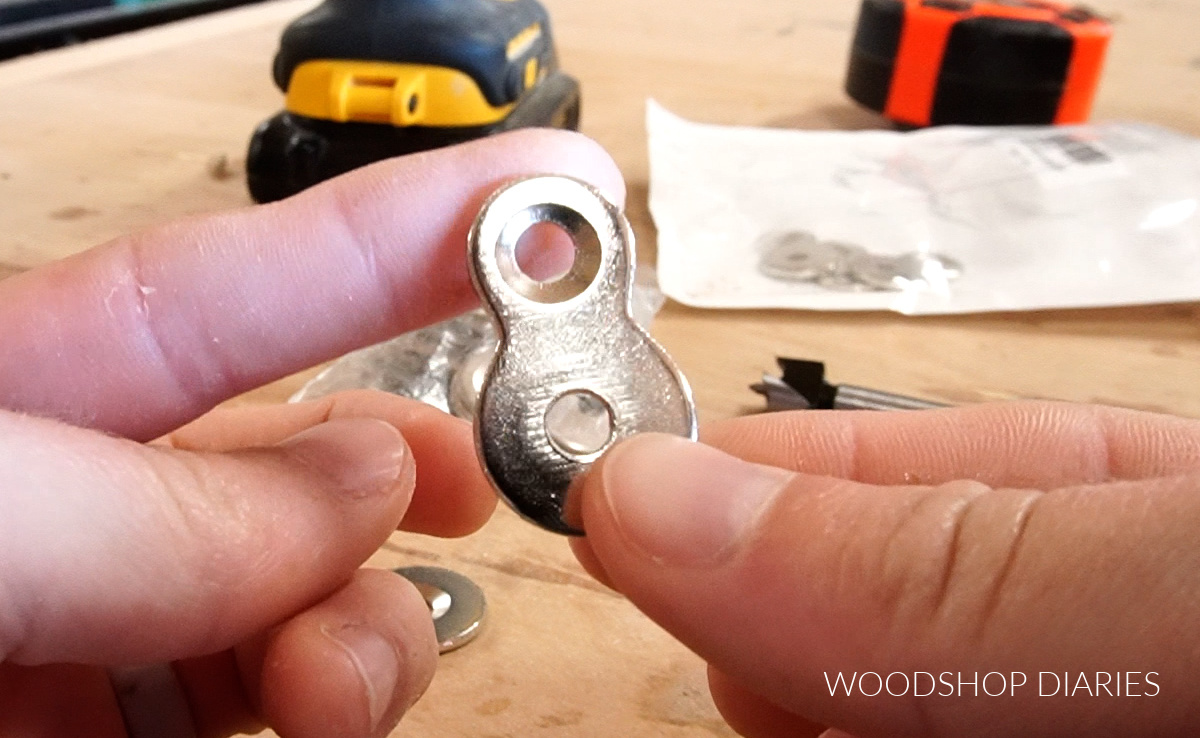
These are what you typically use to attach table tops to table bases. You can find more details on installing the figure 8 brackets in this dining table building tutorial.
.
I installed 4 of these around the top of my base.
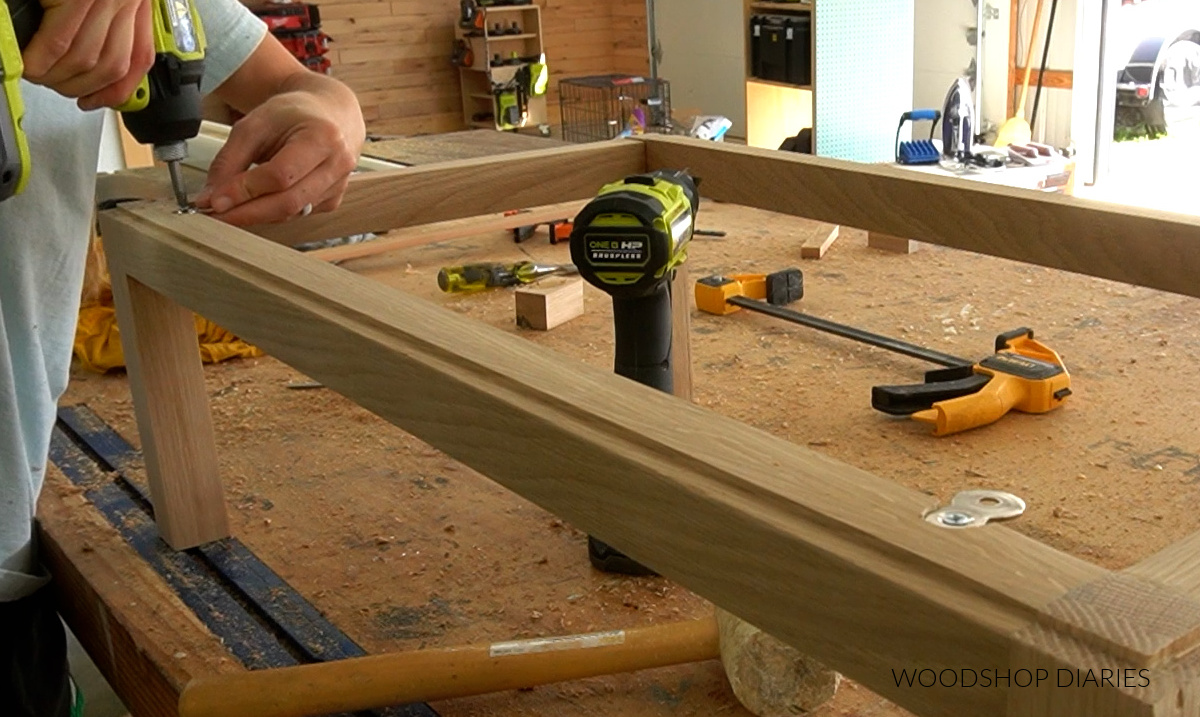
After the brackets were on the base, I attached the other side of the bracket to the cabinet bottom.
Note that the front of the base will stick out in front of the cabinet about ¾″ so that it’ll be flush across the front later when the doors are added.
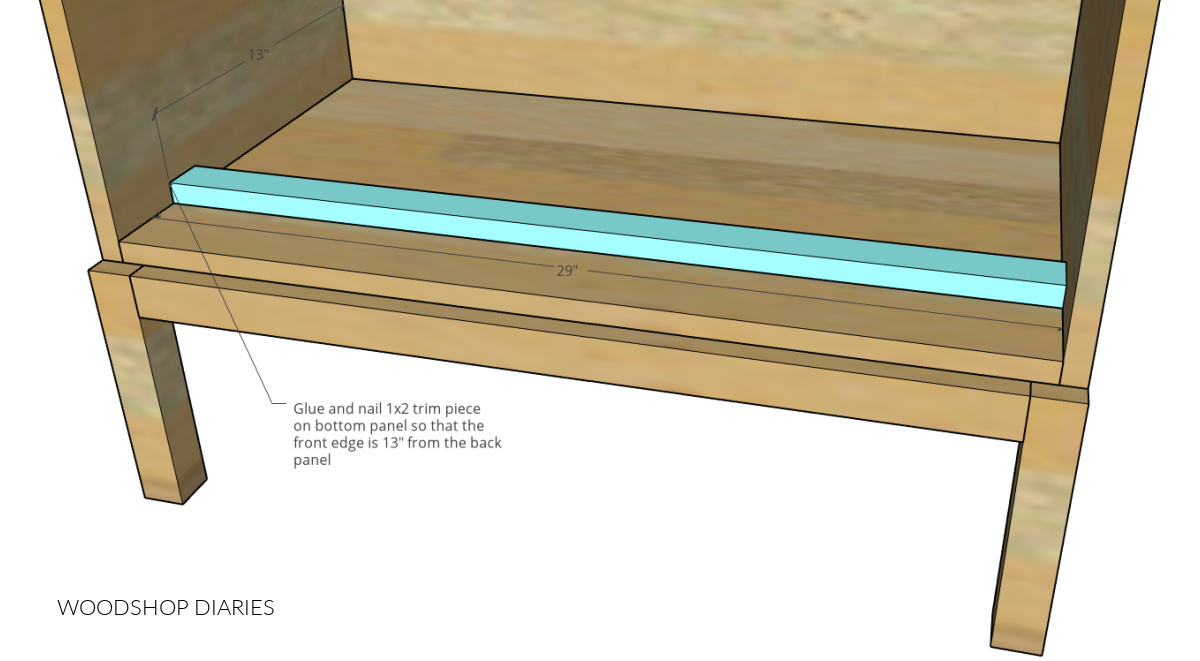
Step 5: Install Drawer Shelf and Trim
I added a stationary shelf and some trim around where the drawer will go at the bottom.
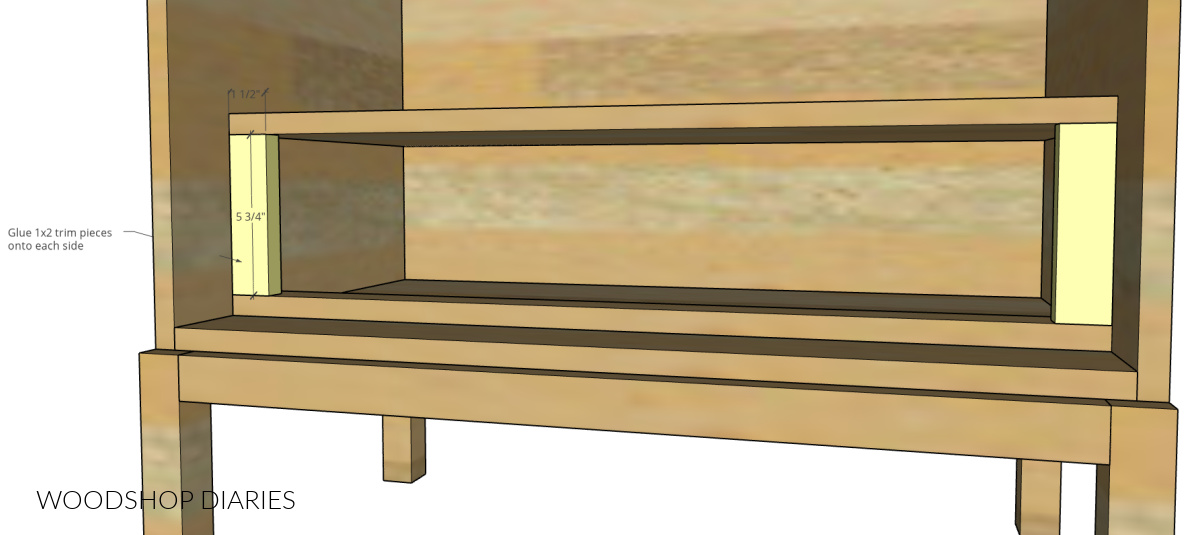
Fun Fact: The trim on the sides looks nice and is a great detail to add dimension, but it’s actually there to “push” the drawer box inside the cabinet enough to clear the hinges when the doors are added later.
If you skipped them and mounted your drawer slides directly to the side panels, you wouldn’t be able to slide your drawer open after installing the doors.
First, glue a piece of 1×2 on the bottom panel of the cabinet. Notice that this should be inset quite a bit.
Then, install the stationary shelf using ¾″ pocket holes and 1 ¼″ pocket hole screws.
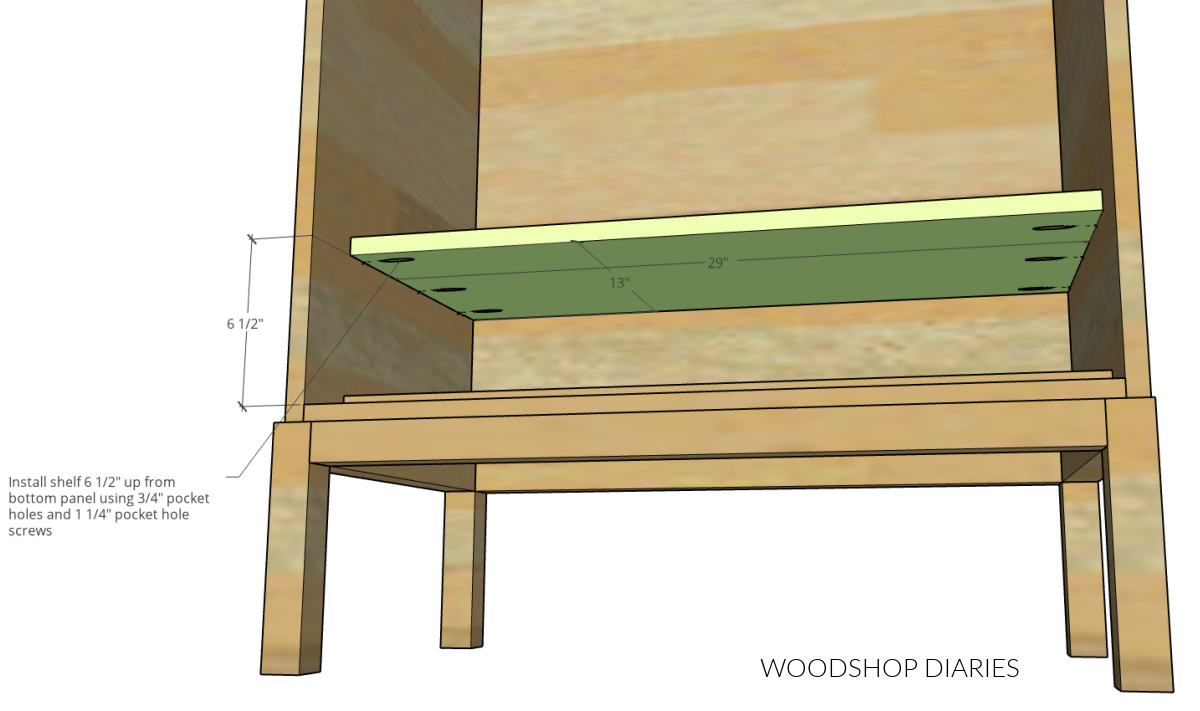
This shelf can be a glued up solid wood panel OR ¾″ plywood.
.
Finally, glue the 1×2 trim pieces onto the sides between the bottom trim and the shelf.
All the dimensions and details for this build can be found in the printable building plans here.
Step 6: Add Drawer Spacer Blocks
Because we added these 1×2 trim pieces to the side in step 5, we need to add some spacer blocks behind them to mount the drawer slides onto so they can slide in and out.
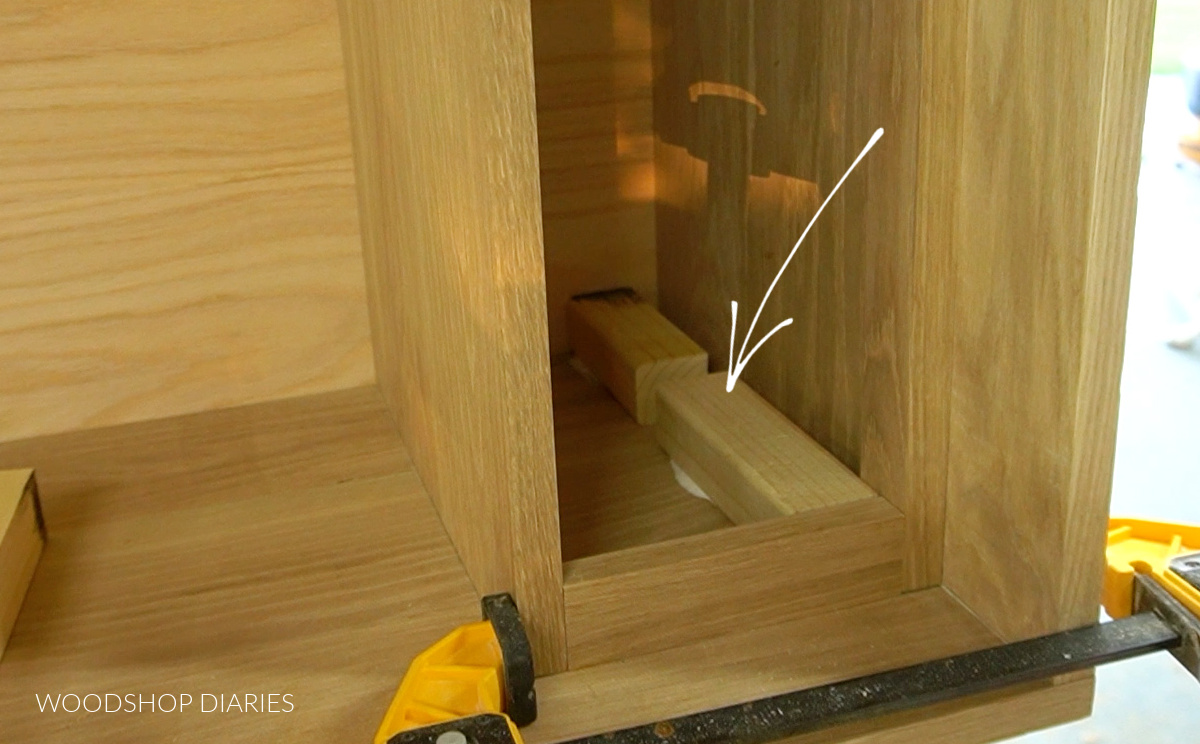
For this, I glued 2×2 blocks ¾″ up from the bottom panel. You can also screw these in as well for a little extra holding power.
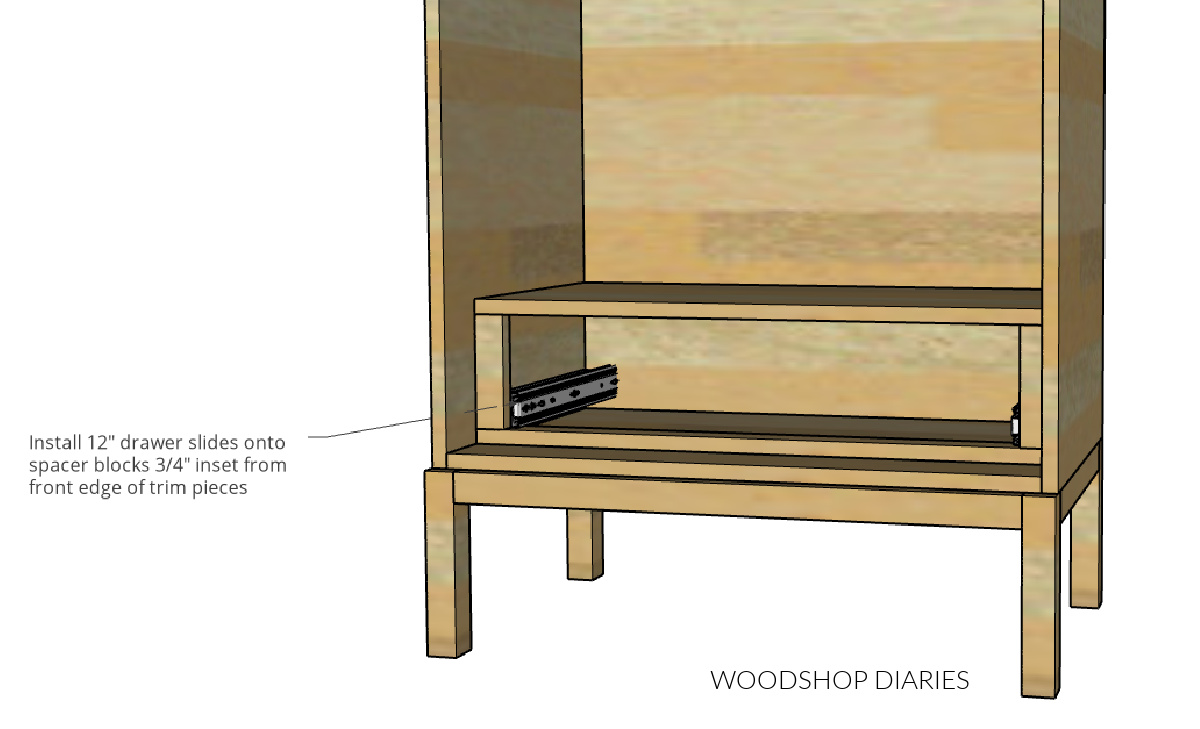
Step 7: Install Drawer Slides
Install 12″ drawer slides onto the spacer blocks so that the front edge of the slides are ¾″ inset from the trim on the sides.
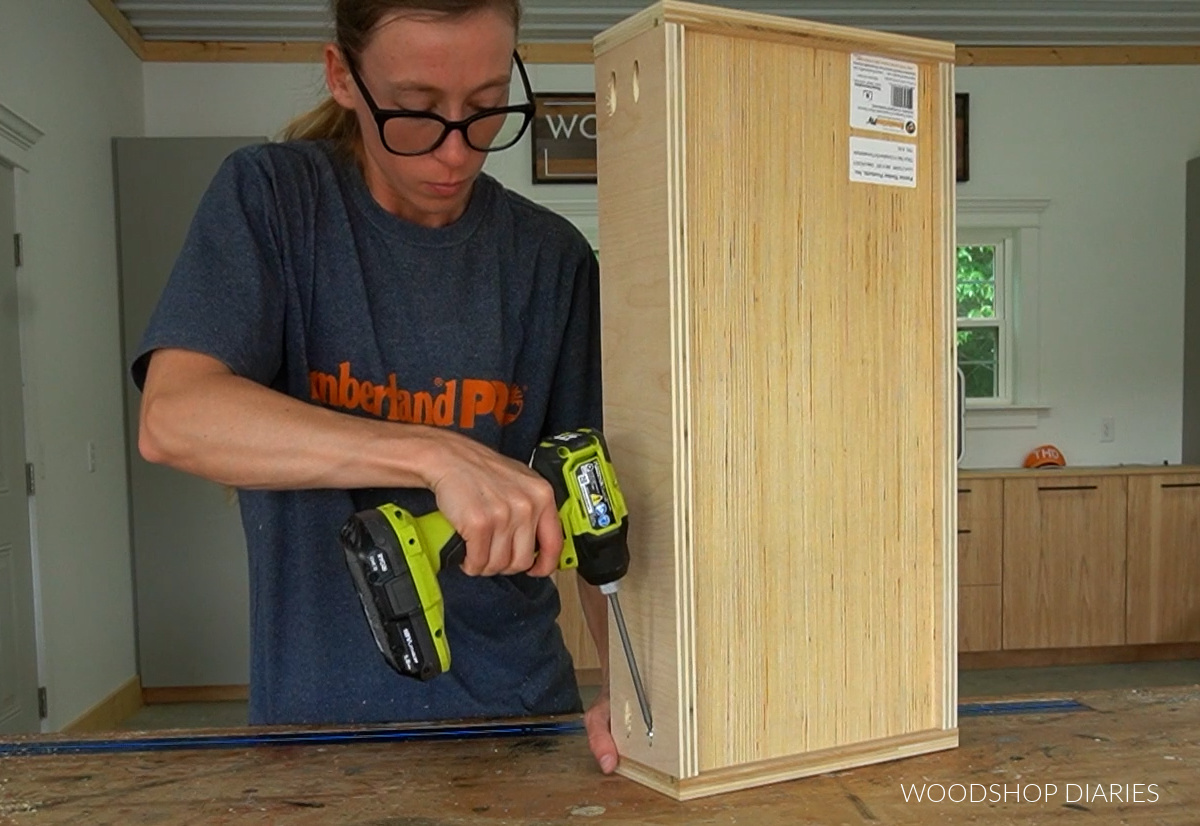
Step 8: Build and Install Drawer Box
I built my drawer box using ¾″ plywood scraps for the box and ¼″ plywood for the bottom panel.
.
I cut my pieces according to the cut list in the plans, then cut ¼″ dadoes ¼″ deep ½″ from the bottom edge to install the plywood bottom.
.
I assembled the box using ¾″ pocket holes and 1 ¼″ pocket hole screws.
Check out this guide for how to build and install drawer boxes for more details.
.
Then, I installed this onto the slides.
.
If you watch the YouTube video at the bottom of this post, you will see that I assembled my cabinet out of order because I was waiting on my slides to come in the mail.
.
So I already had my doors installed when I installed the drawer. Because the doors were now in the way, I had to remove the part of the slide that attaches to the drawer and screw these into the drawer box sides separately like shown below.
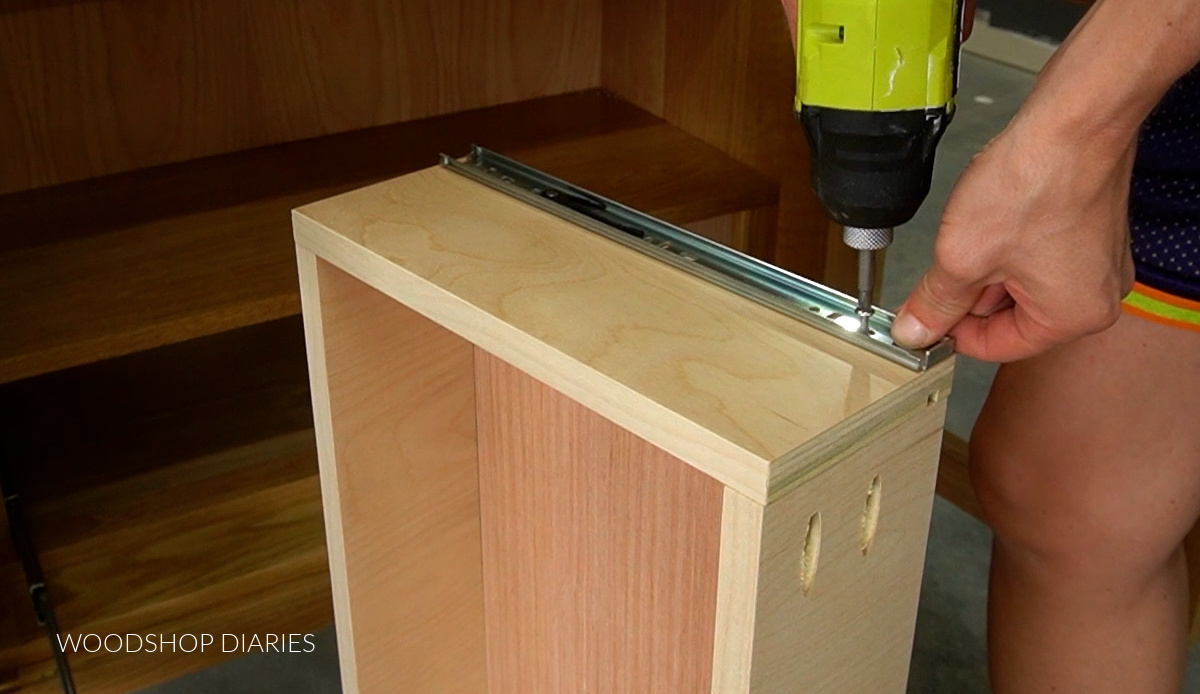
PRO TIP: You can separate the parts of a ball bearing drawer slide using the little tabs on the sides. You extend the slide all the way and push the tab up or down (the left and right side will be opposite), and slide the inside piece out.
.
Usually, I keep my slides assembled when installing the drawers. But in this case, I wasn’t able to.
.
After the brackets are on the drawer box, you can slide them back together and into the cabinet.
Step 9: Add Drawer Front
Cut to fit a drawer front from either solid wood or ¾″ plywood that is ¼″ smaller in each direction than the drawer box opening.
.
Use 1 ¼″ wood screws from the inside of the drawer box to secure so that there is ⅛″ gap around all sides.
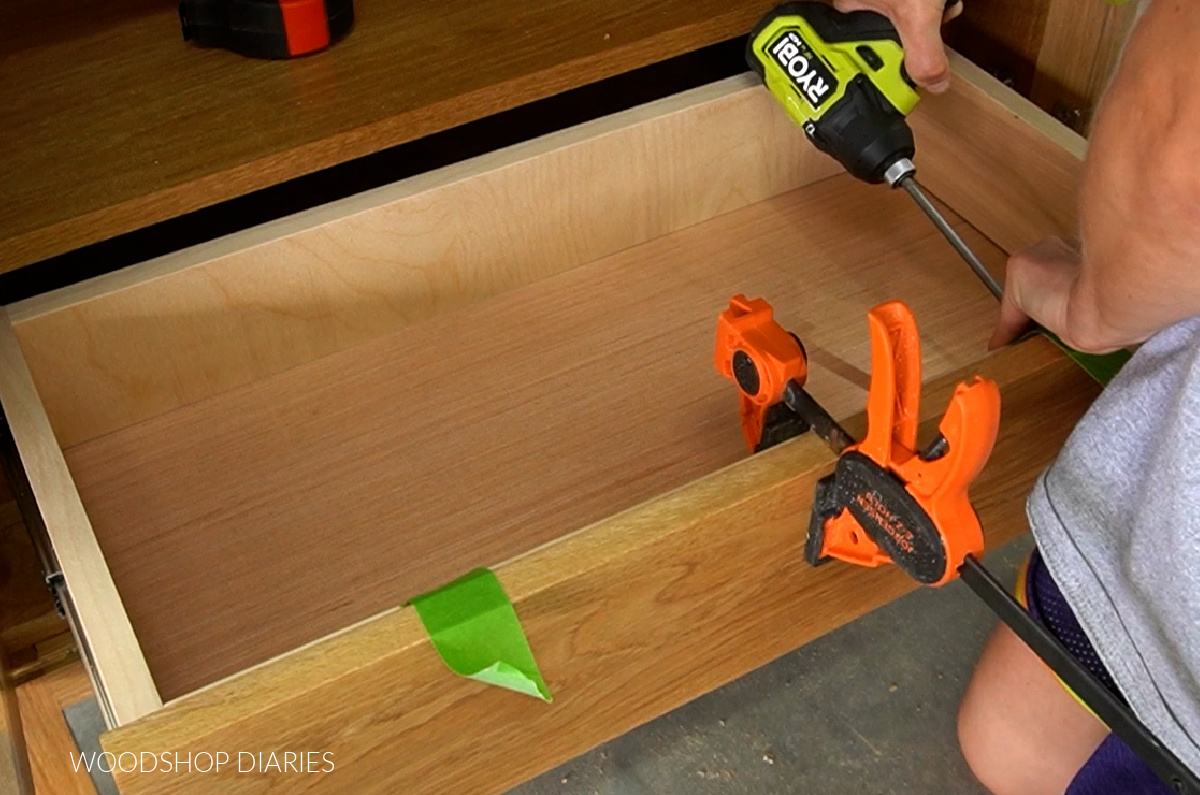
See video at the end of the post for some helpful tips.
.
Before pushing the drawer in with the front installed, add some painters tape running up the inside of the drawer, over the top, and out the front. This will allow you to pull the drawer back out to finish and install knobs later.
Step 10: Add Shelving to Display Cabinet
For the rest of the shelves, I wanted them to be adjustable, so I used a Kreg Shelf Pin Jig to drill shelf pin holes along the insides of the cabinet box.
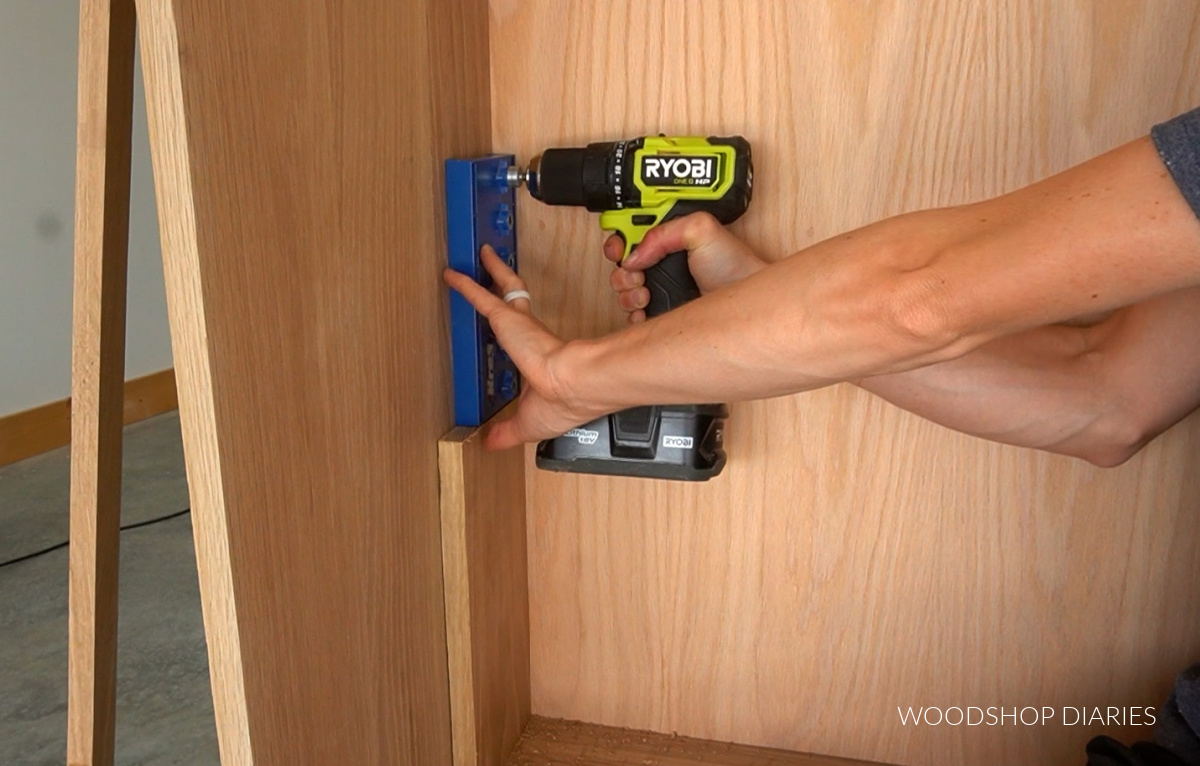
I made sure to keep the front holes inset far enough that the shelves would still be able to reach them since they are quite a bit inset from the front edge.
.
See printable building plans for specifics.
.
Then, I cut three ¾″ thick shelves (these can be solid wood or ¾″ plywood) and used shelf pins to install them where I wanted.
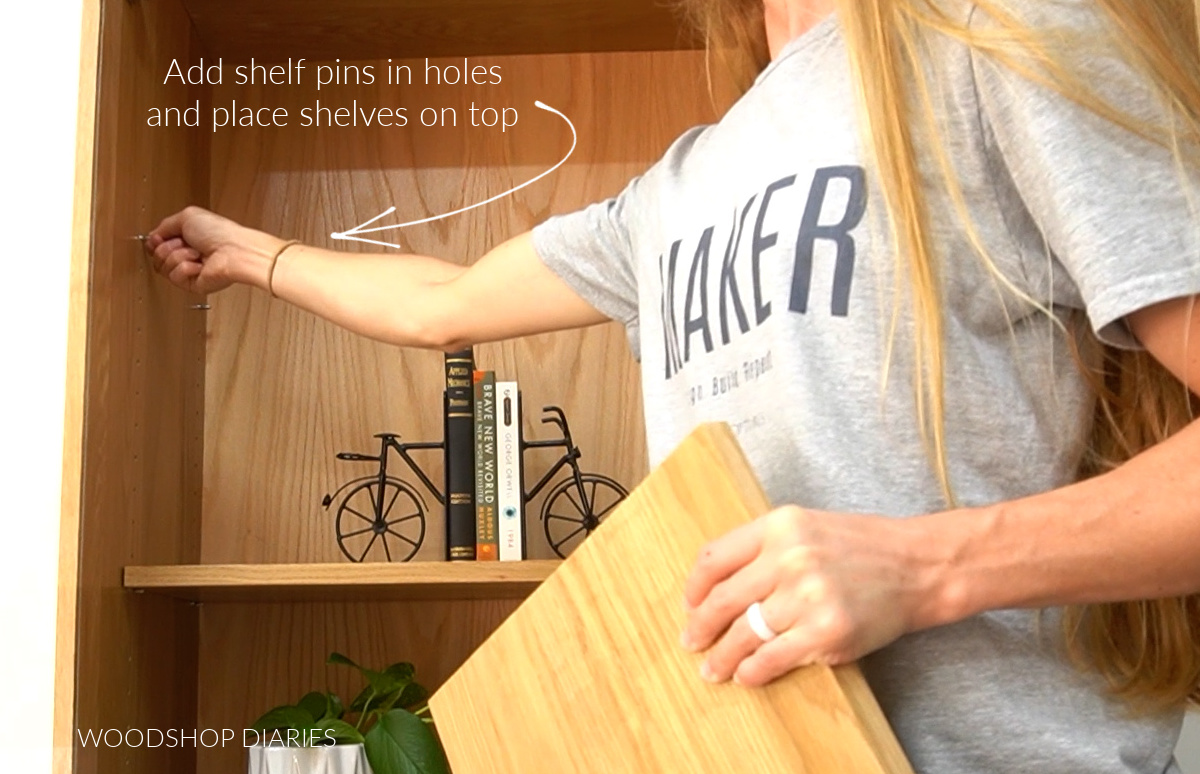
Check out more details on the shelf pin jig in this post about must have tools for cabinet building!
Step 11: Build Display Cabinet Door Frames
The last part of the build is the doors, so we are almost finished!
.
I’d recommend using wood glue and dowels to assemble the door frames if you are able–I ran out of dowels and used pocket holes and screws. Either method works, but with dowels, you won’t see them like you will pocket holes.
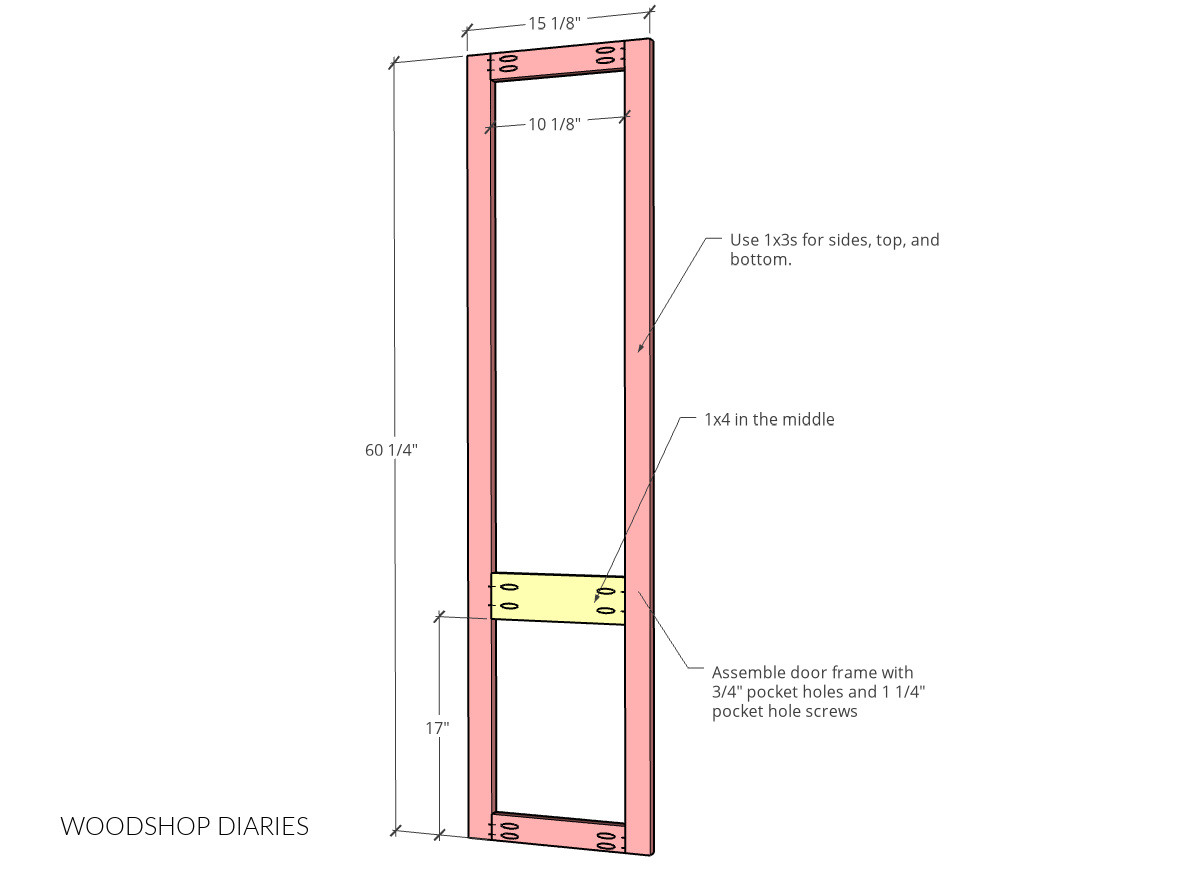
I used 1x3s for the sides, top and bottom, but used a 1×4 for the middle piece just because I thought it looked nice. You could stick with 1x3s for the entire frame if you wanted.
.
If you do assemble your doors using pocket holes and screws, check out this guide for how to plug pocket holes.
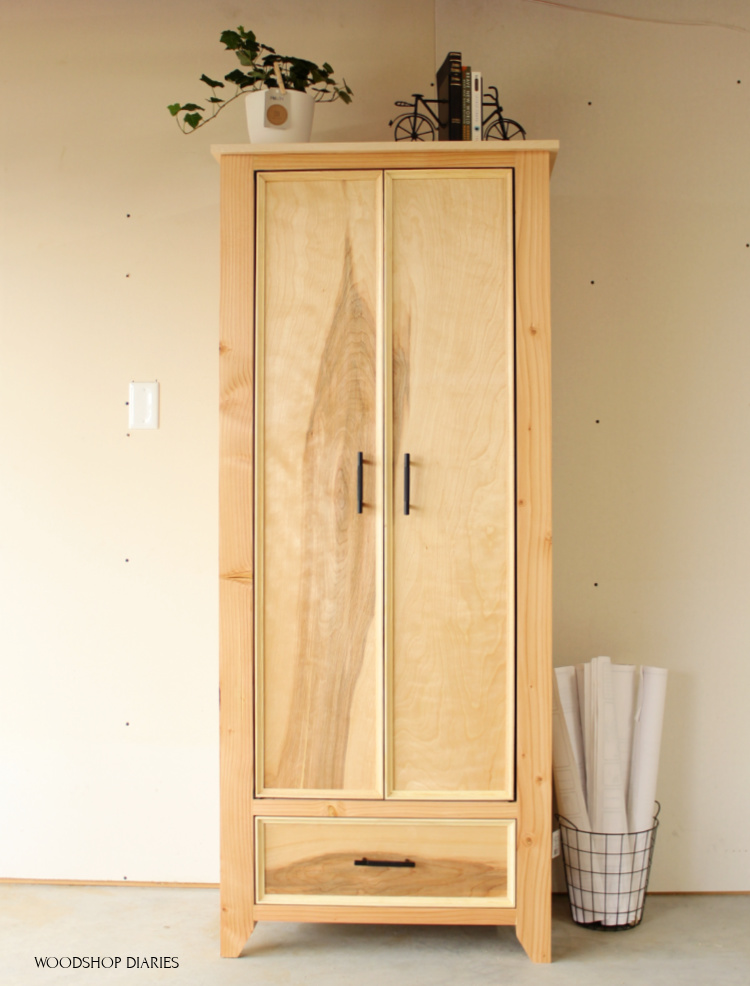
Step 12: Install “Glass” Into Cabinet Doors
After my door frames were together, I used a ⅜″ rabbeting bit to cut a rabbet along the inside openings of each frame to install my plexiglass panels into.
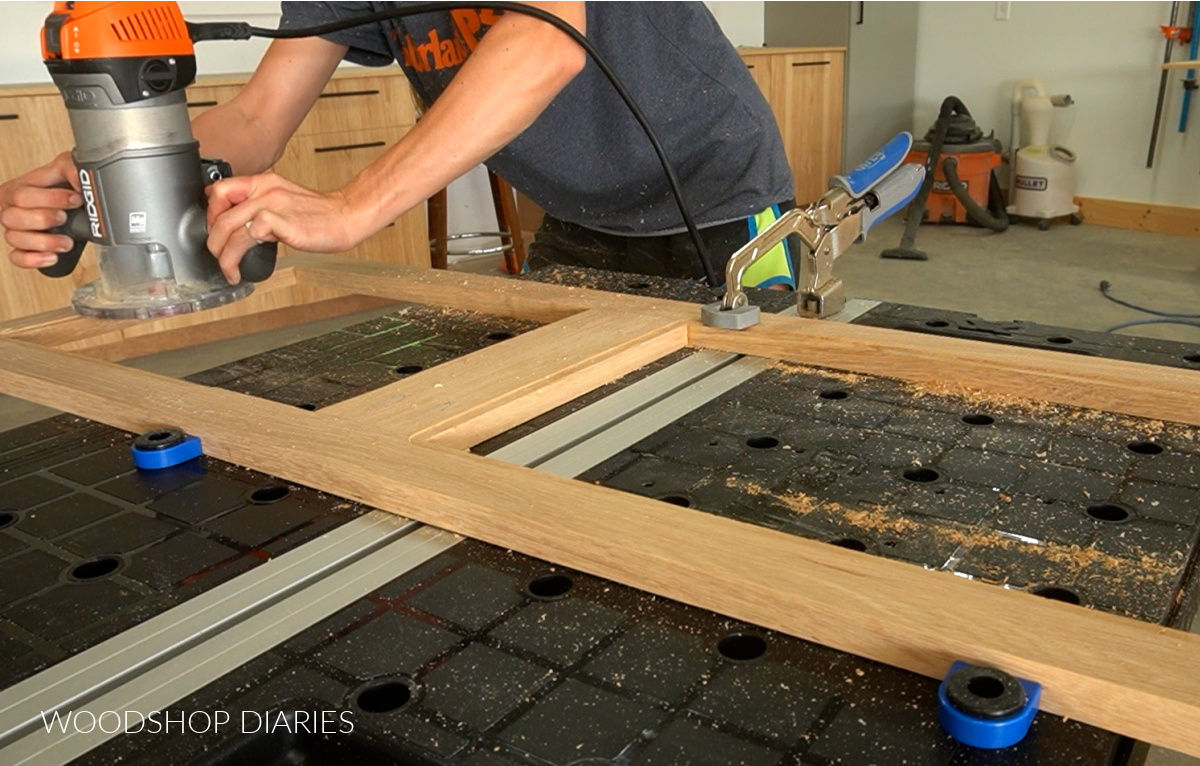
I used a chisel to square out the corners (the rabbeting bit will leave rounded corners).
.
Then, I cut my plexiglass panels to fit.
.
You can cut plexiglass using a jig saw or circular saw with a fine tooth blade. Or, you can ask your local big box store or glass supplier if they can custom cut your pieces for you. Most of them will for free or for a small fee.
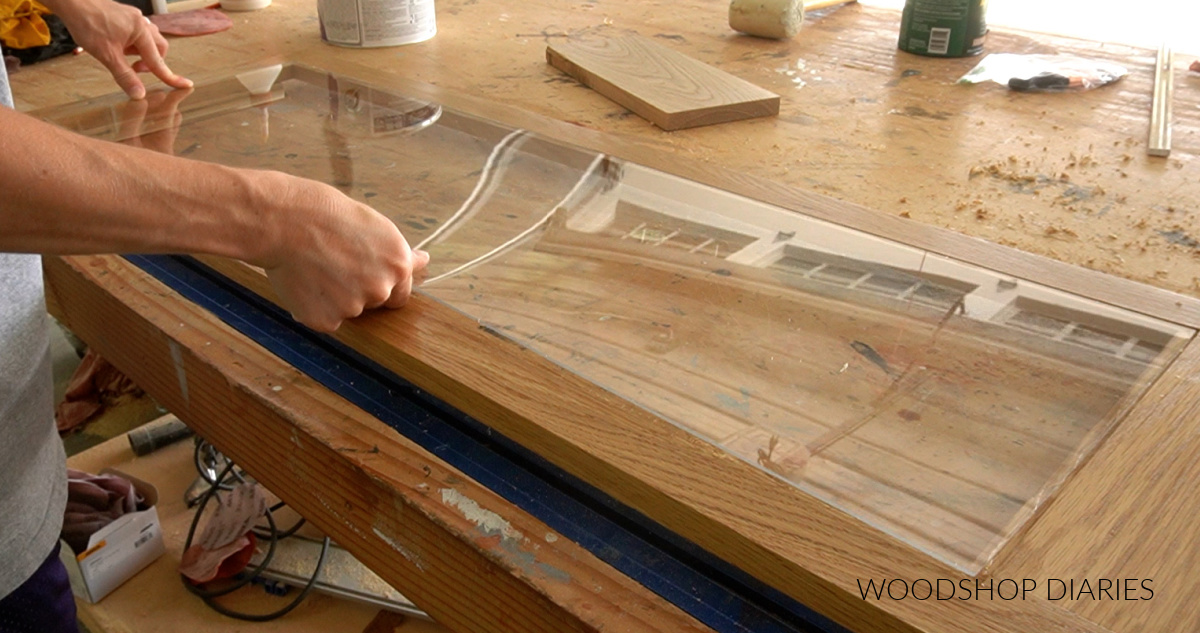
I used some clear super glue to glue these panels into the rabbets. However, you could also use some picture frame turn buttons if you wanted the panels to be removeable for cleaning.
Step 13: Attach Display Doors to Cabinet
Use a concealed hinge jig to drill holes for concealed hinges for frameless full overlay doors.
.
Follow manufacturer’s instructions for installing hinges as every brand is different.
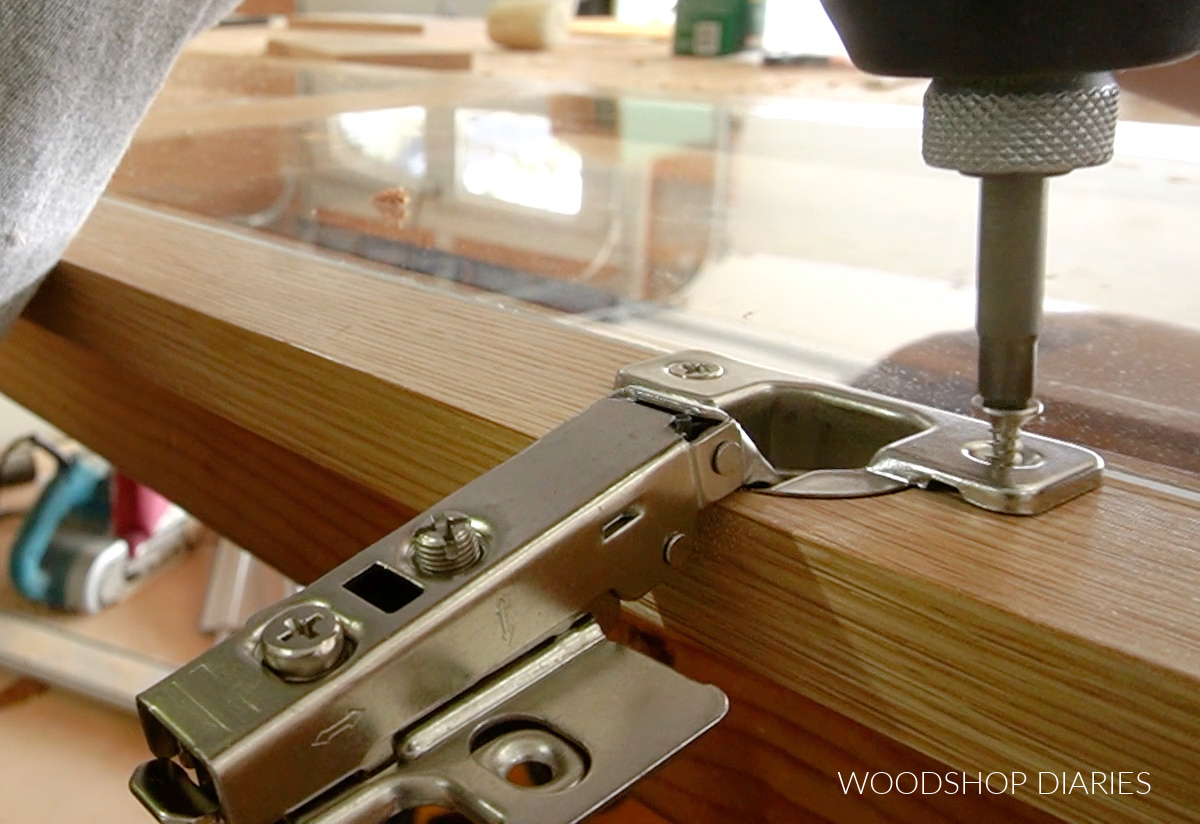
Install the hinges to the doors, then install the doors onto the cabinet.
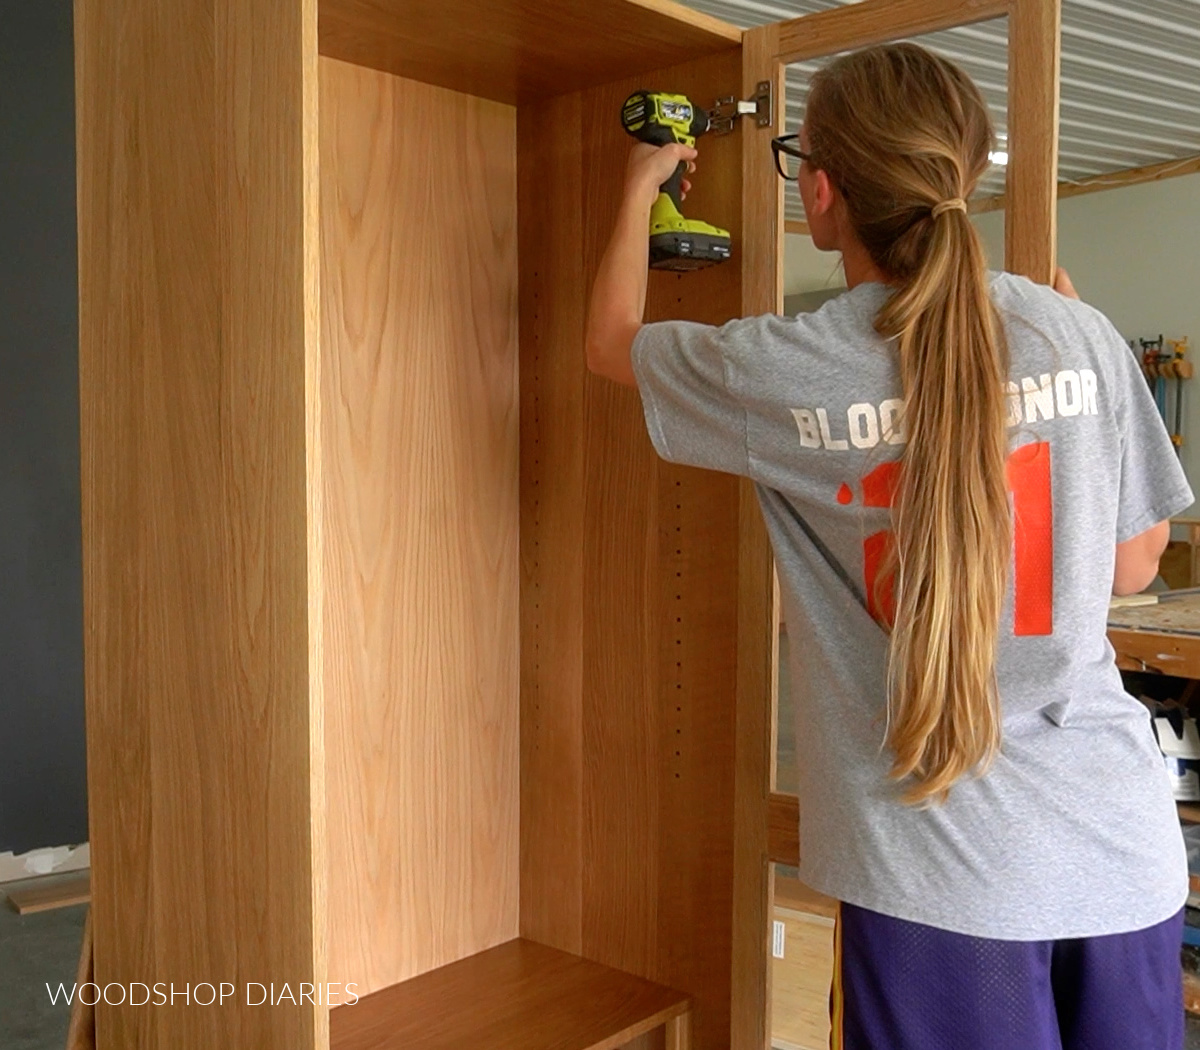
Concealed hinges come with several adjustment settings. Adjust the hinges to align the doors so that they are straight and there’s about ⅛″ gap between the two doors.
Step 14: Finish Display Cabinet
You can finish your project as desired and add knobs, handles, etc to dress it up.
.
I was working with white oak and I wanted something simple that wouldn’t yellow over time or darken it too much, so I used Minwax Helmsman clear poly to seal everything.
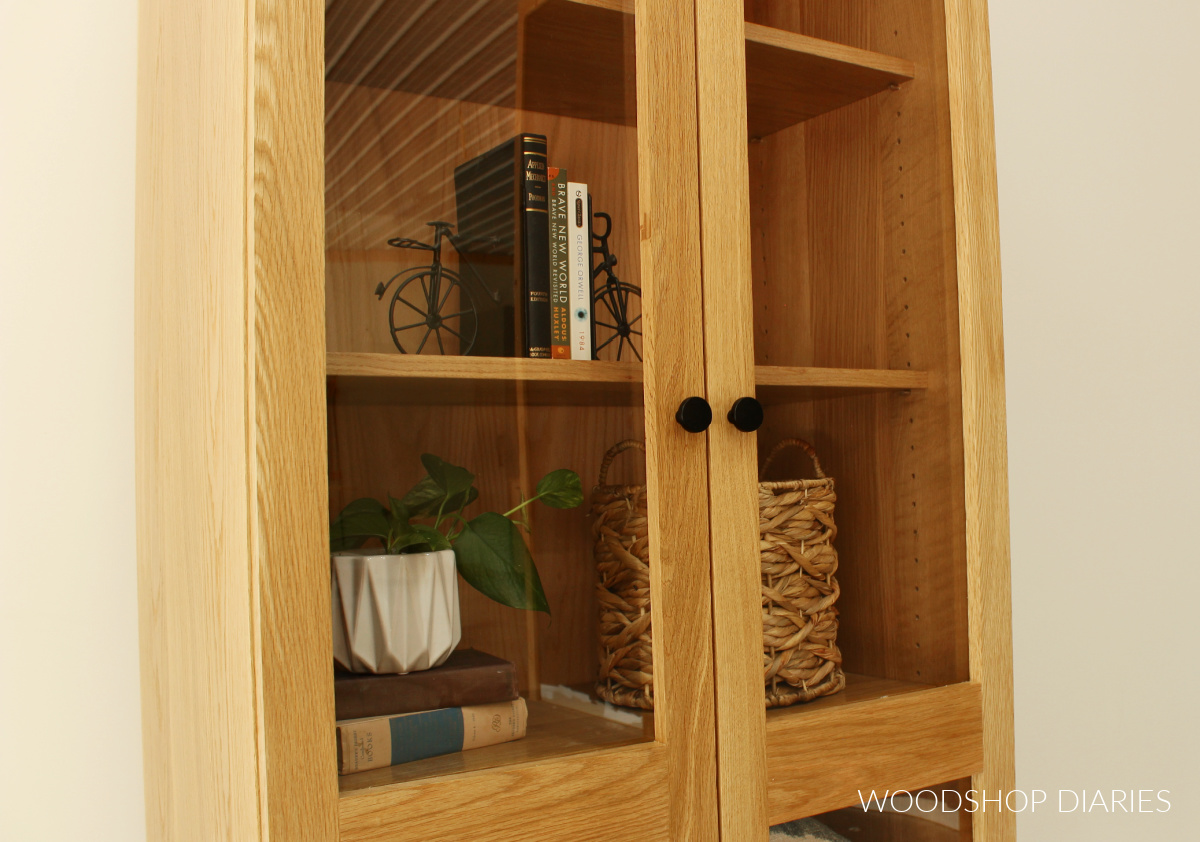
And to keep things simple and minimal, I added these simple black knobs to the drawer and the doors.
.
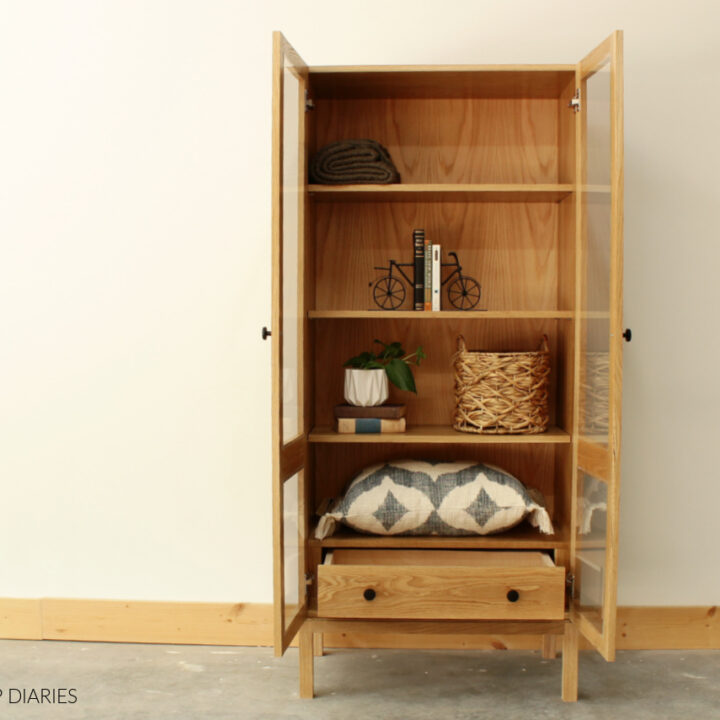
I’m so excited to put this to good use and to have another display cabinet again in my home!
I hope you enjoyed seeing it come to life and if you’d like to build your own, don’t forget to grab the DIY display cabinet printable building plans here!
.
Watch the full length build video for additional tips, information, and details:
Want More DIY and Furniture Building Projects?
Enjoy this build and looking for more ideas? Here’s a few favorites:
If you want to save this project for later, don’t forget to pin it or share it on your favorite social channel!
Until next time, friends, happy building!
DIY Display Cabinet with Drawer
Build a DIY display cabinet with drawer using these building plans and video! Step by step instructions, tips & tricks to build it yourself
Materials
- (1) 1x2x8 board
- (4) 1x3x8 boards
- (1) 1x4x8 board
- (2) 2x2x8 boards
- (2) 4x8 sheets ¾" plywood
- (1) 4x8 sheet ¼" plywood
- (1) pair 12" drawer slides
- (2) pair frameless full overlay concealed hinges
- Shelf Pins
- ⅜" diameter x 1 ½" wood dowels (optional)
- Wood Glue
- Super Glue for Plexiglass
- 1 ¼″ pocket hole screws
- 2 ½" pocket hole screws (optional)
- Figure 8 clips
- Wood finish
- (2) sheets ⅛" (or less) 24" x 48" acrylic or plexiglass
Tools
Instructions
- Assemble the display cabinet box using wood glue and dowels or wood glue and ¾" pocket holes and 1 ¼" pocket hole screws.
- Add back panel by either inseting it or stapling it to the back.
- Assemble the cabinet base using wood glue, 1 ½" pocket holes, and 2 ½" pocket hole screws.
- Install the cabinet base by attaching it using figure 8 brackets or Z clips.
- Install drawer shelf and trim.
- Add drawer spacer blocks to mount drawer slides on to.
- Install drawer slides inset ¾" from the trim on the sides.
- Build and install drawer box.
- Add drawer front using 1 ¼" wood screws.
- Add shelving to display cabinet by drilling shelf pin holes so they are adjustable.
- Build display cabinet doors frames using wood glue and dowels or wood glue and pocket holes.
- Using a router and rabbeting but, cut a rabbet along the inside openings of each frame and install the plexiglass panels using clear super glue.
- Attach display doors to cabinet using concealed hinges.
- Finish your display cabinet as desired.