DIY Tiered Planter Boxes
This post contains an affiliate link, please read my disclosure here.
Our dirt is not the best for growing things in, so I tried my hand at some DIY tiered planter boxes. I meant to post this tutorial four (yikes) years ago when I first did it, but…life. So I apologize that the wood in my photos looks a little weathered, but even better that you can see how it is holding up.
When we first planned out our backyard, we picked a spot for a vegetable garden and set up an irrigation zone specifically for that area. It wasn’t actually the best spot for a vegetable garden, since it only receives about 4-5 hours of sun a day. However, my love for flower gardening is greater than my love for vegetable gardening, so it did not receive a high priority location. It’s done decently well in its location.
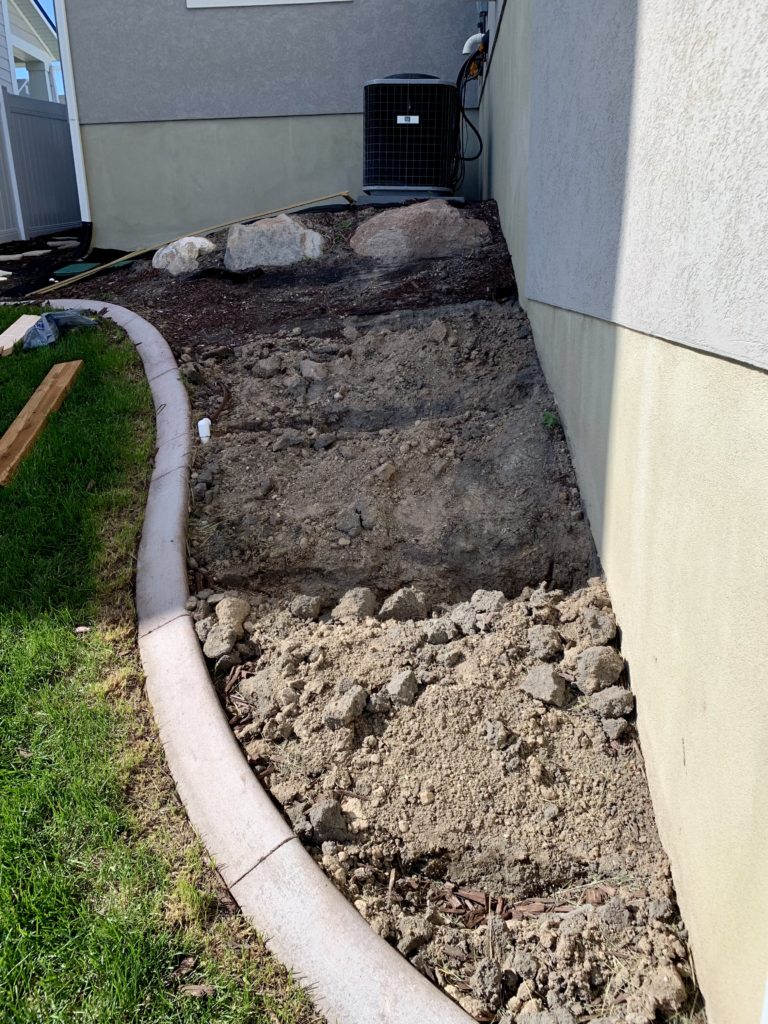
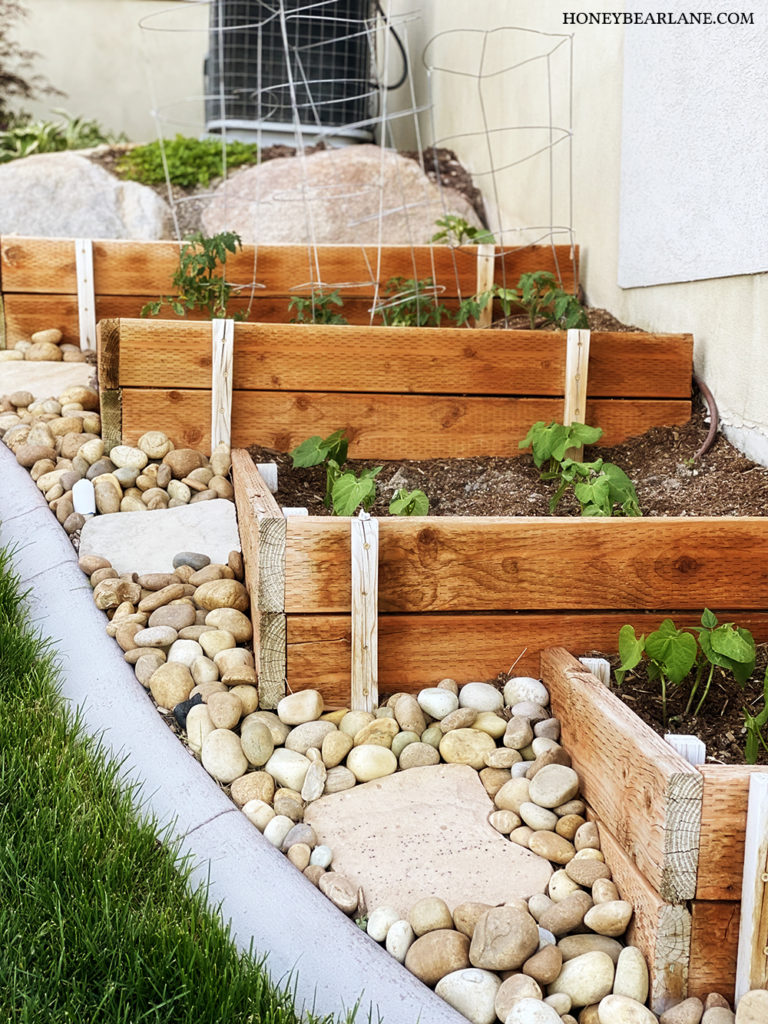
Another issue with the location was that it is on a hill. In order for this to work for vegetable growing, it has to be terraced, otherwise all the water will just run off the hill to the bottom. I planned to build out some little boxes right into the hill to help level things out and prevent erosion. It was a lot of work because of how hard our dirt is to dig!
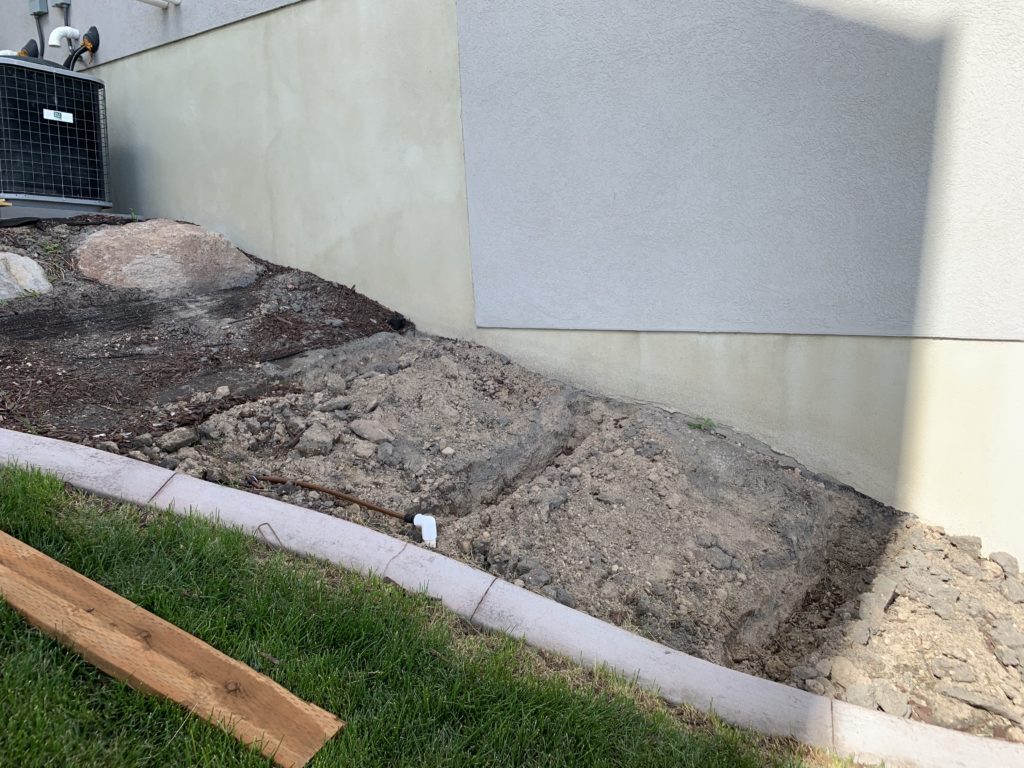
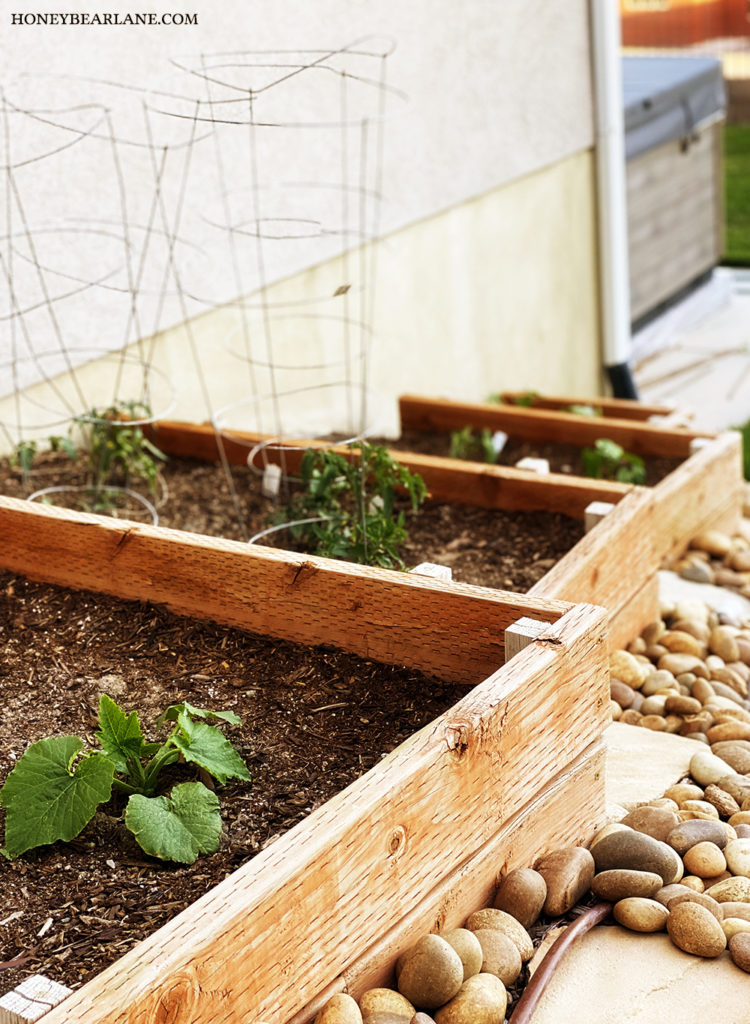
The first thing I did was to kind of carve out the steps. I had to dig out the spaces for the retaining wood pieces. This helped me to know how long to cut the pieces. I had purchased a bunch of 2x6x8s in pressure-treated wood. I also purchased wooden stakes and exterior self-tapping screws.
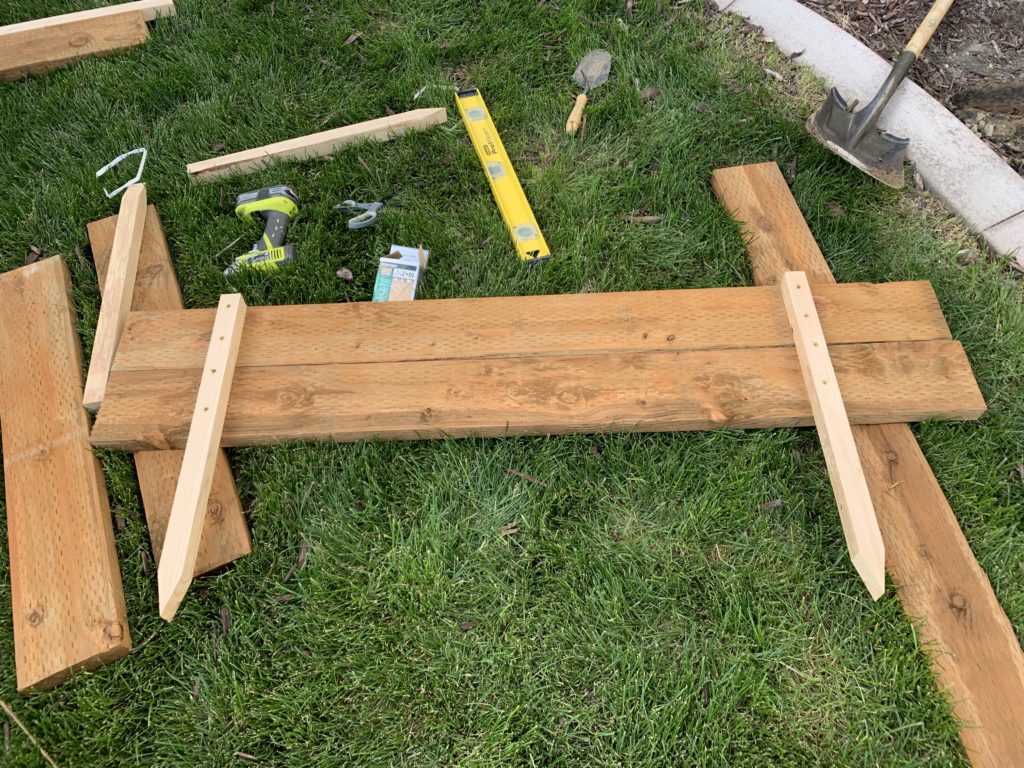
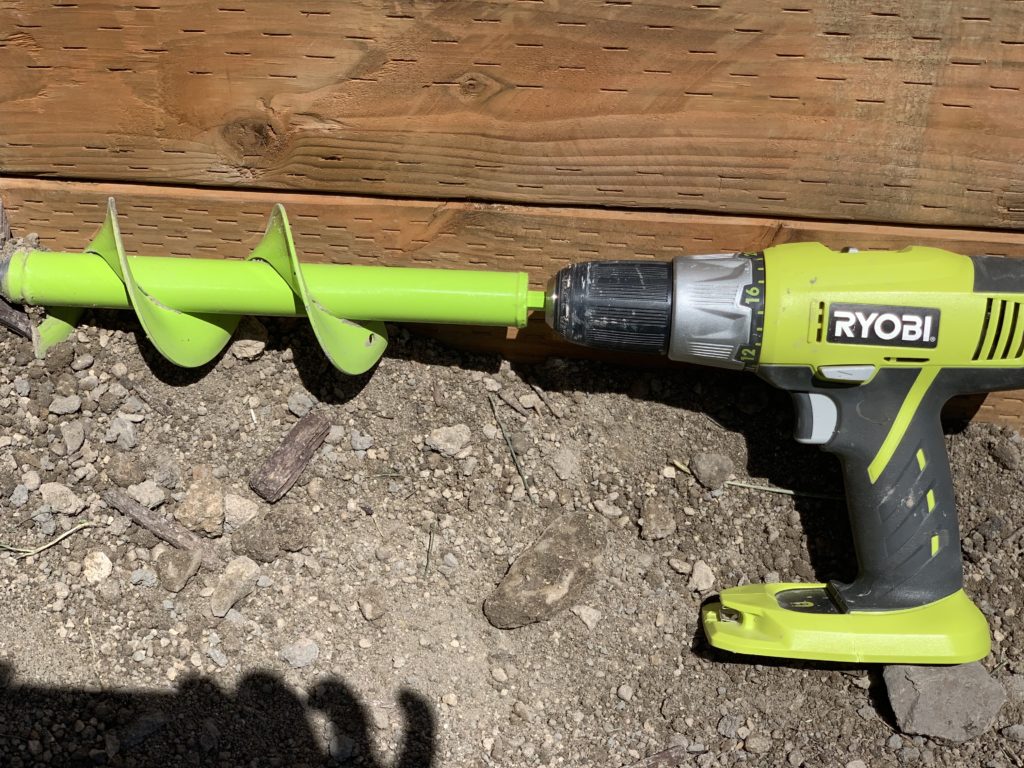
After measuring the right lengths for each box (this is something that you have to do custom to your own space) I cut them, two of each length, and then screwed two stakes to each stack of 2x6s. Then I hammered these stakes into the ground the best I could. I used these awesome large auger drill bit to help drill out the holes. But this was hard, as we have rock-hard ground. I was literally jumping on top of the little fences to get them into the ground. Side note: This auger bit is super useful for planting small seedlings when you plant your garden!
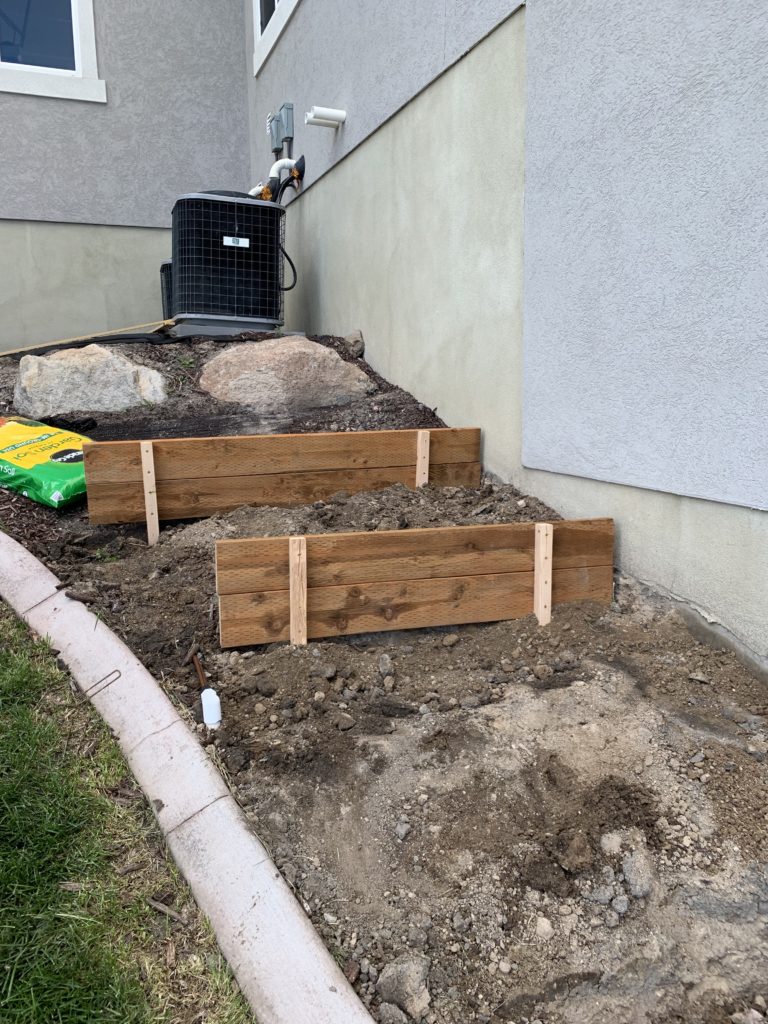
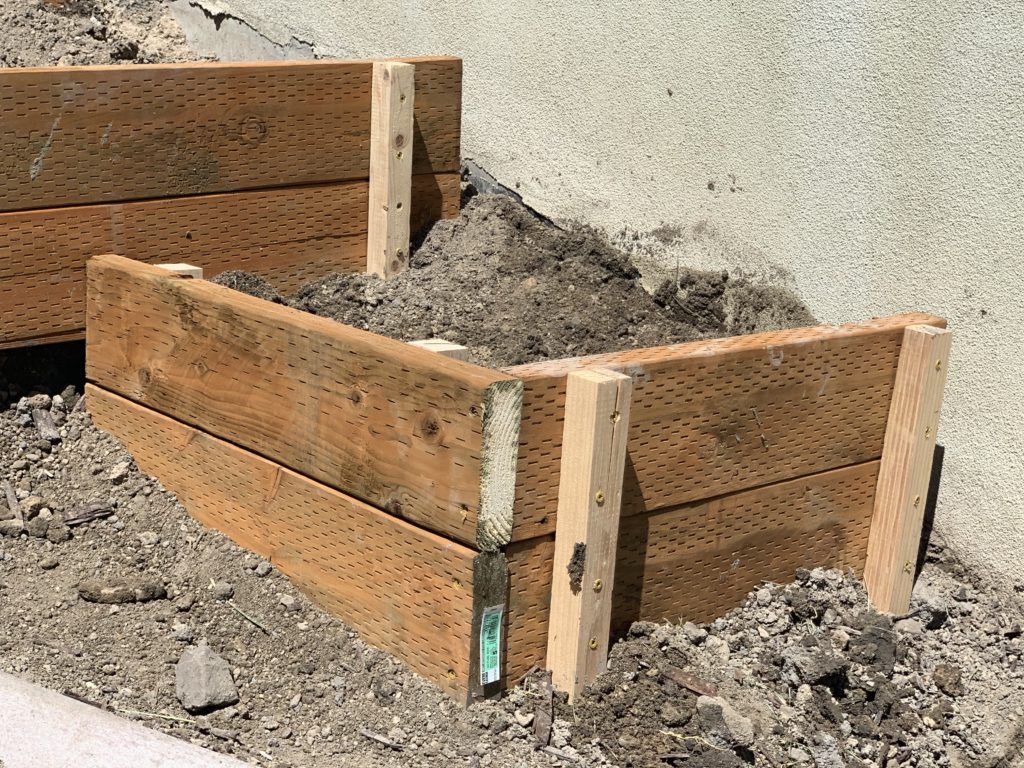
After they were in, I dug out more dirt to allow for the sides of the box. Actually at first I was just going to separate each terrace with just the one piece you see above. But it seemed incredibly unstable and I knew it needed more construction to make it more secure. I dug out the spaces, measured the area, built the side pieces, then attached them to the fronts with screws. I added a couple of extra stakes here between the levels to attach levels together for more security.

Once the boxes were in place, I buried them with the dirt I dug out. Then I filled each box with several bags of garden soil. My husband set up the soaker hose and then the garden was ready to go!
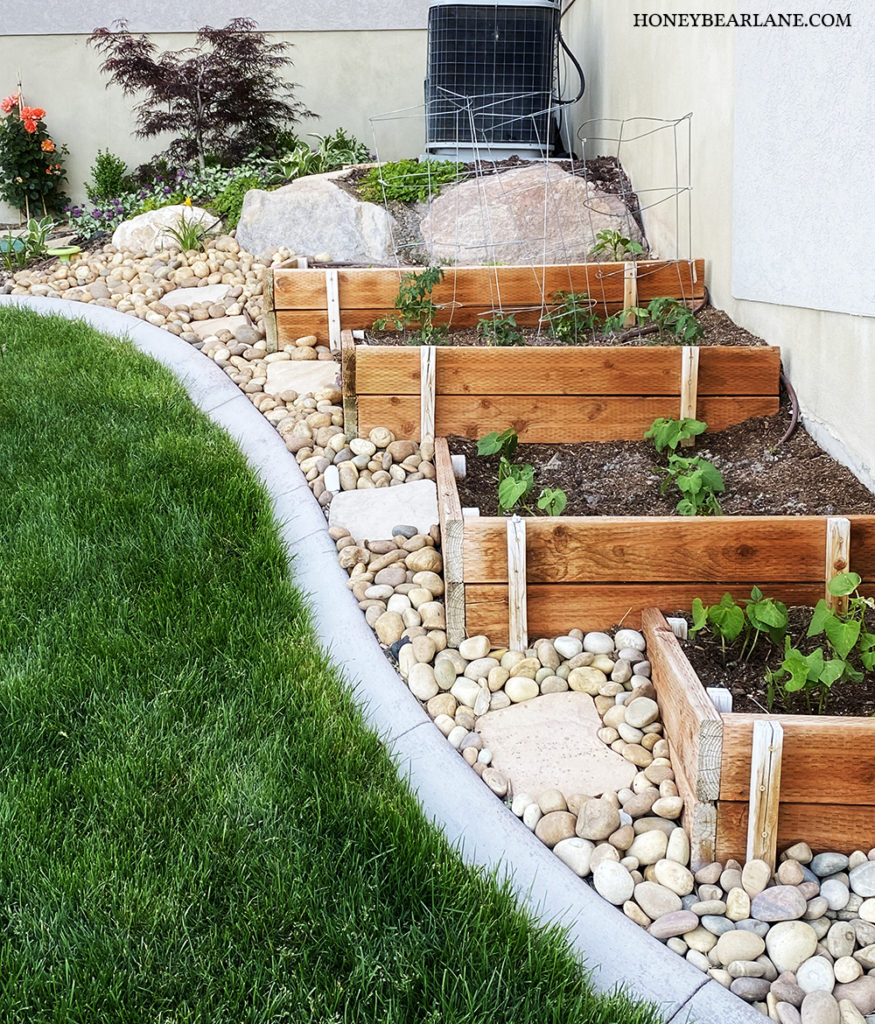
Last year I planted squash and zucchini, cucumbers, tomatoes, and green beans. The first year I planted too many tomatoes (6 plants) and they grew like gangbusters. The next year I went down to four plants and it was still more than we could manage.
This year I’m going to switch the tomatoes to the lowest and smaller tier and just do one or two. I will move the green beans up higher and I may try some zucchini and/or cucumbers again. I only want to grow things I will actually use. So far, year four, these planter boxes are going strong!
 I also added some rock to fill in the space between the curbing and the boxes. This has helped with weed control and also keeps the soaker hose in place. It also looks much nicer. I am happy with these boxes!
Check out these other outdoor tutorials!
How to Have a Successful Shade Garden
10 Outdoor Projects that Can be Built in a Weekend
These planter boxes are so lovely! I especially like how you made excellent use of downhill area to these beautiful planter boxes!
Here i also come accross some other beautiful plater boxes designs:
https://hngideas.com/diy/23-diy-garden-box-plans-and-ideas-for-easy-gardening/