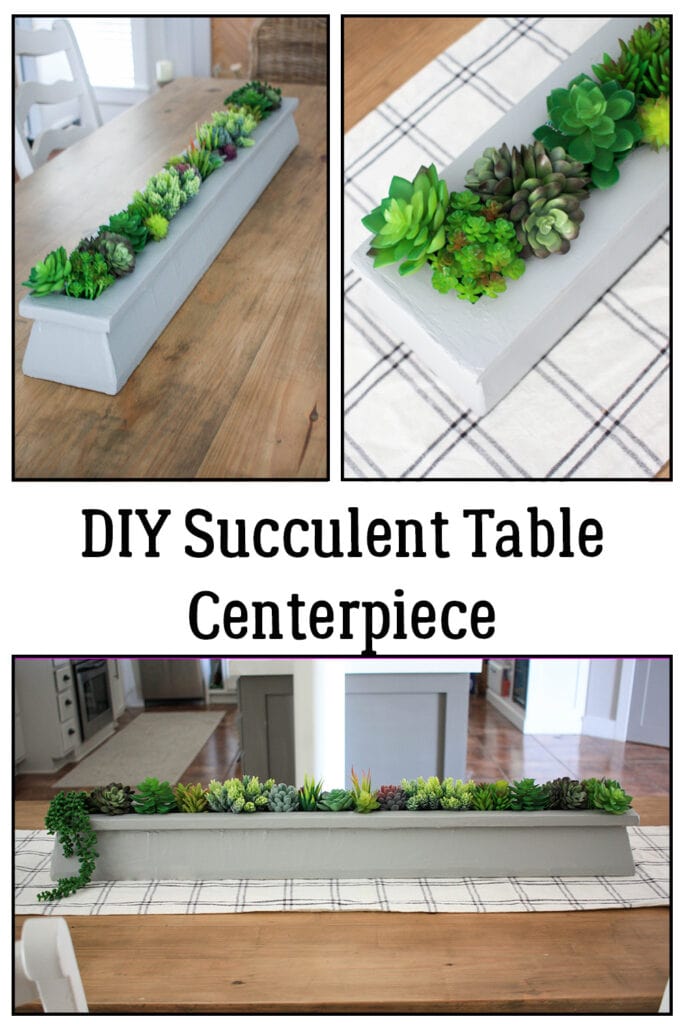
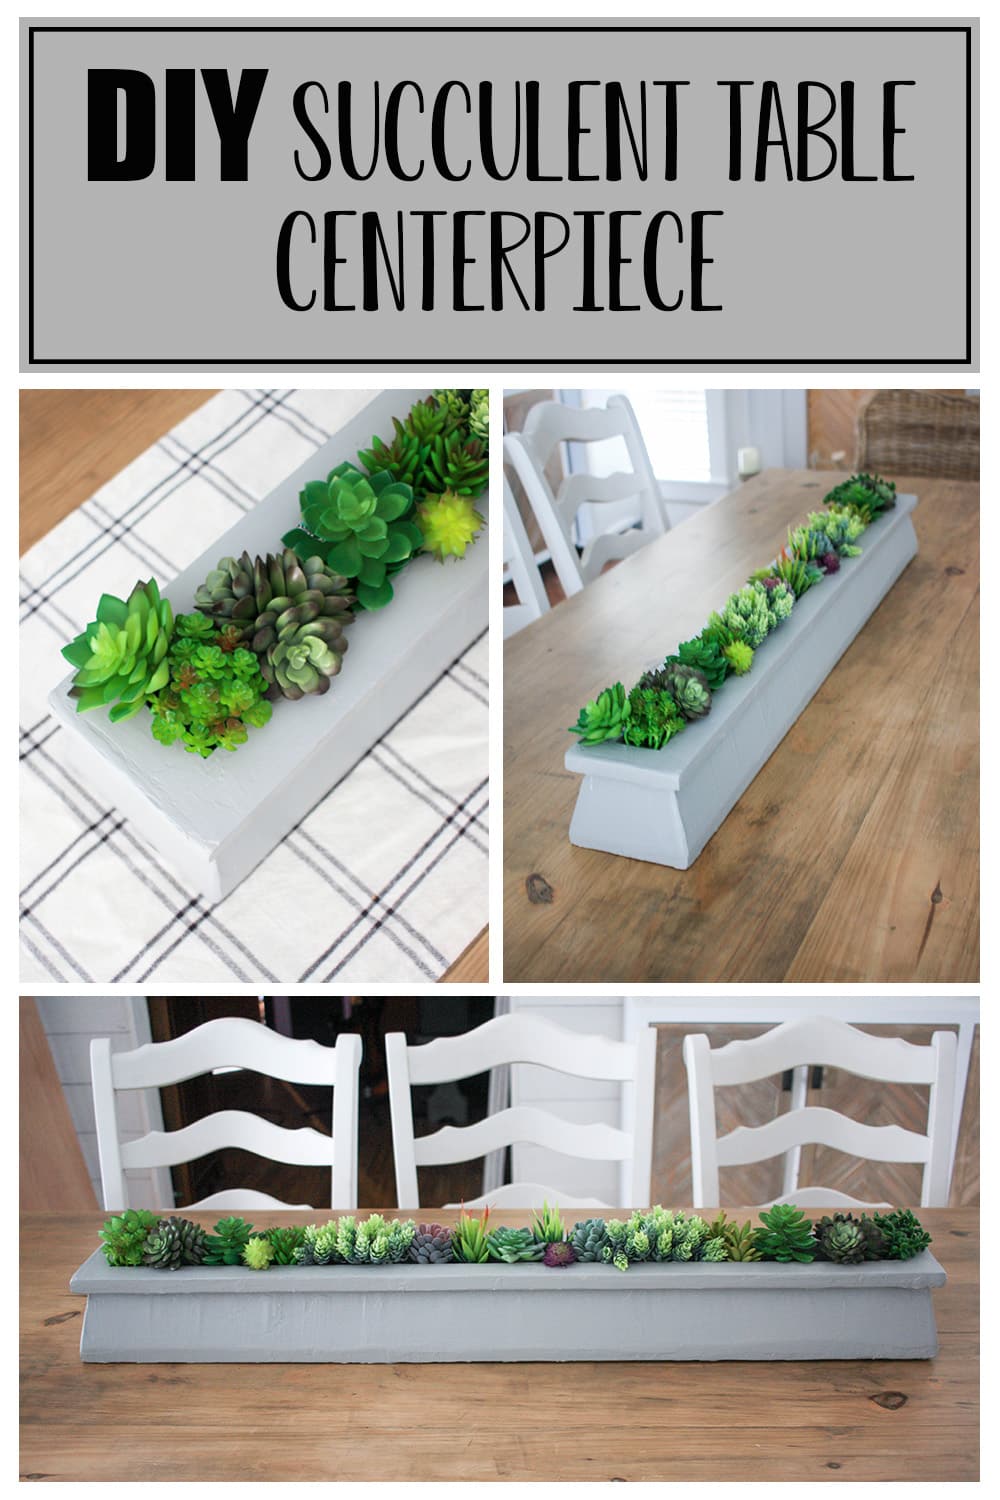
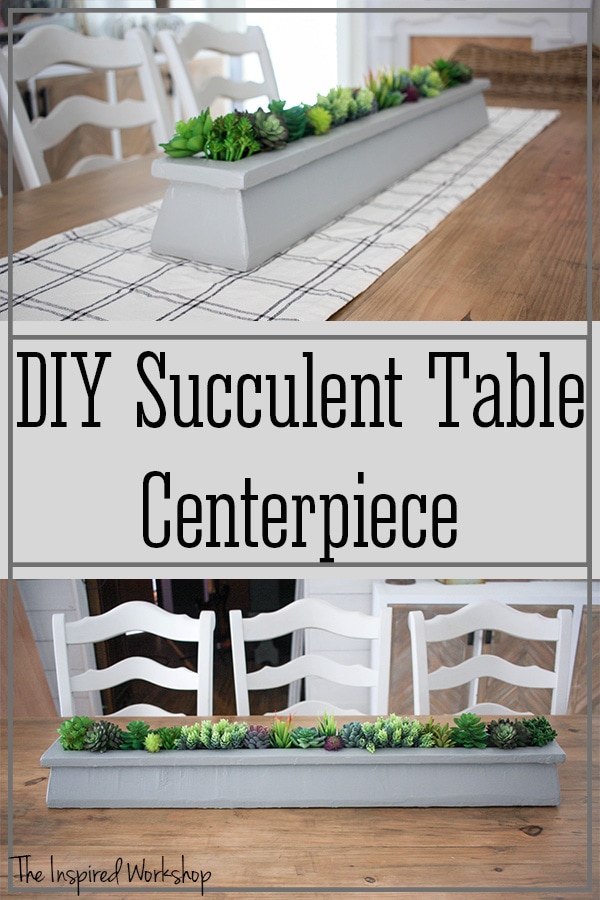
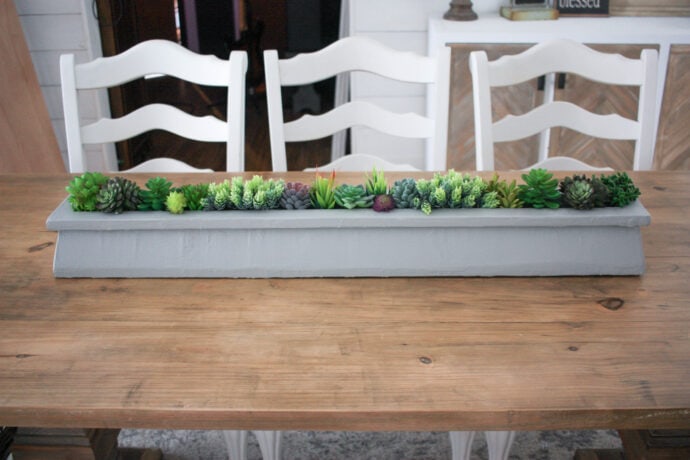
DIY Succulent Table Centerpiece
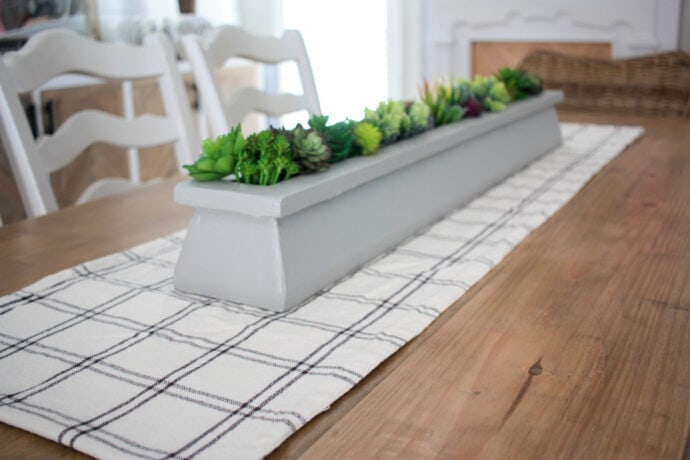
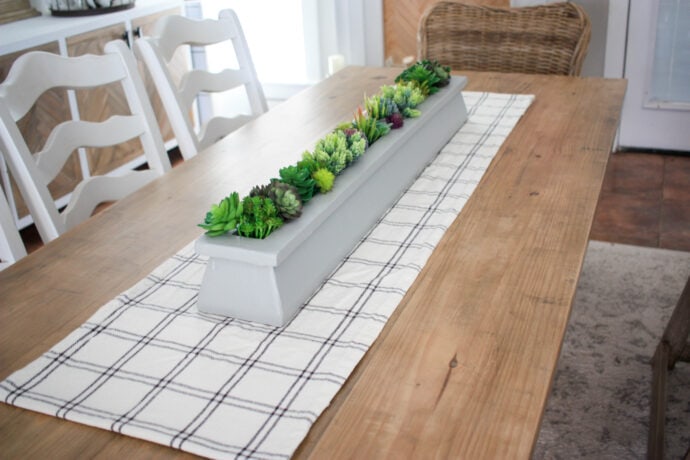
When looking for a table centerpiece that could be used year-round, you need something to add dimension to a flat tabletop, but also add a visual element that doesn’t obstruct everyone’s view across the table while eating or visiting during a meal. This DIY succulent table centerpiece does just that and can be used any time of year to add the perfect simple and clean touch to your dining table!
I may be slightly obsessed with plants this spring! I want them everywhere, I think we have had the nastiest winter in a long time and I’ve looked at dead plants long enough, I want to see greenery! Now the plants in my DIY succulent table centerpiece are fake but they still are curing my winter blues!
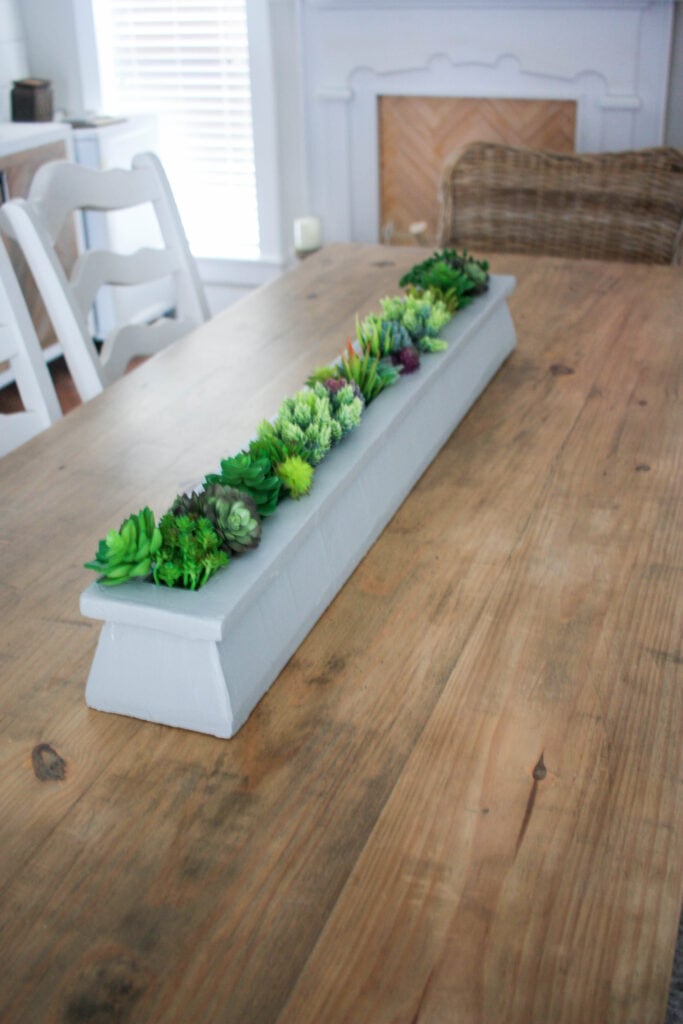
I wanted a table centerpiece that had a plaster…stone…or maybe a concrete look! Lol! I’m not sure exactly what I wanted, I just didn’t want something wood up against my wood table and I think I accomplished it pretty well! It turning out to be a succulent centerpiece was just the icing on my cake!😍
Y’all I couldn’t even remotely take pictures that really captured how great it looked! Probably because almost every angle there was something that would end up in the photo that wasn’t supposed to be there! Lol! We are renovating a bathroom and there is stuff everywhere in this dining room that I am not sure what I am doing with it, or it will be used as soon as I get to that part of the reno!😅
Anyway, it would look great as a wooden table centerpiece as well though, I contemplated not coating it in the joint compound when it was complete because it looked really good, but decided to go through with my original idea!
So you want to build yourself a succulent centerpiece, or heck put tulips in it for spring, and Christmas trees at Christmas time, make it a table centerpiece for any table decor you want, I’ll give you the know-how!
Are you interested in other awesome DIY plans to place some greenery in your life? Check out my latest wall planter for herbs, DIY planter boxes, or even this large planter box that I used for my Christmas tree but then put some tulips in this spring! Oh, I can’t forget my oldie but goodie scrap wood planter! You are sure to find some planter ideas you will love!
Gathering the Supplies for the Succulent Table Centerpiece
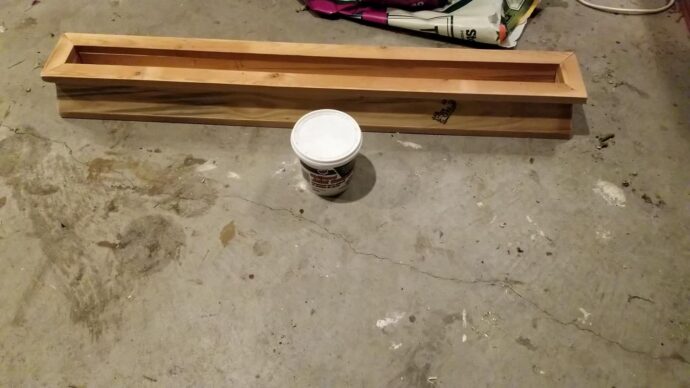
The table centerpiece is made using only a 1×6 and a 1×4 so it is inexpensive to build even in the high lumber market right now! Lol! I used scrap wood to make it so it only cost me a few bucks in joint compound and technically it was even leftover joint compound from my bathroom walls I recently skim coated! I know, I know I am cheap…or just enjoy making beauty from the leftovers! 😂
***NOTE: Amazon links below are affiliate links! Affiliate links are links that pay me a small commission, at no extra cost to you should you make a purchase after clicking one! Affiliate links are a way for me to make a little money to help pay operating expenses and keep the free content coming your way, so thank you in advance for any purchases made! I appreciate it!
Materials for Making Table Centerpiece:
- 1 – 1x6x8
- 1 – 1x4x8
- joint compound – this is the one I used but this is the large container, you only need the small one!
- wood glue
- brad nailer
- brad nails
- compound miter saw
- table saw
- paint – I used SW Tin Lizzie reduced 50% (it was just a sample I had laying around)
- succulents – I ordered that set and grabbed a two of this green succulent at Hobby Lobby and two of this green echeveria!
- floral foam
Cut List for the Table Centerpiece:
- 1 – 1×6 @ 41″
- 2 – 1×4 @ 41″ longest end measurement – ends mitered at 15 degrees off square both ends, ends beveled at 45 degrees off square, AND both edges of the board are beveled at 15 degrees off square, sides parallel
- 2 – 1×4 @ 5 1/2″ longest end measurement – ends mitered at 15 degrees off square, ends beveled at 45 degrees off square, ends not parallel
- 2 – 1×2 (rip the leftover 1×6 down to 1 1/2″) @ 38 1/4″ shortest end measurement – mitered at 45 degrees off square, ends not parallel
- 2 – 1×2 (rip the leftover 1×6 down to 1 1/2″) @ 2″ shortest end measurement – ends mitered at 45 degrees of square, ends not parallel
Do all the supplies, cutlist, and thought of building something yourself seem overwhelming? I know you can do it, but if you are more interested in purchasing as opposed to building, here are a couple of really cute succulent planters I found that you could purchase instead! They are not as long as the one I built, but you could get two or three and it would still look great! Links are affiliate links!
Building the DIY Succulent Table Centerpiece
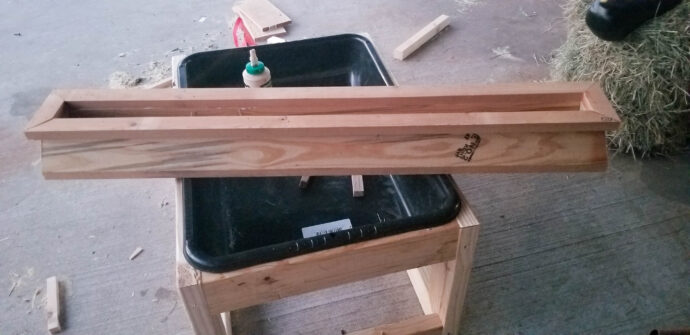
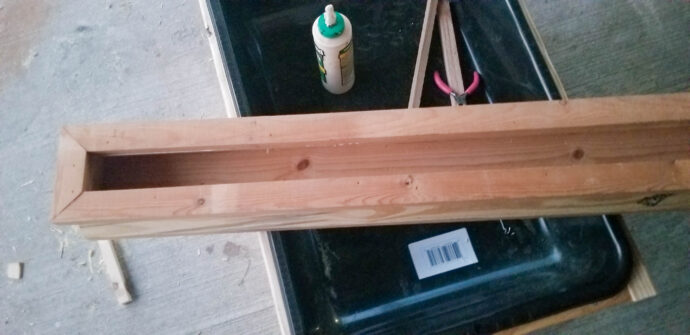
Cut the 1×6 down to 41″ to make the bottom of your succulent centerpiece!
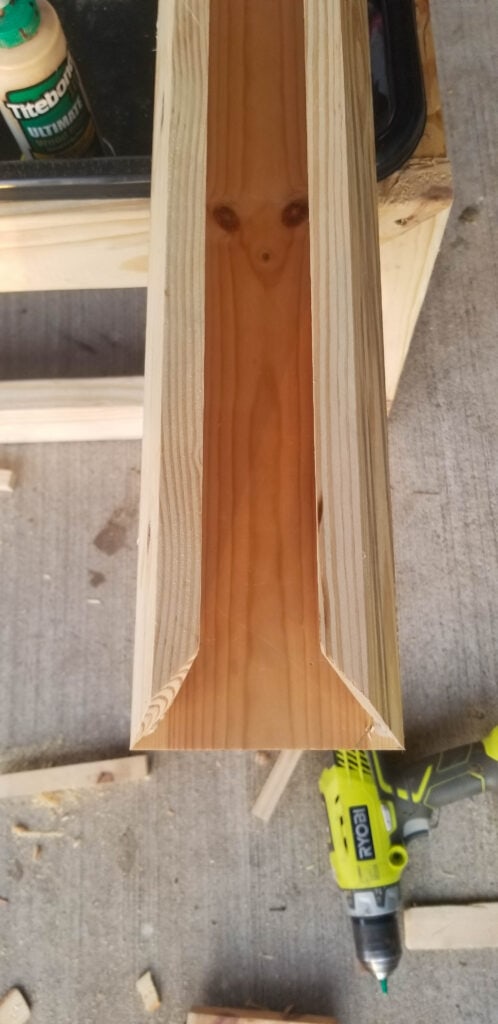
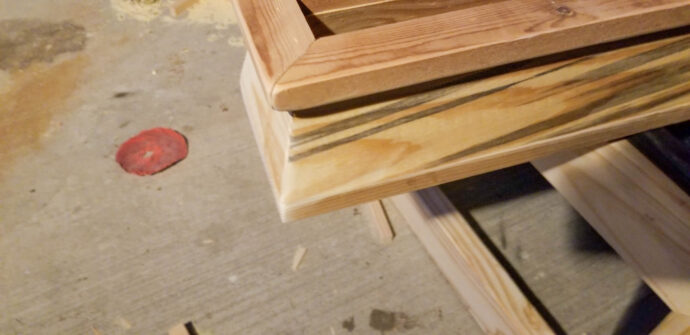
Rip the 1x4s (sides) on the table saw at 15 degrees off square along the long sides of the 1x4s, they should be parallel. This is how the 1×4 sides lean inward as shown below!
Next cut the 1×4 sides down to size, 41″ on the longest end, both ends mitered at 15 degrees off square, and beveled at 45 degrees off square to make the corners beveled and lean inward still! (top will be a slightly shorter measurement) Just use glue and brad nail from the underside on the 1×6 to attach!
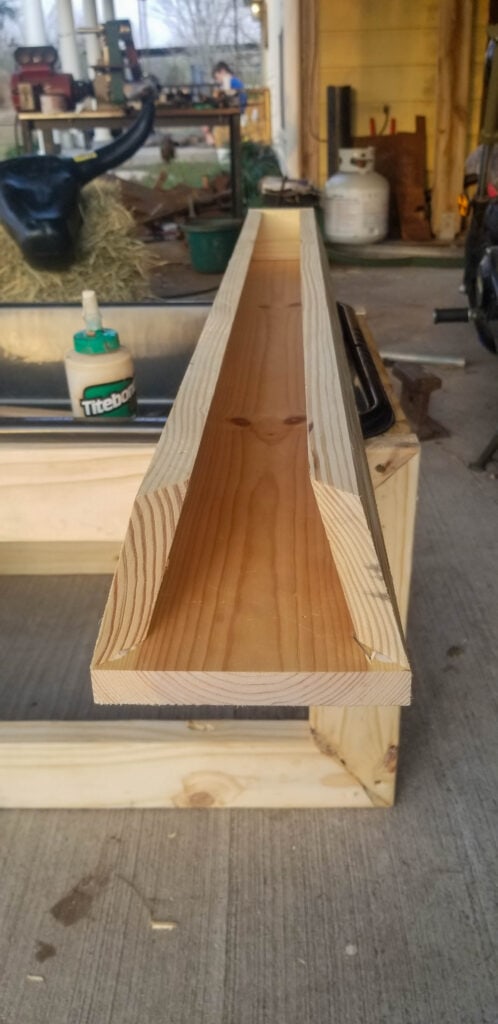
The short ends are the same, beveled and mitered just as the long sides! Make sure and use wood glue and brad nails from the underside of the 1×6, and then brad nail the short sides into the long sides!
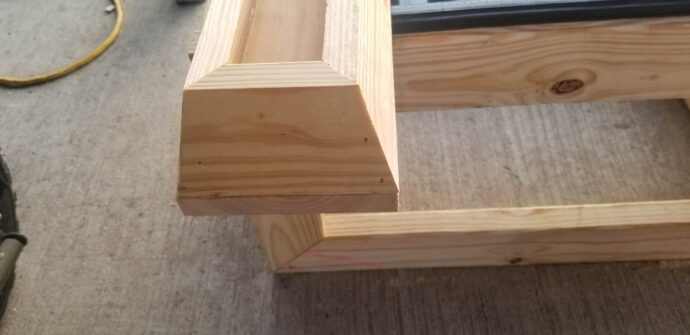
Add the 1x2s around the top edge to complete the wooden table centerpiece! The 1x2s are mitered at 45 degrees off square, both ends, and they are not parallel! If your bevel is done correctly on your 1x4s it will sit level! Use wood glue and brad nails to hold it in place!
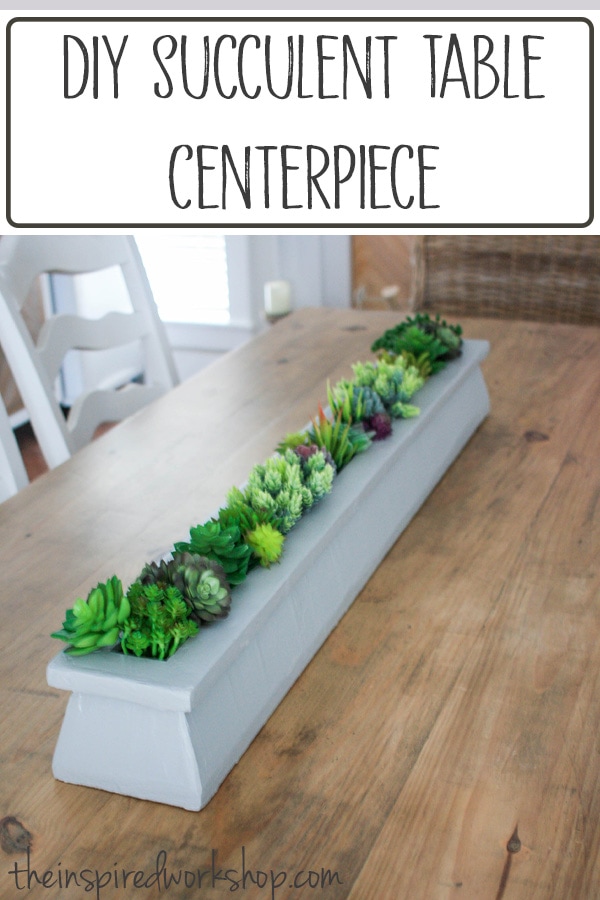
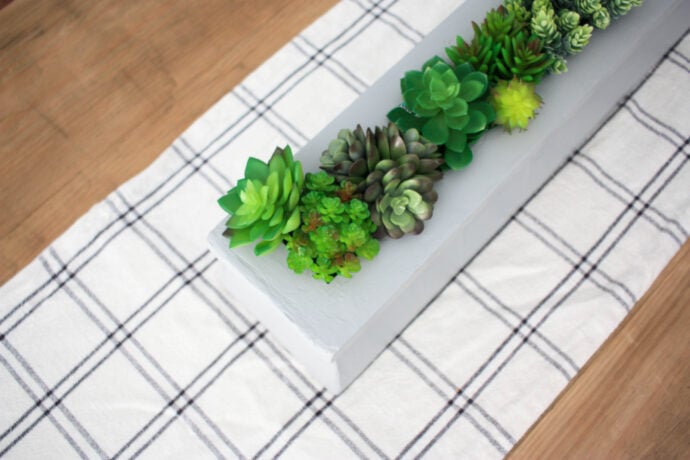
Building the table centerpiece as I did, leaves a pretty narrow opening at the top to make the succulents fit perfectly without having to add any type of moss or filler! You can always adjust sizing if you’d like to fit what you want!
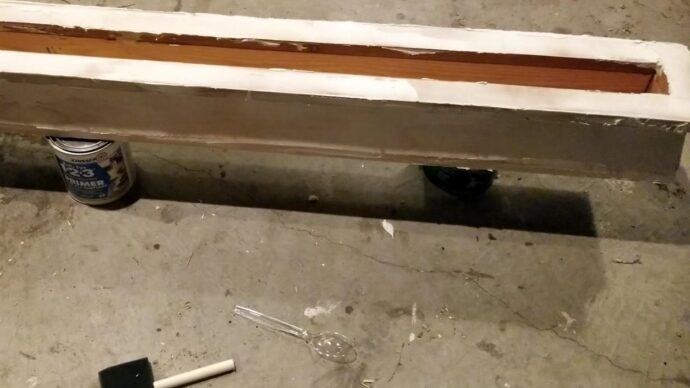
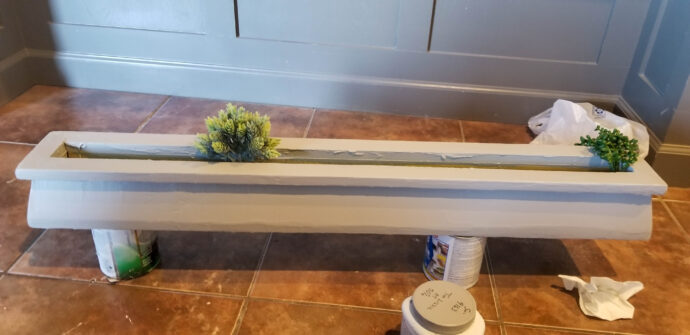
Once you have the planter portion built, you will want to sand it before painting or staining. If you are going to cover it in joint compound as I did, you will want to round the edges as much as possible just so the joint compound can make it look less like wood!
Using Joint Compound on the Table Centerpiece
I really had no idea what I was going for as I mentioned earlier, so I just slapped some joint compound onto the wood, making sure to liberally coat everything!
I started using a butter knife thinking it would be just like buttering toast and quickly realized that was a dumb idea! Lol! It actually worked fine except that butter knives have rippled edges so it kept putting lines all in the joint compound!🙃
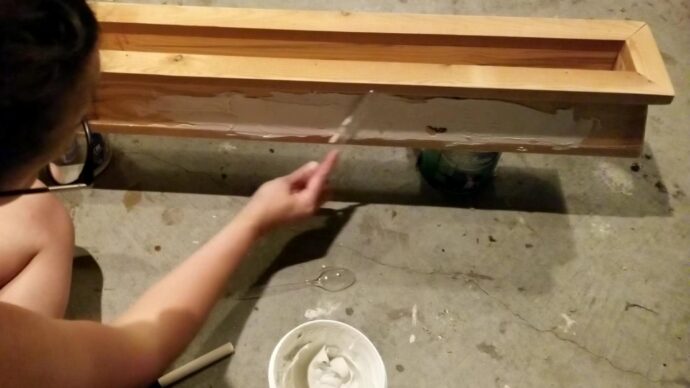
I switched over to a putty knife and it started going a lot faster, but the main thing is just covering the wood box in joint compound, making sure to cover the underside of the 1×2 as well!
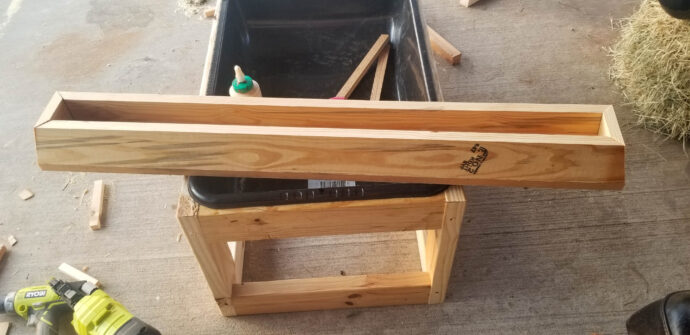
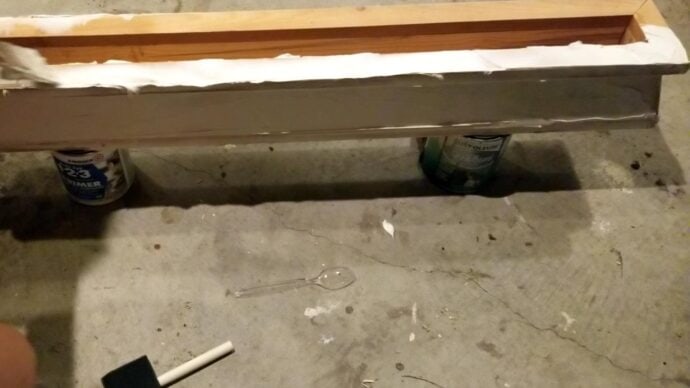
Once you have covered all the sides, let it dry!
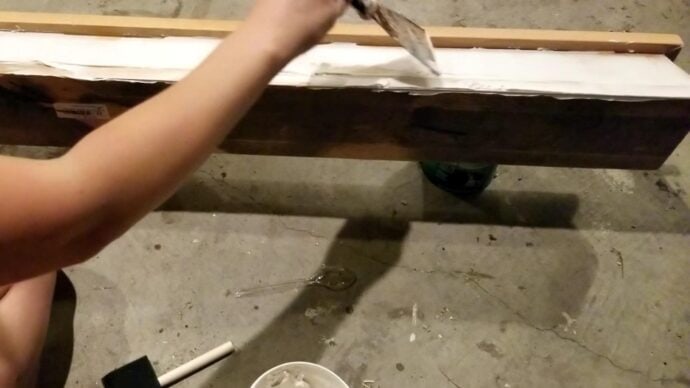
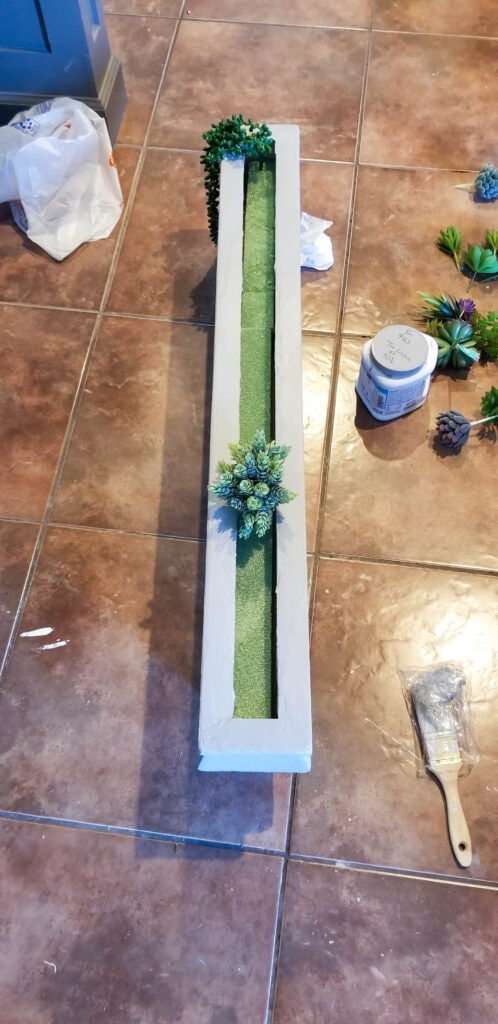
The next day I reevaluated the look! Lol! I sanded some of the really chunky spots to make them look more natural and then painted it to see what I thought.
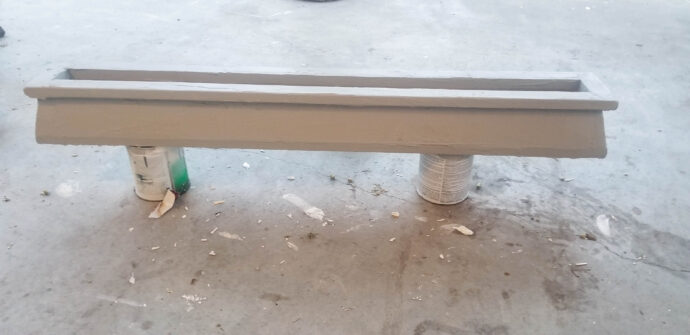
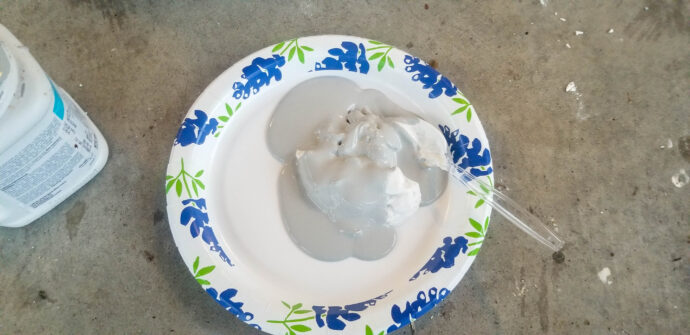
I needed to sand a little more even though I had already painted it, so I did…and that left a couple of places where white was showing through. I tried mixing paint with the joint compound on the next layer and it worked really well. I would suggest doing that from the beginning so you can sand extra if you need to and it won’t be white underneath!
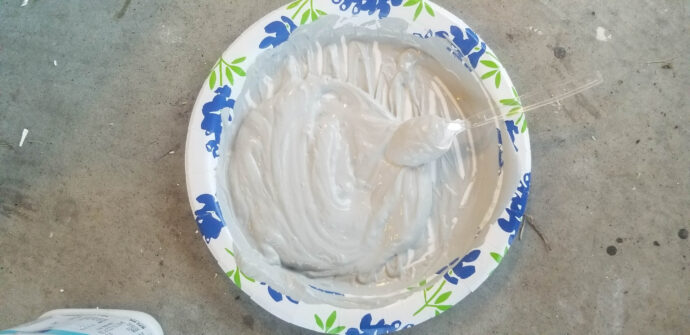
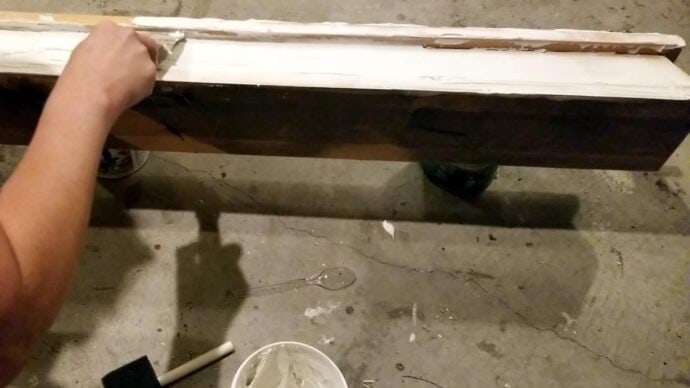
The joint compound with paint was a little lighter than the paint alone but not by much! After this second coat, it was good to go I felt like and so I was ready to add plants!
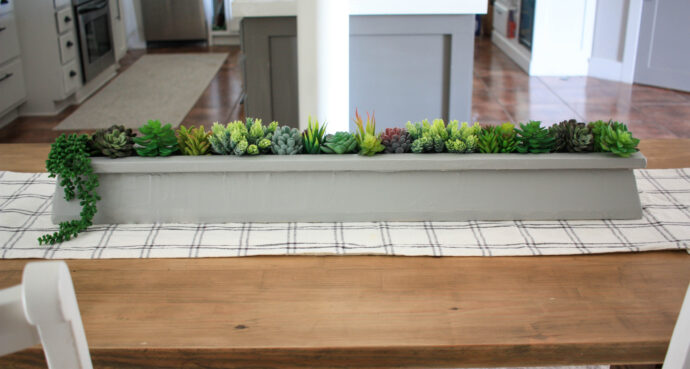
Adding Succulents to the Table Centerpiece
I used floral foam, I purchased two blocks and cut them in half which fit pretty perfectly in the succulent planter. You will only need one and a half of the other along with a small piece of the last half.
Then so easily you just stick the succulents in the planter where you think they look good! It is really that SIMPLE! Lol!
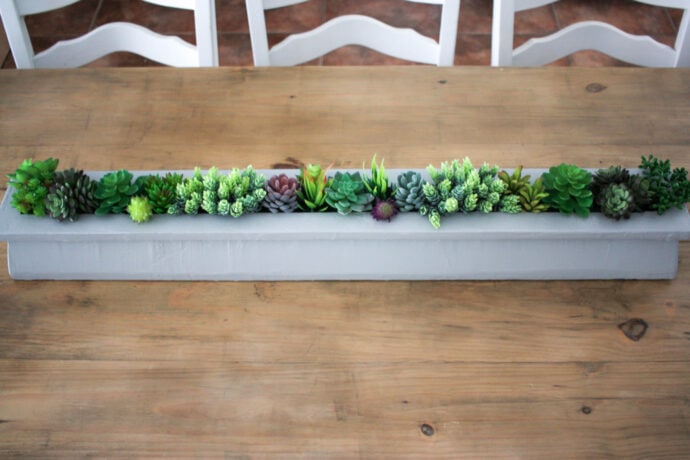
I freaking LOVE it! And again, the pictures do not even begin to do this beautiful little succulent planter table centerpiece justice!
Are you looking to make something as your dining table centerpiece? Show us if you make one, I would love to see your version, it always makes my day to see your projects that my projects inspired!
Happy Building!

Want to save this DIY Succulent Table Centerpiece for Later? PIN IT!