
This project combines two of my favorite things: 2x4s and floating shelves. Why do I like 2x4s so much? Mainly because they don’t cost much and are readily available.
Of course they have shortcomings, but with a little time and effort you can get past that. I’m talking about problems like warping, knots, and just low quality boards. With a little extra time at the store and some milling as needed you can end up with some nice true boards to work with.
Floating shelves are a great DIY project for any beginners or novices who want a practical build they can use in their house or office. It is hard to make a floating shelf complicated really, but surprisingly there are many different ways to build one.
Hidden Lag Bolt Method
I actually haven’t seen the method I used anywhere else, although I’m sure it exists.
It consists of using lag bolts to secure the inner half of the shelf to the wall. Then the outer half of the shelf is connected to the other half with some 1/2″ wooden dowels.
It ends up being a fairly strong shelf, but as a disclaimer I cannot guarantee the strength nor do I make any claims on the strength of my design. You should do your own testing to make sure it is safe. I know lag bolts like I used (5/16″) might even be overkill for this. And the wooden dowels are pretty strong as well, so that is why I am confident presenting this design to you.
You will need to find/have wall studs to attach these lag anchors to for best results.
Other Considerations
I personally like this method of floating shelf because it is low on materials and pretty clean looking. A lot of designs I see require a thicker shelf, and this kind of eliminates the “sleekness” that some people are probably going for. This is due to needing a larger surface to attach and screw into the wall. There isn’t anything wrong with this method, it just isn’t how I wanted to do it.
Here is a short list of reasons I did it this way:
- Sleek and Thin
- Removable
- Few materials
- Expandability
- Relatively Good strength
- Simplicity
Materials
This does not require a lot of materials, and what you do need to get is pretty cheap.
- 2×4 8′ long (One minimum, but more if you plan on making several, bigger sizes, etc.)
- (2) 5/16 x 5″ Lag Bolt
- (2) 5/16 washers
- 1/2″ wooden dowels (preferably oak)
- Stain (if needed)
- Finish
- Clean Rags/Brush
- Optional – wood glue or small screws
Tools
You will need tools that you may already own, but one special tool that is super helpful is the dowel jig. I didn’t own this tool beforehand, so I waited to do this project till it came in. You can check it out here.
This can also be done without a table saw, but you will not get the straight edges of the 2x4s. It will take off the rounded over edges when you use the table saw. I will leave it up to you if you want that look or not.
- Table Saw
- Miter Saw
- Cordless Drill
- Tape Measure
- Dowel Jig
- Drill Bit Set
- Sander (Random Orbital or Belt)
- Ratchet Set (for lag bolt)
- Stud Finder
- Small Level
- Optional – Trim Router with various bits
The trim router is to add a special outside edge to the shelf. It is not necessary by any means but gives it a nice finished look.
In addition to all these tools and materials it is always good to have a nice clean working area, along with good lighting. And remember to practice good habits and technique around all of your tools.
Prep Work
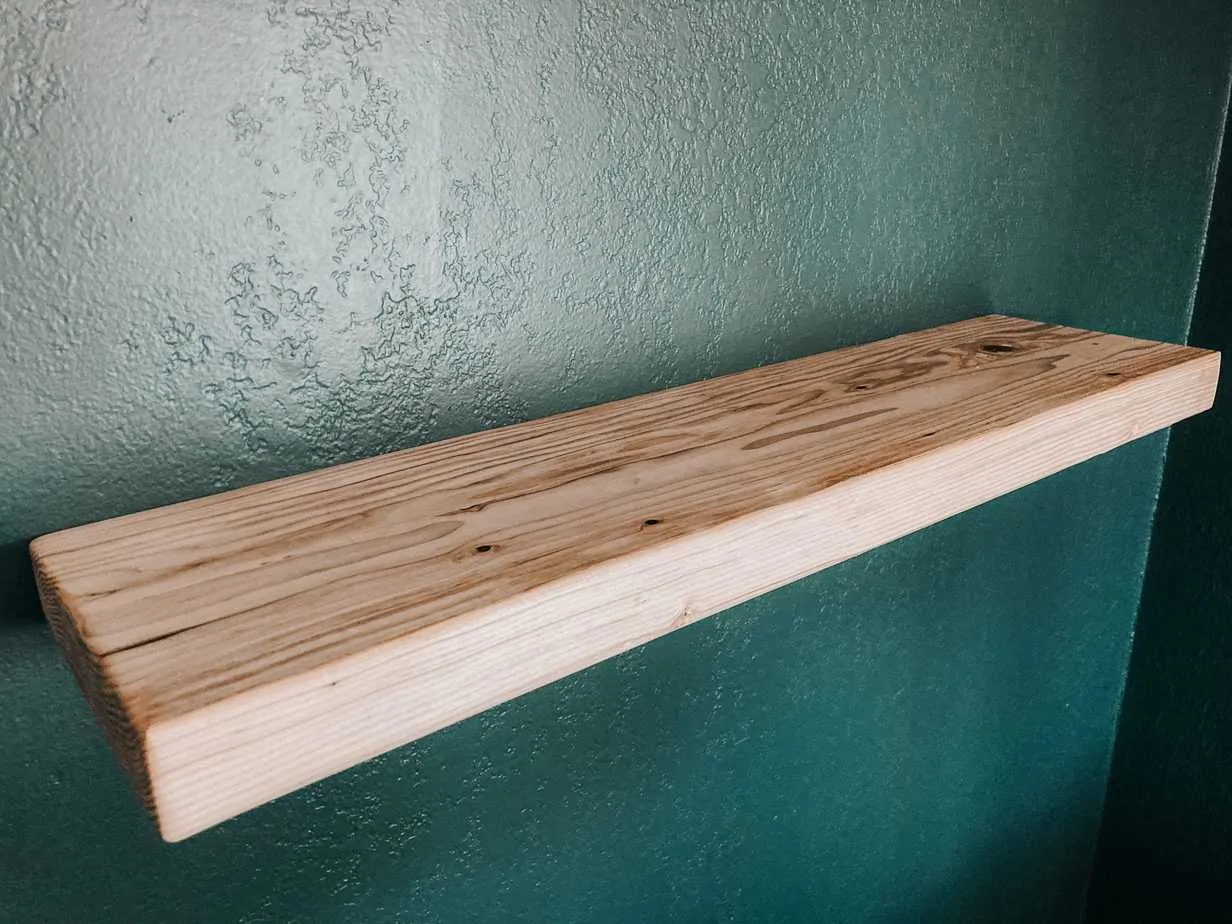
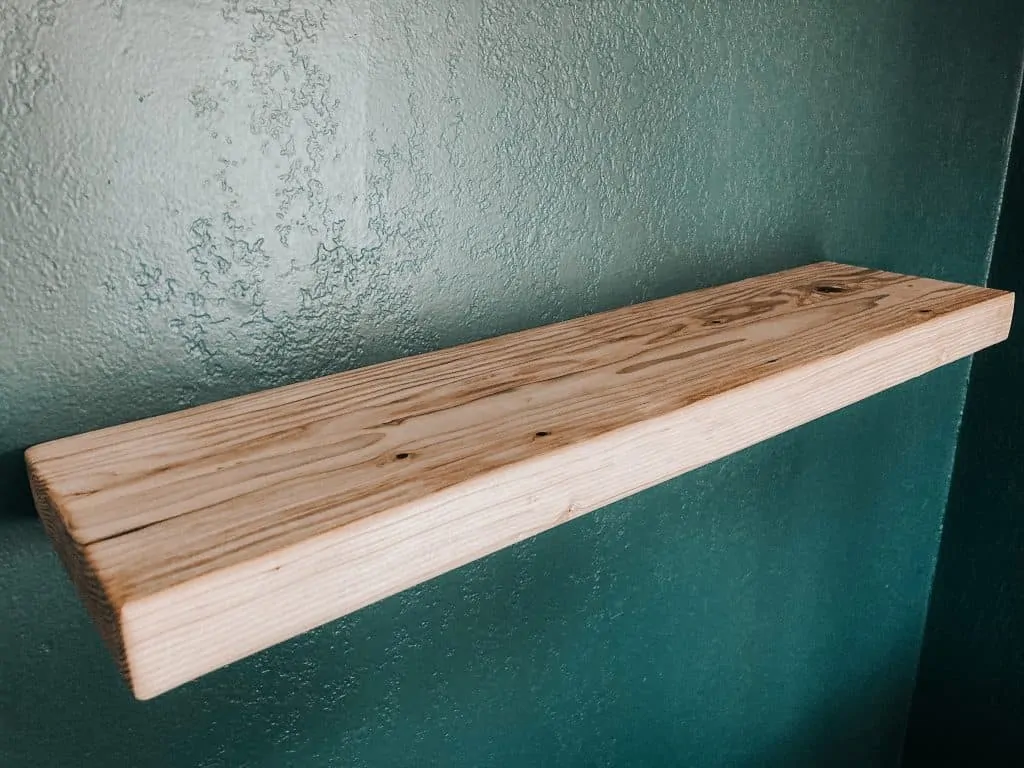
Initial prep work involves getting your wood and planning the actual project. The project size that I present here is:
24″ wide x 6″ deep x 1.5″ thick
It involves two boards. If you are confident you can always use more boards, bigger 2x6s, or customize it in other ways.
Find where you plan to place the shelf and make sure to determine where the studs are and how far they are apart. This is critical because you will be predrilling the holes in the shelf.
Step 1 – Choose and Cut Boards
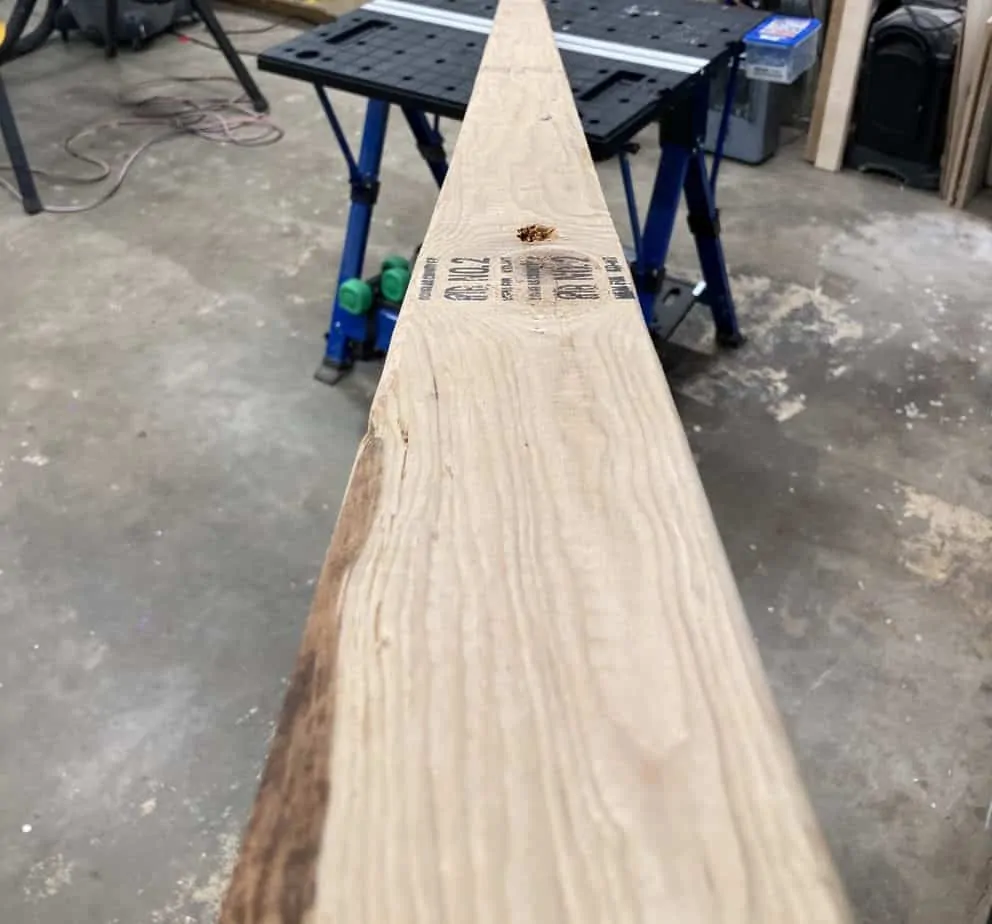
The first step is to prepare your boards for cutting. This involves choosing the best boards for the job.
With 2x4s you will generally a lot of problems like twisting, cupping, and knots. If you are making the shelf 2′ long, then you only need to find a stretch of board that is straight and true for this length.
Make your marks and cut the boards to the desired length. In my case it is 24″. It will be hard to go below your stud width because then you will only have one lag bolt in a stud in the wall. It is definitely best to have two bolts into the wall, but not impossible with just one. I am not going to show how to only use one in this tutorial, however.
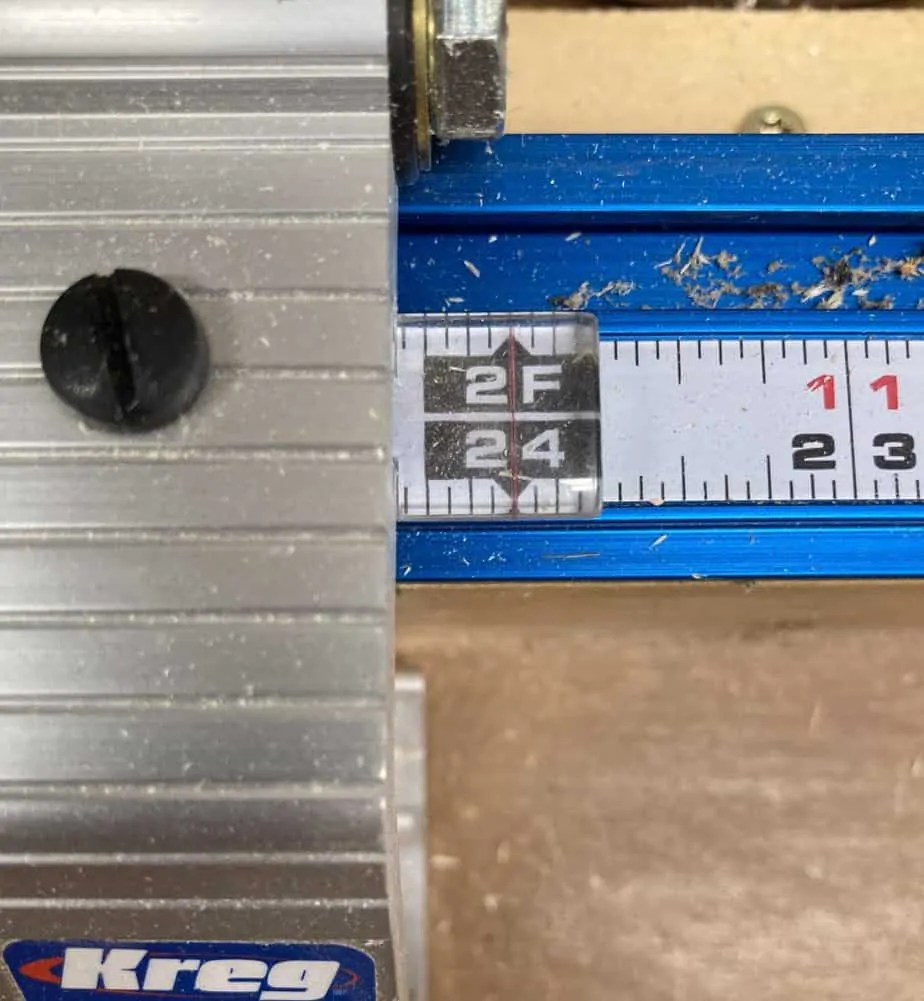
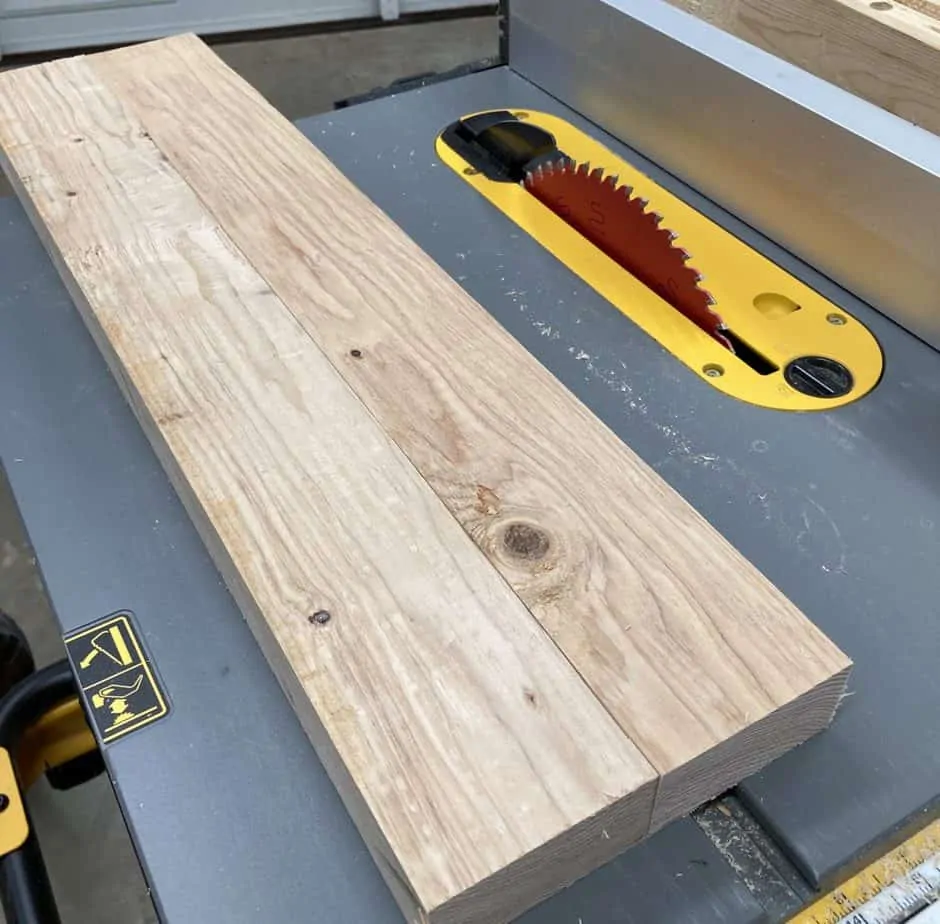
Cut two boards with the miter saw. In the image above I use my Kreg precision trak kit.
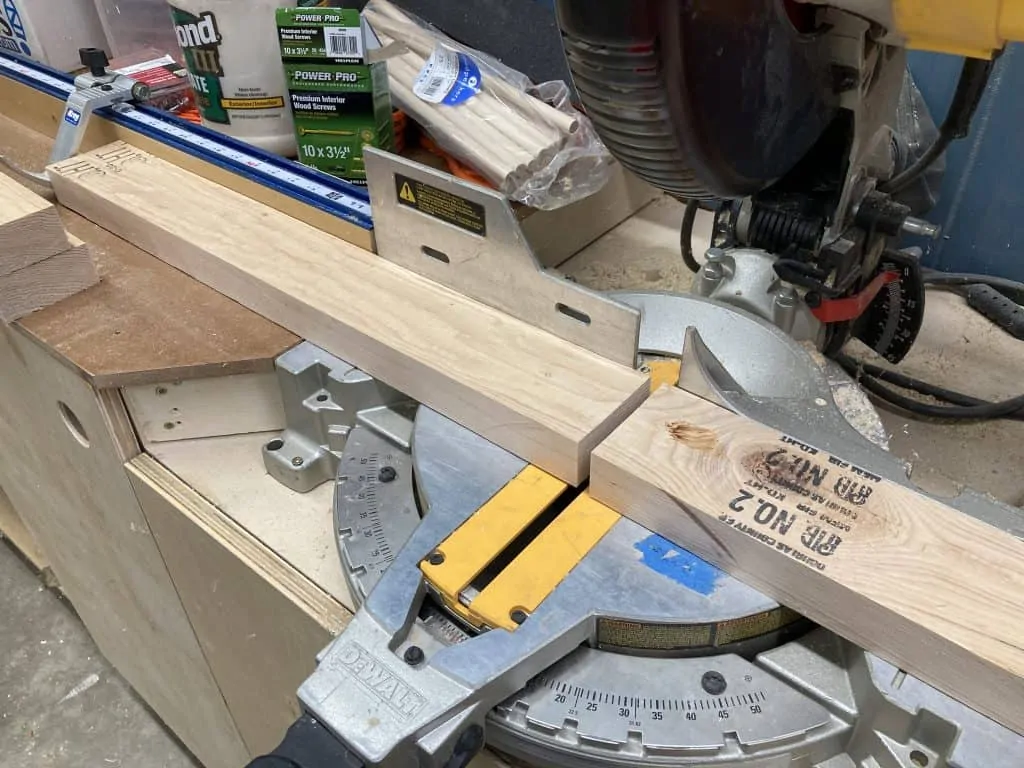
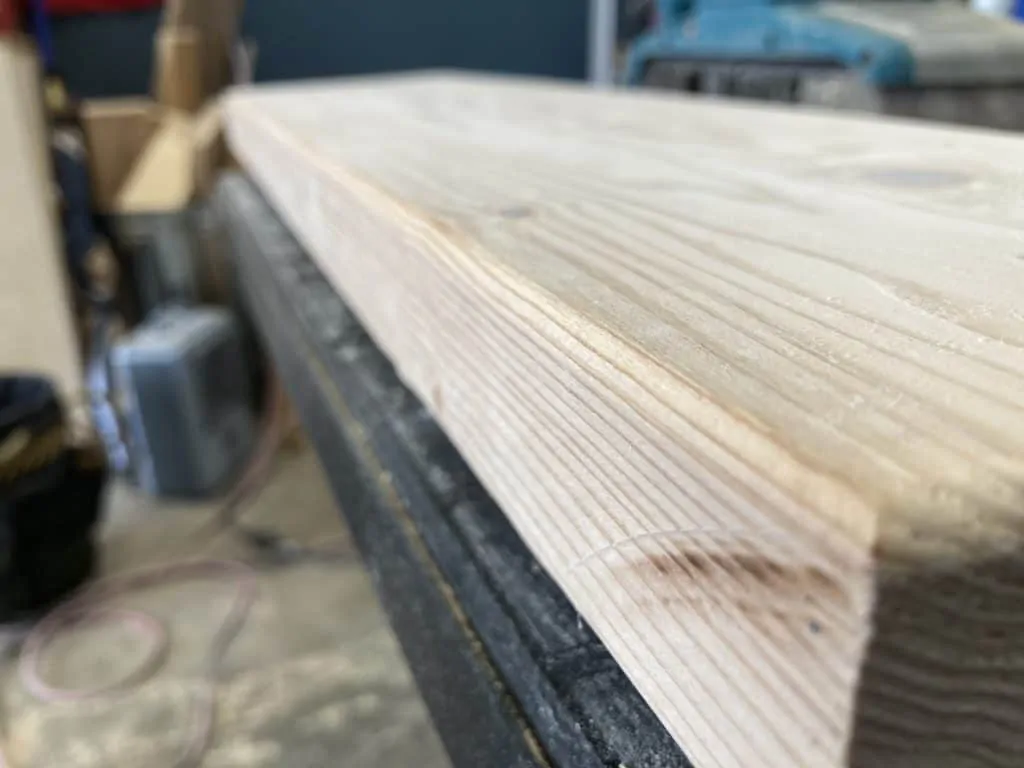
In the above image the 2×4 is already milled along the edges from the table saw. This is because I already had a full length 2×4 cut along the edges ready to go.
I believe that it is actually best to cut the edges off on the table saw after the board is cut to length. It will have less variation against the fence of the table saw (due to the entire 8′ board being slightly bent in some direction) and therefore be a more consistent cut.
Once you have both 24″ long boards, head over to the table saw (skip this step if you don’t own table saw – just know that you won’t have the 90 degree edges in following images – if you want to see some affordable table saw options you can visit my post here: these are some portable table saws)
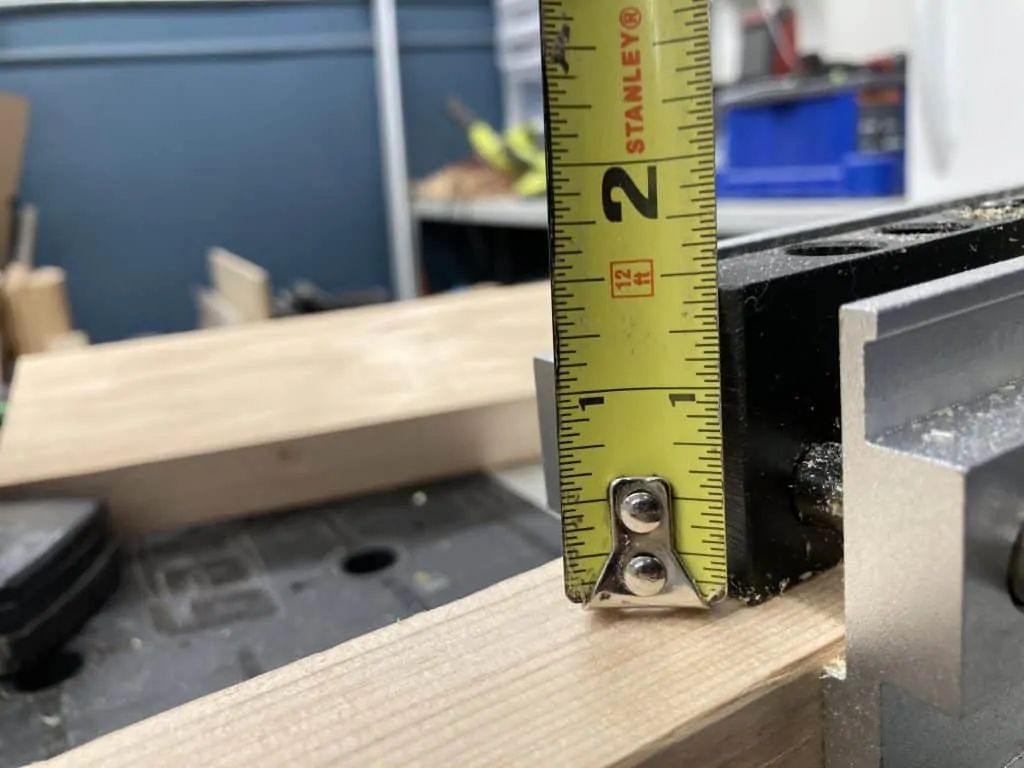
Set the fence to 3.25″ (I am assuming the standard 2×4 width is 3.5″).
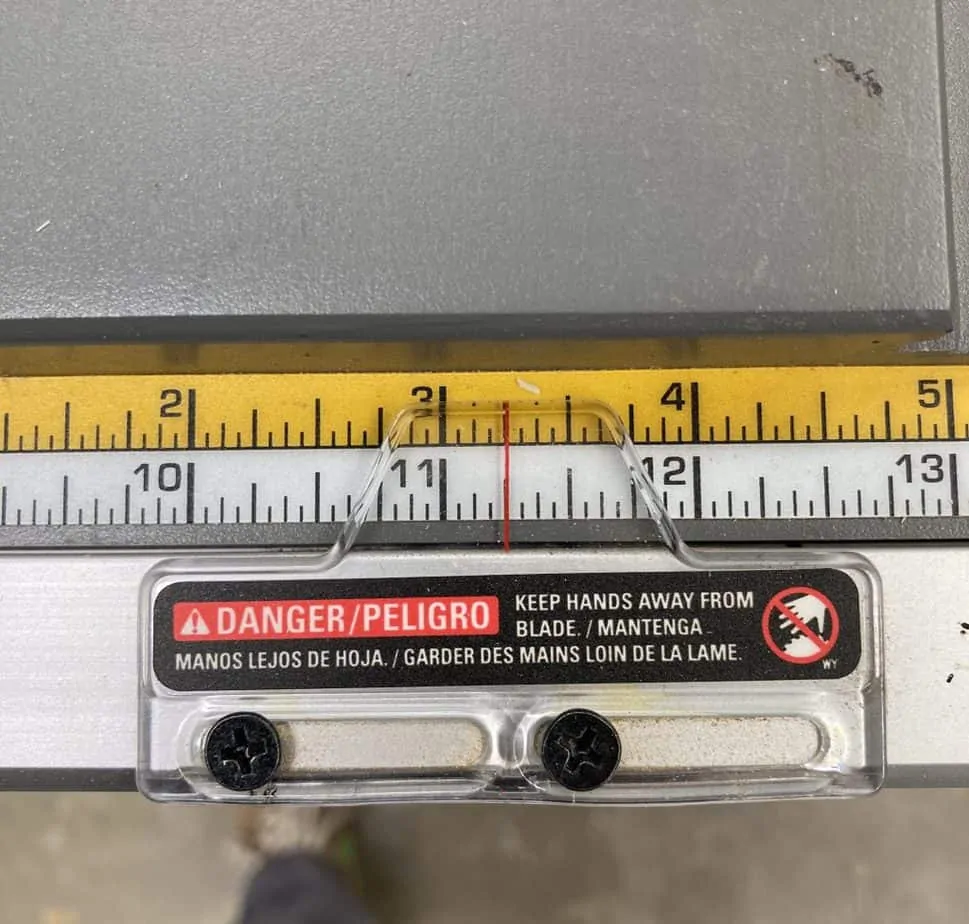
Our plan is to take off .25″ of each side of the 2×4. Run it through the saw at this width.
This is what I have found the be the minimum width you can take off the get rid of the rounded edge. I do this to almost any 2×4 that I use for building because I don’t like the way it comes from the store.
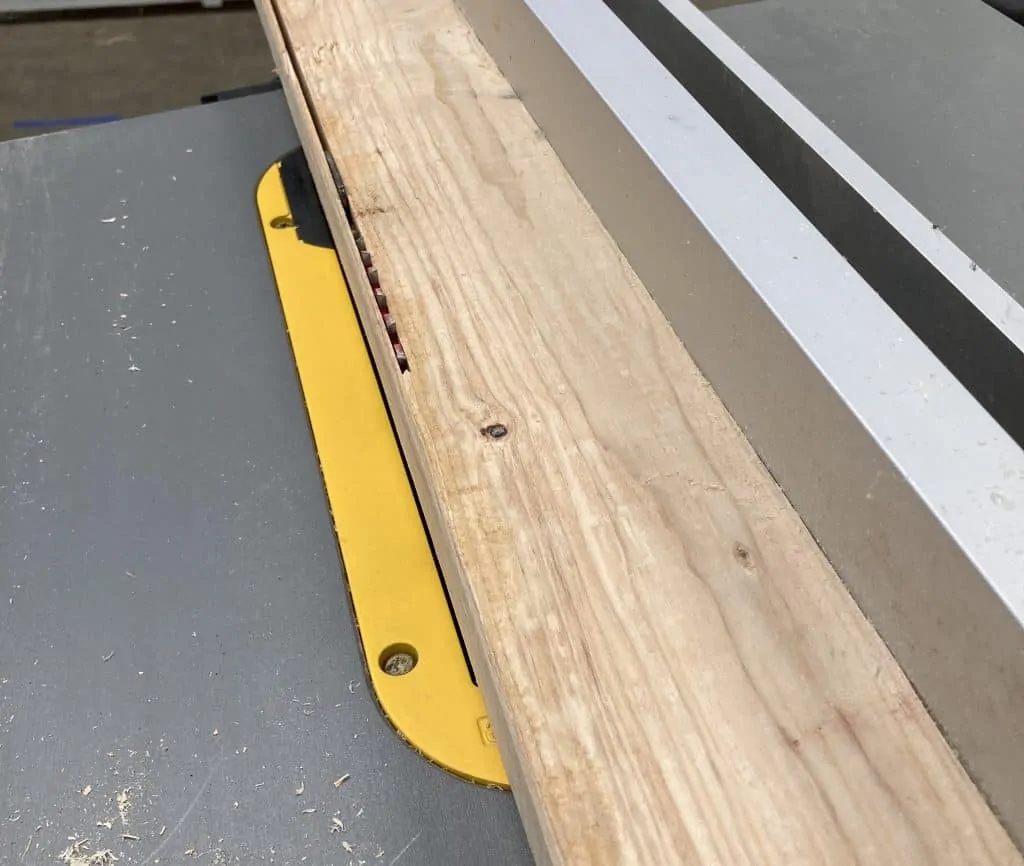
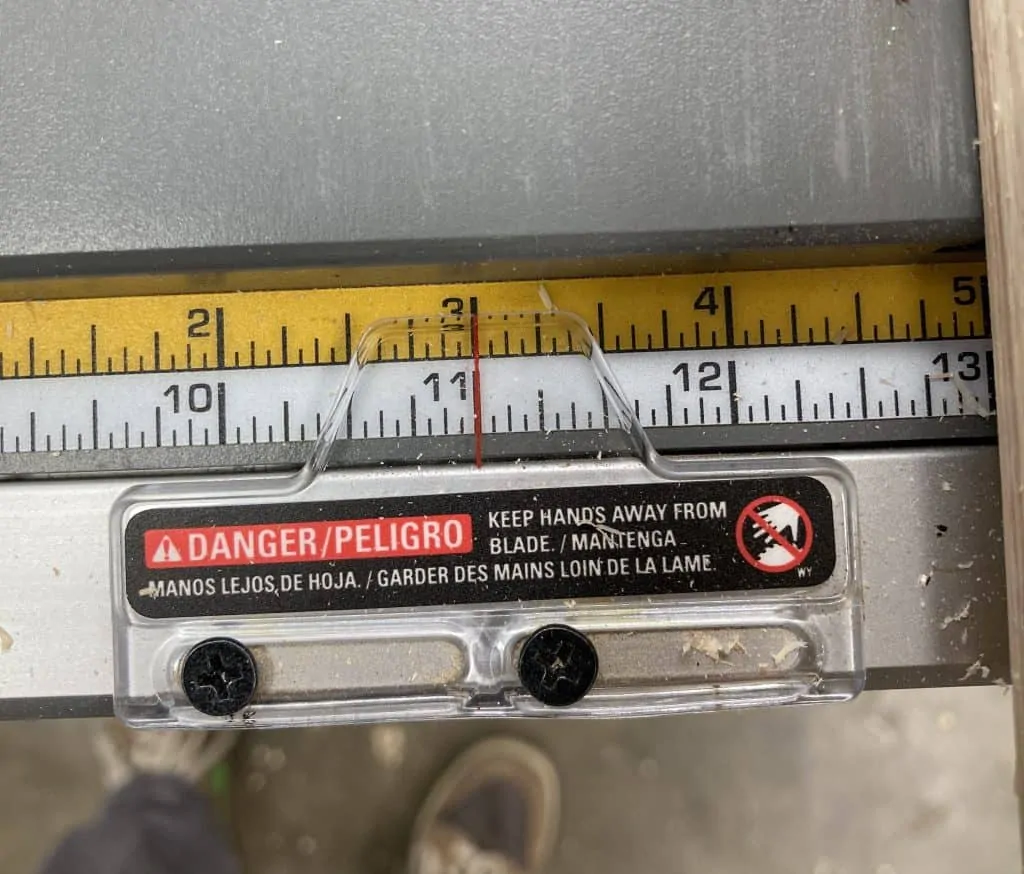
Flip the board over and run the other side with the fence set at 3″. This will be your final width. That way the shelf altogether totals 6″
Step 2 – Mark and Drill Dowel Holes
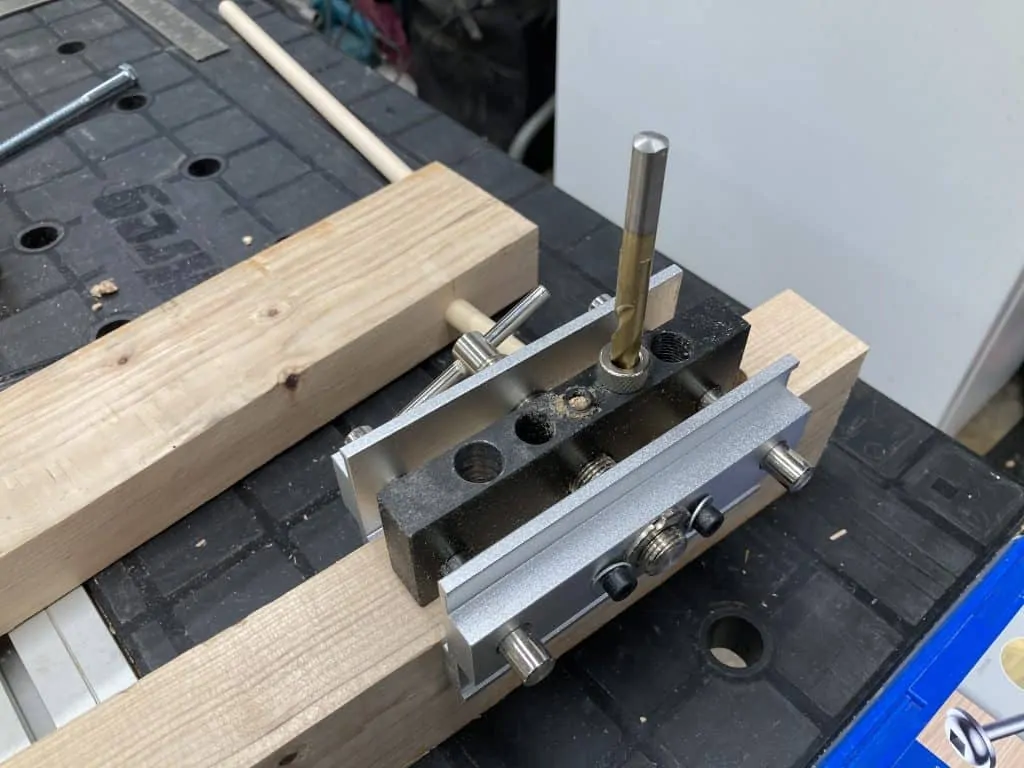
In this step you will utilize the dowel jig. It is of course possible to drill the dowel holes without a jig, but it will be more difficult to get things to line up. If you have a drill press, however, you don’t need a jig because with a true horizontal table setup it should drill a hole straight and vertical.
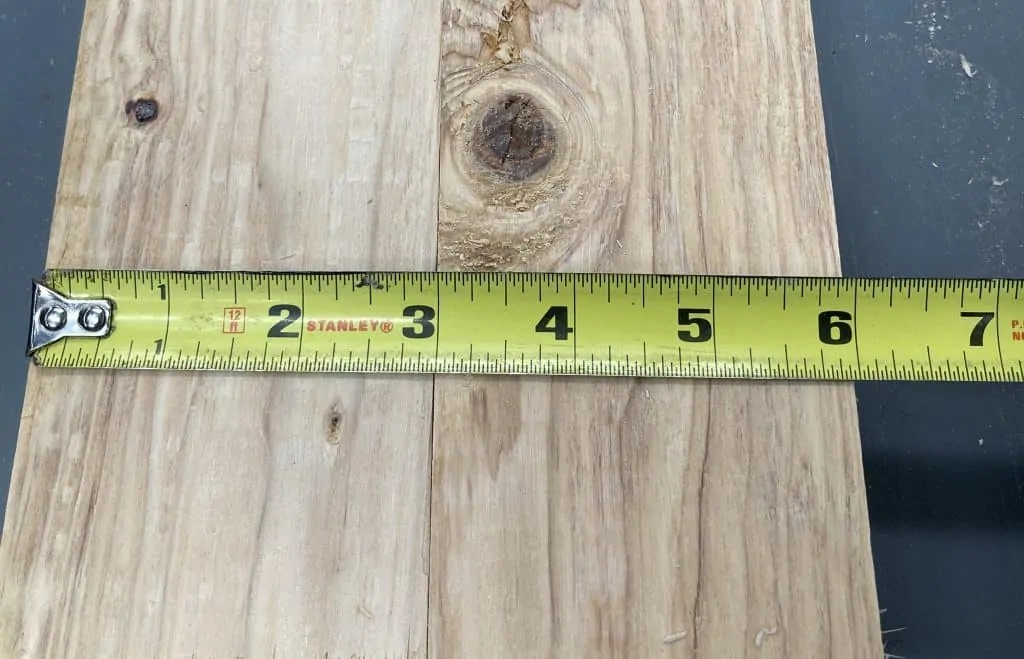
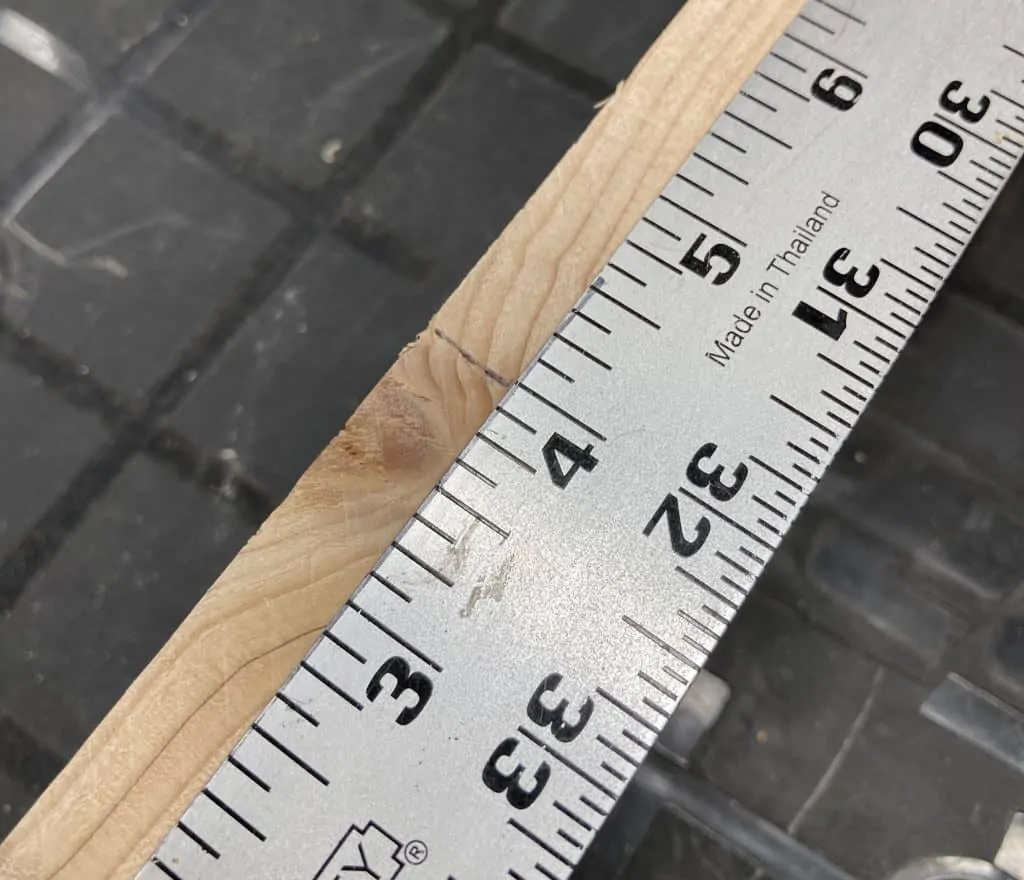
I marked 2″ in from each edge for the dowel holes.
The next step is to line the two boards up even together, clamp them in place, and use a square to mark a line across so that you can line the dowel jig up appropriately.
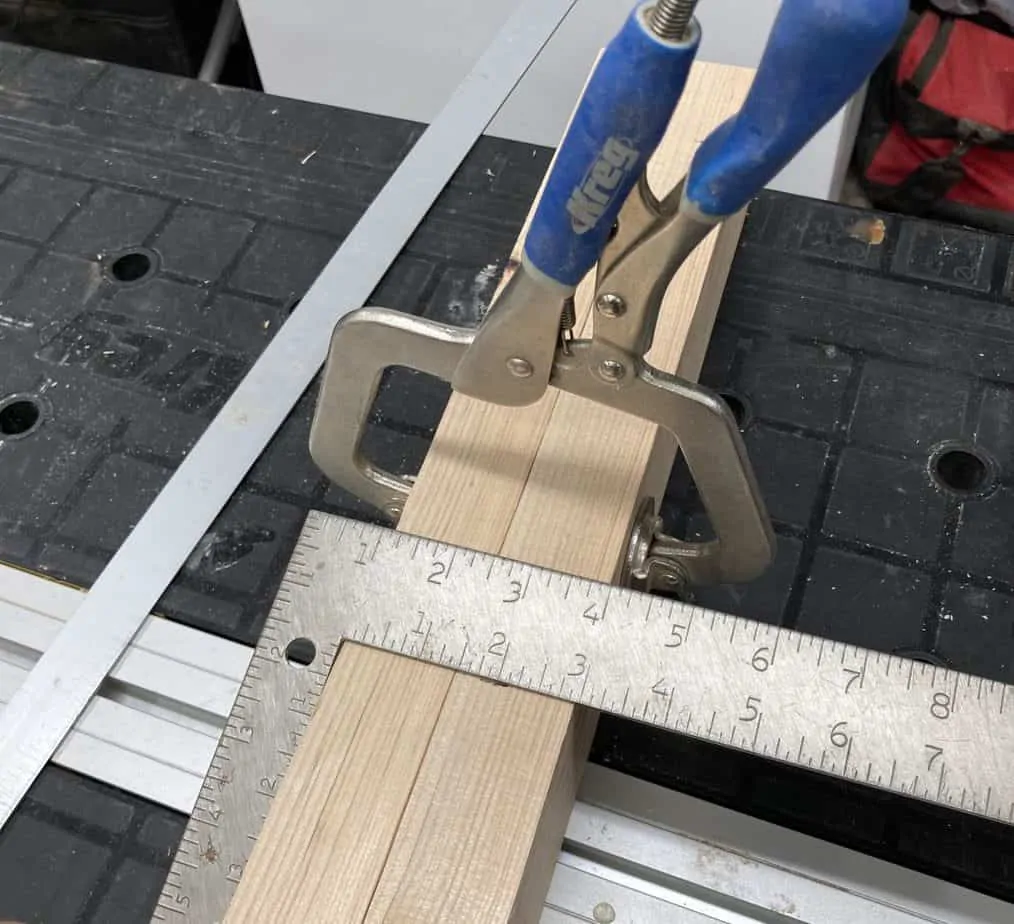
Now we are setup to drill holes for the dowels. One complaint I have about this jig is that there isn’t a good way to perfectly line it up. I think there should be some engraved lines along the outside of the jig to help line it up, but instead you have to look down through the drill hole and get it centered over the line.
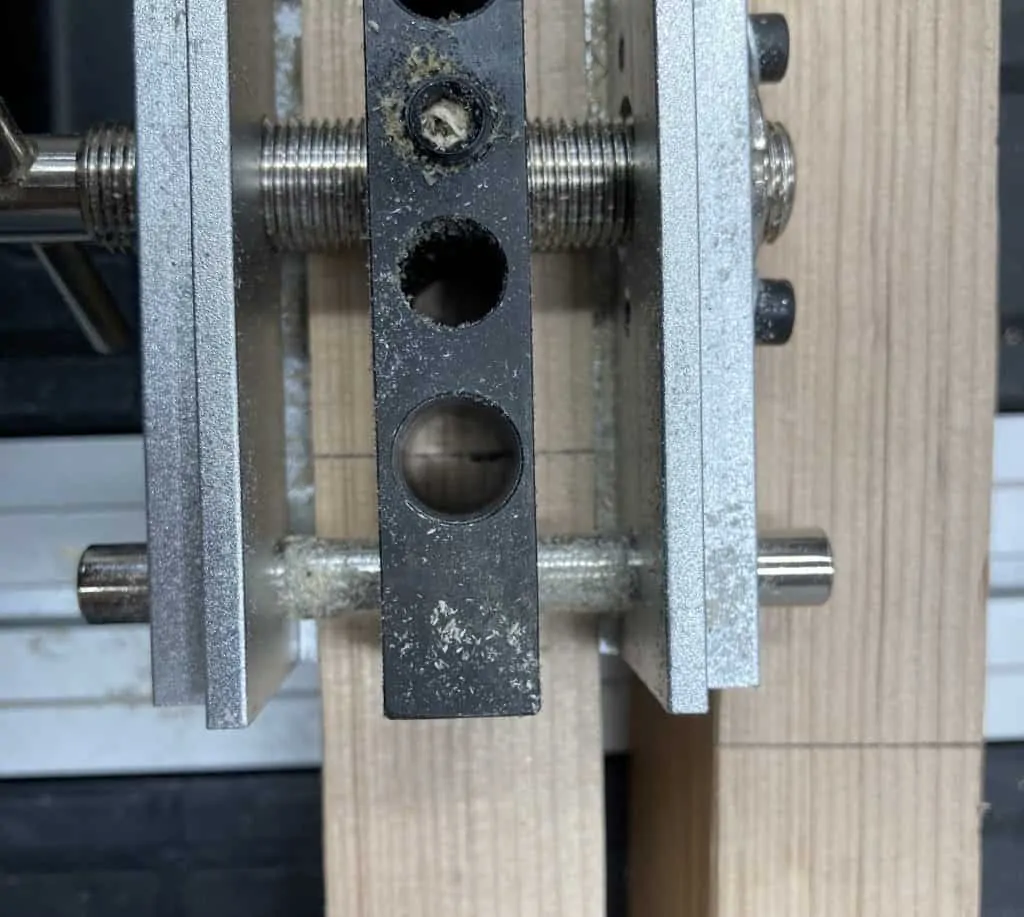
We will be using the 1/2″ hole with a 1/2″ drill bit.
Now the depth of the dowel holes is important, but not absolutely critical. We just don’t want to go overly deep but we want to use as much dowel as we can for strength.
Since our board is 3″, I decided to make the holes 2″ deep in each board for a total dowel length of 4″. This should be plenty difficult to break or come off.
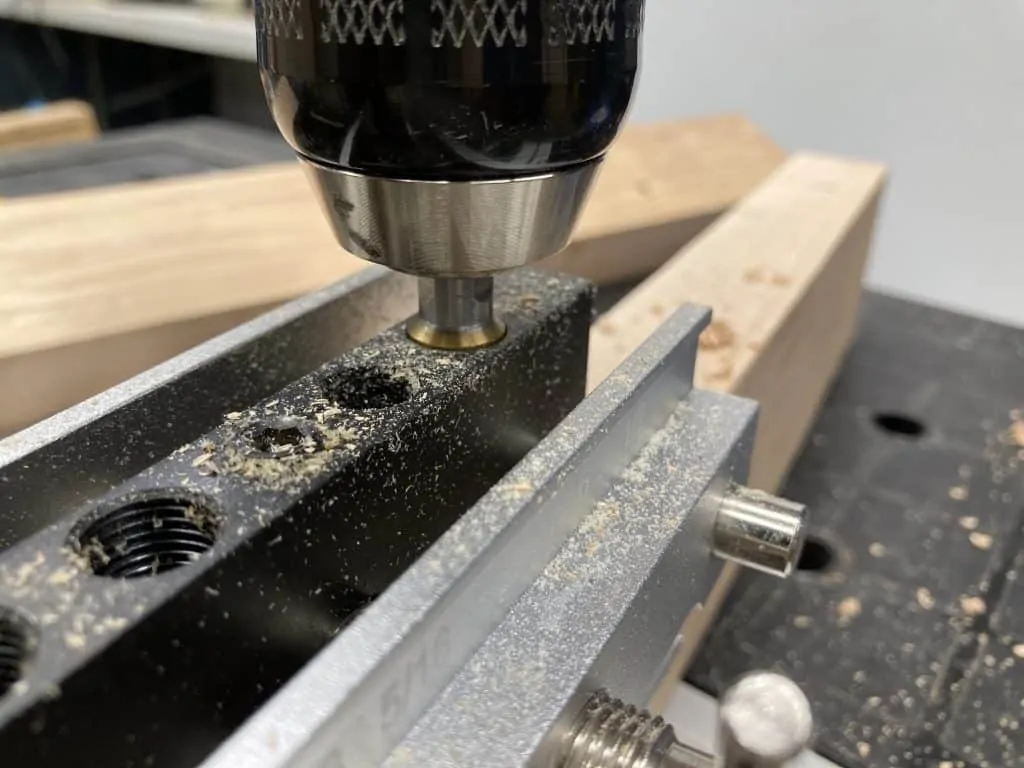
As you can see in the images below, the dowel jig is 1.5″ tall, and the drill bit tapers off at its base at 3.5″. So when I drill the hole I know I am 2″ deep when I reach the tapered part of the drill bit.

Here is the drilling in action:
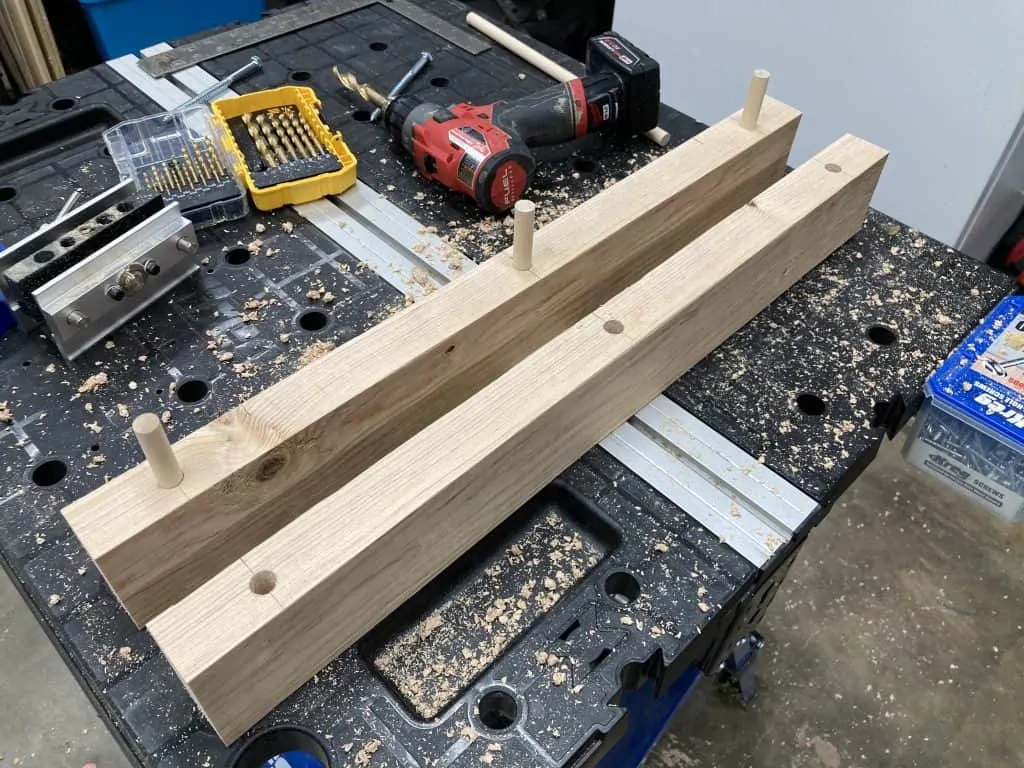
Once you have these holes drilled it is time to test the dowels. You can go ahead and cut the dowels to 4″ with a miter saw.
In the image below I also drilled a hole in the middle of the boards, but I decided it wasn’t necessary and didn’t end up using it in the end.
Step 3 – Test Fit and Drill Lag Bolt Holes
Now testing the fit can be tricky because it can get stuck together if the fit is real snug. But I like to do it because the whole idea of this design is that the shelf is removable. This wouldn’t be possible if we glued the dowel holes.
If the fit is too snug you can use a screwdriver to pry on the underside of the two boards like in the image below:

Drill Lag Bolt Holes
This part uses the dowel jig again and a smaller drill bit, the 5/16 bit and the 5/16 dowel jig hole.
My studs are on 16″ centers, so I marked lines 4″ in from either end of the boards. Double check the distance between each mark to make sure it matches your stud centers.
First, mark the centers of your stud alignment. Do this only on one of the boards. Then align the dowel jig and drill a hole ALL the way through the board. You may have to remove the jig to continue drilling, but the hole should be set up straight enough to go all the through.
Once you drill the two holes all the through the board, it is time to countersink the hole by drilling a large hole big enough for the washer to fit. It needs to be drilled just deep enough to sit the top of the lag bolt flush with the edge. You can see what I mean in the second picture below.
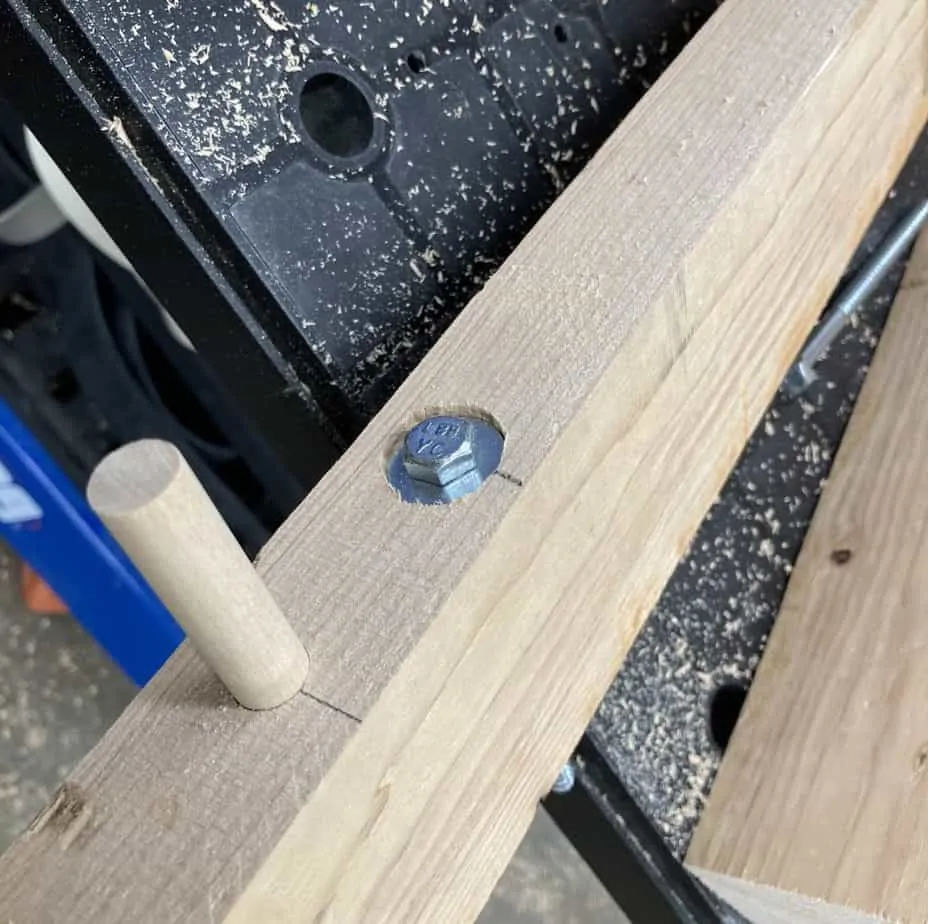
You can drill this larger hole using a 1″ spade bit, or a forstner bit may work better. A spade bit flops around a bit much in the predrilled hole. You can prevent this by drilling the countersink hole first if you would like.
Step 4 – Sand Boards and Stain/Finish
At this point we are ready to start putting some finishing touches on the shelf.
When you put together your shelf you may notice that it does not line up precisely. This can be due to a variety of factors, but in my case it is that the jig simply was off to one side by a hair.

We can even this out in one of two ways:
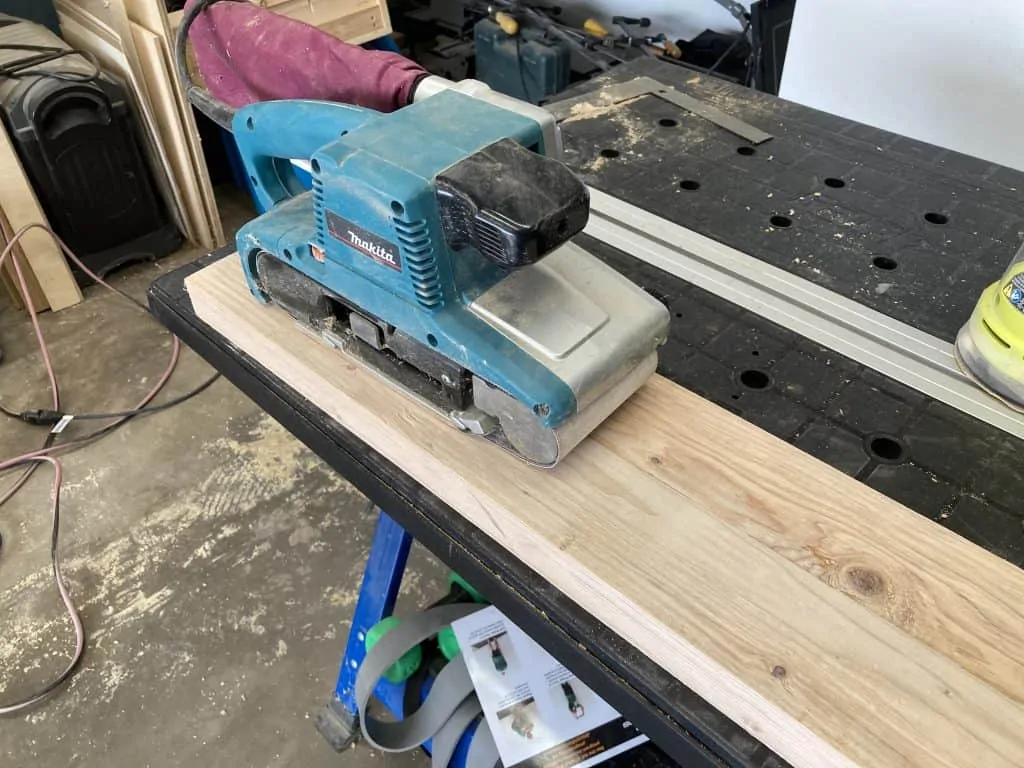
- Use a random orbital sander or a belt sander to sand down one side even with the other.
- Run the assembled shelf through a planer.
I could have ran it through my benchtop planer, but instead I opted to sand it even with a belt sander and finish up sanding with some lighter grits on the random orbital sander.
Check out the images below for some more detail on this process.
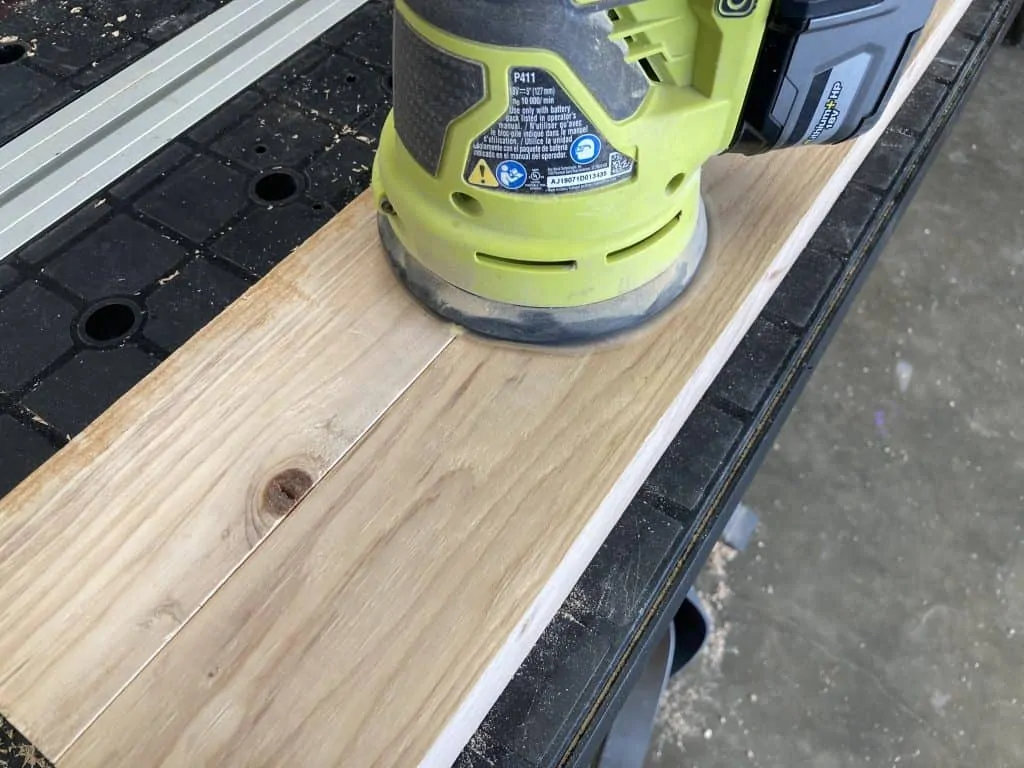
Sand all the edges and underside well and work your way up to 220 grit paper. I like to finish with the orbital because the belt sander can leave some gouges that aren’t pretty when it is stained/finished.
Optional Step – Use Trim Router for Edges
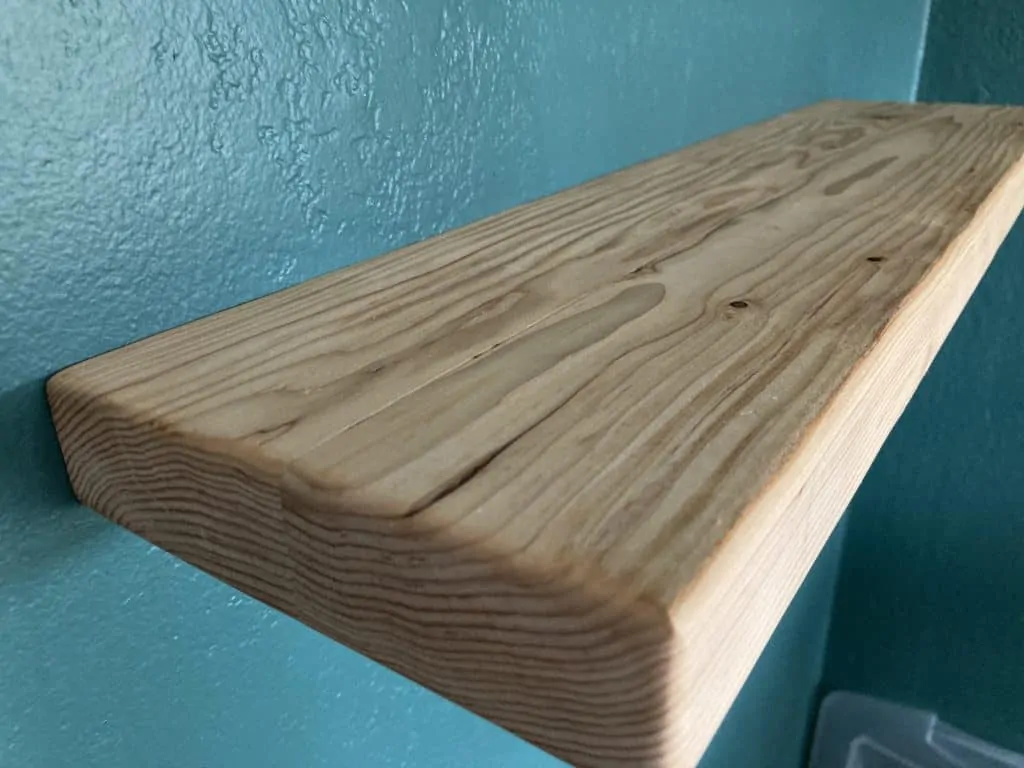
This step is completely optional. Some people (including me) like the sharp 90 degree edge of the shelf.
If you want, however, you can get a roundover bit or a 45 degree bit and run a router along the outer edges (meaning any edge not against the wall) of the shelf.
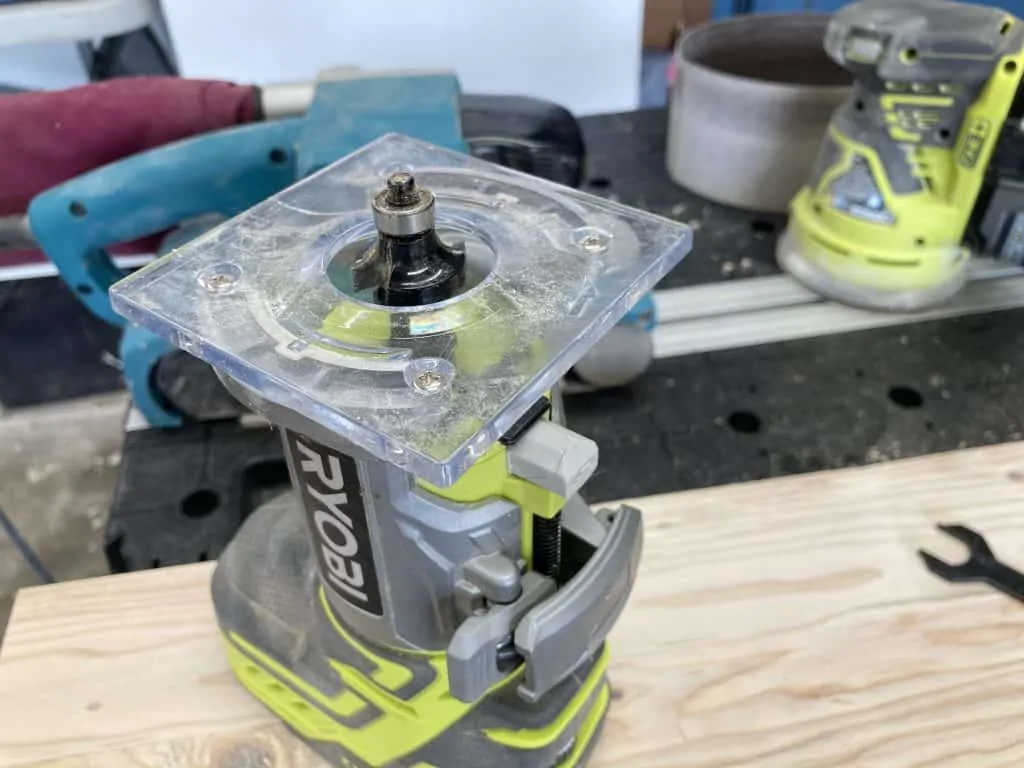
My bit was a bit dull so it ended up leaving some burnt marks. You can use the random orbital sander to buff those out (along with the burnt marks from the saw in the image above).
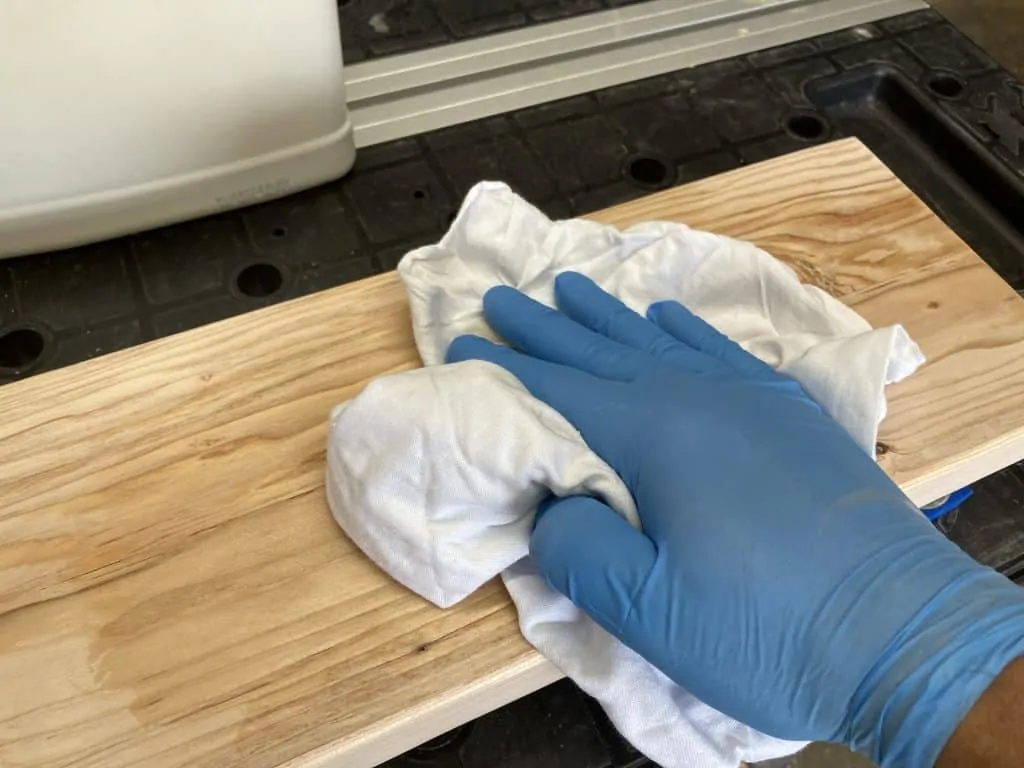
Apply Stain and Finish
I did not apply stain to this project, but you can definitely do so if you desire.
I like to rub on my polyurethane and for this project I just did one coat. I don’t foresee this getting much wear and tear or anything wet on it, plus it is just some pine, so I didn’t go all out on protection.
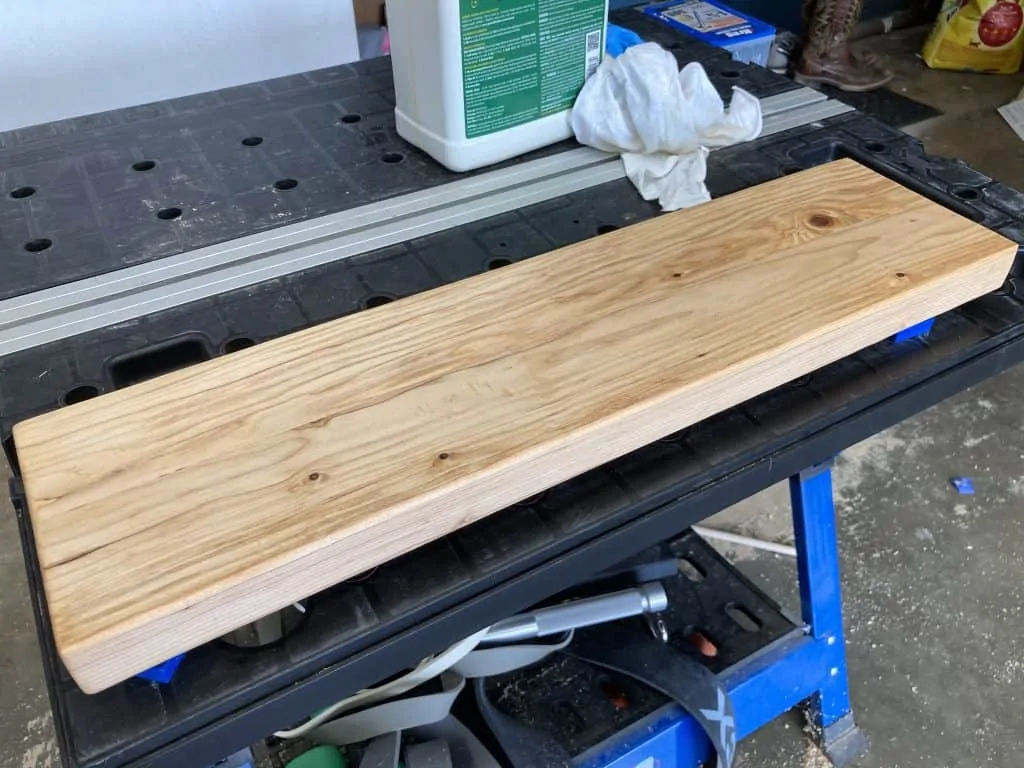
Ready to install shelf:
Step 5 – Install Shelf
To install the shelf you will need to first separate the boards again. Hopefully you have already done this once so the procedure should be straightforward. Use a screwdriver if you need to and work it back and forth. I do it on the bottom side because it does smudge up the wood some, but I don’t feel that it is noticeable on the bottom.
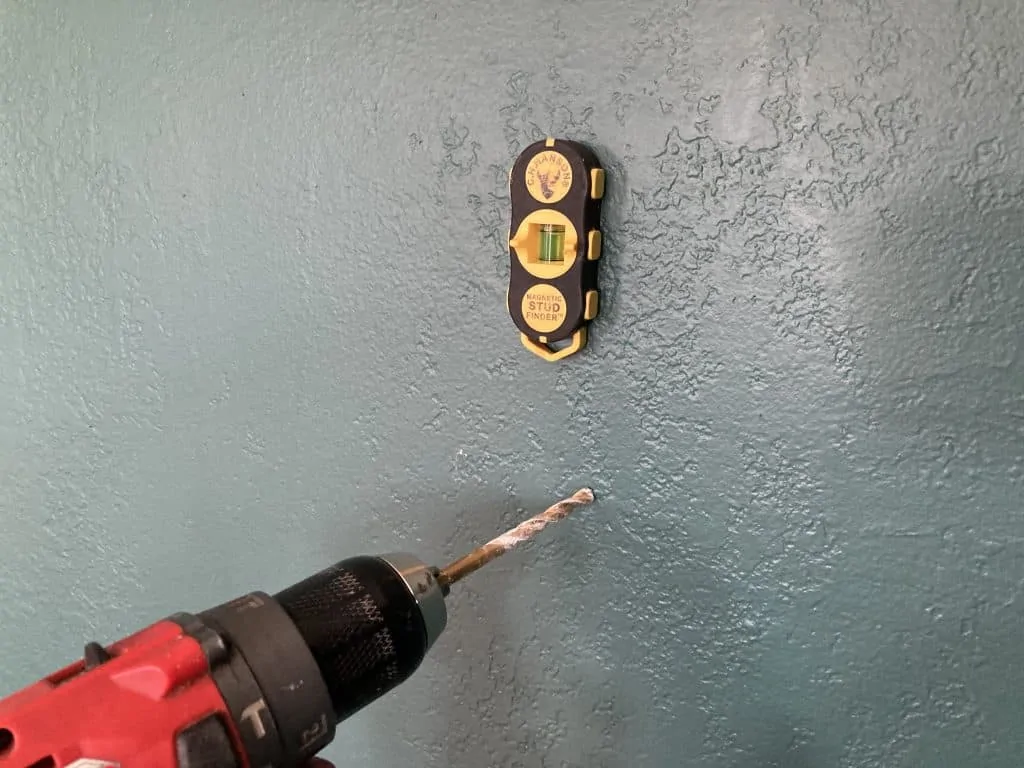
Then use a studfinder to find your studs in the wall, and drill a hole with a slightly smaller bit than your lag bolt. That way it will screw into the stud snugly.
Drill one side only at this point. Then begin installing the shelf with a lag bolt and ratchet. You will only need the half with the holes drilled for the lag bolts.
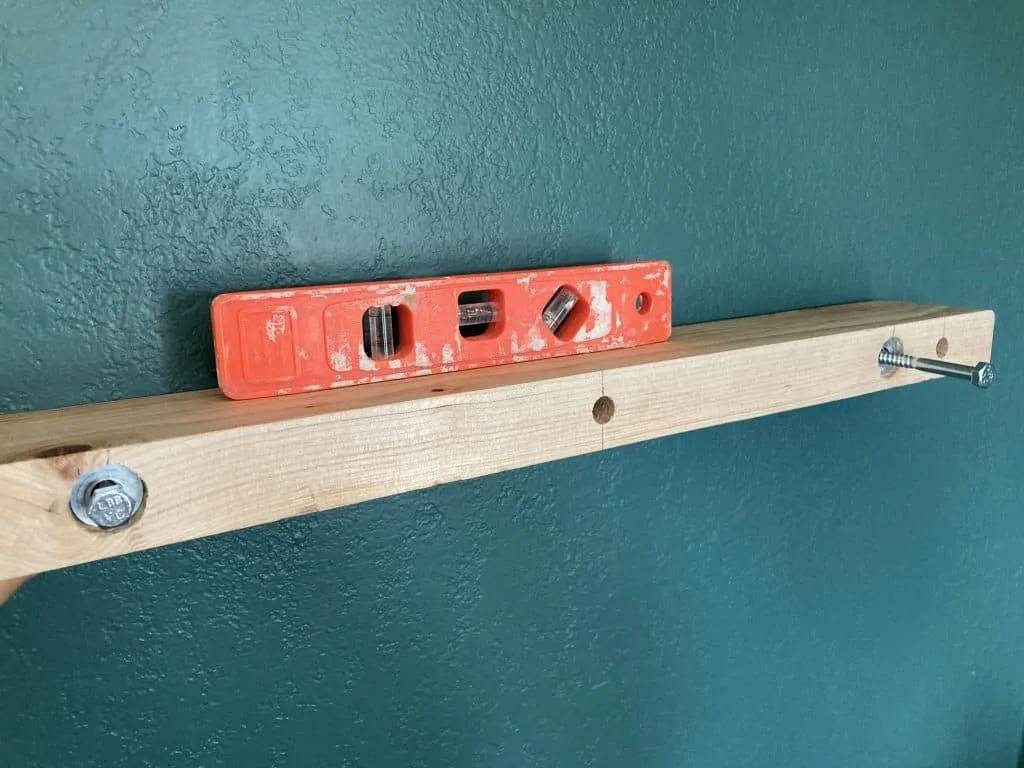
Once one lag bolt is started into the wall, then you can get a level and hold the shelf level while you mark the position of the other bolt. To mark the position I simply pushed the other bolt into the wall and turned it a little so it made an indention in the drywall.
Let the shelf swing down out of the way (because it is being held up by one of the bolts) and drill the other hole.
Then move the shelf back up and screw the other bolt in (and hopefully they both hit the studs).
Pull the board snug up to the wall tight
Now put in the dowels and slide the other board onto the shelf.
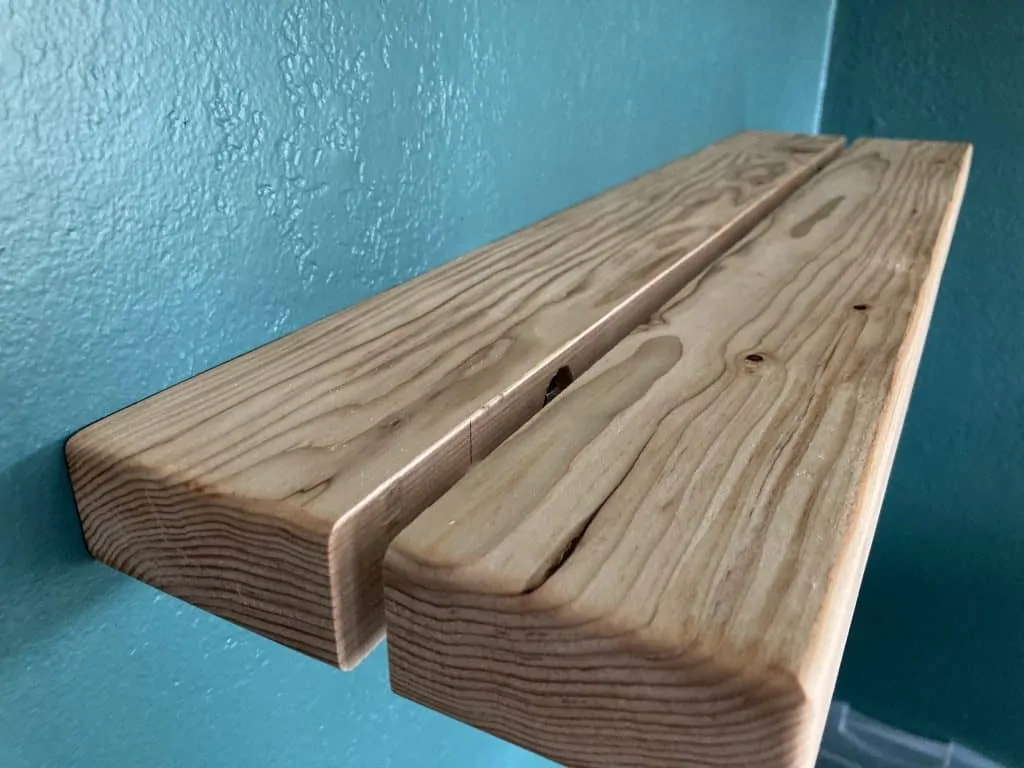
Tap it up snug to the other one:
Optional Steps
If you feel that the board is not holding tight on the dowels, then you have two options.
- Glue the dowels in place. This will make the shelf difficult to remove.
- Drive a small screw from the bottom up into the dowel in the outer half. This is probably the best option because it will hold it tight and still be removable (but also not too noticeable).
Conclusion
It is beyond time to wrap up this project! But I hope you enjoyed the step by step descriptions.
I like this project because (like all of my ideas I try to make) it is highly customizable. My theory is that a tutorial should show you a principle of the design and allow you to take it and make it your own (if you want).
For example, this shelf could easily be made as wide as you want, 48″, 72″, go wild. It could also be three boards deep if you wanted to make it fancy (just make the middle board have through dowel holes). Or use 2x6s instead of 2x4s.
Anyways, please enjoy this project and have fun with your DIY creations.
And don’t forget to sign up for my mailing list! I have great offers and freebies available there.