How to build a doghouse
Skill Level: Intermediate | Estimated Time: 4 hours + dry time
Building a dog house with a single sheet of plywood saves time and money.
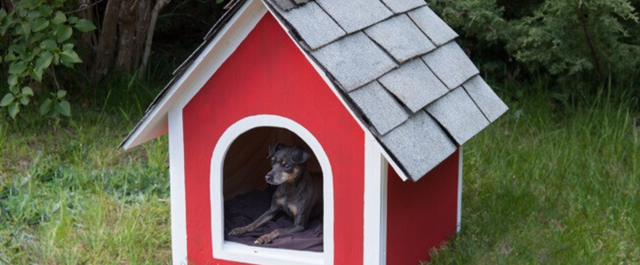
Constructing it with a jigsaw, sander, and tool kit simplifies the process even more. The BLACK+DECKER 20V MAX* 4-Tool Combo Kit includes many of the tools you'll need for this project, including a drill, circular saw, and even a flashlight. This dog house measures 22-1/2" wide, 26" long and 27" tall on the inside and is roomy enough for a medium-sized dog.
Things You’ll Need

Step by Step Instructions
Step 1. Draw + Cut the Pieces
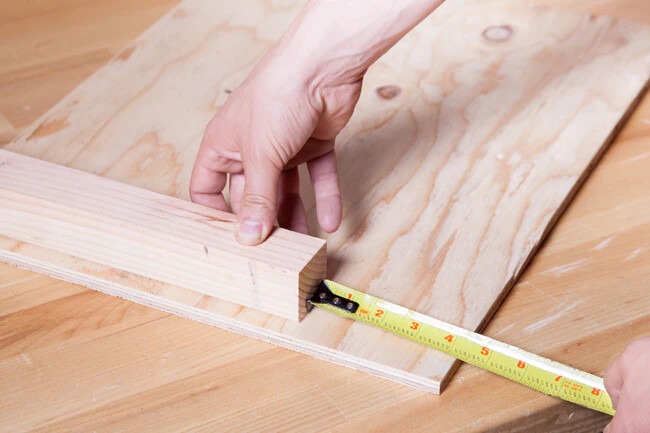
Use a carpenter's square to draw out the following pieces on the plywood sheet:
- (1) piece, 20-3/4 x 32" for the roof
- (1) piece, 20 x 32" for the roof
- (2) pieces, 24 x 31-1/4" for the front and back
- (2) pieces, 19-1/4" x 26" for the sides
- (1) piece, 22-1/2" x 26" for the floor
Cut out the pieces with the BLACK+DECKER 20V MAX* 5-1/2 in. Circular Saw.

Step 2. Draw the Doorway
Choose one of the 24 x 31-1/4" pieces of plywood for the front. Use the square to draw one horizontal line 4-1/4" up from the bottom, and one horizontal line 18-1/4" up from the bottom. The 4-1/4" line represents the bottom of the doorway, and the 18-1/4" line represents the top of the doorway.
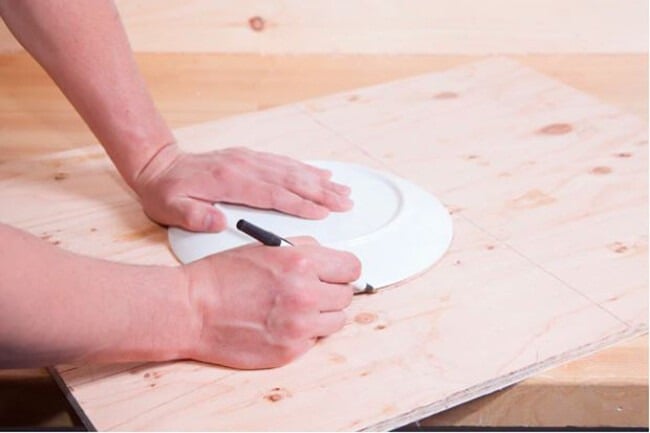
Use a large plate or lid with an 11" diameter to represent the rounded top of the door. Center it on the doorway, with the top flush with the 18-1/4" line. Use it to trace an arch around the top, and continue vertical lines down to the 4-1/4" line (this is the doorway).
Step 3. Cut the Doorway
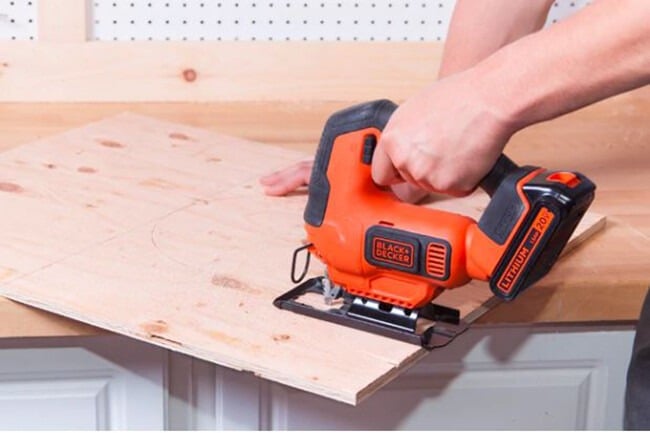
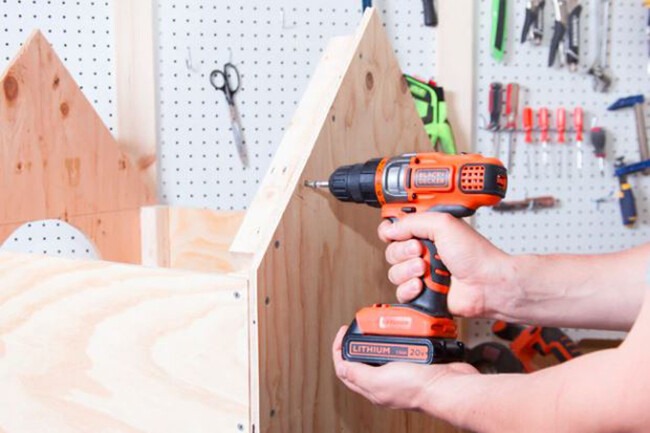
Use the BLACK+DECKER 20V MAX* Lithium 2-Speed Drill/Driver from the BLACK+DECKER 20V MAX* 4-Tool Combo Kit to drill 3/8" holes inside the lines, one at each bottom corner, for a total of two holes. Insert the blade of the BLACK+DECKER 20V MAX* Cordless Lithium Jigsaw in one of the holes. Cut across the bottom to the next hole, and then follow the line around the arched top, and down to the hole where you started.
To help prevent your dog from getting splinters, use the BLACK+DECKER MOUSE® Detail Sander with 100-grit sandpaper to smooth the edges of the doorway.
Step 4. Cut the Roof Angles
Use the square to draw a 31-1/4" vertical line from top to bottom, centered on both pieces of 24 x 31-1/4" plywood. These two pieces represent the front and back of the dog house. The top of the line represents the peak of the dog house. Make a mark on each side of each piece, 19-1/4" up from the bottom edge.
Draw angled lines from the peak, down at an angle to the 19-1/4" mark on both sides. The angled lines represent the angle of the roof on both sides. Use the circular saw to cut the angled lines.
Step 5. Cut the Base + Side Supports
Use the circular saw to cut the following pieces from the 2 x 2 for boards:
- (4) pieces, 15" long for the side supports
- (4) pieces, 13" long for the roof supports
Also, cut the following pieces from the 2 x 4 pressure-treated fir board:
- (2) pieces, 22-1/2" long for the base ends
- (2) pieces, 23" long for the base sides

Step 6. Assemble the Base
Place the 23" base sides between the 22-1/2" base ends, standing on their narrow edges, to form a base measuring 22-1/2 x 26" (the same size as the plywood floor).
Drill two pilot holes in the ends of each 22-1/2" piece, evenly spaced, with a 3/16" drill bit with a countersink. Screw the frame together with the drill/driver using 3" exterior wood screws.
Depending on what type of screw you're using, pilot holes should be just slightly smaller than the screw.
The idea is to allow the hole to be big enough for the screw to pass through without splitting the wood, but at the same time, small enough so that the threads grip firmly.

Step 7. Build the Box
Place the 22-1/2 x 26" plywood floor on top of the base. It should fit flush on all four sides of the base. Screw the plywood to the base using the drill/driver and six 1-1/4" screws for each side, evenly spaced. Drill four pilot holes for each 15" fir side support, and screw them to the two pieces of 19-1/4" x 26" side pieces of plywood, one on each side, with four 1-1/4" screws. There should be a 4-1/4" recess at the bottom of the side pieces, where the 15" fir pieces are shorter than the 19 -1/4" plywood.
Stand the side pieces up on the base, allowing the ends of the fir side supports to stand on the base. The 4-1/4" plywood recess should overlap the base. Screw the sides to the base through the overlapping plywood, using six 1-1/4" screws for each side.
Step 8. Place the Front, Back + Supports
Stand the assembly on its front, with the doorway side facing down. Fit the back piece on the frame. Screw the back to the base with six 1-1/4" screws, evenly spaced. Screw the back to the side supports on both sides using four 1-1/4" screws, evenly spaced for each support. Turn over the box, and repeat for the front of the dog house.
Screw one 13" fir roof support to the inside of all four angled sides that you cut on the plywood for the roof, flush on the top edge, and butted against the side support at the bottom, using four 1-1/4" screws. (There should be approximately a 2" gap between the top of the roof support and the peak.) Clamp the supports to the angled edges for easier installation.
Step 9. Build the Roof
Fit the 20 x 32" plywood roof piece on one angled side. The top edge of the roof piece should be flush with the peaks of the front and back pieces. The sides of the roof piece should overhang the front and back equally on both sides. Screw the roof piece to the roof supports with four 1-1/4" screws on each side.
Fit the 20-3/4 x 32" piece on the other angled side of the roof. It overlaps the 20" piece to form the peak of the roof. Repeat screwing it on the same way. Carefully place four more screws through the peak where the two top pieces join together. Use the BLACK+DECKER 20V MAX* Lithium Flashlight to peer inside to see if you have any exposed screws that missed their mark, and move them if needed.

Tip: For the best fit, place both roof pieces on the roof together before screwing them on, and make adjustments if needed so that all four sides fit flush.
Step 10. Add the Felt
Cover the roof with a single piece of asphalt-impregnated roofing felt or roofing paper. Secure it to the roof with a staple gun and at least 20 3/8" galvanized staples, placed randomly as needed to secure it. Trim the paper off flush on all sides with a utility knife.
Step 11. Put on Shingles + Roof Cap
Place the first shingle at the bottom, with the tabs facing down. Secure it to the roof with four 3/4" galvanized roofing nails. Overlap the next two shingles and nail them on, taking care that the tabs do not line up with each other. (Note that the nails should be covered by the shingles as they ascend.)
Trim the excess off at the top with a utility knife. Also trim the excess at the side edges (staggering the shingles between rows creates a 4" overhang at the sides). Repeat on the other side of the roof. Cut four shingles into thirds. Bend the small pieces over the roof peak, overlapping each one to form a roof cap, with two nails each.
The nails on each cap should be overlapped by the preceding piece, except for the one on the end. Add a dab of roofing patch to cover the nail head.

Step 12. Paint the Dog House
Run the detail sander over everything to smooth the edges and blunt all the corners. Paint the exterior of the dog house using a paintbrush and exterior-grade, low VOC, enamel paint. When the paint is dry, use masking tape to form 2" wide borders on all the vertical corners. Tape off 1 1/2" borders along the top edges of the front and back pieces and around the doors.
Finish by painting the borders, and then remove the tape. Consult the manufacturer's recommended drying time for your particular brand of paint.


