

Introduction: Viking Ship Cookbook Stand


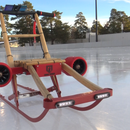


Viking Ship Cookbook Stand - I was tasked to make a gift for a complete stranger. As part of the Fools with Tools Treasure Trade. This was the result
Supplies


For this project you’ll need some wood.
The best wood available is always free wood. I had some Beechwood lying around that I “acquired” from a local farmer. You will also need
- 4 small jewelry box hinges
- Wood stain
- finishing oil.
You'll need an assortment of tools too.
- Chisels,
- Jewelers files
- Carbon copy paper
- Rotary carving tool such as a Dremel and some wood cutting bits.
In addition you'll also need an assortment of standard workshop tools such as a sander, bandsaw(Jigsaw) and a butt load of patience.
Step 1: The Design


The Design.
There is plenty of inspiring things on the internet. You'll have to find or make a design you really want to carve. I found this one on the internet and modified it slightly so that it would fit the purpose. You're going to have to print it out in the size that you want to carve.
Step 2: Wood Prep


Wood Preparation
My Beechwood was approximately 35 mm stick to start, with some large cupping. To get rid of the cupping. I use the bandsaw to remove the most material. Then the joiner and the thicknesser to get the wood down to 20mm thick. If you don't have these tools you could use a hand plane but this would really suck. Unless you like torture. The best bet is to find a friend with these tools. Friends with tools are the best.
Step 3: Rough Shaping


Rough Shaping
Cut out and glue your template on. Using a bandsaw or a jigsaw to cut out your rough shape.
Step 4: Shaping the Gunwales


Shaping the gunwales
this is a fore-step process
- Clean up your rough shape.
- Dangerously and precariously mount the wood in the mitre saw to cut a 33 degree angle. (This will make the angle of the bow of the boat if you manage to keep your fingers)
- Using a belt sander. Shape the gunwales so that they seem to curve under to meet an imaginary keel.
- Now carving of the details I use a Dremel or rotary carving tool. A mini sanding drum seemed to be a good choice to rough out the lines of the bow. Then lightly clean up the details with a carbide bit.
Step 5: Shaping the Dragon's Head


Shaping the dragon's head
This by far is the most difficult part that will take an immense amount of hours
- Remove your template
- Using carbon copy paper trace the details of the design onto the wood
- The next process is just to start carving. I used mainly Dremel tools. A cone carbide bit along with a couple of others. You just have to do what's right for you. Keep in mind this Is a long tiresome process and you will make some mistakes. Turn any mistakes into unique design touches. At least that's the way I think about it. If you look closely you’ll see all mine
- To finish: Clean up your carving with some hand files and some sandpaper
Step 6: The Paddles


The Paddles
- Using some scrap wood 7-8mm thick. Trace out your paddle so that the handle is approximately 7-8 mm wide as well
- Rough cut this out on the bandsaw
- Mount Your paddle into your overly priced drill. Shape the Paddle handle using a belt sander whilst rotating the piece of wood in your drill. Being sure that you do not sand the chuck of your very expensive drill… unlike me. You are aiming here for a dowel diameter of just less than 6 mm so that it will fit it in the locating holes
- Using the belt sander again thin out and shape the blade of the Paddle
- To finish cleaning up with a little sandpaper to take away the sharp edges
- Drill 4x 6mm holes 12 mm deep in each side of the gunwales.
Step 7: The Hinges


The Hinges
- Cut recesses in the dragon's neck with a chisel to hide the the Jewelry Box hinges
- Knock the pins out of the hinges so that you have two halves
- Mount one side of the hinge in the recess and the other on the inside of the the angled cut we made earlier on the gunwales
- Test alignment by placing the pins back in place but do not put them in all the way as we must remove the pins for Staining and finishing
Step 8: The Finish


The Finish
Note: test your stains before you apply. Unlike me who miss read the label and applied the wrong stain. Then consequently went on a swearing spree in my workshop.
- Apply a dark stain with a small brush and wipe off excess with a rag. I went with Dark Oak from Liberon
- Clean up your stain with 0000 steel wool. Note: make sure you blow off all the steel fibers before you apply your finishing oil
- Apply 2 coats of finishing oil. I went with OSMO 3032 colorless silk matte
Step 9:


Final Assembly
- Insert the pins of the hinges so that both gunnels are able to pivot.
- Insert paddles to the specific hole required to hold your cookbook
And you're done now you can enjoy your Viking ship cookbook stand!


