
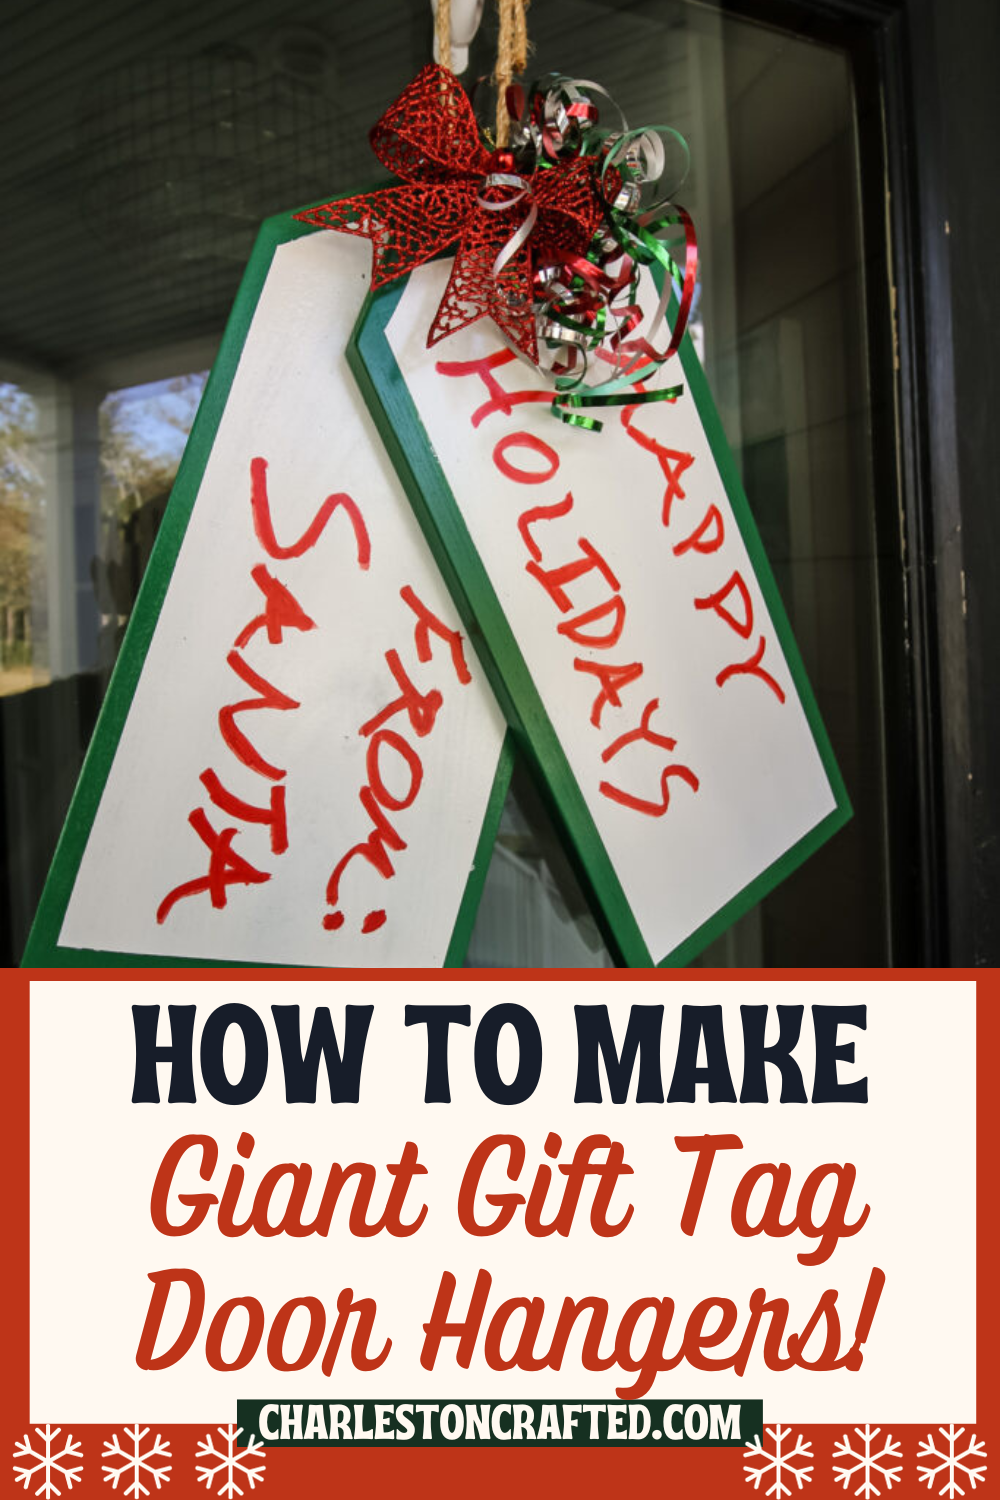
Looking for a fun alternative to a wreath for the holidays? Try making this simple DIY holiday gift tag door hanger that will greet you and your guests with some joy!
With the holidays coming up and everyone getting ready to decorate, we wanted to try something a little different this year on the front door.
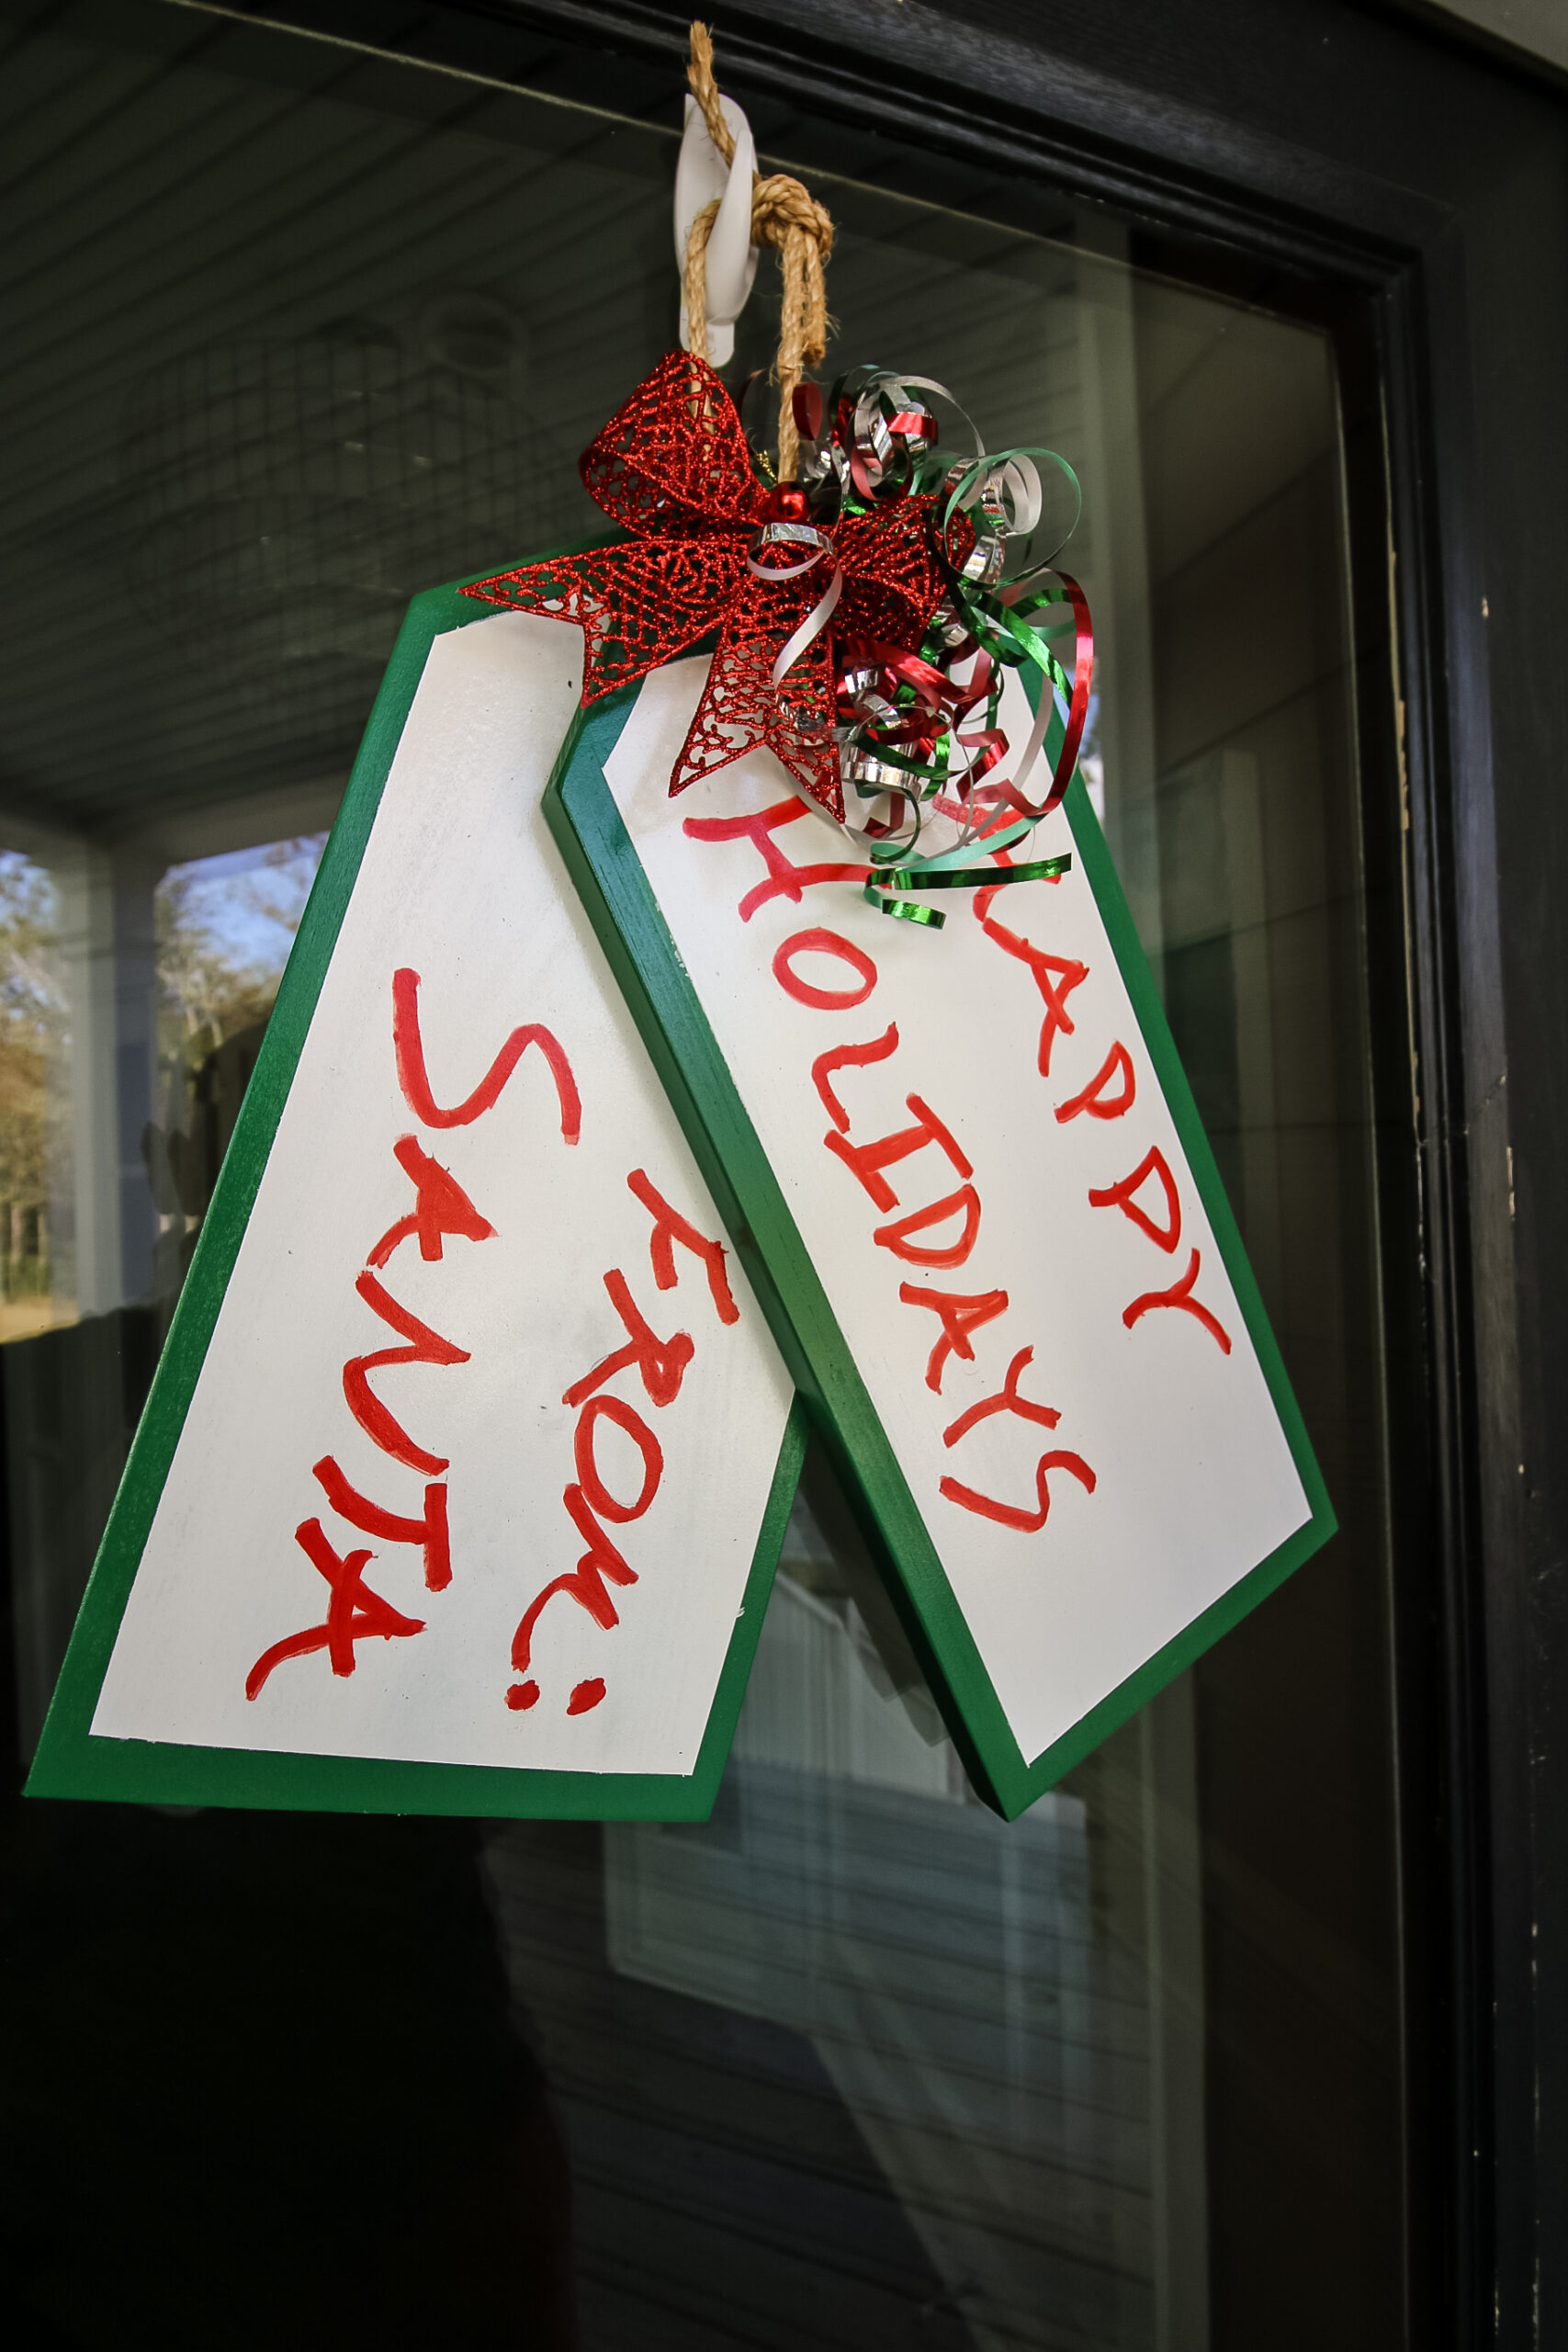
Rather than a traditional wreath, we decided to make some oversized Christmas gift tags out of wood to hang from the front door.
This Christmas gift tag door hanger is super cute and makes your home look like a present to all.
They are also completely customizable with the paint colors and phrasing, which allows you to put your own touch on them.
Let’s dive into the best way to make a DIY gift tag door hanger out of wood for the holidays!
Christmas gift tag door hanger
This DIY Christmas gift tag door hanger is an easy project for anyone! It only requires a couple small pieces of wood, a saw, a drill and some paint.
This is a great project to make as an alternative to a Christmas front door wreath or can also be hung from a nail or doorknob in your home as indoor decor.
Time to see how to make this fun little project and have a Merry Christmas!

What do you need to make a holiday door tag?
The best part about this DIY project is that it can be made from scrap wood and uses minimal tools and supplies.
Even if you don’t do a lot of regular woodworking, you probably have all of the supplies needed to make this door decor.
Here’s what you need to make a front door hanger shaped like Christmas gift tags:
- 2 pieces of wood 16″ x 7 1/4″ x 3/4″ (aka 16″ of 1×8 common board)
- Spray paint
- Paint pen
- Wood glue
- Rope
- Bow
The only tools you need to make this door hanger are:
- Miter saw or jig saw
- Drill
- Clamps
How to make a DIY gift tag door hanger
These wood door hangers are perfect for your outdoor Christmas decor to add a bit of joy as people come to your home.
They are a great alternative to a wreath and pair nicely with other Christmas decorations, like faux presents or Christmas trees.
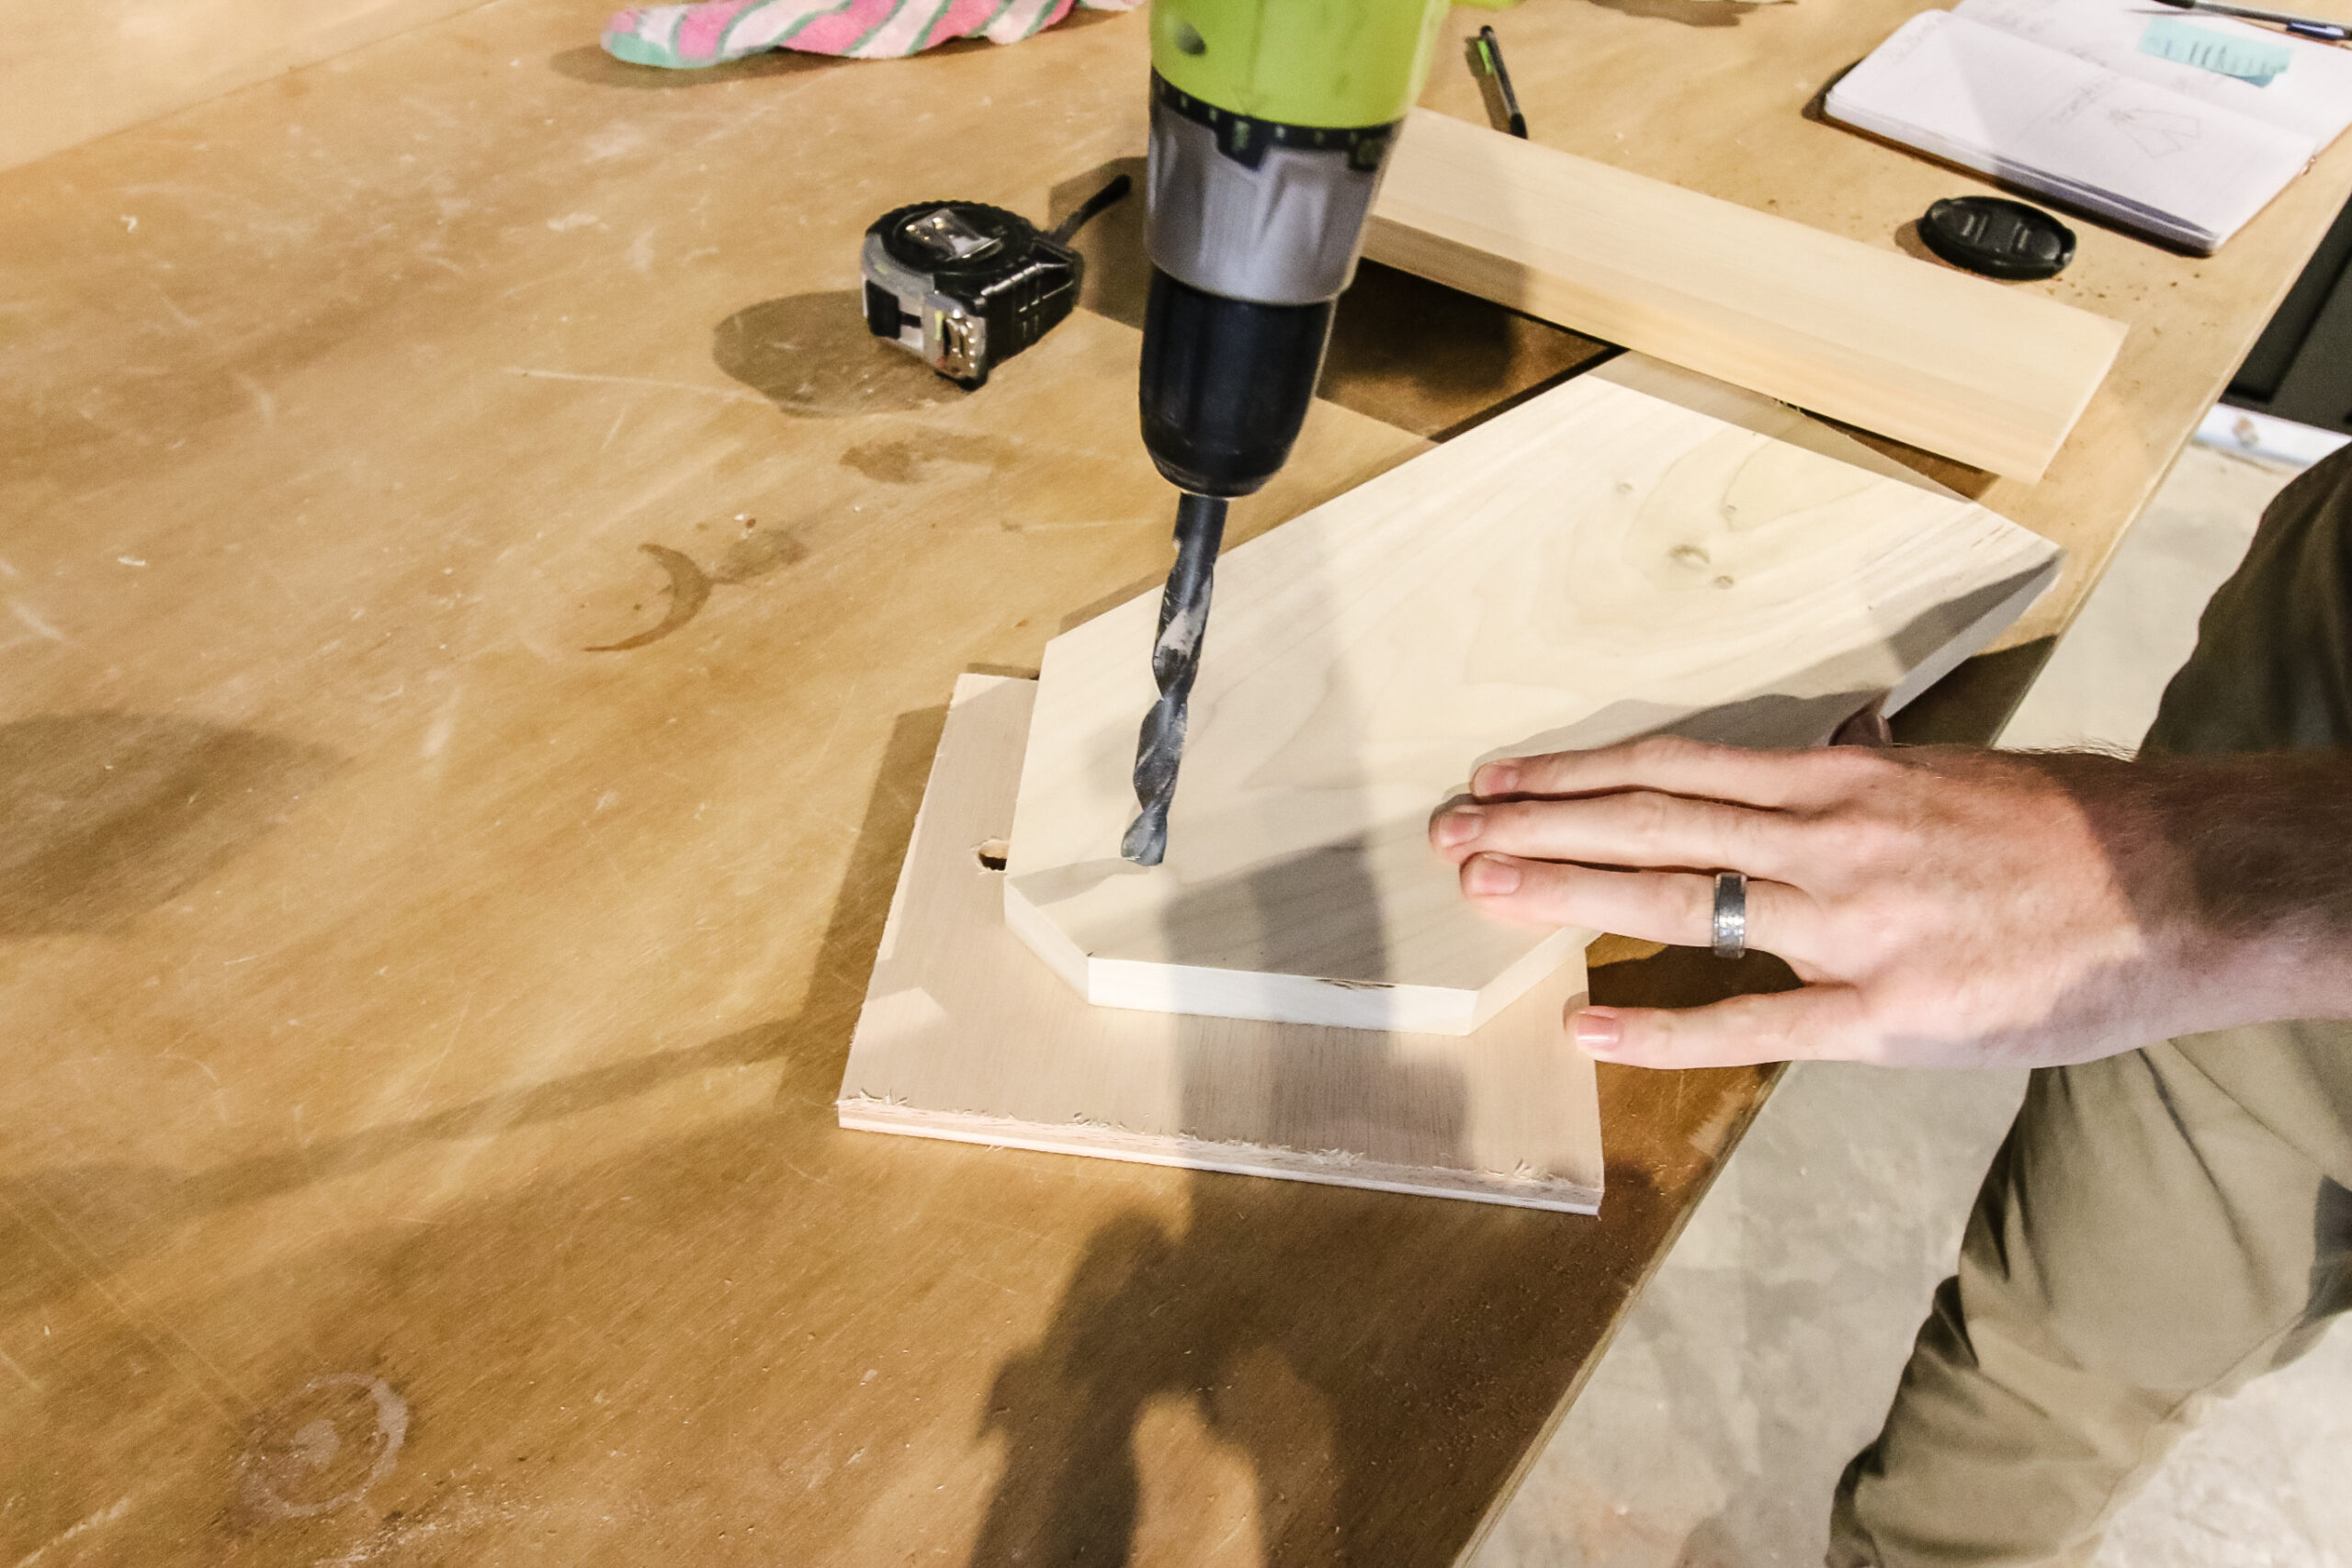
Step One: Cut wood
The first step is to cut the two boards to look like gift tags.
To do this, measure 3″ in from each corner on one of the short sides. Then measure 3″ down from the same corner. Draw a line between these points. Repeat for the other board.
Use a saw to cut along the line between the points.
With the boards the right shape, drill a 1/2″ hole near the point on the tag.
Step Two: Apply spray paint
To give these pieces of wood a gift tag look, you need to apply two shades of spray paint.
First, choose a shade like green or red and spray paint the outside edges and approximately 1″ in around the face.
Let dry for a day so that it is fully cured.

The other painted boards in the picture are for a wood slat Christmas tree we have plans for!
Then, use painter’s tape to tape off the painted edges really good.
Now, apply white spray paint to the inner rectangle of the wood and let fully dry before removing the painter’s tape.

Step Three: Glue tags together
Now for connecting them so you can see both tags at once. Obviously, if you didn’t attach them, they would just fall on top of each other.
To do this, we used wood glue. You could really use whatever glue you have on hand, it will work just fine.
Start by aligning the two holes that were drilled in Step One. Then, askew the top tag so that the angled part is parallel with the long edge of the tag on the bottom.
Mark that placement with a pencil, then remove the top tag and apply glue in the area that the top tag will touch.
Place the top tag back in place and clamp until the glue is dry.
Step Four: Write a holiday message
Now it’s time to write your holiday message!
To do this, we traced out our letters on the two tags with a pencil.
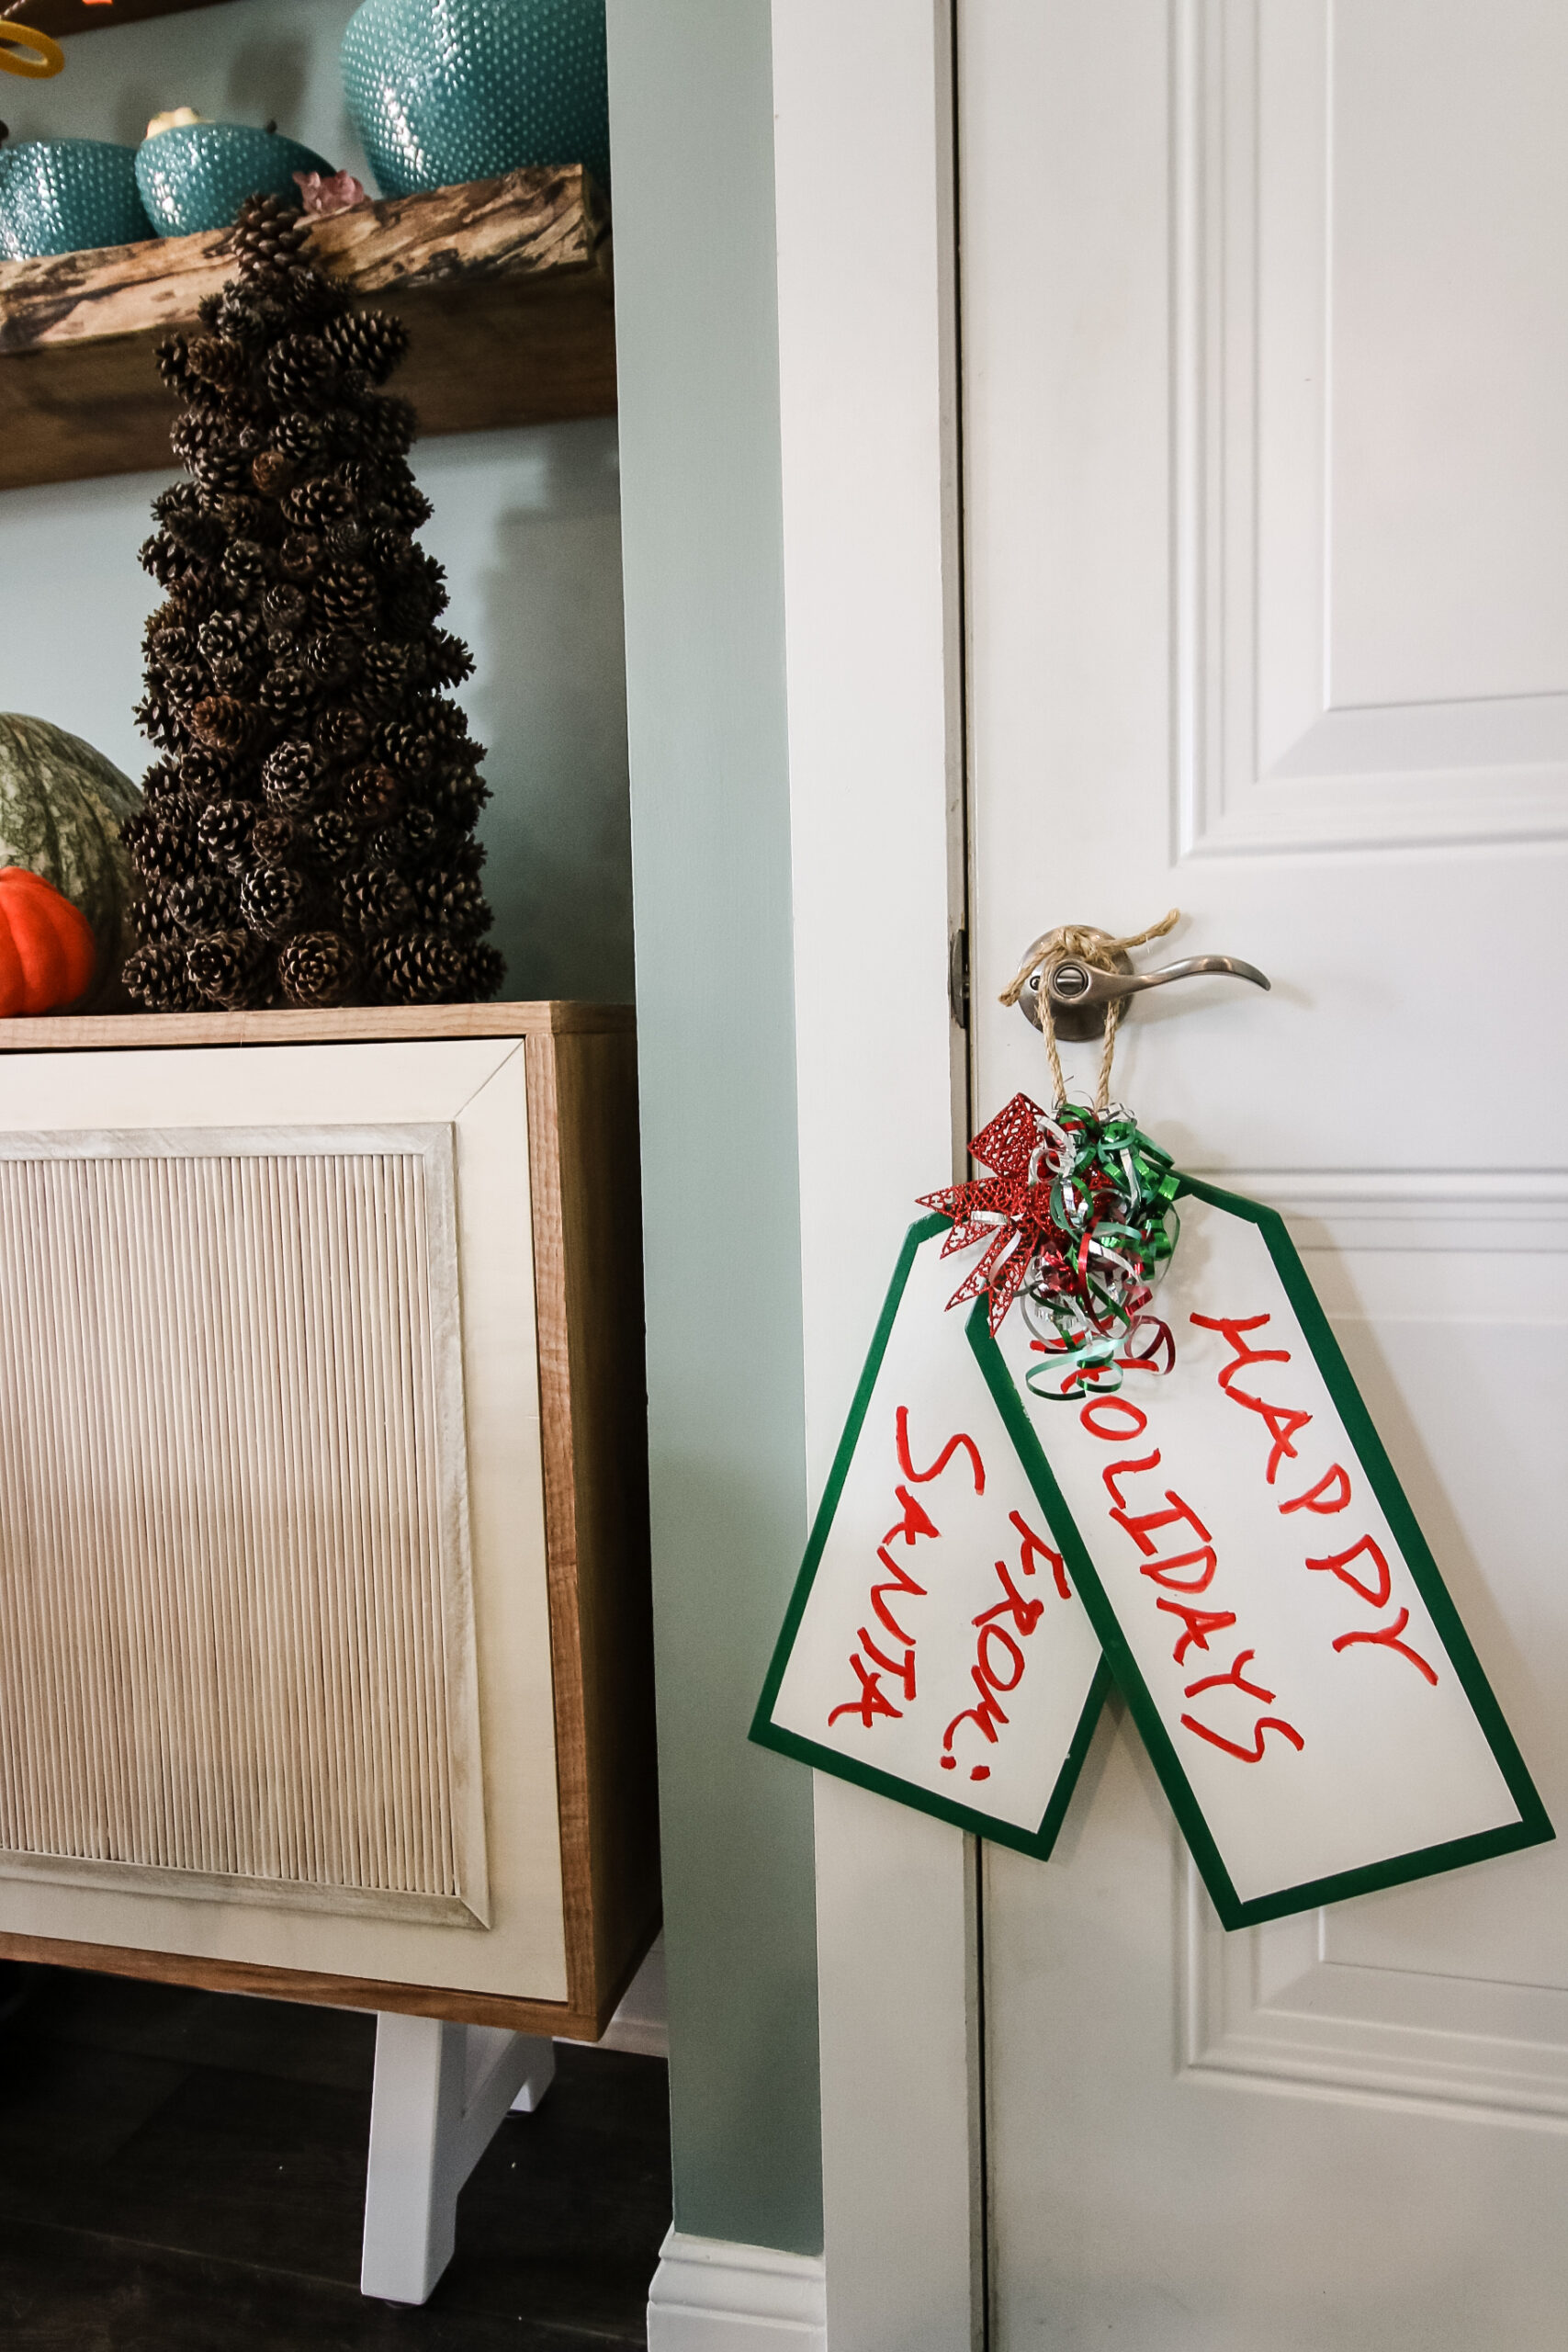
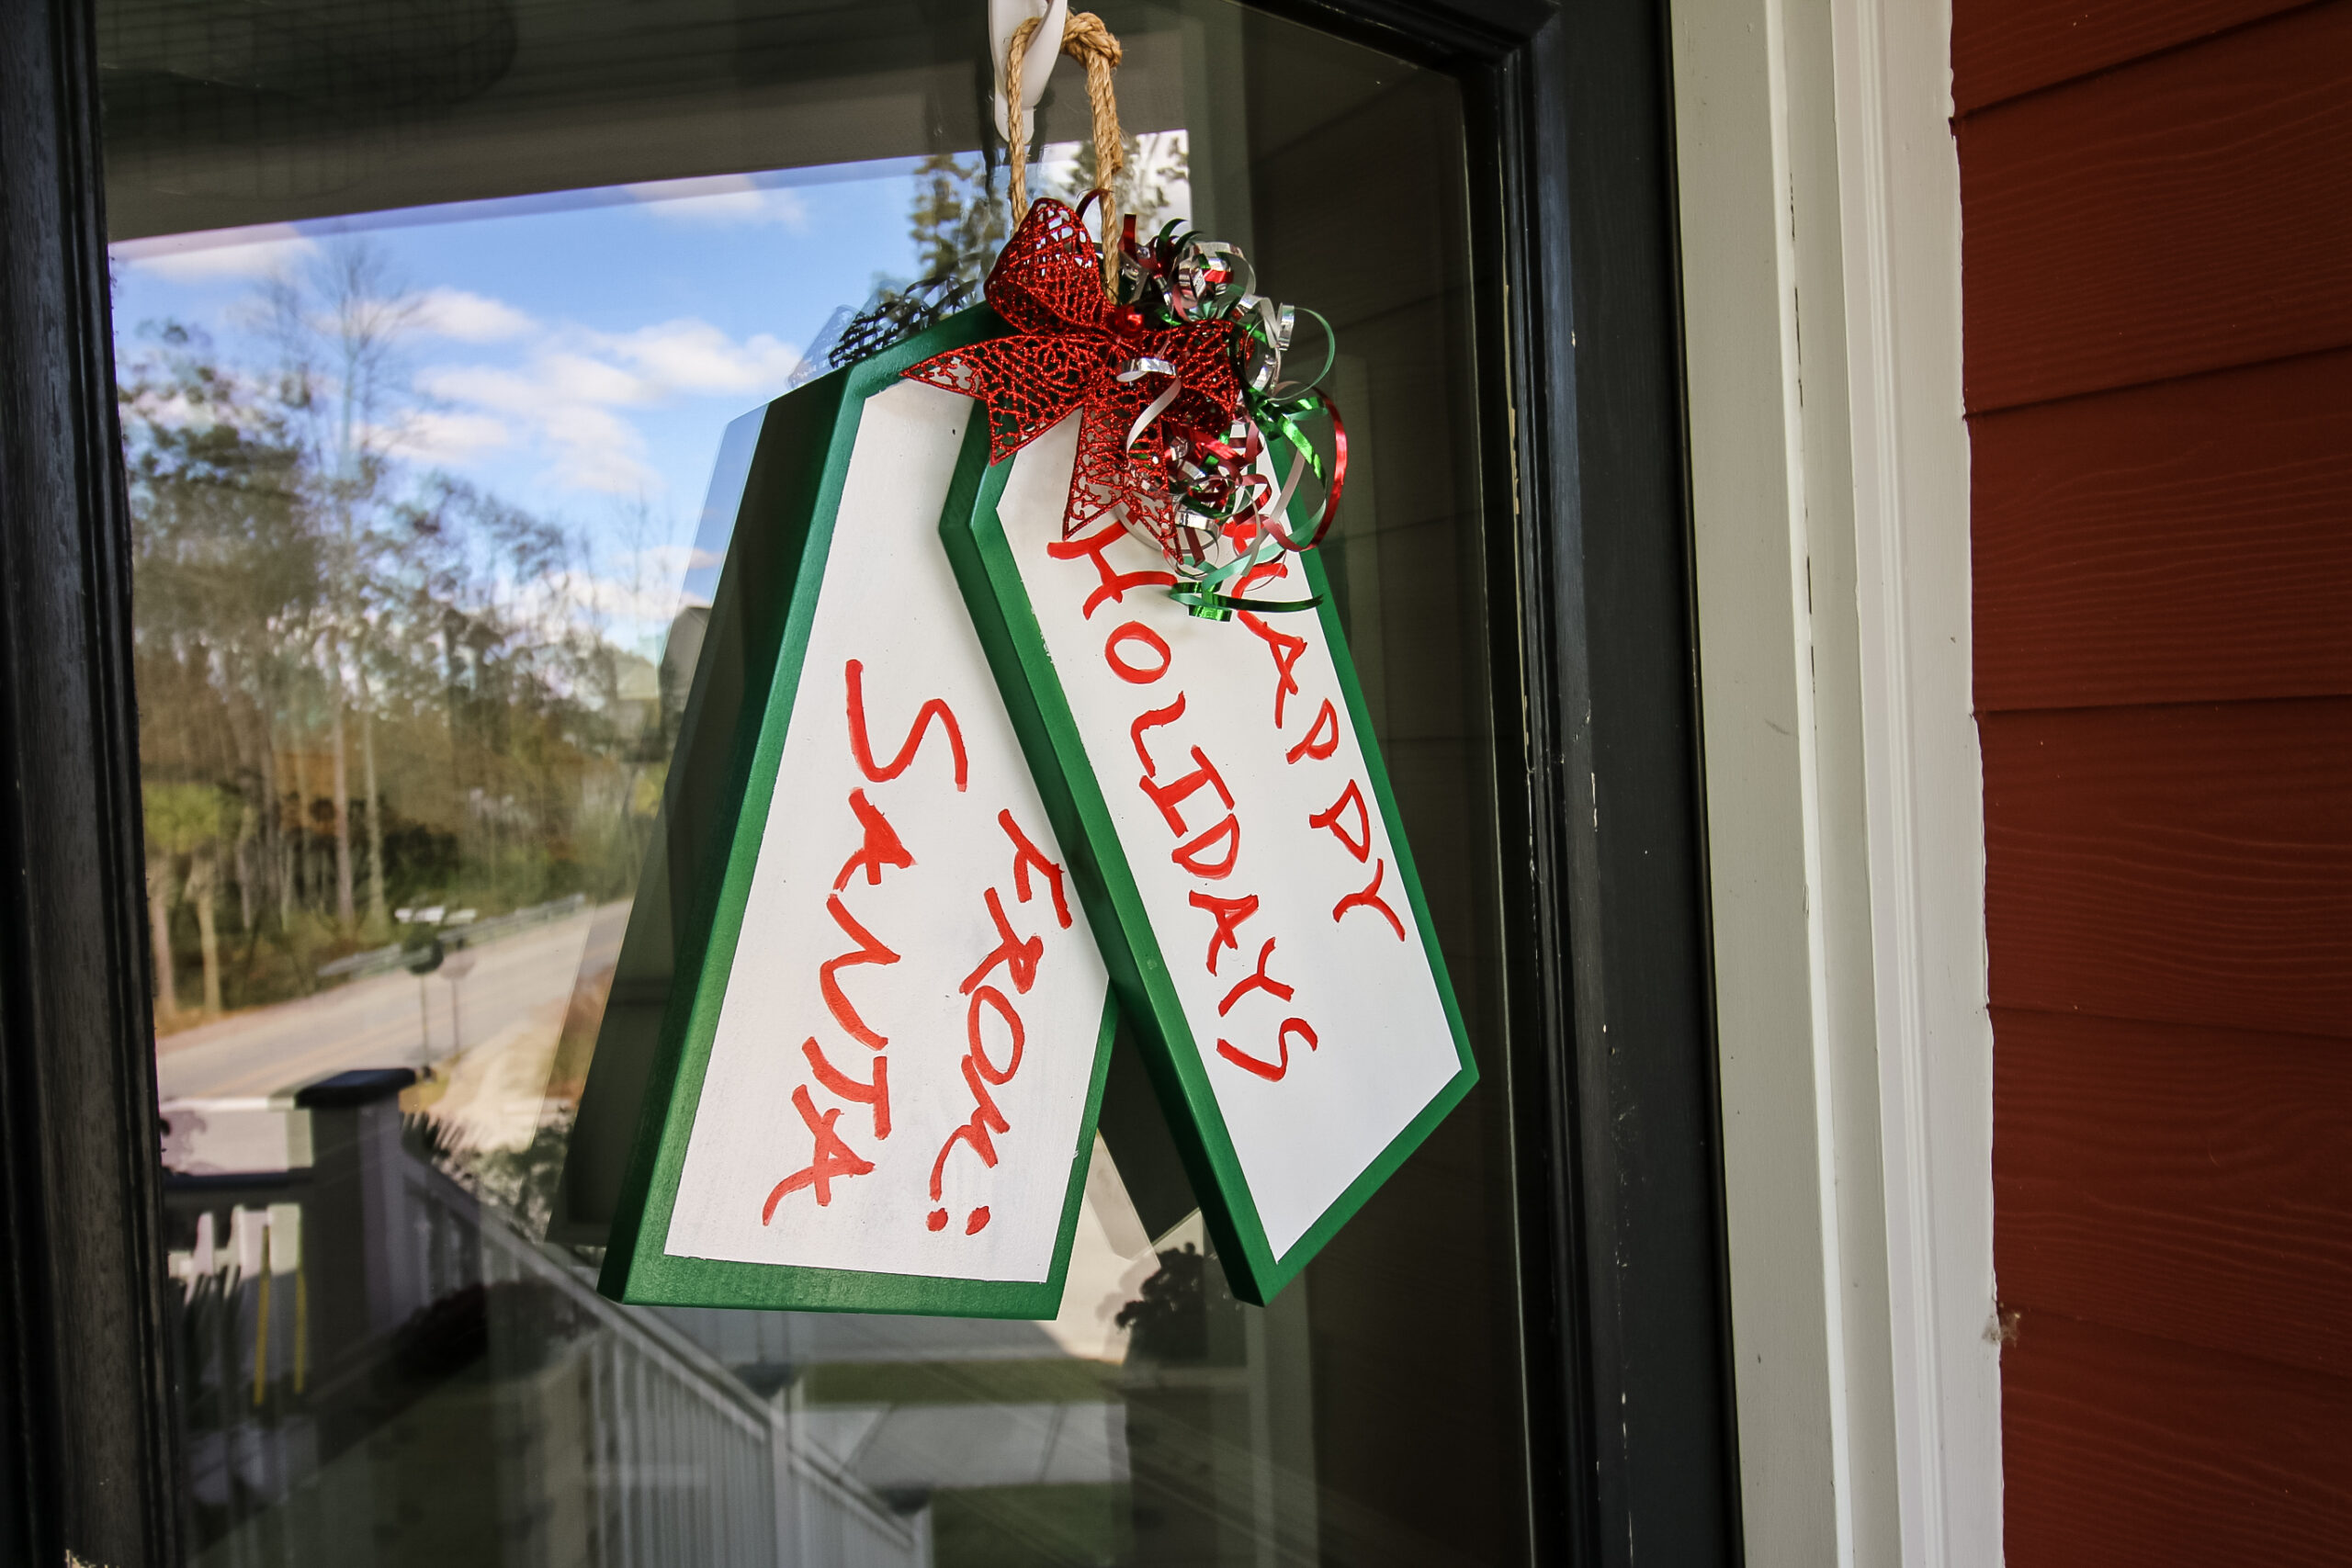
We went with “Happy Holidays” on the top tag and “From: Santa” on the lower tag, to make them look like what an actual present might say.
Other options would be “Merry Christmas” or “Welcome to our home” or “Season’s Greetings.” Really go with whatever you’re comfortable with.
We then went over our letters with a paint pen. You could also use a marker or paint and paint brush.

Step Five: Add rope and bow
Finally, get the gift tags ready to be hung as your front door decor!
We strung a piece of rope through the hole and tied it off, then tied on a bow from an actual Christmas present and finished off the look!
You could also choose to make your own bow or add some ribbon or anything you like. Make it festive and you!

What size should a Christmas door hanger be?
A Christmas door hanger should be fairly large.
Hanging something that is small on a door doesn’t look right and won’t add any emphasis, especially as holiday decor.
A big goal with putting up Christmas decor in general is to make it large and visible from the street so you can spread joy to all our your neighbors.
We recommend a Christmas door hanger be no smaller than ours, which measures out to be about 16″ tall by 16″ wide. This is a decent size to accommodate most doors.
You could also go larger to have a huge impact. Just keep your decorations smaller than the doorframe so you don’t run into any issues there.
Other DIY wreath ideas:
We’ve made a few holiday wreaths in the past. Check these out to see if they inspire you!
Other simple outdoor DIY holiday projects:
Want some other fun DIY Christmas and holiday projects to try this year? Here’s a few good ideas that would go great with this gift tag door hanger.


Looking for something?
We’ve been doing this since 2012 so we have a LOT of blog posts!
Search stuff like: Ceiling Projects | DIY Plant Stands | Thrift Flips


Hello, I’m Morgan, half of the creative force behind CharlestonCrafted.com! With a passion for DIY that dates back to 2012, I’ve transformed three homes and now I’m dedicated to helping others craft their dream spaces. Let’s turn your house into a home together!