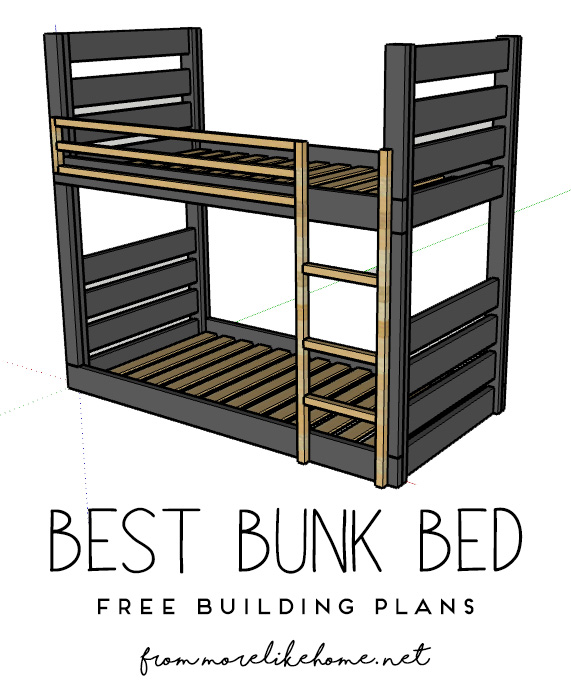
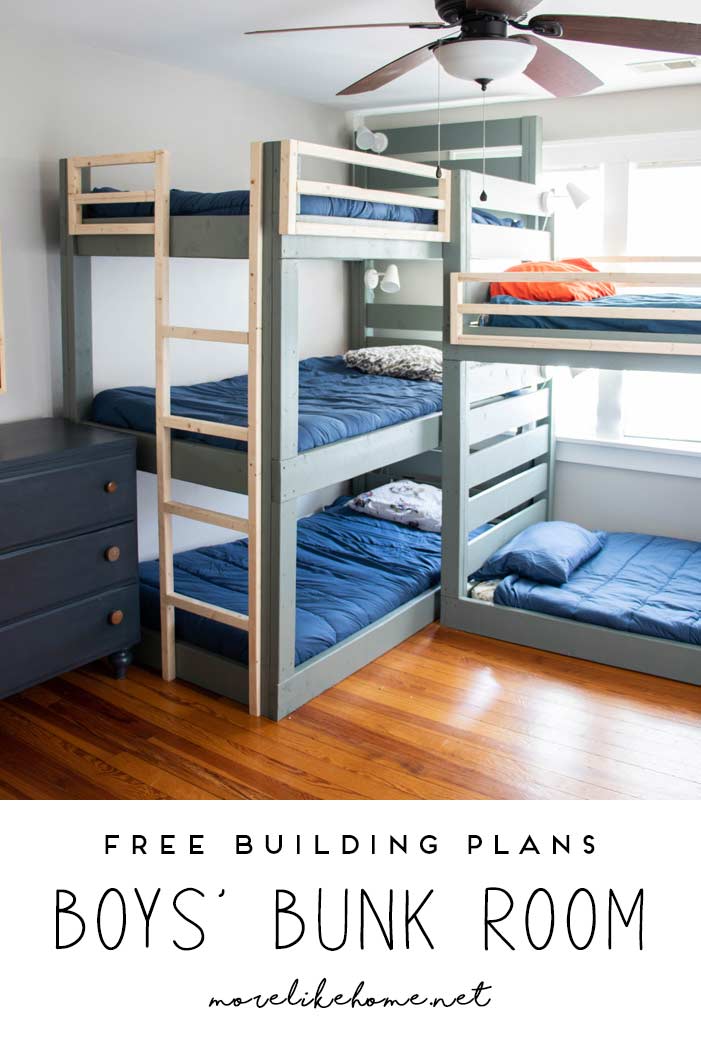
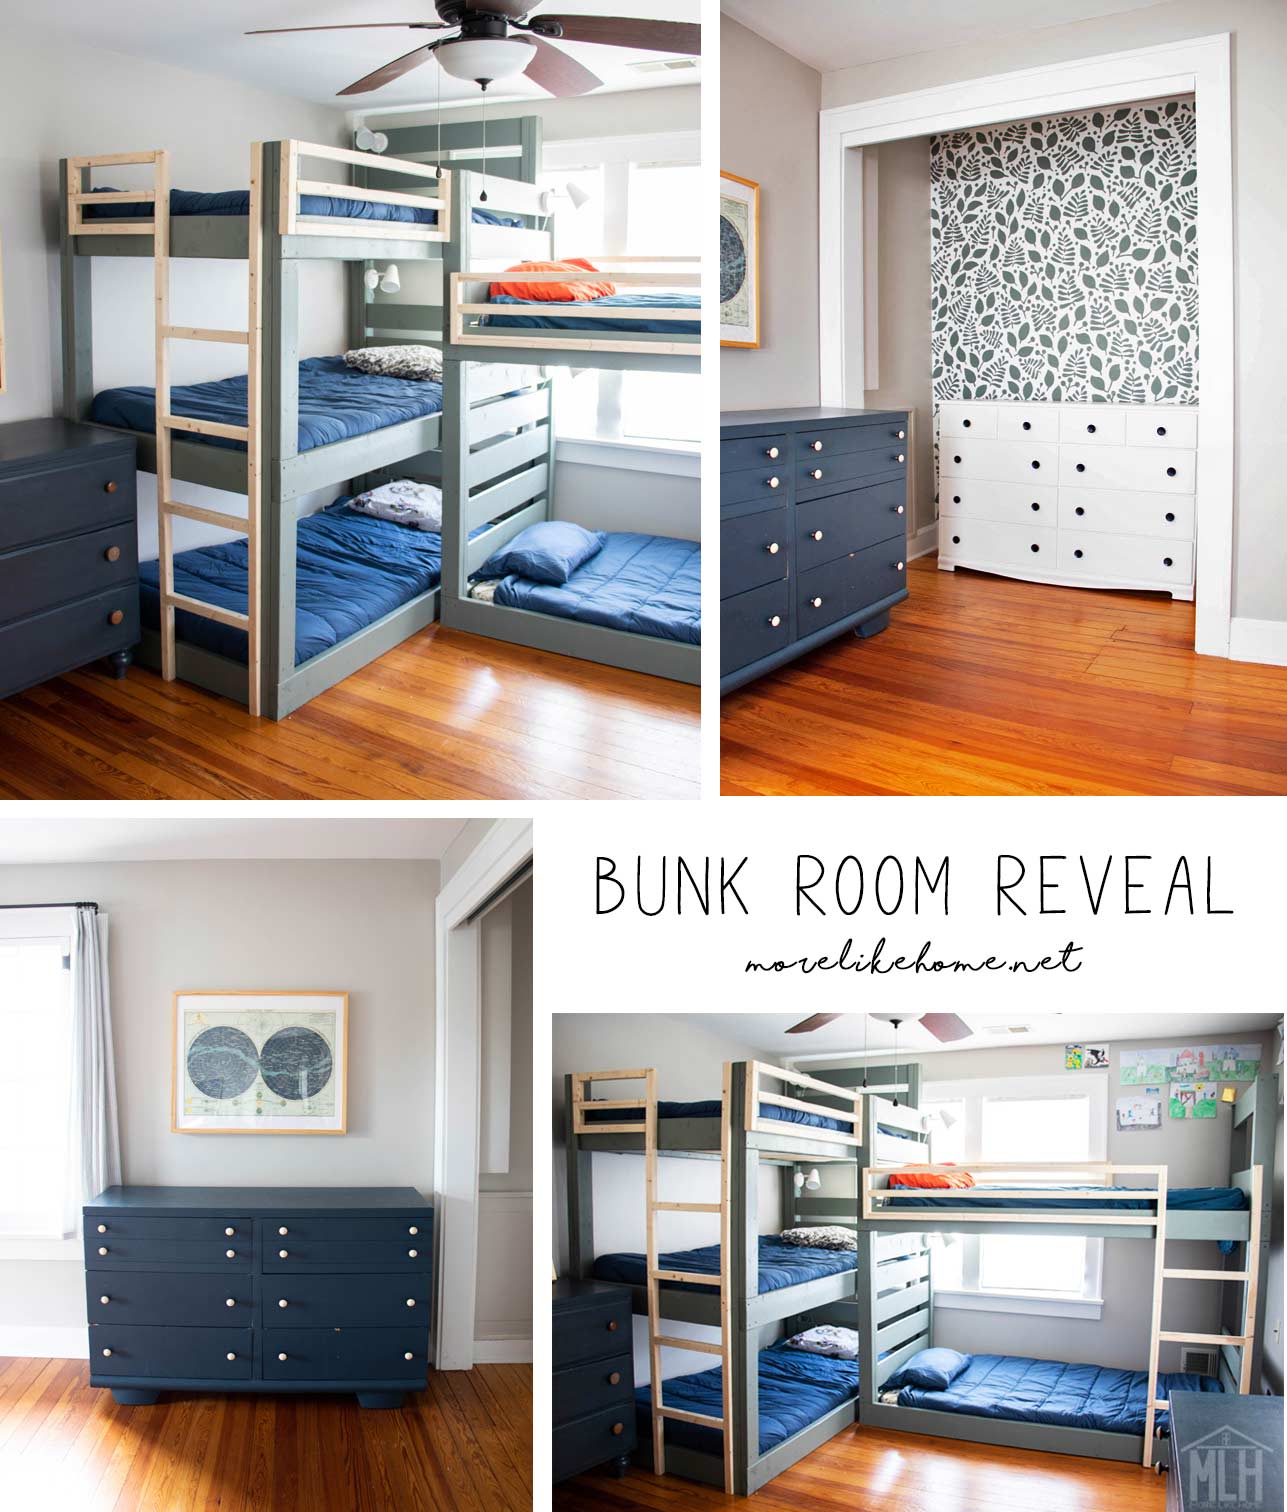
Today I'm sharing plans for the regular double bunk bed we used in our boys' new bunk room!
We built the bunks as two separate units (a freestanding triple set and double set) so if we ever change course later and decided to split them up, we can! They also disassemble into a few large pieces for easy moving. We painted them all a muted green ("Retreat" from Lowe's) which feels perfect for a boys room without being over-powering. And I love the contrast that came with leaving the ladders and railings natural wood.
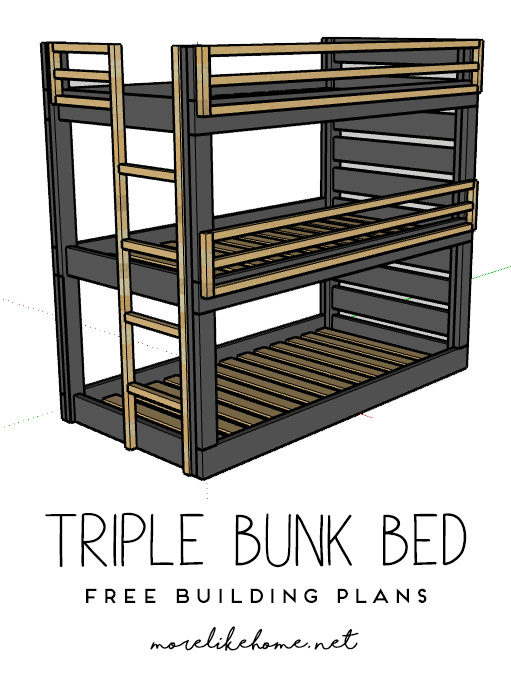
You can find the triple bunk plans here.
These plans are based on Ana White's modern bunk beds, but I modified them to fit our needs and space a little better. Besides creating a triple bunk version, I also changed the overall height of the beds and moved the bottom bunks all the way to the floor (with slats underneath for air flow) to create as much head room as possible. I put a lot of thought into the bunk layout and decided to set the double bed at different heights than the triple to give as much headroom as possible to those bunks (especially so I can sit up on the bottom bunk for bedtime reading).

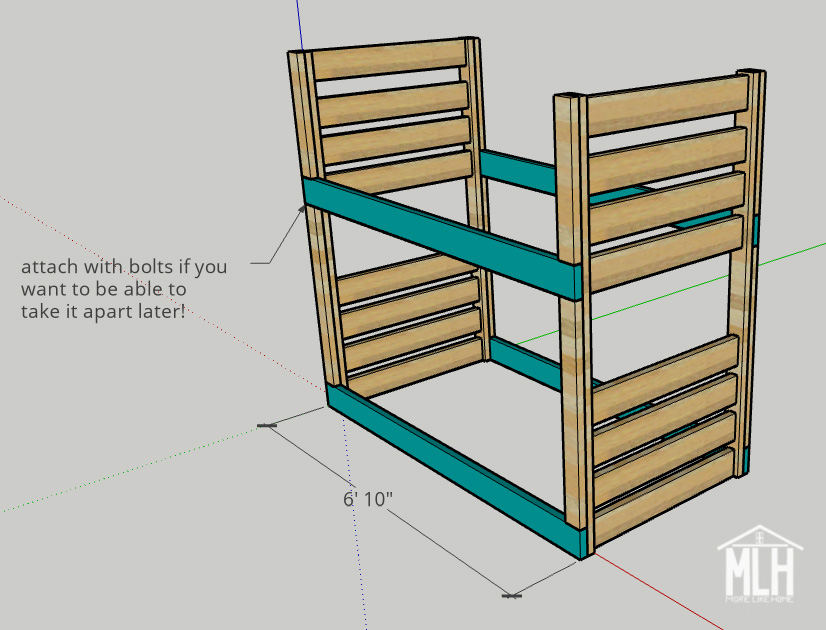
Here are the overall dimensions if you want to do a corner set-up like we have:
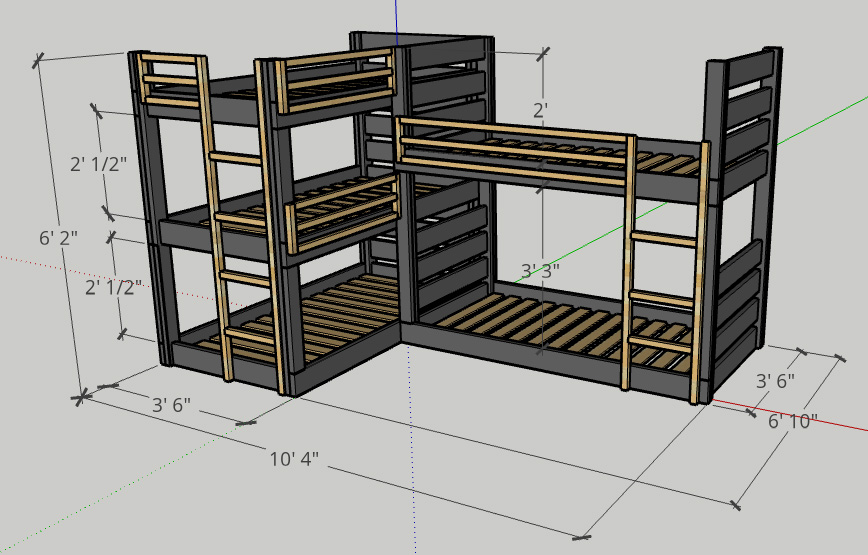
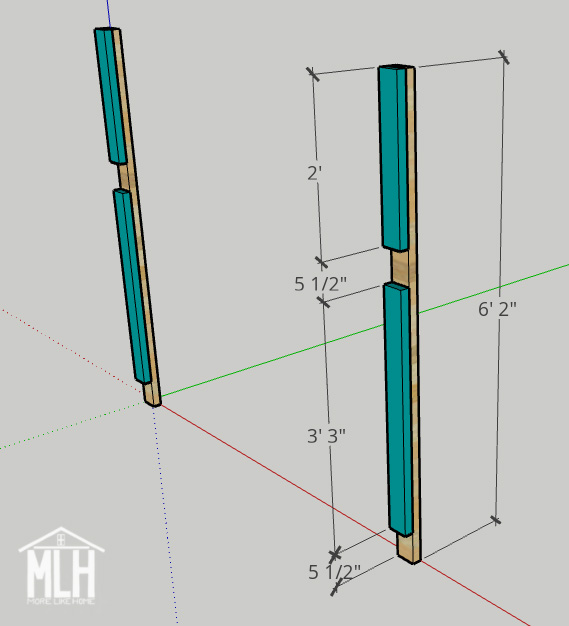
And here are dimensions for just the double bunk we'll be building today:

Double Bunk Shopping List
3 - 2x2 @ 10' long (OR 6 @ 6' long) (ladder + rail)
4 - 2x2 @ 8' long (slat supports)
4 - 2x6 @ 10' long (cut one side and one end from each)
6 - 1x6 @ 6' long (headboard + footboard - you could use 2x6s instead to match the depth of the end boards, but they will cost more.)
4 - 2x4 @ 10' long (cut one leg and one long leg support from each)
1 - 2x4 @ 8' long
9 - 1x4 @ 10' long (mattress slats)
1 - 1x4 @ 4' (one more mattress slat)
Double Bunk Cut List
(A) 4 - 2x4 @ 74" long (legs)
(B) 4 - 2x4 @ 24" long (short leg support)
(C) 4 - 2x4 @ 39" long (long leg support)
(D) 4 - 2x6 @ 36" long (end boards)
(E) 12 - 1x6 OR 2x6 @ 36" long (headboard + footboard - 2x6s will match the depth of the end boards, but 1x6s would be a bit cheaper. You can use either!)
(F) 4 - 2x6 @ 82" long (side boards)
(G) 2 - 2x2 @ 58" long (ladder sides)
(H) 3 - 2x2 @ 15" long (ladder rungs)
(I) 1 - 2x2 @ 11" long (rail sides)
(J) 3 - 2x2 @ 58 3/4" (rails)
(K) 4 - 2x2 @ 75" long (slat supports)
(L) 28 - 1x4 @ 39" (slats) Note: you can use plywood instead if you prefer.
Double Bunk Building Plans
Start by building four legs. Take one leg board (A) and attach a short leg support (B) flush with the top of the leg. Drill through the support board into the leg with 2 1/2" deck screws (pre-drill your holes to prevent splitting your boards!).
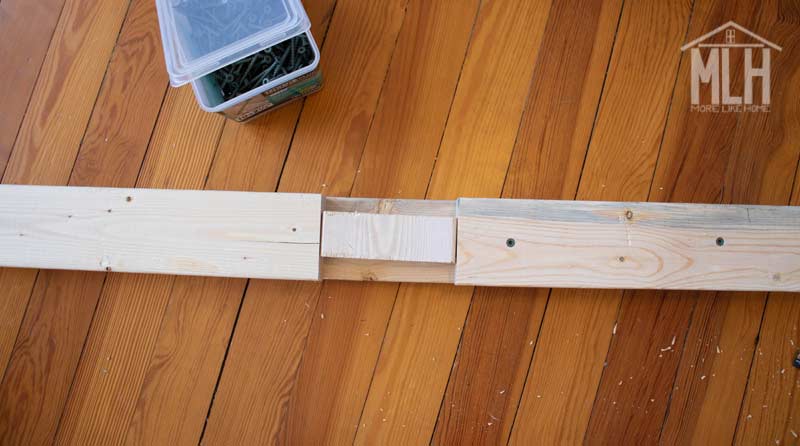
Now install a long leg support boards (C). Leave a gap of 5 1/2" below the short support board, then attach the long support board by drilling through the support into the leg with 2 1/2" deck screws. We used 6 screws per board. This should leave a 5 1/2" gap at the bottom of the leg board. Repeat to build three more legs.
The side boards that will rest in the gaps will be made of 2x6 boards, so I cut a scrap of a 2x6 and used it as a spacer as I attached the support boards. It made it super easy to leave the right amount of gap!
Now use the end boards (D) to connect two of the legs together. The legs should be turned so the gaps face the outside, and the end boards should sit even with the gap openings (you'll use two end boards for each pair of legs). Drill three pocket holes in each end of the boards and attach them with 2 1/2" pocket hole screws. Repeat with the other pair of legs.
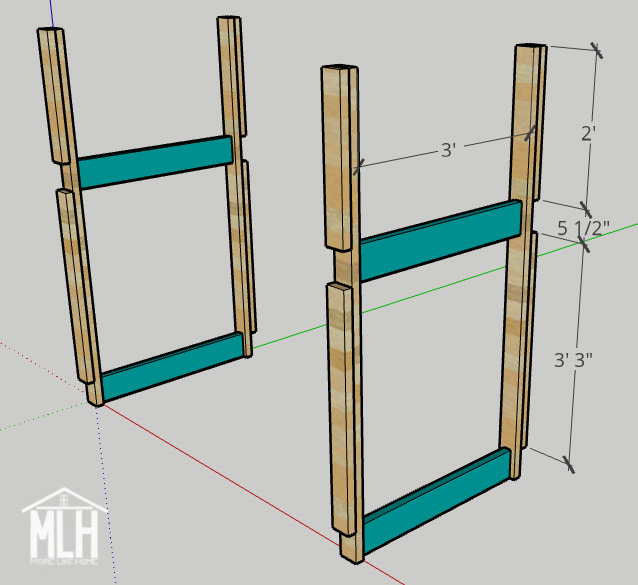
I drew the plans up thinking I would center these boards on the legs with 1" in front and behind, but instead ended up using a scrap 1x6 as a support underneath the end board while I installed it which made the process so much easier and was totally close enough to centered for this project:

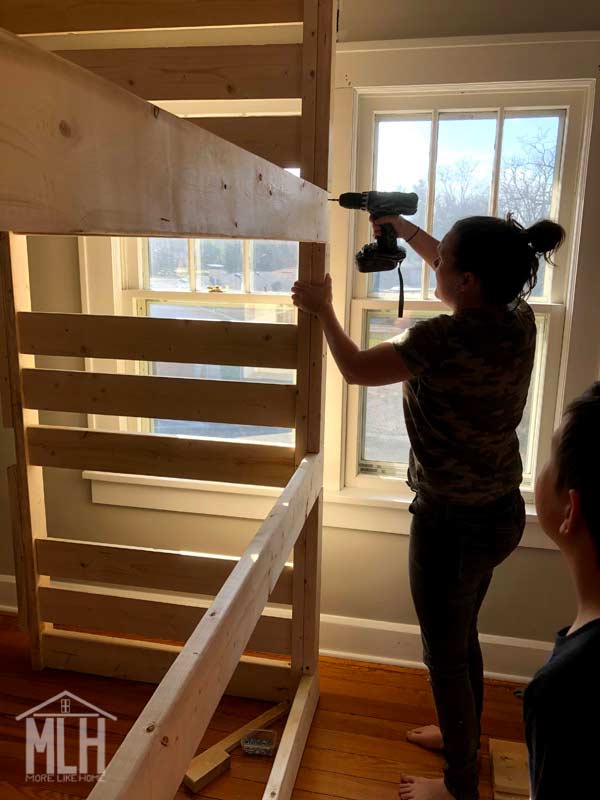
Now install the headboard boards (E) along both of the end sections you just built. Leave a 2" gap between the slats (the top board should be flush with top of the legs, and the gap below it will be a smidge larger than the rest - you can wiggle these around to even out the spacing if that bothers you!). Drill three pocket holes in the end of each headboard board and attach them with 1 1/4" pocket hole screws. You will have three headboard pieces above each end board:

Again, I used scrap 1x2 boards as supports while I attached these boards. It keeps them level and evenly spaced off the ground so you don't need to measure for each board! I also cut a scrap of a 2x6 board 2" long and used it as a spacer between the slats so I didn't need to measure that spacing either. Love a good shortcut! If you want, you can add extra 1x6 boards to fill in the the rest of the gap for the bottom bunk (if you scroll back up to the photo of the finished room you can see that we did this on the end where the beds meet to give a little more privacy between the bunks. Do what works for you! Isn't DIY great??
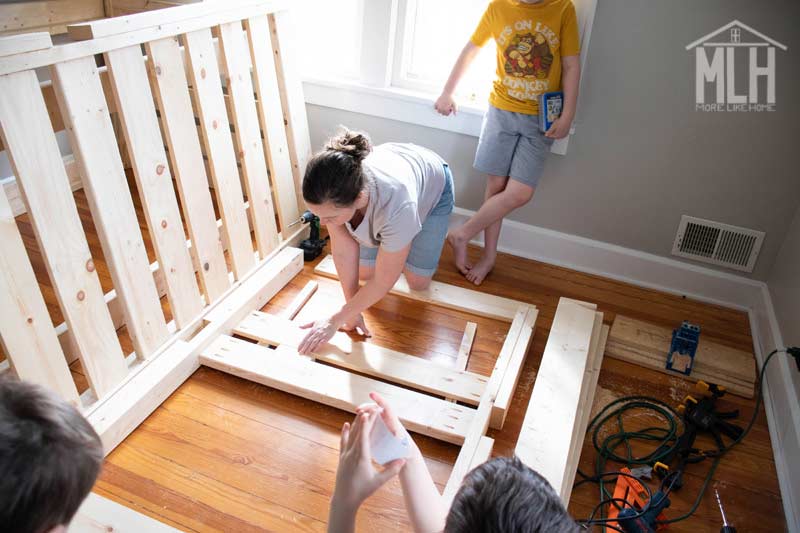
Now you should have two big end sections completed that just need to be attached together using the side boards (F). If you ever need to take the bunk bed apart for some reason, just remove these side boards and leave the end sections in tact for easy moving! The side boards should fit into the gaps you left between the leg supports like this:
Attach each side board by drilling through into the leg with 2 1/2" deck screws. We used four screws per joint. This was a much easier job with an extra set of hands (or two)!
Your bunk bed frame is done!
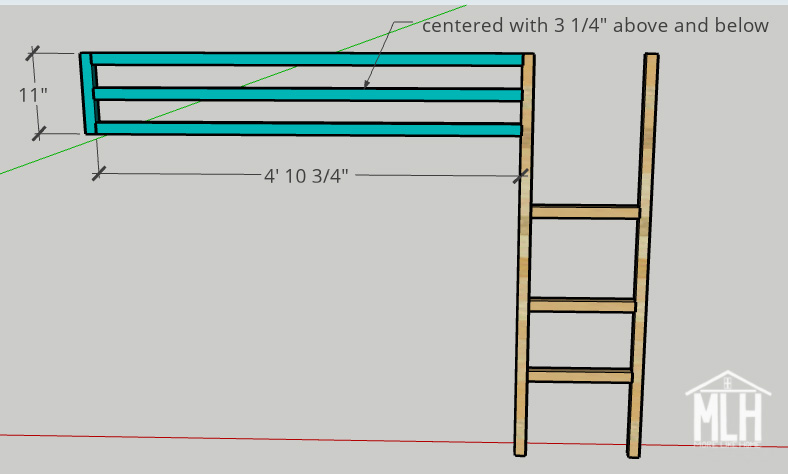
Now let's work on the ladder and railings.
Start by attaching the two ladder sides (G) together using the ladder rungs (H). Install the first rung 1' off the ground, then leave a 1' gap between each remaining rung. Install them by drilling two pocket holes in each end of the rungs and attaching them with 2 1/2' pocket hole screws (make sure the pocket holes are turned toward the back or bottom if you don't plan to fill them later).

Attach this entire unit to the side of the bunk bed (it should overlap the front of the legs). Get as many points of contact as you can by drilling into both of the legs and both side boards to attach it. Remember to pre-drill you holes to avoid splitting these boards, and install it using the 2 1/2" deck screws. We actually drilled out through the side boards into the back of the ladder and railing boards so the screw heads wouldn't be visible from the front.

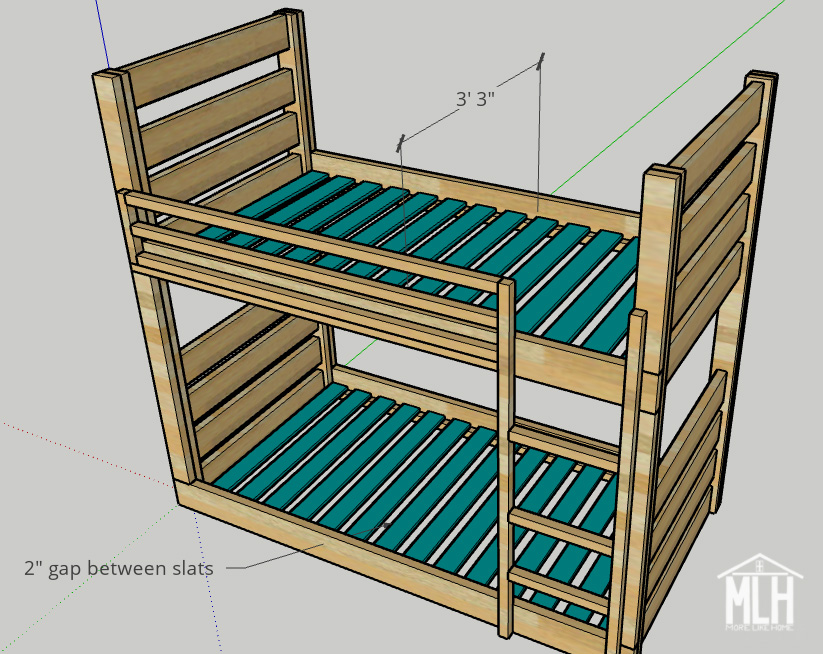
You're almost done! Now you need to install the slat supports (L). Attach one support on each side board, flush with the bottom edge. Drill through the support into the side board with 2 1/2" deck screws. Repeat for the remaining three supports.

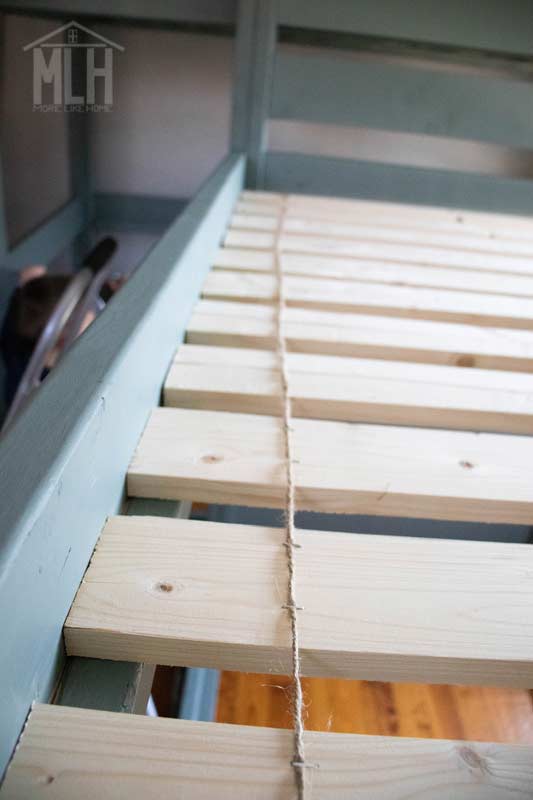
Install the slats (M) on top of the slat supports. You'll have 14 slats per bed, and there should be about a 2" gap between each slat.
You can attach each slat individually to the supports with 1 1/4" wood screws, or try this shortcut:
I laid out all my slats, ran two piece of twine across them (one near each side), and stapled the twine to each slat. Then I only needed to attach the end slats to the support boards because the rest are held in place by the twine and can't slide around. This will make it super easy if you ever need to take the bunk beds apart (or sweep under the bottom bunk!) because you only need to remove a couple screws and the slats roll up into a handy bundle.
Finishing
Here's my normal finishing advice:
"Fill any visible holes with wood filler then sand everything down really well. This is the most important step for a professional finish! Start with a rough sand paper, then go over everything with a medium paper, then again with a fine paper. Once it's super smooth, finish it with whatever paint or stain and sealer you like."
And that would look amazing if you do it! Just make sure you don't fill the holes attaching the side boards to the legs in case you need to take it apart later.
But... here's what I did for the bunk beds:
Got tired of working on it and just wanted to be DONE. Sanded it well enough to get rid of any splinters. Didn't make it to the fine sandpaper. Didn't fill any holes. Painted it and called it a day. And you know what? It turned out totally fine and probably saved a couple hours of filling and sanding! Remember, guys: It doesn't have to be perfect to be good.
!)
I like all the head room in the bottom bunk. That would be great for Mom to join kiddos there.
ReplyDelete