


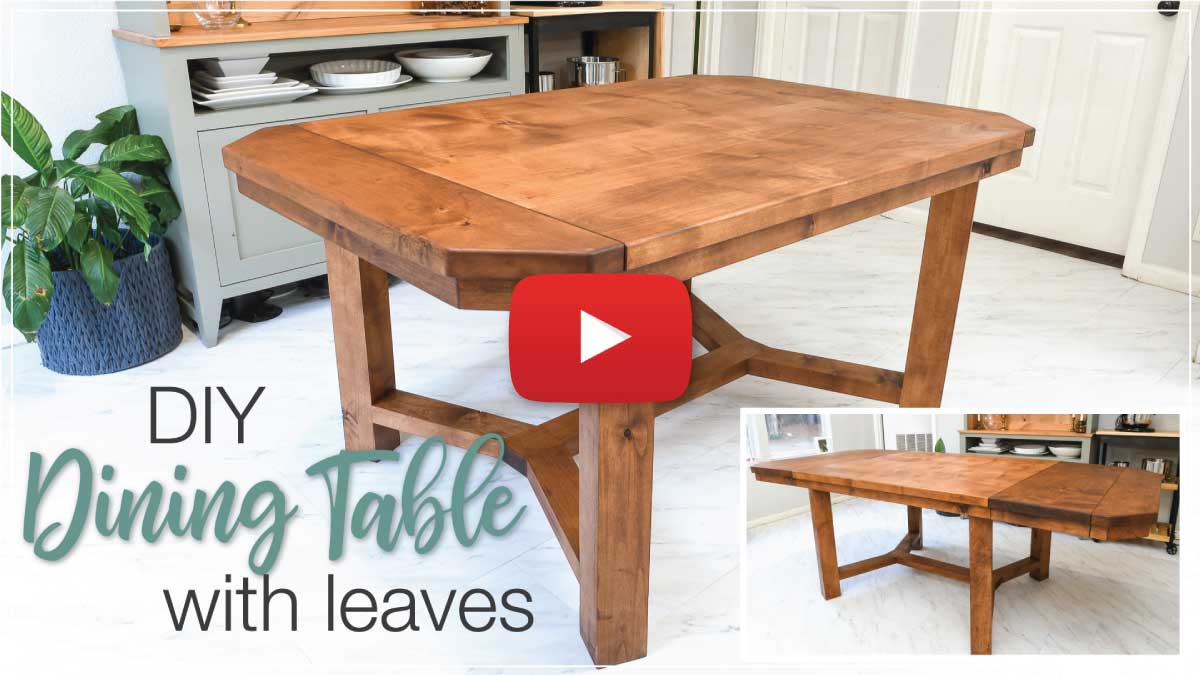
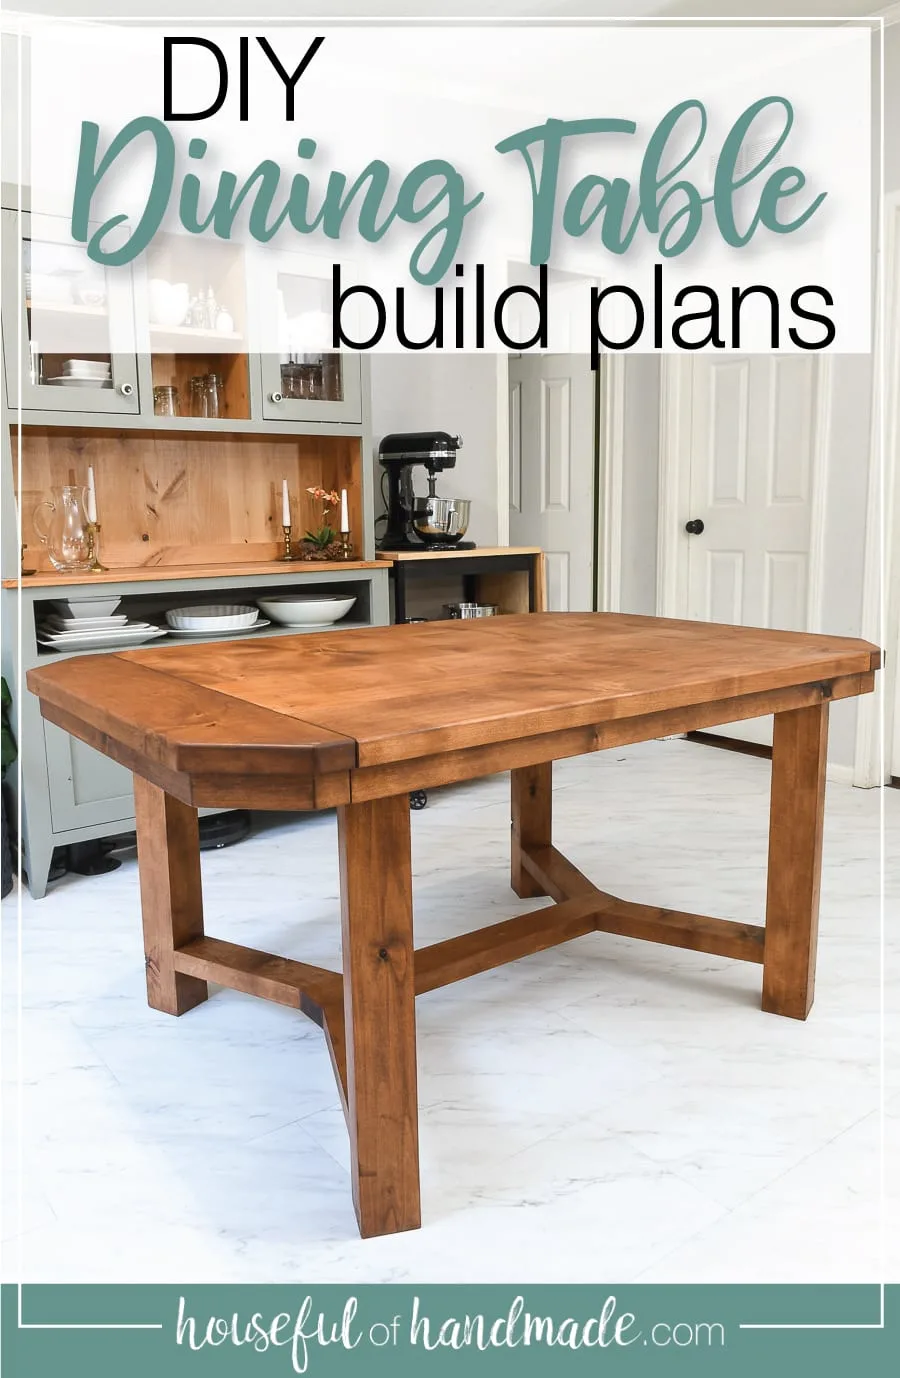
Build the perfect dining table with 2 leaves big enough for entertaining with these build plans.
One of the things I miss the most from our old home is our giant dining table. But it was too big to trek across multiple states and we knew it would not fit into our new home.
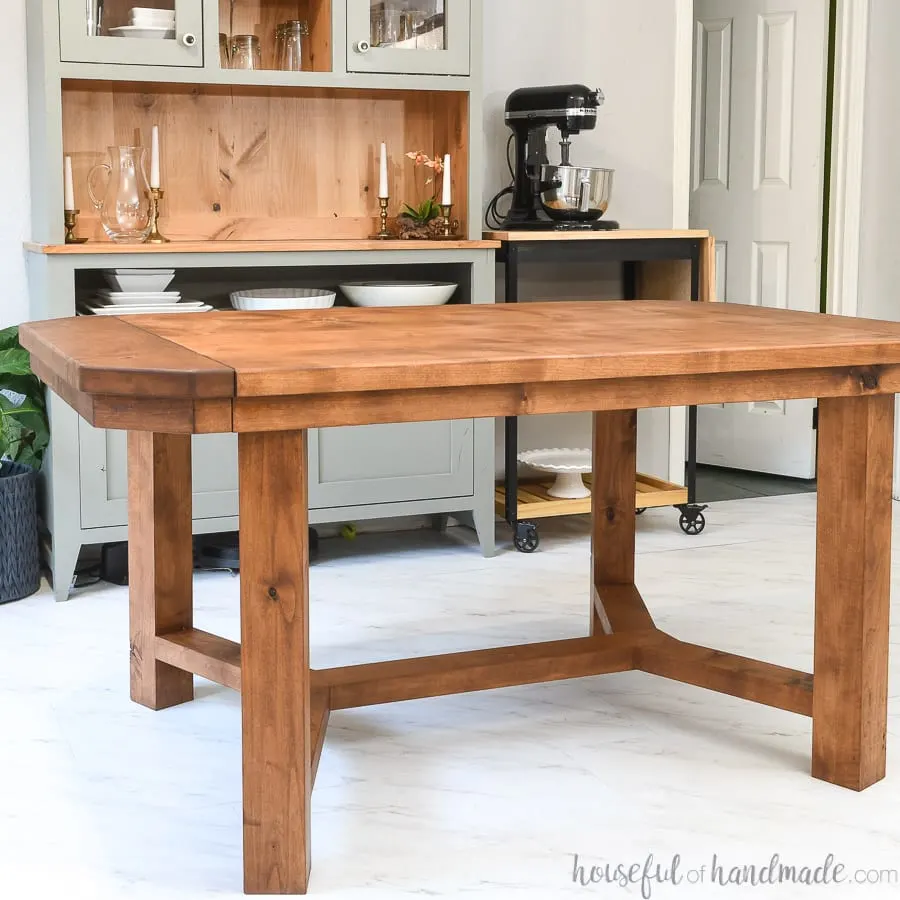
So one of the first things I wanted to build for our new home is a dining table. Since we don’t have room to always have a big table, I made one with 2 leaves. Now we have can add space when we have guests over!
And I partnered with Waterlox to seal our new dining table with their new TrueTone Color Infused Tung oil finish. The buff in color and sealer are perfect for finishing a gorgeous dining table without a glossy surface.
This post may contain affiliate links. As an Amazon Associate I earn from qualifying purchases. Click here to read my full disclosure policy.
Matte Unfinished Look Sealer
My favorite part of the new TrueTone formula from Waterlox is the matte finish. The tung oil finish offers a penetrating waterproof sealer that leaves the wood with a modern unfinished look.
And the TrueTone not only seals your wood, but it offers 11 colors to stain the wood too. Use it to deepen or change your wood’s color.

I had fun testing out three of the 11 colors on the alder wood I used for the dining table build before making the final decision to use Chestnut. The Chestnut was perfect for deepening the color on the alder making it look very rich.
But it still has the beautiful alder coloring and coordinates so well with the alder hutch that did make the move.

The other two colors I tested also were beautiful as well: Natural and White. The Natural color didn’t add much color to the alder wood since it already has a richness to it, but it would add a slight color to a lighter wood.
The white gave the wood a duller, almost bleached look. It was a truly beautiful modern stain, but not what I was going for in our dining room. I cannot wait to use it on another project though!
A pint of the TrueTone color infused tung oil covers around 300 square feet. They also come in a smaller 2 ounce size that would cover around 37.5 square feet. The alder wood did seem to soak up the color quite easily and I ended up needing 5 ounces to cover the table and leaves.
The finish soaked up way less since it was the second coat. I only 3 ounces to seal the entire table.

Update: I get asked all the time how this finish is holding up. I am happy to report it is holding up amazing 3 years later.
I have not reapplied anything and we use our dining table for family dinners every single night.
Since I was afraid the kids would scratch my table, I did use table cloths for the first year. But now we eat on it bare, with spill all over, and it still looks amazing.
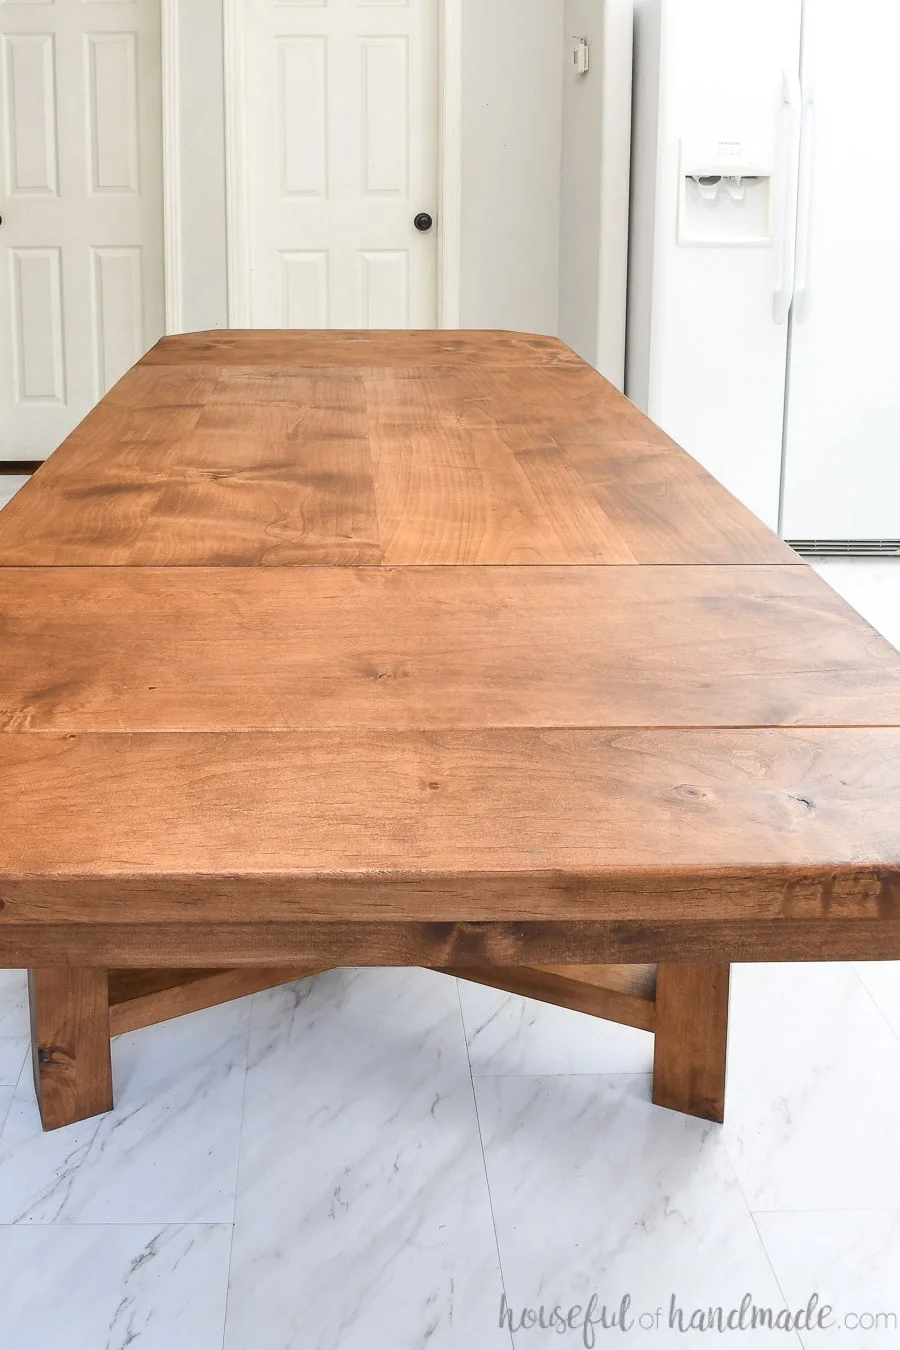
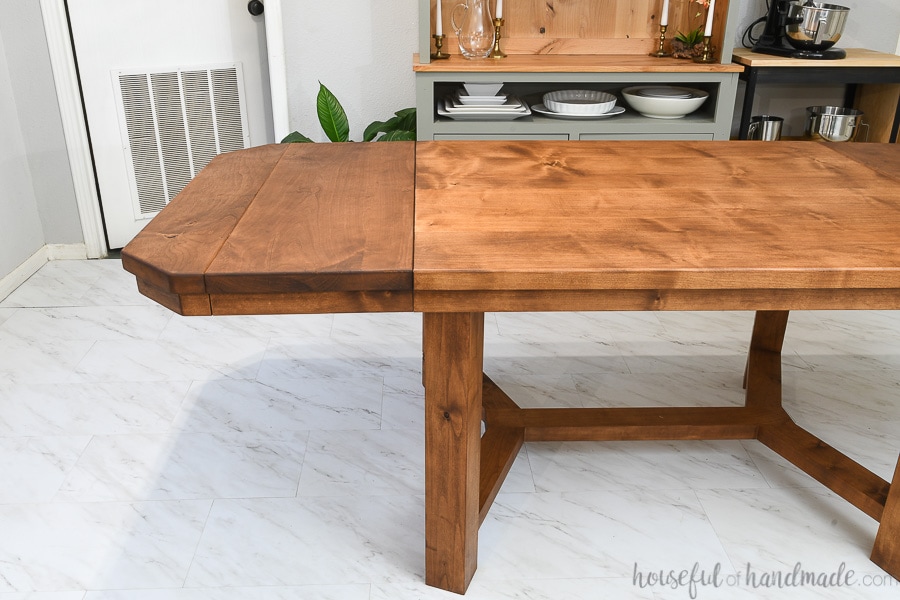
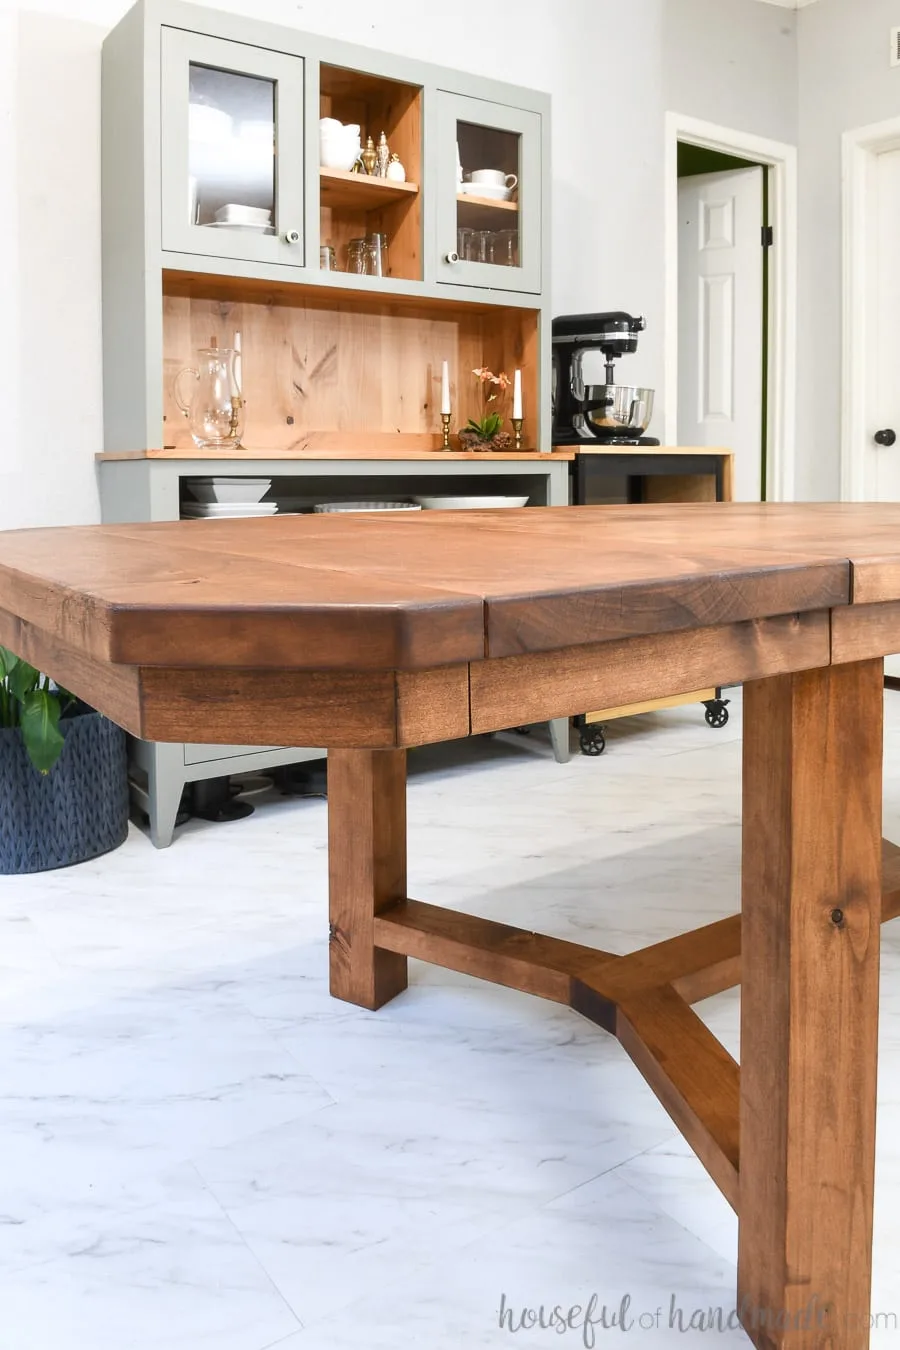
Breadboard End Leaves
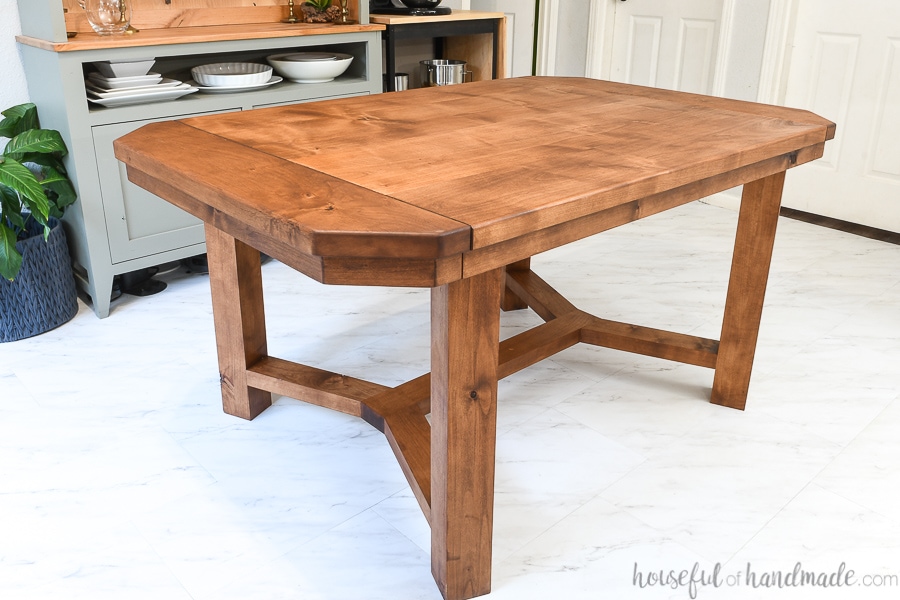
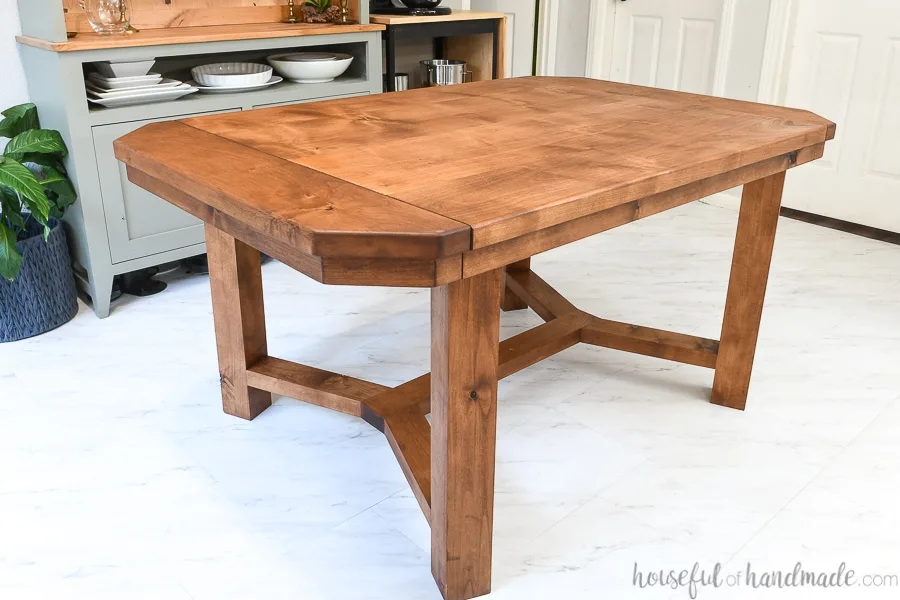
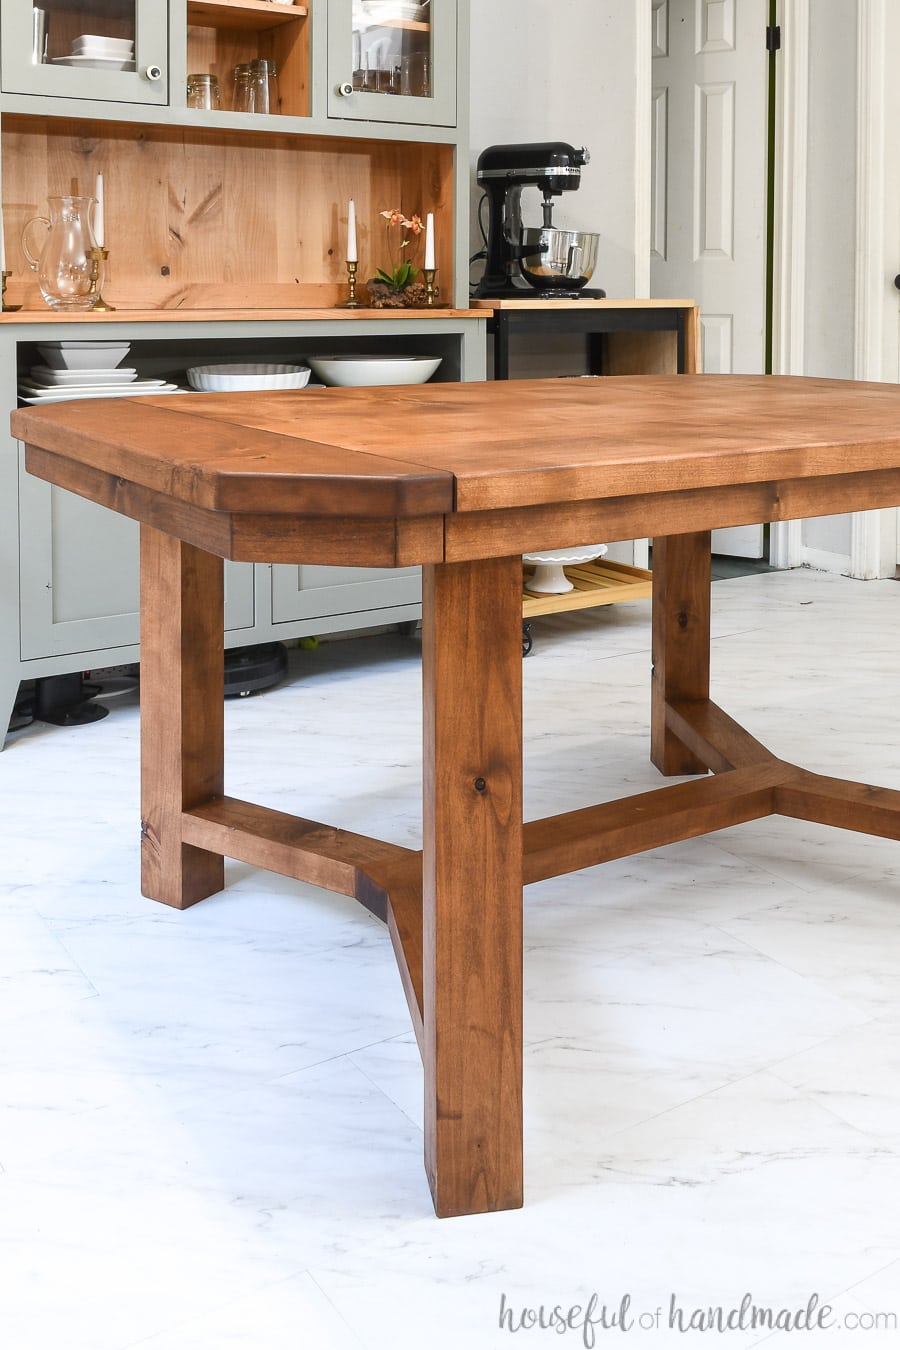
Since we have a much smaller dining room than before, we needed a smaller dining room table. But I love to entertain and have people over for dinner, so the idea to make a table with leaves was born.
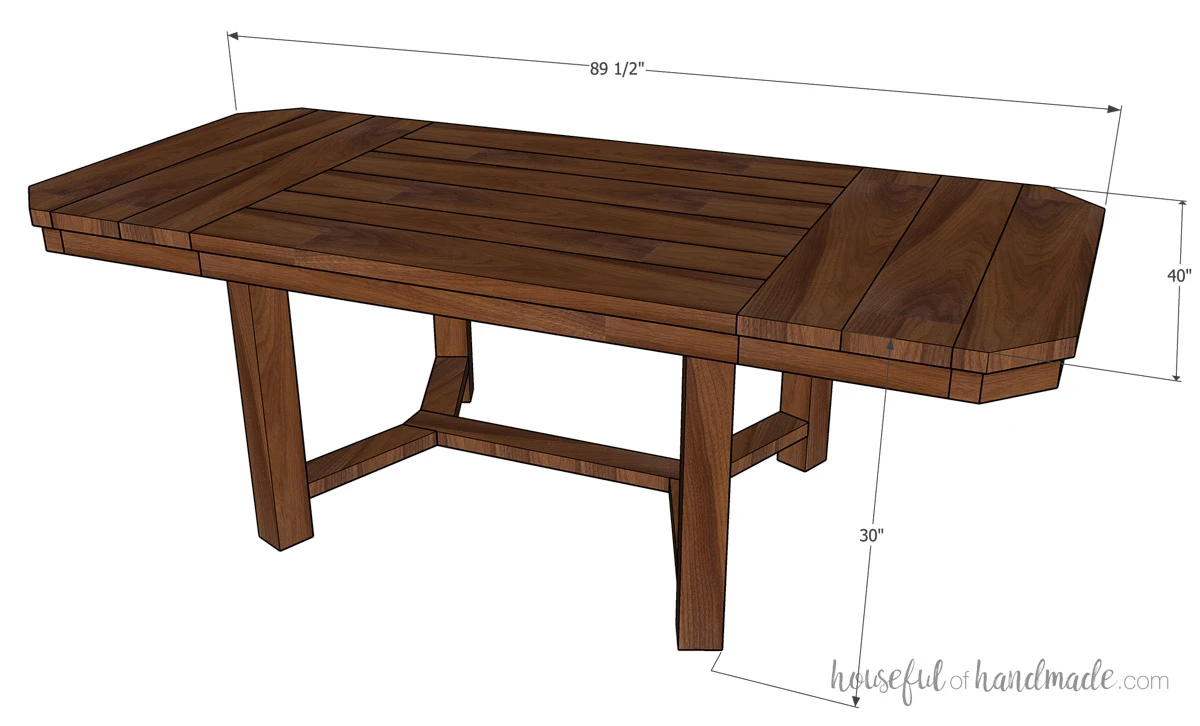
Without the leaves, this dining table can seat 4-6 people comfortably. It is 40″ wide and 60 1/2″ long.

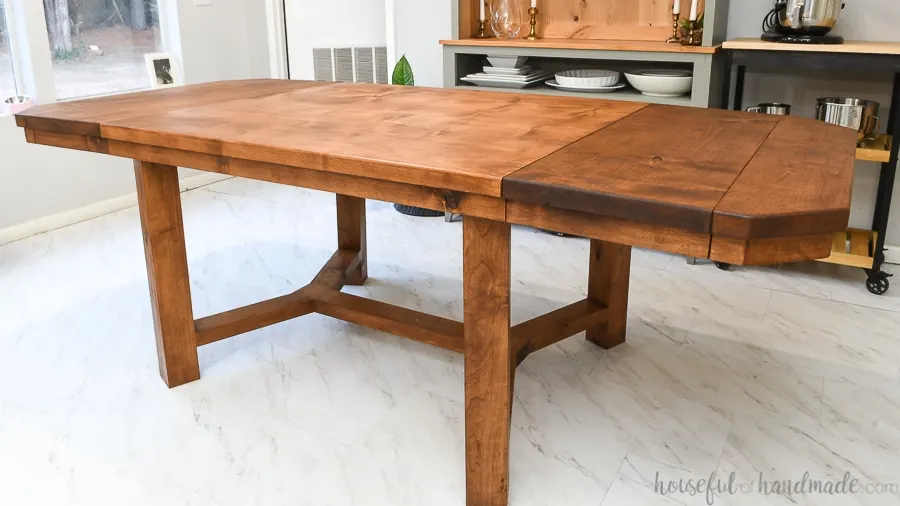
And when we have company over, we can add in two 14 1/2″ leaves on each end. The breadboard end slides out and the leaves tuck inside. With both leaves in, the dining table ends up at 89 1/2″ long!
We should easily be able to sit 10 people at the full table, more if we have a lot of kids.

I am not going to lie, this dining table build was a little harder than I initially thought. The precision needed to make sure the leaves line up perfectly took some time and patience.
But the end result is a gorgeous heirloom table that I cannot wait to make more family memories around!

How to Build a Dining Table with 2 Leaves
Tools & Materials
Recommended Tools:
- Miter saw
- I recently upgraded to this larger sliding miter saw (watch for it to go on sale), but all my projects before were built with this inexpensive miter saw that I loved.
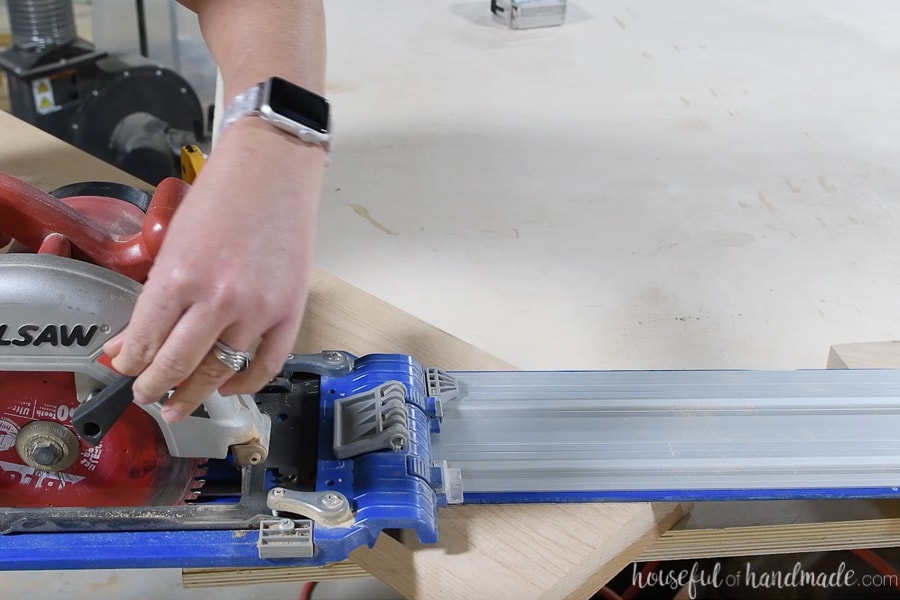
- Circular saw with guide track
- Pocket hole jig
- Drill
- Impact driver (optional, but I love not having to switch bits with the drill)
- Face clamps
- Trim router
- Self-centering doweling jig
- Sander
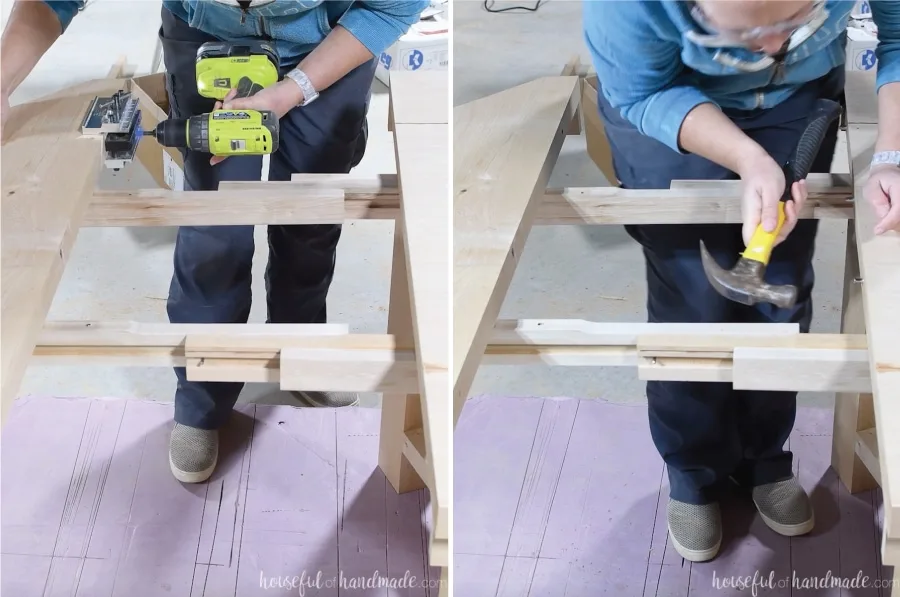
- Hammer
- Carpenters square
- Measuring tape
- Biscuit jointer (optional)
Supplies:
- Wood products:
- (5) 2×8, 8′ long boards
- (1) 2×6, 8′ long board
- (1) 4×4, 12′ long board
- (1) 2×4, 8′ long board
- (4) 1×3, 8′ long boards
- 2 1/2″ pocket hole screws
- If you want to use pocket holes instead of biscuits to secure the table top you will need more.
- 2″ wood screws
- (8) figure 8 fasteners
- 1″ wood screws
- Wood glue
- 2 pair table extension slides
- (16) 1/4″ straight shelf pins
- Sandpaper
- Tack cloth
- TrueTone color-infused tung oil
- I used (3) 2 ounce jars for the table made with alder, different woods will absorb it differently so use this as a guide.
- TrueTone buff-in tung oil finish
- I used (2) 2 ounce jars for our table made in alder, different woods will absorb it differently so use this as a guide.
- Lint free cloths
- (8) table leaf locks
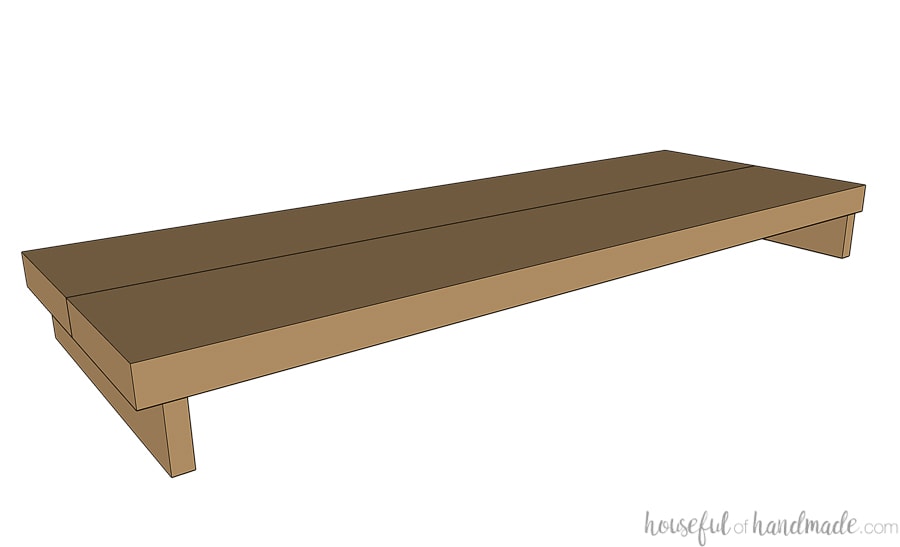
Overall Dimensions

Prefer to Watch? Check out the YouTube Video

Cut List
Cut out the pieces according to the cut chart in the PDF plans.

Build the Table Top
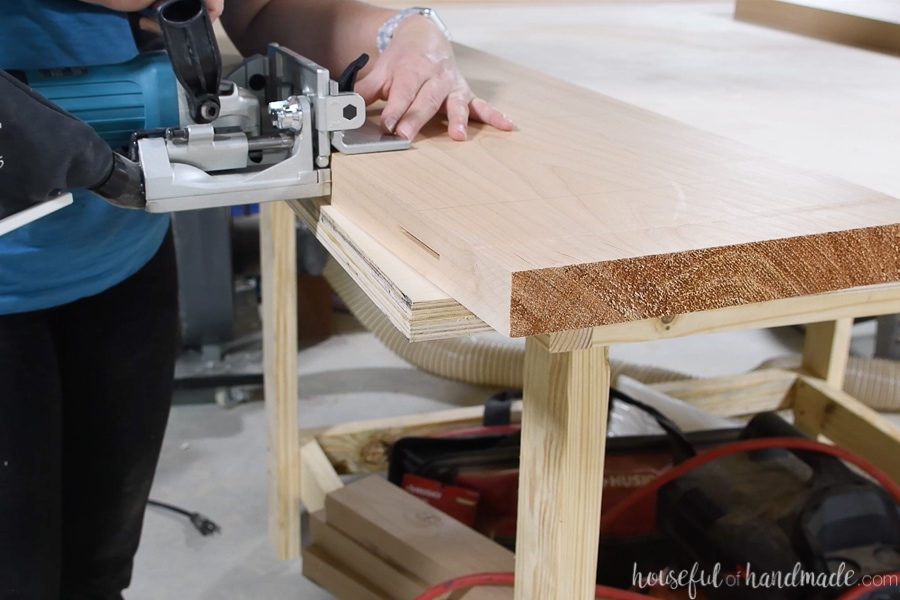
The table top is built with multiple boards running lengthwise. You can join them together with biscuits (which is what I did) or you could also use pocket holes since it is on the underside and no one will see it.
I used lumber from the lumberyard (you can read my tips for buying lumber from a lumber yard in this DIY wood kitchen countertops post). But I am including the measurements for using dimensional lumber so you can make this table with lumber from the big box store too.
Assemble the top
The final table top (minus the breadboards and leaves) is 40″ wide and 46″ long. Cut your boards slightly longer than 46″ so you can square up the table top after glueing them together.
To make the table top with dimensional lumber, glue together (4) 2×8 boards and (2) 2×6 boards.
Line up all the boards according to the diagram in the build plans. Mark where your biscuits or pocket holes will be on every board.
- If using biscuits: cut biscuit slots every 6-8″ along both sides of the center boards and just the outside of the middle boards.
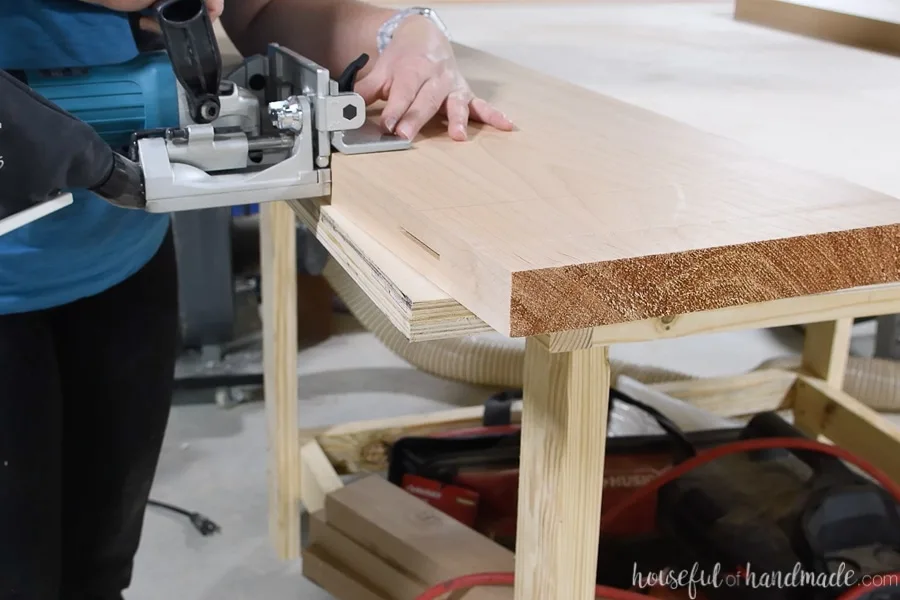
- If using pocket holes: drill pocket holes set for 1 1/2″ thick material every 6-8″ along one side of all but the last board.
Add wood glue and biscuits (if using) to the edges of the boards.
Clamp the boards together. If using pocket holes, secure with 2 1/2″ long pocket hole screws. Let them dry.

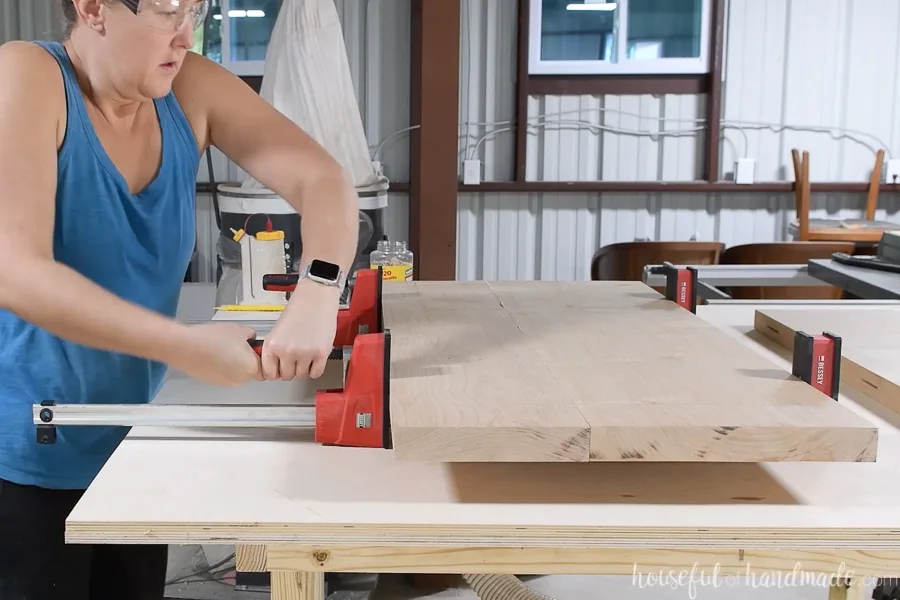
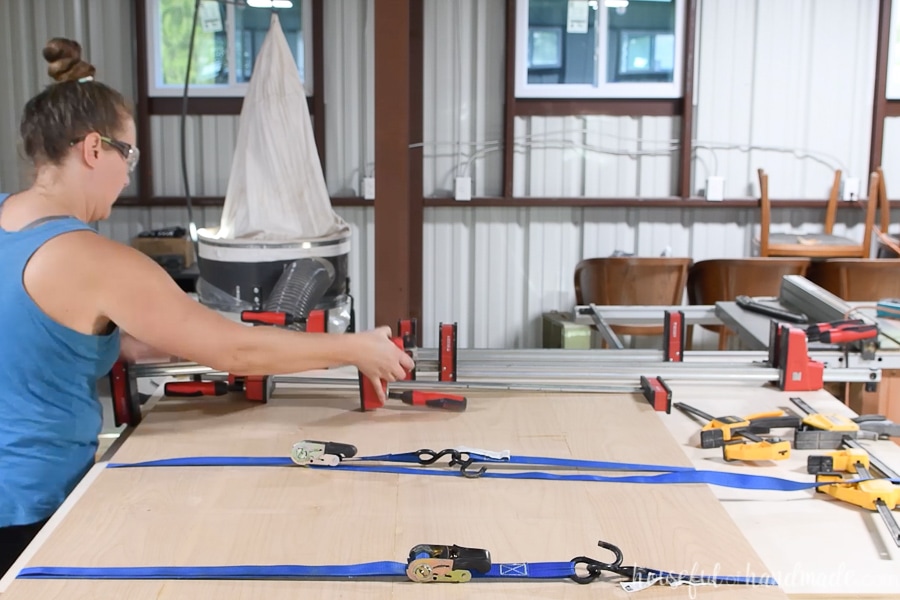
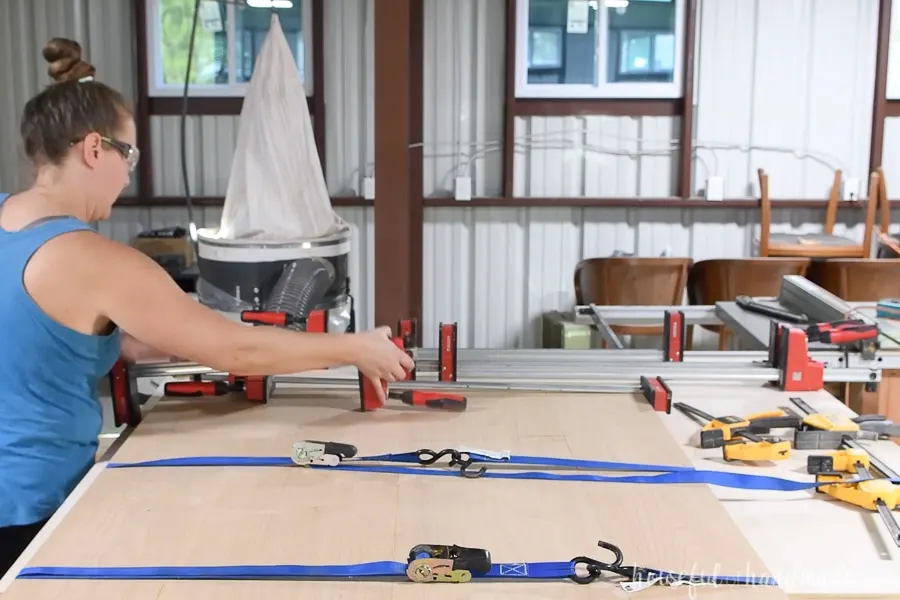
My table top was built from 4 boards, so I Joined the two outside boards together first using lots of wood glue and biscuits. I let them dry for a couple hours.
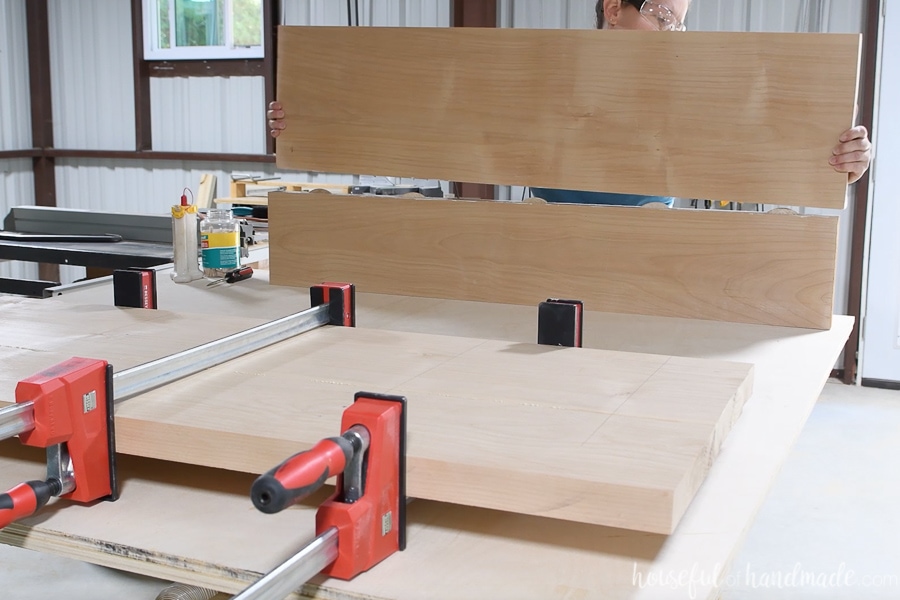

Then I joined the two sides together. This is where I had a bit of a challenge since we did not have clamps long enough for the 40″ wide table top.
My husband got creative and we were able to get a decent clamp with ratchet straps. But you could also use a few pocket holes along one side to pull the boards together without clamps.
I also used some clamps end-to-end to add more clamping pressure. It gave me better squeeze out than just the ratchet straps alone giving me a better joint.
Cut the ends to square up your table top so it is 46″ long.
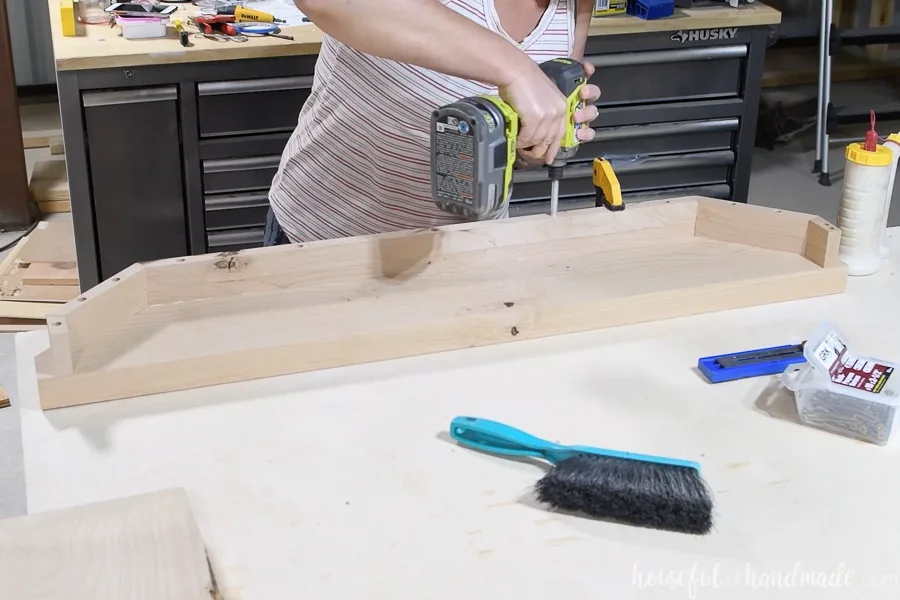
Attach the skirt
Now it’s time to add the skirt to the table top. The skirt is used to both hide the extension slides for the leaves and attach the legs to the table top.
Cut 46″ long skirt pieces from the 1×3 boards as noted in the PDF plans.
Since I have a table saw, I ripped the skirt boards for my table to 2″ which is the same size as the extension slides. I wanted the smallest skirt possible since I like to cross my legs when I sit.
But you can use 1×3 dimensional lumber which is 2 1/2″ wide without needing a table saw (and I only gained 1/2″ by ripping the boards).
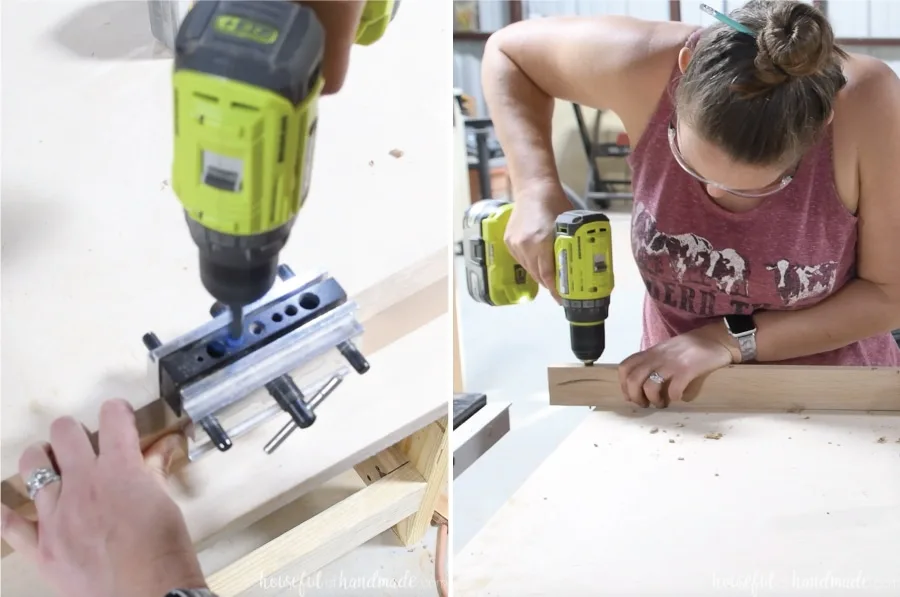
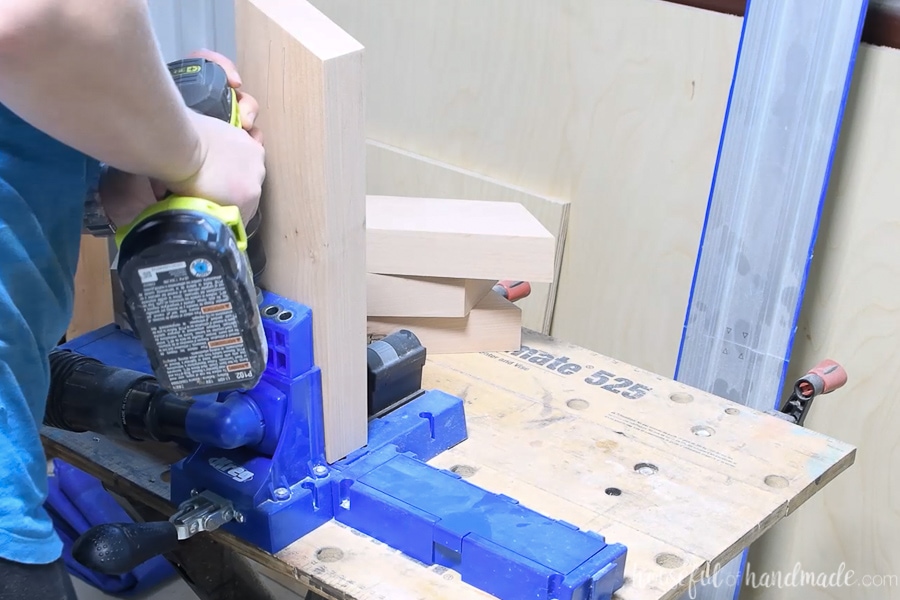
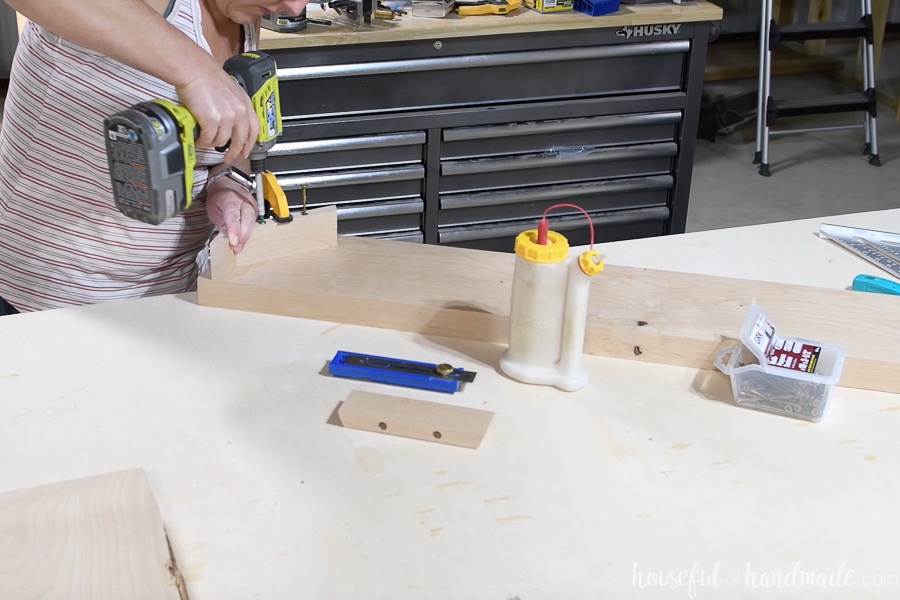
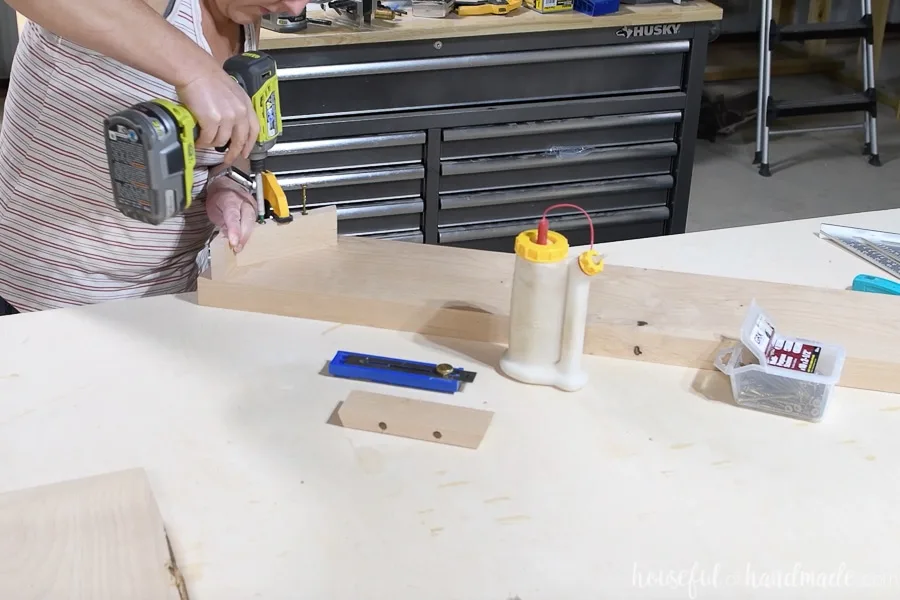
To attach the skirt, drill 1″ deep holes in the center of the edge of the skirt. I used the self-centering dowel jig and marked my depth with a piece of blue painters tape.
Drill a hole 2″ in from each end and then every 7″ along the skirt with a 3/8″ drill bit. Then use a drill bit just smaller than your 2″ wood screws to predrill all the way through the skirt board to prevent splitting.

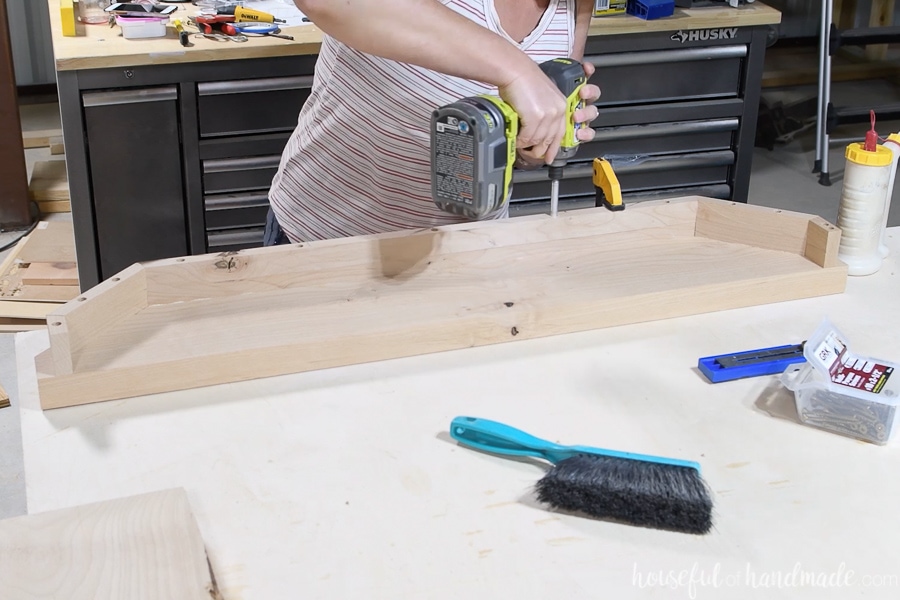
Attach the skirt to the side of the finished table top. Set it in from the edge 3/4″ and secure with wood glue and 2″ wood screws.
Repeat for the other side of the table.
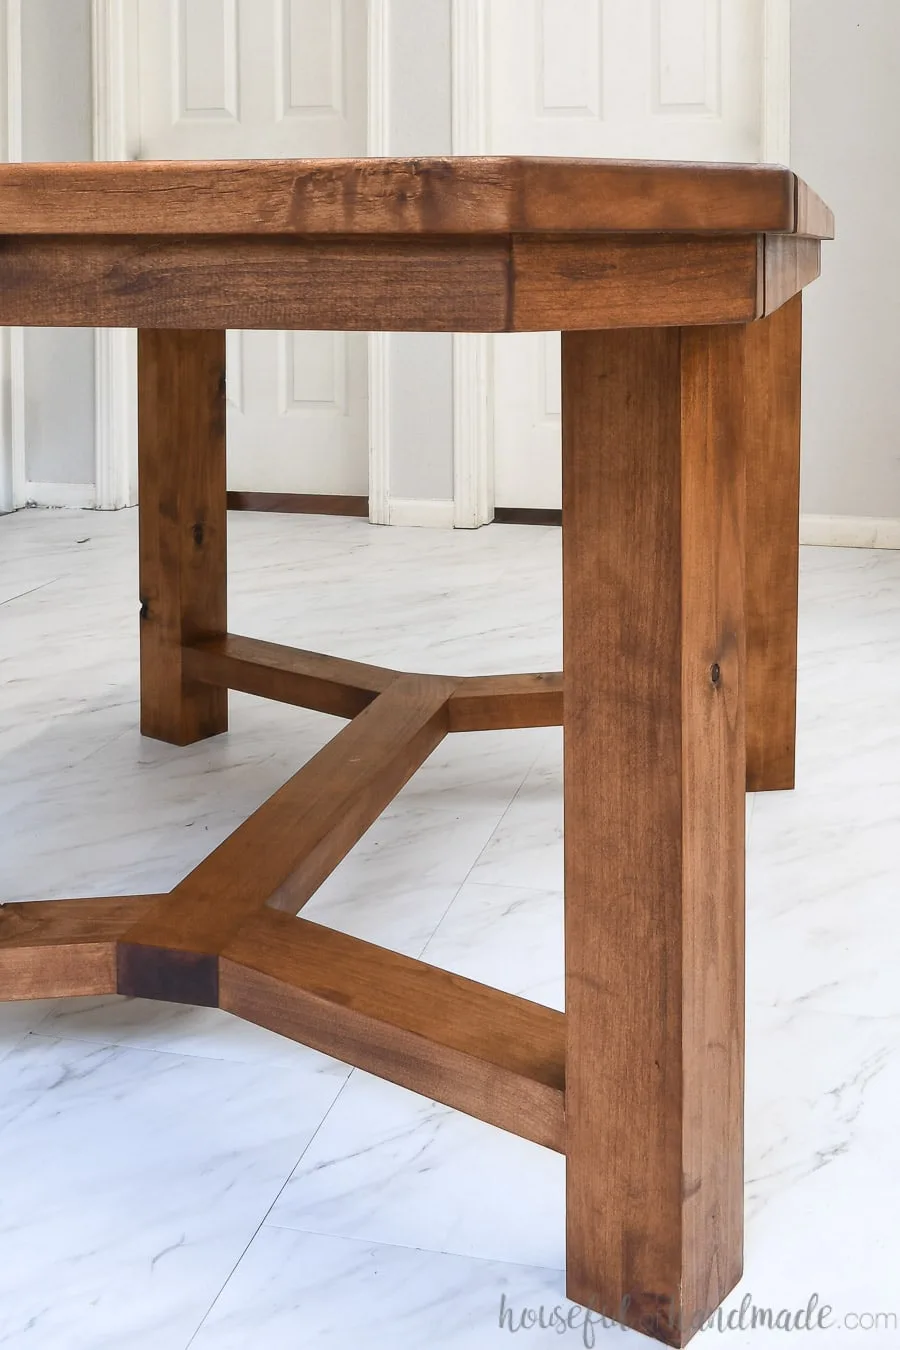
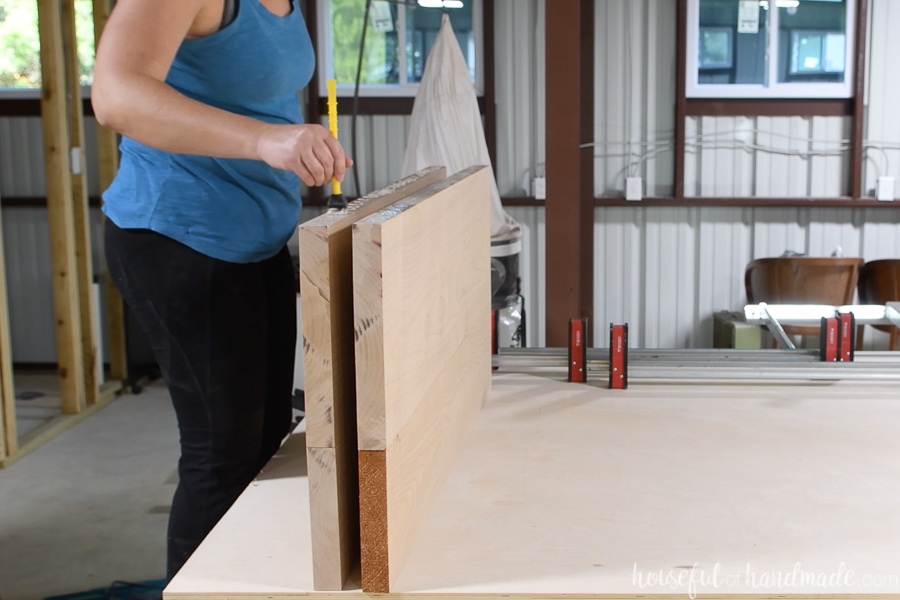
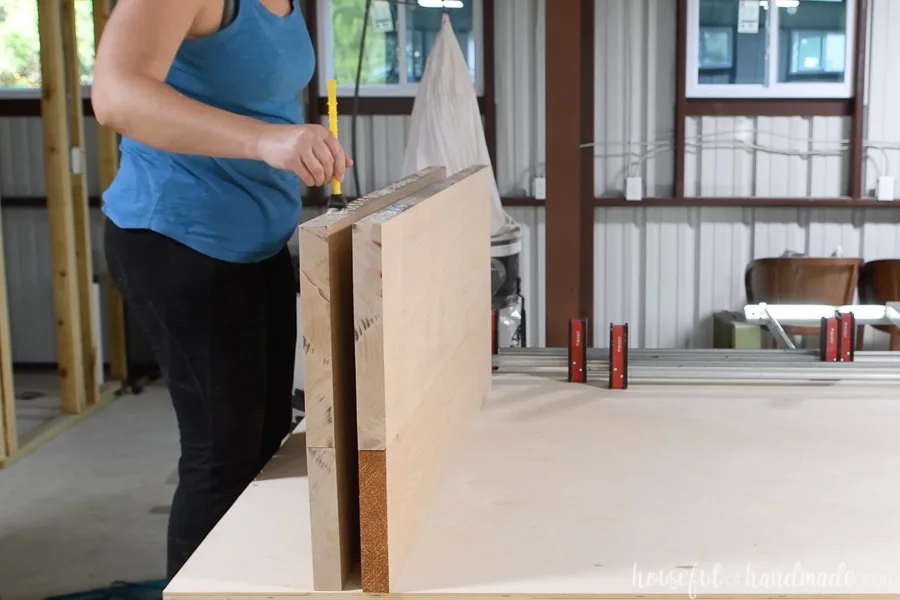
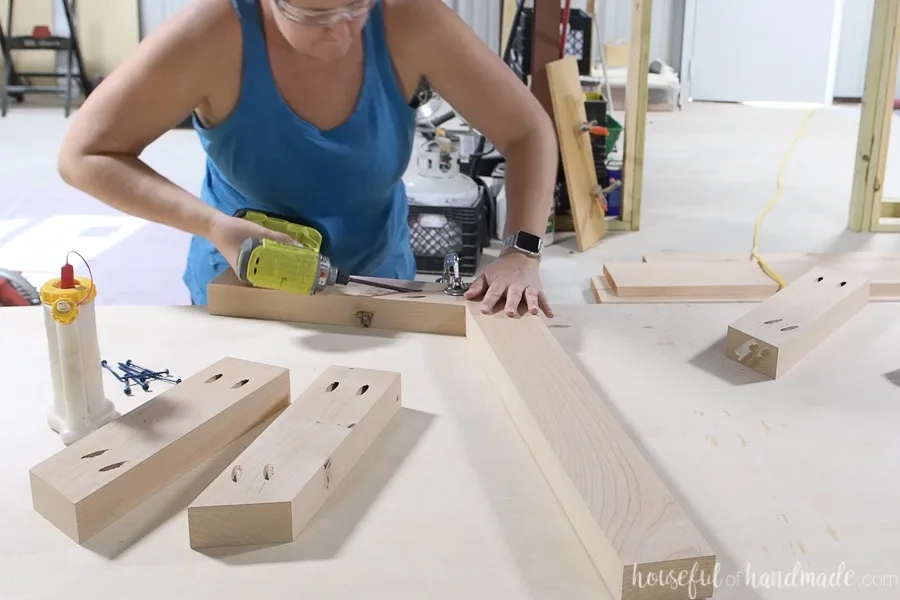
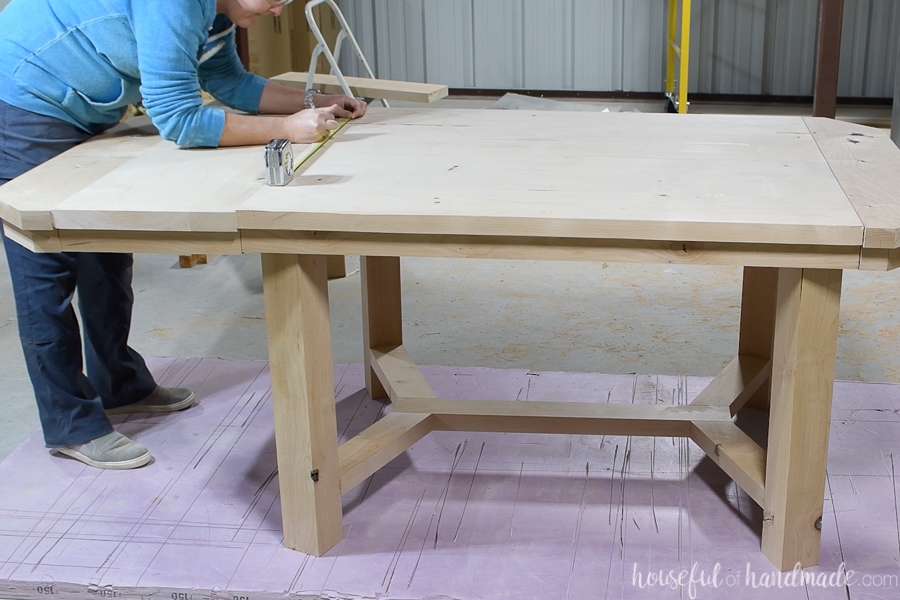
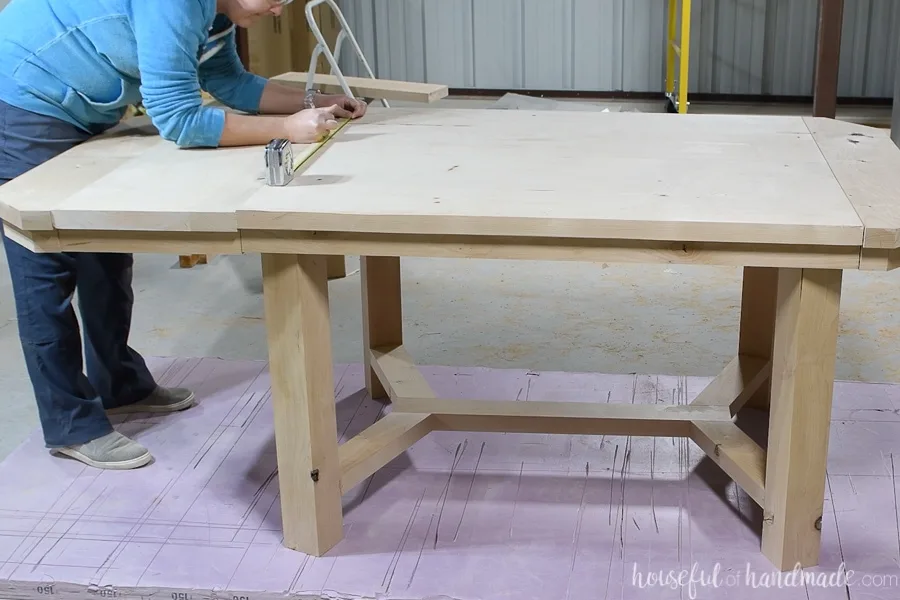
Build the Base
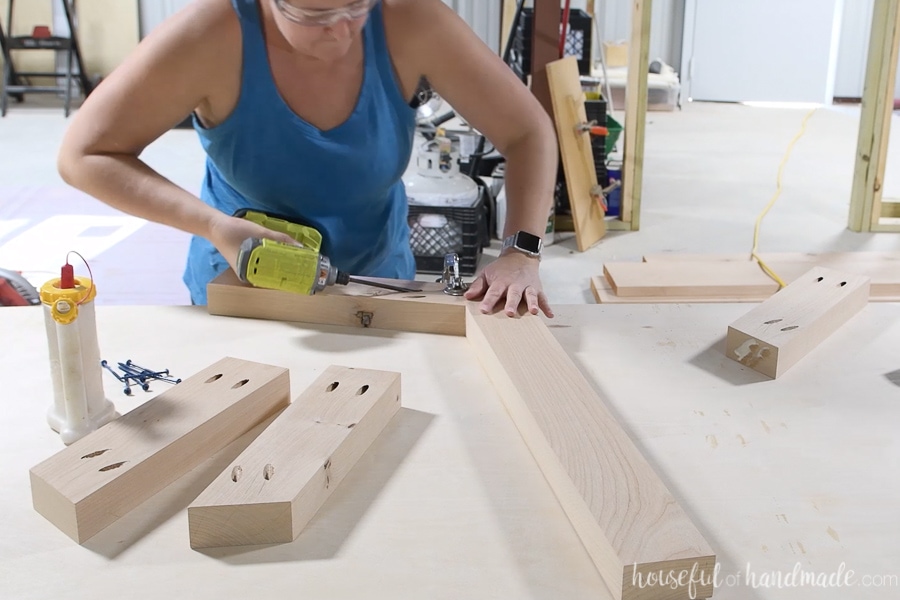
For the base, you need to cut the 28 1/2″ long legs from the 4×4 board.
Then cut a 31 5/8″ long base center and 14 5/8″ long base sides from the 2×4 board. The base sides need to be cut at a 22 1/2″ degree angle on one end.

Add 2 pocket holes set for 1 1/2″ thick material to each end of the four base sides. Make sure to mirror them so that all the pocket holes will be on the bottom when assembled.
Be careful when adding the pocket holes on the angled side so that they are not visible on the side and don’t accidentally poke out the end.
I used the two closer (A & B) pocket holes on the angled side to make certain it wouldn’t happen.

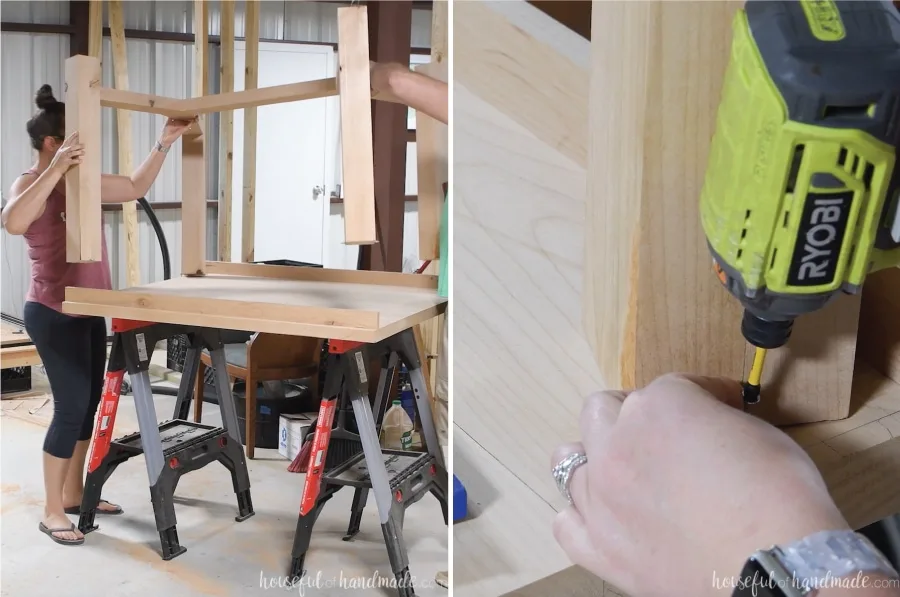
Now it’s time to attach the base all together. I started by attaching the base sides to the center then attaching the entire things to the legs, but it was hard to line things up on the legs with the turn on them.
So I would recommend attaching the legs to the side bases first, then attaching the side bases to the center base. The preferred order is described with 3D diagrams in the premium plans.
The side bases are attached to the legs so they are 4″ up from the floor. You can obviously adjust this up or down if you want. I wanted it high enough to allow my Roomba vacuum to easily clean under the base.
Attach the 90 degree angle side of the base sides to the legs with wood glue and 2 1/2″ pocket hole screws.
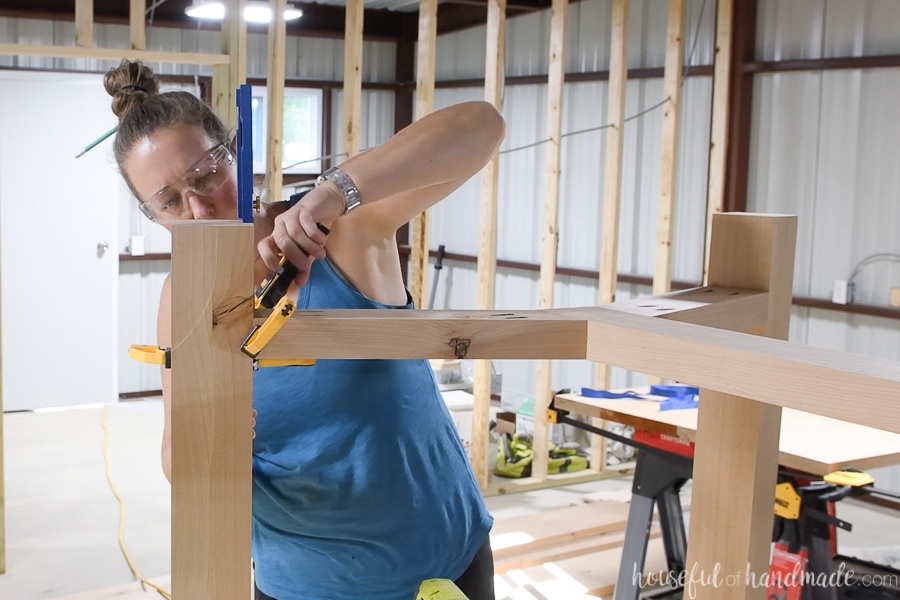

When attaching the side base pieces to the legs. Attach the angled side so it sits flush to the side of the center base piece. Attach with wood glue and 2 1/2″ pocket hole screws.
Then attach the other side so it is mirrored to the first.
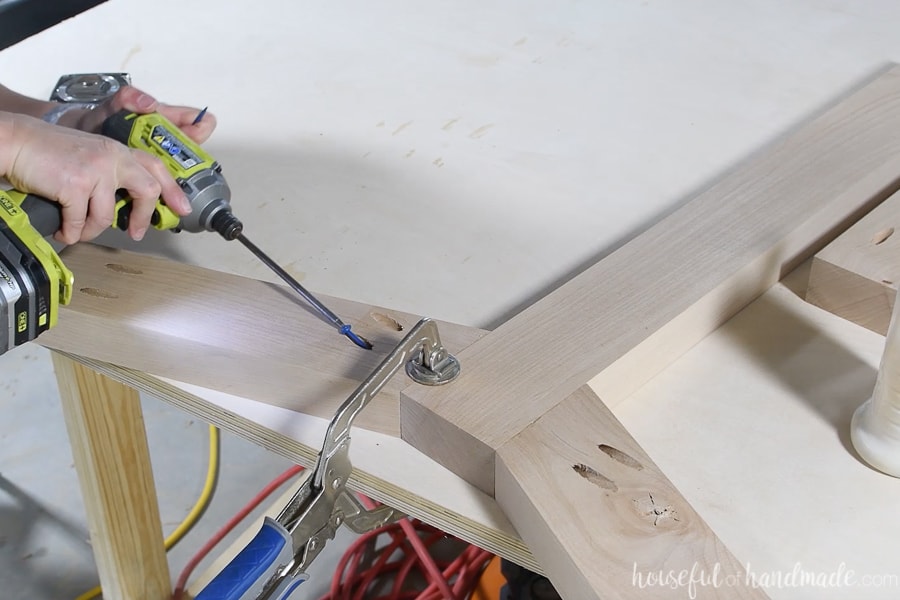
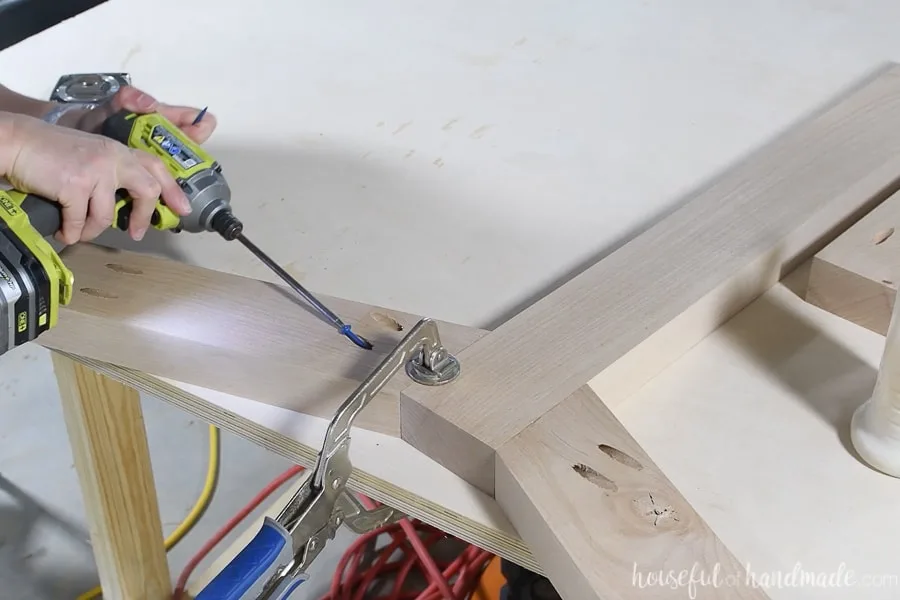
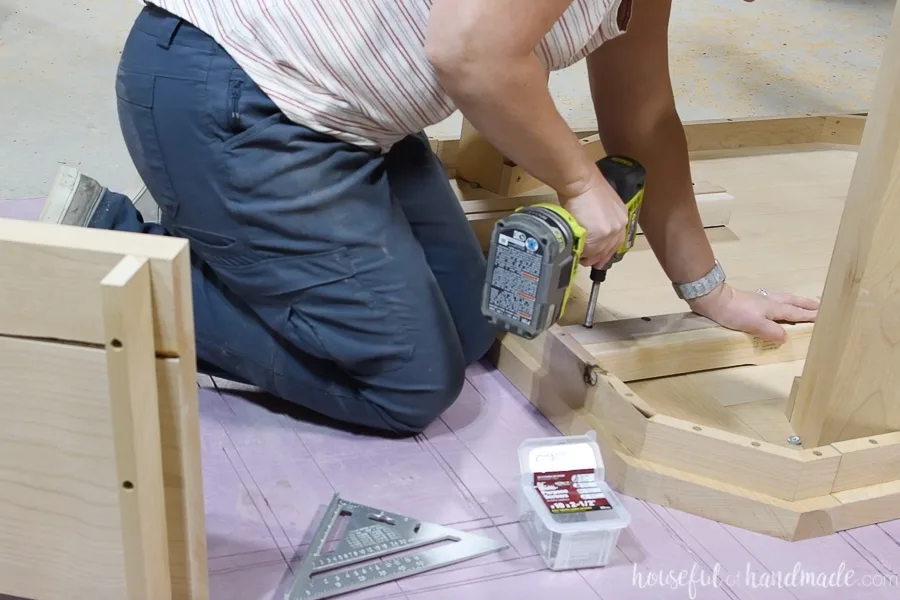
Attach the Base
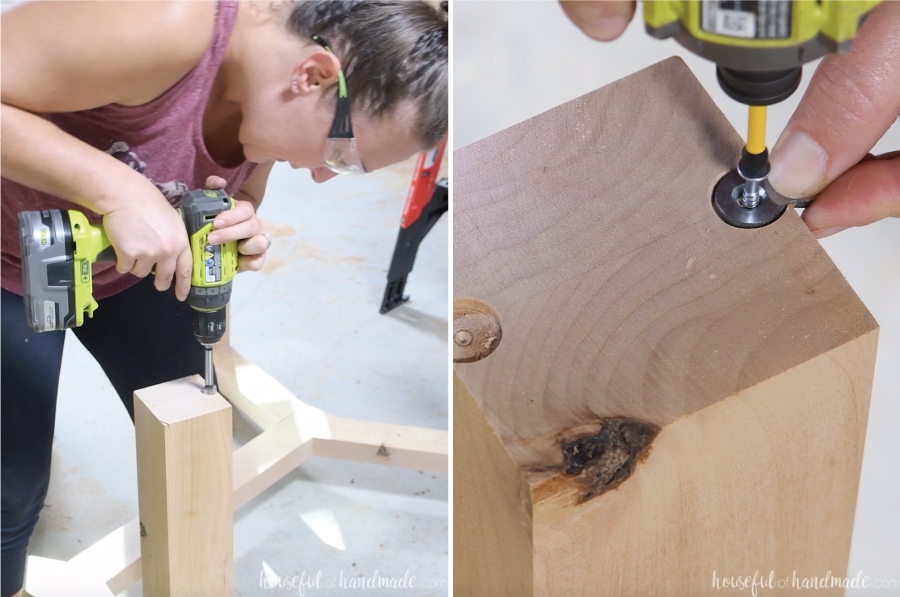
The first part of securing the legs/base to the table top is with 2 figure 8 fasteners on the top of each leg. The fasteners need to be on the sides of the table legs that do not run along the skirt sides.
Use a Forstner bit just bigger than the figure 8 fastener and drill a hole slightly over the edge of the side of the leg top. Secure one side of a figure 8 fastener to the hole.
Repeat for all legs.

Place the table top upside down on a work surface and then place the base on top of it. The legs will sit so they are at a 22 1/2 degree angle with the edge of the table.
Attach the legs to the table top with the other end of the figure 8 fastener. One corner of the leg will sit up agains the skirt and the other should be 3/4″ from the edge of the table top.

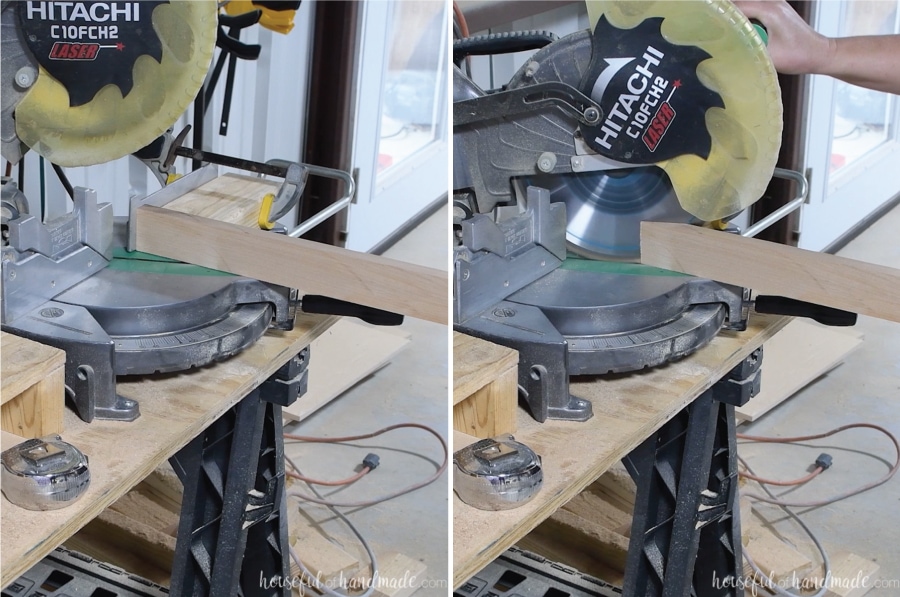
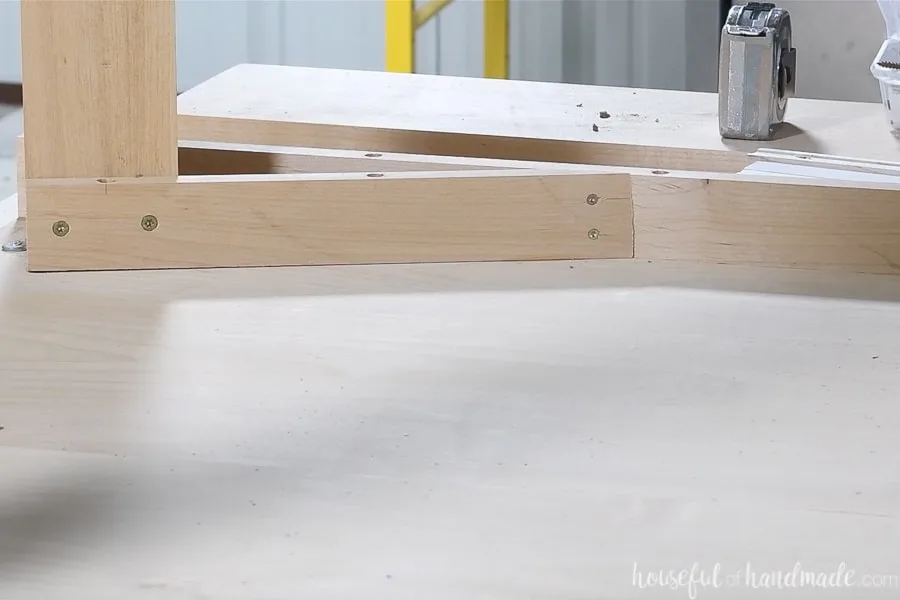
Now we will attach an inside skirt to give the legs a little more support. One end of this is cut so it is at a 67 1/2 degree angle.
This is tricky to do on a miter saw, but I set up a makeshift jig to accomplish it. With the miter saw set at a 22 1/2 degree angle, I clamped a piece of 2×4 to the fence of my miter saw so it was far enough away from the angled blade not to get cut.
Then I could press the 1×3 board up against the 2×4 and the fence to support it and cut the board to get the sharp angle.

Place the cut board up against the inside of the table skirt and mark the cut line on the edge of the table leg.

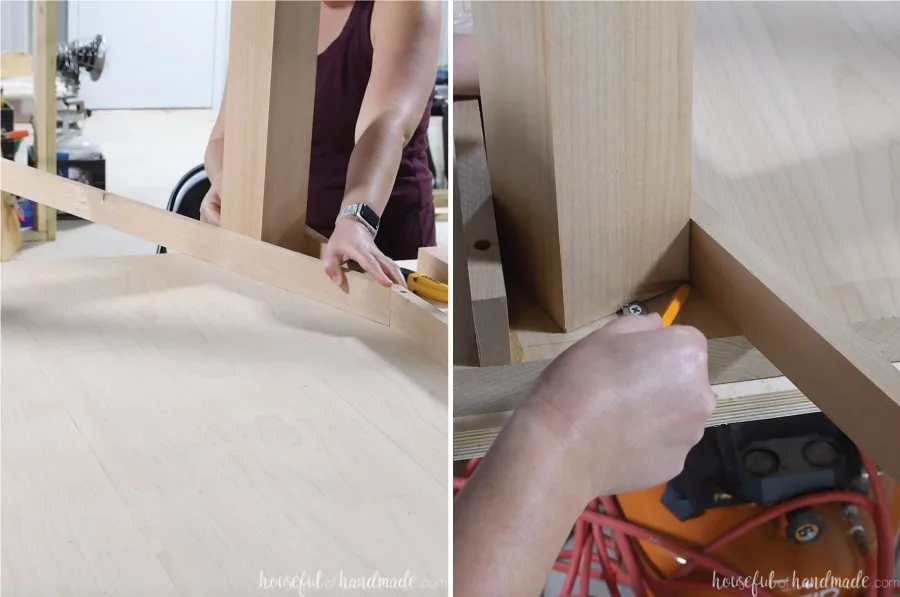
Cut the board. Drill (2) 1″ holes (like you did for the table skirt) in the side of it and predrill all the way through. Then attach it to the inside of the table.
Use wood glue on the side of the board that attaches to the table top and skirt, but do not add wood glue to the part that attaches to the leg, that way you can remove the legs if needed for transport or storage.
Attach the skirt to the table top with 2″ wood screws. Then attach it to the leg with 2″ wood screws. And finally attach it to the inside of the skirt with 1″ wood screws.
Repeat for all 4 legs.

Build the Breadboard Ends
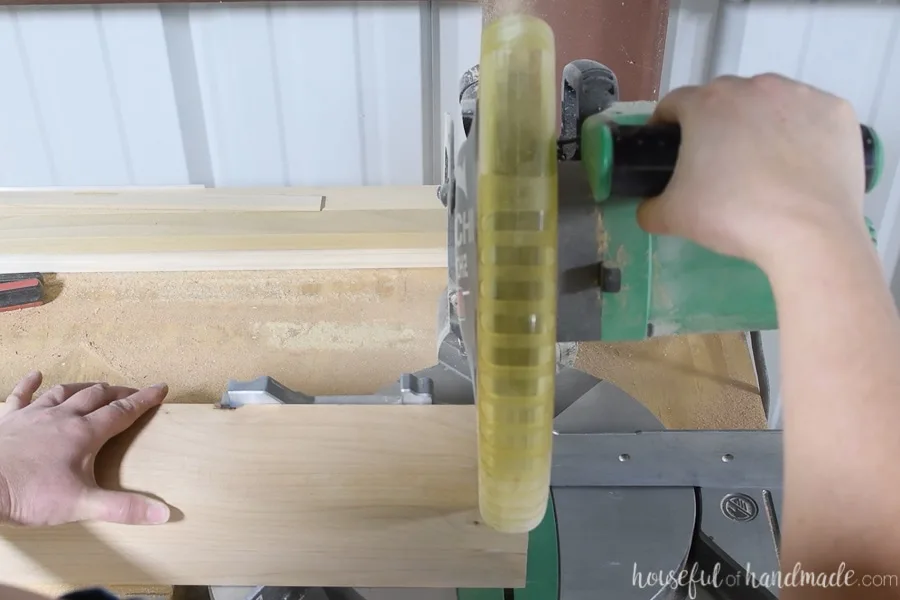
Cut 40″ long pieces from 2×8 boards for the ends. Then measure 5″ in from the top and 5″ down from the side and draw a line between them.
Cut this piece off with a circular saw and guide track.

For each breadboard skirt, cut 2″ long pieces with a 22 1/2 degree angle on one end and 6 3/8″ pieces with the 22 1/2 degree angle on both ends.
Drill one 1″ deep 3/8″ hole in the center of the smaller piece and 2 on the other piece. Then predrill for the screw all the way through (like you did for the other skirt pieces). Make sure the holes are on the correct sides so the pieces will be mirrored when attached.
Attach the 2″ piece so it is 3/4″ from the end of the breadboard and flush with the side. Secure with wood glue and 2″ wood screws.
Then attach the other pieces so the angled match up and the front is set 3/4″ back from the angle cut in the breadboard. Secure with wood glue and 2″ wood screws.
Then measure the opening between two sides and cut the final skirt piece to fit. This piece will also have a 22 1/2″ degree cut on both ends.
Drill the holes and predrill for the screws. Then attach with wood glue and 2″ wood screws. Repeat for the other breadboard making sure to mirror it since it will be on the other end of the table.
Build the Leaves
To build the two leaves, cut 40″ long pieces from the 2×8 boards. Each leaf will be made up of 2 pieces.
Use wood glue and biscuits (or pocket holes) to attach the two pieces together along the long edge.
Then cut the 14 1/2″ skirt pieces from the 1×3 board for each leaf. Attach these the same way you attached all the other skirt pieces. They should be set back 3/4″ in from the edges of the leaves.

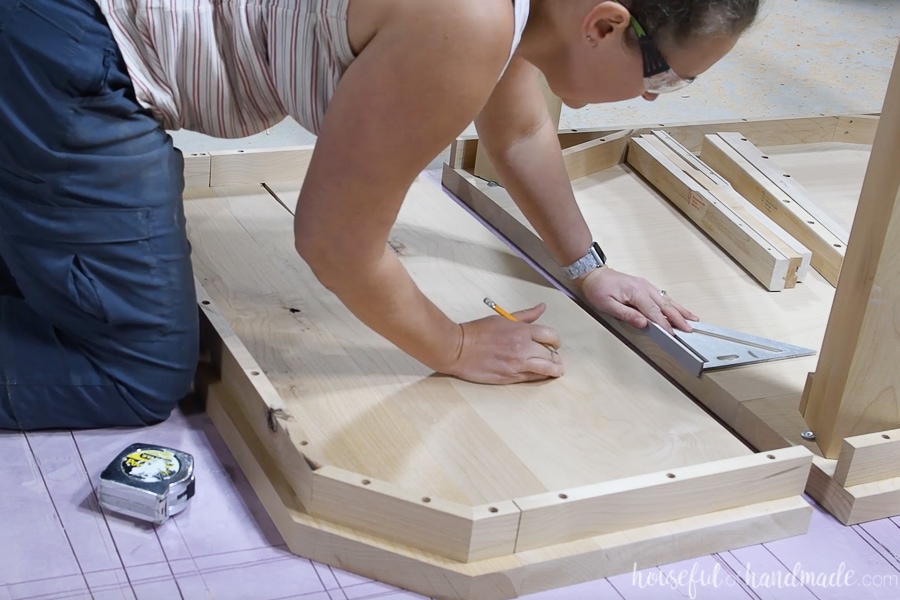
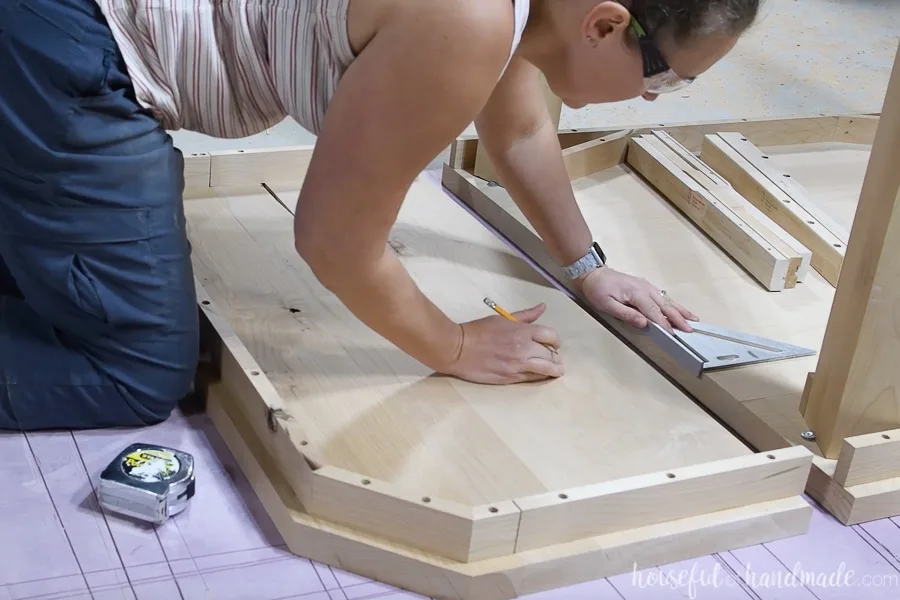
Attach the Ends and Leaves
Now it’s time to put all the pieces together. This is the part that requires precision. So get a very sharp pencil and make sure you have enough lighting to easily see the thin lines.
I used the rigid foam I keep in my shop for cutting plywood with a circular saw on the floor of my shop as my worktable from here on out. It protected the top of my table and made it more comfortable for me to kneel next to it.
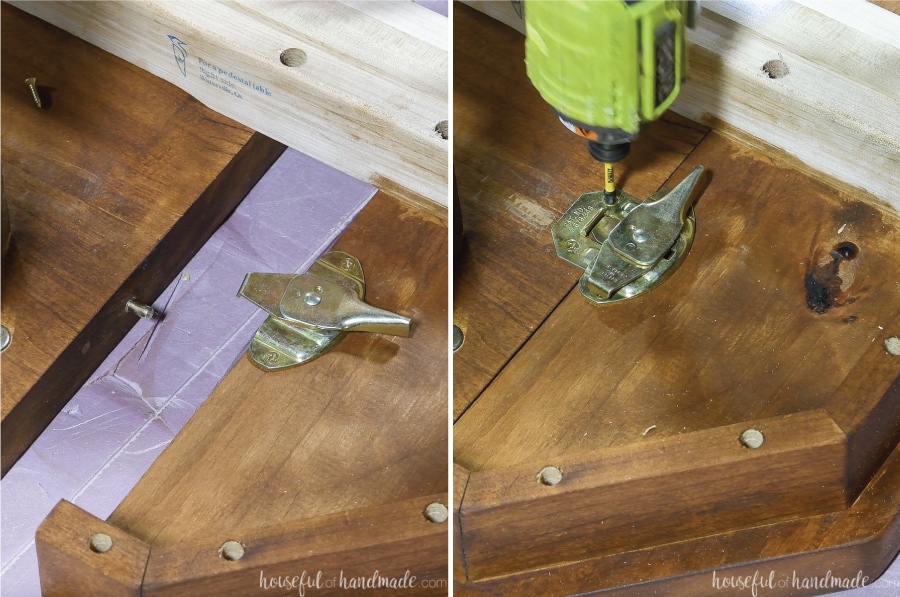
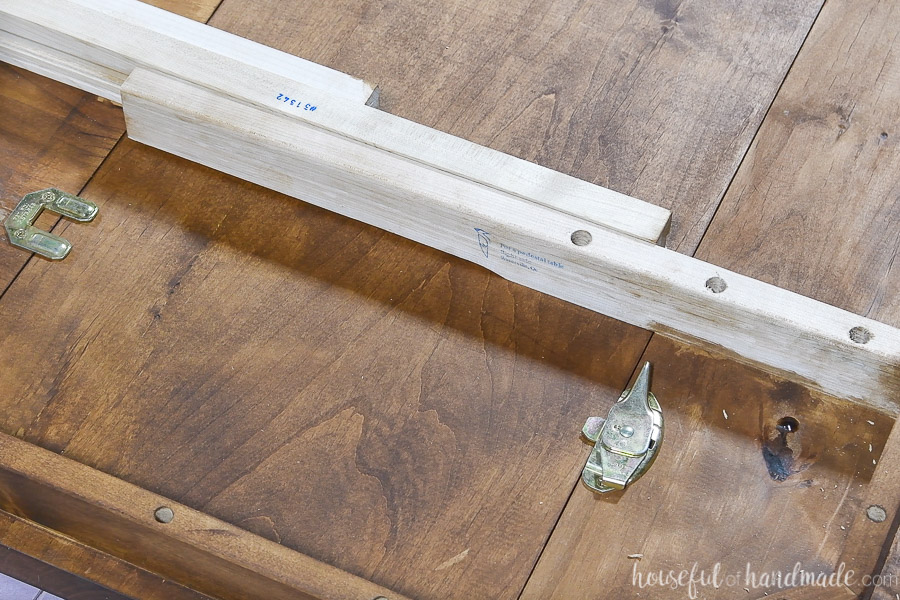
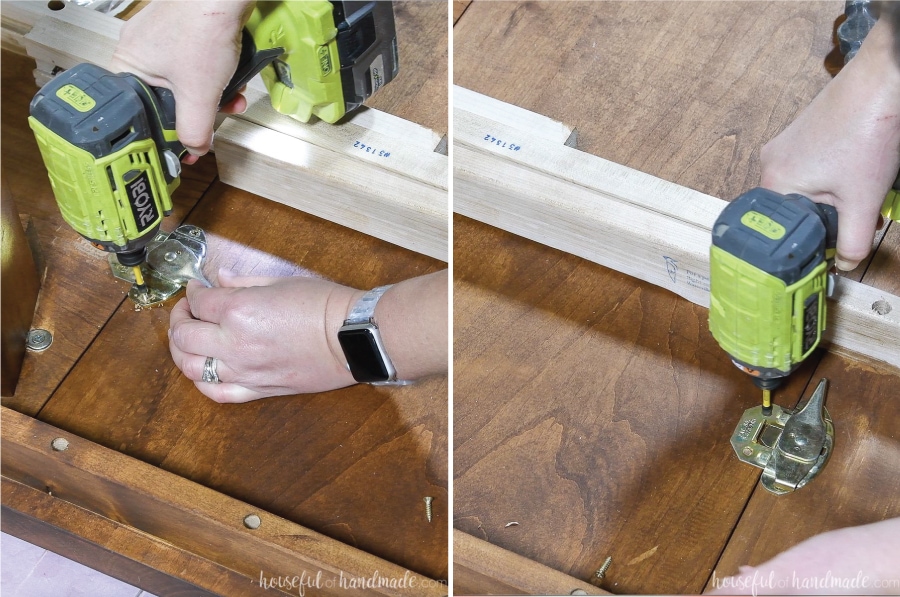
Draw a line 11″ in from each side of the table top. Make sure this line is perfectly perpendicular to the edge of the table top. If the slides are not straight they will not slide easily or cause the ends to shift to the sides so things don’t line up nicely when they are opened.
Attach the table slides so the side is along this line. Use the recommended hardware/screws to attach them based on the slides you got. Attach them to the table top and breadboard ends.
My slides had a right and left side to them so check if yours do and make sure to attach them to the proper side.

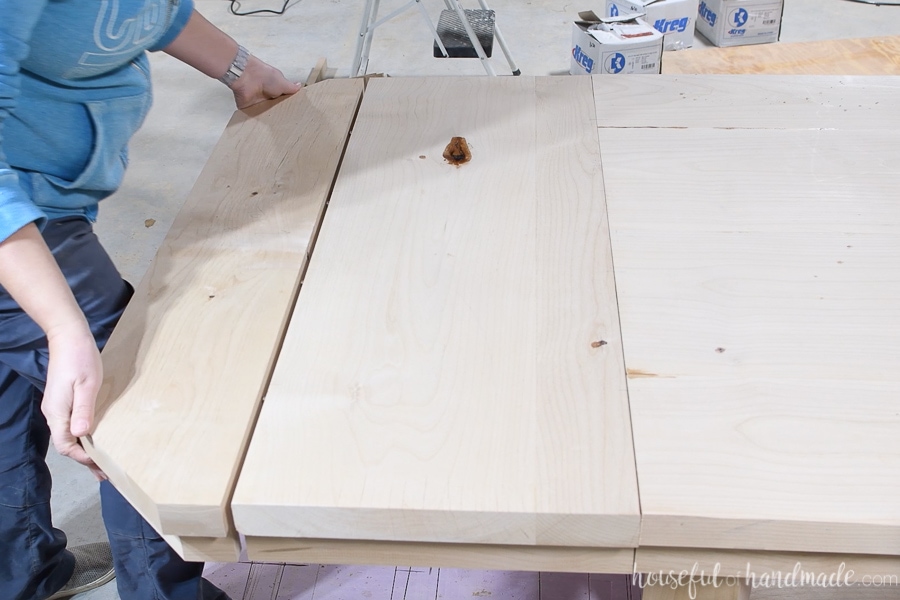
Now get a hand and flip the table back over. Add the leaf into the side of the table sitting on the slides. The top might not line up perfectly, but we will fix that with the pins.
Make sure the sides are lining up where you want them, but you will also sand the ends to line up even better when it’s all assembled.
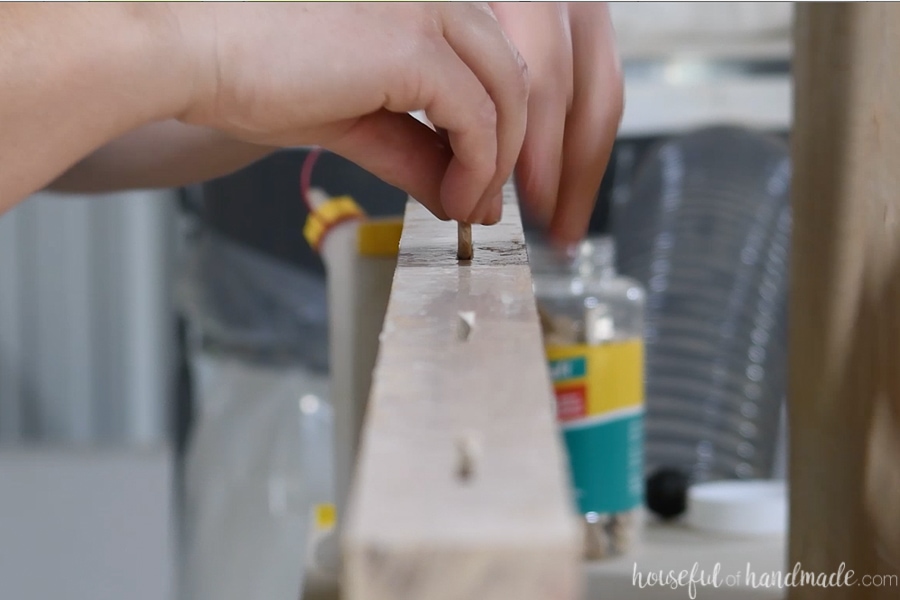
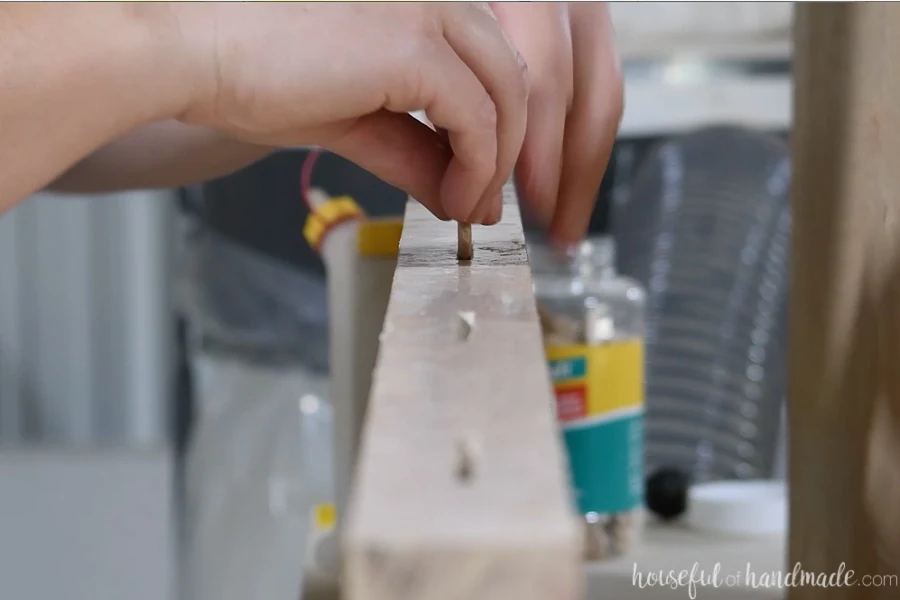
Mark where you will be installing the shelf pins. These are going to help line up the leaves/breadboard end when installed and give them a little extra strength.
You can skip this if you want but it takes your DIY dining table to a professional level.
I added 4 pins along each side, so I made a mark every 8″.
Then using a square flush with the end of the table, draw a line across the seam of the table top/leaf and leaf/end. Confirm that the line matches up with the leaf removed between the table top/end.
Then use your square to transfer this line to the side of the opening.
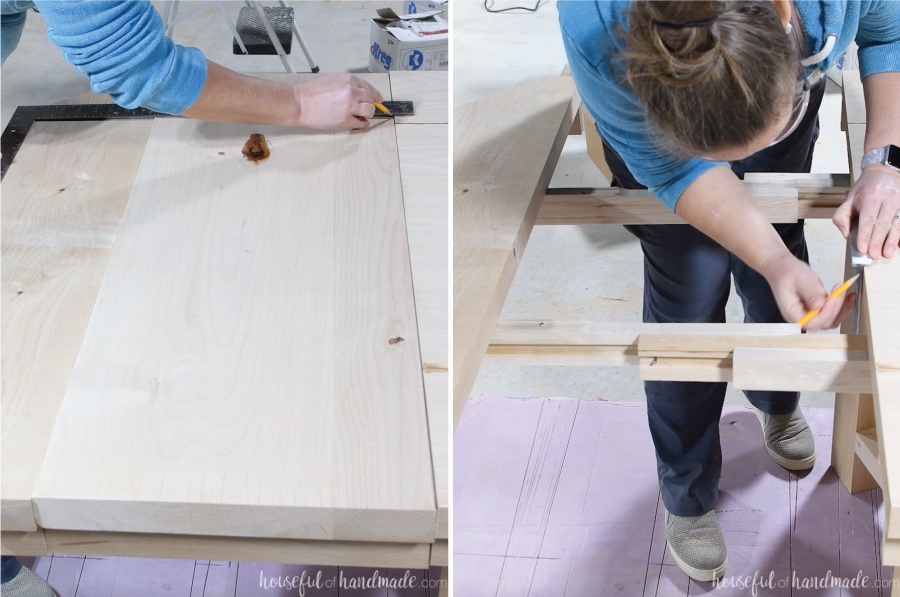

Using the self centering dowel jig, carefully line up the line for the 1/4″ hole on the jig to line you made for the pin. Drill a 1/4″ hole just deeper than 1/2″ of the shelf pin.
Drill the hole on both sides of the leaf and the inside of the end and table top.
Hammer in the shelf pins on the table top side. If your shelf pins have a tiny ring around them like mine did, tap them in so the ring is inside the end of the table top.
Using a 9/32 drill bit (just 1/32″ larger than the 1/4″ drill bit you just used), drill the holes you didn’t hammer the shelf pins into. This will make it easier to slide the sides open to add the leaves.
Do the same for the leaf. The side that lines up to the table top will get the slightly larger holes and the side that lines up to the breadboard will get the pins hammered into it.

Then test out your pins by pressing everything together. It might take a little shimmying to line it all up, but they will all go together for a nice tight fit.

High End Finishing Touches
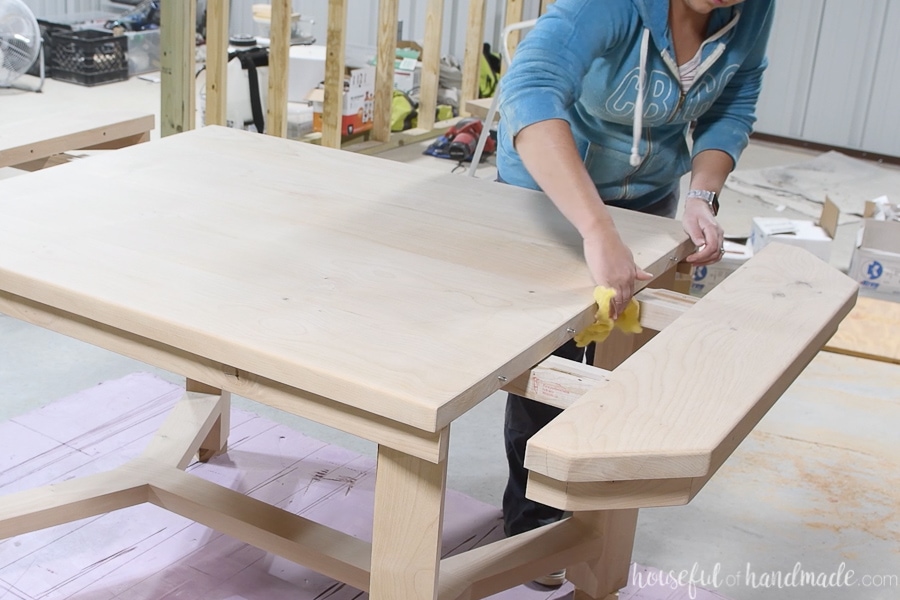
With both the leaves installed. Sand the entire table. This will allow you to adjust any high points from leaf to table to end.
I started with a 150 grit to smooth any high spots, then finished with a 220 grit sanding on the entire table.
To really give your DIY dining table a high end look, use a palm router to router a tiny chamfer on the sides of the leaves, table top and ends. This makes it so any imperfections are more hidden when it is all put together.
Plus it looks really nice.


Then with the leaves installed, router a round over (or other decorative edge) around the entire table top.


Touch up any sanding as needed.
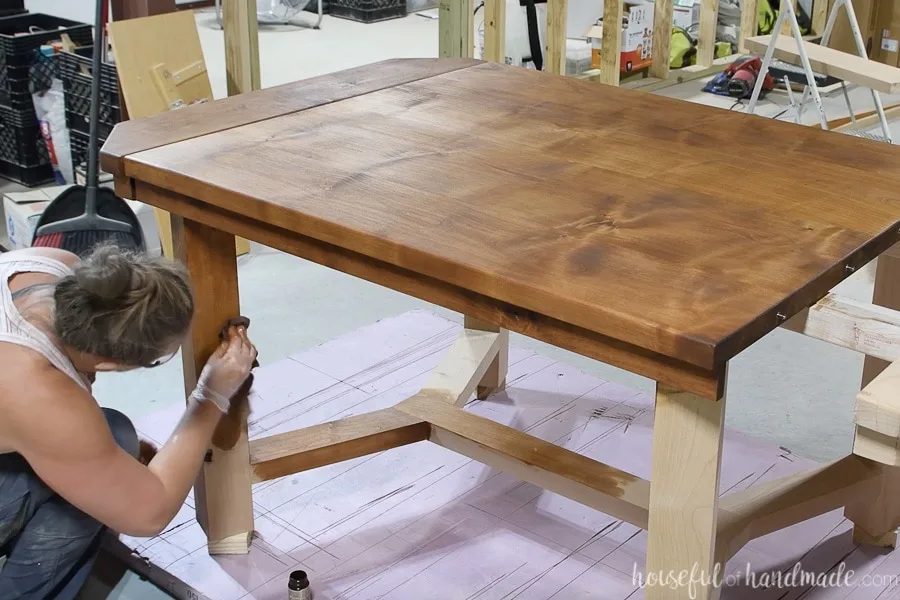
Apply the TrueTone Finish
Now it’s time to finally add the TrueTone finish. It’s the perfect finish to all the hard work!
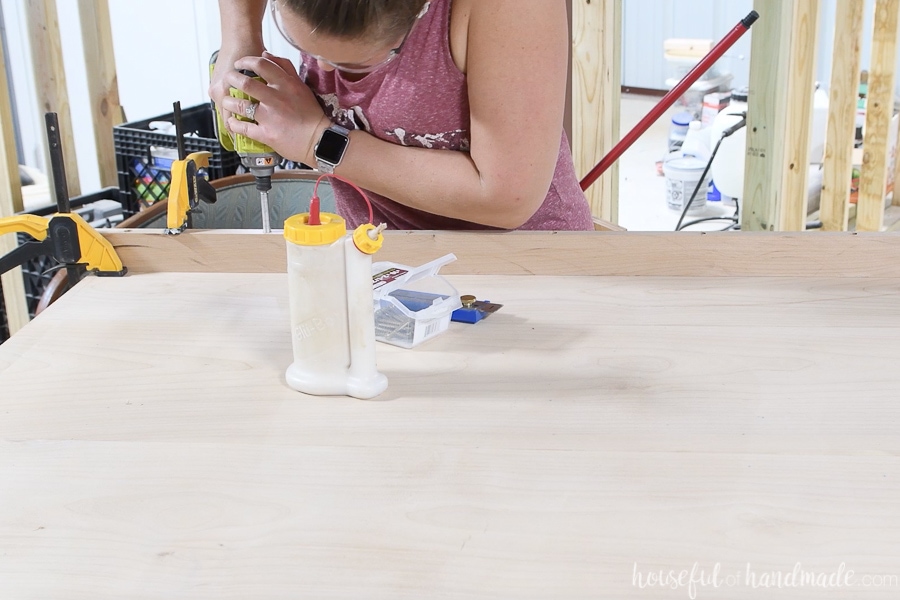
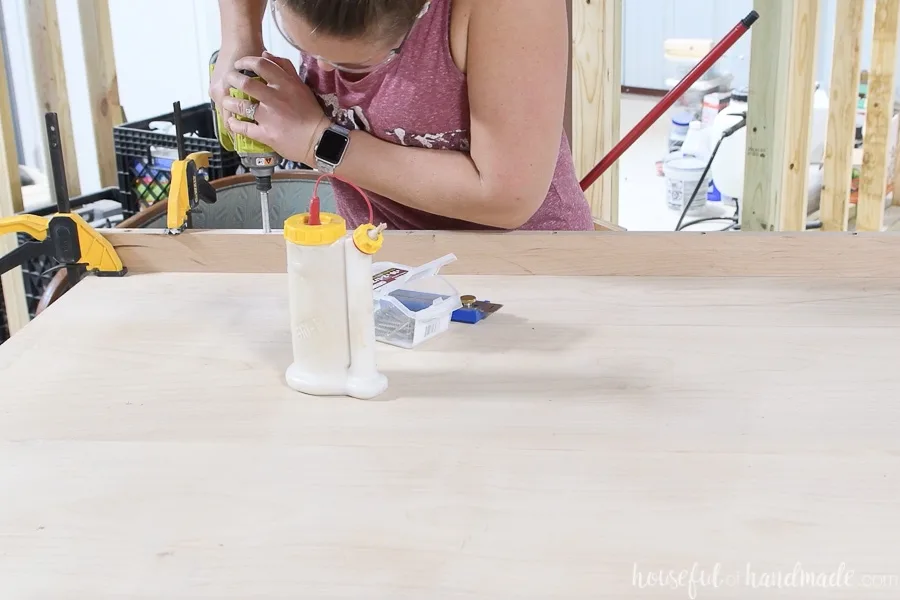
Before adding the finish, vacuum the dust off the entire table. Then dust it off with a tack cloth remove any residual dust.
You can remove the breadboard ends if you want during finishing. But since the TrueTone is a buff-in finish, it was easy to apply the finish around the table slides.

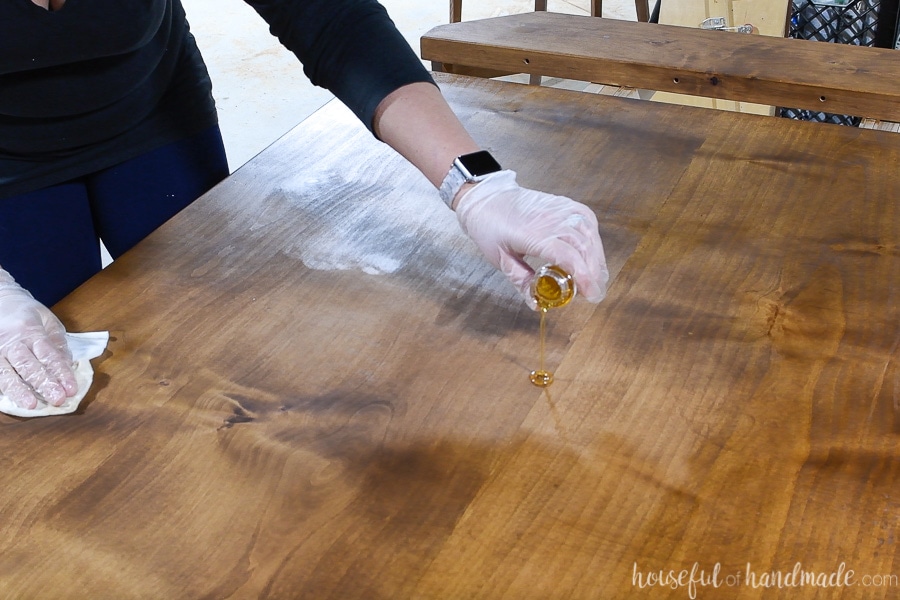
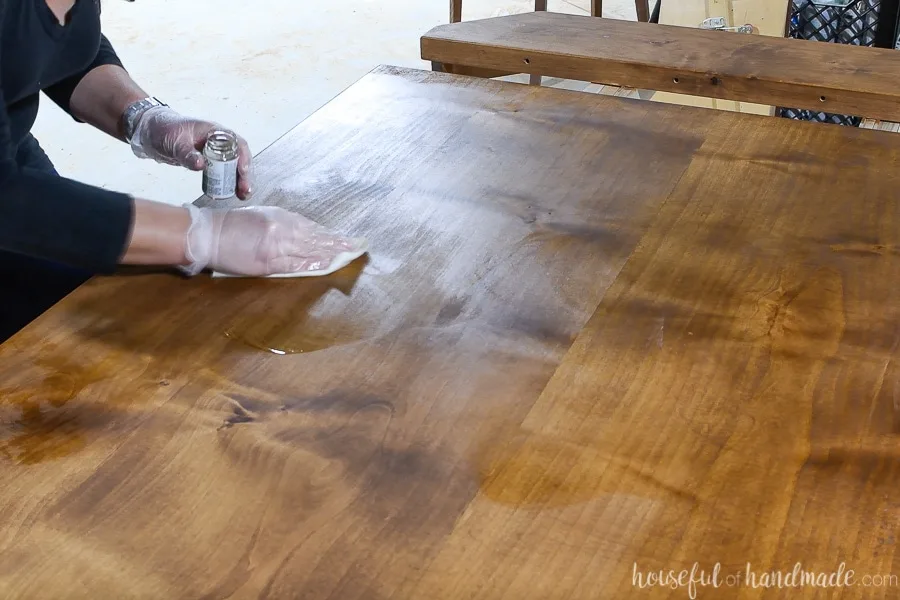
To apply the TrueTone color infused tung oil, make sure you are wearing gloves. Then use a clean, lint-free rag to buff in the finish.
You can pour a puddle on the surface, or just dip your rag in the color. I preferred the dip method for the color.
On the small jars, I just placed the rag over the top of the bottle and tipped it over. Then used that to buff into the wood in a circular motion. This also kept the color mixed as I went so I didn’t have to think about shaking it as I went.

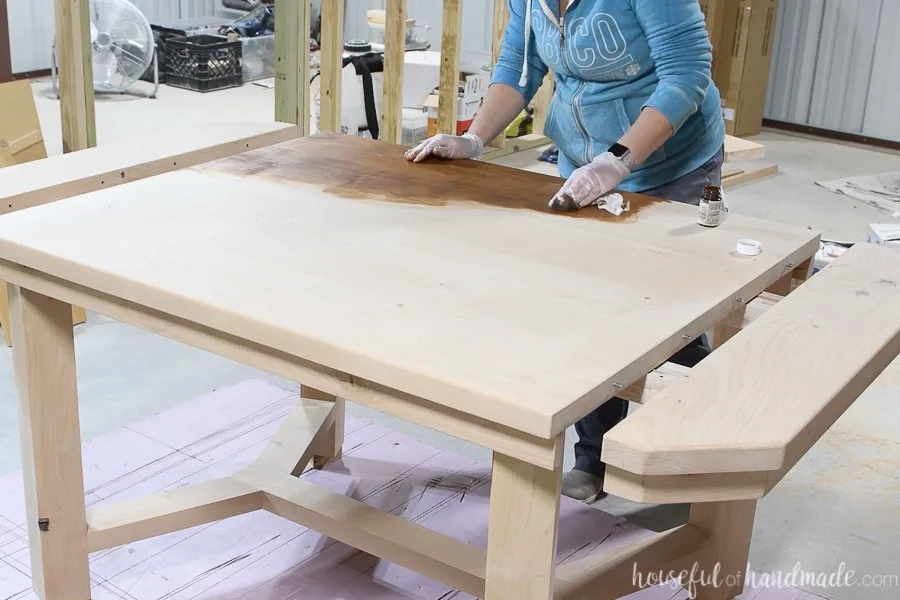
The buff in finish is very easy to apply. Rub it in until you get a uniform color. Make sure not to leave excess tung oil on the surface for too long. Just go back over it with a clean rag to buff off any excess shiny spots.
Knots, cracks, and soft grain may bleed out excess tung oil as you dry. You just buff off any spots you see with a clean rag.

Let the color infused layer dry for 24 hours before applying the finishing layer. Waterlox cures with exposure to oxygen so use a few fans/open windows to give them more airflow to ensure proper drying.
Once dry, it’s time for the Tung oil finish. This is a clear coat that goes over the color layer. The color layer does not waterproof on it’s own, it requires a sealing layer.
You can use the other Waterlox finishes with the TrueTone color infused tun oil if you want a more finished look. But I wanted the unfinished matte look for our dining room table. This is what you get with the TrueTone Tung Oil finish.
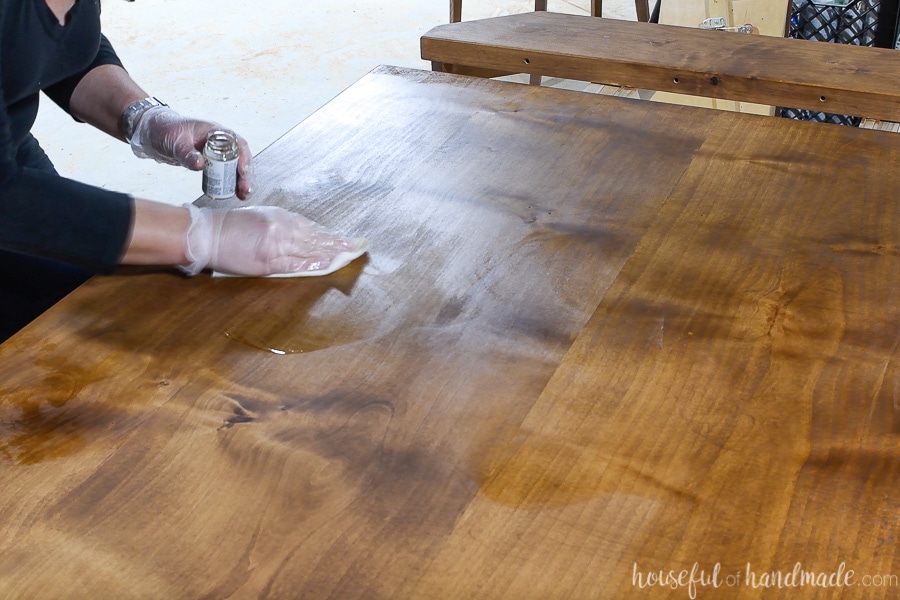
To apply, pour a small puddle of the sealer on the dry table. Then just like the color layer, buff it in with a clean, lint-free cloth.
Continue to buff it in in a circular motion and add more finish as you go. You do not want the surface of the wood to look wet like you do with other finishes. This one absorbs into the wood and just slightly appears shiny.
If you still have shiny spots after 15-30 minutes, buff them off with a clean rag. You don’t want excess tun oil to sit on the surface.
Let the TrueTone finish dry just like you did with the color layer. Add extra airflow with open windows and fans.
Apply a second coat if desired. Make sure to wait 24 hours between coats.
The TrueTone is not water resistant until it cures for 7 days. So let your table have plenty of airflow and protect it from water during this time.
Adding Final Hardware
The final step is to add the table leaf locks to the underside of the table. These will hold the ends/leaves in place. They also pull the seam nice and tight helping to prevent food from getting inside.
Start by pressing the breadboard end firmly up against the table top. Attach the table leaf lock according to the instructions.

Then unlock them and slide the leaf into place. Push it tightly together.

Attach the other leaf locks so they fit into the ones already attached. Repeat for the other end.

Don’t forget to grab the printable PDF plans here!
Premium plans include:
- Recommended Tools
- Materials list
- Easy to read cut list table
- Step-by-step instructions with 3D renderings
- Helpful resources
- BONUS: 3D SketchUp file
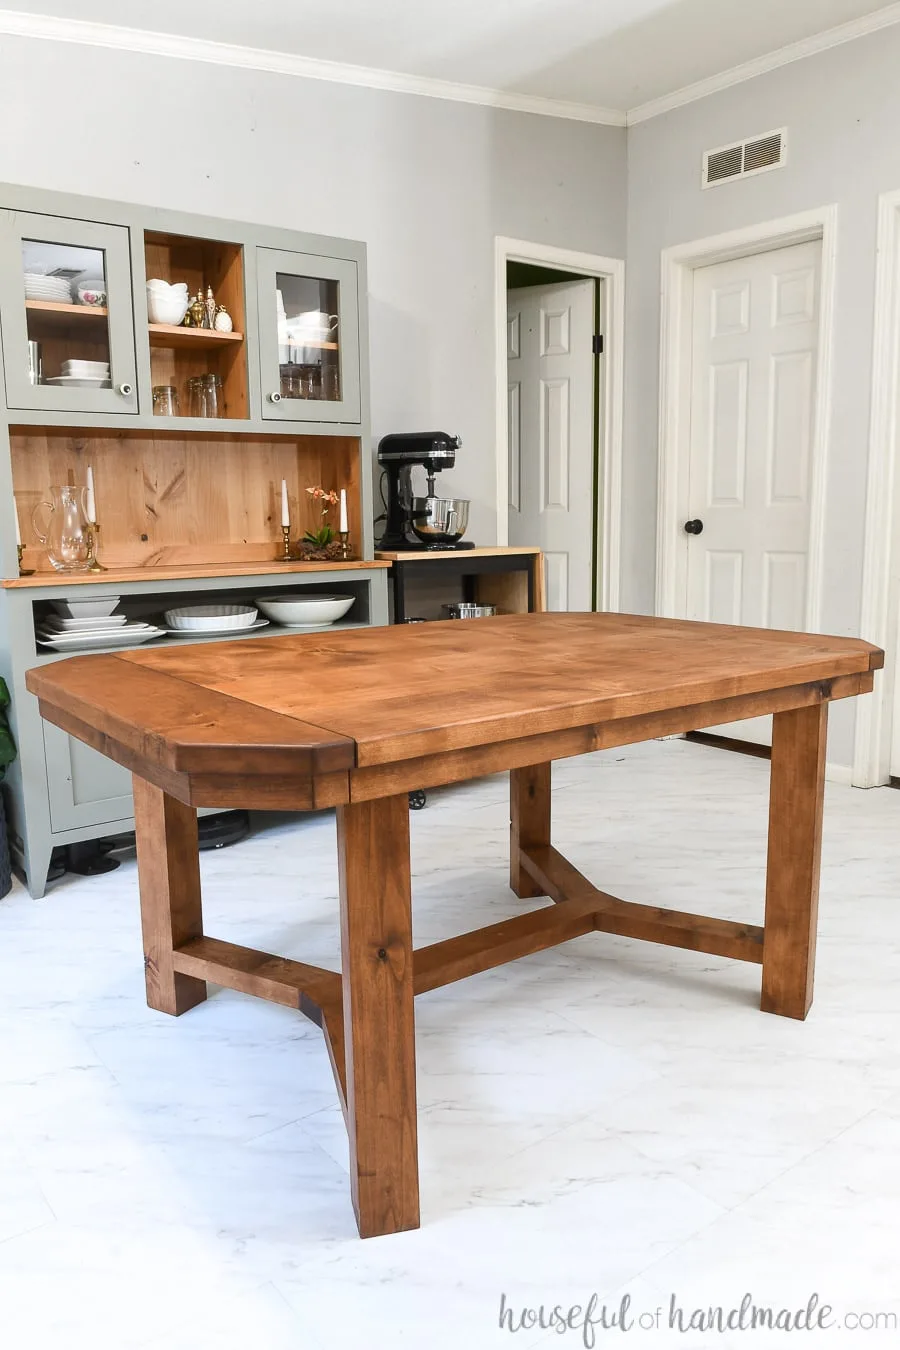
You did it!
And now your table is all done!!!
This gorgeous dining room table with leaves is definitely a larger DIY project, but it was well worth the additional steps to get an amazing table that rivals that of high-end furniture stores (step aside Pottery Barn!!!!).

Now I need to turn my attention to seating. I am thinking two smaller benches and two larger chairs for the ends would work great in our smaller space, but still feel quite fancy.
Until then, I can’t wait to sit down to dinner at our new dining table, even if we are still sitting on folding chairs 😉

Happy Building!


Thank you to Waterlox for sponsoring this post. I only recommend products that I use and love and all opinions are 100% my own. Click here to read my full disclosure policy.

Tara
Tuesday 26th of December 2023
I would love to make this table, but larger to start with and then still have added leaves. Any suggestions on increasing the sizing overall while still following these directions?
Deb
Tuesday 21st of November 2023
Beautiful! I really love the shape and look of the base. Do you think it's possible to make this table sturdy enough with thinner wood?
Bob
Wednesday 4th of January 2023
Kati Very nice table. What size table glides did you use and where did you get them?
Bob Hammond
Kati Farrer
Friday 13th of January 2023
Bob, thank you! I used the 26" wood slides from Rockler.
Fredrik
Thursday 24th of November 2022
I found your blog via Pinterest. You made a beautiful table, with an astonishing finish!
I work in renovation and as a stud / rough carpenter in Sweden. At home, I have been sketching on a few closets, built from scratch.
You introduced a company to me, providing products that I have not come across before. Those are very interesting, providing quality colors for several difficult woods to color - such as pine and alder.
So - thank you, and again, great work!
Best regards Fredrik
Betty
Friday 26th of August 2022
What are the dimensions of the finished table?
Kati Farrer
Monday 29th of August 2022
60.5 x 40 inches and with leaves its 89.5 x 40