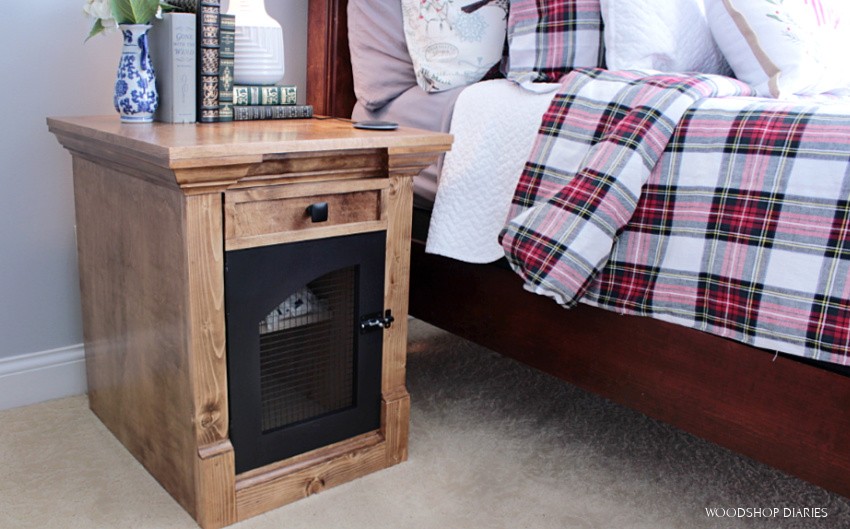
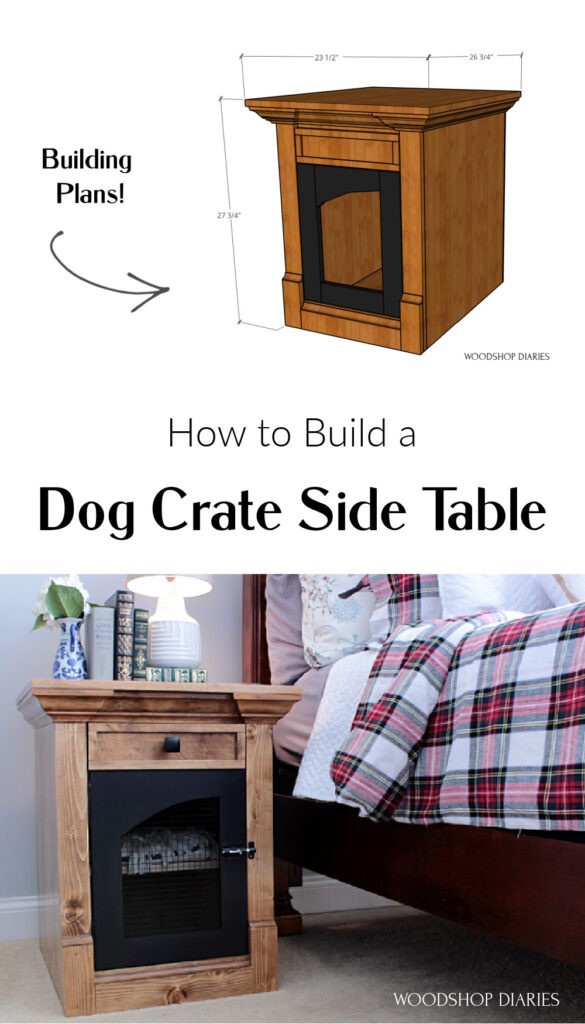
In this post, I’m sharing how to build a DIY dog crate end table!
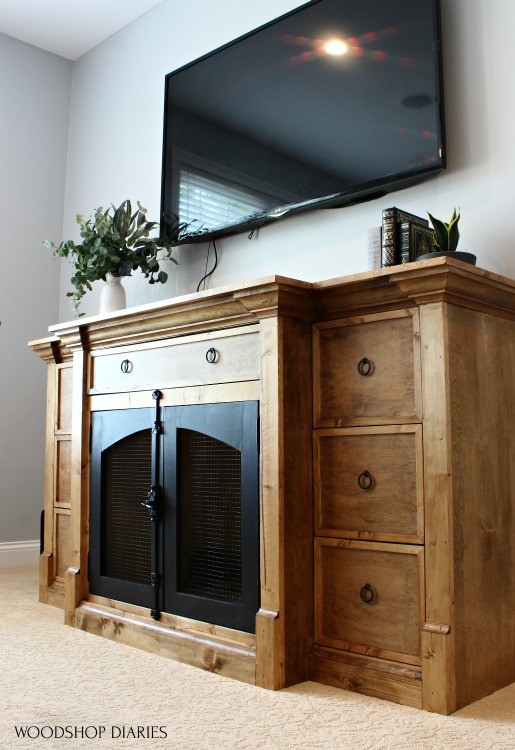
If you remember back this summer, I built my sister a console with all the bells and whistles for them to use as both a dresser and a dog crate. See it below?? *heart eyes*
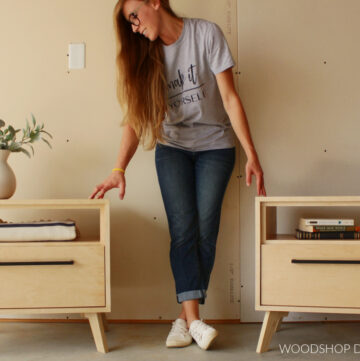
And today, I’m sharing how to build the matching nightstands.
.
What’s cool about this set is that you can use it as nightstands and a dresser in the bedroom, but it also works great as a TV console and end tables for the living room, too!
.
This end table/nightstand design obviously works fine as a dog crate, but if you don’t need the crate function, it works fine as a storage cabinet, too.
.
I’ve got the plans, materials list, and all the details below, and a video tutorial for you right here:
This post contains affiliate links. See policies.
For this DIY Dog Crate End Table, You Will Need:
- (1) sheet ¾″ plywood
- ¼ sheet ¼″ plywood
- (2) 1x3x8
- (1) 1x4x8
- (1) 1x6x6 (only need small piece)
- Crown molding
- Cove molding
- 1 pair 16″ ball bearing drawer slides
- 1 pair butt hinges
- 1 ¼″ pocket hole screws
- Hardware mesh (optional)
- Miter Saw
- Circular Saw
- Nail Gun
- Jig saw (optional)
- Drill
- Pocket Hole Jig
- Staple gun & 9 ⅙″ staples
Step 1: Cut Down Plywood Sheet
To get started, the first thing I did was start cutting down the ¾″ plywood sheet.
.
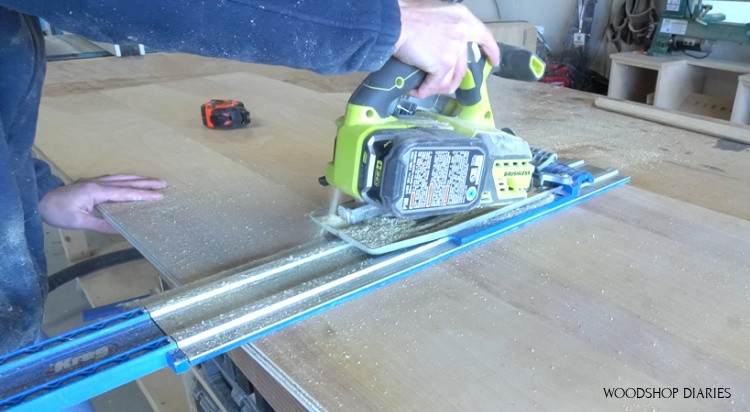
I used my circular saw and Kreg Rip Cut to rip a 23 ¾″ strip from the full sheet to make the sides and the bottom. Save the rest of the plywood for the top later.
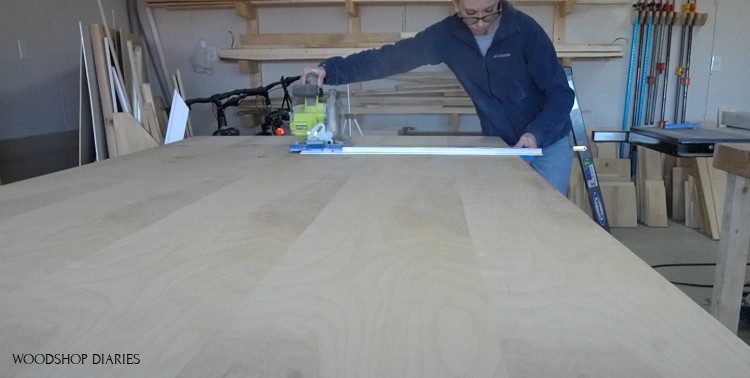
Then, I used my AccuCut and circular saw to cut these strips to their final size.
If you’re interested in how I cut down my plywood sheets, I’ve got a detailed guide here.
.
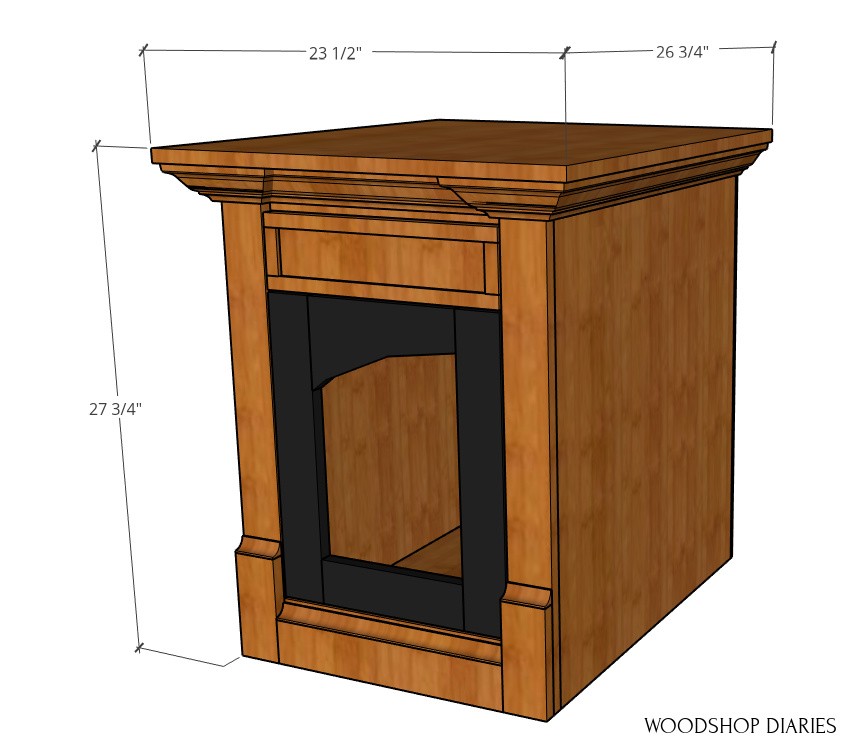
Each nightstand will have two 27″ long side panels and a 17 ½″ long bottom panel.
.
I didn’t bother edge banding these pieces since the edges will be covered with a face frame later. I just sanded them a little and began assembly.
Step 2: Assemble End Table Cabinet Carcass
I used ¾″ pocket holes and 1 ¼″ pocket hole screws to attach the bottom panel between the side panels.
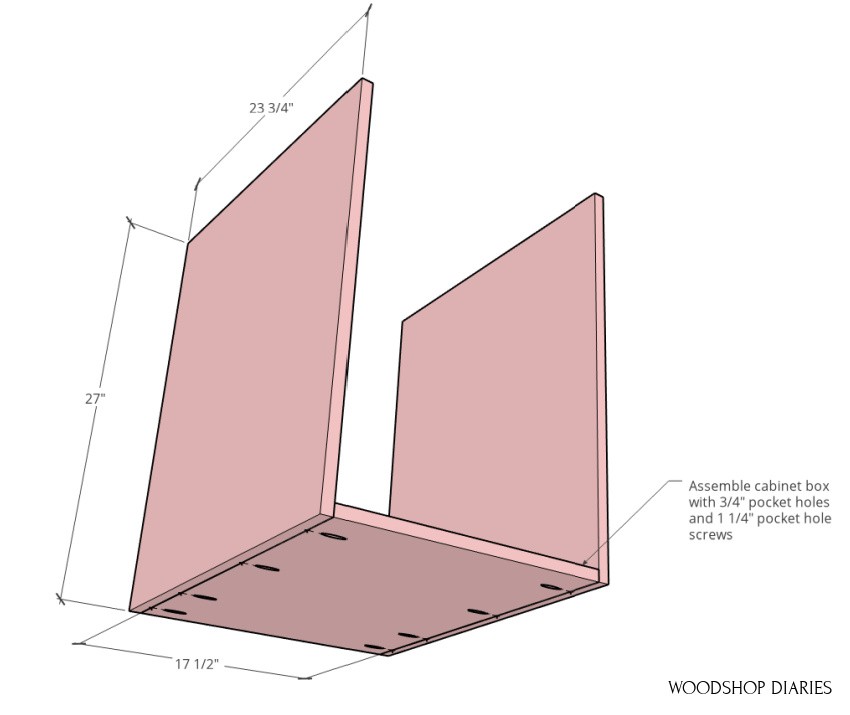
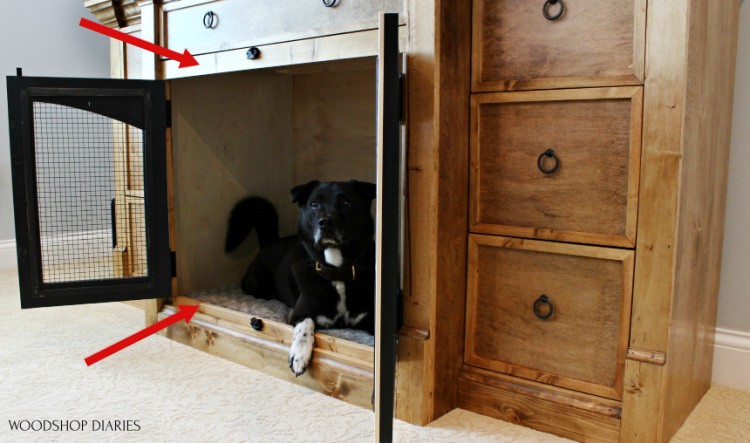
I attached these at the bottom just to give the dog a little more height once he’s inside the crate.
.
If you aren’t using this as a dog crate or don’t need the extra height, you can install this panel 3 ½″ up from the bottom so that it’ll be flush across the bottom once the face frame is attached. Either way works fine.
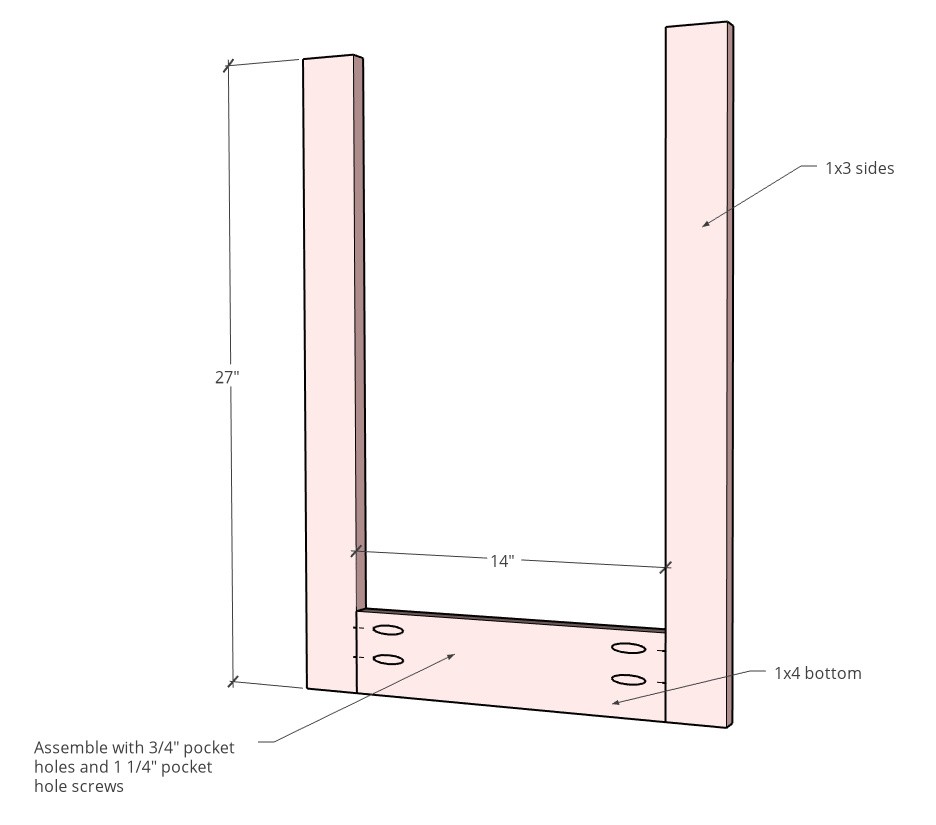
Step 3: Add Face Frame and Support Pieces
Once the carcasses were together, I started working on the face frames and top support pieces.
.
The face frames on these nightstands were made using 1x3s for the sides and a 1×4 at the bottom. I cut these to length on the miter saw and assembled using ¾″ pocket holes and 1 ¼″ pocket hole screws.
RELATED: Check out the TOP 10 tools and gadgets I recommend using for cabinet and furniture building here.
.
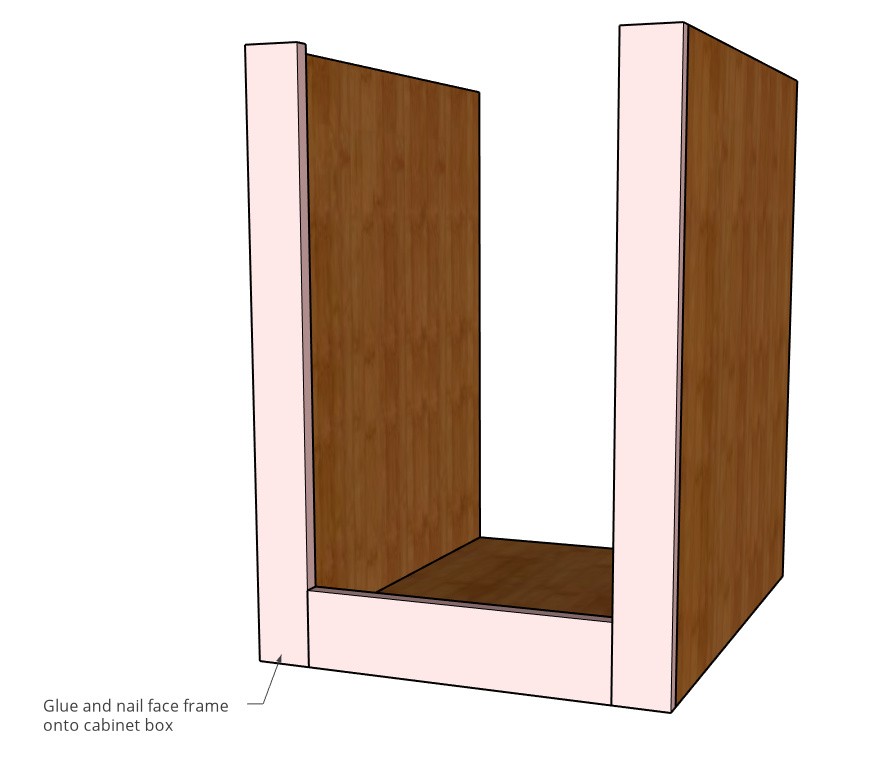
Then, I applied wood glue and used brad nails to secure to the front.
You may be wondering why there isn’t a top piece…yet.
.
So if you notice in the finished piece, the crown molding wraps around the 1×3 face frames. This was a detail my sister wanted in the console I built her, so I wanted these nightstands to have the same matching detail.
That meant the top piece of the “face frame” had to be installed behind the sides. If you don’t have the patience for cutting crown molding like this (it is a little tedious), feel free to attach a top to the face frame so that it’s flush instead of doing it this way.
.
But, I used pocket holes and screws to attach a 1×3 on the inside of the face frame like shown.
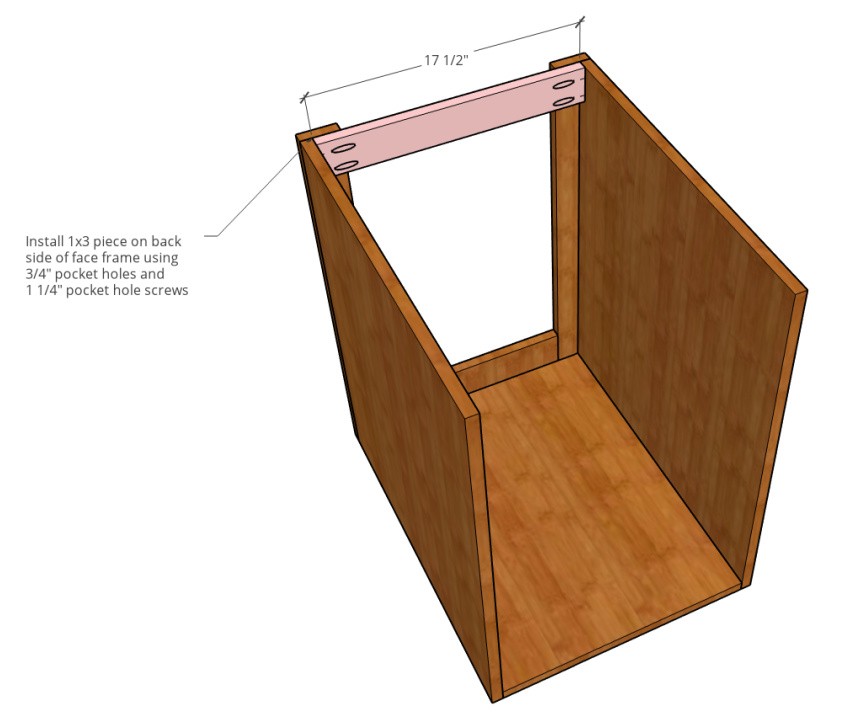
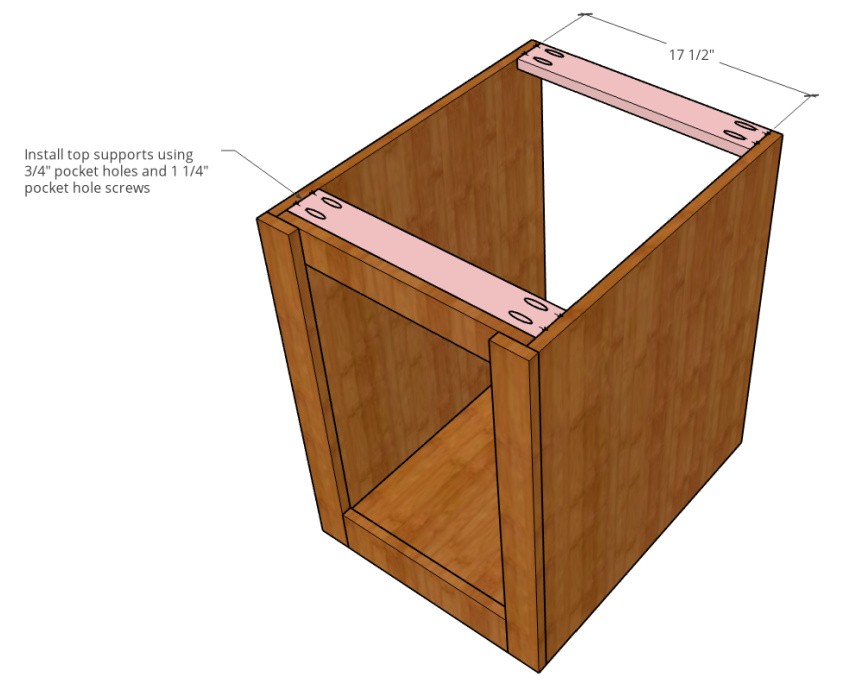
Then, I added two scrap plywood supports (or you can also use 1x3s) on the top here to give me somewhere to attach the top and the back panel later.
Now for the fun little details.
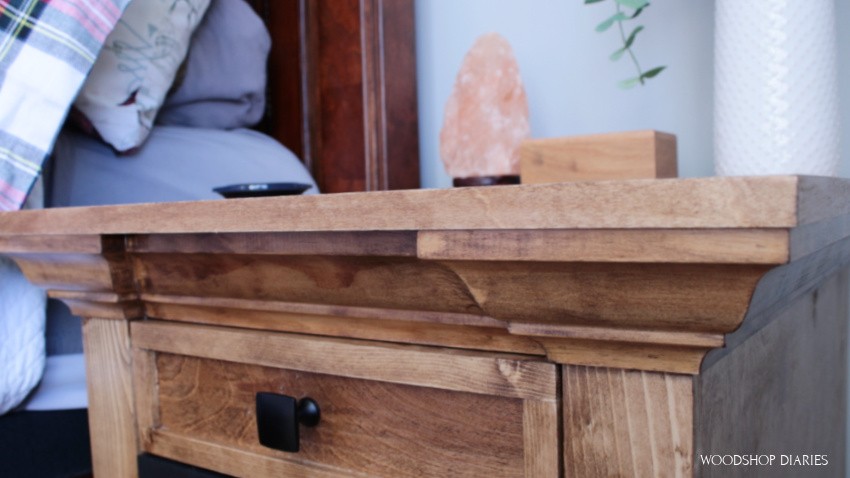
Step 4: Add Trim and Molding to Dog Crate End Table
My sister loves details. So whenever there’s an opportunity to add some, we do 😊
.
Just like with the matching console, I added some 1x3s on the bottom of the face frame, cutting to fit, then gluing and nailing into place.
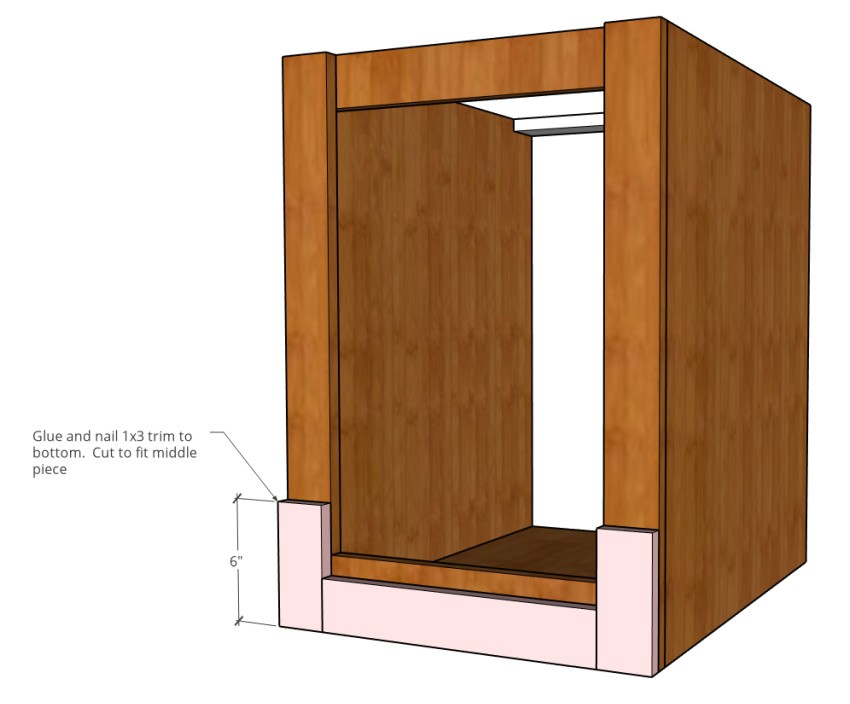
To top them off, I also added little cove molding pieces to fancy things up a little.

And the last detail before I started working on what’s inside the cabinet was adding crown molding along the top. I cut to fit pieces to fit around the top edge, wrapping around the face frame pieces and glued and nailed in place.
.
Now, it would make sense to attach the top before I did this, BUT I wanted to cut the top to fit perfectly over the molding, so I installed the molding first.
.
I used a scrap board laid on top to help me figure out how high to attach the crown.
Once it was attached, I puttied the nail holes and the joints and moved on to the doors while the putty dried.
Side Note: On the console, I did add even more detail by attaching another face frame on the inside of the cabinet.
But this time, since this piece was much smaller, adding that detail would have made the door too small for Wally (my sister’s dog) to fit into, so we opted to skip that part to allow for a larger door.
Sometimes you have to choose function over looks. This meant that I also wouldn’t be able to mount the cremone bolt hardware to this piece–which is why we opted for a different latch.
Step 5: Build DIY End Table Door
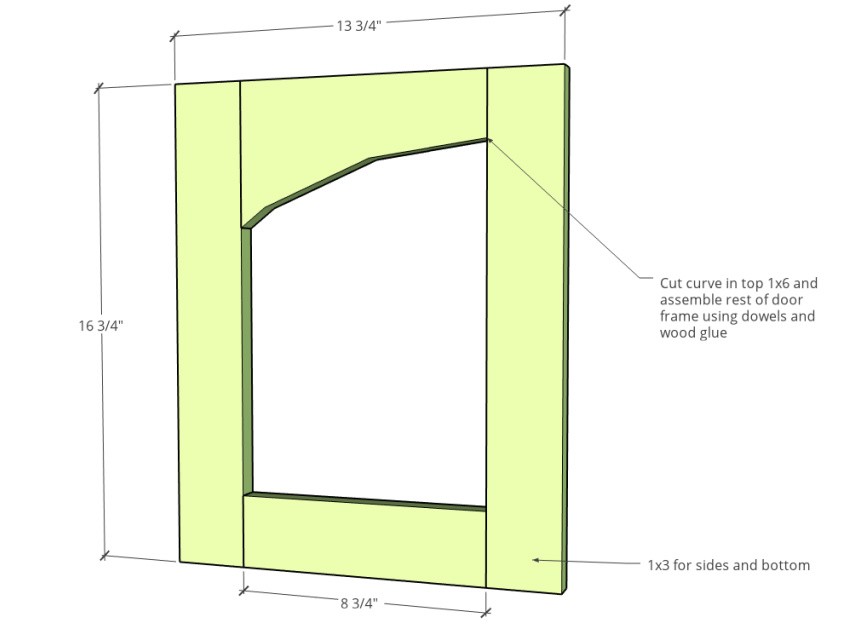
I built the doors similar to the console with 1x3s on the sides and bottom and a 1×6 at the top. I used a round object and then kind of freehanded the rest of the curve on the top and cut it out with a jig saw. The curve is optional–you could just use another 1×3 piece to make a plain door.
.
NOTE: The diagram shows making this door 13 ¾″ wide overall. However, when I installed this into my cabinet using butt hinges, it was too wide to close and I had to trim a little off the side. I recommend (if you’re using butt hinges) to make this door slightly smaller than 13 ¾″ to make sure it fits.
Then, I used dowels to assemble the frame. You could use pocket holes here if you wanted, but I didn’t want to deal with plugging the holes, so that’s why I used dowels.
.
Once the glue was dry, I sanded them down and painted them black.
.
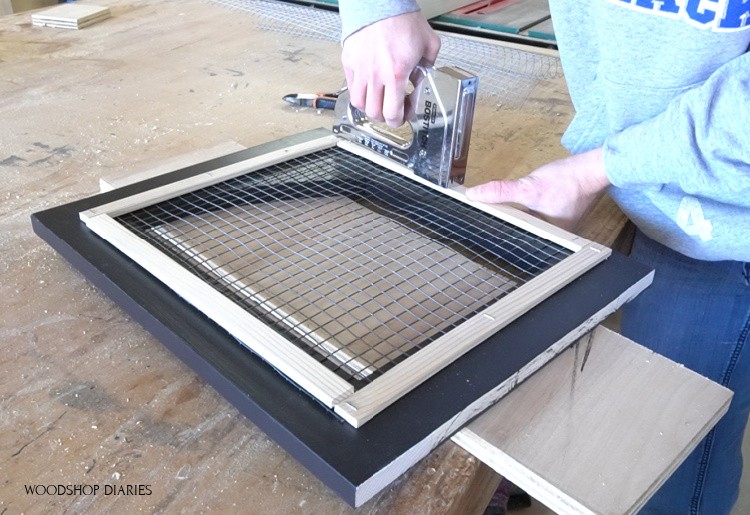
While that was drying, I cut some hardware mesh pieces to add to the middle of these doors. I spray painted these black as well and once everything was good and dry, I stapled them onto the back.

I used some thin scrap strips to cover the rough edges.
Step 6: Build and Install Drawer
Then, I moved on to the drawer. Since this has a face frame, I needed to install some bracing to mount the drawer slides flush to the inside of the frame so they are able to slide in and out.
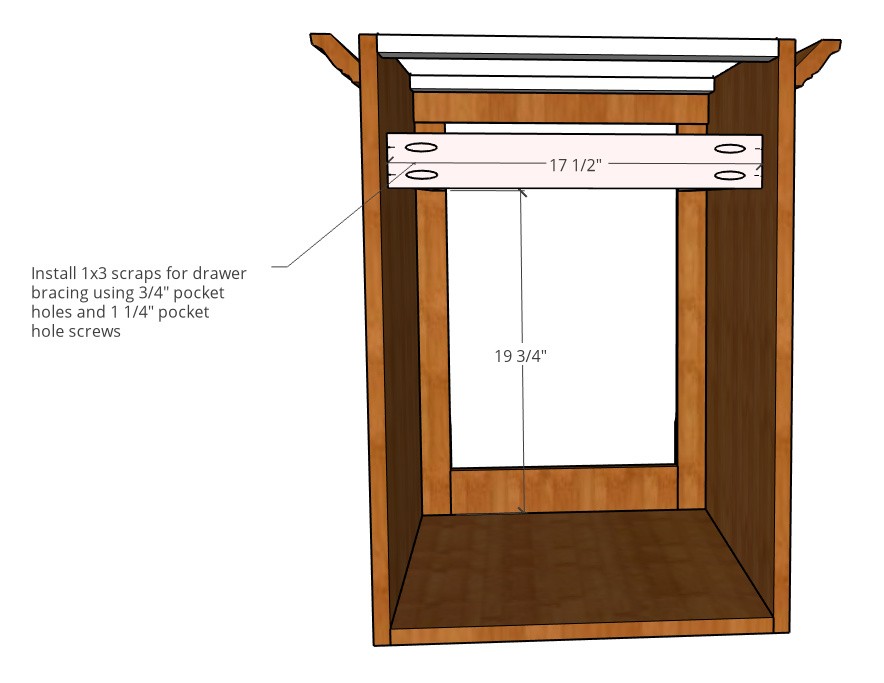
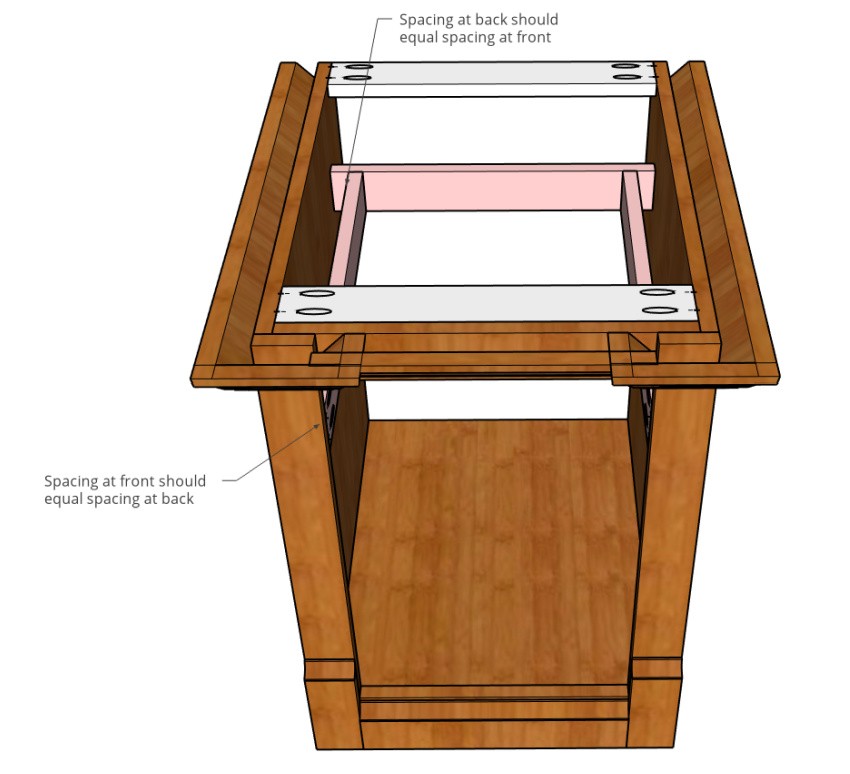
You can do this a thousand ways, but I added a piece that runs between the sides (see above), then installed stretchers between this piece and the front (see below). You can use scrap plywood or 1x3s for this.
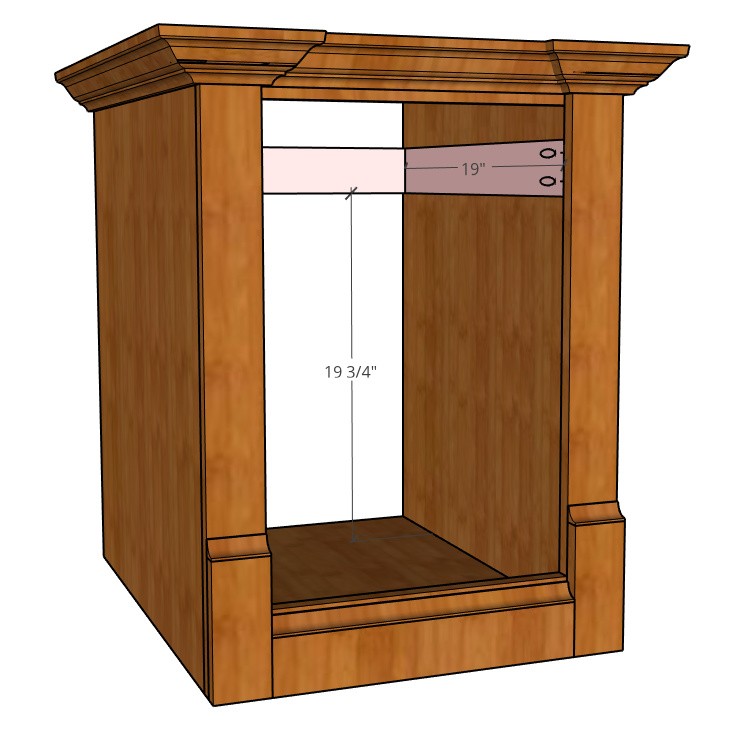
I installed 19 ¾″ up from the bottom panel and made sure that the stretchers were installed flush to the inside of the face frame. It’s important to keep that same spacing at the front and the back when you install it.
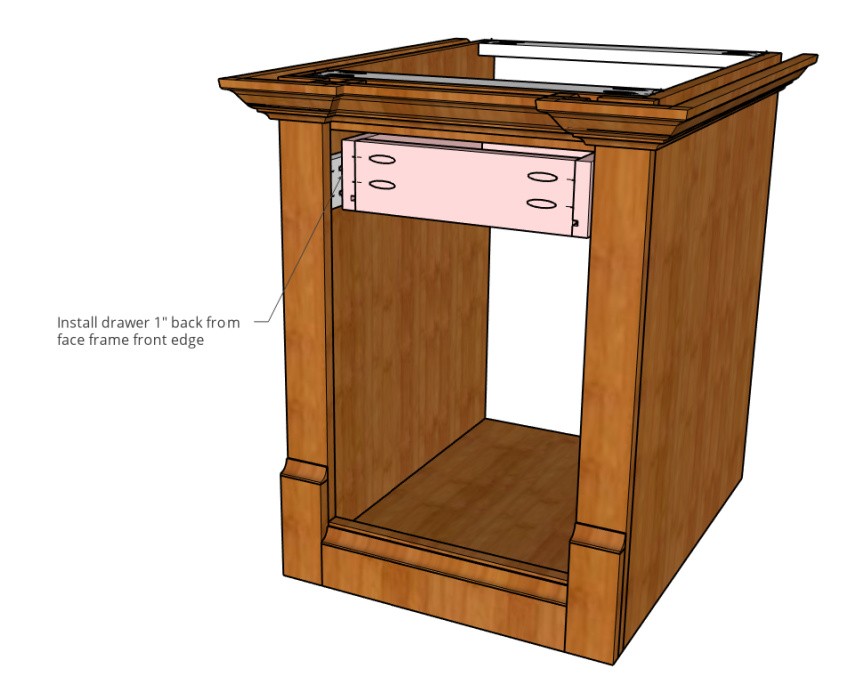
Now, I could mount the slides onto these stretchers and start building the drawer. These drawer fronts will have a decorative edge that will make the overall thickness of the drawer front 1”, so I mounted these slides so that they were 1” in from the front of the face frame.

For the drawer, I used some scrap plywood because I have a TON of scrap plywood. But, you could also use 1x4s as well.
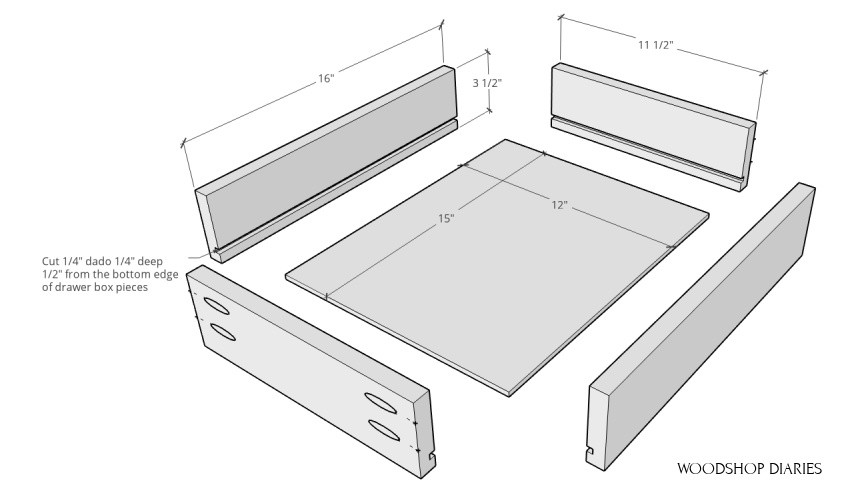
I cut pieces to length, cut a dado in along the bottom edge, and assembled with pocket holes and screws.
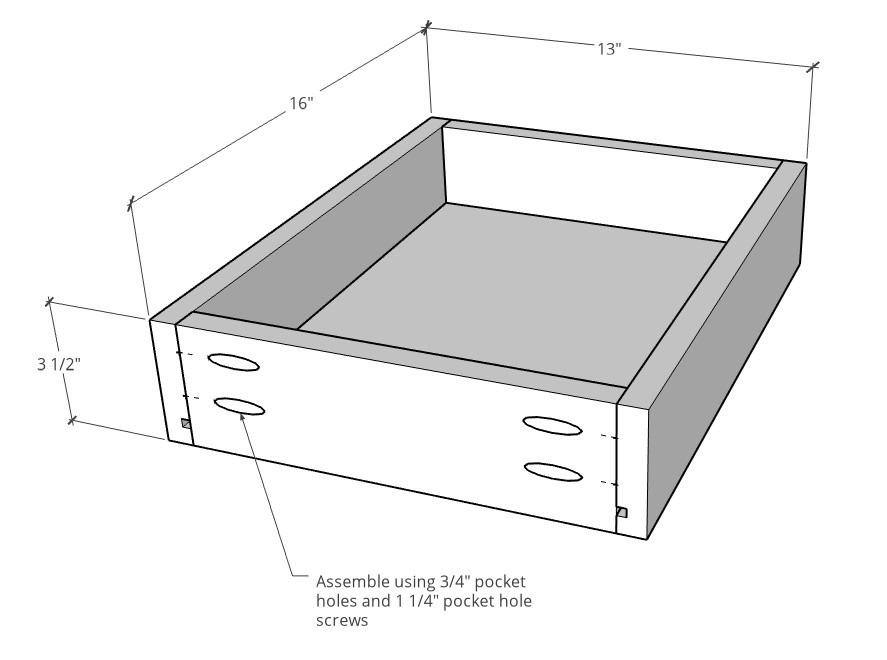
I slid a ¼” plywood panel into the bottom of the drawer before adding the final piece of the box.
.
If you want to know more about building drawers, I have a super detailed guide for how to measure for, build and install drawers here.
.
Then, I installed it into the nightstand.
Just like with the console, I made these drawer fronts so that they had a 1” wide trim piece glued and nailed around the edges of a ¾″ plywood center panel. I had to cut these trim pieces on the table saw.
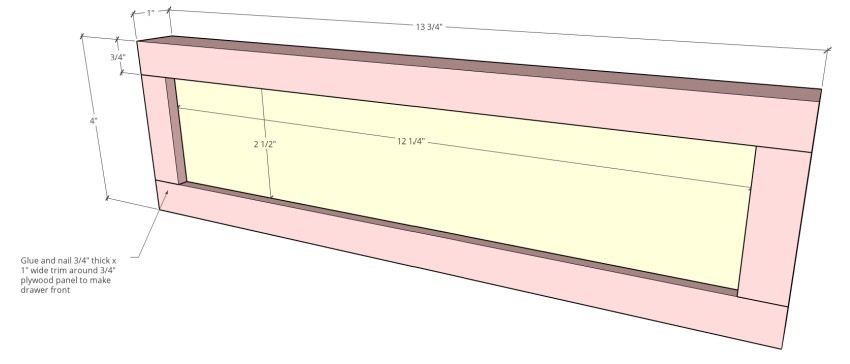
If you want to skip that detail, you can make the front completely from ¾″ plywood instead. The trim is totally optional.
.
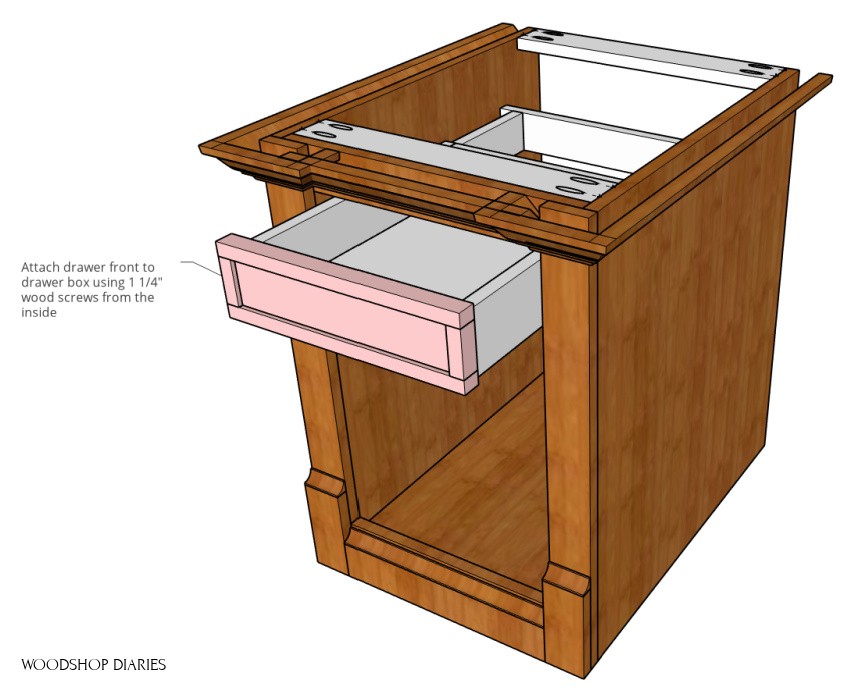
Then, I installed this onto the drawer leaving about ⅛″ gap around all sides.
Step 7: Add Top, Back, and Finish
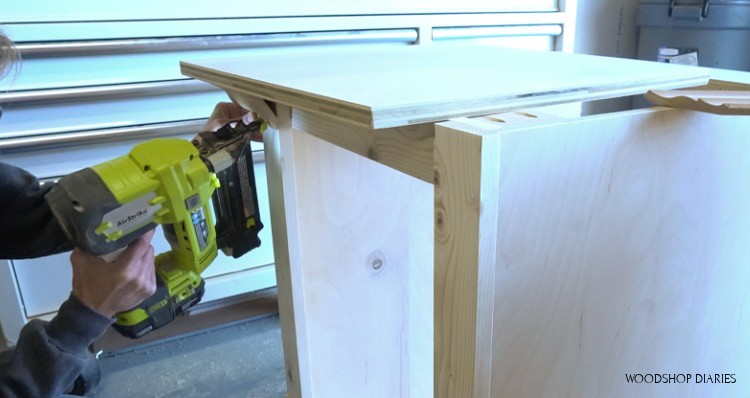
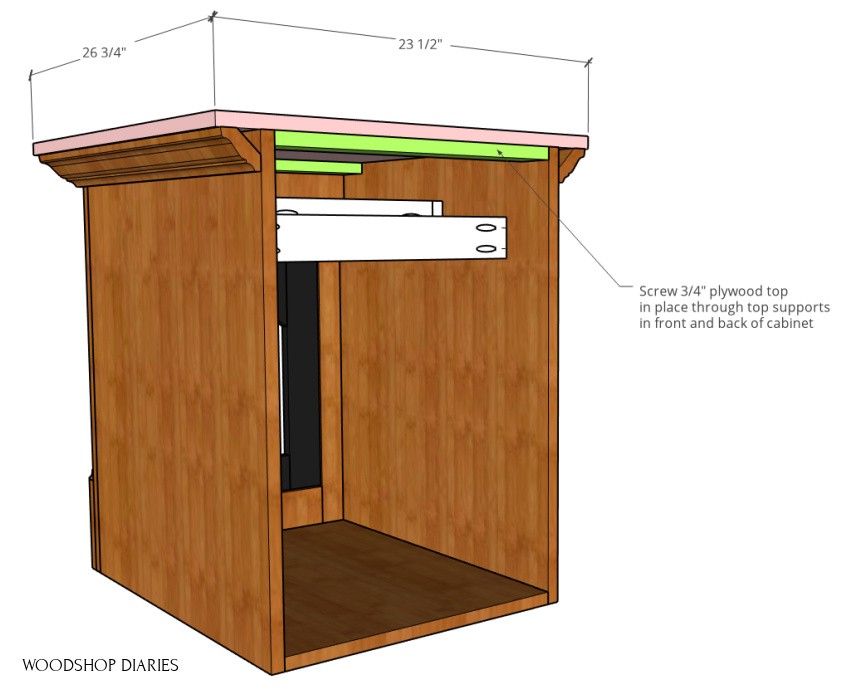
Finally, I cut, edge banded, and installed the top panel so that it fit over all the crown molding. I encourage you to check your sizing before cutting your top piece and make any adjustments as needed.
.
I screwed this in place through the top supports of the nightstand and nailed the crown to it in a few places along the top.
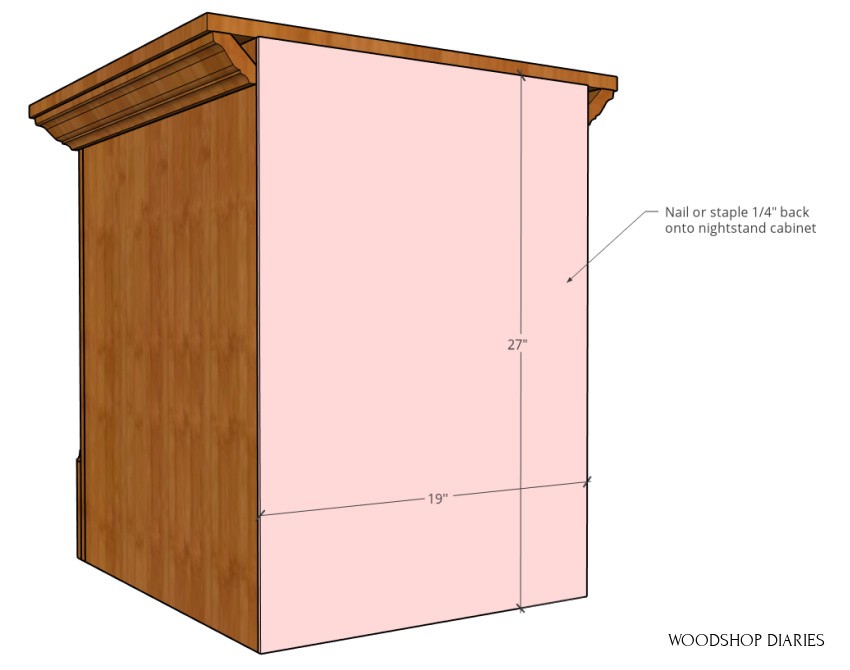
The last step was just stapling a ¼” plywood backer over the back side.
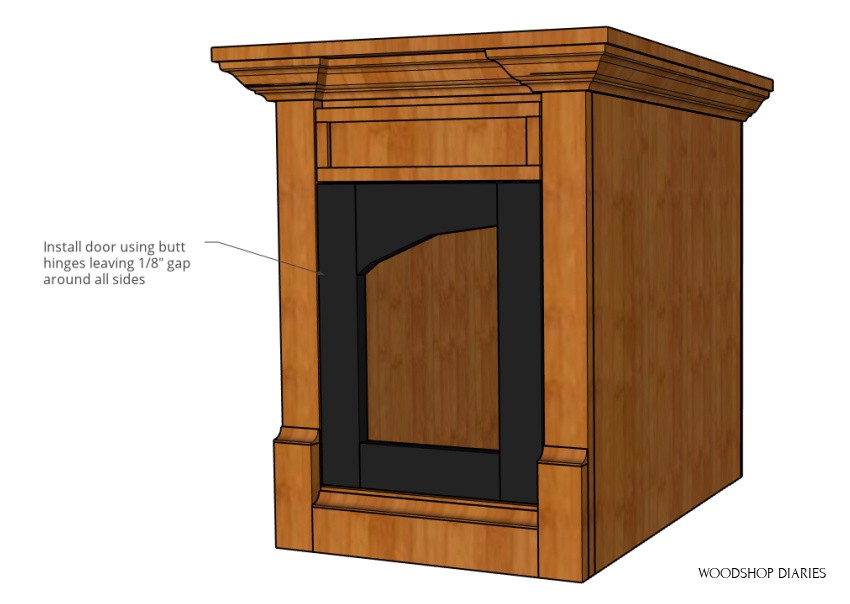
After all the putty was sanded well, I applied stain (I used Minwax Early American) to the nightstand, then polyed it, and installed the door using some small decorative butt hinges.
.
I ended up having to trim the side of my door slightly to fit–the butt hinges were a little thicker than I had planned when I ordered them. I took about a blade width off on the miter saw and it fit perfect. I’ve noted this above in step 5.
Because we opted out of installing the matching cremone bolt door hardware that the dresser had on these nightstands, we decided to go with some simple knobs and a small latch here on the doors.
OPTIONAL: Add Shelf to Dog Crate End Table
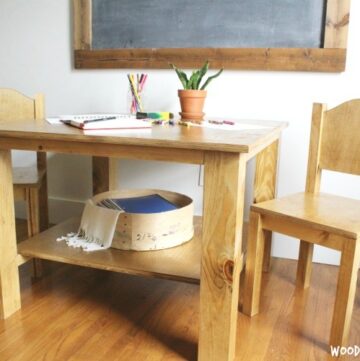
If you weren’t wanting to use these as a dog crate, you could leave this large cabinet underneath for storing large items, OR, use a shelf pin jig and drill holes to add pins for adjustable shelves to make the most of your storage space.
I recommend drilling the shelf pin holes BEFORE adding the back panel because the front door is a tight squeeze to get into to drill the holes. It’s easier to drill them from the larger back opening.
.
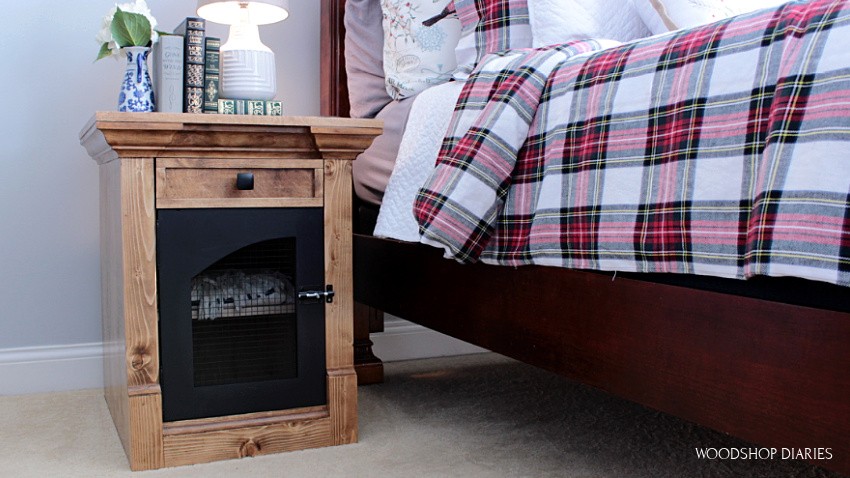
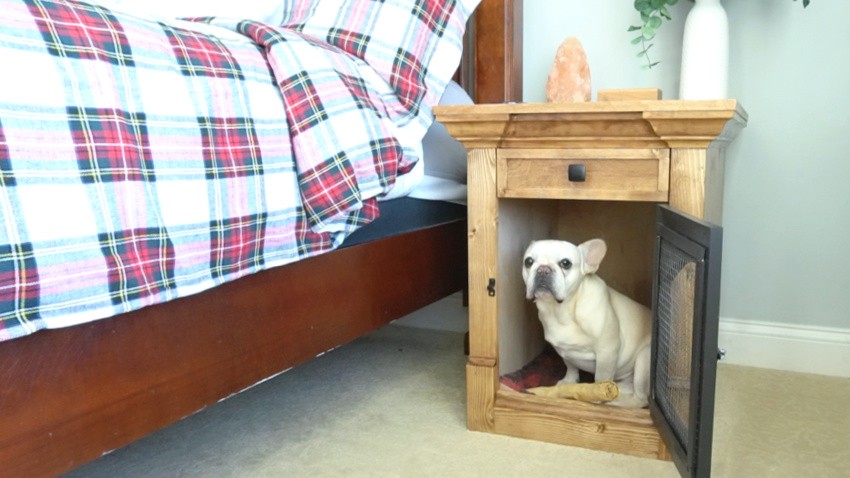
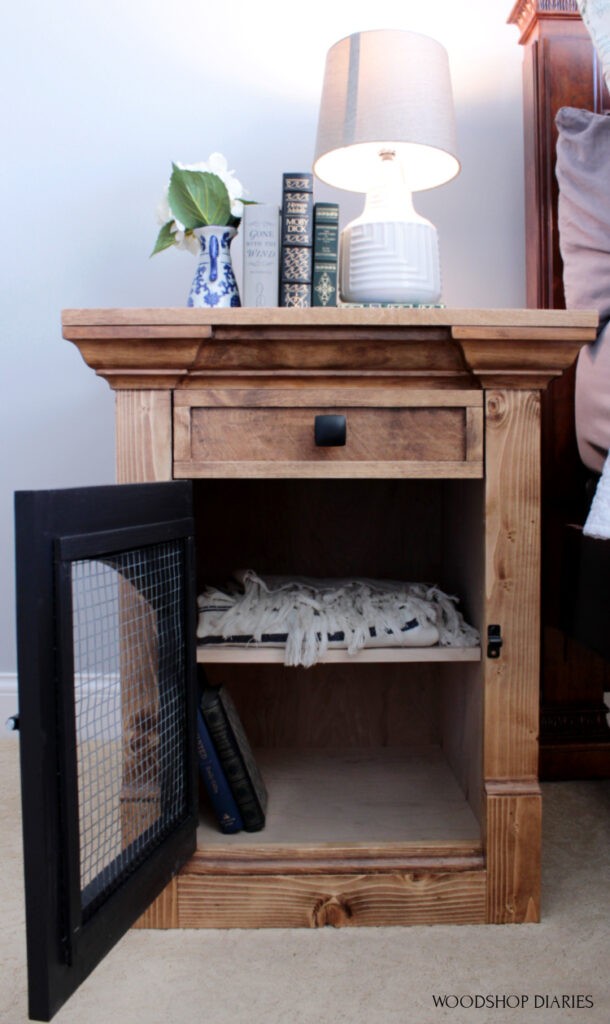
And now, they’re finished and ready to use.
I’m really not much on traditional style furniture with all the fancy moldings, but I must say, this dresser and nightstand set is pretty slick.
.
Dog crate or not, these are great for adding some style and storage to your bedroom or even to your living room as a TV console and side tables.

I hope you’ve enjoyed this project and be sure to head over and watch the video tutorial to see the build in action.
.
If you’d like to save this for later, I’d love if you’d pin it!
Until next time, happy building 😊