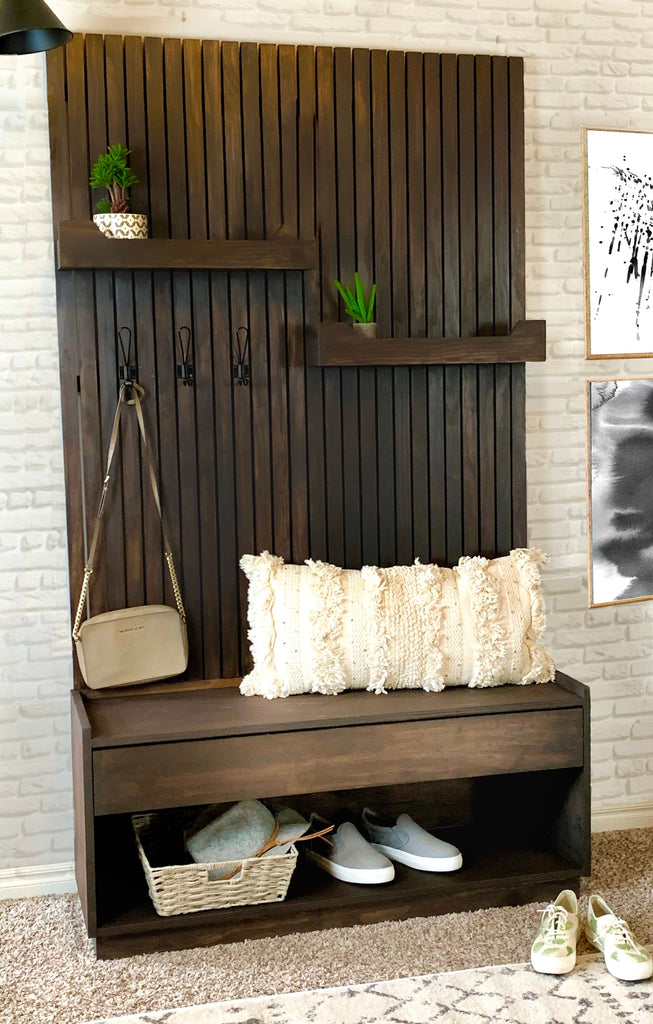
Hall Tree with Storage Bench
"This DIY Hall Tree Storage Bench is every modern girl's dream."
There are some affiliate links in this post, meaning I get a small commission if you purchase through these links, at no cost to you. Click Here to read my full disclosure."
Materials
- 1 - ¾” piece of plywood (4’x8’)
- 1 – ¼” piece of plywood (2’x4”)
- 2 – 1x6x6
- 2 – 1x4x8
- 2 - 1x3x8
- 29 – 1x2x8
- 12” Drawer Slides
- 1 ¼” Pocket Hole Screws
- 1” Staples
- Brad Nails
- Wood Glue
- 1/4" Dowel
- Coat Hooks
- 1 1/2" Wood Screws
- Rustoleum Kona Gel Stain
Cut List
See Printable Plans for Detailed Cut List
Tools
- Kreg Jig
- 5/32” drill bit
- Impact Drill
- Miter Saw
- Kreg Adaptive Cutting System
- Kreg Right Angle Clamp
- Kreg 90 Degree Corner Clamps
- Kreg Drawer Slides

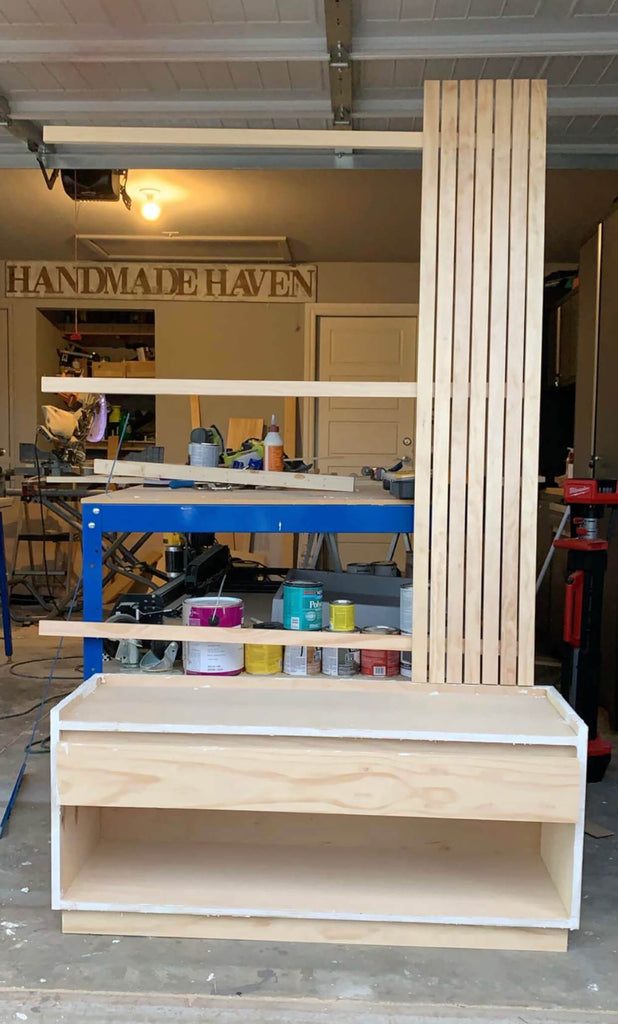
Step 1: Assemble the Entryay Storage Bench
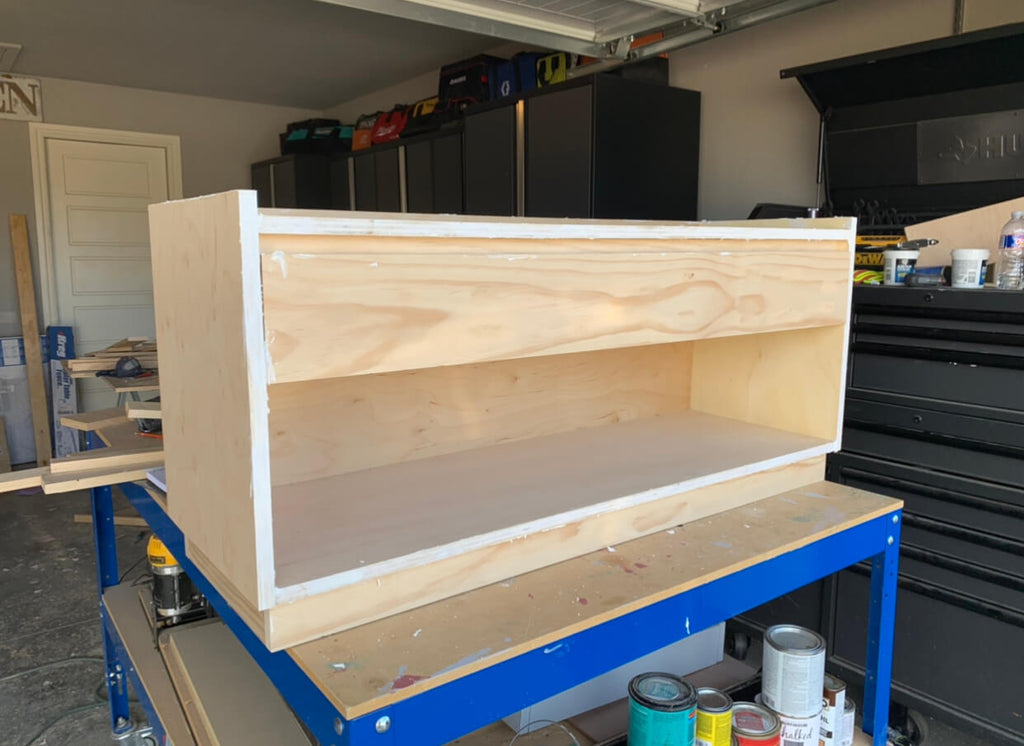
I first started off by assembling the bottom storage bench. I used 3/4" plywood to assemble a bulk of the storage bench and used my handy dandy Kreg Jig for most of the assembly.
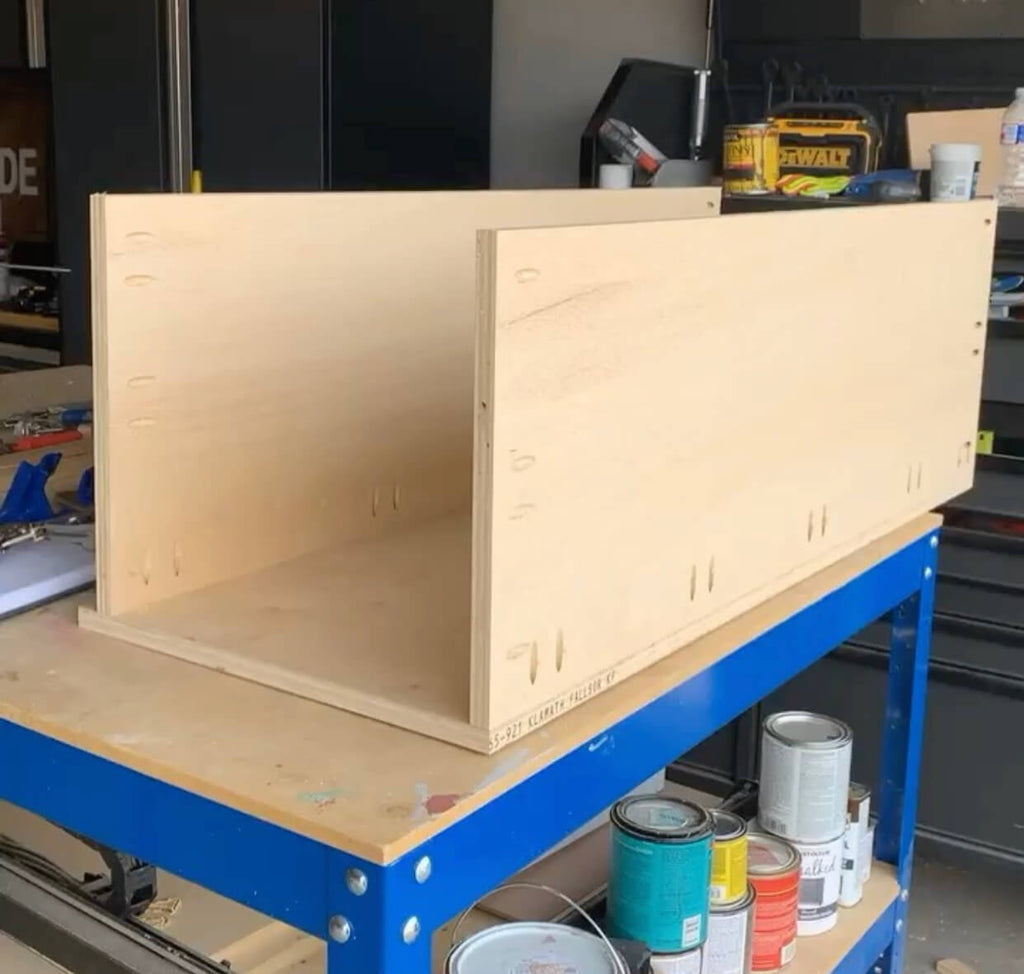
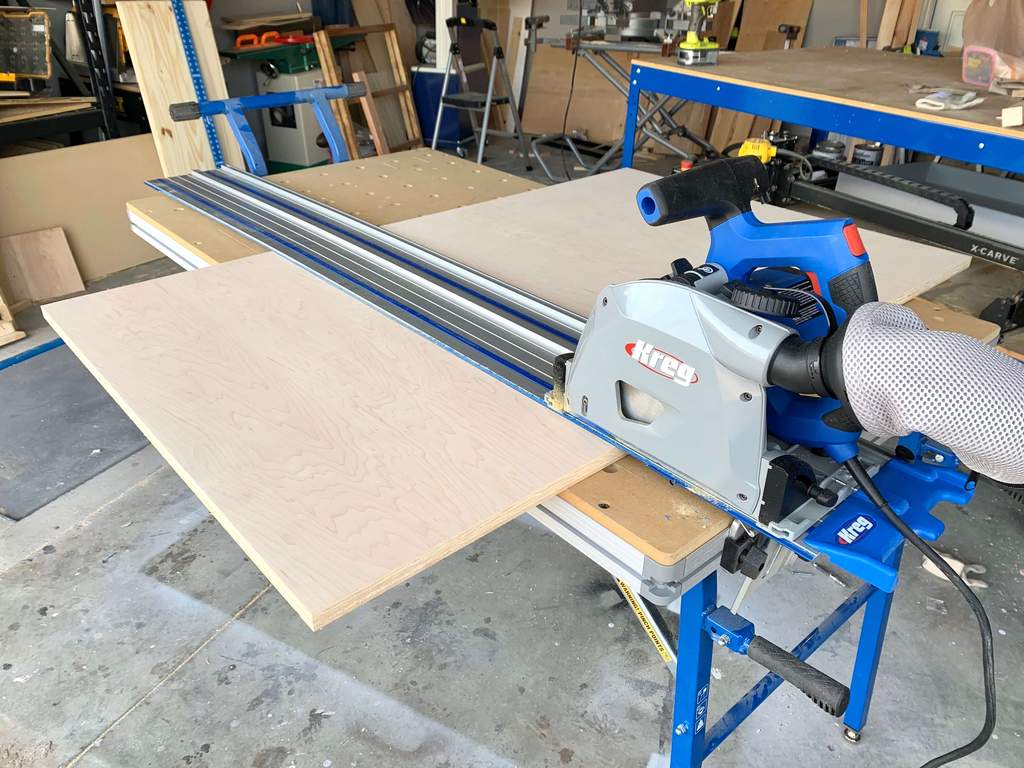
I was able to cut all of my plywood down to size using my Kreg Adaptive Cutting System. If you don't have a table saw this is a great alternative. It also feels a lot safer than that of a table saw.
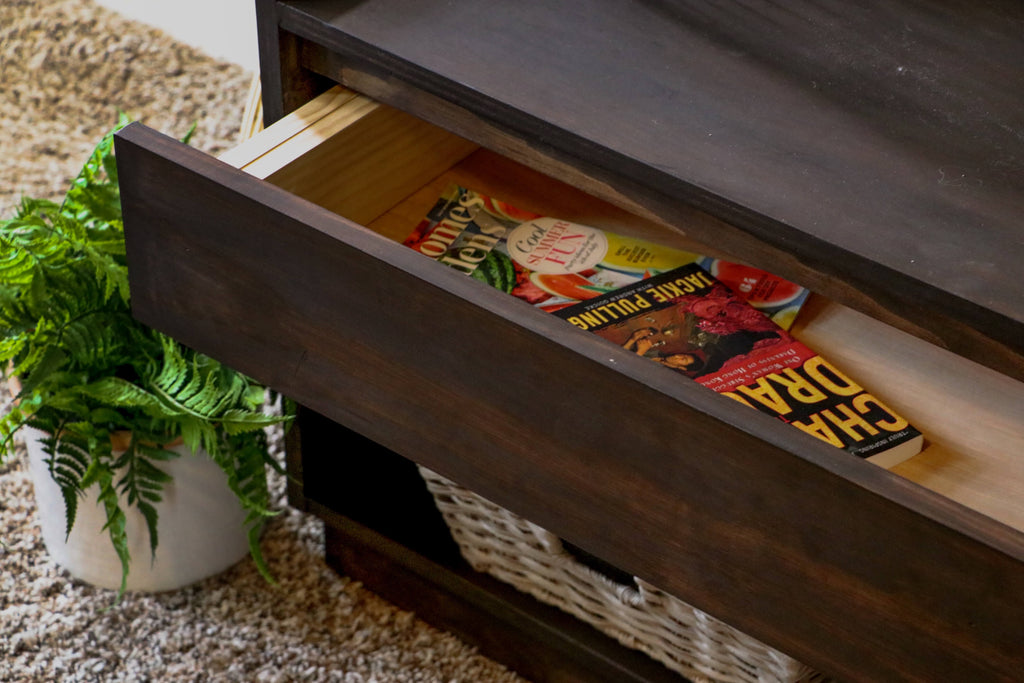
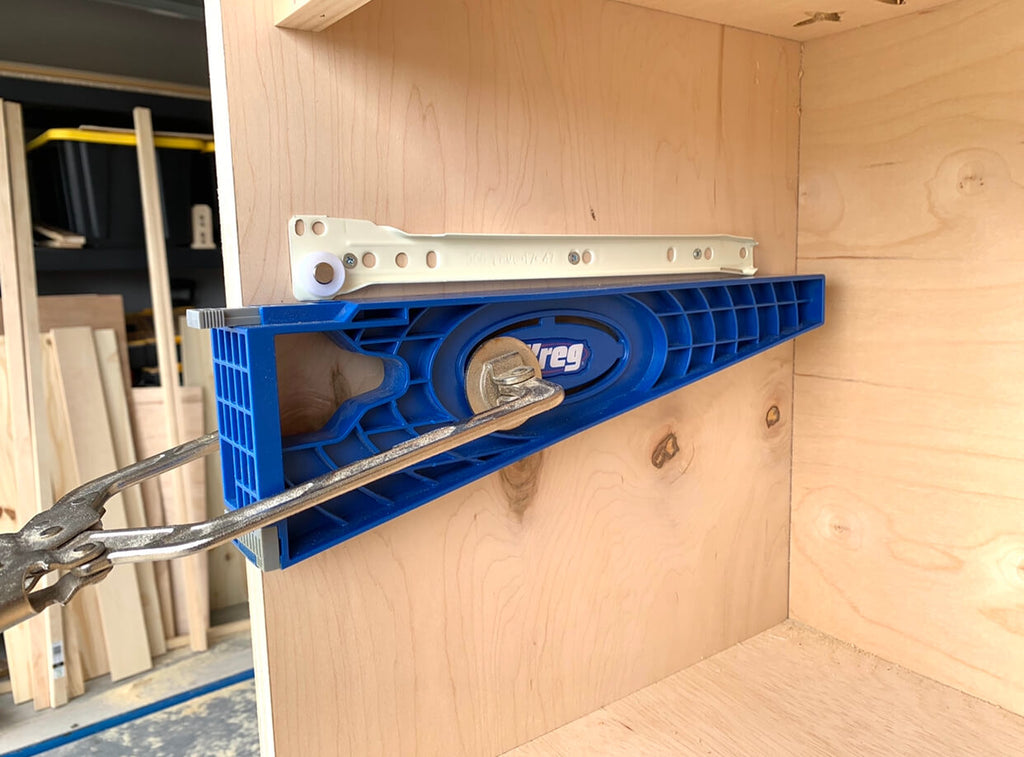
 I was able to assemble the drawer for the storage bench using my favorite right angle clamps and with the help of my Kreg drawer slides, I was easily able to create the drawer design.
I used 12” Drawer Slides for this particular build. I absolutely love the extra storage that this build provides.
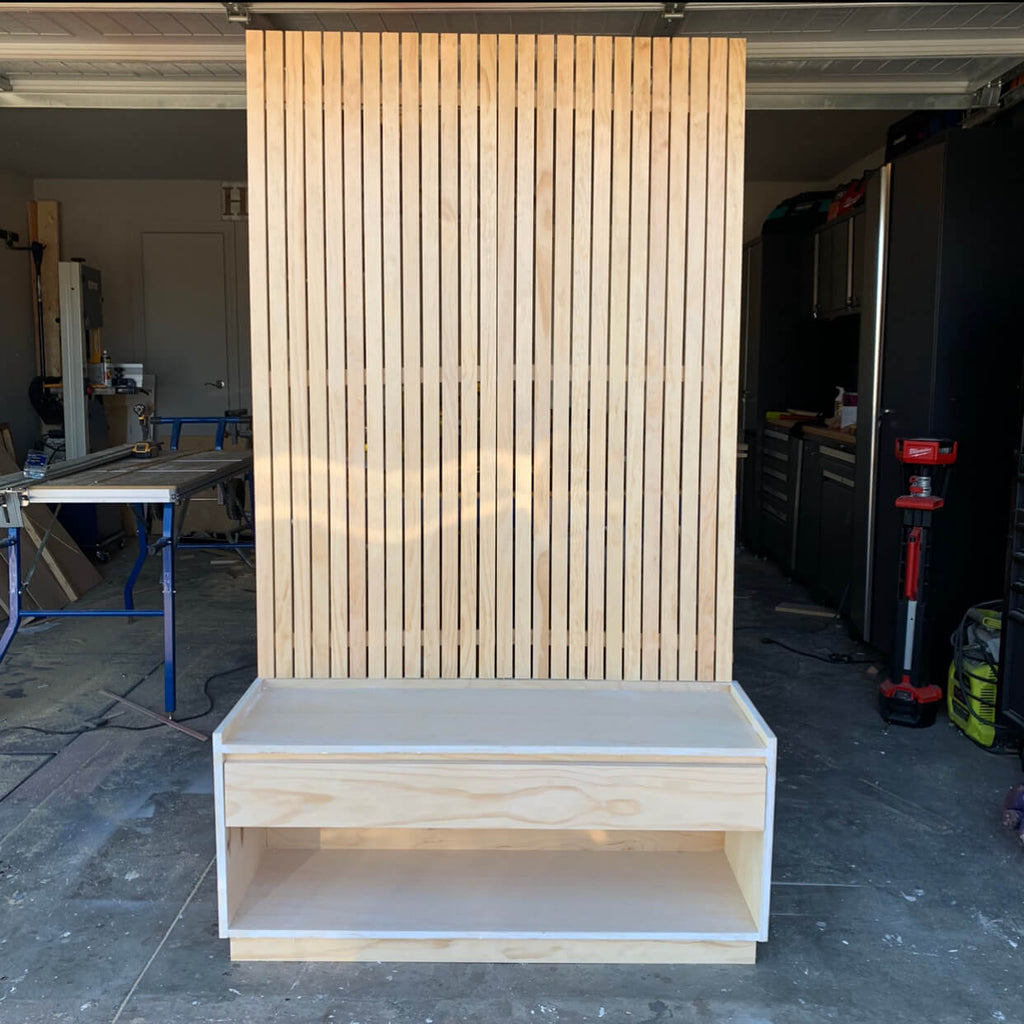
 Once the drawer was put it, my storage bench was complete, now on to the wall paneling set.
Step 2: Assemble the Wall Paneling Set
To begin the wall paneled set, I first had to cut all of my 1x2s down to the correct sizing. Once I had my 1x2s cut I started attaching them together.
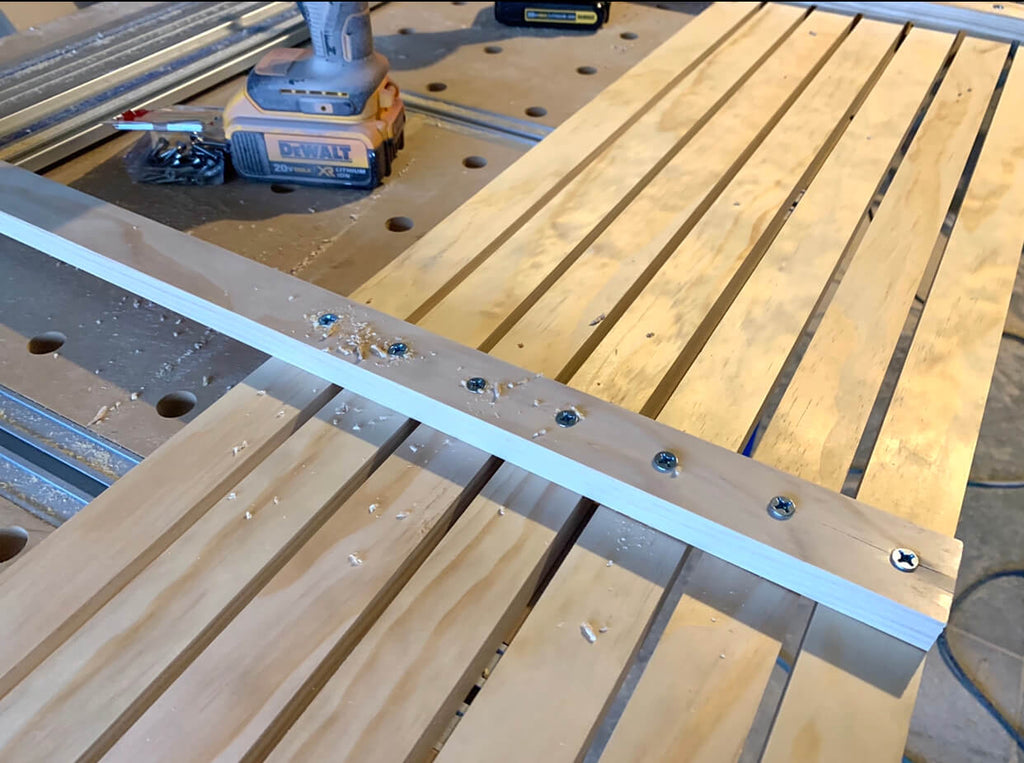
First, I placed the 23” 1x2 on top of the first 1x2, and then drilled a pilot hole first using a 5/32” drill bit, and then screwed in a 1 1/2" Wood Screws into both 1x2 boards to attach them together. Then repeated this step all of the way down.
Originally, I was going to have one big panel, but it became to heavy so I decided to have two even panels. No worries though; because once you hang them up, its gives the illusion of one.
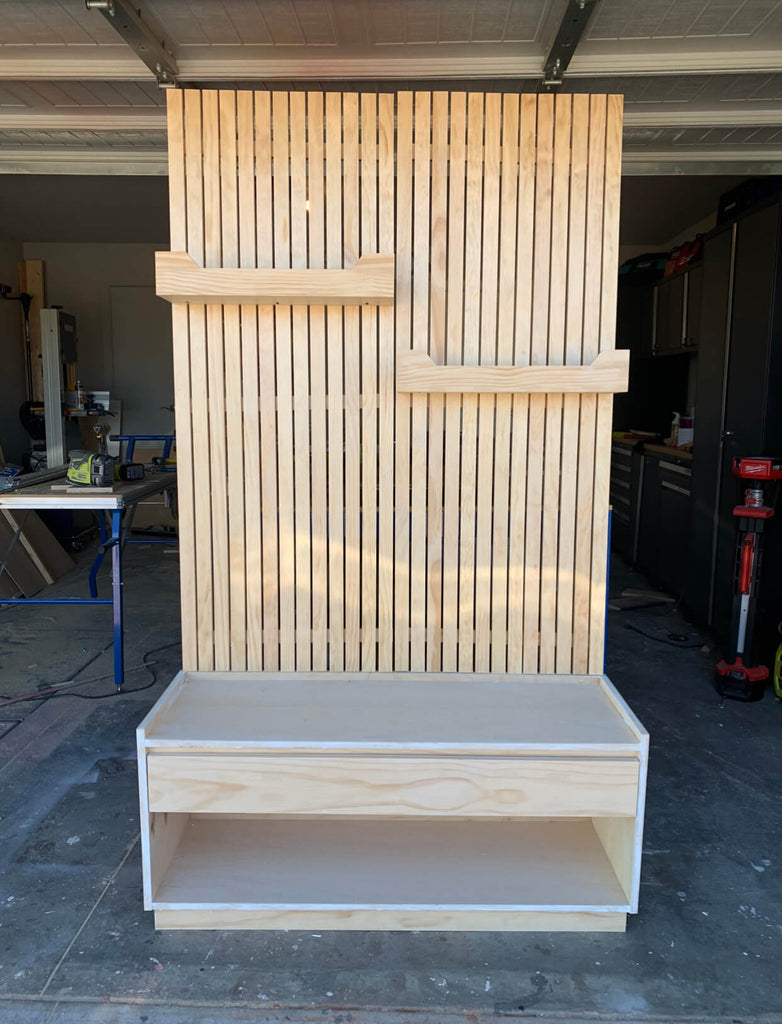
I love the look of the 1x2s together because it really brings that modern vibe. I had planned on adding shelves, but I still love how it looks without. I was drooling at this point.
If you want to see the technique of how I created this wall paneled set, check out this video on how I made this paneled coat rack. I used the same technique that I used to create this hall tree.
Step 3: Prep the Hall Tree Storage Bench for Stain
Once the hall tree bench was all built, it was time to prep for stain. This is always my most least favorite part, but its an important step.
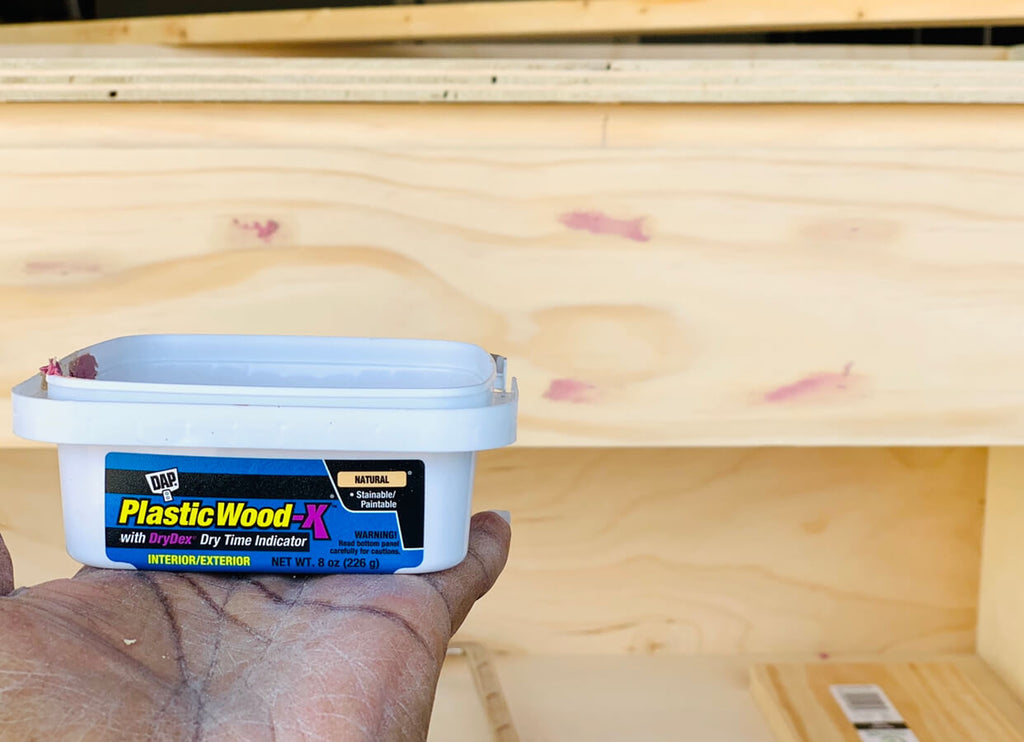
I first used my DAP Wood Filler to fill in all of the nail holes that I created on the panels and the storage bench. You definitely want to fill the nail holes on the wall panels to give them a seamless look.
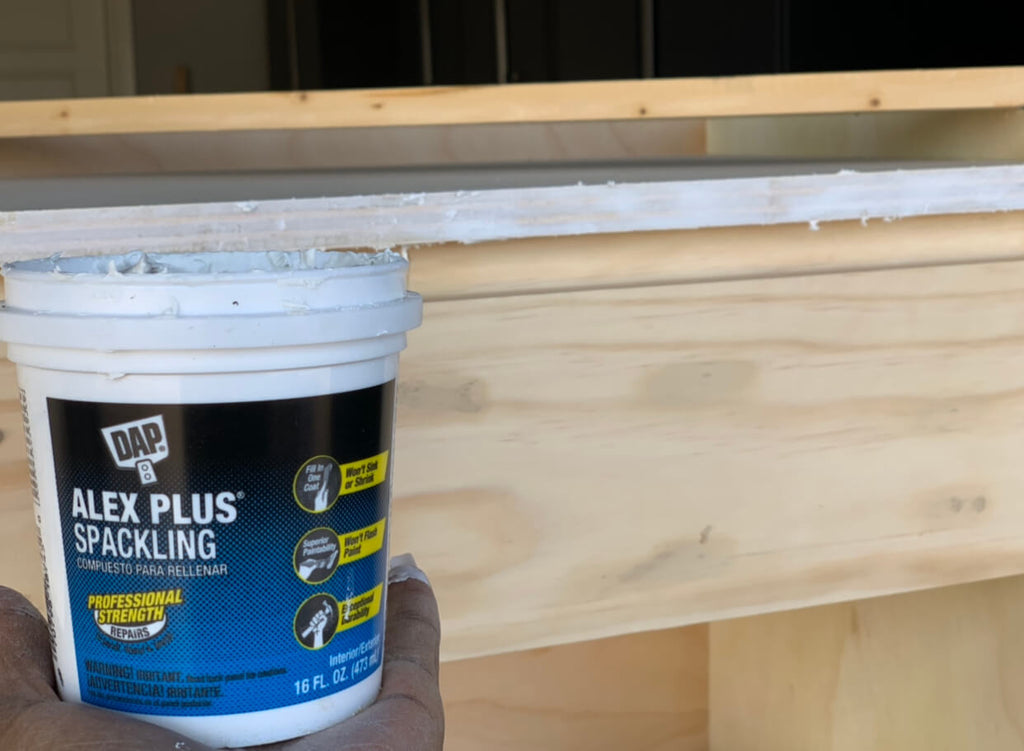
Next, I used to DAP Spackle to fill the plywood edges. This is a little trick I use to make plywood edges straight. Once I filled in all of the edges, I sanded her down with some sandpaper to make it nice and smooth for stain.
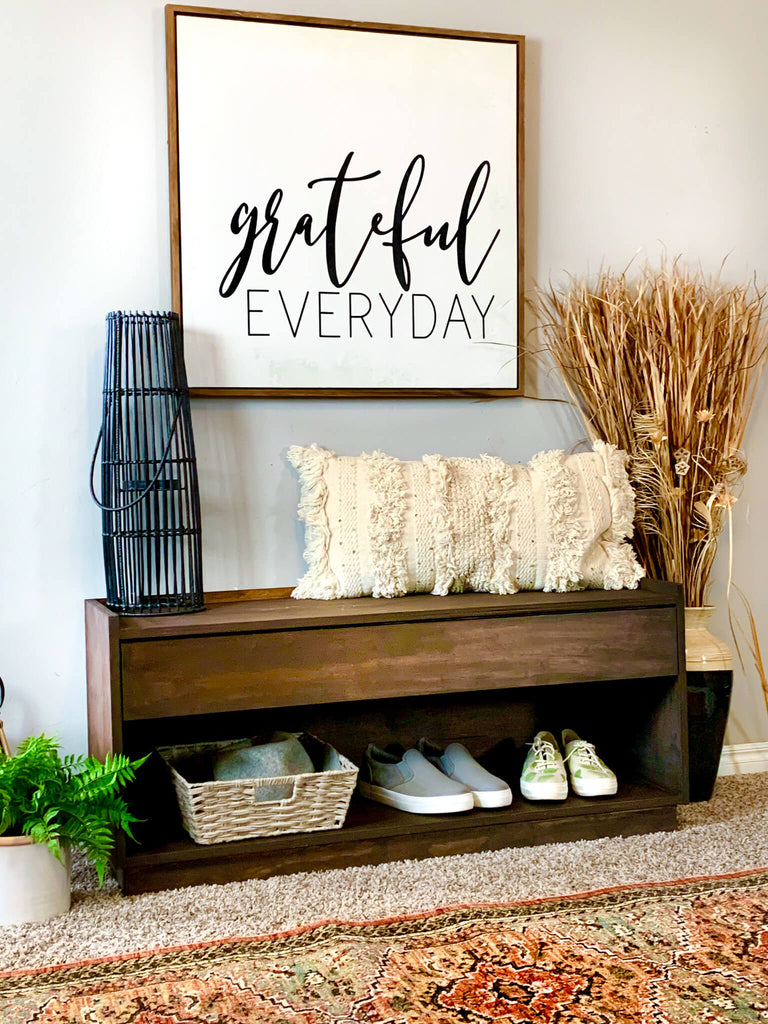
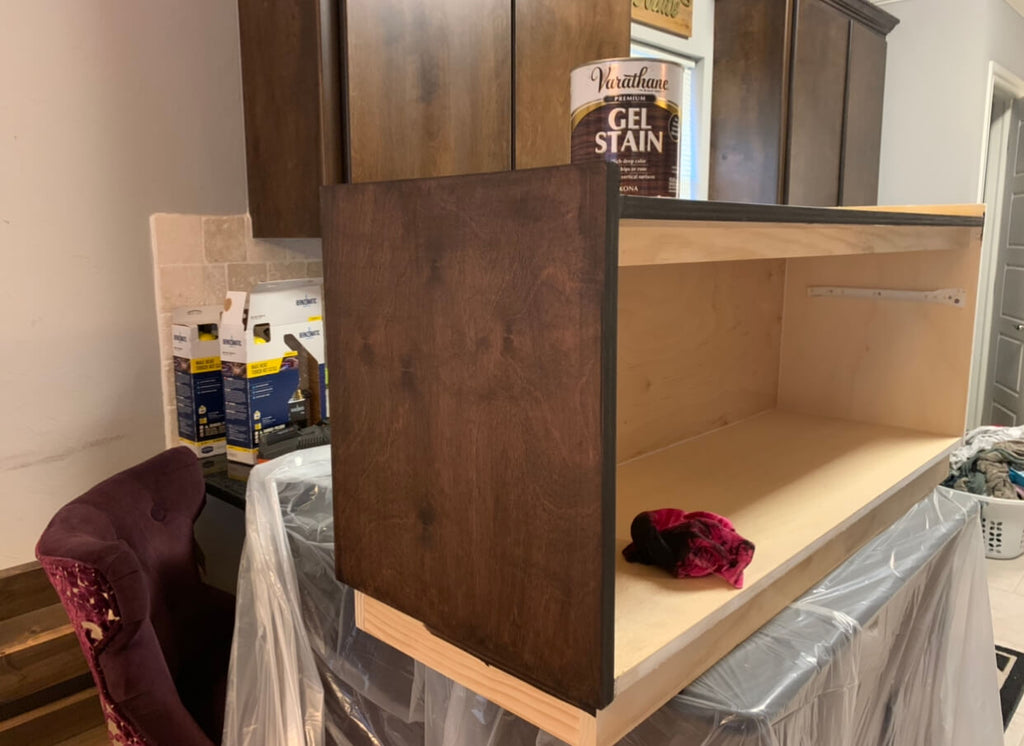
Step 4: Stain the Hall Tree
Once my build was all prepped, I begin staining. I decided to go with Rustoleum Kona Gel Stain and man did she look good. To apply the stain to the storage bench, I just used an old rag to wipe it down. I was able to easily apply it to the plywood and it made it look really good!
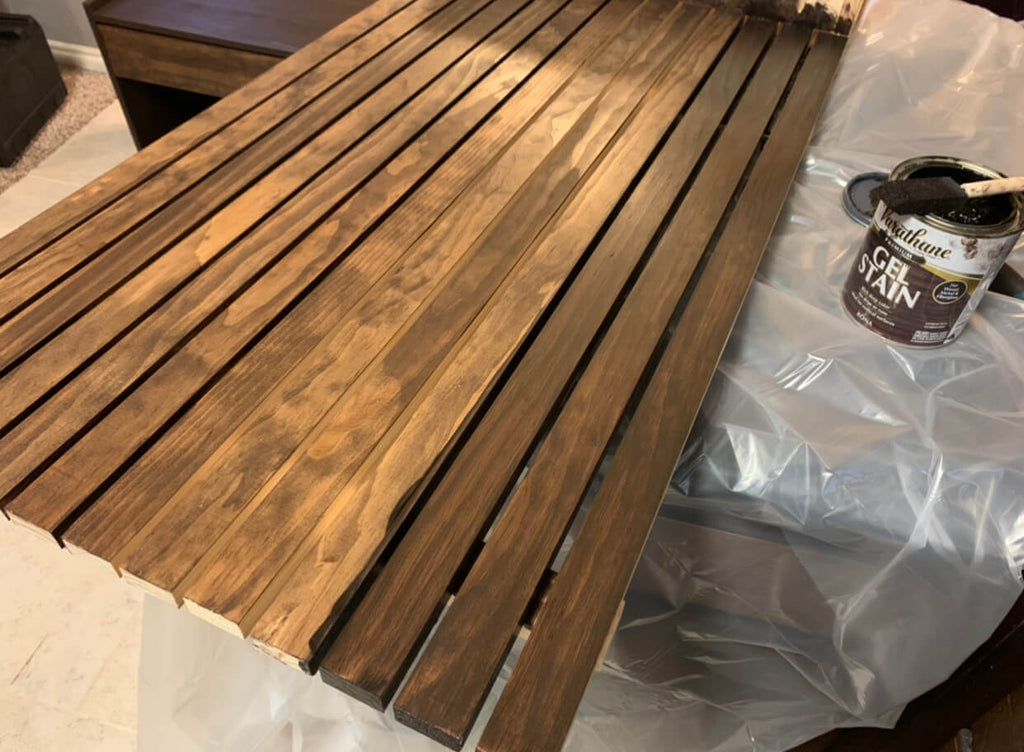
For the wall paneling, I first wiped it down with a rag at first, but I noticed the color wasn't coming out as rich as the storage bench, so I decided to use a small foam brush to wipe the gel stain on and that definitely did the trick. The little foam brush also helped to get in between the cracks of the the panels.
As you can see, the second time through made the panels look rich. I applied a heavy amount the second time around to get that deep rich color.
Step 5: Hang the Wall Paneled Set
Now you may be thinking; how the heck did she get that hung up. Well its a little easier than you may think. I first put my storage bench where I wanted it and then set one of my panels on top.
Once I had one of the panels where I wanted it, I marked where the top 1x2 was on the wall so I would know where it needed to go and then I used this metal cleat hanging system to hang them on the wall.
You screw one side of the metal cleat system to the wall and then the other side to the paneled set, and it allows you to hang the panel right on the other side of the cleat. I did one side and then the other
I made sure to hang the panel set so that it sits right on the storage bench for extra support and that's ends the hall tree journey.
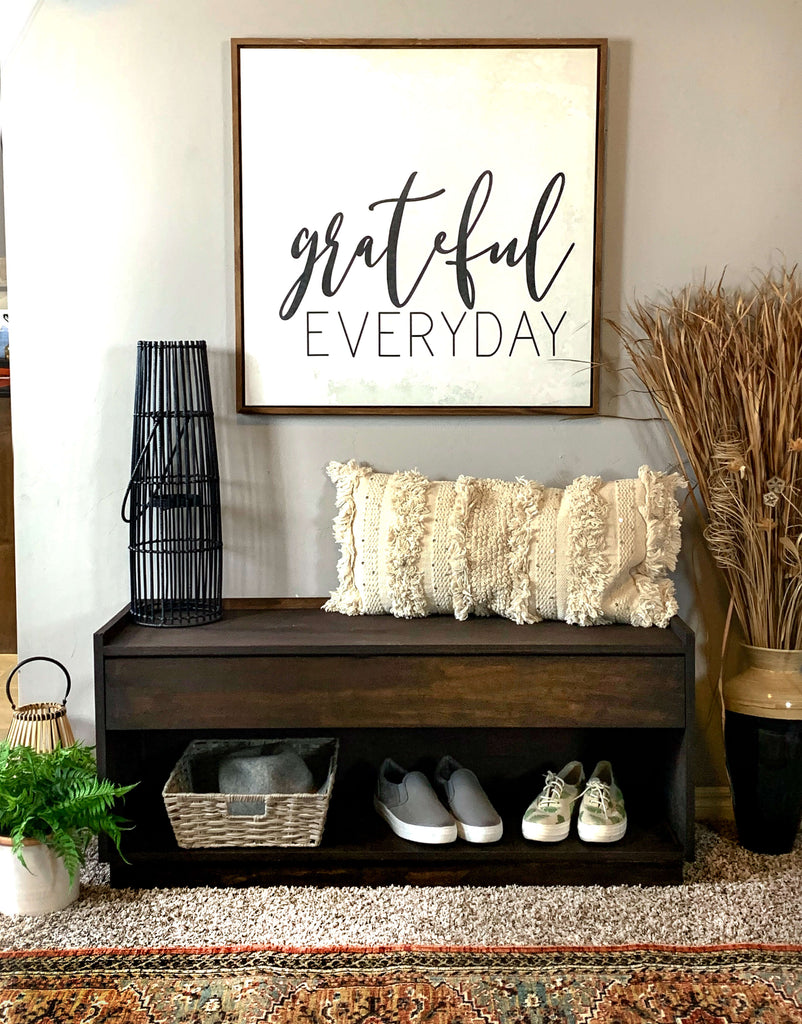
Whether you want to create a fun storage bench or the full hall tree, this project is the perfect addition for your home entryway.
As always, thanks for reading guys! XOXO, Ashley