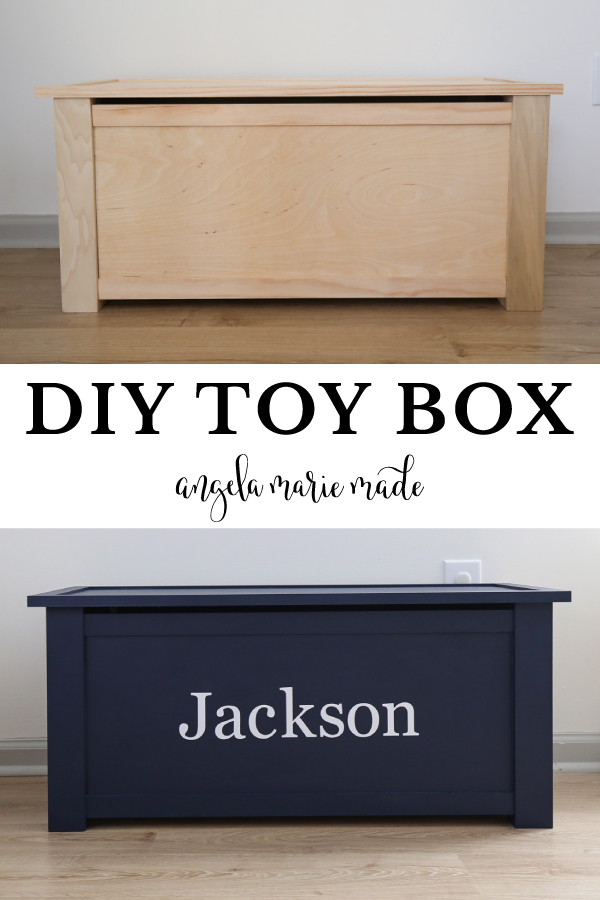
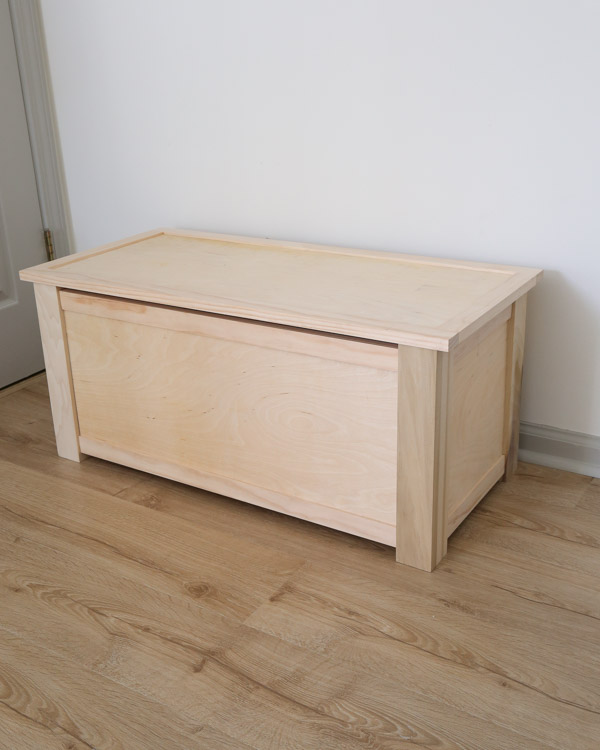
Learn how to make a classic, DIY toy box out of wood!
When our baby boy turned one a few months ago, his toy collection started to grow a lot and we realized we needed more toy storage.
Well a DIY toy chest was the perfect solution!
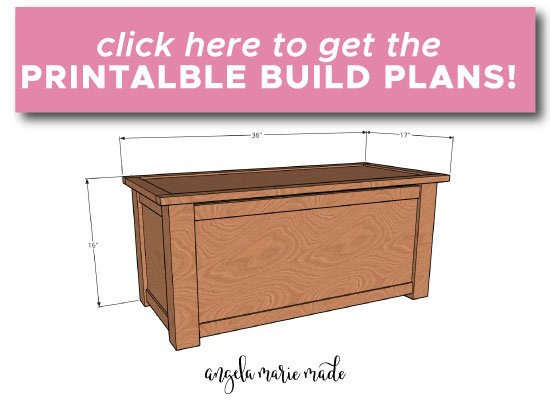
You can get the tutorial, how to video, and printable DIY toy box plans for easy building below too!
This is our Day 7 project for the 10 Days of DIY Challenge & Giveaway going on right now, don’t forget to enter the giveaway here!
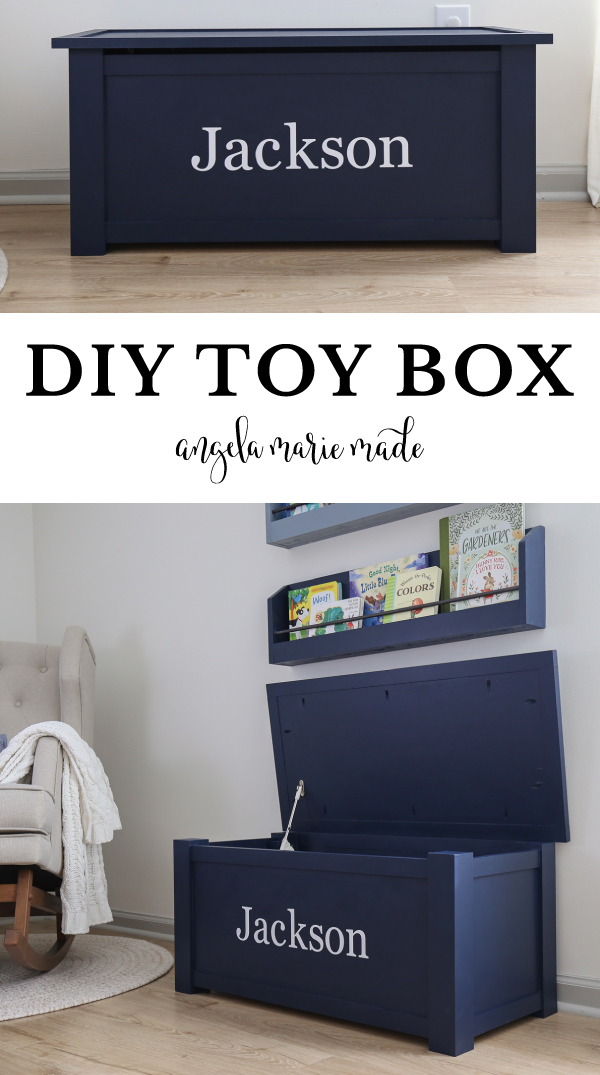
The final size of this DIY wooden toy box is 16″ tall x 36″ wide x 17″ deep
Note, this post contains some affiliate links. I may earn a commission if you shop those links (at no cost to you). Thank you for supporting my small business. For more info see my disclosures here.
How to Build a DIY Toy Box:
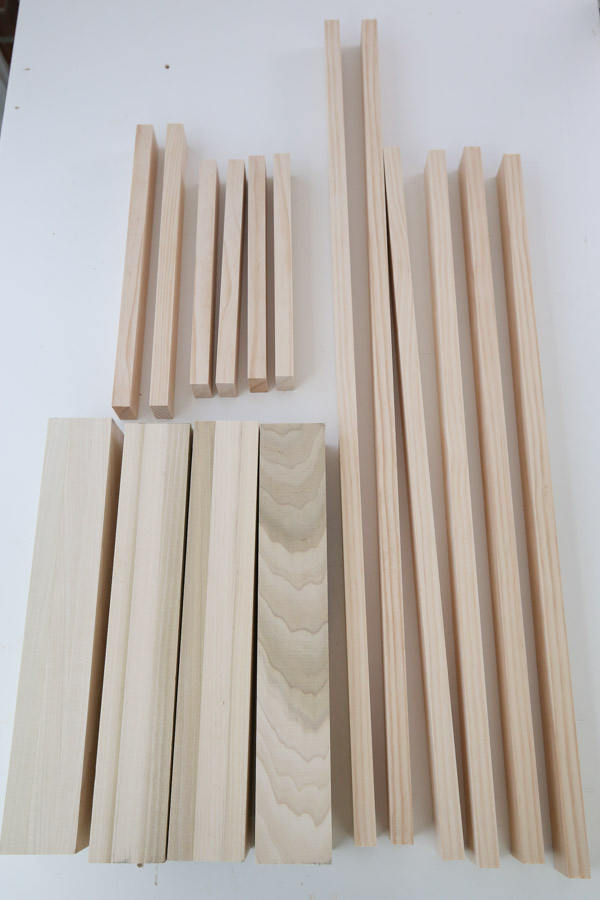
Materials:
- (4) 1×2 @ 8ft
- (1) 4ft x 8ft plywood @ 1/2″ thick*
- (2) 3×3 @ 3ft (we used these boards, here too)
- (1) 2×2 @ 8ft
- 1/4″ scrap wood or wood shims or plywood
- Surface Mount Hinges (we used these middle hinges)
- (1) soft close hinge (we used this one)
- Wood Glue
- 1″ Kreg screws
- 1 1/4 wood screws
- Paint & Primer
*I used this formaldehyde free plywood that was also pre-sanded
Video Tutorial:
Subscribe to my YouTube Channel here!
1. Make initial lumber cuts for the DIY toy chest
Click here for the printable DIY toy box plans which include the cut list and step by step building steps with easy to follow diagrams!
We had our initial rip cuts for the plywood done at the home improvement store and then we made the remaining cuts with our circular saw and straight edge guide. You can also use a table saw.
You will need to make plywood cuts for the two sides of the toybox, the lid, the front, the back, and the bottom of the toybox.
Make the following cuts from the 4ft x 8ft plywood:
- 2 pieces @ 11″ x 11″ (for the sides)
- 1 piece @ 14″ x 33″ (for the top lid)
- 1 piece @ 13 7/8″ x 28 7/8″ (for the bottom)
- 1 piece @ 11″ x 29″ (for the front)
- 1 piece @ 11 1/2″ x 29″ (for the back)
Use a miter saw and make the following cuts from the 1x2s:
- 4 pieces @ 29″ (for the front and back)
- 4 pieces @ 11″ (for the sides)
- 2 pieces @ 10 7/8″ (for the bottom)
- 2 pieces @ 36″ (for the lid)
- 2 pieces @ 14″ (for the lid)
- 2 pieces at 28 3/4″ (for the front and back slat supports)
Use a miter saw and make the following cuts from the 3x3s:
- 4 pieces @ 15 1/4″

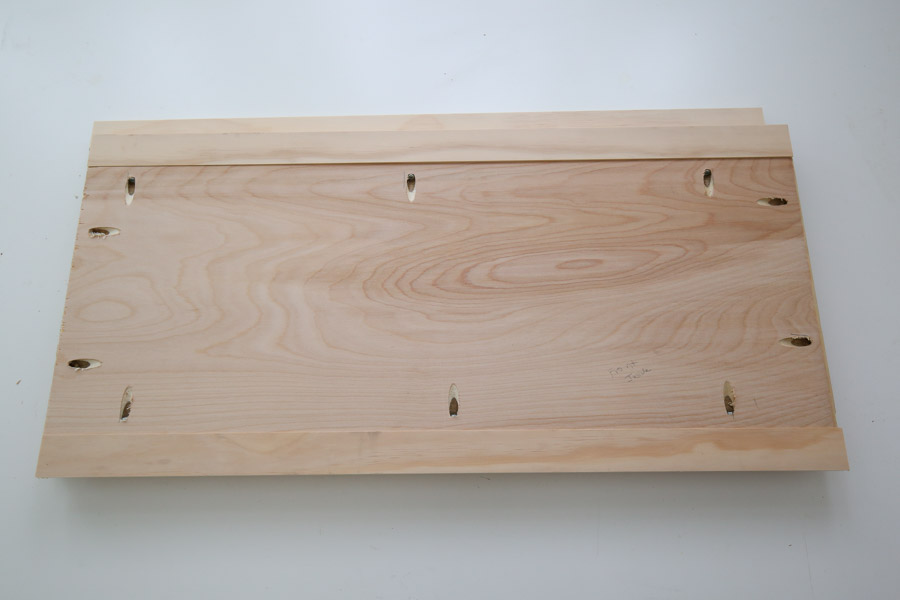
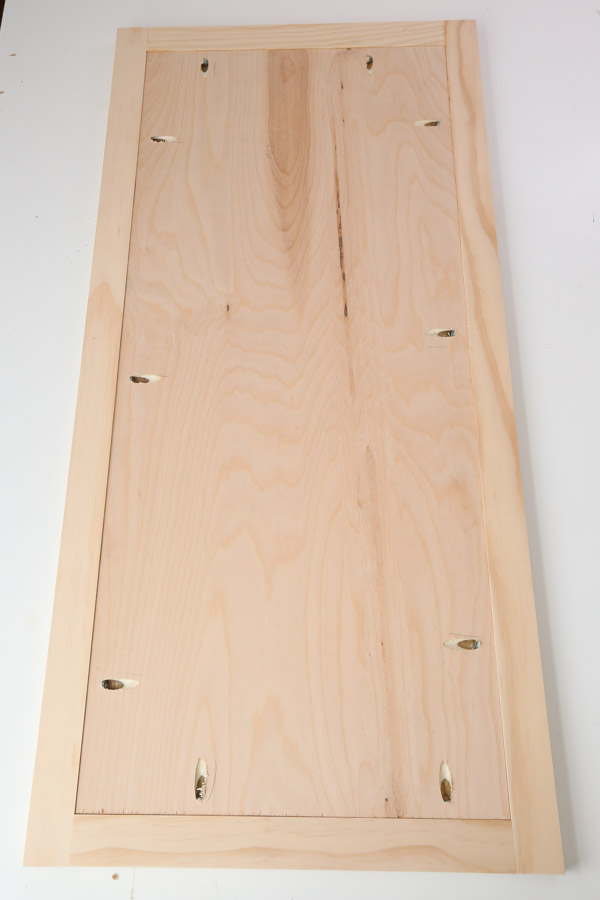
2. Add pocket holes to boards
It’s time to drill pocket holes on our boards using a Kreg Jig. If you need tips on using one, see my how to use a Kreg Jig tutorial!
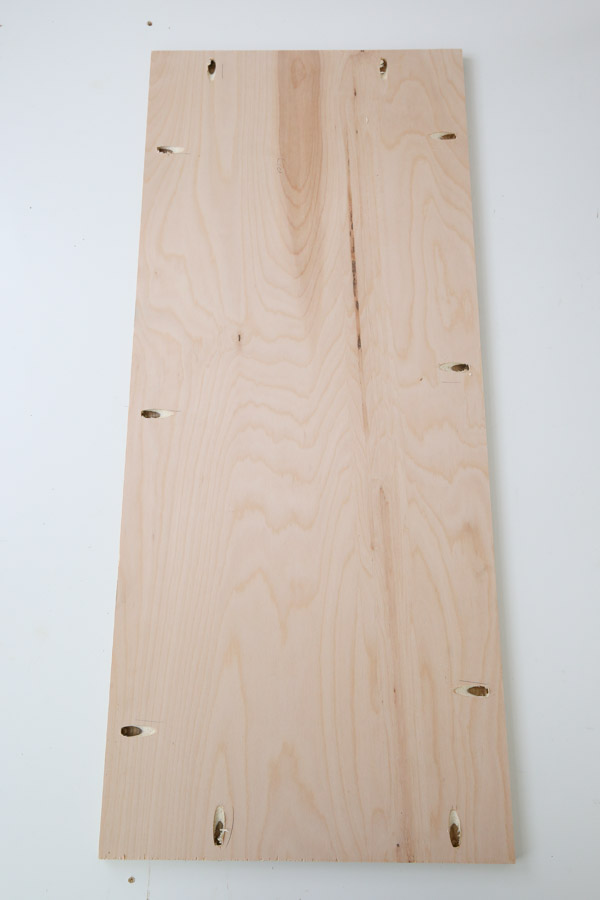
Add pocket holes on each side of the four plywood boards that are being used for the two sides (2 boards @ 11″ x 11″) and the front and back of the toy box (1 piece @ 11″ x 29″ and 1 piece @ 11 1/2″ x 29″).
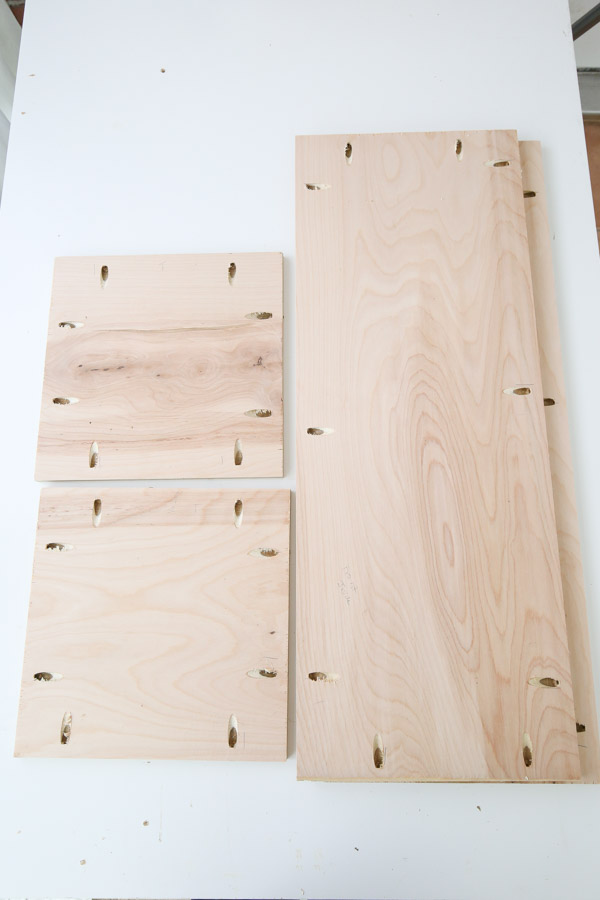
Then add pocket holes to each side of the top lid (1 piece @ 14″ x 33″).
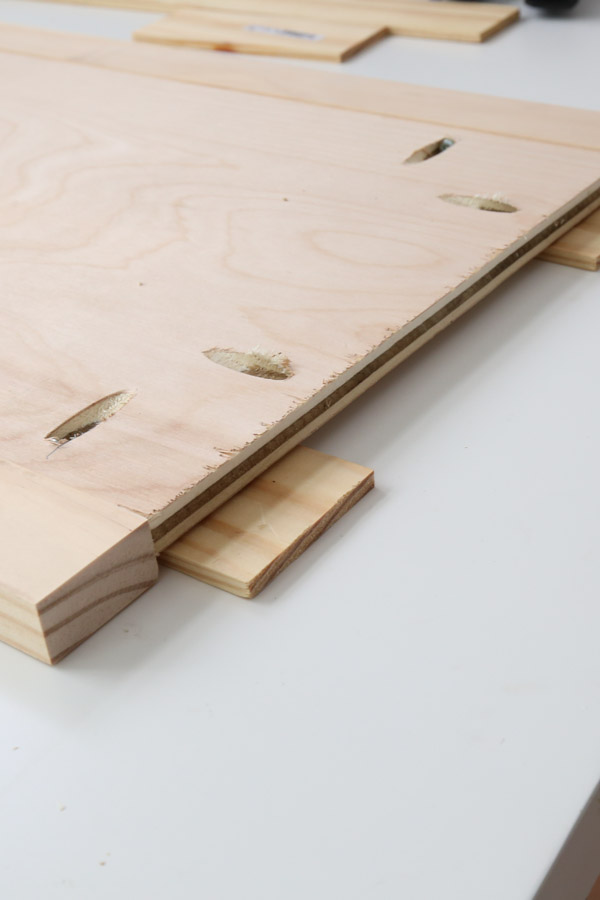
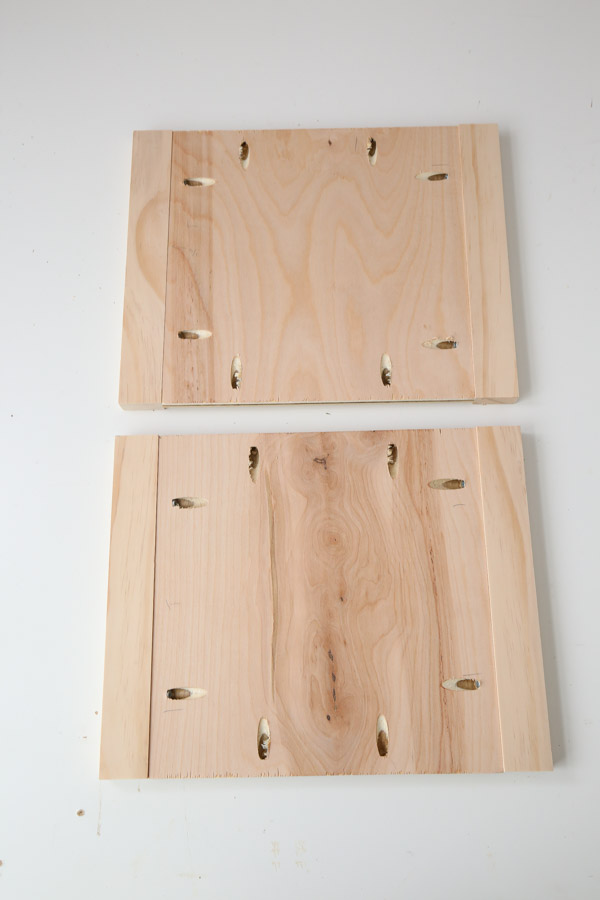
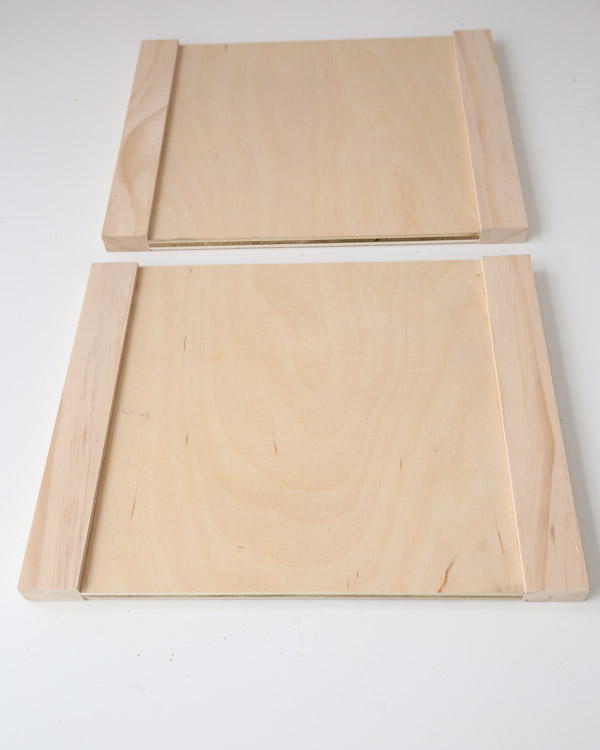
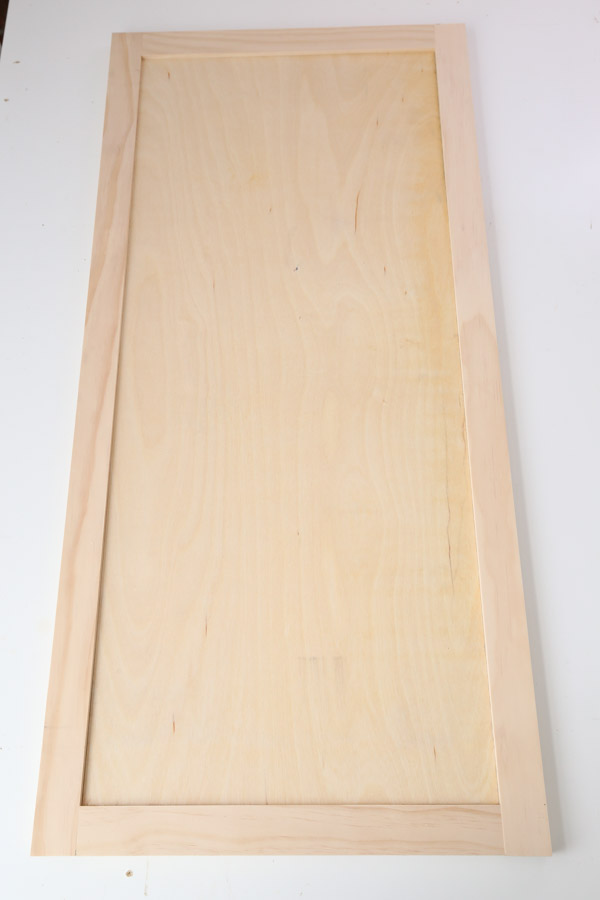
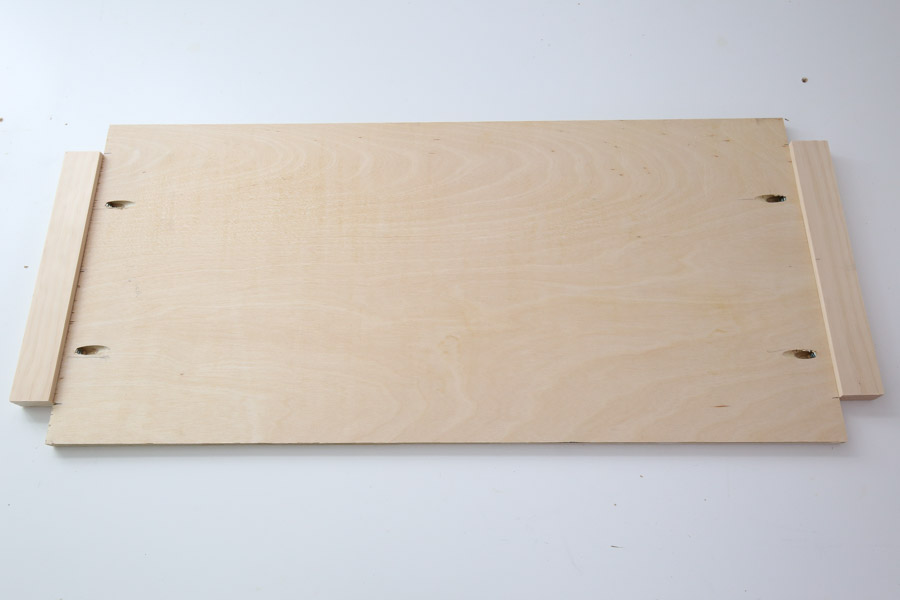
3. Assemble side frames of the toy box
Attach one plywood side frame piece together with an 11″ 1×2 board on the top and the bottom of it using a drill and 1″ Kreg screws and some wood glue.
Make sure that the back of the plywood is flush with the back of the 1×2. We used 1/4″ scrap wood to help with this part.
Repeat this process for the second side frame piece of the DIY toy chest.
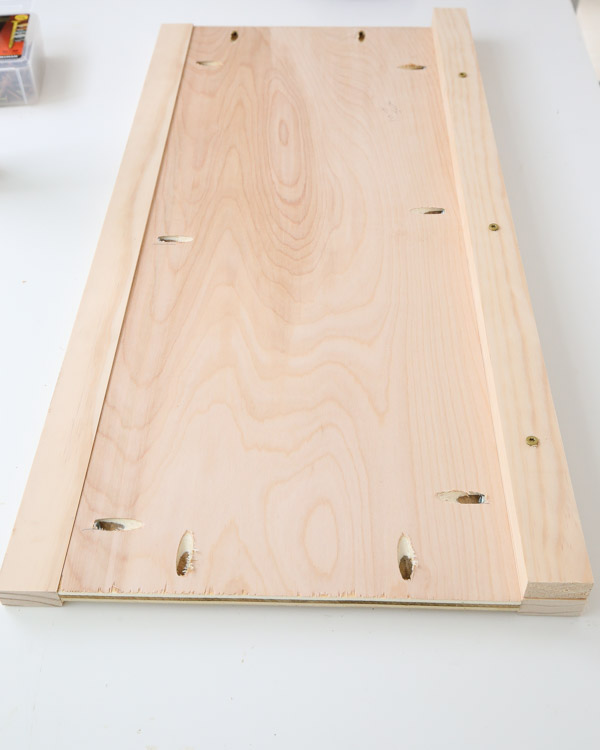
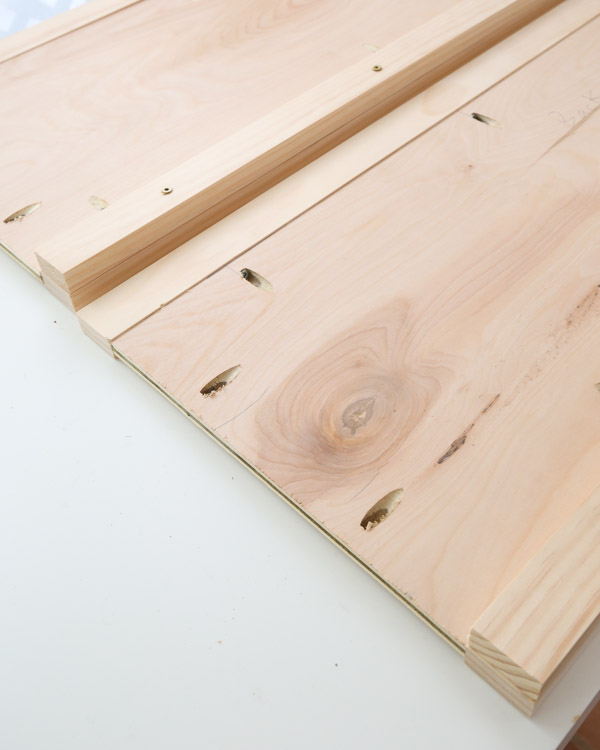
4. Assemble the front and back frames of the toy box
After the two side frames are assembled, attach the front frame and back frame together the same as the side frames except using the longer 1x2s @ 29″and two plywood boards @ 29″ long.
After the front and back frames are assembled, add a 28 3/4″ 1×2 with wood glue and 1 1/4″ self tapping screws (or regular wood screws) on top of the bottom 1x2s on the back side of the front and back frames. This is to create slat supports for the bottom of our toy box.
5. Build the lid of the DIY wooden toy box
Now it’s time to build the DIY toy box lid. The lid needs to be assembled the same way as the side frames and back and front frames except that we need to add 1x2s along all sides of the lid.
Use the two 1x2s @ 36″ and two 1x2s @ 14″ around the 14″ x 33″ plywood board.
Attach all of the 1x2s with 1″ Kreg screws and wood glue.
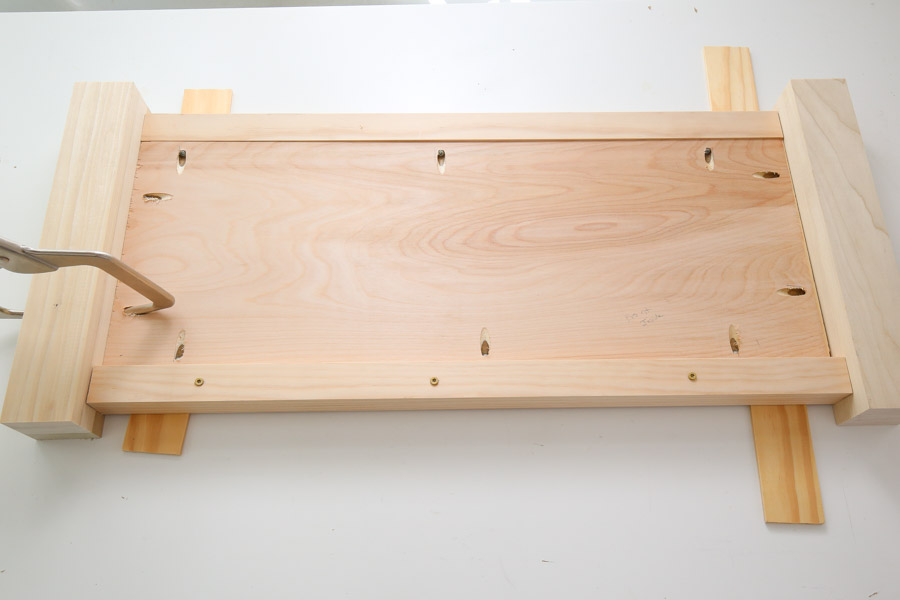
6. Attach the front and back sides frames to the DIY toy box legs.
To attach to the toy box frames together, start with the front frame of the toy box and place it between two 3×3 leg boards.
We want the front and two side frames to be inset 1/4″ so we placed our 1/4″ scrap wood under the front frame while attaching it to the legs.
Also, the front and two side frames need to be attached 1/2″ down from the top of the 3×3 legs because we want a 1/2″ gap to remain under the lid to leave a gap for fingers.
Attach the legs with wood glue and Kreg screws. We used our Kreg clamp to help with this part. You can see all of this in action in our DIY toy box video here!

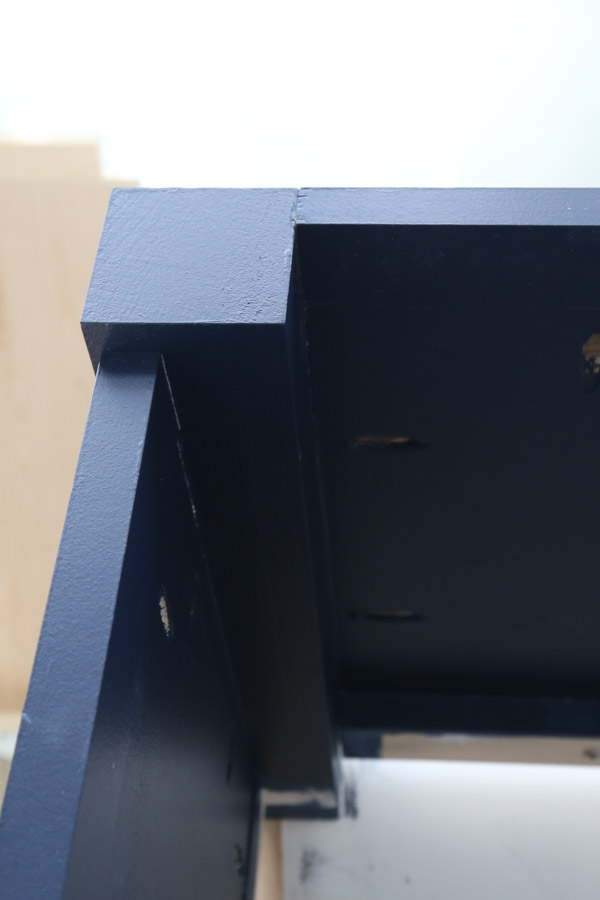
Next, attach the back frame of the toy box to the other two 3×3 legs. For the the back frame which is 1/2″ longer than the front frame, we need to attach it at the top of the 3×3 leg so there is no gap.
And don’t attach it with a 1/4″ inset either. This is because we need the back frame of the toy box to line up with our lid for installing the lid hinges as you can see in step #11.
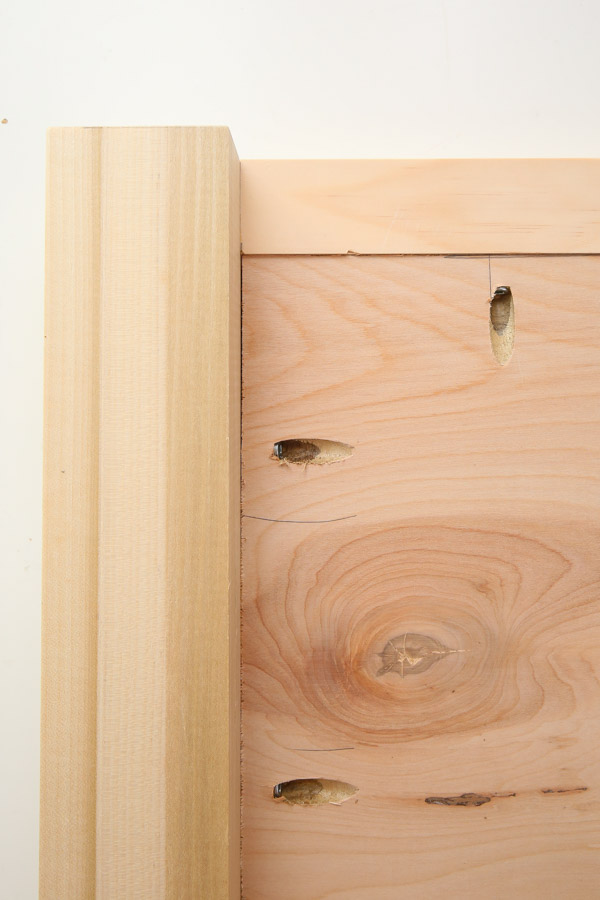
Here is what it will look like for the back top view (I took this after we painted so you can see what I mean):
7. Attach all sides of the DIY toy chest together
Now the side frames can be attached to the front and back frames.
Attach the side frames to the 3×3 legs the same way as the front frame, with a 1/2″ gap at the top and a 1/4″ inset. We had to use our smaller Kreg drill bit for this part with our standard size drill
You can see all of this in action in our DIY toy box video here!
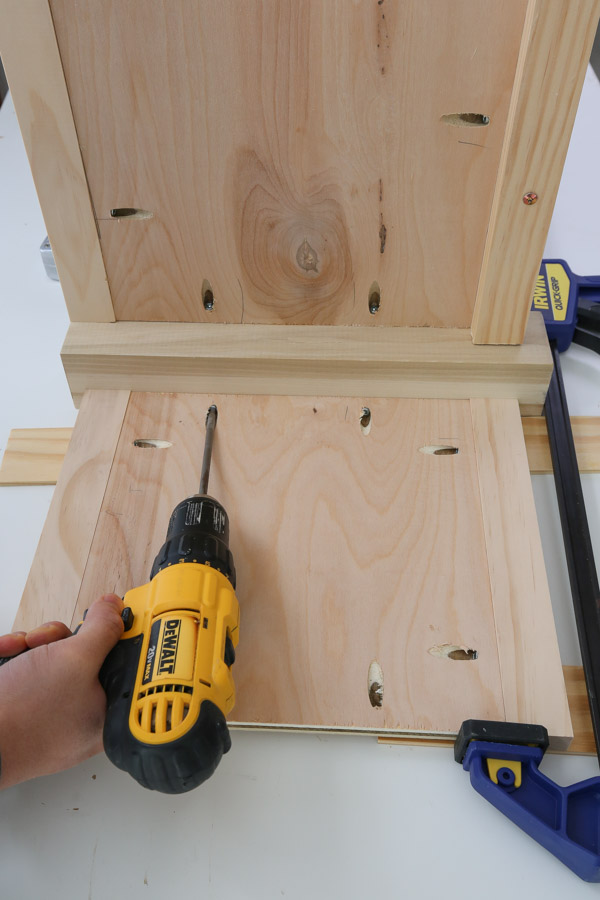
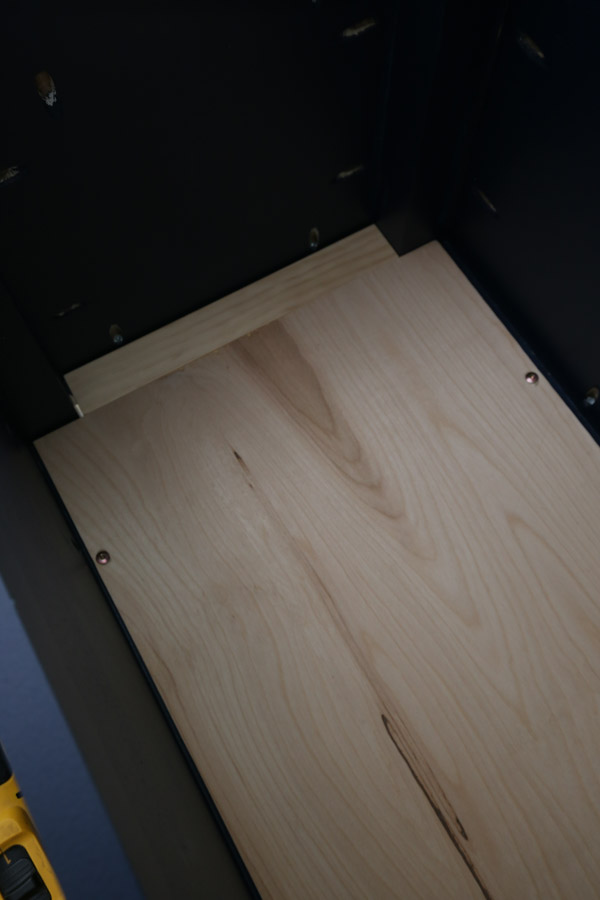
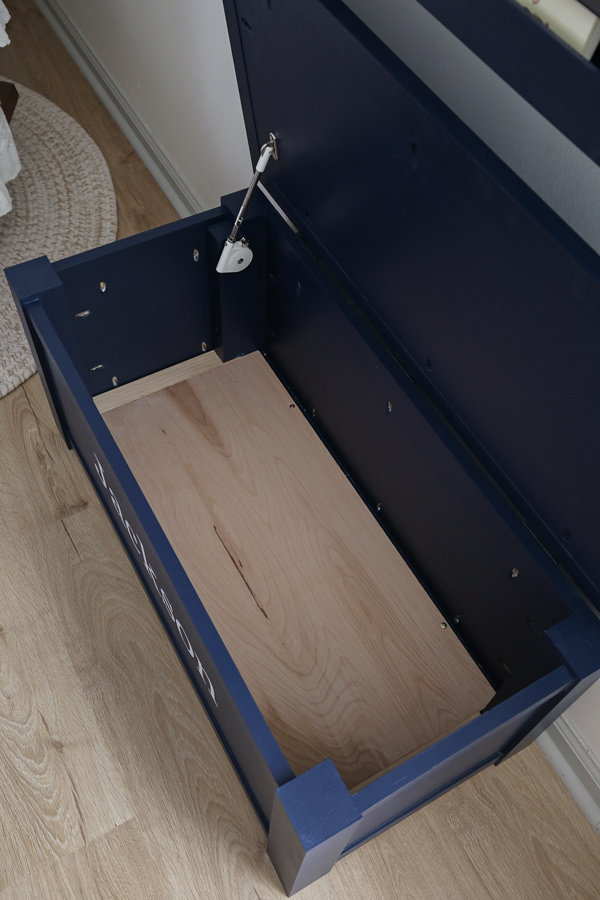
8. Build the bottom of the toy box
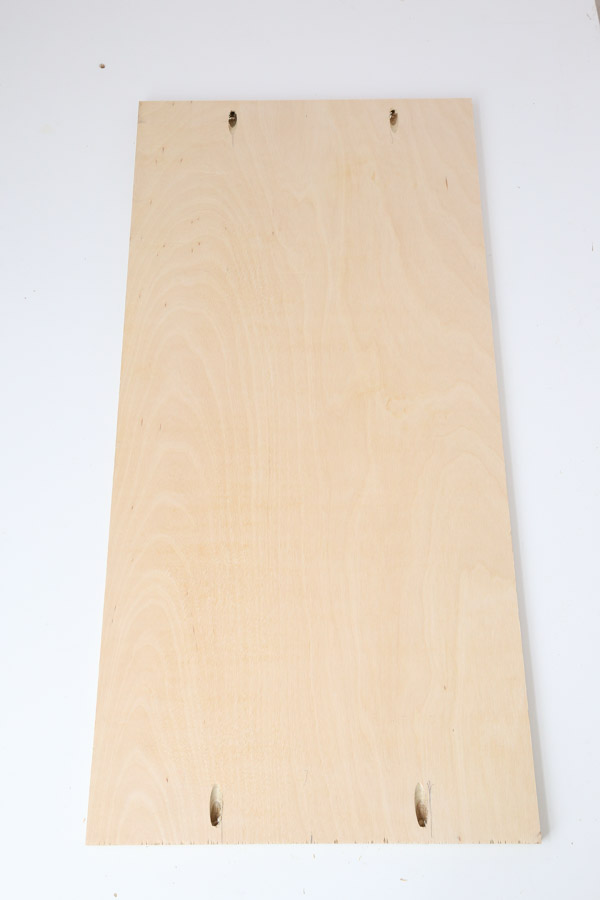
For the bottom of our toy box we cut a piece of plywood to 1/8″ less than the width and length of our front and back frames (1 piece @ 13 7/8″ x 28 7/8″). We did this so it would be easy to drop the bottom into place in the toy box.
Then, we added two pocket holes on each side.
Then, we marked on the plywood where we needed to attach 1x2s to the board to close the remaining gap on each side between the 3×3 legs.
Attach the two 1x2s @ 10 7/8″ on the bottom plywood board with 1″ Kreg screws and wood glue so they are between your pencil marks.
Flip the bottom board over and make sure it fits into the bottom of the toy box. It will sit on top of the 1×2 slat supports and be screwed into place. But, first we decided to paint everything before attaching the bottom board which we left unfinished.
9. Paint or stain
Now your DIY toy box is assembled and it’s time to paint or stain! If painting make sure to prime first! We painted ours Anchors Aweigh by Sherwin Williams in an eggshell finish.
10. Screw bottom board into place
After painting or staining, we used 1 1/4″ self tapping screws (you can use regular screws too, just drill pilot holes first) to attach the bottom board into the 1×2 slat supports.
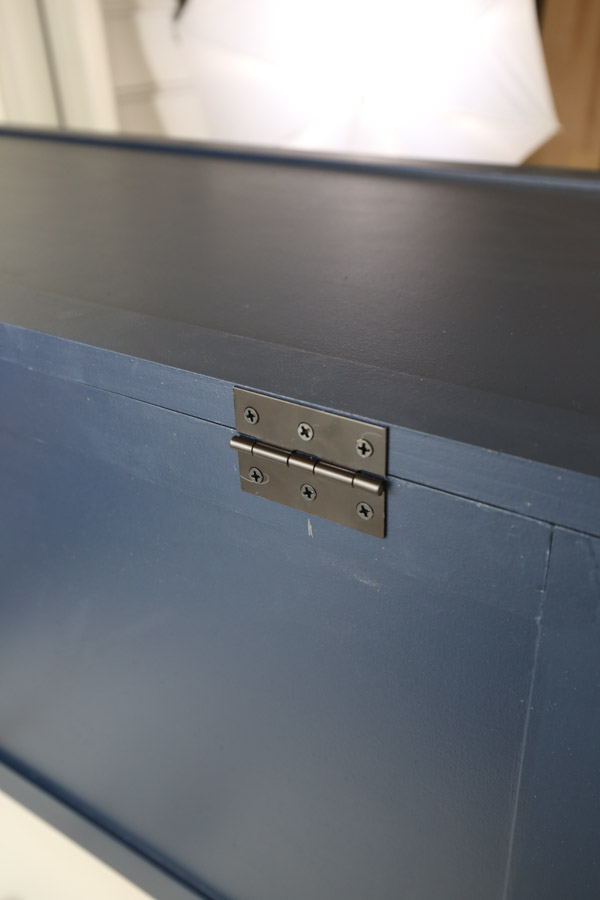
11. Attach lid and hinges to the toy box
Line up the toy box lid and make sure there is a 1″ overhang on the front and the sides but no overhang on the back.

Attach the toy box lid with surface mount hinges. We used three of these middle hinges that needed to be installed from the back but you could also use piano hinges or other hinges that can be hidden.
I just used these because I used them on our DIY double barn door entertainment center and they are very easy to install.
We marked the hole locations for our three hinges and drilled pilot holes first. Then screwed the hinges into place (you can see this install in the video tutorial).
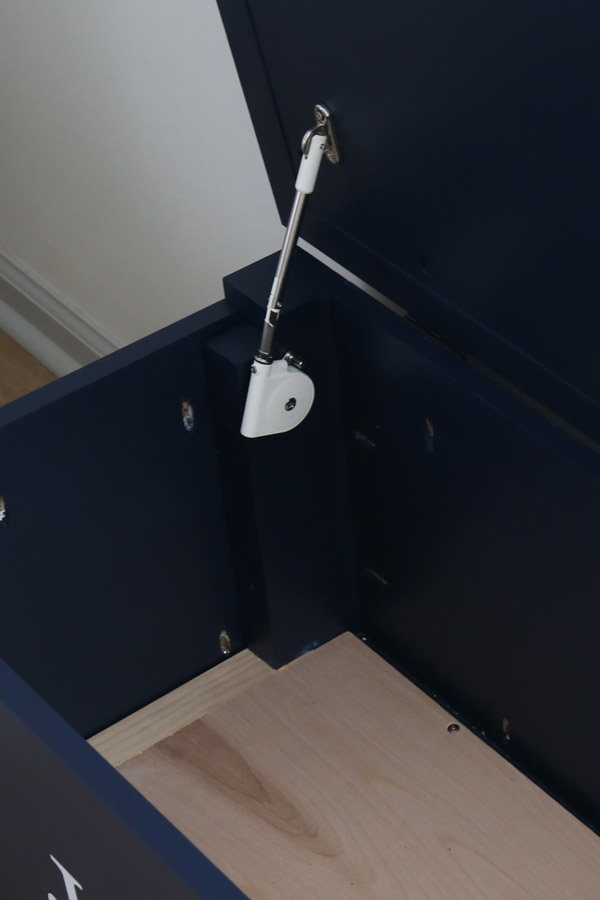
Lastly, we added a slow closing hinge on the inside. We did need to attach a 2×2 next to one of the back 3×3 legs so the hinge could be installed closer to the back frame. We just screwed the 2×2 into the 3×3 leg as shown below.
There are other slow close hinges that can be installed, this one was ok and not the easiest to install. But it does close slow which is the most important part.
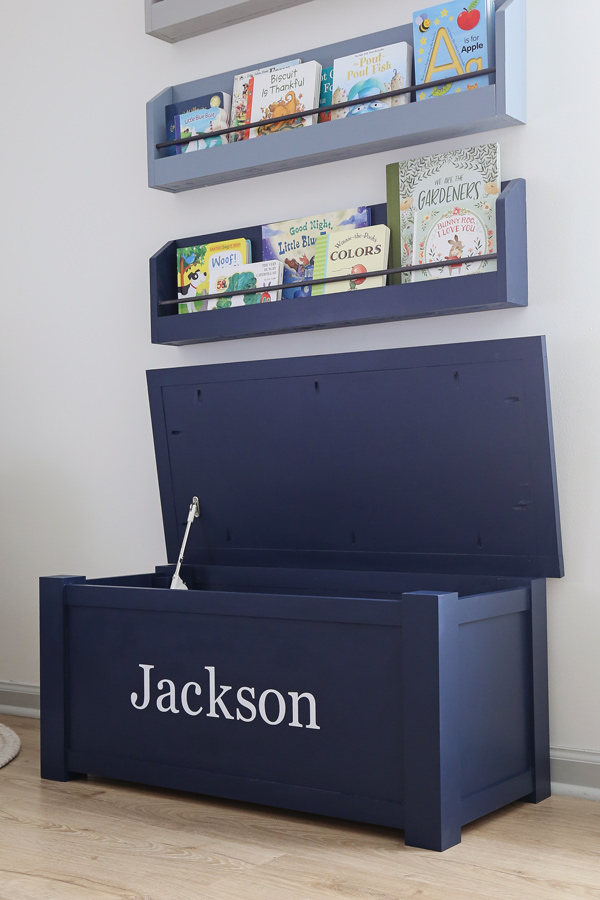
And that’s it for this build! I did add a custom name vinyl decal that I made with my Cricut and white vinyl! It was really the perfect final touch to this special, handmade toy box for our son Jackson!

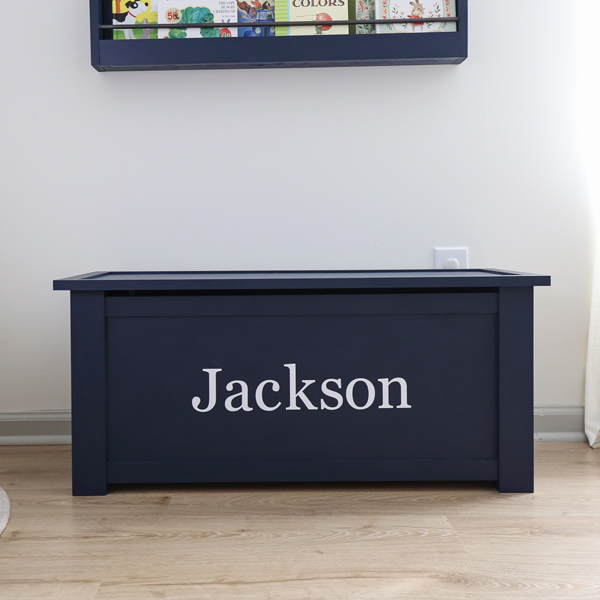

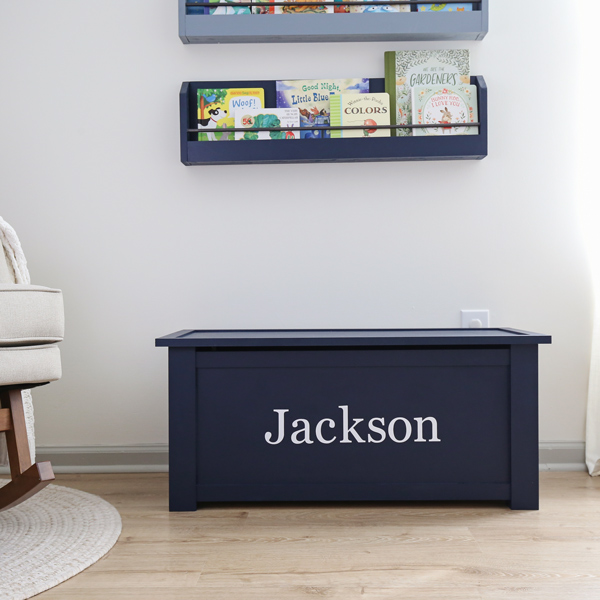
I love our son’s new DIY toy box! It’s perfect for storing all of his toys and he loves using it too! It really turned out beautiful and the style is so classic, so it will last for years to come!
Do you have a special little one that you want to make this DIY toy chest for?
Make sure to join our Woodworking for the Home Facebook group and share this project there if you make it! Or tag me on social media @angelamariemade or #angelamariemade!
Don’t forget to enter our holiday giveaway and check out all of the other fun projects in our 10 Days of DIY Challenge & Giveaway!
Follow along for my latest projects and sneak peaks on Instagram, YouTube, and Pinterest!
Want to save for later?! Pin it here:
Jan-Willem Janssen
Sunday 4th of February 2024
Hi Angela, i don't understand the measures for the lid. We have a plywood plate of 14 x 33 inch. We have to surround it with 1 x 2's. the length of these 1 x 2's are 14 inch and 36 inch. The 36 inch 1 x 2 is to small to surround the plywood plate. According to me To surround the plywood plate i need the 36 inch 1 x 2's to be 37 inch long. What am i seeing wrong?
Best regards, Jan-Willem
Angela Marie Made
Thursday 29th of February 2024
The actual width of a 1x2 is 1.5" not 2", 2" is the nominal width so 1.5 + 1.5 + 33 = 36" Check out this post for more info about wood sizes! https://angelamariemade.com/intro-to-woodworking-lumber-size-guide-free-printable/
Michael Preator
Tuesday 7th of February 2023
I love it and am thinking about building for my son. I was curious about the pocket holes. Do you know a way to fill them while still making it look somewhat natural? I am familiar with using the jigs but have never filled in before. I know they have wood filler but I'm not sure how good that actually works.
Angela Marie Made
Friday 10th of February 2023
If the holes will be visible from the outside, I fill them with wood filler and sand, then paint or stain over them! You can also buy wood pocket hole plugs as an alternative.
Peter Ledger
Sunday 2nd of January 2022
Can you use 2x2 for the legs and will it affect other measurements?
Angela Marie Made
Tuesday 4th of January 2022
You can but it will change some of the measurements.
Peter Ledger
Saturday 1st of January 2022
Can you use 12mm MDF instead of plywood
Angela Marie Made
Tuesday 4th of January 2022
You can, but I have never tried to use kreg screws with mdf. It sounds like you have to be a lot more careful when attaching the screws and also need to use glue but if that is the material you have I would give it a shot with a couple boards and see how they hold up before starting the whole project.
Hollie
Sunday 14th of November 2021
What did you use for the name
Angela Marie Made
Monday 15th of November 2021
I used a cricut and vinyl