
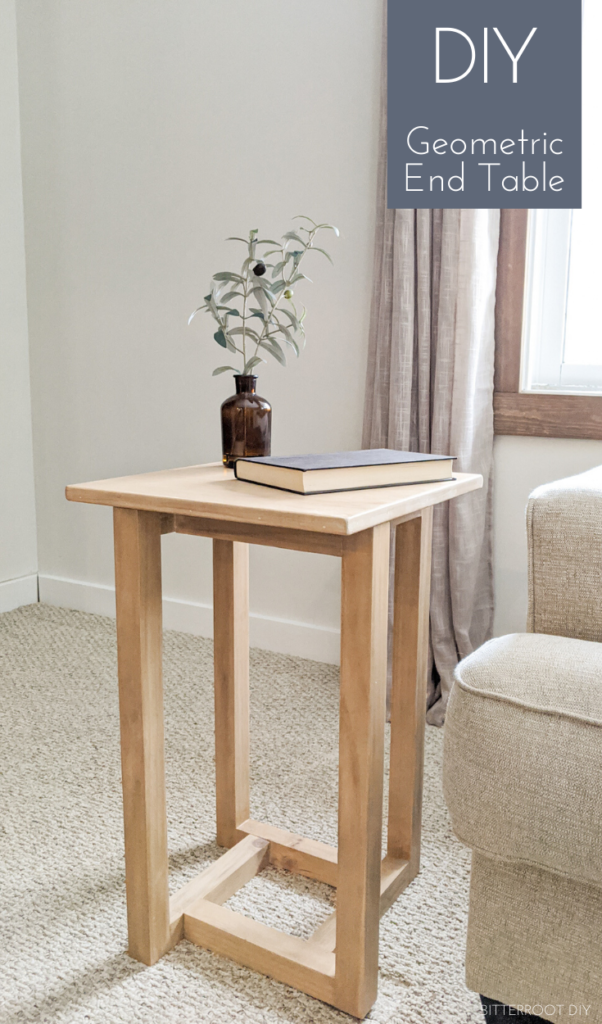
Plans and a tutorial to build your own geometric DIY end table.

This post contains affiliate links. If you make a purchase from one of the links, I may make a small commission at NO EXTRA COST to you. This helps keep the tutorials and plans free here at Bitterroot DIY. Thank you for your support! See my full disclosure here.
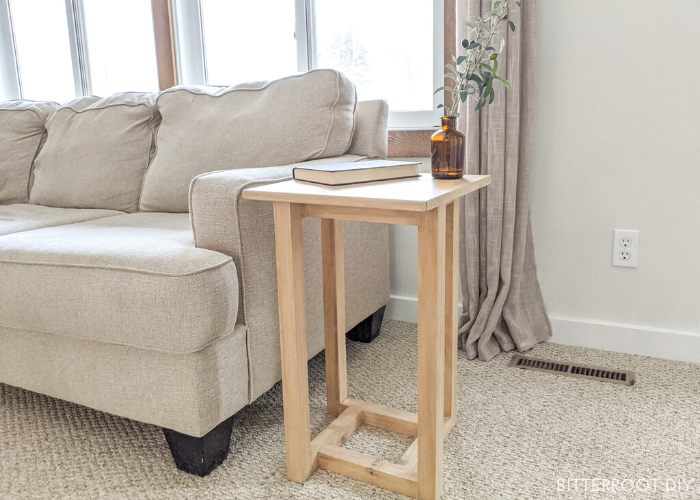
Here’s table #3 of the latest DIY end table kick – a geometric end table. The base looks a little complicated but, I promise, it’s SUPER SIMPLE! In case you missed it over on Instagram, we’ve been considering new end tables for our living room but couldn’t decide on a style, so I just went ahead and built a few! Here’s the third of four.
Enjoy the plans!
TOOLS & SUPPLIES
- Miter Saw
- Drill
- Kreg Pocket Hole Jig
- 1 1/4″ Pocket Hole Screws
- 2 1/2″ Pocket Hole Screws
- 3/4″ Corner Braces (optional)
- Tape Measure
- Clamps
- Wood Glue
- Pre-Stain
- White Wash Stain
- Early American Stain
- Water Based Polyurethane in Glossy
- Stain Pads
- Polyurethane Brush
- Speed Square
- Pencil
- Safety Glasses
- Ear Protection
Lumber:
- 2 | 2 x 2 @ 8′
- 1 | 1 x 4 @ 6′
Cuts:
- 4 | 2 x 2 @ 23″ (legs)
- 8 | 2 x 2 @ 6″ (top and bottom frame)
- 4 | 1 x 4 @ 14″ (tabletop)
Step 1.
Attach one 6″ 2×2 to the top and bottom of each leg with wood glue and two 2 1/2″ pocket hole screws.


Repeat for all four legs.
Step 2.
Mark a line 2″ to the inside of each leg frame and attach the first two leg frames together with wood glue and one 2 1/2″ pocket hole screw.


I only used one pocket hole screw since there are already two screws going from the frame into the leg. I used wood glue as well to ensure it’s a strong joint.
Repeat the same thing on the bottom of the frame. When you flip the frame over, the bottom should be exactly the same as the top.
Attach the other two leg frames together the same way. When all four legs are put together, the frame should look like this from both the top and bottom:


And there you have the frame – told you it was easier than it looks!


Step 3.
Build the tabletop by attaching the four 1x4s together with wood glue and 1 1/4″ pocket hole screws. I stagger the pocket holes for a super strong tabletop.


For more information, see my post on how to build a tabletop.
Once you’ve built the tabletop, I recommend sanding and staining before attaching it to the base so you don’t have to work around as many corners.


I stained this table with my latest favorite stain combo – pre stain, white wash pickling, and early american.
Finally, attach the tabletop to the base. There are a lot of different ways to attach tabletops, but I go back and forth between small 3/4″ corner braces, figure 8 fasteners , or just screwing it directly in from the bottom. I kept it simple with this one and just drove 2″ screws through the frame into bottom of the tabletop.
Please let me know if you have any questions and I’ll get back to you as soon as possible!


Thanks for stopping by!
For more project ideas, you can find me on Pinterest. And to stay up to date with the latest shenanigans, follow me on Instagram.


Alexandra
Wednesday 6th of January 2021
Hello!
When you say white stain- is it oil based or water based?
tylynn_sattler
Thursday 7th of January 2021
I used an oil based one here, but I think you could use a water based one as long as you let it try a little before trying to apply an oil based stain over it.
Chris
Monday 14th of September 2020
Just built this yesterday. "LOVE IT"!! I had searched all over the web to try and find a nice little side table to put onside my recliner. I'm glad I came across your website. I did make a slight modification to your plan by making it a little taller (18') and the table top a little wider (16"). Will probably build one more to put onside my sofa. Thinking also about building a matching coffee table. Any suggestions?
tylynn_sattler
Monday 21st of September 2020
Thanks for using my plans!
I'd just start by figuring out what dimensions you want and go from there. It's totally up to you.
Laila
Saturday 22nd of August 2020
Gorgeous project! Did you use a router on the ends of the table top ? The finish is beautiful!
tylynn_sattler
Saturday 22nd of August 2020
Thanks! No I didn't router the ends, but the trim I used to finish them had a slightly rounded edge.
Ariel
Wednesday 19th of August 2020
I can't believe I made this! I'm so impressed with myself. I honestly did this out of boredom, (pandemic lockdown), and now I'm addicted to DIY projects on your website. Thank you for making the steps so easy to follow. I've never been able to make DIY projects look like they do when presented. Thank you!!!!! This was really fun!!
tylynn_sattler
Saturday 22nd of August 2020
Way to go! I'm so glad you tried it out and it went well. Keep building!
Vanessa
Friday 10th of July 2020
This is so beautiful! I’m looking to make something very similar, what kind of wood did you use?
tylynn_sattler
Sunday 12th of July 2020
Thank you! I just used pine