We are back with another fun and easy project this week! Whitney and I both adopted the cutest little frenchie pups and they are siblings!! Every Shanty family member gets at least one Shanty bed in their lives and our pups are no exception! Come build this super cute and super easy DIY Dog Bed with us! Just click the box below to watch!
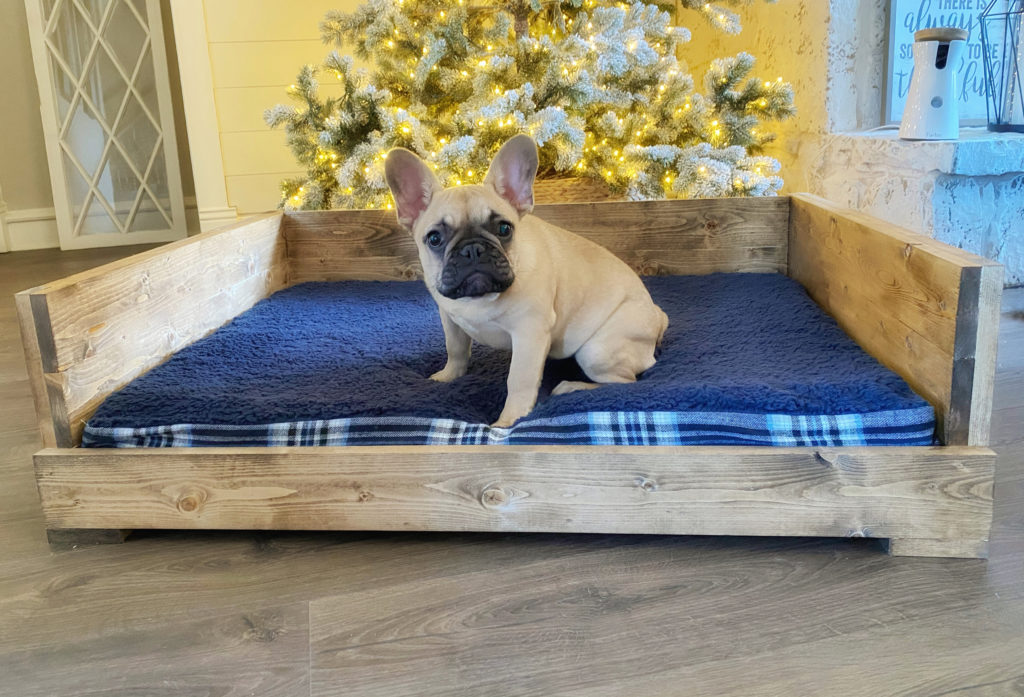
Table of Contents
Tools
Supply List
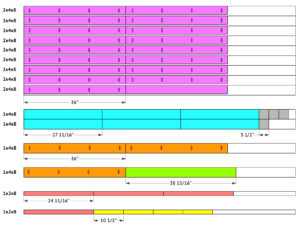
- 9 – 2x4x8 Framing Lumber
- 4 – 1x4x8 Pine or Common Boards
- 2 – 1x2x8 Pine or Common Boards
- 1 1/4″ pocket hole screws
- 2 1/2″ pocket hole screws
- 1 1/4″ brad nails
- 2″ brad nails
- wood glue
- dog mattress
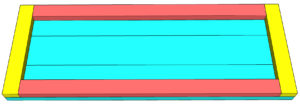
How to Build a DIY Dog Bed
Step 1
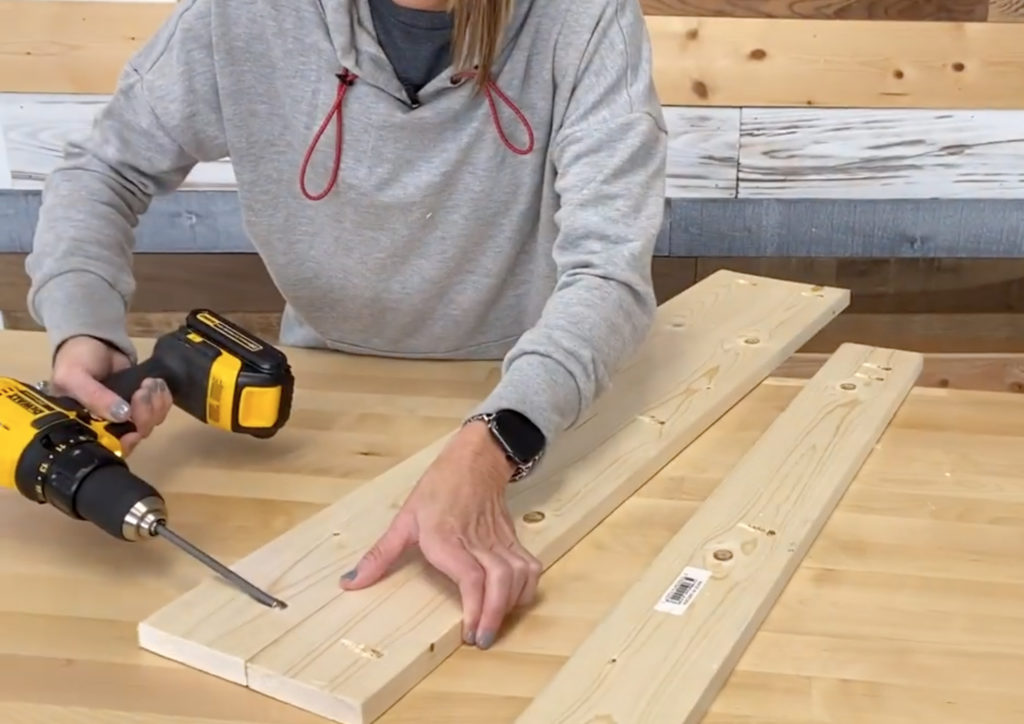
Cut the bottom planks to size and drill 1 1/2″ pocket holes along one edge of all except one board.
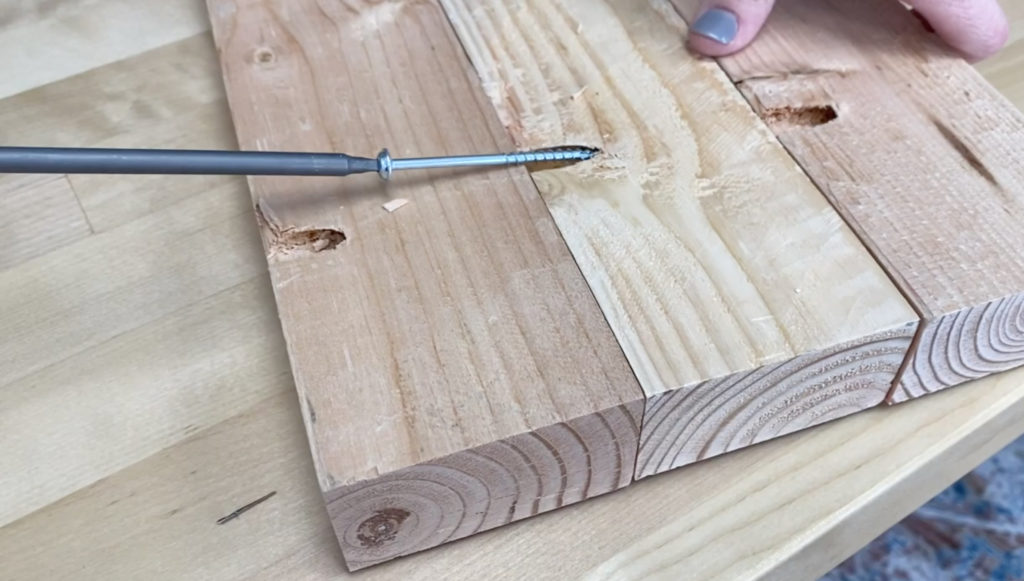
Attach them together using 2 1/2″ pocket hole screws.
Step 2
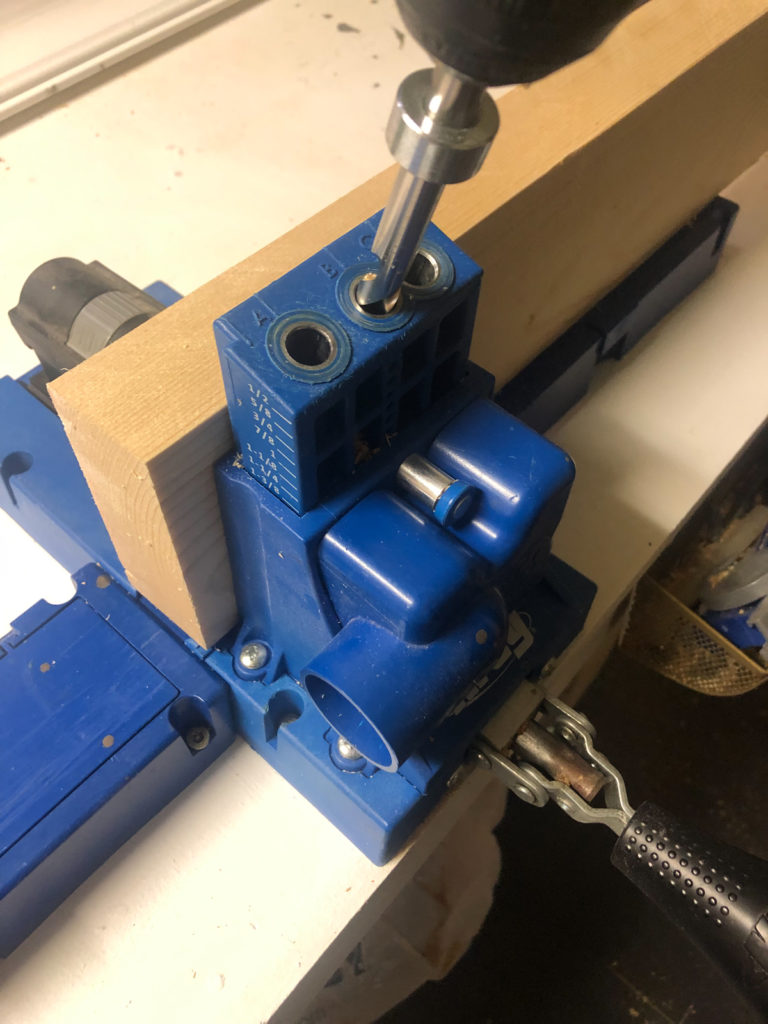
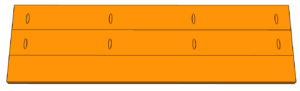
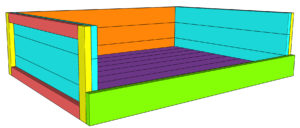
Cut the back planks to size and drill 3/4″ pocket holes along one edge of two of the planks. Attach them together with 1 1/4″ pocket hole screws.
Step 3
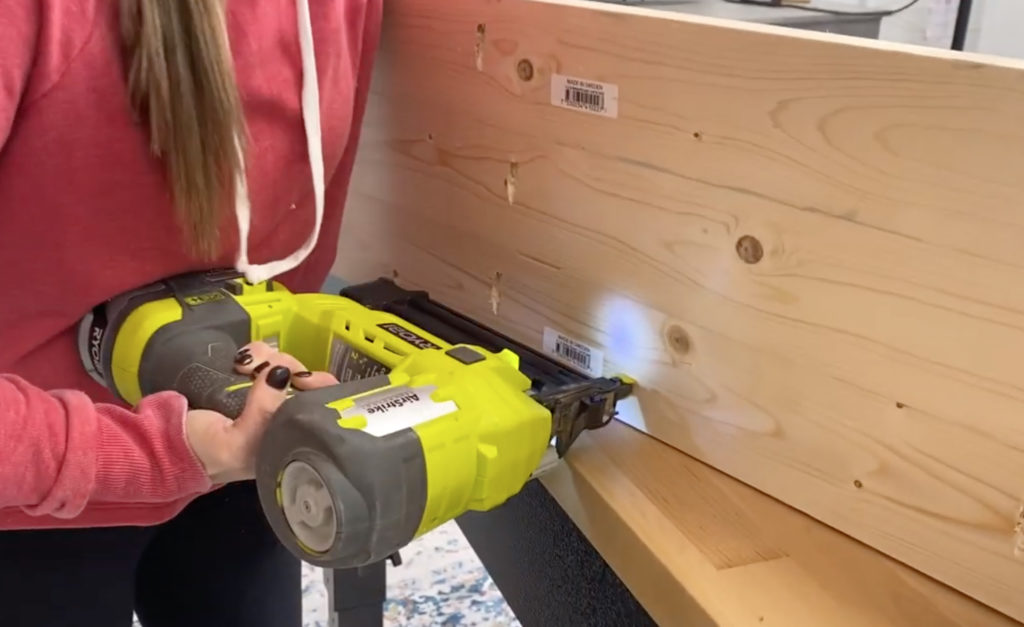
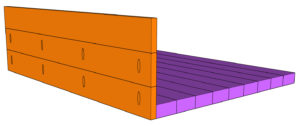
Attach the back planks to the bottom planks with 1 1/4″ brad nails and wood glue. The bottom of the back planks should be flush with the bottom of the bottom planks.
Step 4
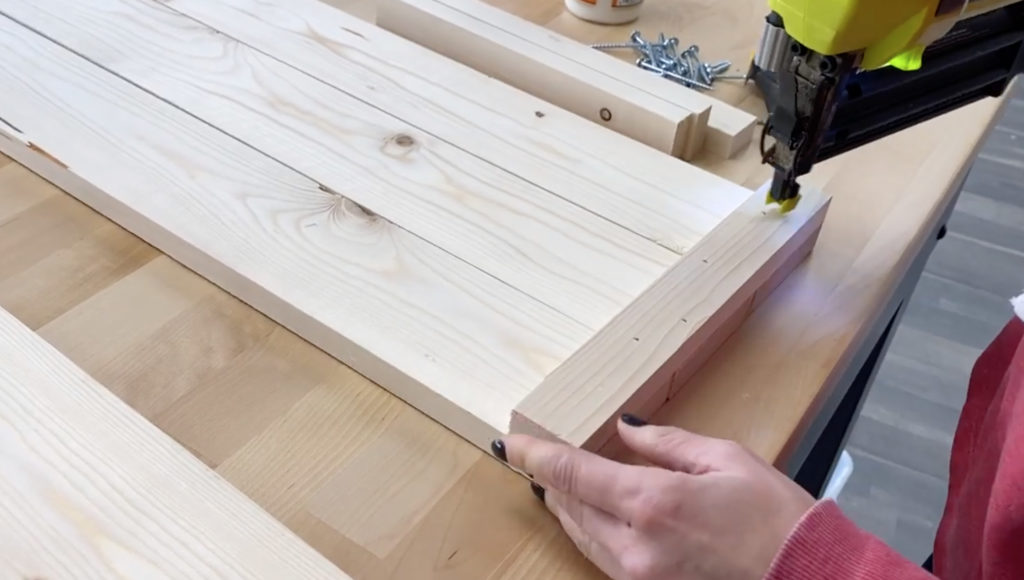
Cut the side planks to size. Measure and cut the vertical trim to fit. Attach the vertical trim to the ends of the planks with 1 1/4″ brad nails and wood glue. Measure and cut the horizontal trim to size and attach it the same way. Build two assemblies.
Step 5
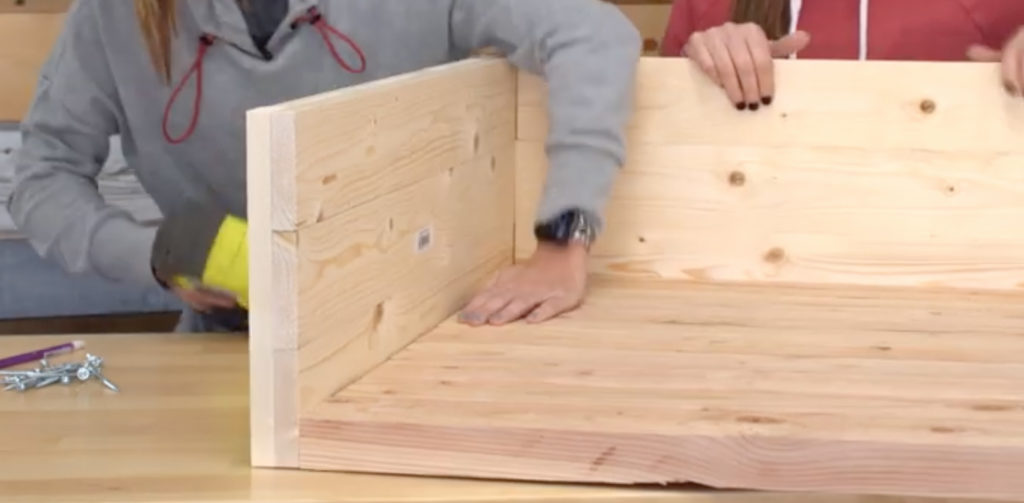
Attach the side assemblies to the dog bed with 2″ brad nails and wood glue. The bottom of the side assemblies should be flush with the back of the back planks and the bottom of the side assemblies.
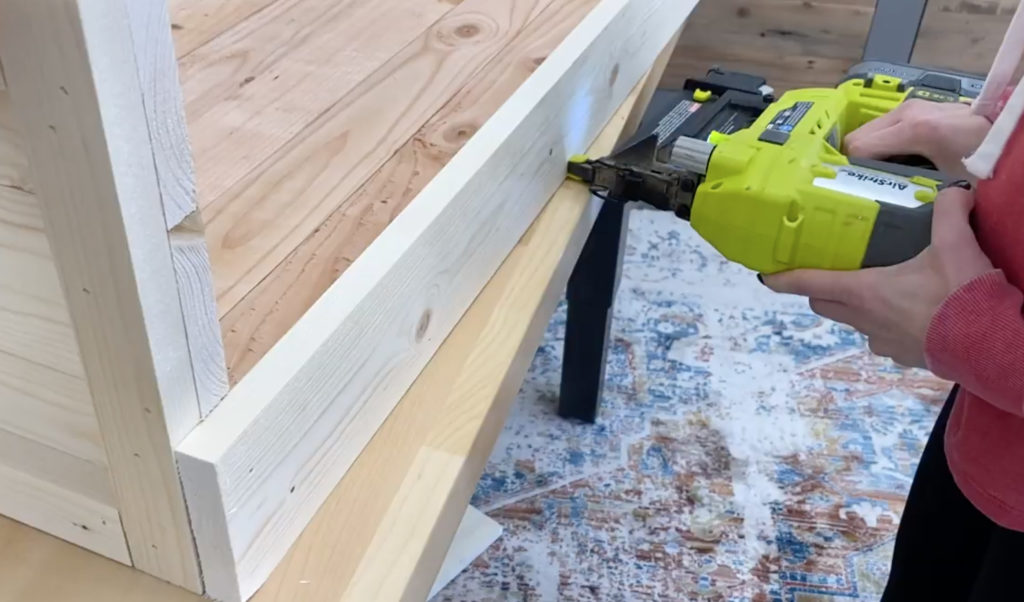
Cut the front trim piece to size and attach it to the front of the dog bed with 1 1/4″ brad nails and wood glue. The side and bottom of the trim piece should be flush with the bottom and edges of the dog bed.
Step 7
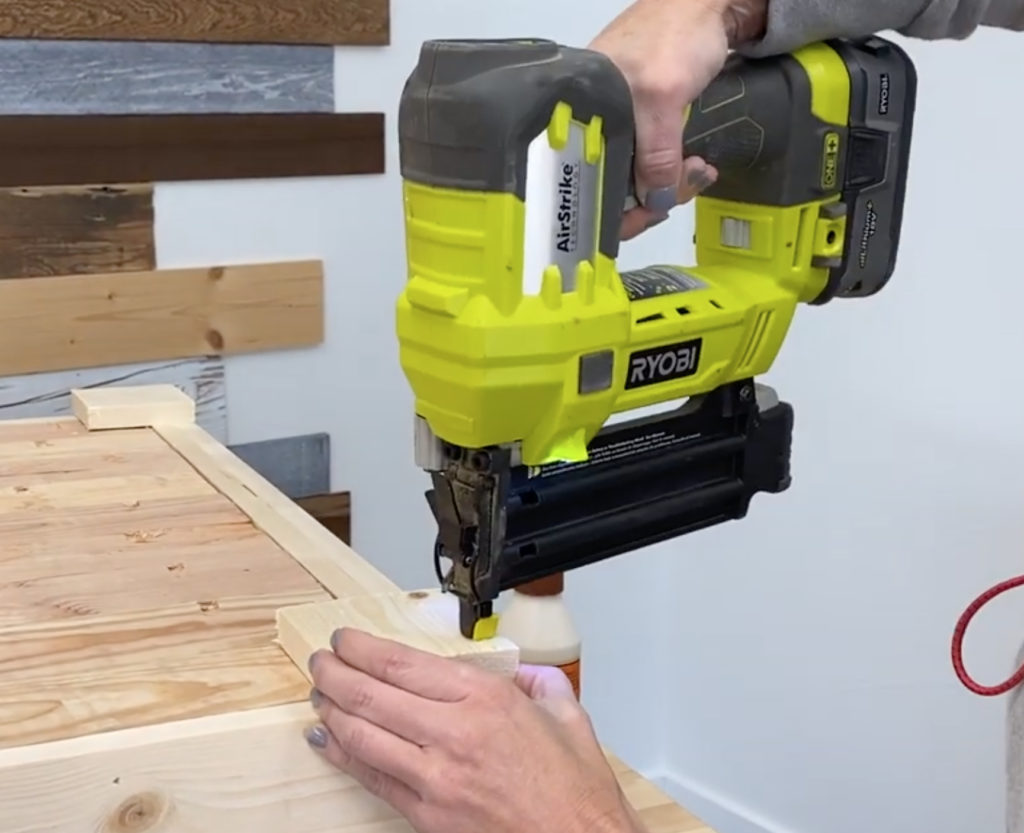
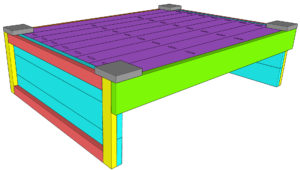
Flip the dog bed upside down and cut the foot pads to size. Attach them to the bottom of the dog bed with 1 1/4″ brad nails and wood glue. They should be flush with the corners of the dog bed.
That’s it! Now, just sand it down, add a finish and the mattress and you’re done! Make sure to share your builds with us on social media and use #shanty2chic so we can share them too!
Happy Building!

DIY Dog Bed
Tools
- Miter Saw
- Drill
- Kreg Jig
- Brad Nailer
Supply List
- 9 2x4x8 Framing Lumber
- 4 1x4x8 Pine or Common Boards
- 2 1x2x8 Pine or Common Boards
- 1 1/4" pocket hole screws
- 2 1/2" pocket hole screws
- 1 1/4" brad nails
- 2" brad nails
- wood glue
- dog mattress
Instructions
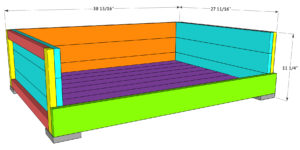
Cut List
- Note: We ripped the round edges off of our 2×4 boards making them 3" wide. This is not a necessary step but if you choose not to rip your boards, modify the measurements accordingly.

Build
- Cut the bottom planks to size and drill 1 1/2" pocket holes along one edge of all except one board. Attach them together using 2 1/2" pocket hole screws.

- Cut the back planks to size and drill 3/4" pocket holes along one edge of two of the planks. Attach them together with 1 1/4" pocket hole screws.

- Attach the back planks to the bottom planks with 1 1/4" brad nails and wood glue. The bottom of the back planks should be flush with the bottom of the bottom planks.

- Cut the side planks to size. Measure and cut the vertical trim to fit. Attach the vertical trim to the ends of the planks with 1 1/4" brad nails and wood glue. Measure and cut the horizontal trim to size and attach it the same way. Build two assemblies.

- Attach the side assemblies to the dog bed with 2" brad nails and wood glue. The bottom of the side assemblies should be flush with the back of the back planks and bottom of the side assemblies.

- Cut the front trim piece to size and attach it to the front of the dog bed with 1 1/4" brad nails and wood glue. The side and bottom of the trim piece should be flush with the bottom and edges of the dog bed.

- Flip the dog bed upsdie down and cut the foot pads to size. Attach them to the bottom of the dog bed with 1 1/4" brad nails and wood glue. They should be flush with the corners of the dog bed.

- Now just sand it, add a finish and the mattress and you're done! Make sure to share your builds with us on social media and use #shanty2chic so we can share them too! Happy Building!


Thanks for your valuable information. Keep posting.
I gain such great knowledge from this article and I am glad to come to know thanks about it…
Really it was great article and very lovable to puppy lovers.. Thanks for share with us
What is the stain that was used?
This is so cute! Sharing on the Weekened Edit over at everydayedits dot co
PS what is the nail color? ha laura
I love the design, but have a question. Why are 9# 2″x4″x8′ boards needed in order to get 9# 2″x4″36″ boards? Wouldn’t you only need 5?
Keep on keepin’ on!! 🙂
I had the same question!!
looks like it was just a typo.. they used 9 slates so maybe whoever put the plans together made a mistake.
Hi.
I just found your website. It’s awesome! I have a question about the size of the dog bed. I have a large 104lb service dog named Zoey. She is a Golden Retriever/Great Pyraneese mix. How do I figure out what size to make her bed and also make sure that it’s sturdy for her weight. I would like to add locking wheels on it so I can move it when I need to.
Please tell me you left a brand new puppy loose in your house only to promote the doggie camera! Also, I am trying to understand why you put footpads on this bed. All I see at this point is a way to allow dust and dirt to accumulate under the bed.