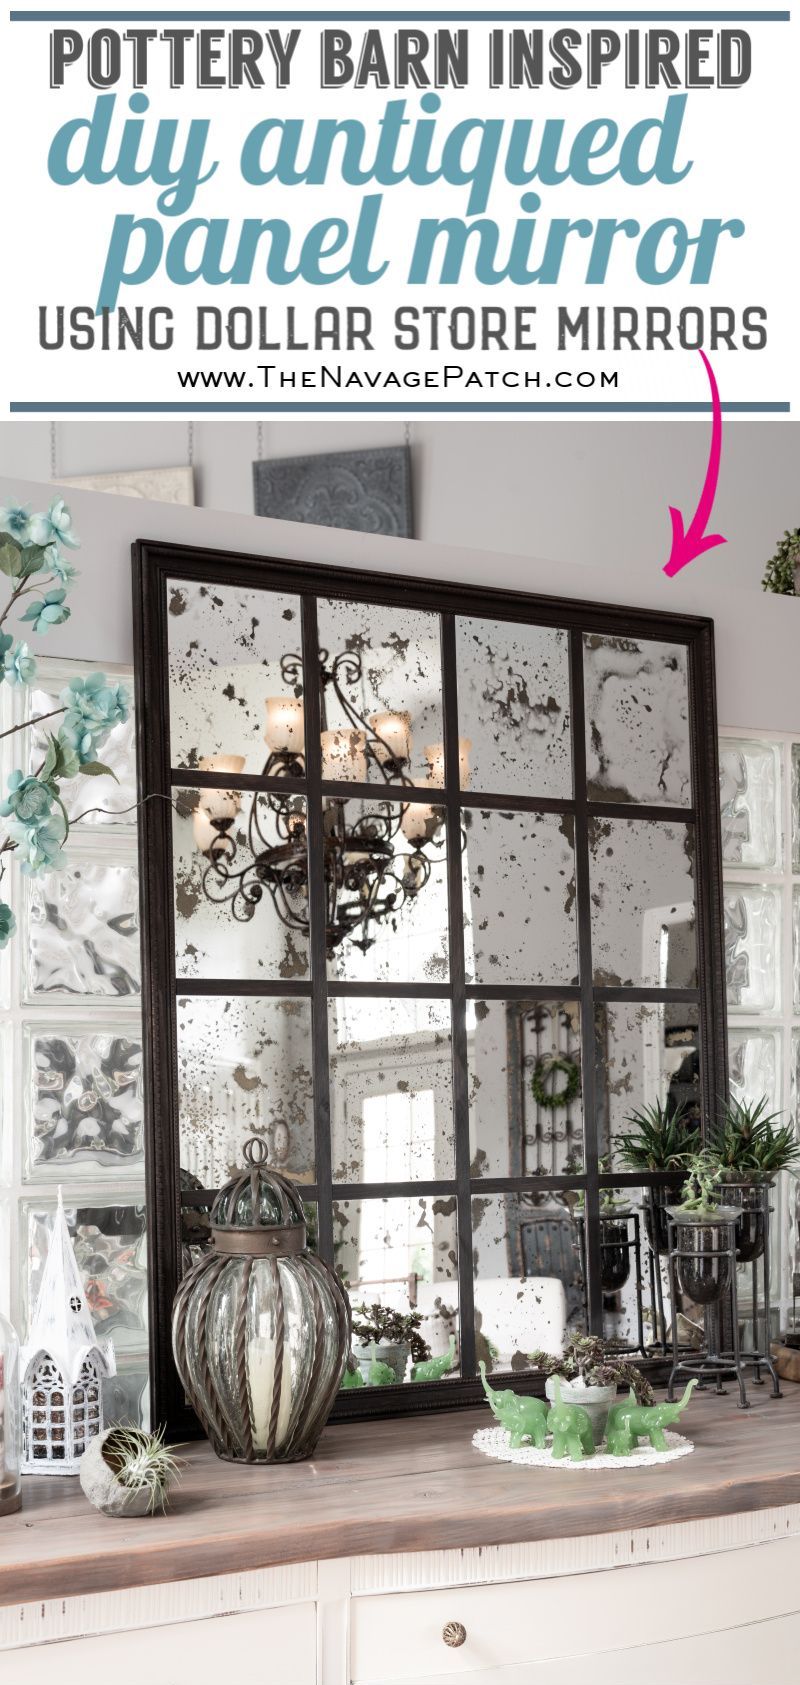
DIY Antiqued Panel Mirror (Pottery Barn Inspired)
This DIY antiqued mirror was made with mirror panels we antiqued ourselves using the simple technique we recently showed.
So Handan’s been yammering on about this Pottery Barn panel mirror for months.
This one, right here:

She showed it to me.
I looked at it. It had a name: Eagan. Why does a mirror need a name?
I yawned.
Then I looked at its price.
And I spit my martini across the room.
They wanted $700 for the thing! (It’s currently on sale for $500 – big whoop!)
Seriously, I get so bored looking at it that my eyelids get droopy, and I start to…zzzzzzzzzzz……
Huh, what? Where am I? Oh, yeah…I was telling you about the absurdity of Eagan the Reflector.
I’ve said it before, and I’ll say it again: Jeezum Crow! Who the hell buys this stuff?
Now, throughout all Handan’s yapping and yammering, there was one thing I was sure of.
One thing was certain.
My babes didn’t want to buy that ridiculously overpriced assemblage of glass and wood. (Thank God)
Nope, she’s way too shrewd for that!
As you might have guessed, she wanted me to make her one.
Or something similar anyway.
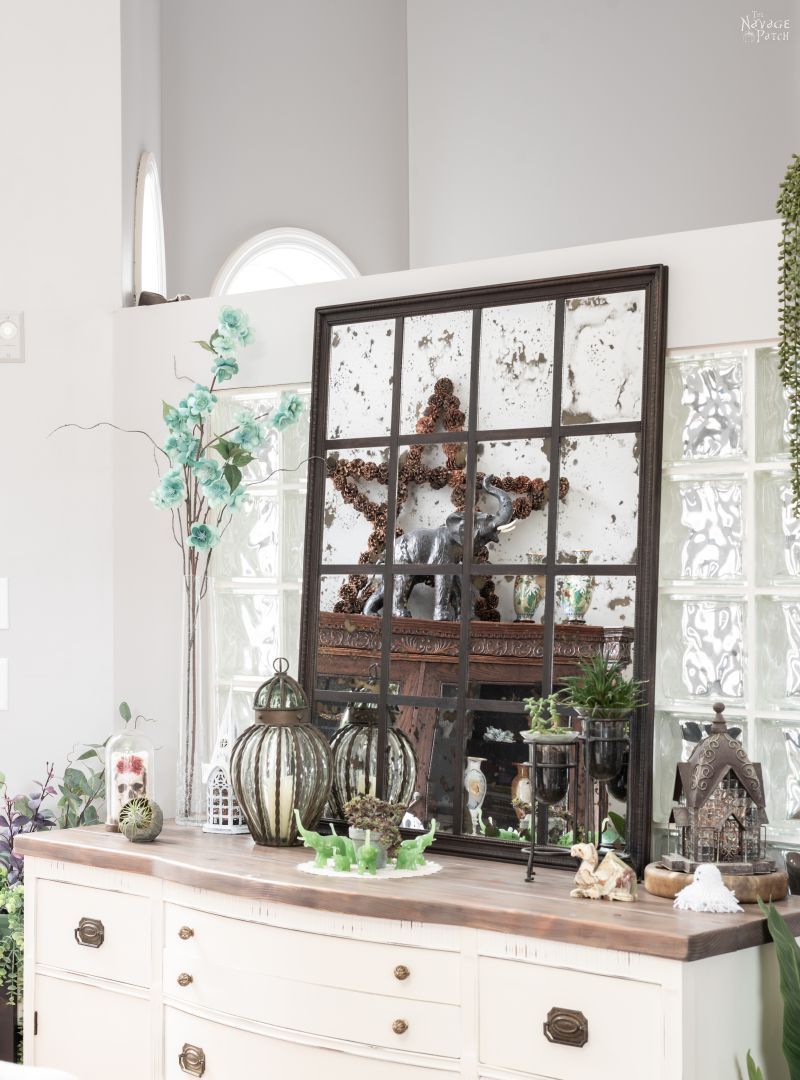
She had all these grand plans for it – hanging seasonal garlands on it and the like.
I’m not sure though if any of her plans involved, you know, anyone actually standing in front of it to check themselves out. I guess only bathroom mirrors fulfill that duty.
There’s a reason they call them vanities, right?
Anyway, my babes wanted me to make the mirror with all of those cool antiqued mirror panels I wrote about in my How to Antique a Mirror post.
If you haven’t read that one yet, you might want to give it a click.
I took another look at Eagan the Reflector, with his fancy beveled glass. Yep, I could do this, no problem.
If my babes wanted a panel mirror inspired by Pottery Barn, my babes was gonna get an antiqued panel mirror that kicked Eagan’s reflective butt!
They want $700?
I did it for under $70, and mine has something theirs will never have.
Personality!
Let’s see how it’s done!
DIY Antiqued Panel Mirror
- 16-20 Dollar Store mirrors (we used 5 x 7 inch mirrors)
- 4ft x 8ft x 3/16 inch hardboard
- 2 Picture frame moulding strips
- 1 x 4 x 6 pine board for the muntins (I used scrap wood)
- Jigsaw, hand saw, or table saw to cut the hardboard
- Jigsaw, table saw or band saw to cut the muntins
- Miter saw or miter box to cut the frame pieces
- Construction adhesive
- Stain of your choice (I used a custom blend of Minwax Ebony and General Finishes Java Gel Stain)
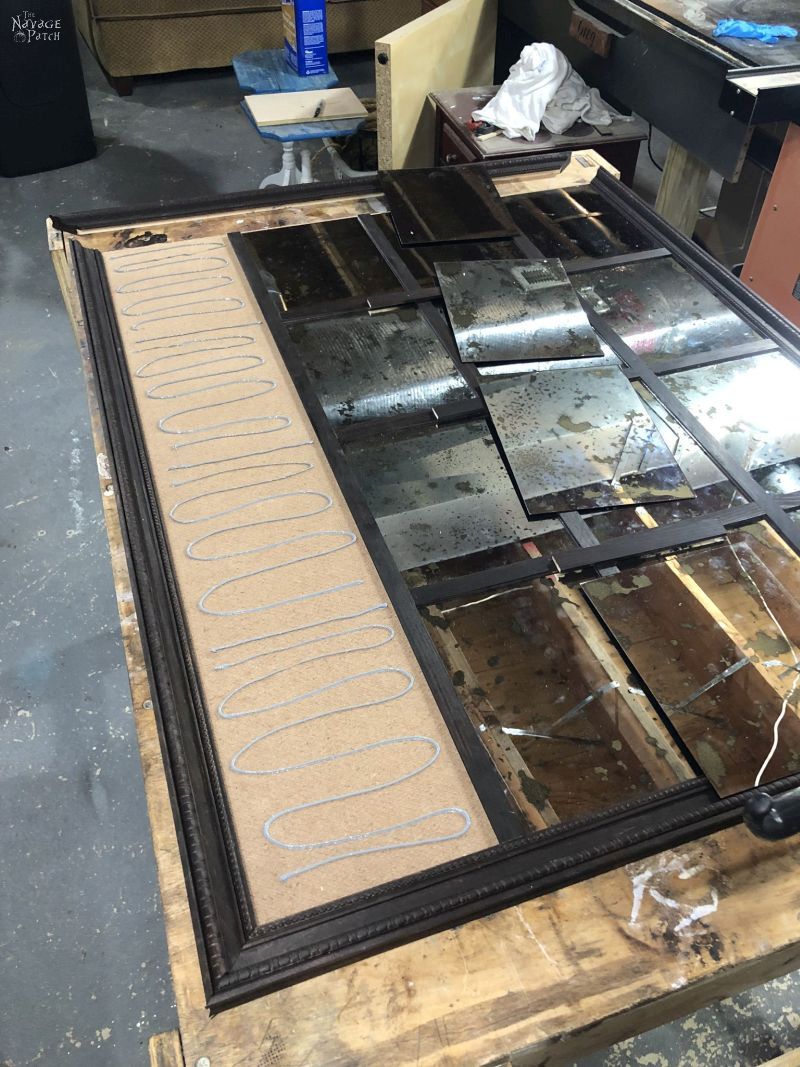
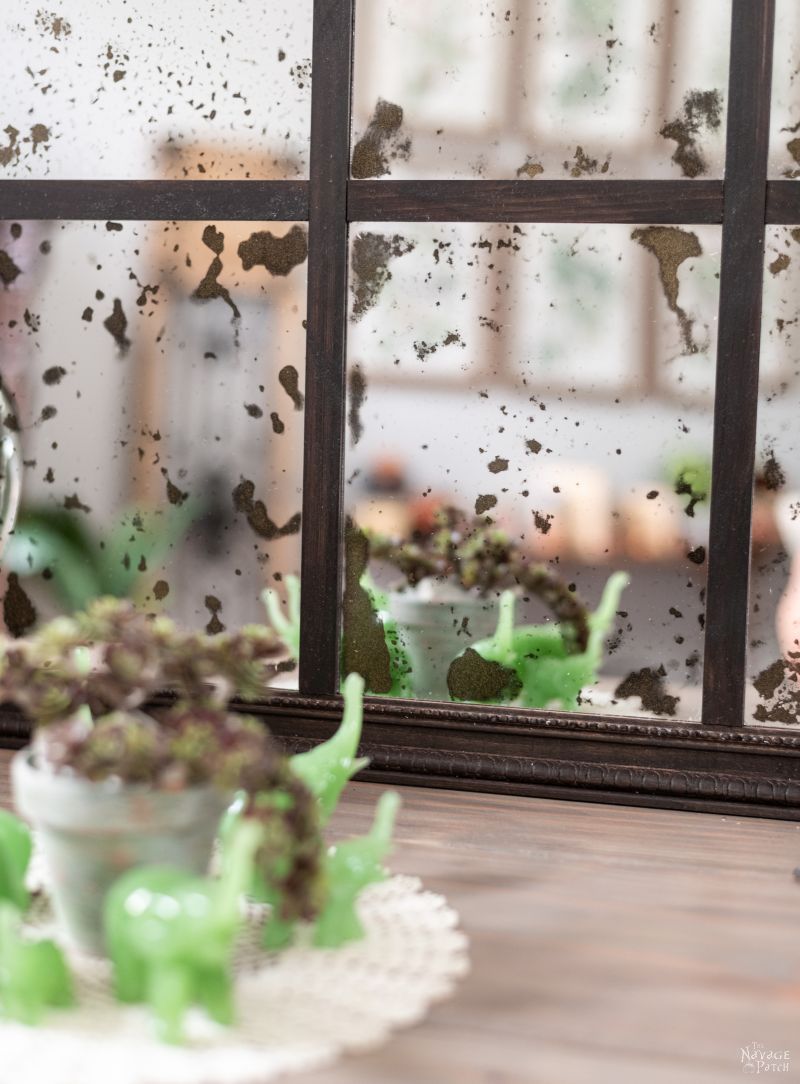
Our first step was to antique the Dollar Store mirrors – see our How to Antique a Mirror post to learn how to antique them easily.

Next we determined how large a mirror I would be building. Handan and I laid out different configurations with the antiqued mirror panels, and we agreed that a 4 x 4 grid looked the best.
I had a 1 x 4 pine board kicking around the basement from a previous project – it would be perfect for the muntins. A 1 x 4 board is actually 3/4 inch thick, and that was the width I wanted for them.
To make the muntins, I set the fence of my table saw to 3/16 inch and ran the board through several times. This gave me a bunch of pine strips that were 3/4 inch wide by 3/16 inch thick.
I kept some of them long (these would be the vertical members), and the rest I cut to 5 inches (the width of the mirror panels).
I laid out the mirrors and muntins to get a sense of the fit. Satisfied that all would fit, I trimmed the long vertical muntins.
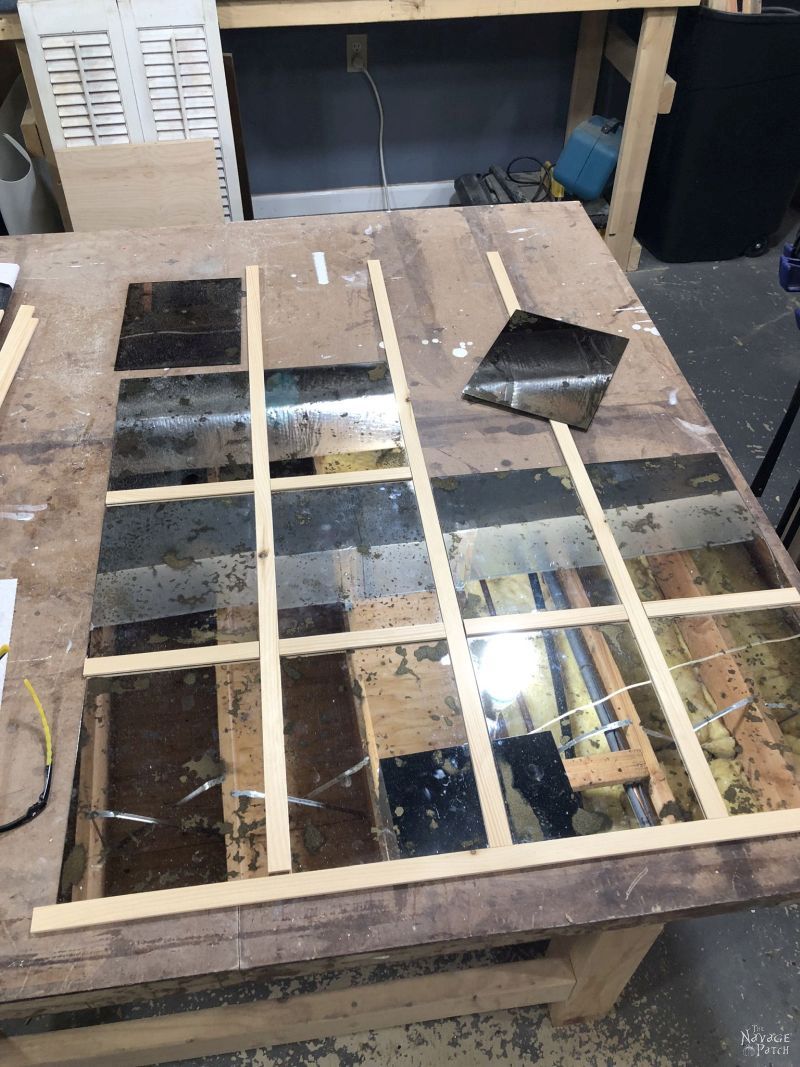
Next, I measured the width and height of my layout, including the muntins: 22 1/4 x 30 1/4.
Okay look, on paper, these mirrors are 5 x 7, but in real life because they were manufactured deep in the bowels of some Chinese sweatshop, the actual measurements were slightly less and they involved horrid fractions. To keep things simple for this post, I’m using prettier numbers.
Just understand that if you want to make a similar panel mirror, you just need to take precise measurements of your mirrors, because lord knows the Chinese ain’t doing it for you!
Anyway, I added 1/2 inch to my dimensions to end up with 22 3/4 x 30 3/4. This is the size to which I needed to cut the hardboard panel.
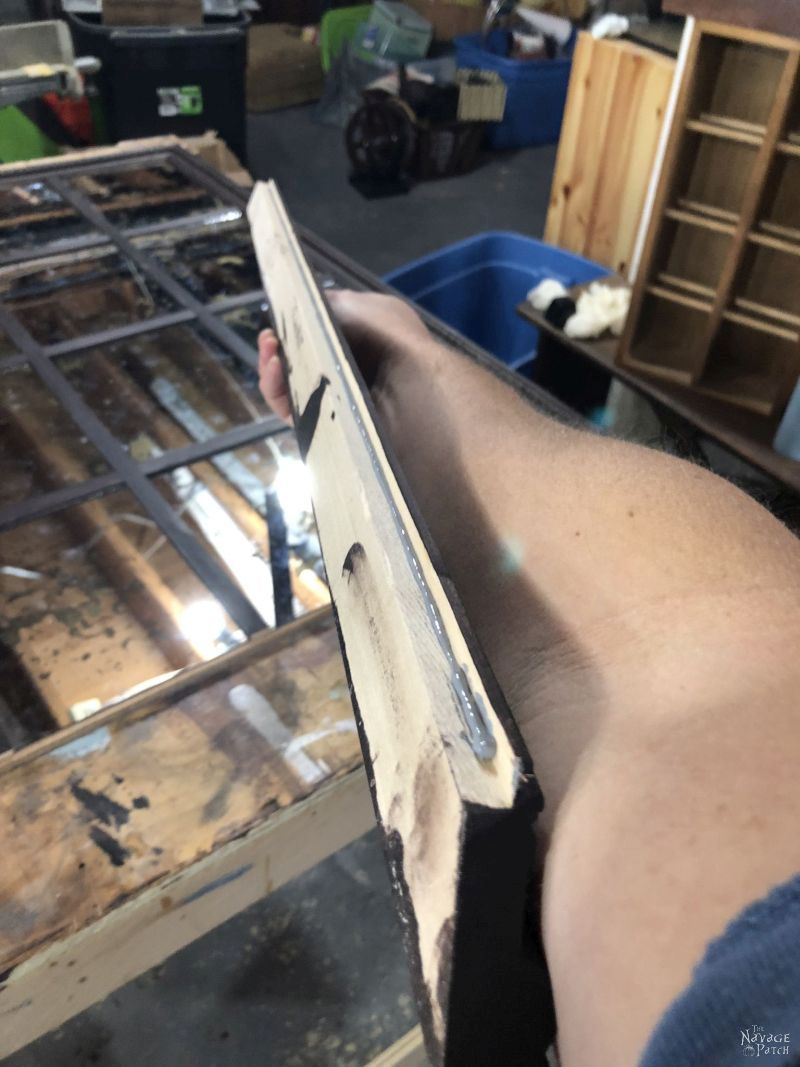
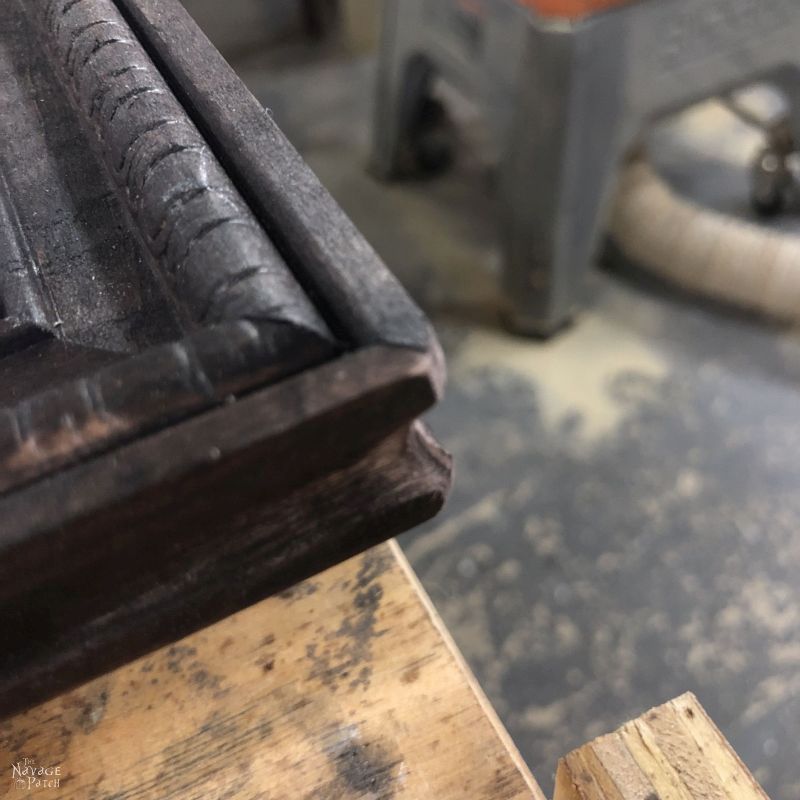
I added the extra 1/4 inch all the way around to accommodate the lip on the back of the moulding, which has the profile shown below.

The lip at the bottom is 1/4 inch deep, and I’d be gluing that lip on the hardboard.
But first I had to miter the pieces so they all fit nicely together.
I did this one strip at a time, carefully trimming the miter cut closer and closer until I had as close to a perfect fit as my sausage fingers and deteriorating vision would allow.

Dry-fitting this mirror together took the most time, but it was necessary. There were too many pieces for me just to rely on measurements alone – a small measuring error could multiply and turn into a big headache.
Eventually, I had everything fitting perfectly together.
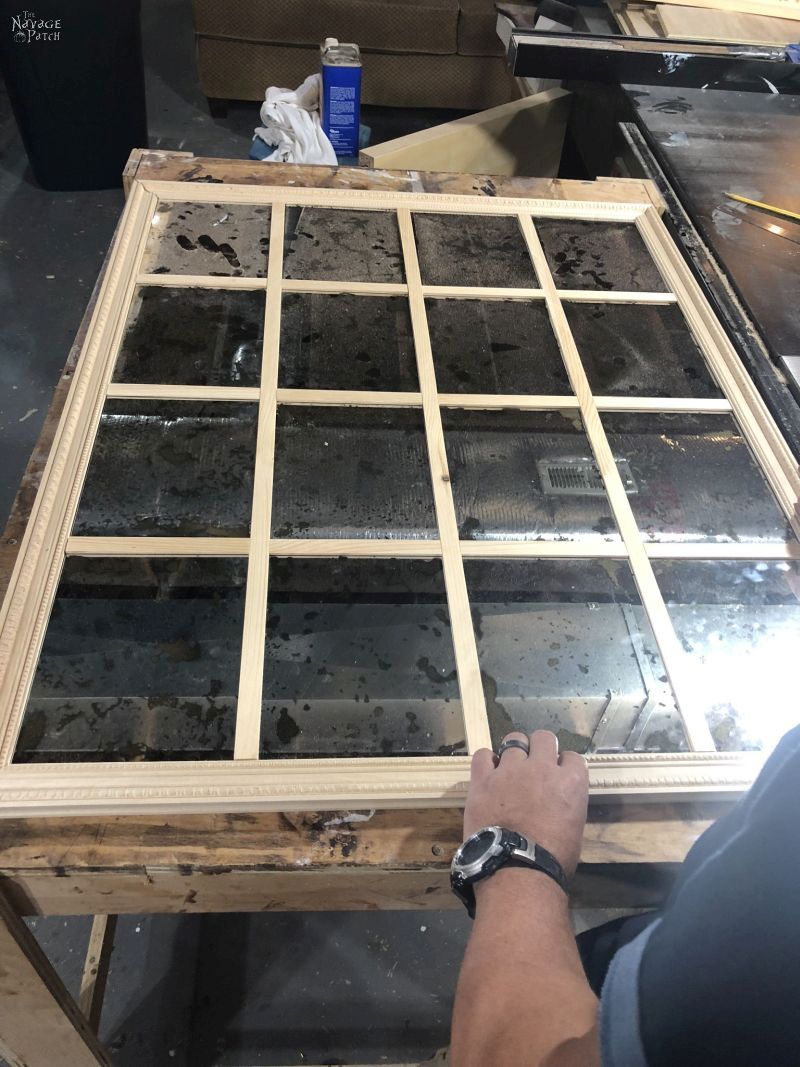
I then moved all of the pieces over to a different table (in the same layout) to be stained.
Since this DIY antiqued mirror was Handan’s vision, I consulted with her on the stain color. We settled on a custom blend of General Finishes Java Gel Stain and Minwax Ebony stain.
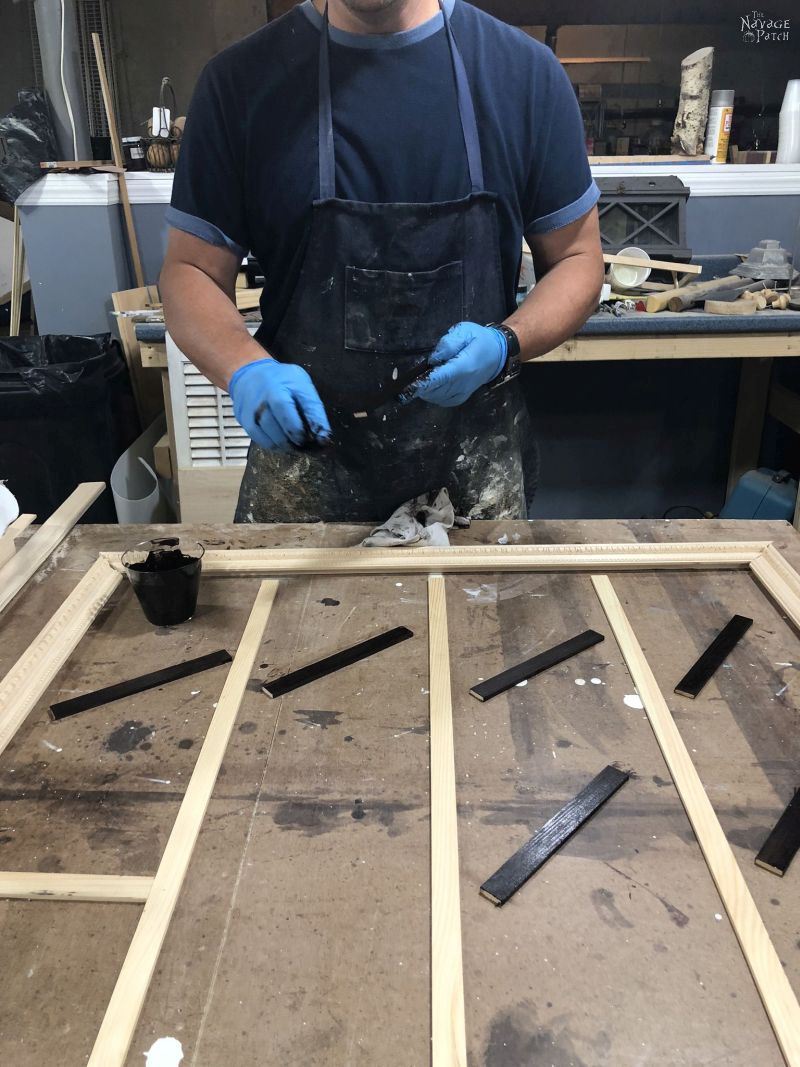
I mixed up a small batch and set to work staining the muntins and the frame moulding.
I love gel stain when working with different shades of wood. One of the moulding pieces was an entirely different shade than the other one. With some regular stains, differences in initial wood color are preserved, even after staining. Gel stain sits more on the surface of the wood, and it allows different shades and types of wood to be stained a uniform color.
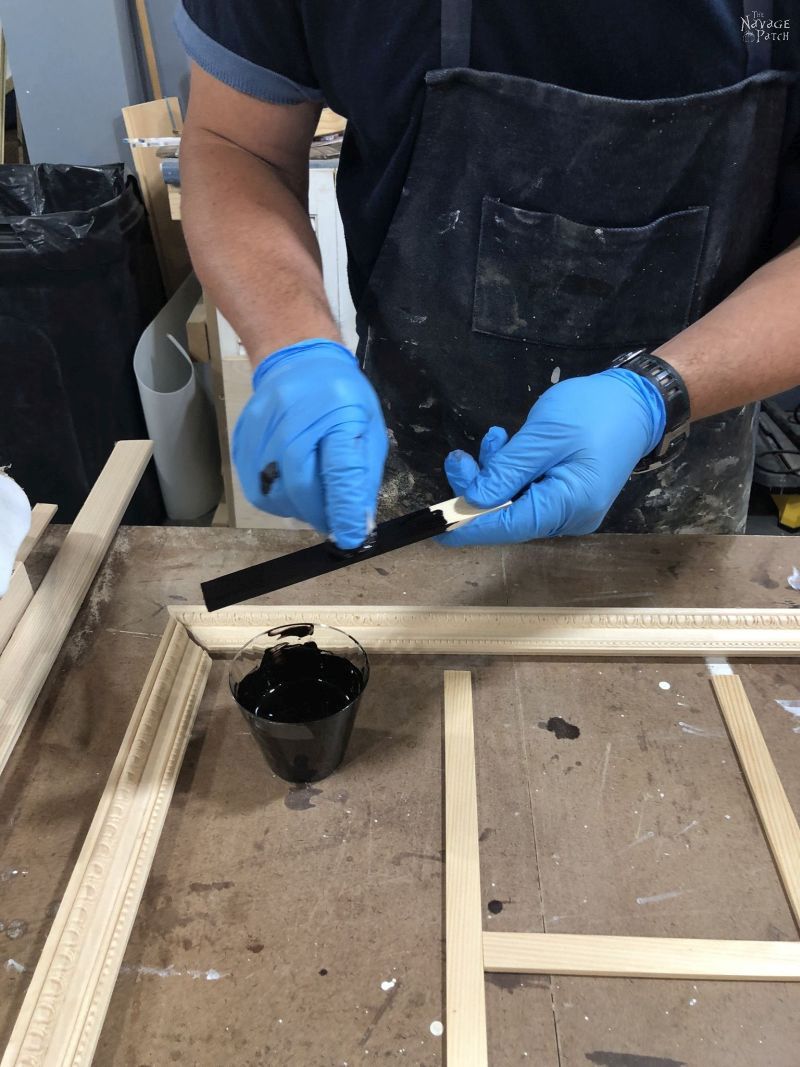
This blend of stain is beautiful! It’s a rich dark brown with hints of black.
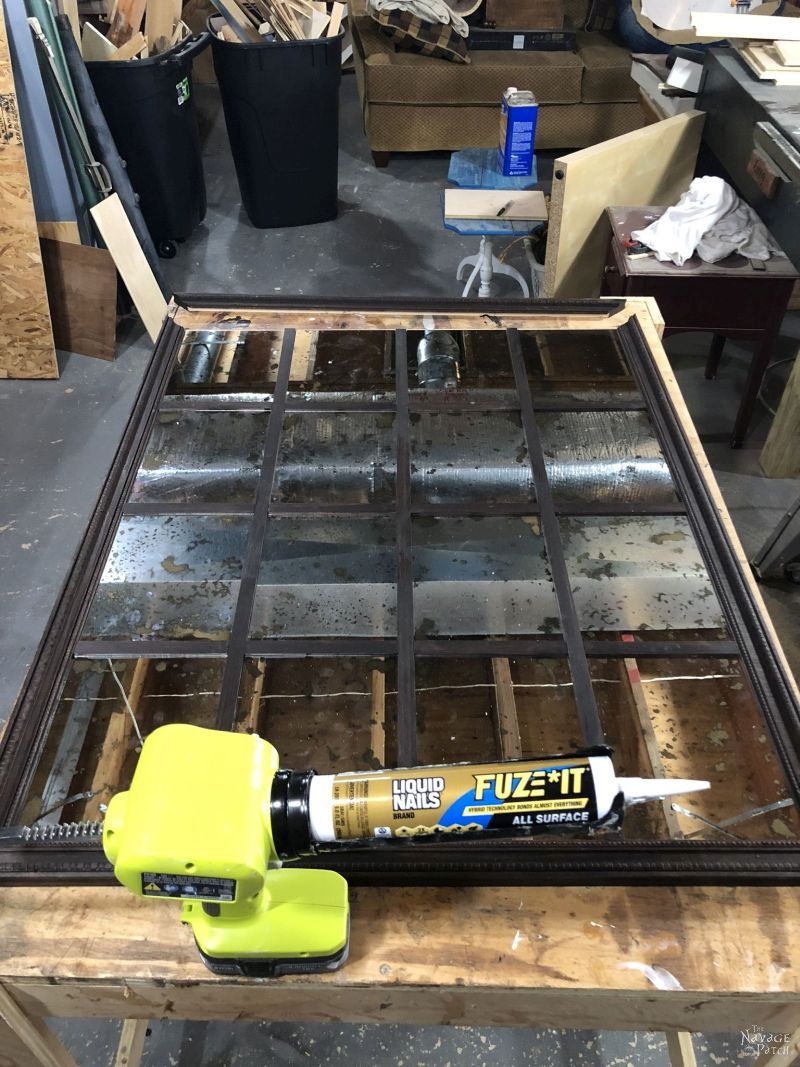
When the stain had dried, I moved the moulding frame back over to the hardboard panel.
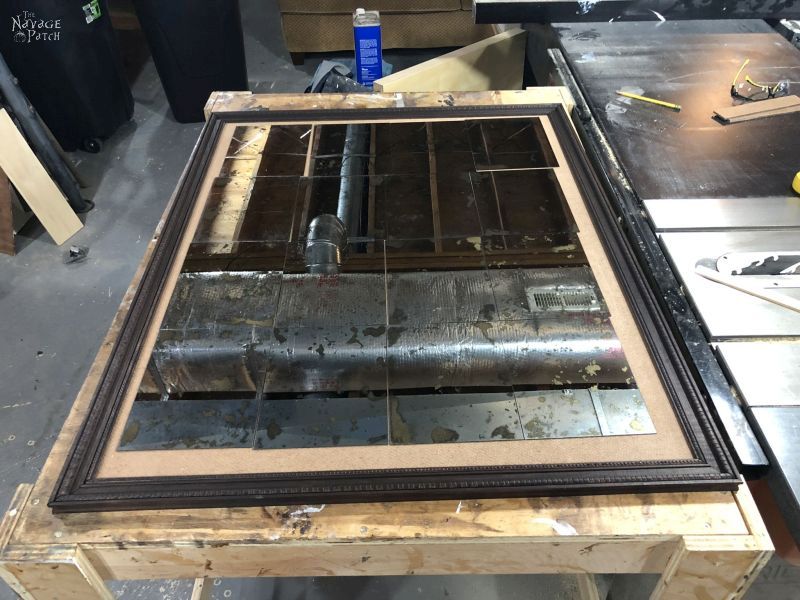
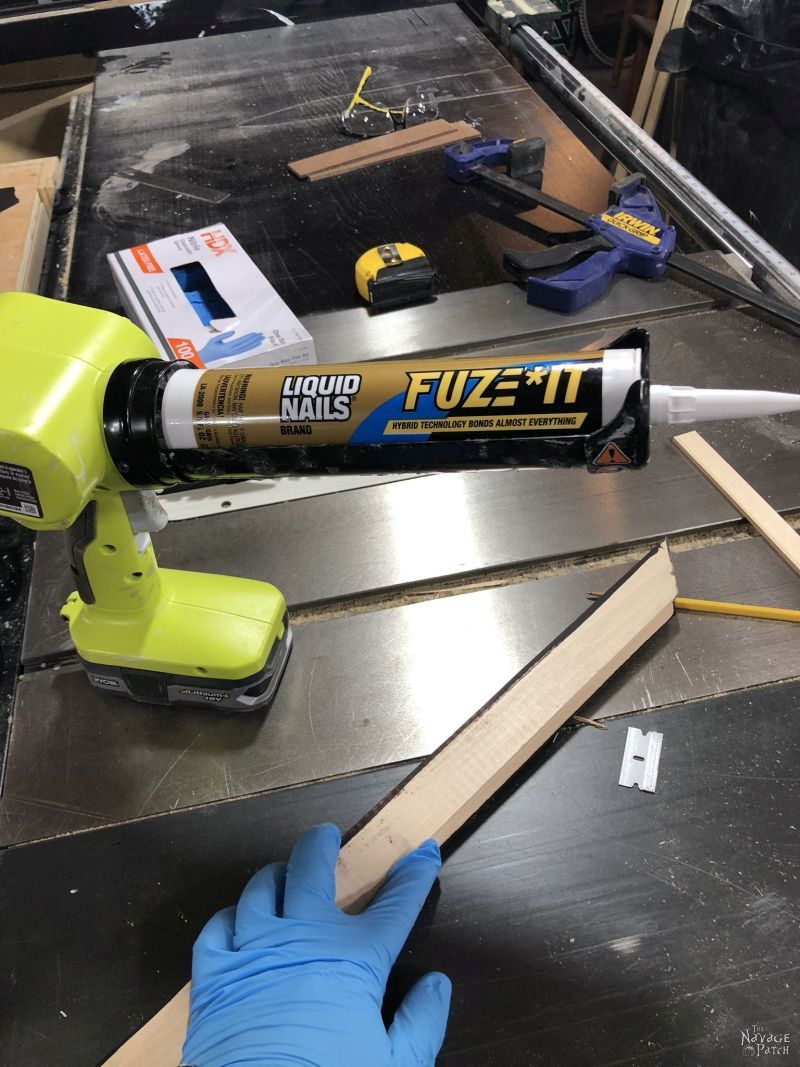
Since the frame would only be attached to the hardboard by that 1/4 inch lip, I wanted to secure it with a quick-grab construction adhesive. I’ve been a big fan of Loc-Tite adhesives, but for some reason, this new Liquid Nails Fuze-It Adhesive was calling to me in Home Depot.
I’ve learned to trust my gut. If it wanted me to jump ship and try a new brand, there had to be a reason. Of course, this is the same gut that demands regular servings of insanely hot food and martinis, so perhaps it shouldn’t be trusted too much!
I glued the bottom and two sides, but I left the top moulding piece off.

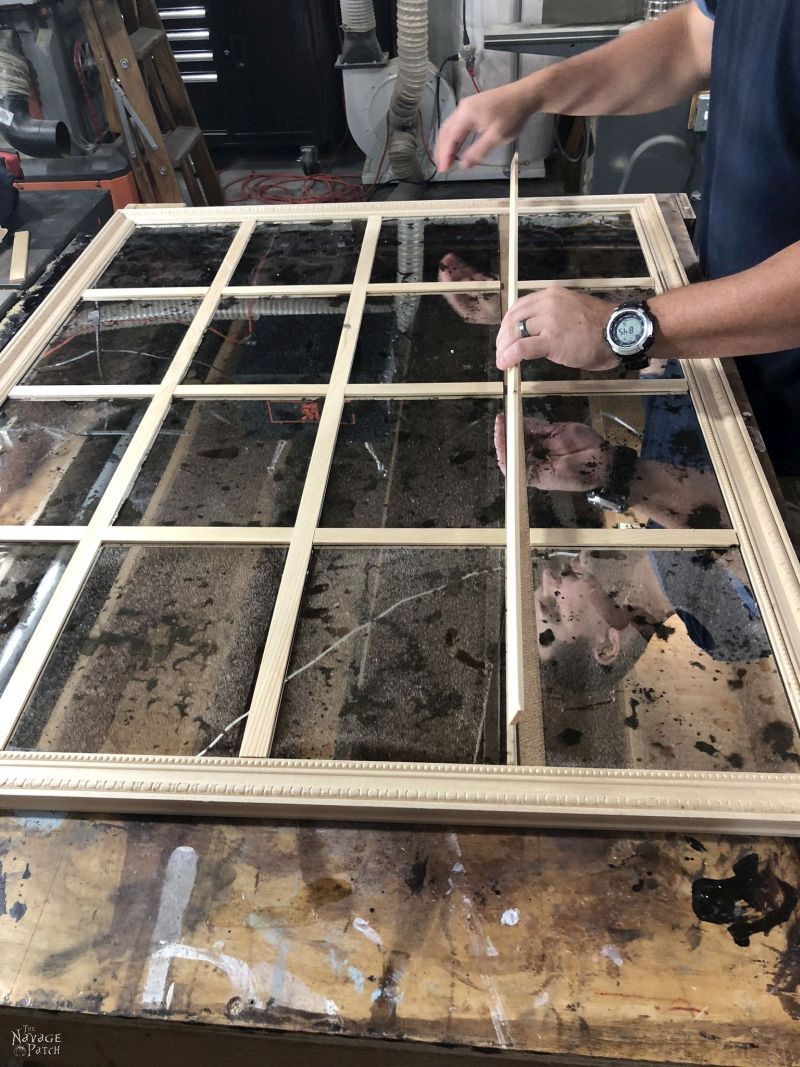
Next, I reassembled the mirror without adhesive.
Of course, it didn’t fit.
Oddly, I wasn’t at all surprised by this.
Either the muntins swelled a little from the stain, or perhaps when I dry-fit the pieces earlier, I didn’t have the frame moulding snug enough. But whatever the reason, I couldn’t fit the last long muntin.
When it comes to mis-measurements and stuff not fitting, this is exactly the situation I’d choose.
It’s a whole heck of a lot easier to trim a tiny sliver from the muntins than it is to try to add wood or, worst case, have to start over and cut new muntins.
I trimmed a tiny bit off each vertical muntin (to keep them all of equal width) until the whole layout fit (once again) perfectly together.
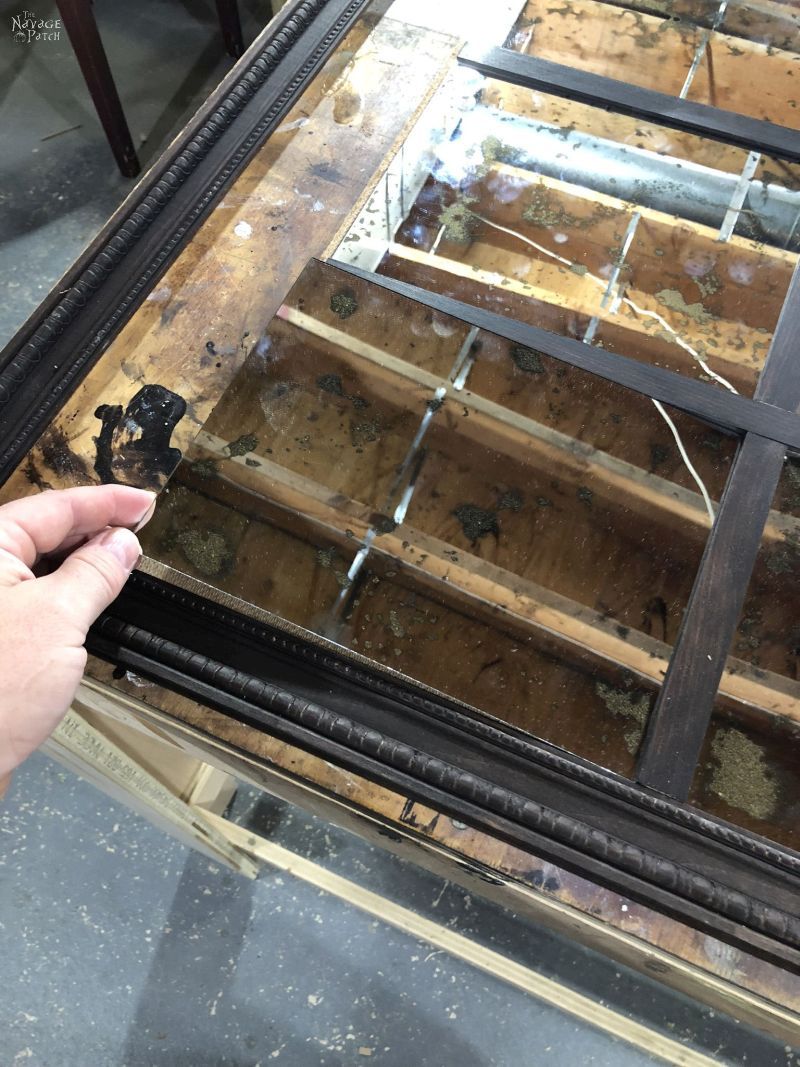
I removed one column of mirrors and their horizontal muntins.

Next I laid out some Fuze-It.
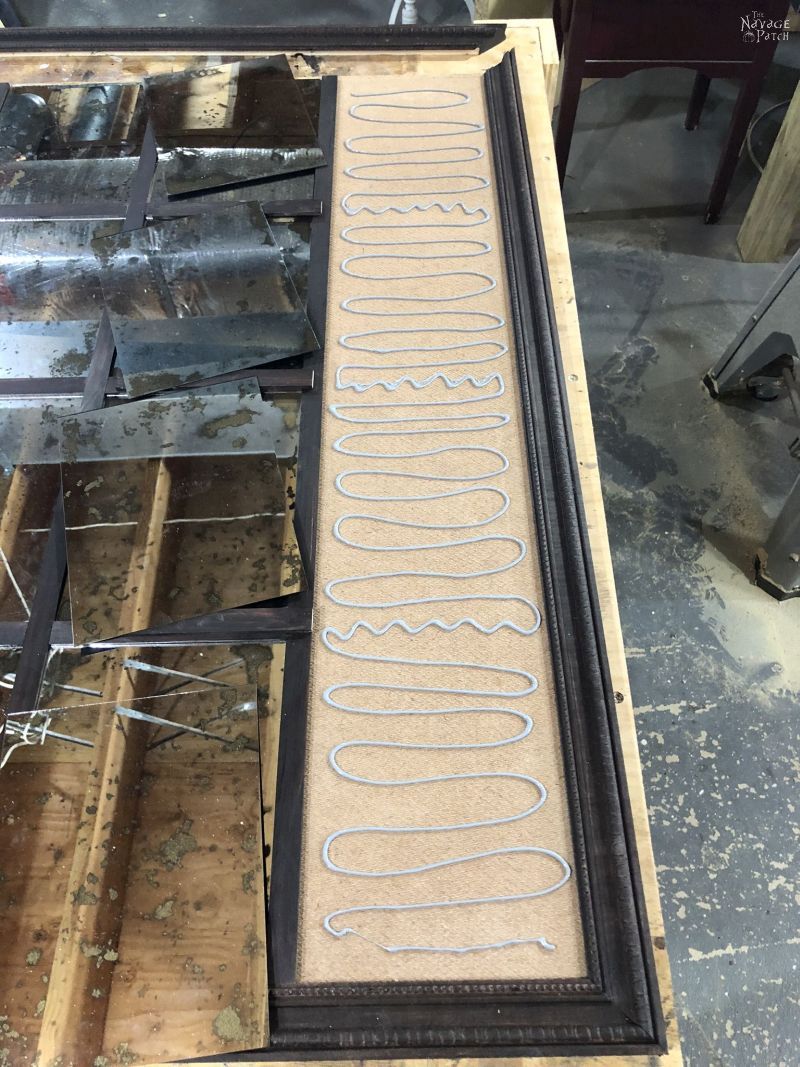
Then I pressed each mirror panel and muntin in its place.

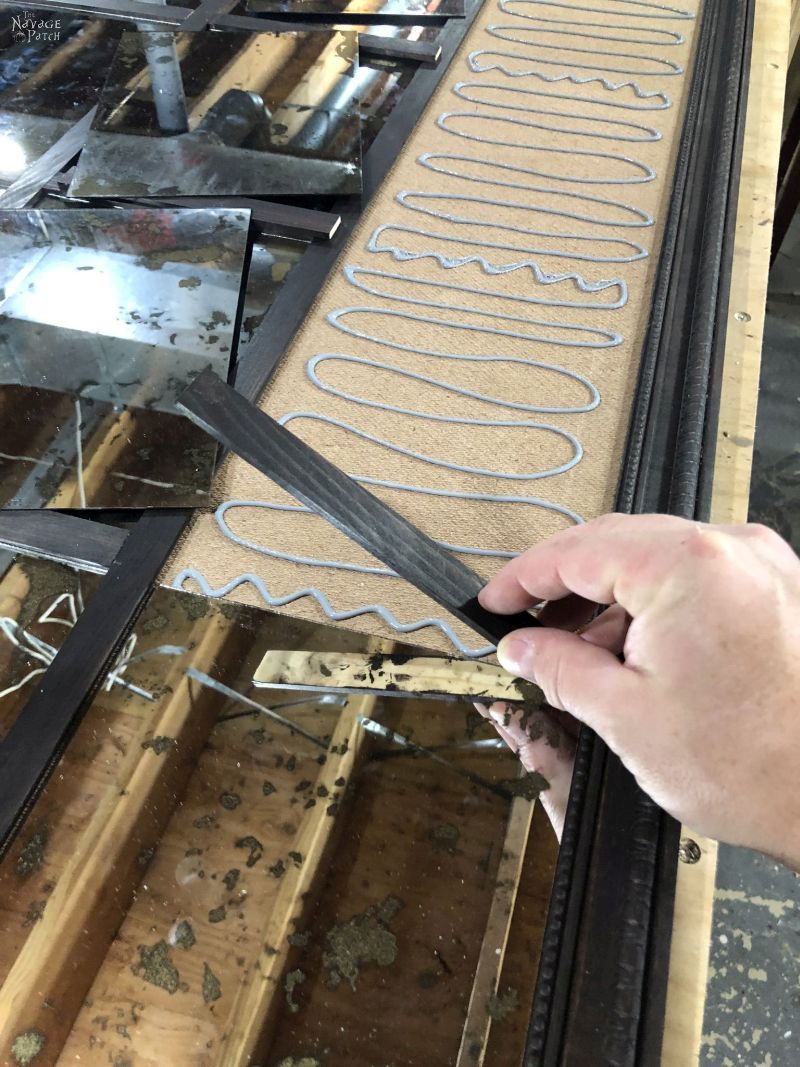

Once I had glued the column of mirrors and horizontal muntins, I glued the vertical muntin in place.

Then I repeated the process with the remaining columns.

Once all the mirrors and muntins were glued, I attached the final piece of frame moulding.
Verdict on the Fuze-It: I think it’s a great product – fast grab and the hold seems to be strong. Time will tell, but I think I’ll be using it again.

As I expected, the corners weren’t perfect.
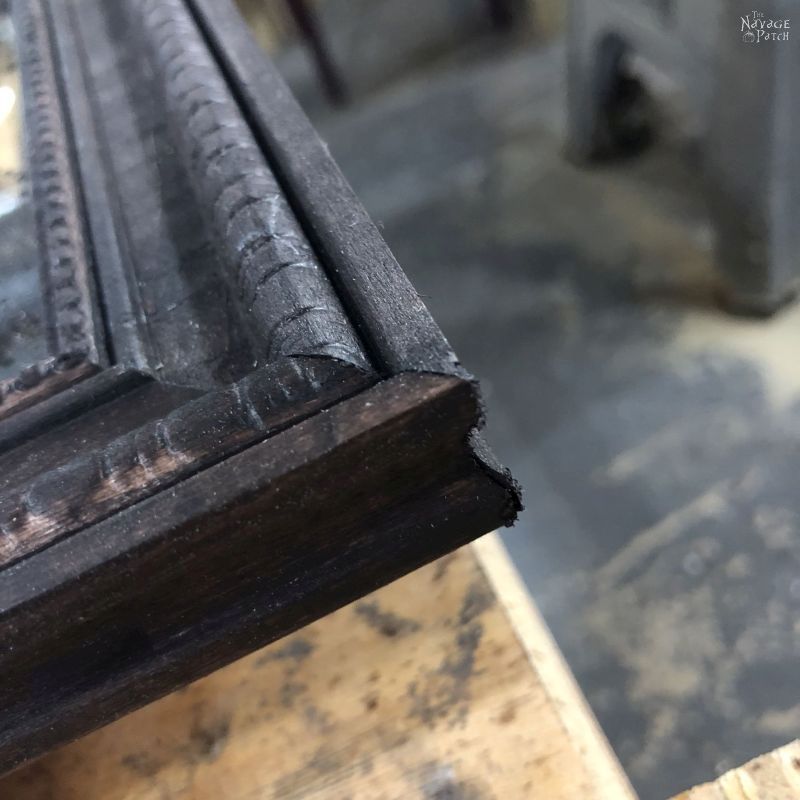
But that’s okay, neither is the guy that built them!
The beauty of DIY is hiding these little imperfections with a little sandpaper and stain! 😉

Damn phone focused on the wrong area, but I was too blind to notice! Guess I’ll have to start wearing my glasses in the workshop one of these days! 🙄
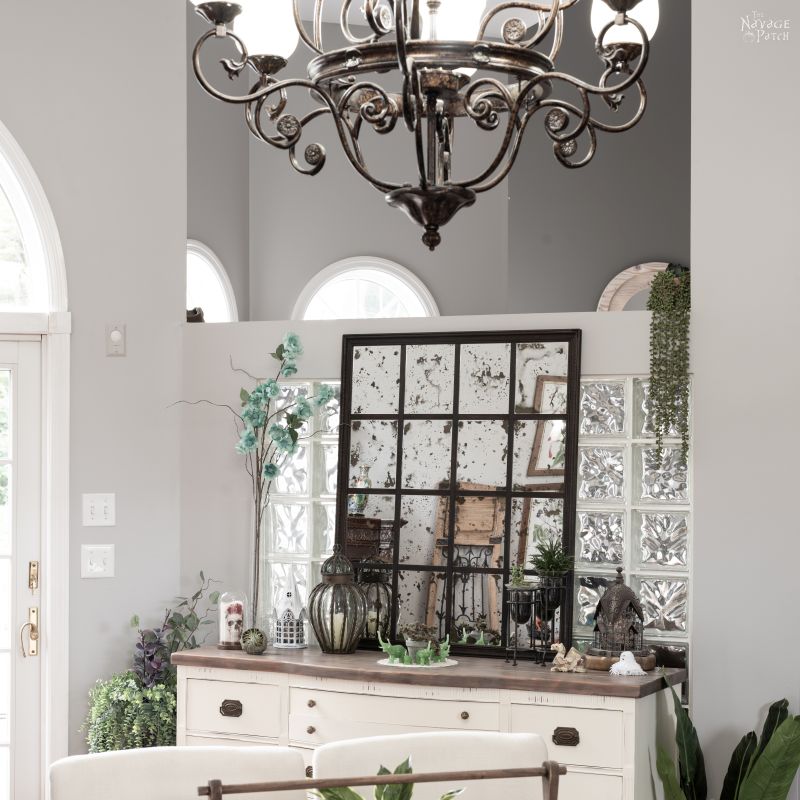
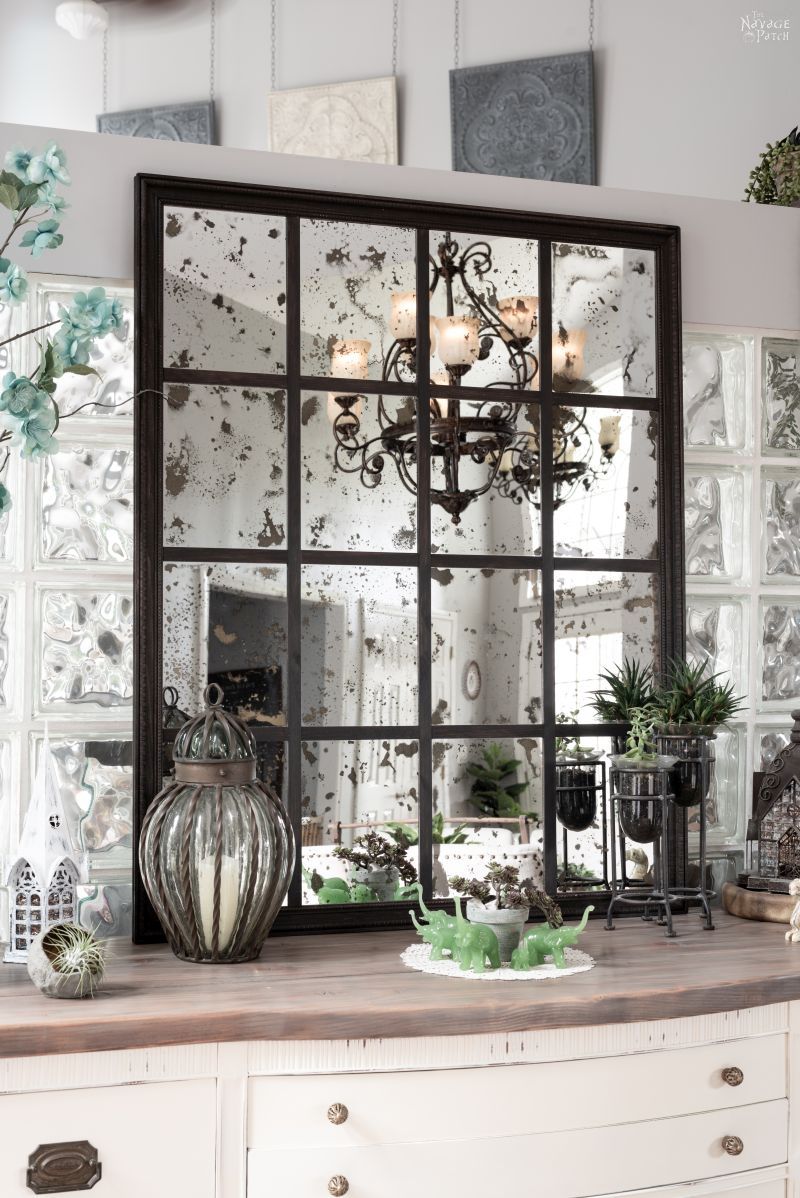
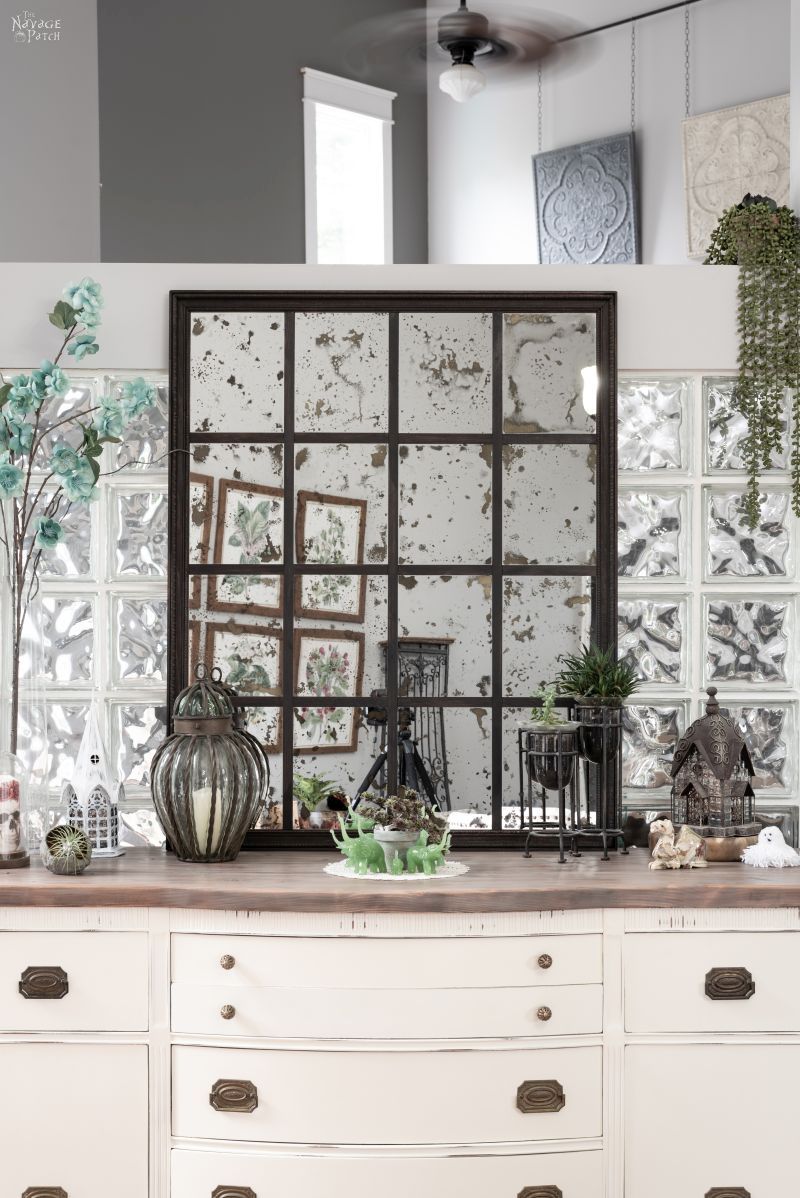
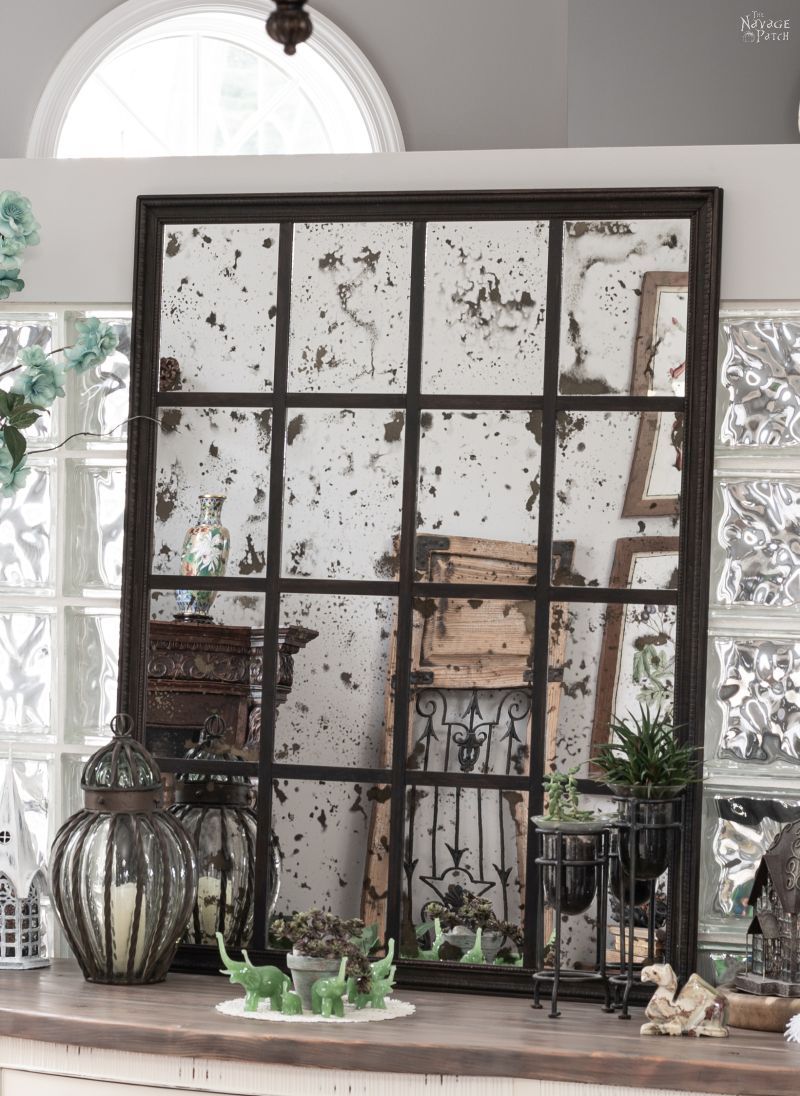
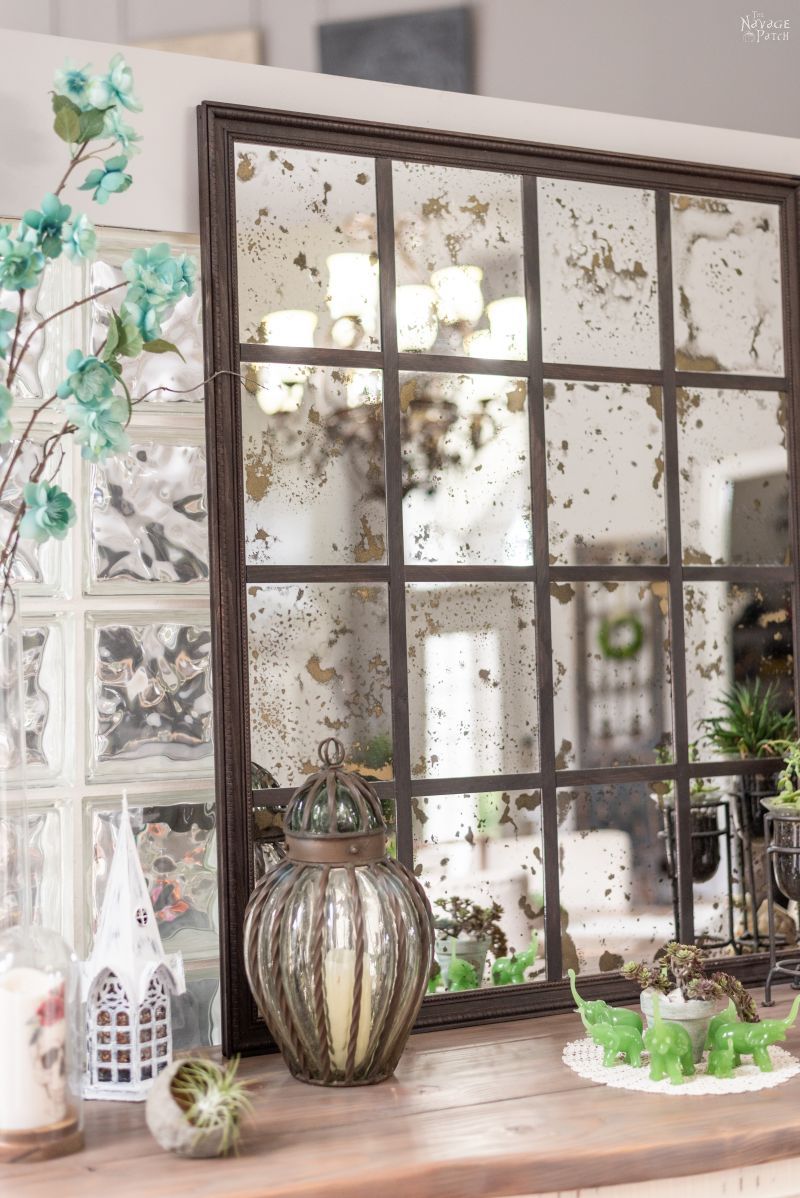
After a day or two, I turned it over to Handan so she could clean up the panels, and then we put our DIY antiqued panel mirror in its new home.

So what do you think?
Handan can’t wait to festoon the thing with seasonal banners and garlands! (Between you and me, she’s already hung the Halloween banner, but you’ll have to wait just a little longer to see it and get the printables for it! 😉 )
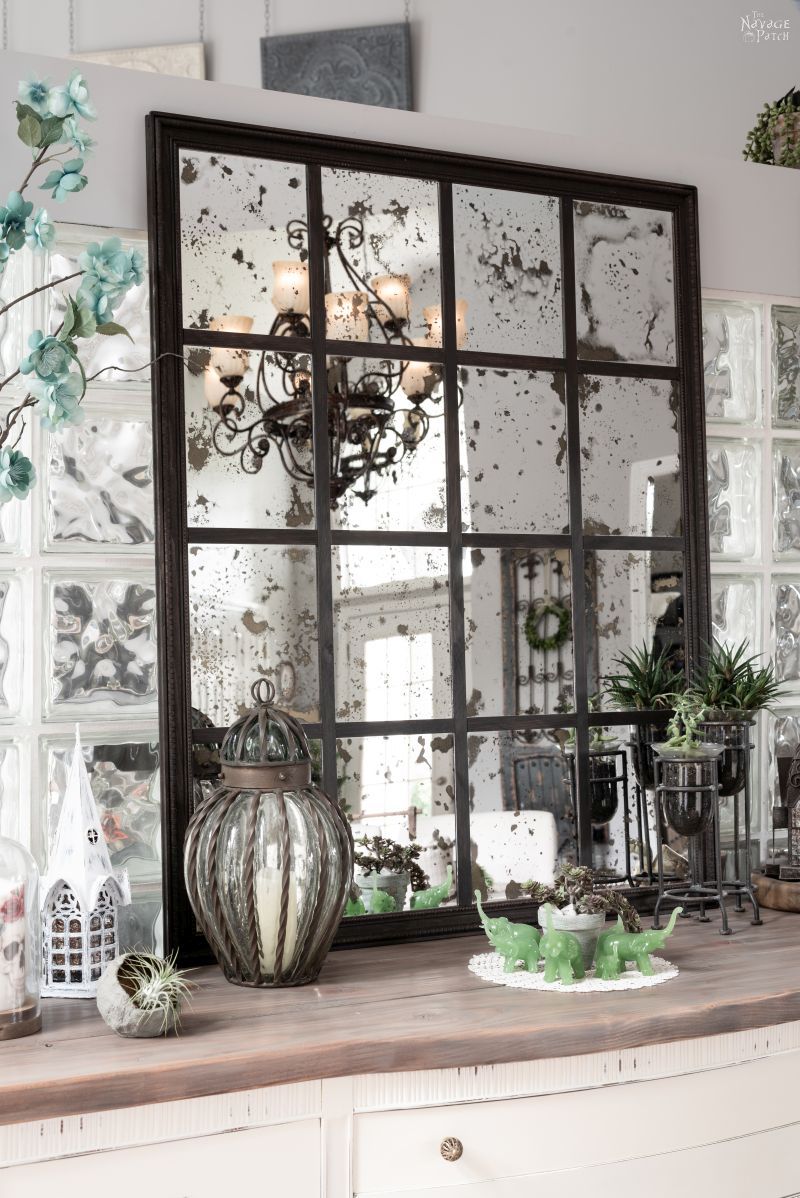
I have to admit – if I just walked in and saw this mirror, I would never guess that it was a Dollar Tree / Home Depot special!
We love it when you share our posts on Facebook and Pinterest!


No true DIYer would spend $500 for that mirror(Sorry Eagan). Your Dollar Tree/Home Depot special looks so much better.
Thank you, Nadine! 🙂
Yeah, I wouldn’t pay $500-$700 for a mirror either. Maybe $300 if I really, really liked it. Very nicely done. I like those metal planter stands next to it too. The whole entry area looks great.
Thanks, Laurie! I know, their prices are usually a little too jaw-dropping. But hey, I can usually make a pretty good copy of their stuff, so there’s that! 🙂
Looks fabulous! It’s no wonder your honey-do list is never ending!
LOLOL! Thank you, Linda!
Please note that their is a special adhesive to use to attach mirrors. Most other products will eat the back off in the not attractive squiggly line it was attached to……not the look you are going for. Just a pro tip from a glass shop employee. ?
Good tip! Thank you, Paula!
Another great masterpiece, Greg! Handan is very lucky!
I’m the lucky one! 🙂
Gorgeous!! I’m familiar with Eagan & it’s price tag. ? This is brilliant! I’ve had a project in mind that calls for antiquing a mirror for a while now…I think you just gave me the push! Thanks!
Good good! I’m happy to push, Erin! Send us a pic of your project when it’s done!
Your mirror has so much more character. The frame is wonderful and the mirrors make this piece. As always, excellently done! I love it that you guys are so practical and creative. Inspiring. Many blessings.
Thank you so much, Dorothy! It really is amazing what splendid things can be made from such modest materials!
Gorgeous project!
Thank you, Dyan! Another great idea from Handan! 🙂
Seriously Greg, you are so patient and creative. Handan’s ideas and your doability skills are awesome! She is one lucky lady. Just wondering what happens when you have run out of rooms to redo and decorative things for around the house to create? On the next fixer-upper? Hope it will be in my neighborhood. Love all your posts. You make me smile with your witty ramblings. LOL
Thank you so much, Jennifer! Comments like yours keep me going! Well, I doubt we’ll ever run out of projects in this house. If we do, maybe we’ll have to move just to keep ourselves busy, lol!! 😀
Awesome project. I wonder how much yours would have “cost” if you figured in an hourly wage of at least $25/hour! DIYers save $$$ but not time! Never mind having the skill level to do stuff like this! Personally, I’ve hated woodworking since ’73 when I ran my L hand with my brand new engagement ring into the belt sander at a woodworking course at UNH! Spun the ring around–I thought I’d sanded off the diamond and my friends took me to the infirmary when they soaked my hand and put on 8 band aids–think road rash on the back of a hand! That’s why I don’t have any hand made mirrors–or $700 ones either!
Thank you, Kathy! Let’s see…I would estimate 6-8 hours for this project (that includes antiquing the mirrors), so still a bargain compared to PB! But yeah, I get your drift. There is an opportunity cost with every project. And DIY isn’t as cheap as it used to be, which is why it has become crucial to work with found objects and dollar store materials! That is scary what happened to your hand. Yeesh, those machines are no joke!
Who would have thought that inexpensive materials, a little frustration and imagination could produce a lovely replica of an outrageously priced mirror? I love the collaboration between you and Handan. I’m looking forward to your next project.
Thank you, Cheryl! I know, right? It blows my mind what can be done with dollar store items!
Oh, Greg, I wish my husband had your skill and talent (and Handan’s vision!)
It’s not too late, Toni! I had zero skill before we moved into this house in 2013 and the high cost of everything forced us into DIY! Stick a hammer in his hand and see what happens! 🙂
I love your mirror. It’s so much prettier than the Pottery Barn one. Your house is gorgeous, too. Does Handan ever hire you out? I have a lot of “2 b done” projects.
Thank you, Sherrie! Ha! Fat chance of that, lol! My 2 b done list stretches out for years!! 😀
Maravilloso!! Mucho mas bonito que el de Pottery Barn. Estoy impresionada, intentaré hacerlo, aunque no creo que me quede así de bien. Gracia por compartir todas vuestras ideas.
Muchas gracias Esmeralda! Si hace uno, ¡envíenos una foto por correo electrónico!
Wow, that is stunning! I love it!
Thank you so much, Christina and sorry for the late reply – I found your comment in the spam folder! 🙂
Wow! Amazing and not just the mirror, your home is STUNNING! I don’t believe I have ever had the pleasure of seeing this part of your home.
Keep up the great work, I love reading your silly (in a smart way) posts and Handan’s ideas with your follow through. Your team work is awesome.
Thank you so much, Kristina! We gave that room a makeover last year. Check it out here: https://www.thenavagepatch.com/dining-room-reveal/
I’m so happy you like my rambling, and yes, Handan and I make a damn good team! 🙂
That mirror is just absolutley perfect! I wish my house was big enough…. you did a wonderful job!
Thank you so much, Kelly! You know, this mirror can be sized down to fit any space – you could start with smaller dollar store mirrors and then use fewer of them to make the final antiqued panel mirror. Just a thought! 🙂
I’ve been looking and looking and looking (and so forth) for a mirror DIY like this. Yours is absolutely fabulous and the one I will be attempting to make. Love it!
Awesome! Good luck with it, Judi! 🙂
This was the perfect post! Peppered with incredible humour and the perfect amount of instruction. I am going to try this. Looks wonderful.
Thanks for the laughs and the realism when it comes to DYI.
Thank you so much, Kari, I’m so happy you enjoyed it! 🙂