
Do you love the look of a rustic barn door? Here is how easy it is to use paint and wood slats to give your existing bifold doors a barn door look!
We’re moving right along with our guest bedroom makeover! Today we’re sharing with you our bi-fold barn doors!
Well, technically they are faux barn doors, but I think you get the gist. Take a look at this simple and effective project!
Have a sliding mirrored closet door? Check out this awesome DIY Mirror Door Update!


Creating Bi-Fold Faux Barn Doors
Last year, we turned the guest bedroom closet into our craft supply storage closet. We had to empty out the old room to create the nursery.
Part of our nursery makeover was to do the bi-fold doors in that room. We went for kind of a modern slatted look for those doors.
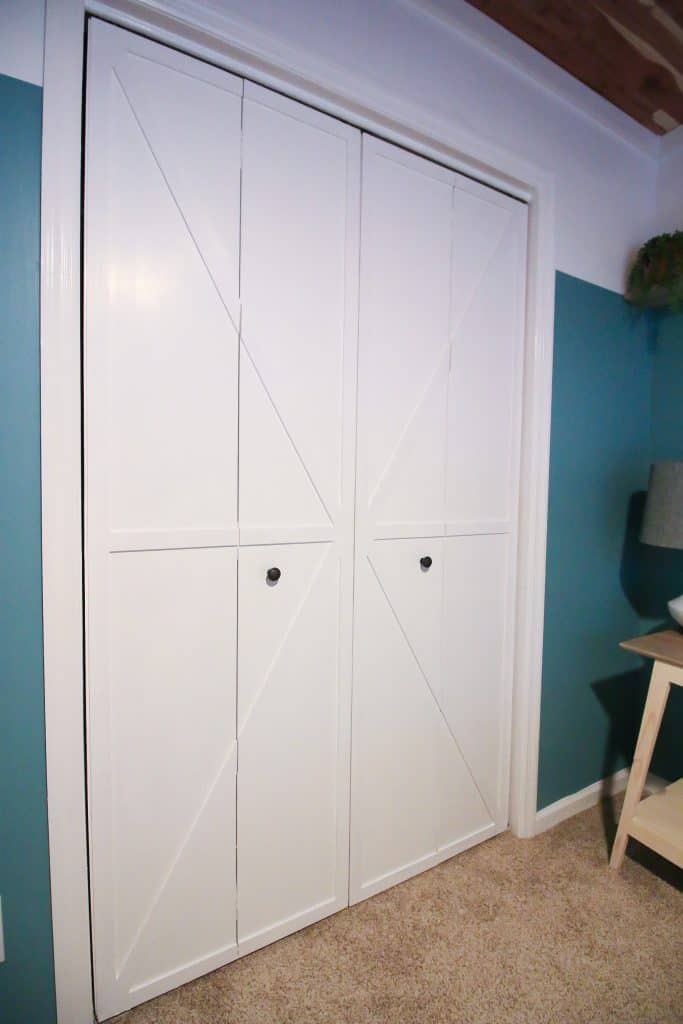
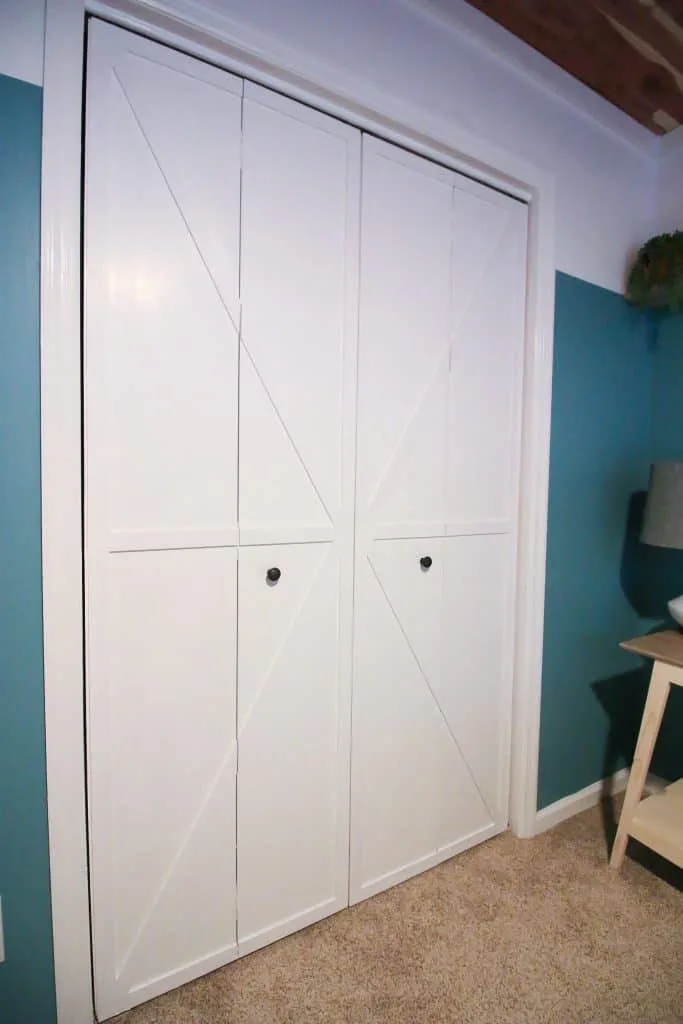
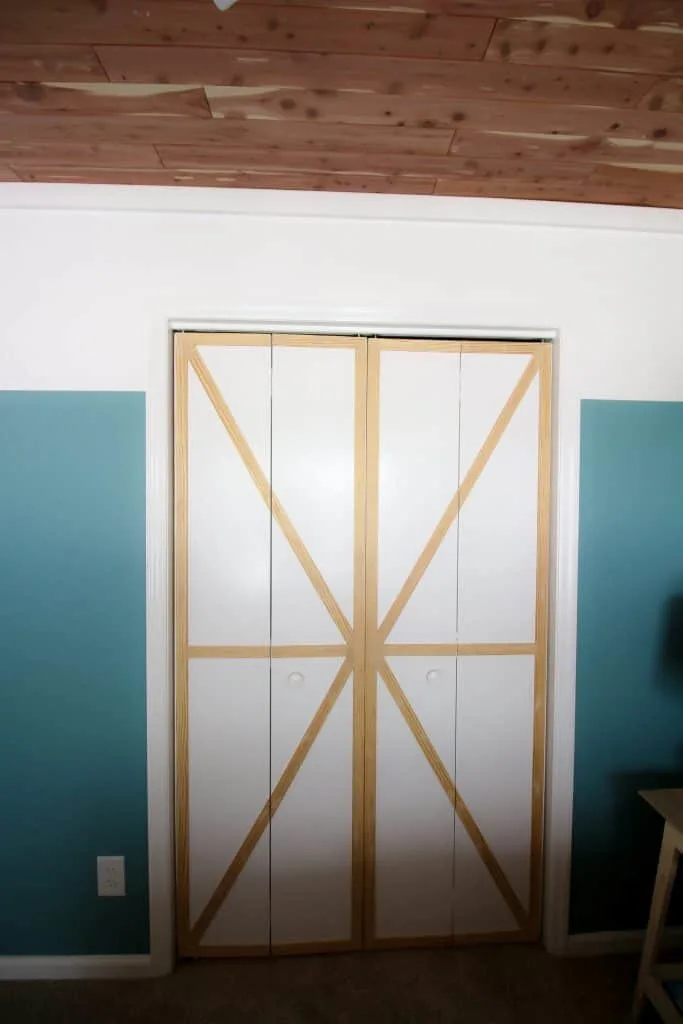
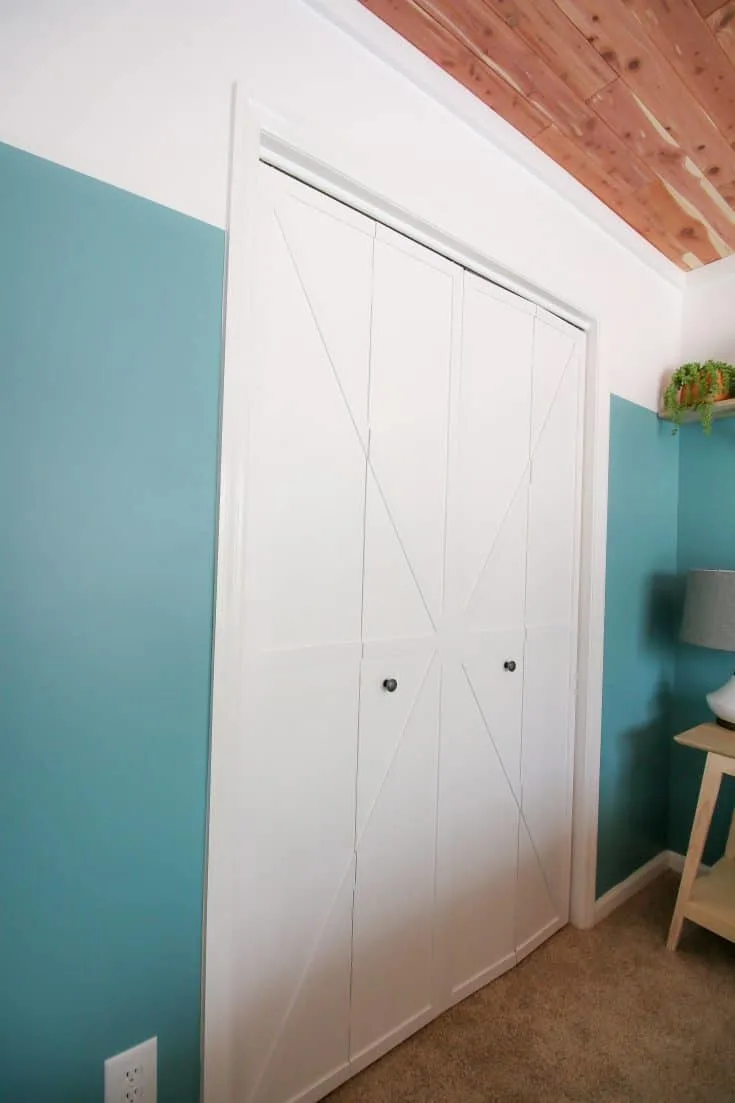
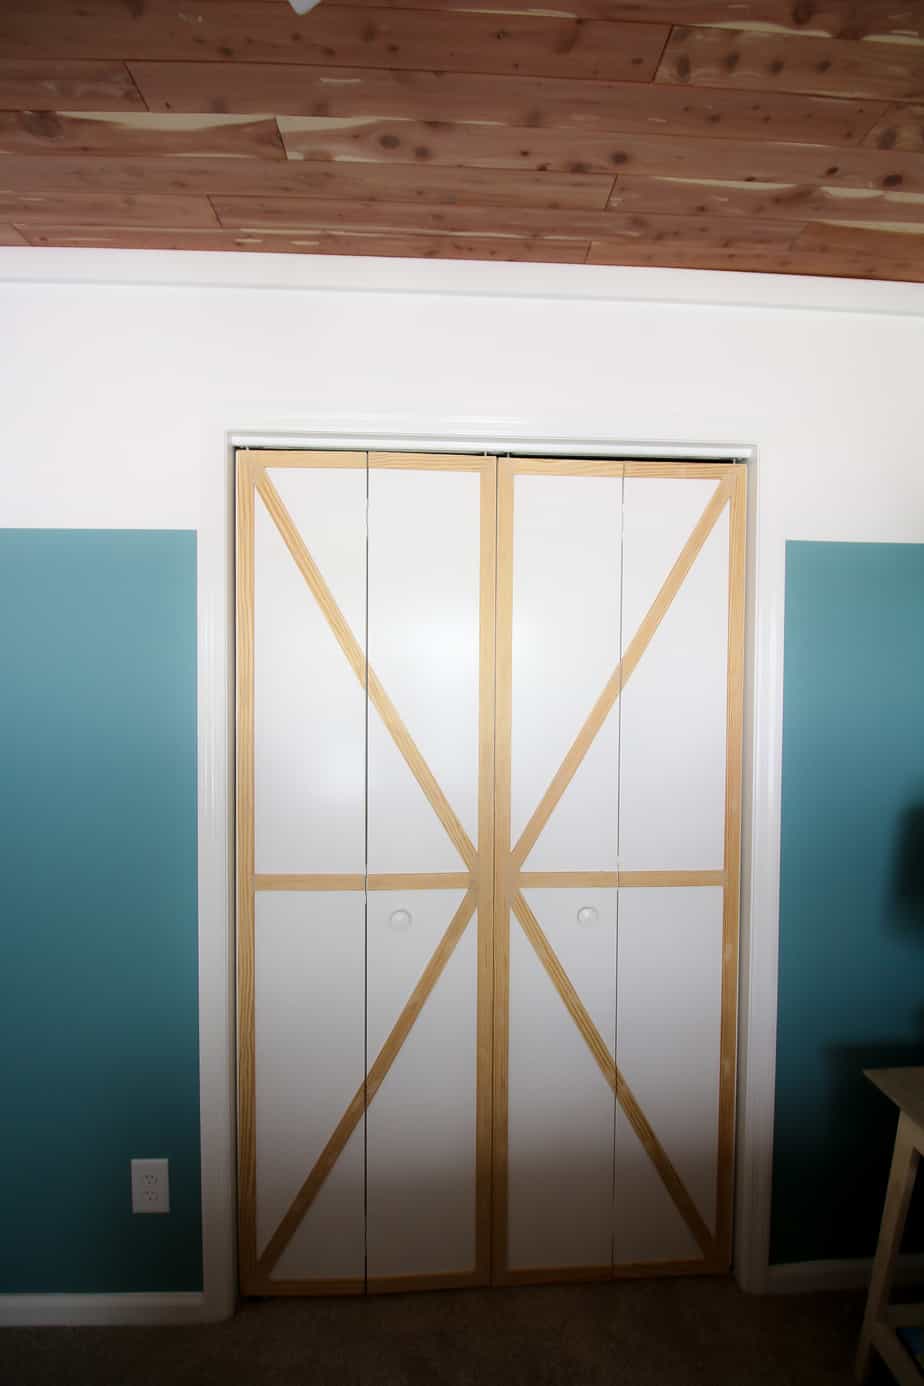
In our guest room, we gone pretty natural with our cedar plank ceiling and color block wall. So we decided to go with a faux barn door look on the bi-fold doors!
We also built a sliding barn door in our bedroom!
How we did it – bifold barn doors
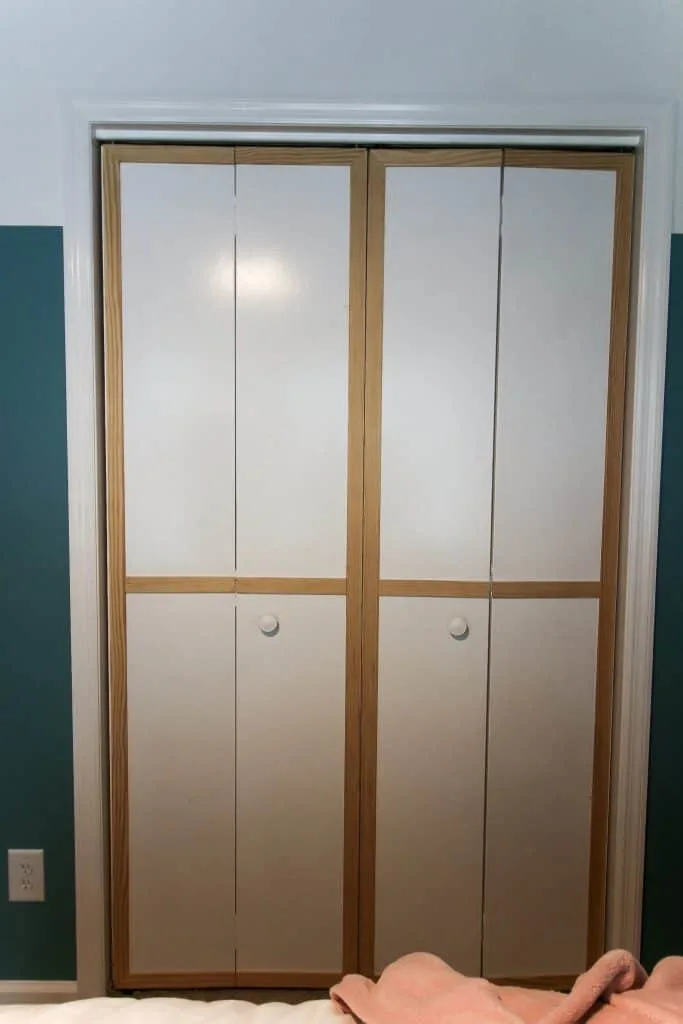
We used the same technique on these doors as we did on the nursery doors. They are standard, flat panel hollow core doors.
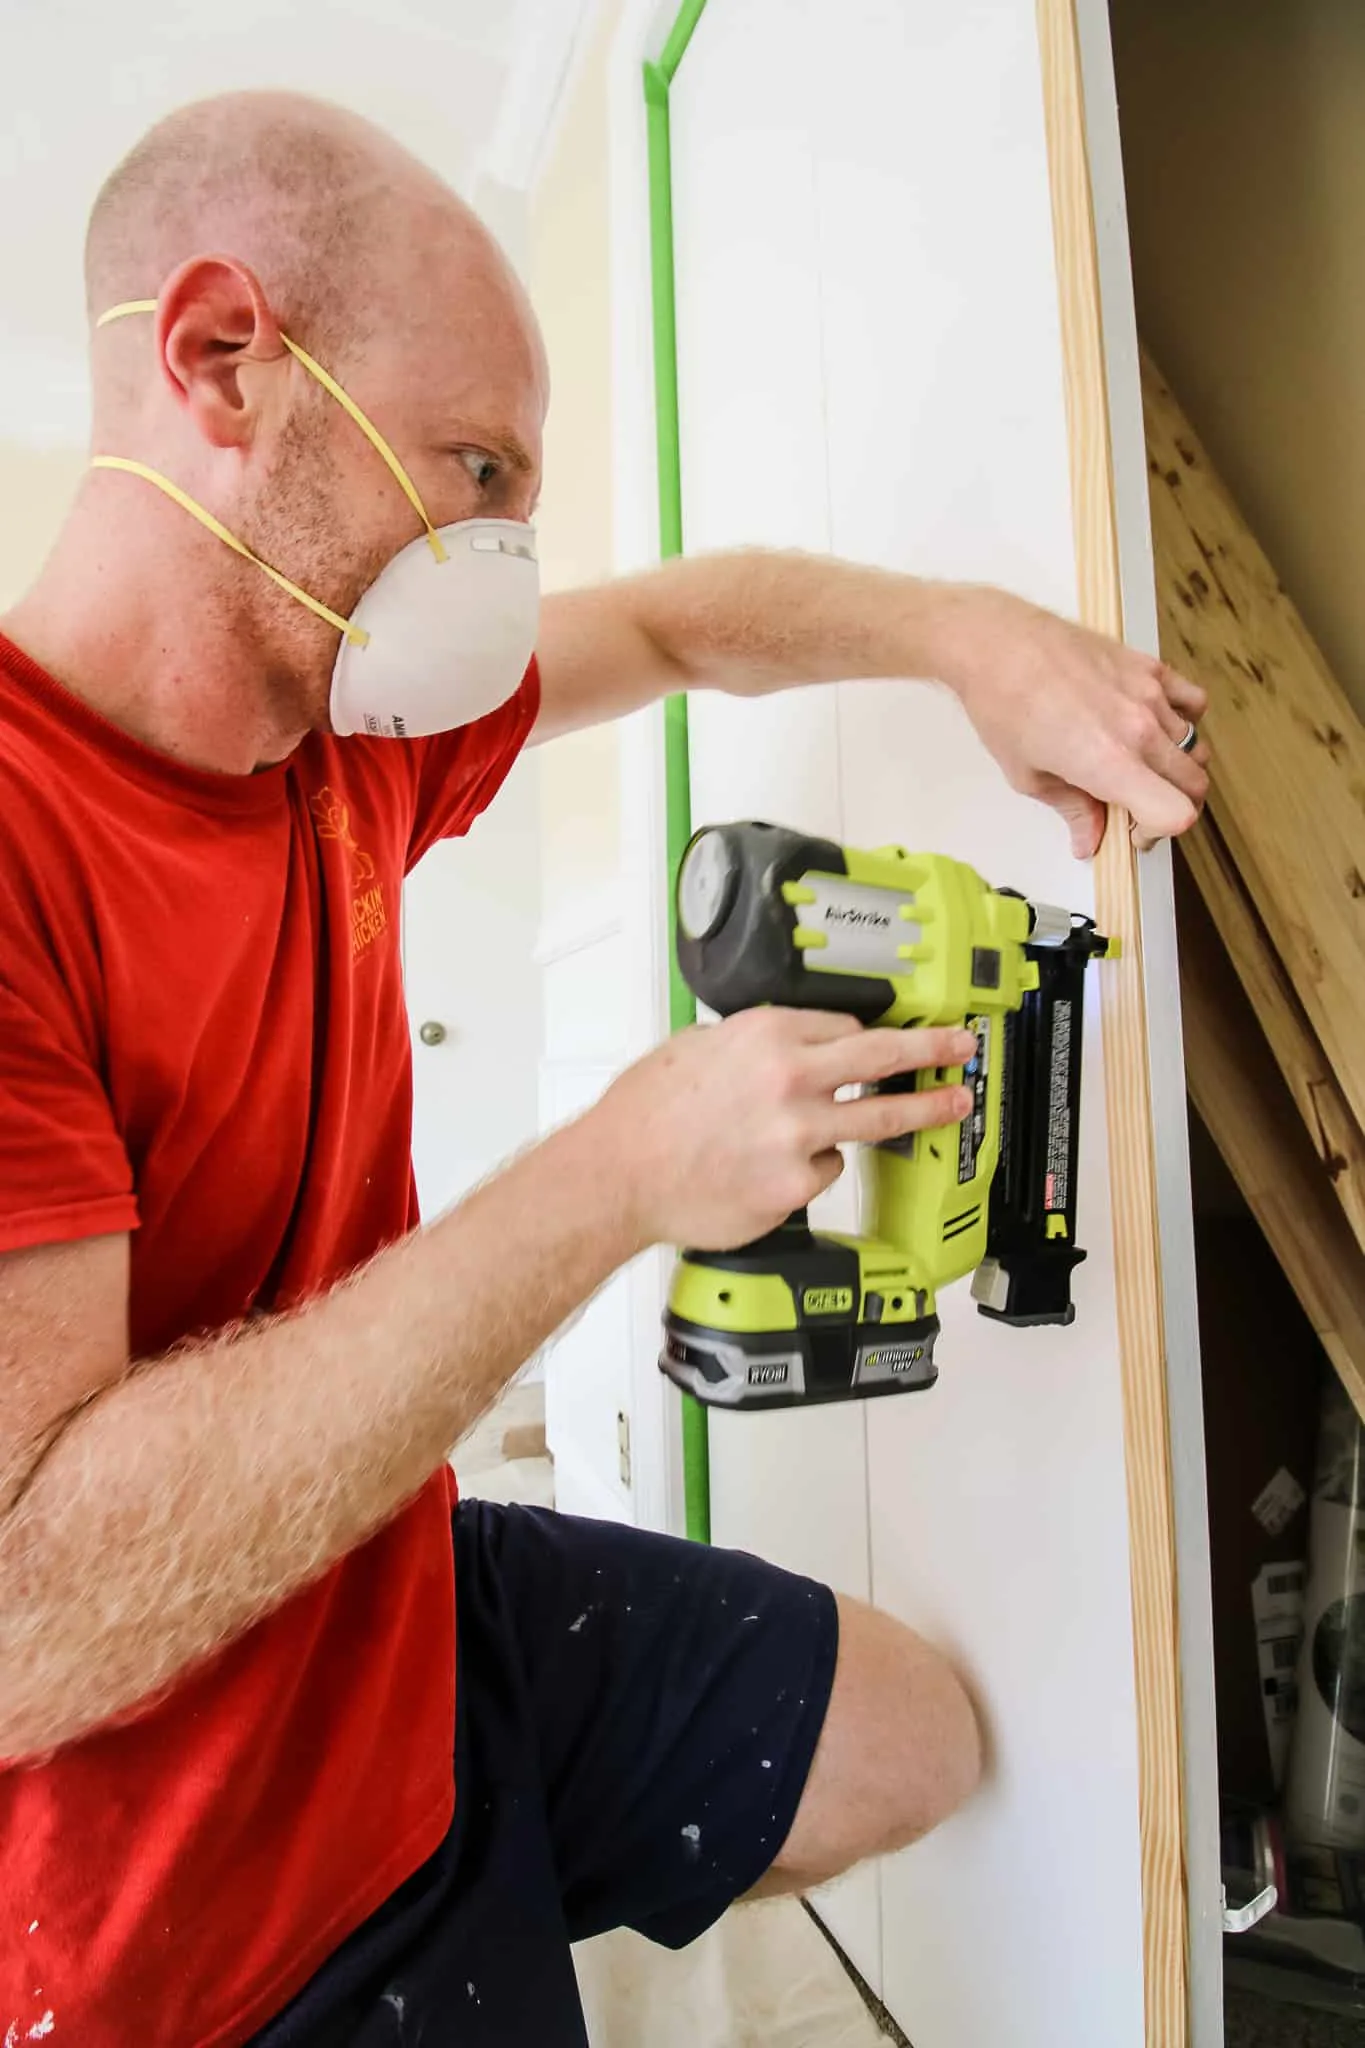
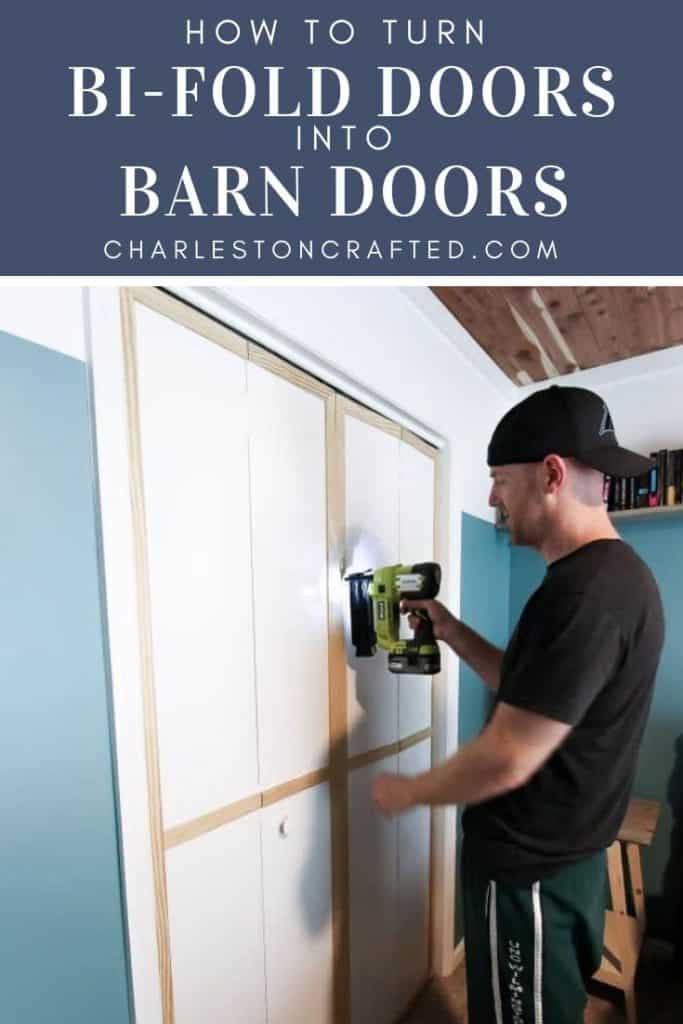
Using 1 1/2″ wide, 1/4″ thick wooden slats, we framed out the doors.
We wanted it to look like two doors coming together, so we framed the left doors and right doors as their own pieces.
We used a nail gun to attach the pieces in place.
Be sure to use a level during this process so you do not end up with crooked lines.

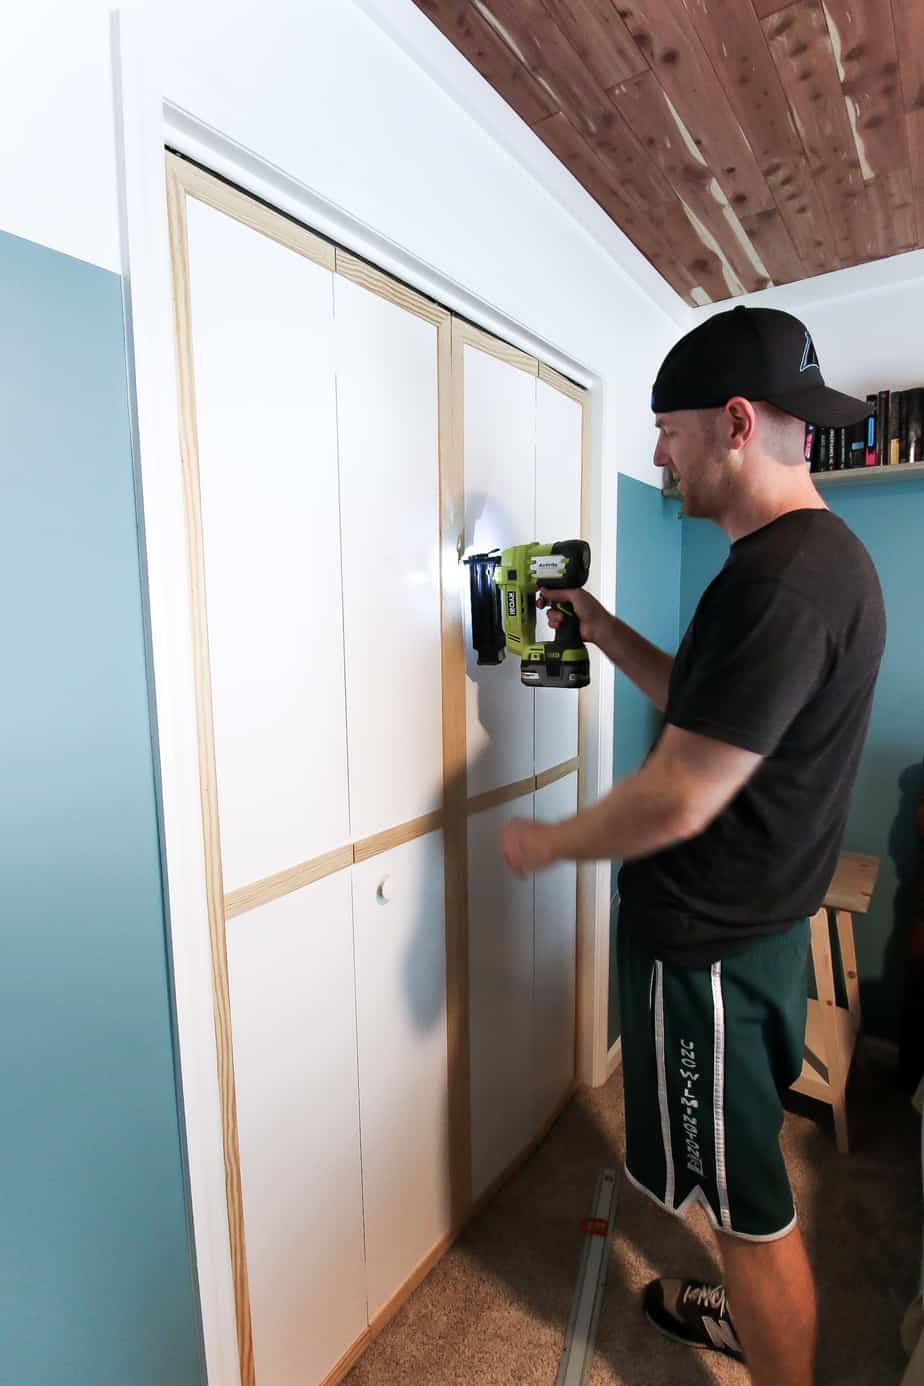
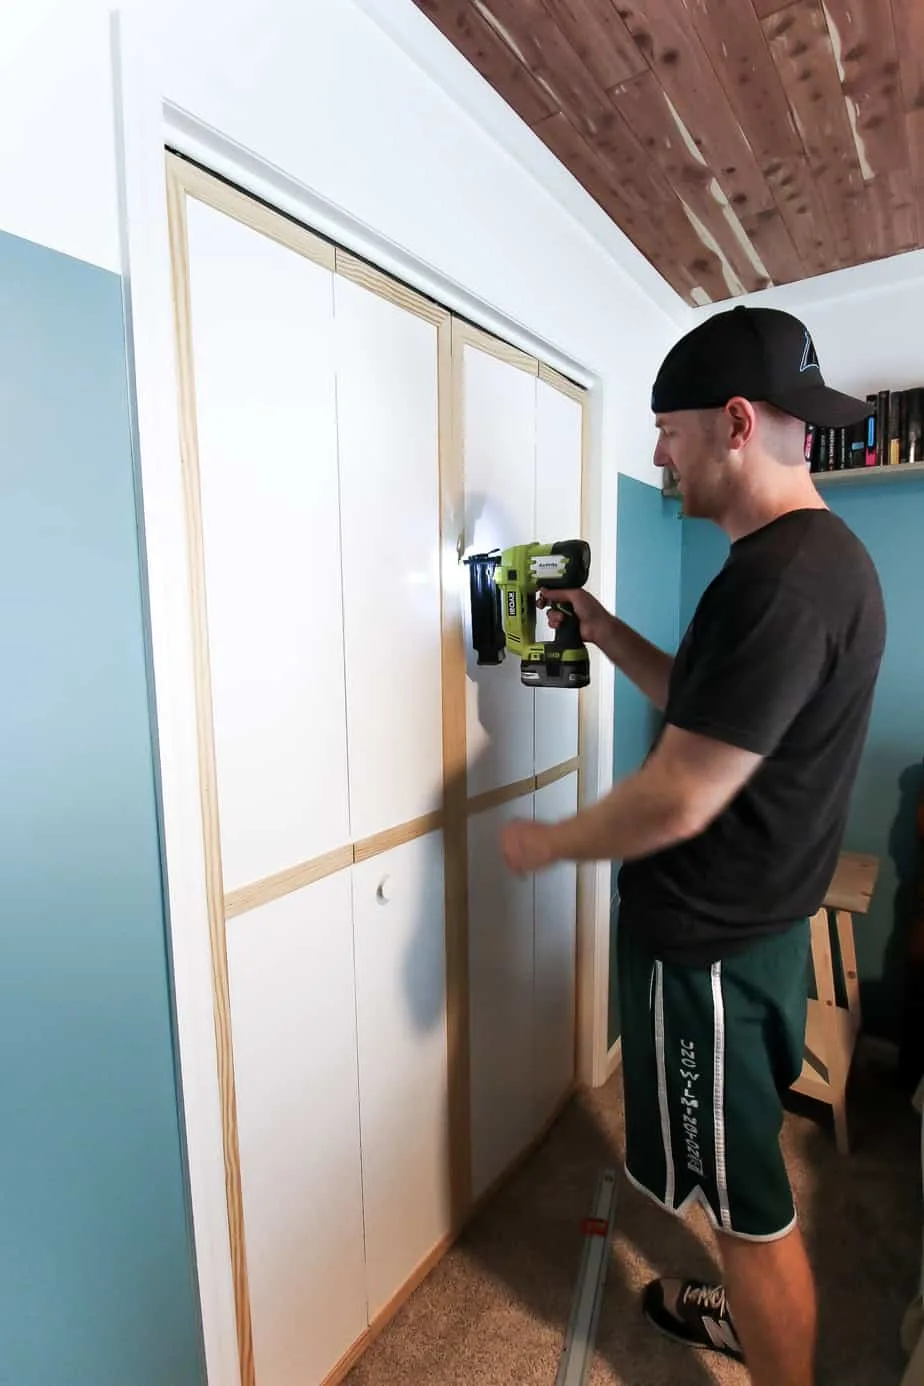
Next, we added slats across the middle of the doors. Note we had to have a cut in the middle where the doors bend.
This process involved a lot of measuring, testing, and then slightly cutting off half an inch or so and repeating. Believe it or not, the doors are all slightly different in size and it makes a difference on the slats.
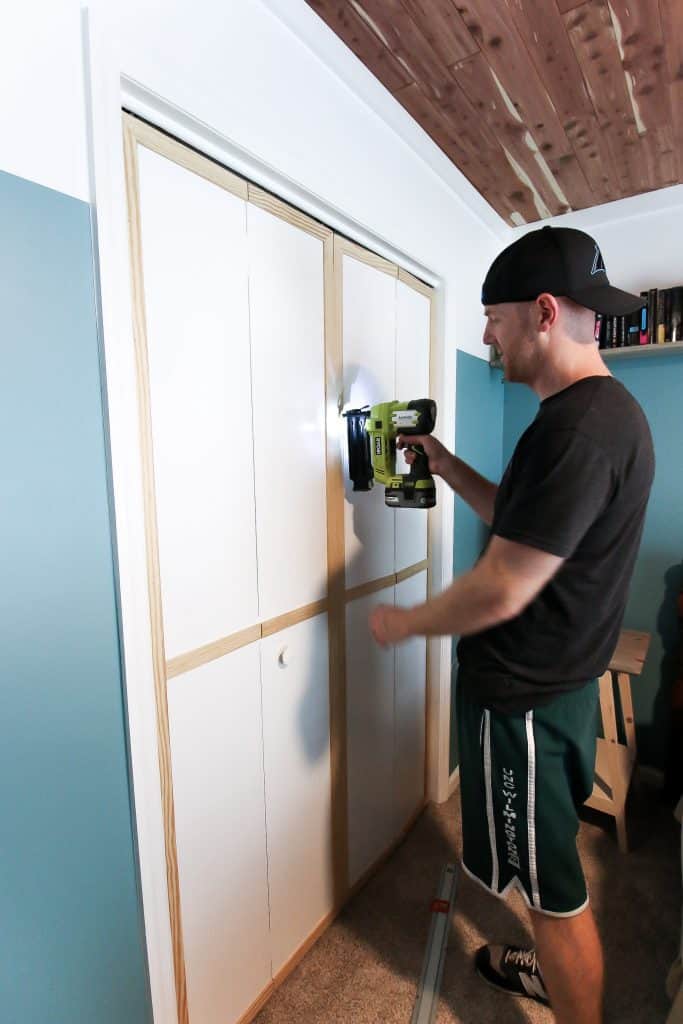

Finally, we cut diagonal slats from the corners to the middle of the doors. When pushed together, they form a large X.
Use your nail gun to nail these slats into place.

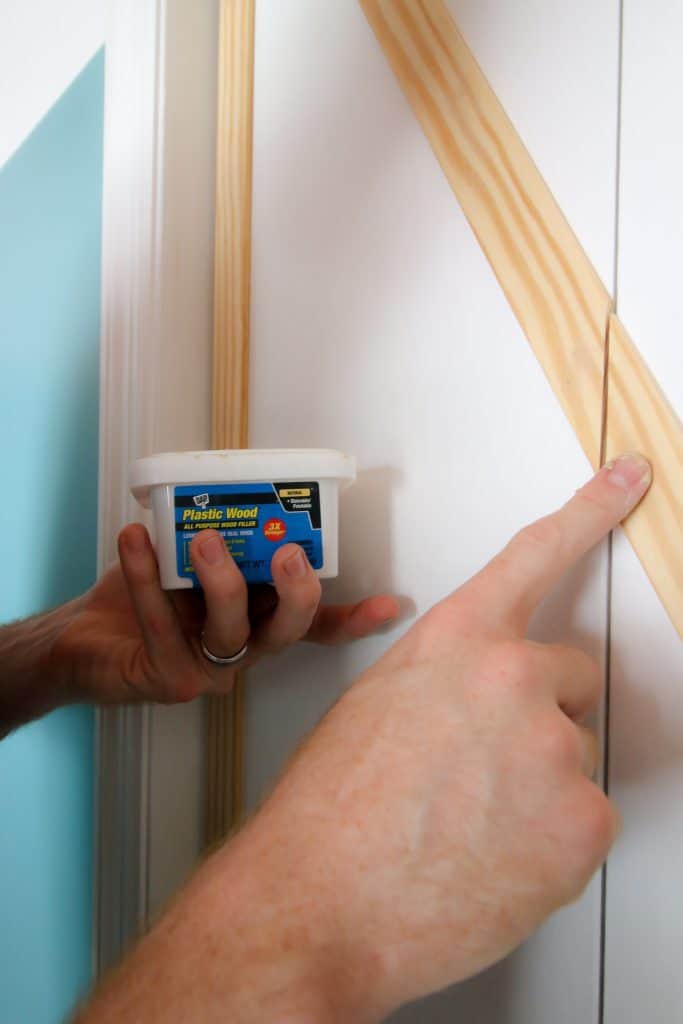
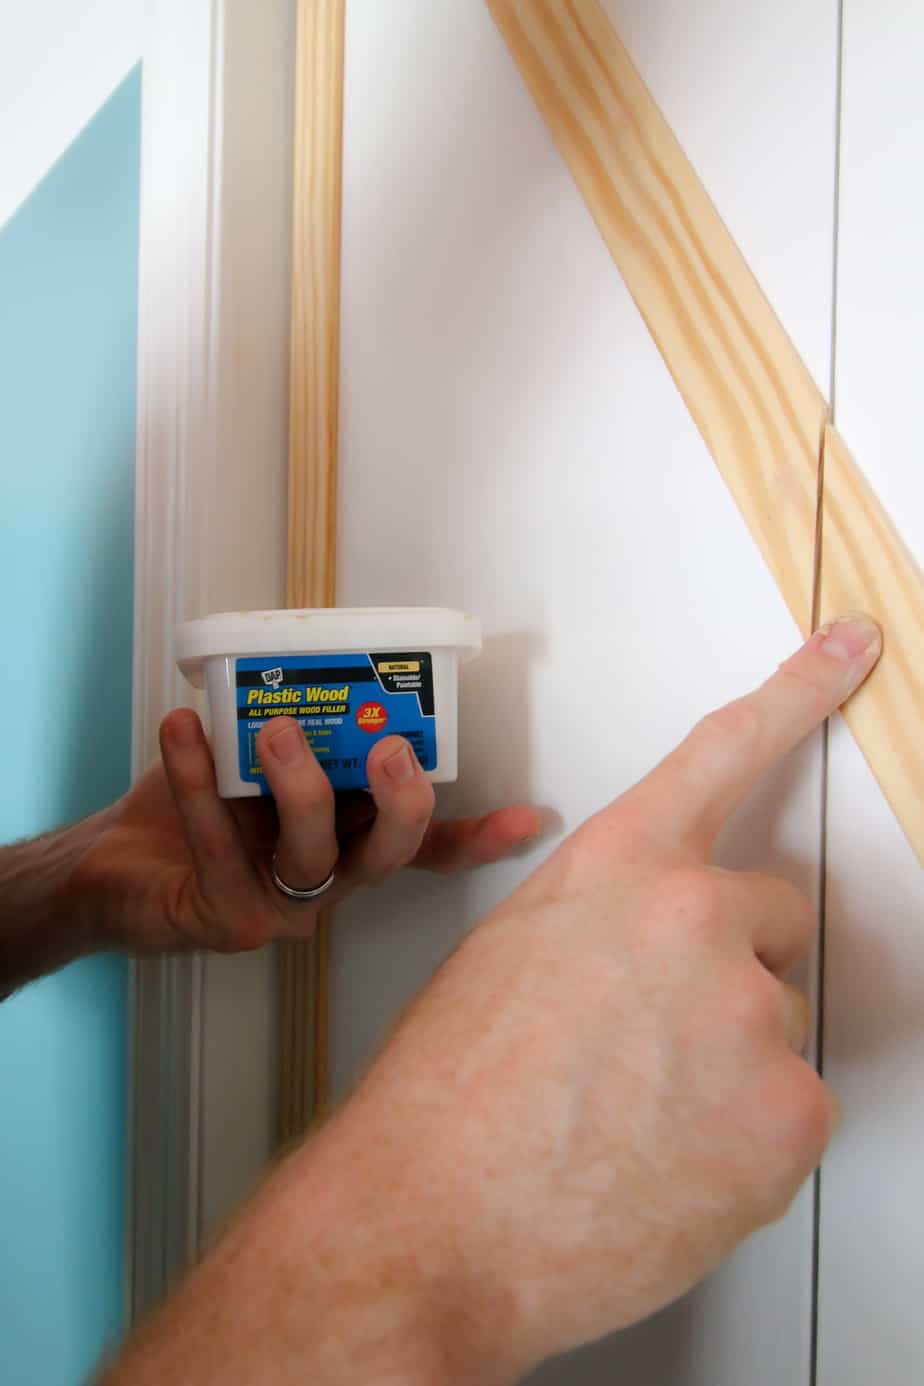
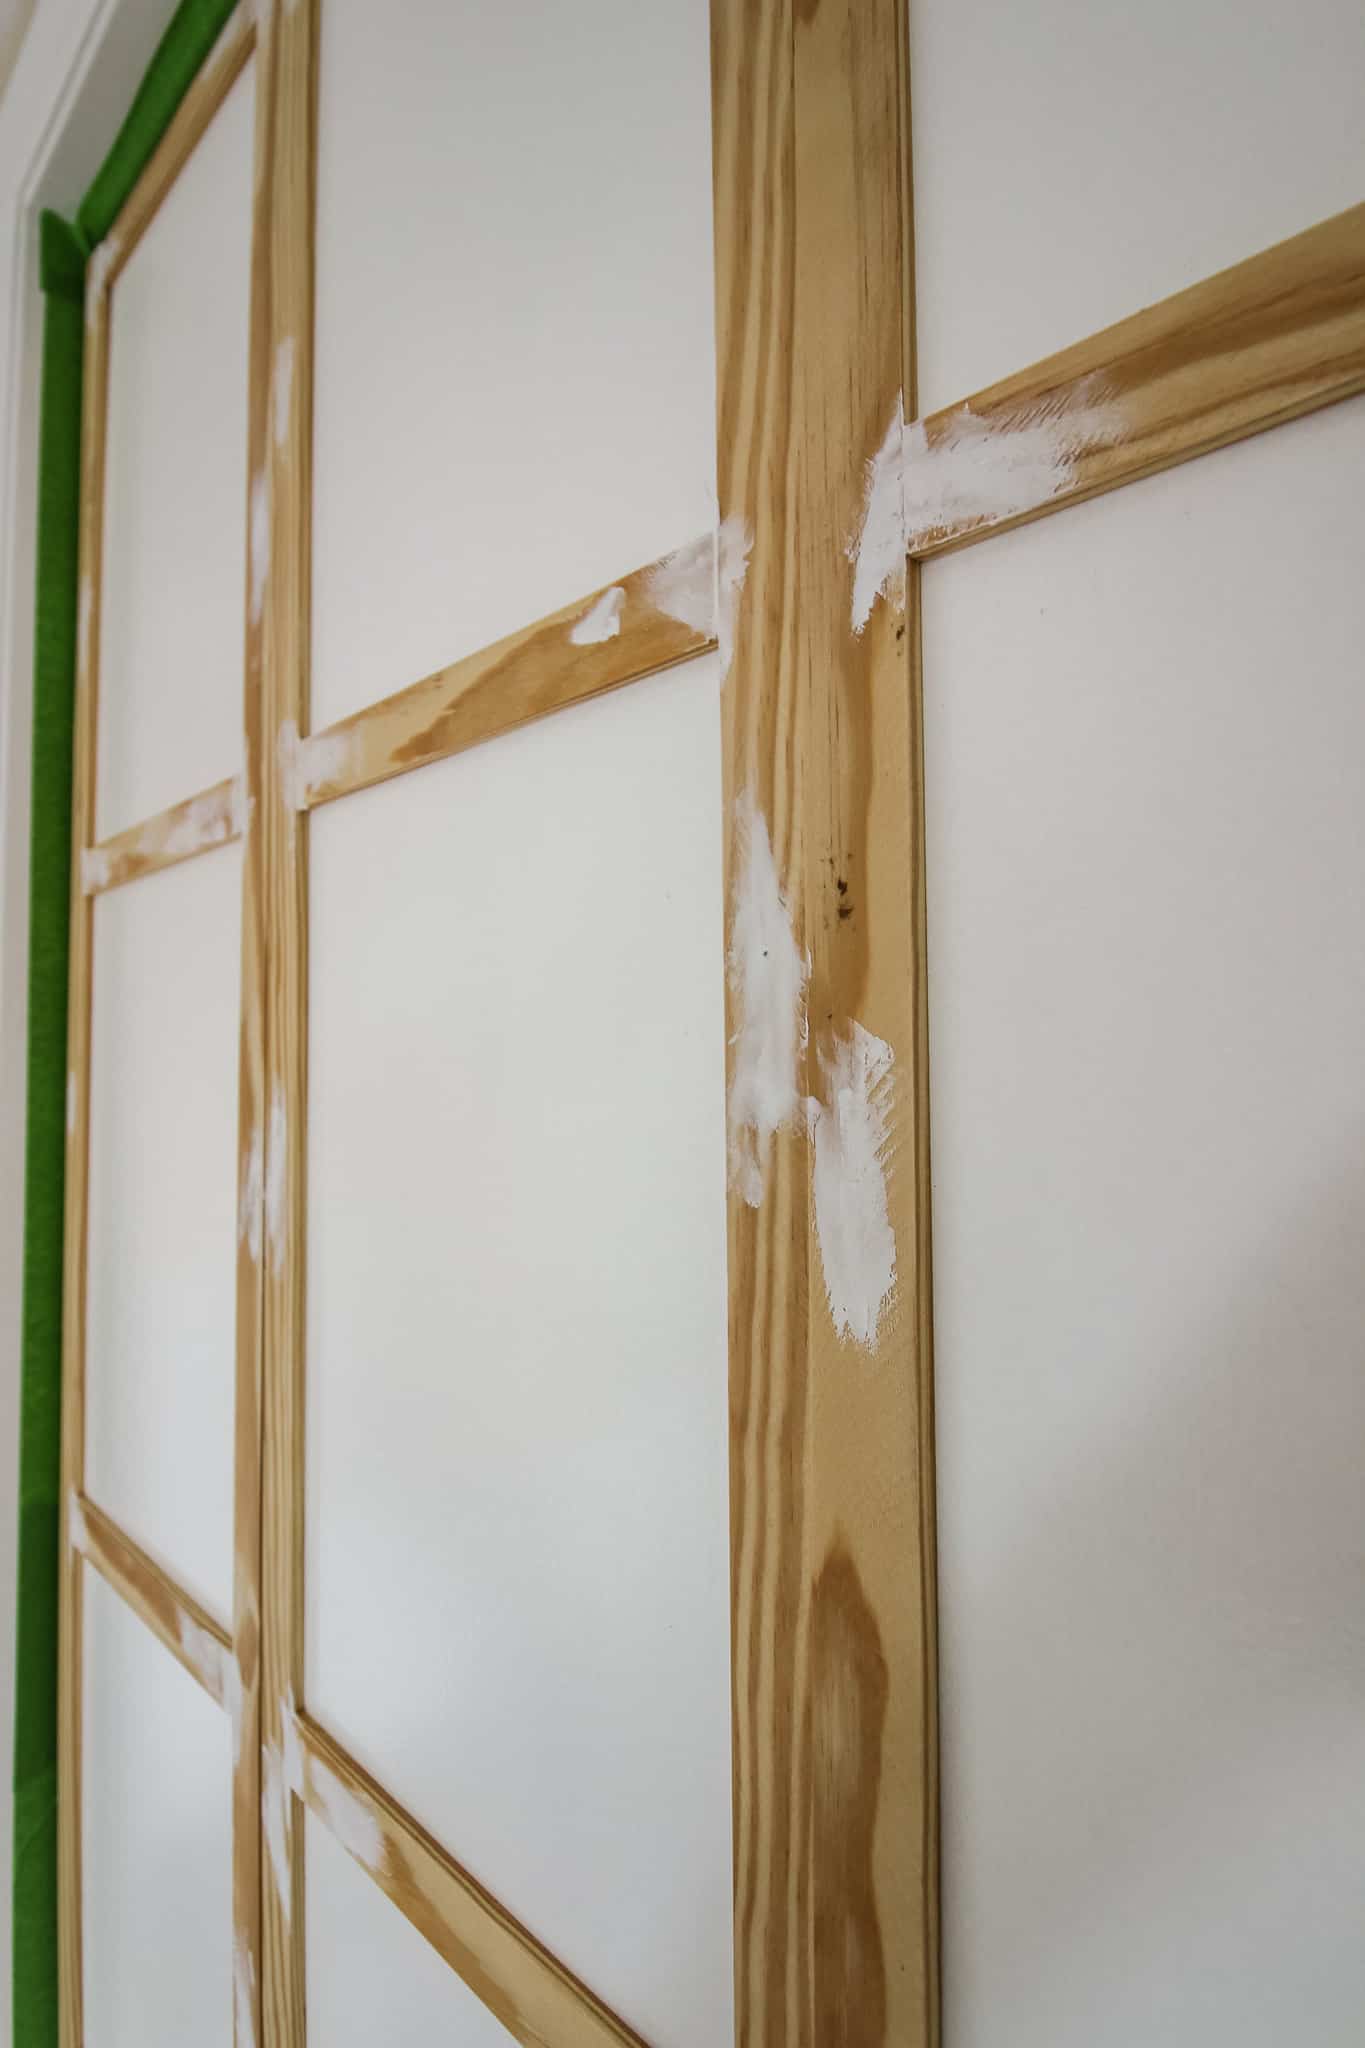
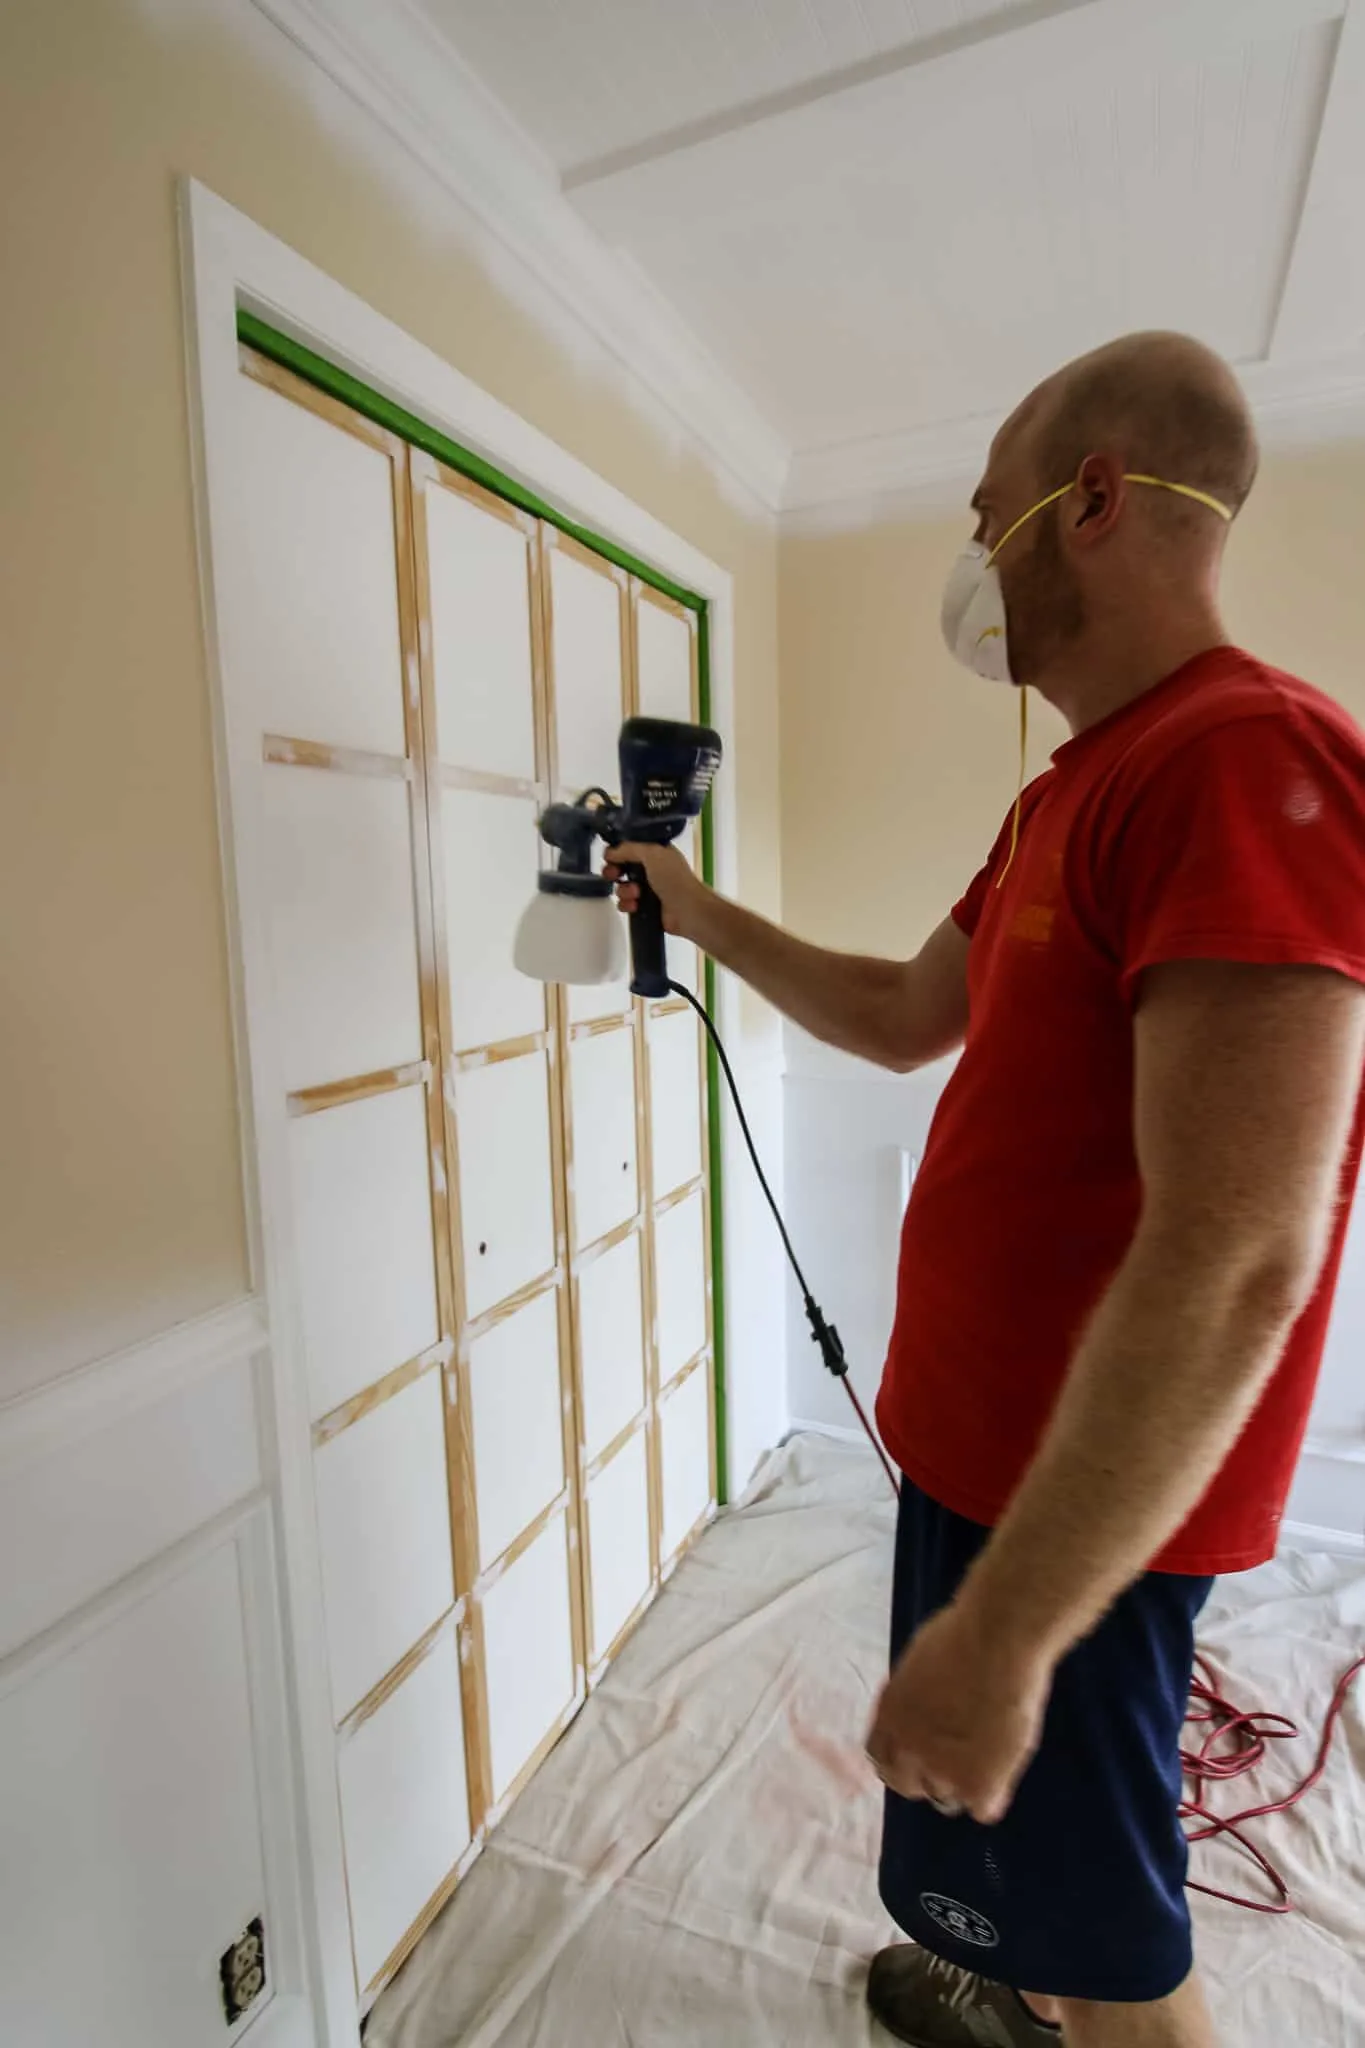
We used wood filler in all the nail holes and seams, then painted everything white.
We used a brush to do this painting, since the walls were already done, but you can also use a paint sprayer! Paint sprayers take just a few minutes to do the whole door.
*hot tip* if your door is already painted – it can be even easier if you pre-paint the slats before hanging them on the doors.
We didn’t do this obviously but it wasn’t super easy to paint some of the edges and having them pre-painted we would have only had to do touch ups!

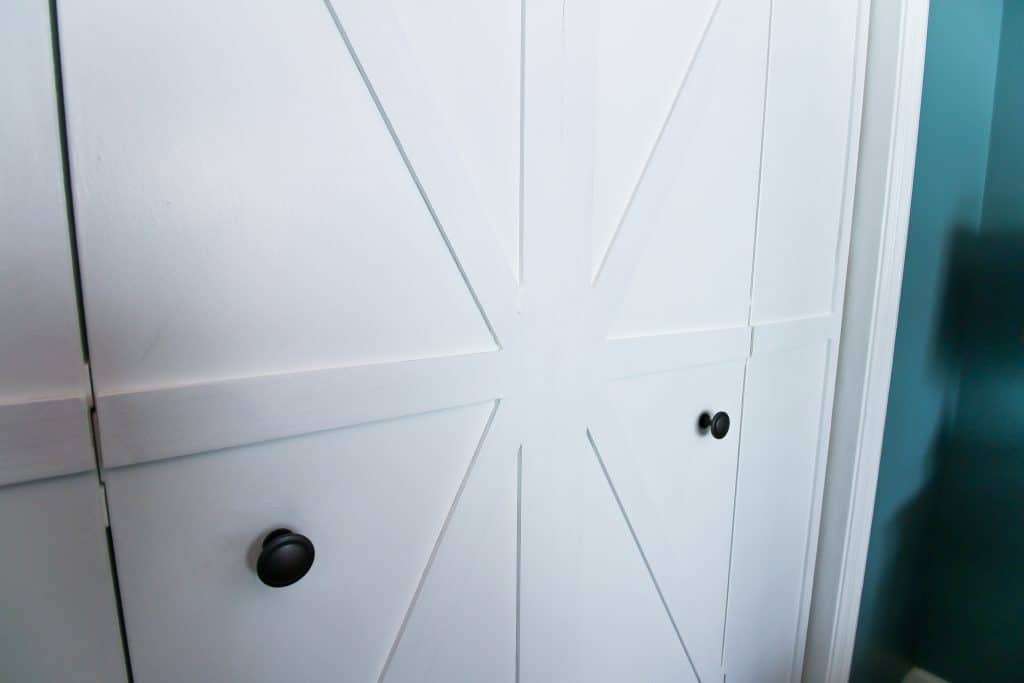
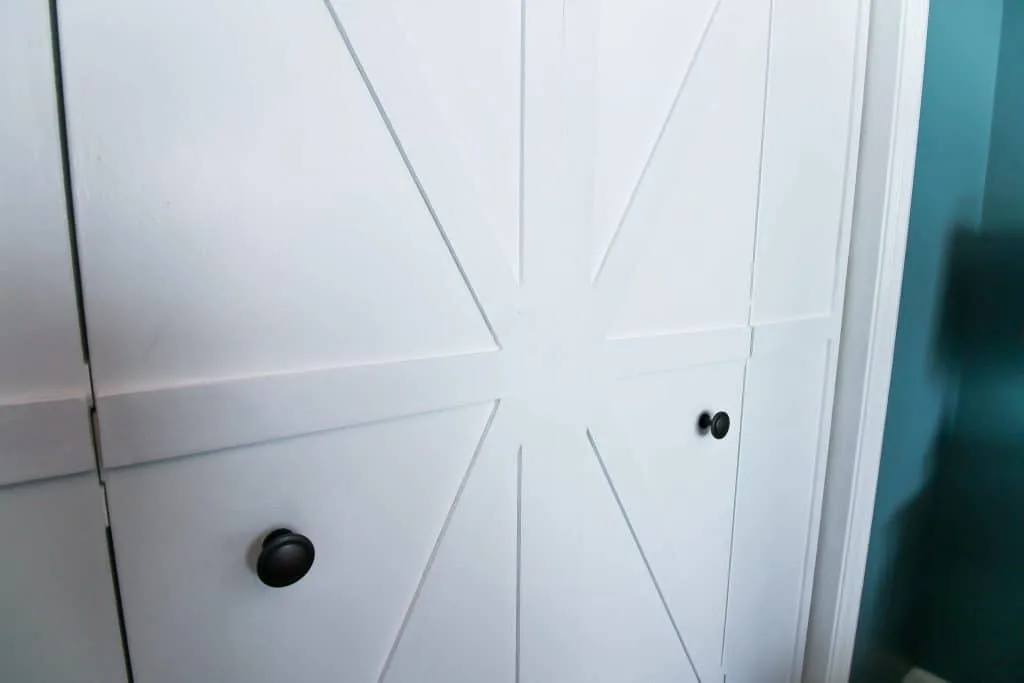
Last step was to add some new knob hardware to replace the big wide white knobs.
We selected kitchen knobs – actually left over from our kitchen cabinets! However, you could also use a pull, cup, or even door knob style knob.
Fun fact – your door might be thicker than the knob was intended for (if you use a cabinet knob). No problem, just use a longer screw!
Results
You make your call, but we think these bi-fold barn doors look amazing! Such an easy DIY project with a big impact!
Here’s another idea for updating bifold doors with a more traditional look.
If you try this project – please tag us on social media! We would love to see it.

How to DIY Bi-fold Barn Doors
It's easy to give boring, plain bi-fold doors a barn door look!
Materials
- 1.5"x0.25" slats
- Wood filler
- White paint
- 2 knobs
Tools
- Saw
- Sander
- Brad nailer
- Paint brush
- Painters Tape
Instructions
- Use slats to frame each pair of doors, with cuts on the boards for each single door within the pair. Hang using brad nailer.

- Add horizontal slats on middle of doors.
- Hold up diagonal slats. Use a pencil to mark angles and cuts. Make cuts and hang.

- Use wood filler to fill all gaps and nail holes.

- Sand wood filler and wipe clean.

- Paint white. We did 2 coats.

- Add new hardware.


Notes
Sand all pieces after cutting before hanging
Recommended Products
As an Amazon Associate and member of other affiliate programs, I earn from qualifying purchases.


Looking for something?
We’ve been doing this since 2012 so we have a LOT of blog posts!
Search stuff like: Ceiling Projects | DIY Plant Stands | Thrift Flips


Hey there, I’m Sean, the woodworking enthusiast and builder behind CharlestonCrafted.com! Since 2012, I’ve been sharing the magic of turning raw materials into beautiful creations. I love teaching others the art and satisfaction of woodworking and DIY. I try to inspire fellow crafters to make something extraordinary out of nothing at all.
28 DIY Barn Doors ideas Easy To Make - DIY Craftsy
Saturday 18th of September 2021
[…] charlestoncrafted […]
35 DIY Barn Door Projects: How To Build A Barn Door
Tuesday 11th of May 2021
[…] Click for more details […]
Jessy
Sunday 16th of August 2020
Hey! I’ve been looking everywhere for boards like what you use to frame. Do you have a link or something where I could find them?
Morgan
Monday 17th of August 2020
They are just simple wooden slats at the hardware store. They are 1/4" thick, maybe 2" wide and sold in 8' lengths. They look similar to this- homedepot.sjv.io/6OLaG. Just ask at the store and you'll get where you need to go!
Bifold Doors into Barn Doors – Free Woodworking Plan.com
Monday 23rd of September 2019
[…] flat bifold doors for your closet into beautiful barn style doors using the free tutorial available at the link. […]