
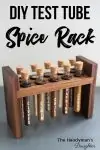
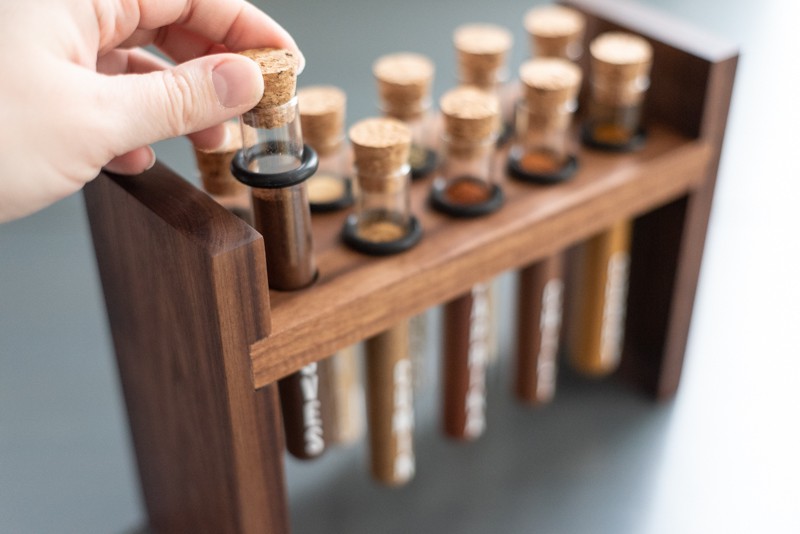
Cooking is chemistry with this DIY test tube spice rack! Learn how to make your own with free plans and this step by step tutorial!

Despite a cabinet full of spices, we only use a handful of them in our everyday cooking. I wanted to make it easier to see when we're running low on these essentials, and clear out the cluttered cabinet.
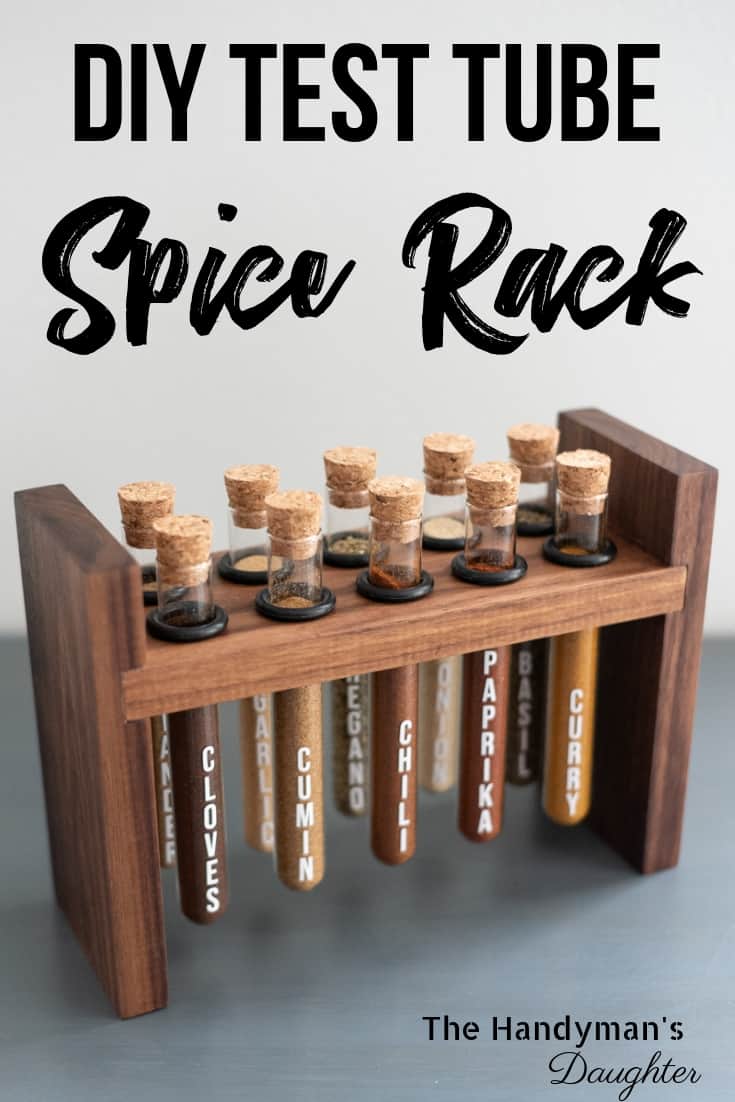
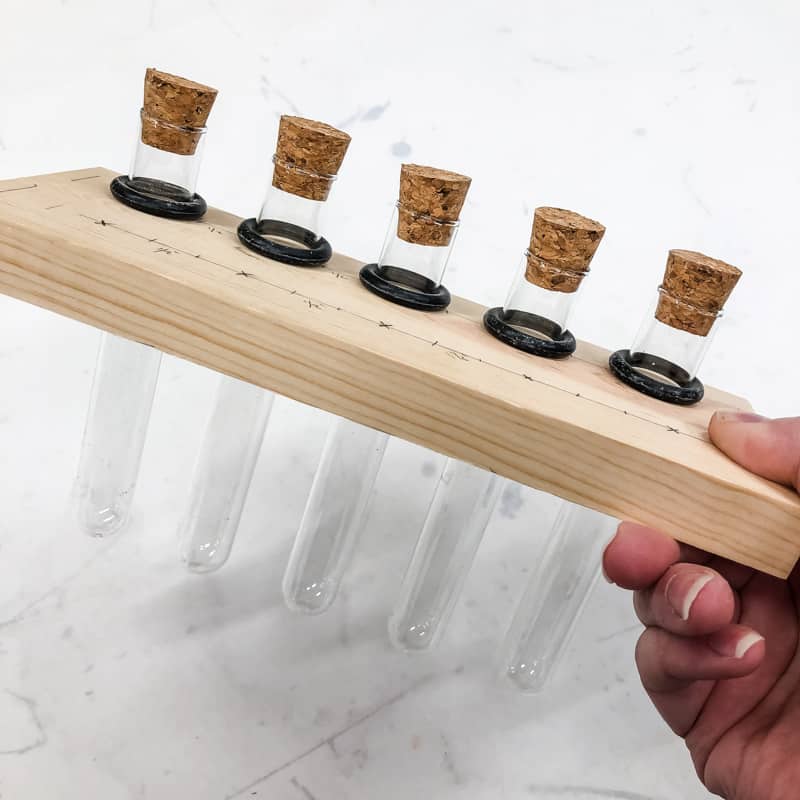
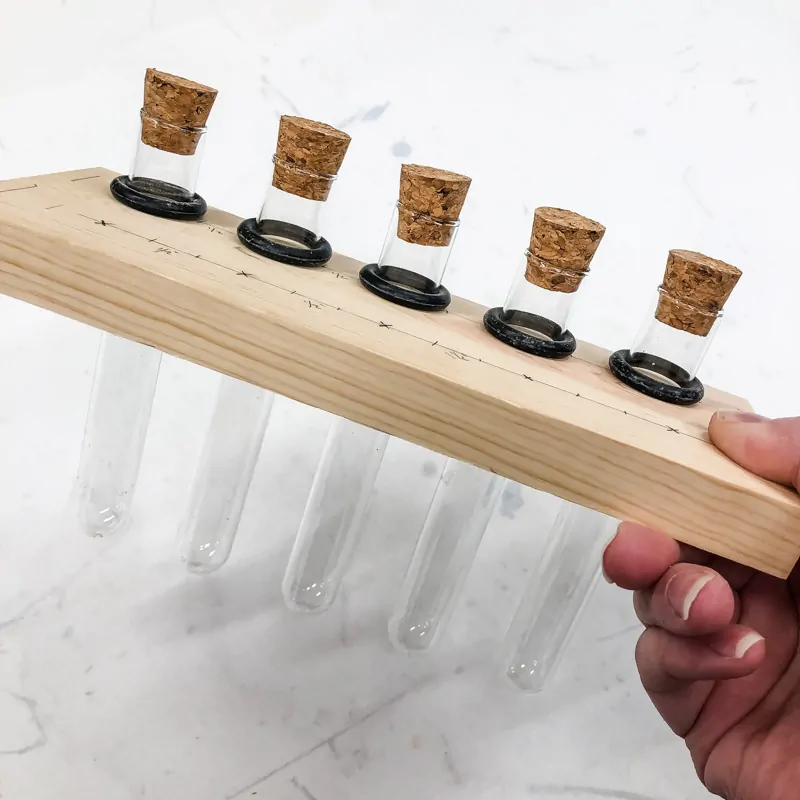
This DIY test tube spice rack displays our favorites suspended in a beautiful walnut frame that sits proudly on our countertop! If this test tube spice rack isn't big enough for all your seasonings, check out these other spice rack ideas instead!
Of course, you could easily use pine for this project and stain it any color you want! Check out my head-to-head comparison of gray wood stain and black wood stain colors to pick the perfect hue!
Let's get building!
This post contains affiliate links for your convenience. Purchases made through these links may earn me a small commission at no additional cost to you. Please visit my disclosures page for more information.
Materials needed
- One 1x4 board
- Hardwood like walnut is priced per board foot, but you only need to buy a 2 foot long piece.
- 20mm test tubes with cork stoppers
- 21mm diameter Forstner bit
- 18mm inner diameter rubber O-rings
- It took some trial and error to find the right diameter O-rings to fit into the test tubes snugly. These are a perfect fit, and stay in place without slipping!
- Table saw
- Drill or drill press
- Sander and sandpaper
- Wood glue
- 12" clamps
- Paint, stain or cutting board oil (for hardwoods only)
- Mineral oil (for hardwoods only)
Don't forget your safety gear when woodworking! Here are my recommendations for safety glasses and ear protection.
How to make a test tube spice rack
Create a test piece
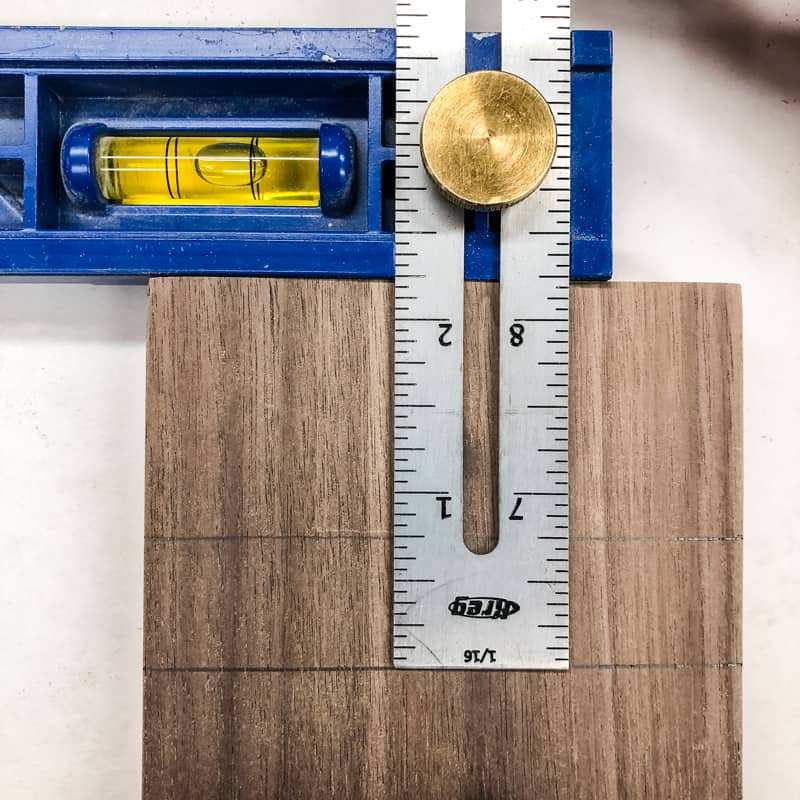
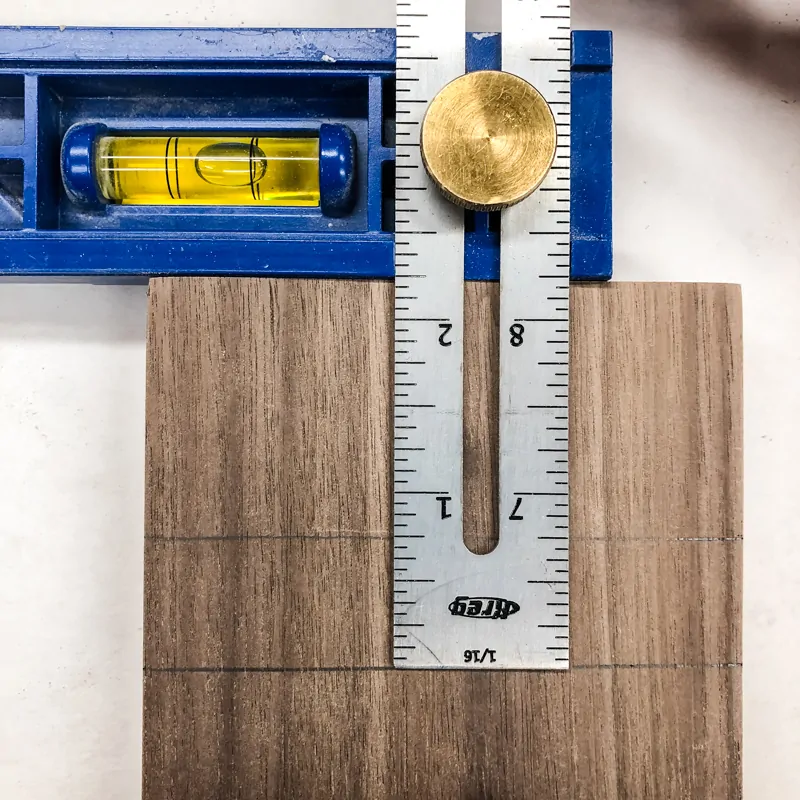
Before I started drilling holes in my beautiful walnut board, I created a test piece in a scrap of 1x4 lumber to determine the spacing. First, I arranged the O-rings so they were evenly spaced ½" apart. The O-rings are 1 ⅛" in diameter, and I left an extra ⅜" on the ends to fit into the side pieces later on.
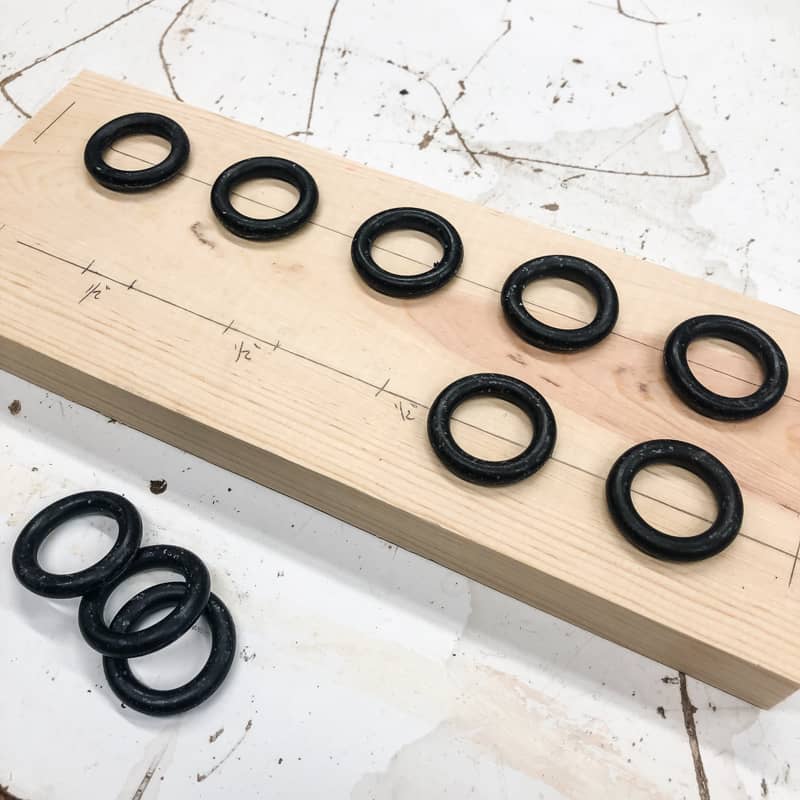

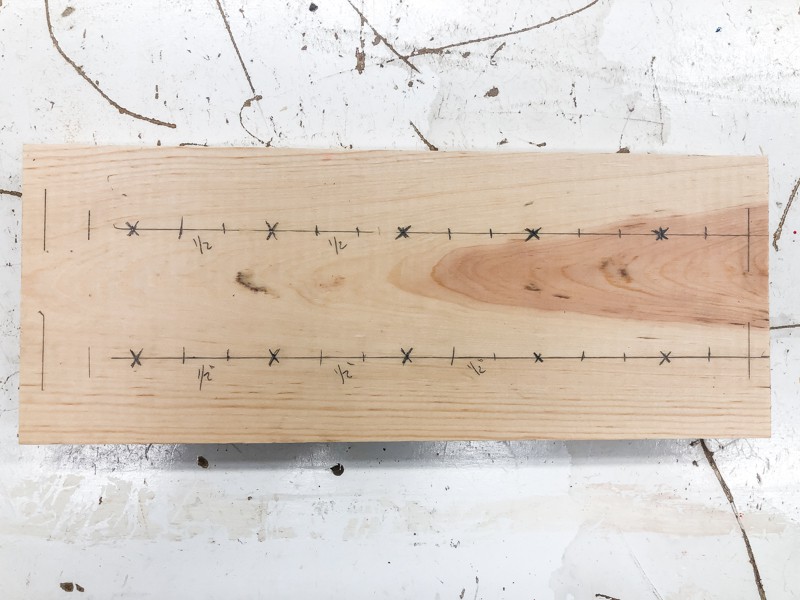
Then I marked the center of the O-rings for the point of the bit. Here's what the final marked-up test piece looked like. Add up all those measurements, and you'll get the length of the top piece (mine was 9 ⅜").
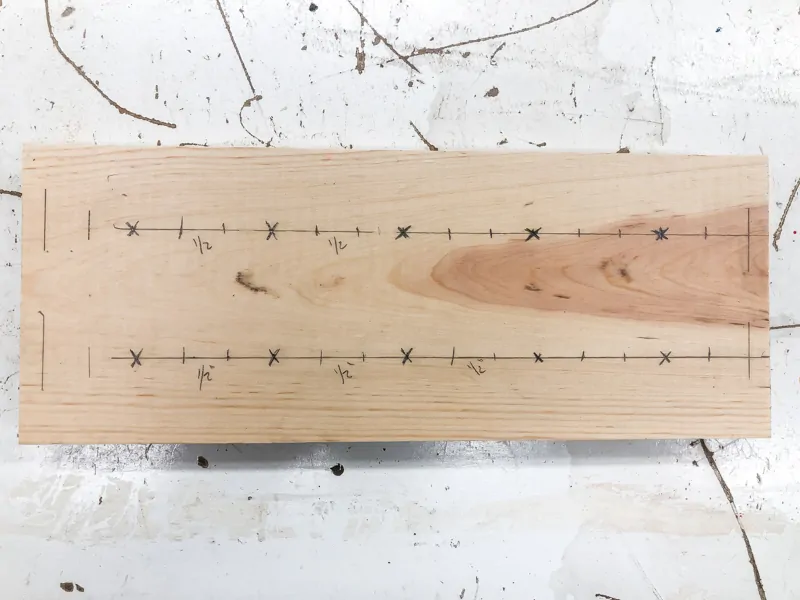
I drilled holes with the 21mm Forstner bit along one side of the test piece to make sure I had the spacing the way I wanted it, and to make sure the O-rings held the test tubes correctly. Looking good!
Clear as mud, right? 😉 If you want a better idea of the spacing and the rest of the details of this project, click below to download the free woodworking plans!
Cut the rack pieces and mark placement
With the final spacing decided, it was time to start cutting the good stuff! I cut one 9 ⅜" long piece and two 7" pieces out of a walnut 1x4 board. Then I transferred all the markings from the test board onto the 9 ⅜" piece.
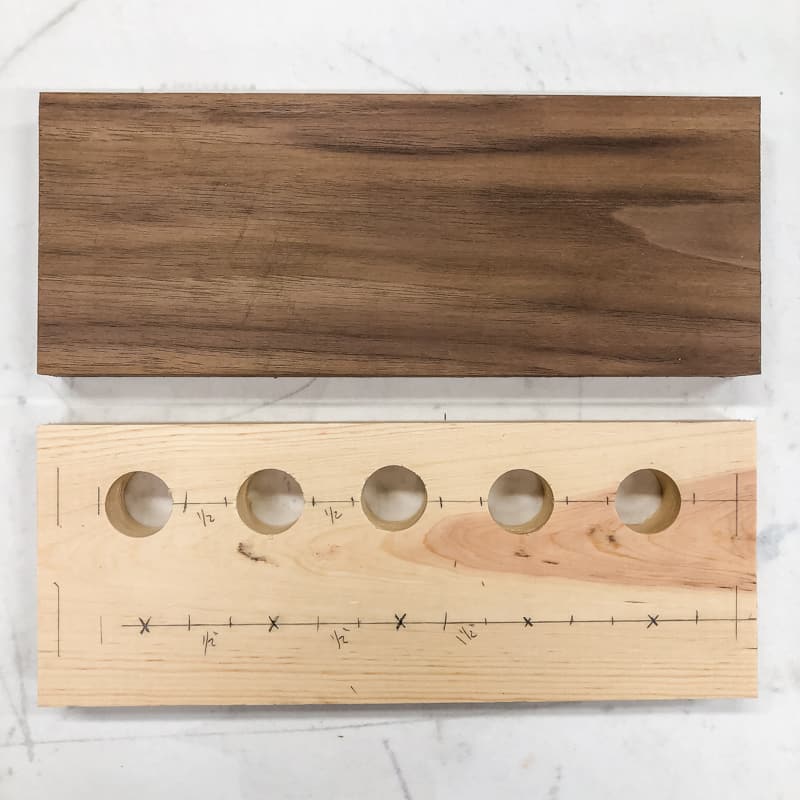

Drill holes for the test tubes
I had debated getting a drill press for a long time, but I've used it in my last two projects, so it's earned its keep. 🙂 I first used it to make circles for my IKEA Lego table, and now it will make perfectly sized holes for this DIY spice rack!
If you don't have a drill press, you can use a regular drill with the same 21mm Forstner bit. Just make sure that the bit is straight as you drill, or the test tube will hang crooked!
Place a sacrificial scrap board under the walnut board so you don't bore into your table! Line up the point of the bit with the X mark, then clamp the board into place.
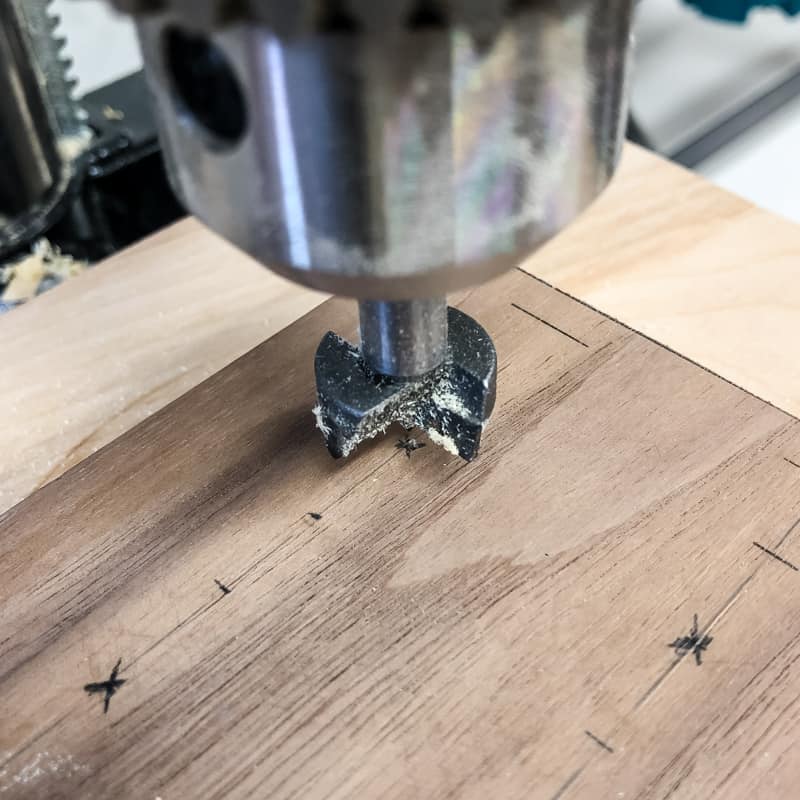

Then drill the hole all the way through the board. You'll know when you're through when the light wood colored shavings come out. I love how the walnut shavings look like chocolate!

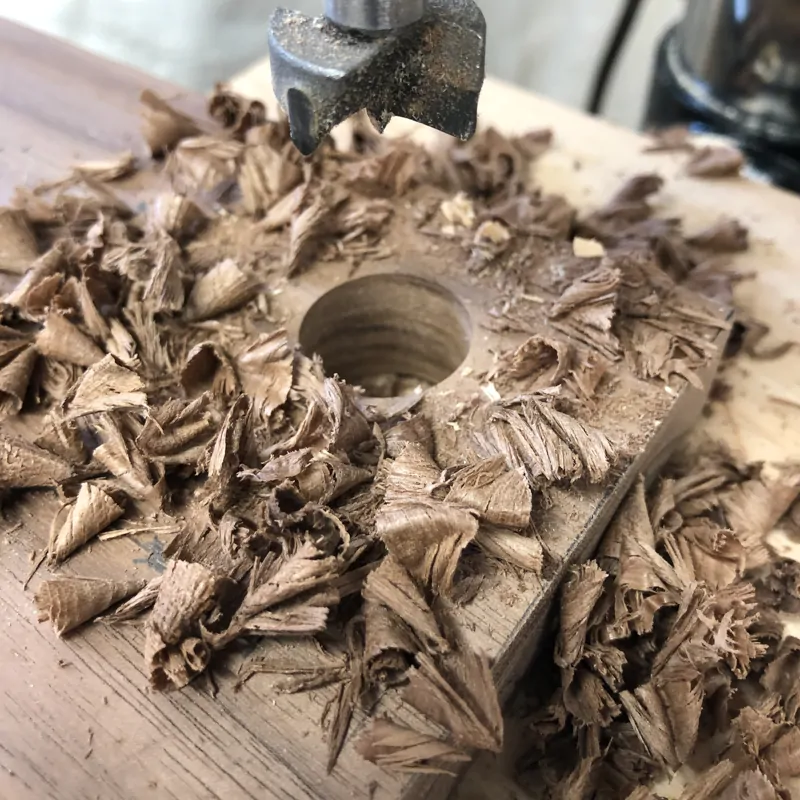
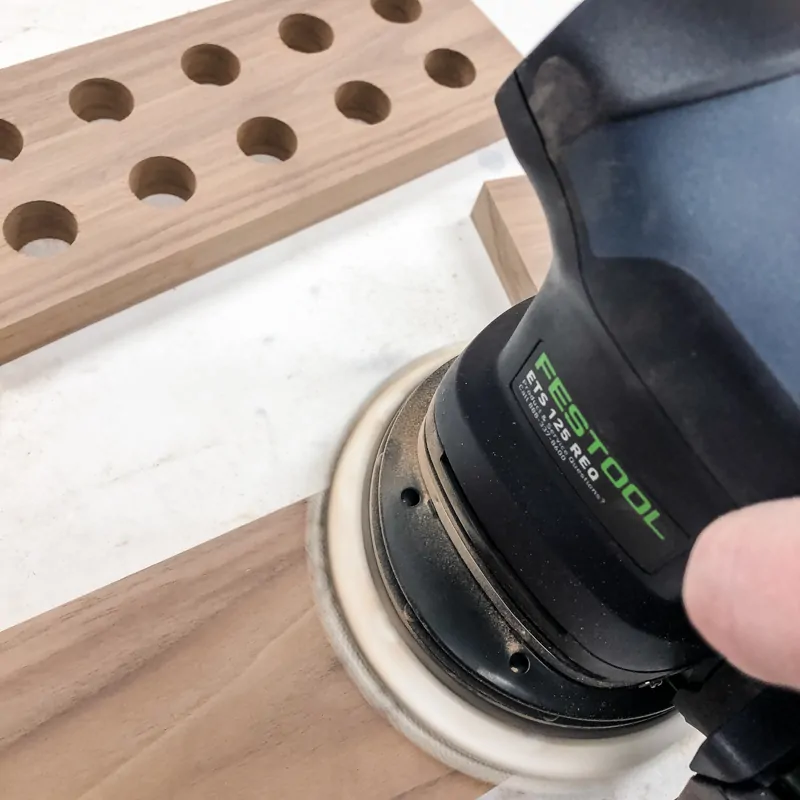
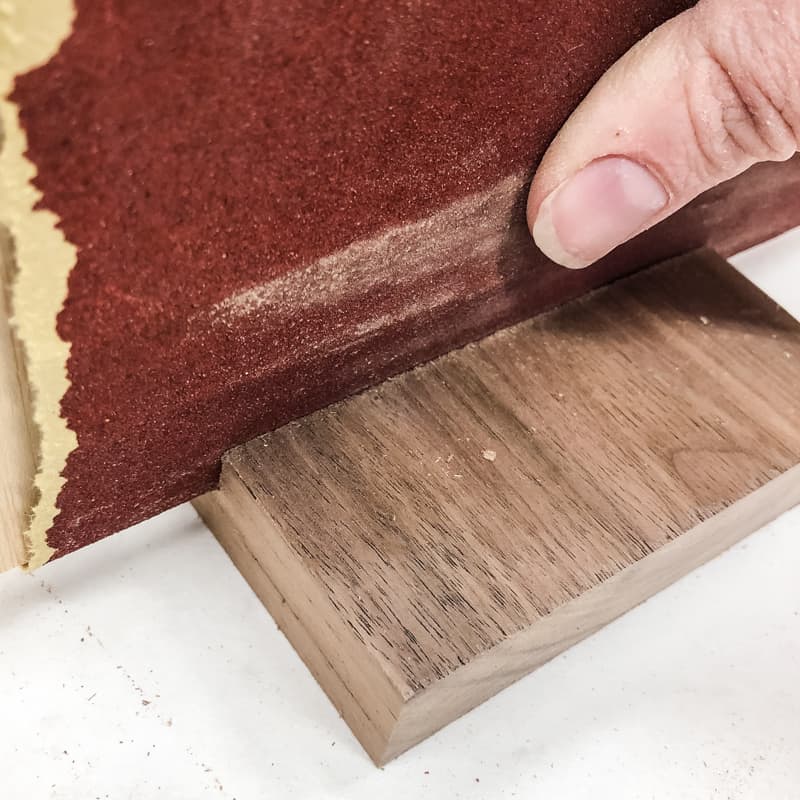
Continue drilling holes until you have all ten completed. Then sand all three pieces with progressively finer sandpaper grits (I used 120, 220 and 320 grits).

Cut dadoes in the side pieces
You can attach the sides to the top several different ways. I thought about using pocket holes, but I didn't want to fill the holes with wood putty or plugs. You could also nail it together with small finish nails.
I've included directions for both of these versions in the free woodworking plans you can download below!
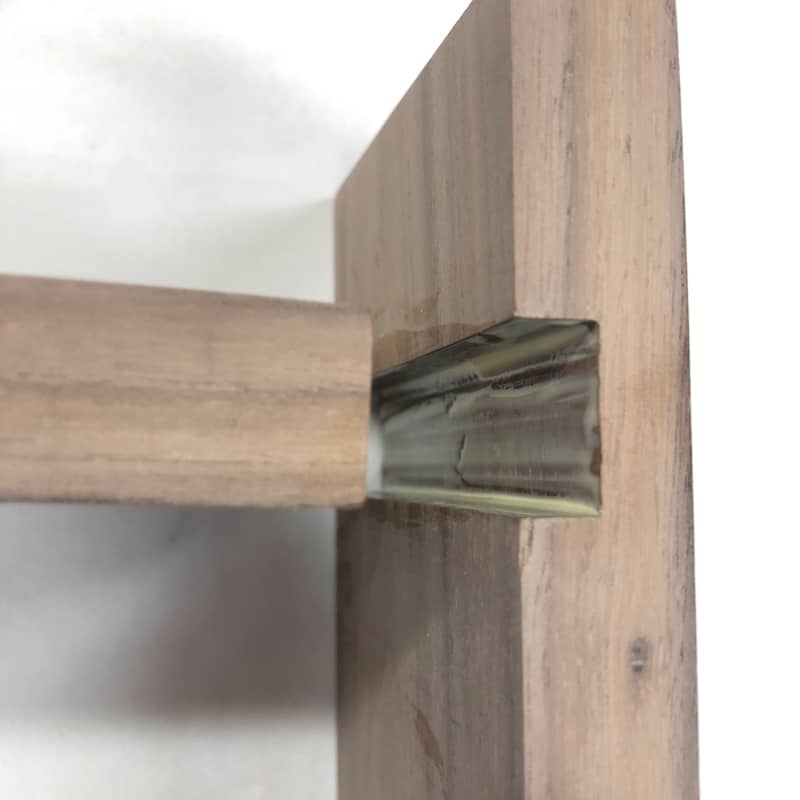
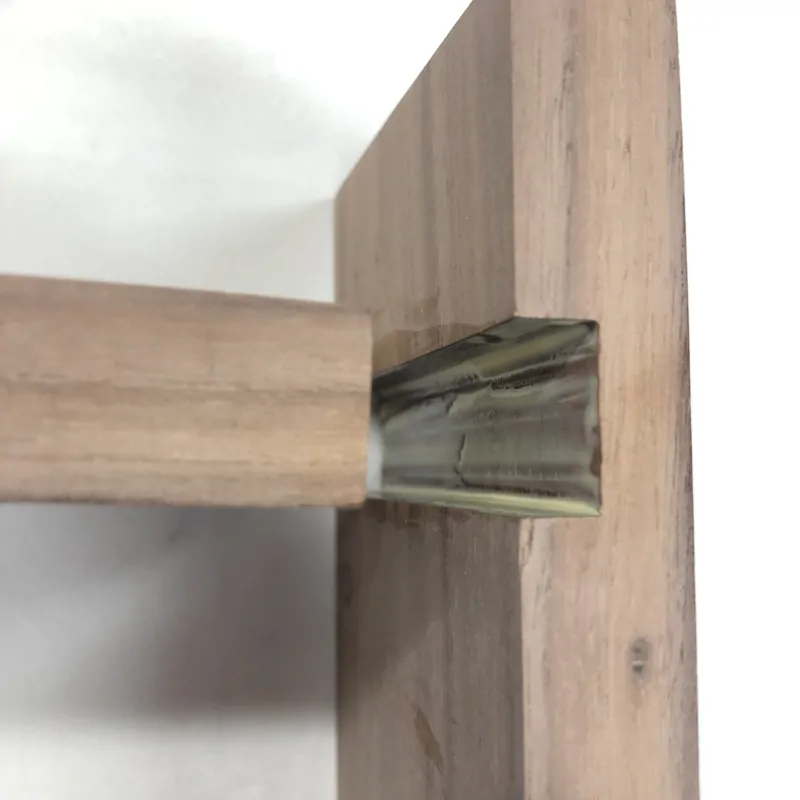
But I decided to go with a hardware-free design with dadoes cut into the side pieces to hold the top in place. This isn't as difficult as you think, and you don't even need a dado blade on your table saw to do it!
Mark a line 1 ½" down from the top of each side. Then measure the width of your top piece (usually ¾", but it isn't always exact) and mark a second line for the bottom.
Set the height of your table saw to ⅜" (this tool makes it super easy!) Then make two cuts just inside the lines you drew on the face of the board.

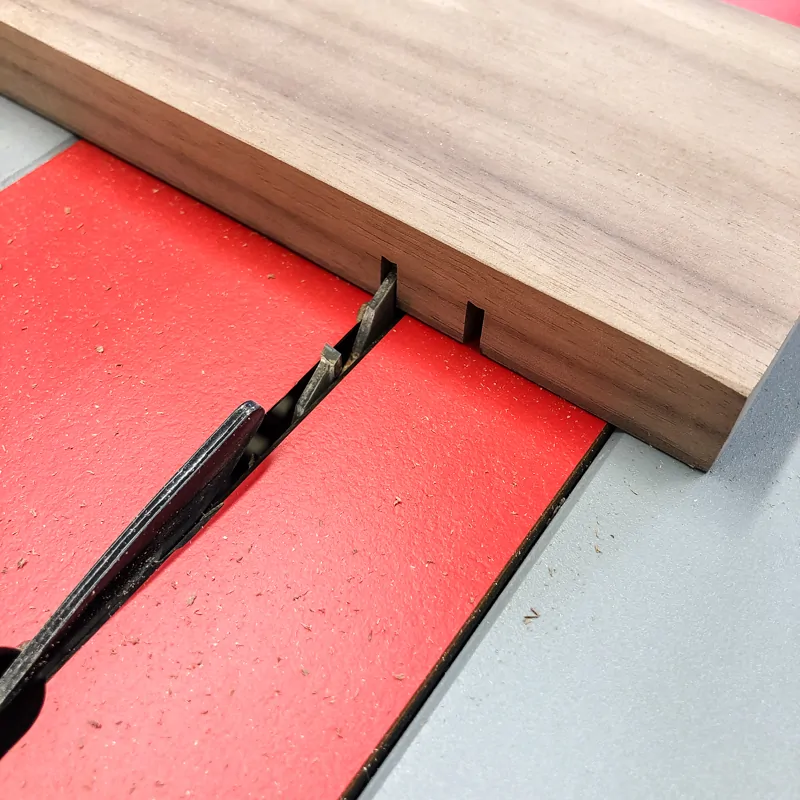
Then make additional cuts in between to clear out the excess wood.
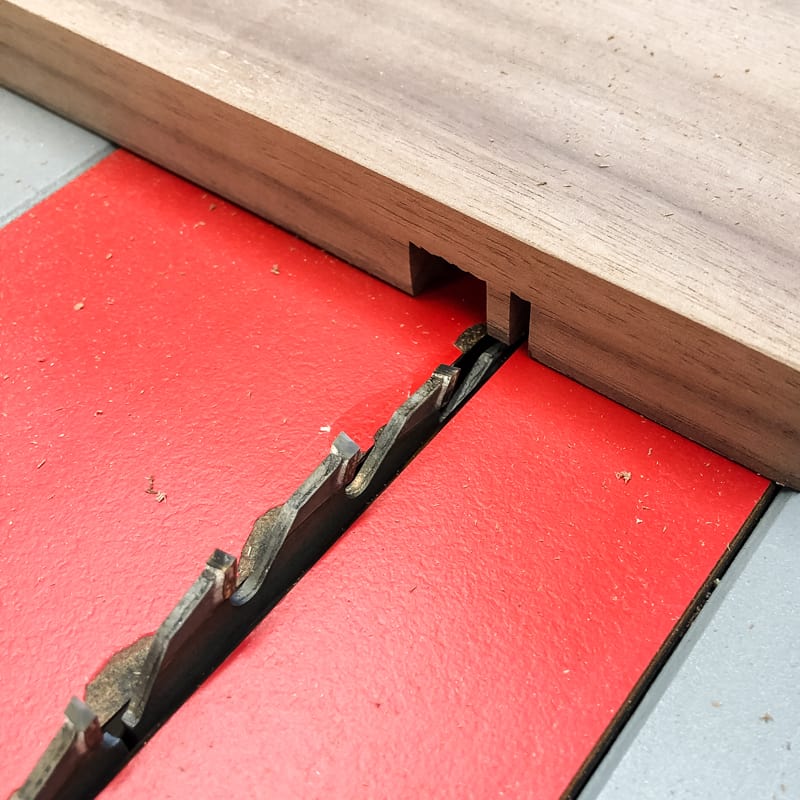
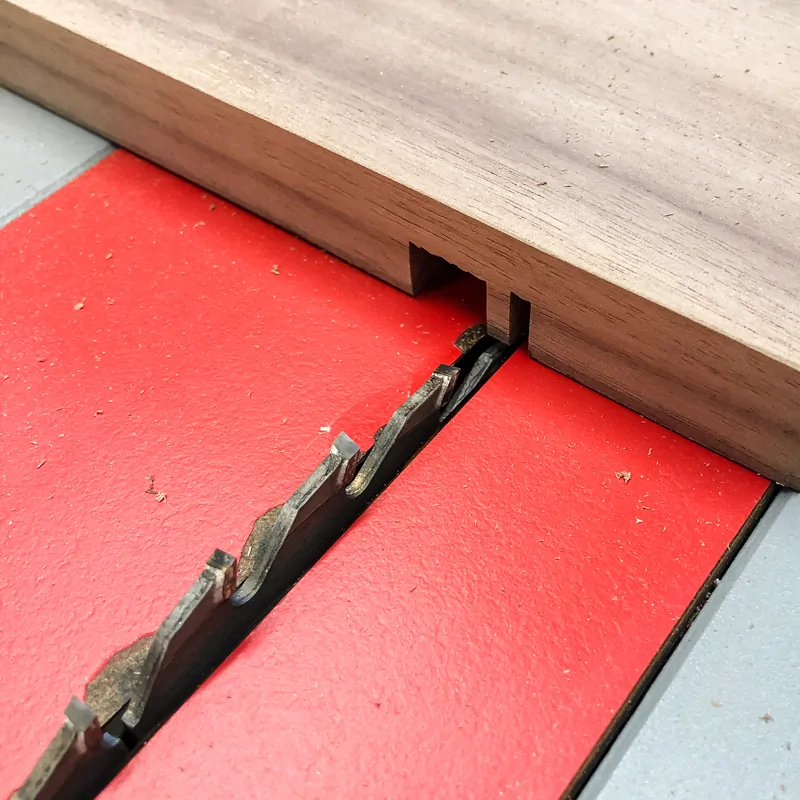
Test the fit to see if it fits snugly. If it needs a little more room, cut the tiniest bit off with the blade and test again. It's better to be too tight and sand it down than too loose!
You might have a series of ridges on the inside of the dado from multiple passes of the blade. I used a scrap piece of ½" plywood wrapped in sandpaper to even out the bumps and create a clean groove. Be careful not to round over the edges!

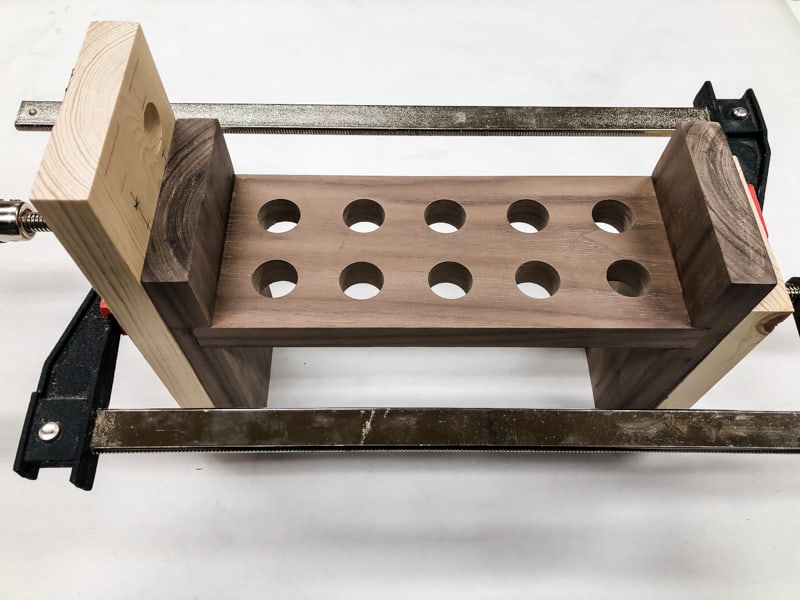
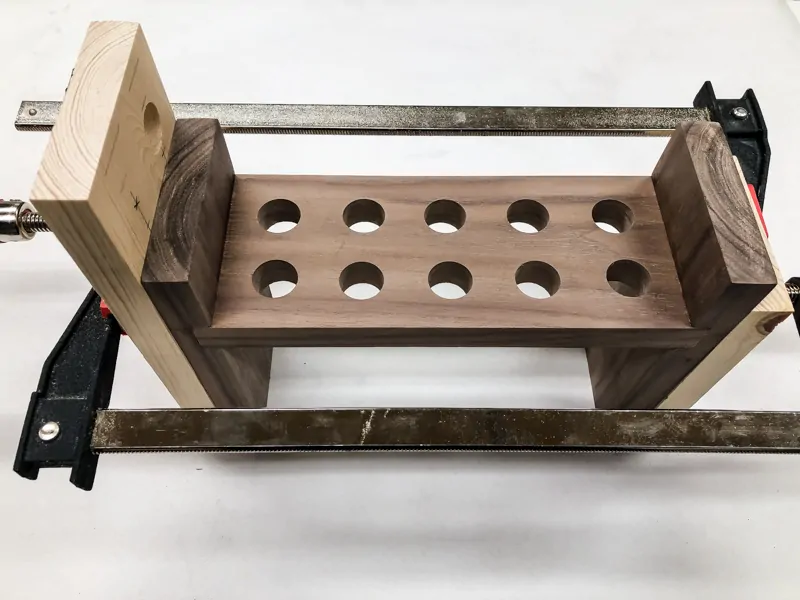
Glue up the spice rack pieces
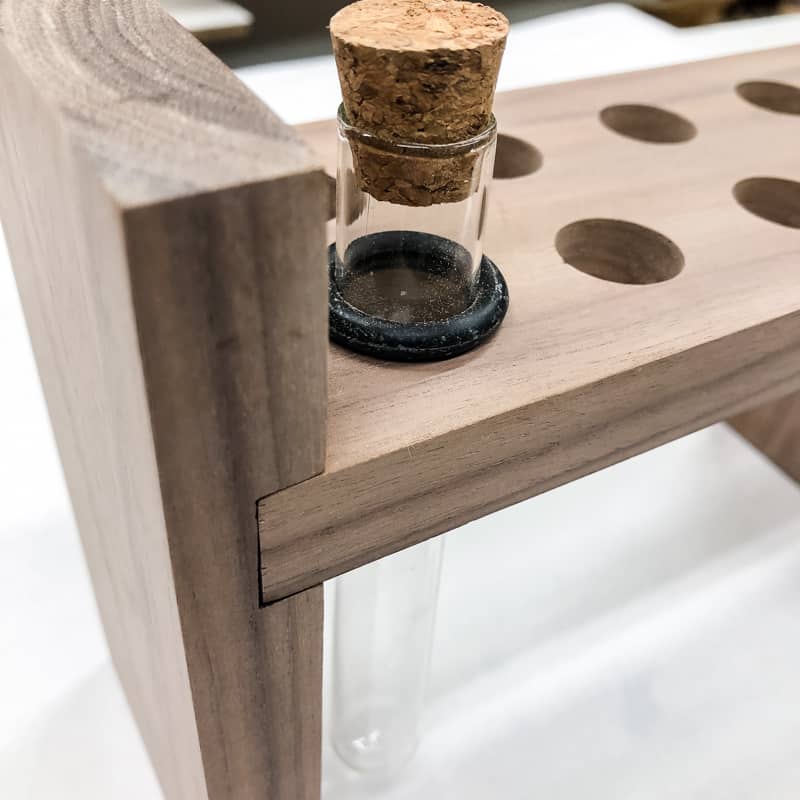
Before permanently gluing the spice rack together, I tested the fit one last time and checked to make sure the test tubes hung the way I planned. Perfect!

Apply wood glue to the inside of the dadoes on all three sides.
Fit the top inside the sides, and clamp it into place. Clean up any glue that has squeezed out from the joints. I used scrap wood on the outside to prevent the clamps from indenting the surface of the walnut wood. Leave it clamped for at least a few hours to ensure the glue has dried.
Apply finish
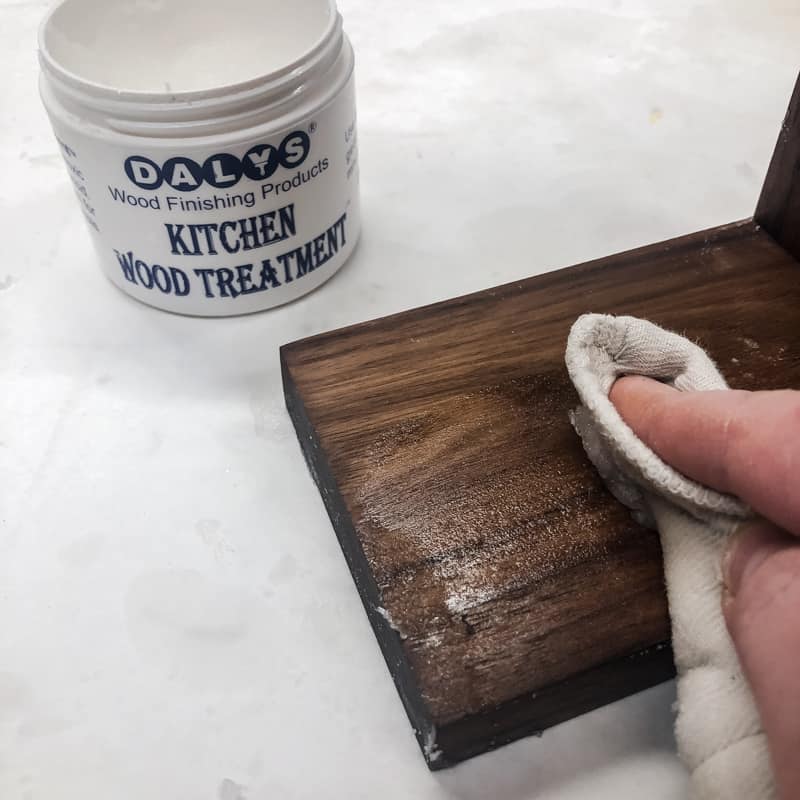
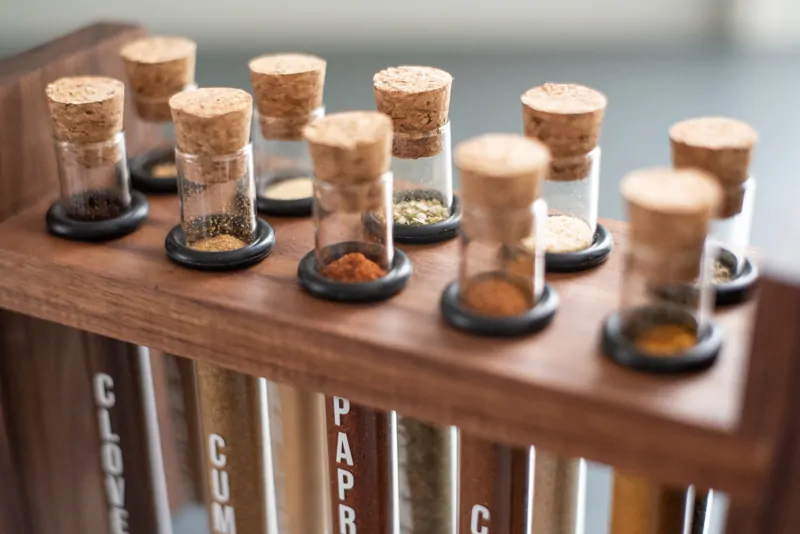
Now you can paint or stain your finished spice rack. If you used a beautiful hardwood like this walnut, all you need is a bit of mineral oil to really bring it to life! The walnut turns from light brown to a deep, rich color that will stay that way even after the mineral oil has dried.
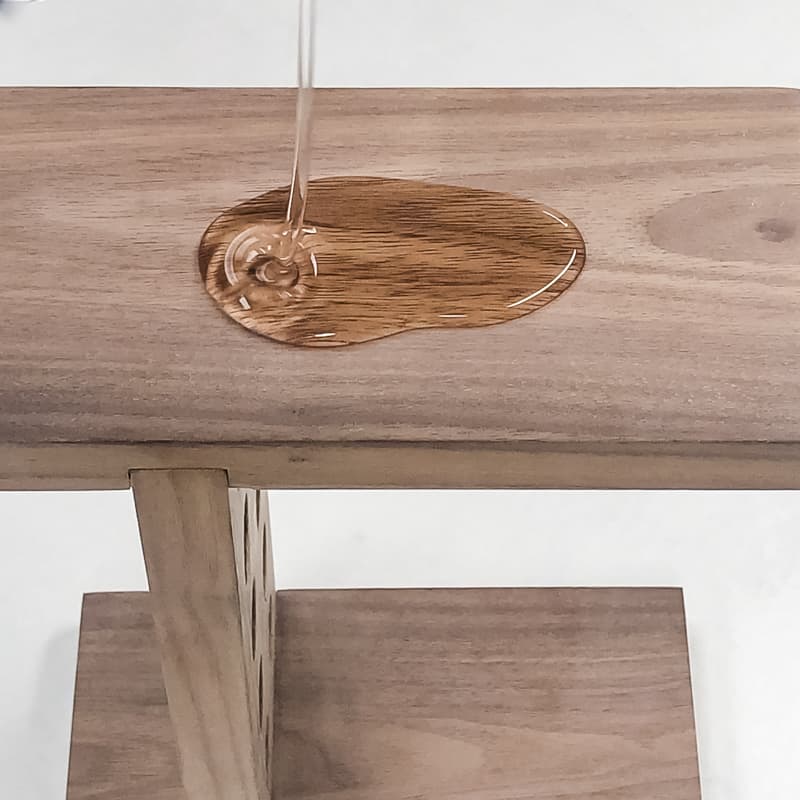
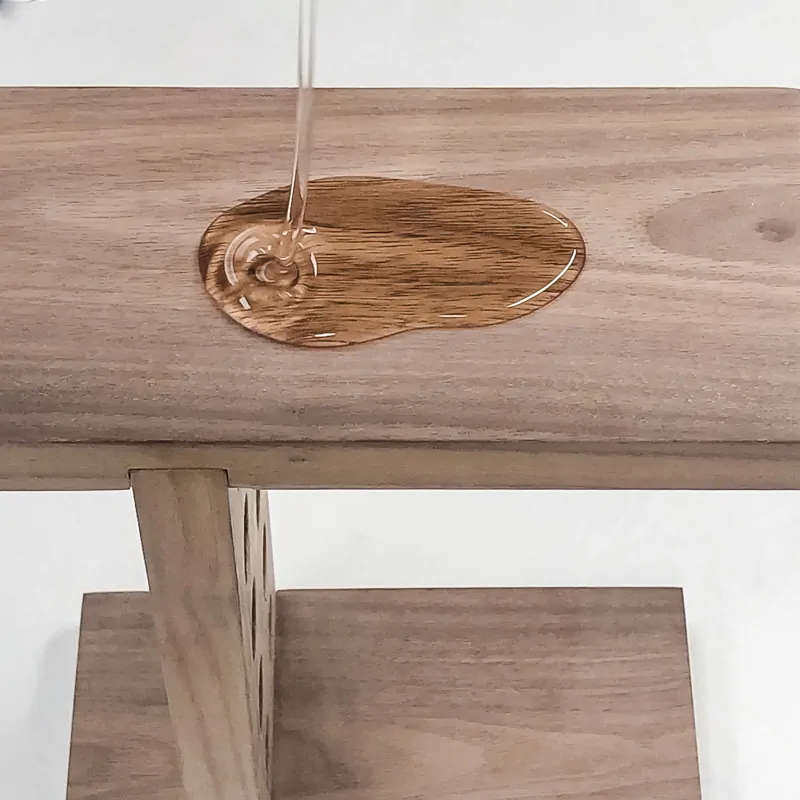
Use a clean cloth to get the oil into all the holes. Allow it to soak into the grain for 5-10 minutes, then wipe off the excess. To protect the wood from the inevitable spice spills, I also gave it a coat of cutting board wax.

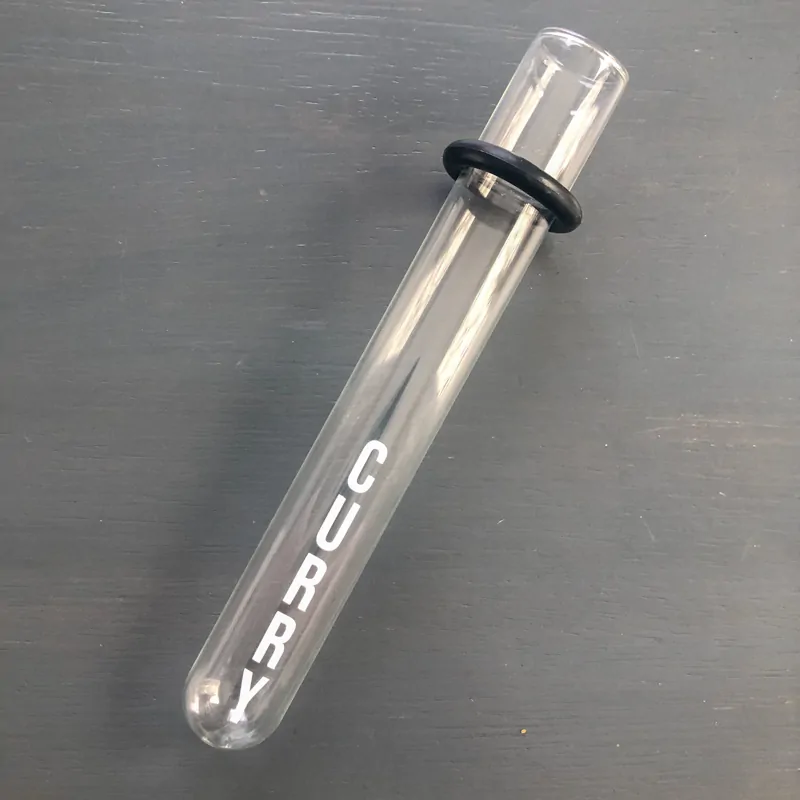
Label the test tubes
It's hard to tell the difference between coriander and cumin by looking at them in the spice rack. You could always remove the cork and give it a sniff, but I didn't want to risk using the wrong ingredient!
Instead, I used my Silhouette machine to create labels for each test tube. The font I used is Bebas Neue, and I arranged the letters vertically so you can read the entire label at a glance.
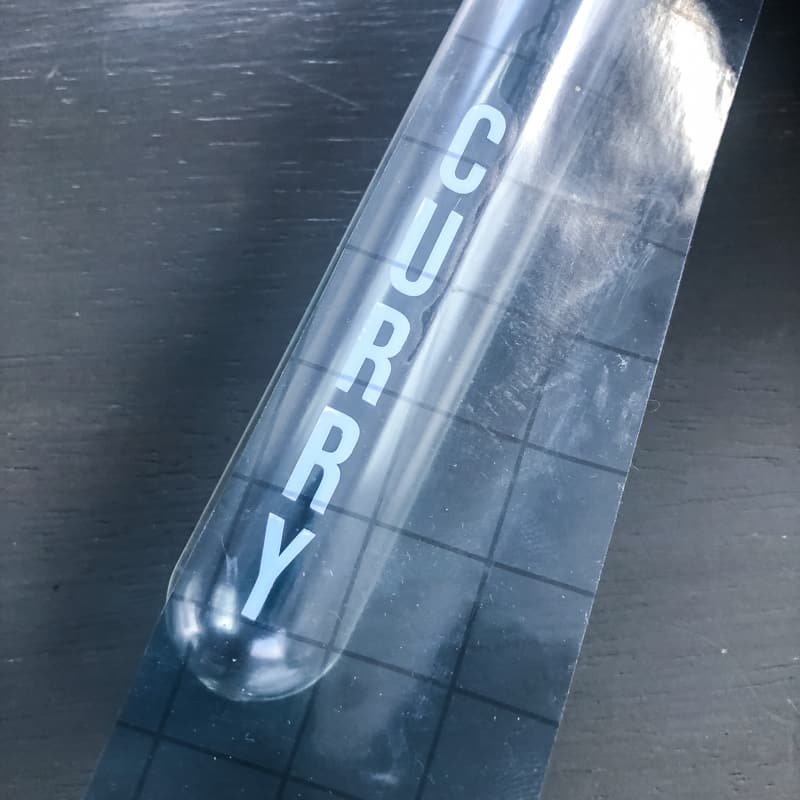
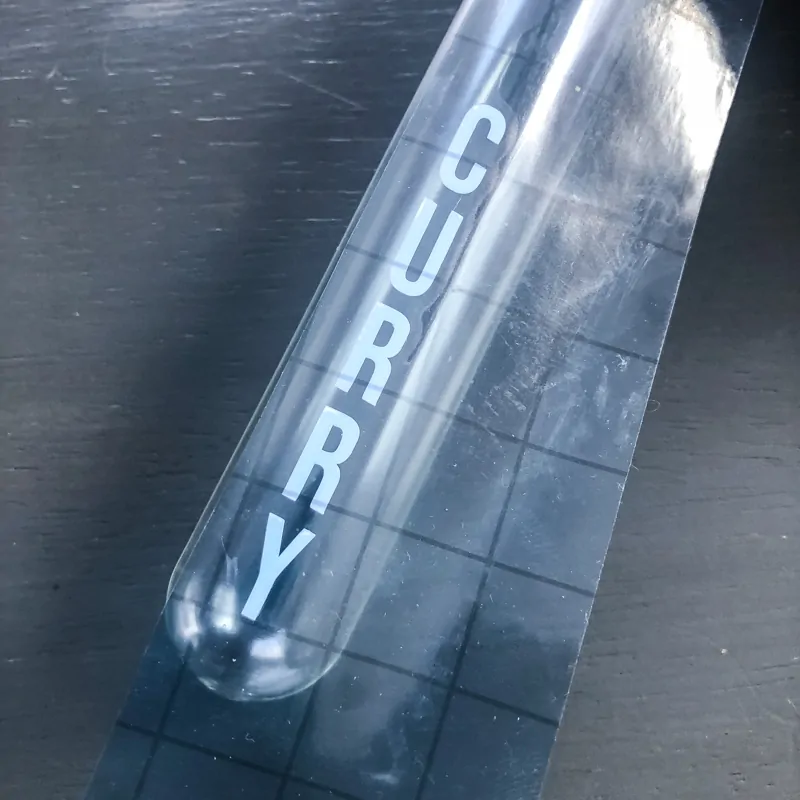
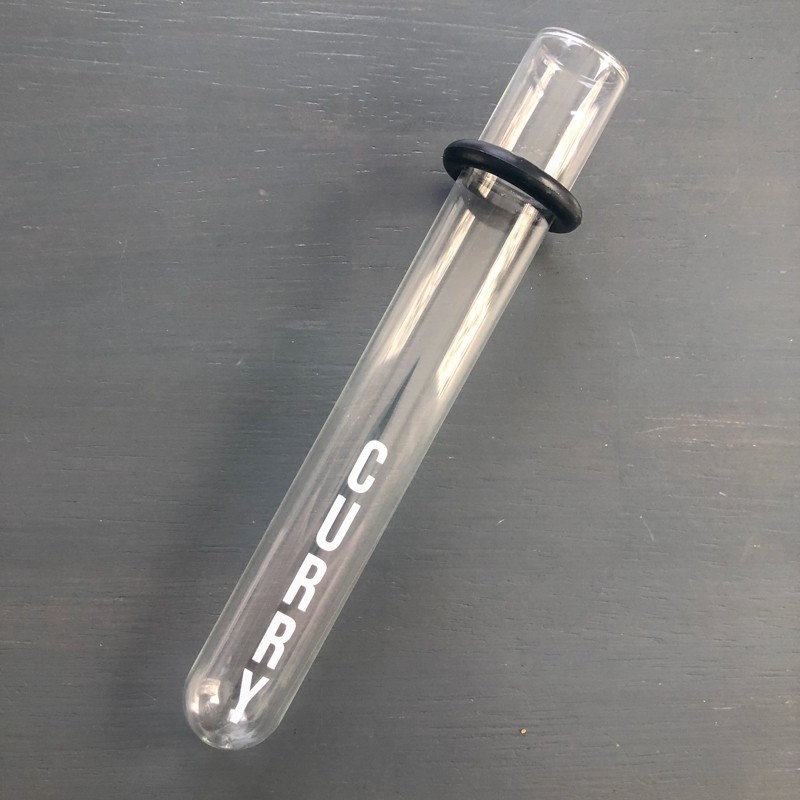
After applying the labels, slip the O rings over the top and push them down to the same point on all the test tubes. This will let them hang evenly in the rack.
Fill the test tubes with spices
Now it's time to clear out some of that cabinet clutter! I had quite a few duplicates of these spices, and some of them expired years ago! I tossed the oldest ones and filled the test tubes with the rest. A small funnel makes this process much easier!
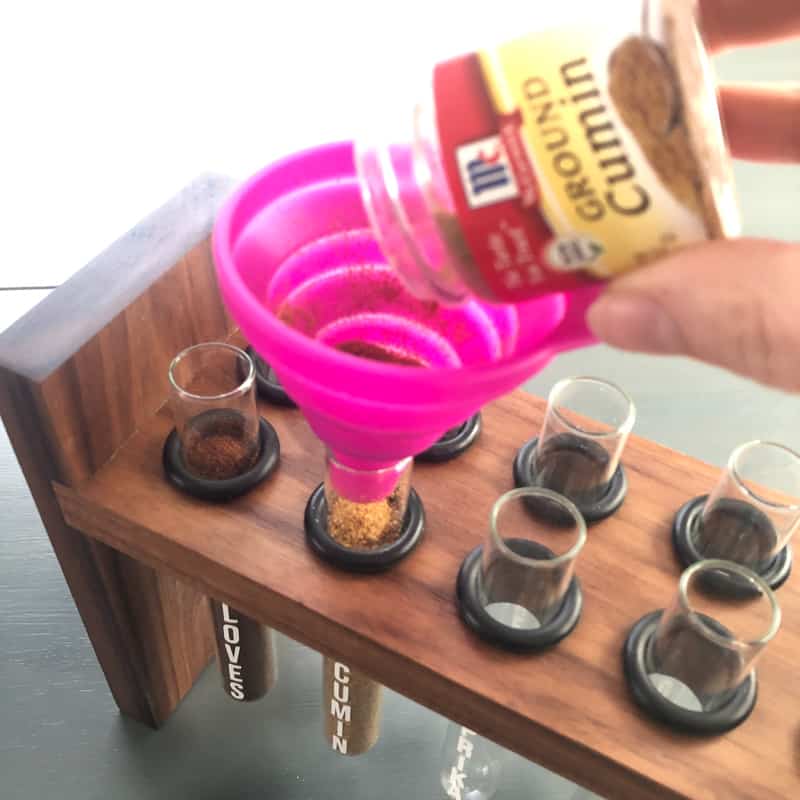

Each test tube uses about half of a small spice jar, but I plan to buy better quality spices in the exact amount I need in the future. Spices can last up to two years in an airtight container, so keep that cork in the top!

Let's start cooking!
This DIY spice rack doesn't take up a lot of space on the countertop, but holds all our favorite spices within arm's reach!
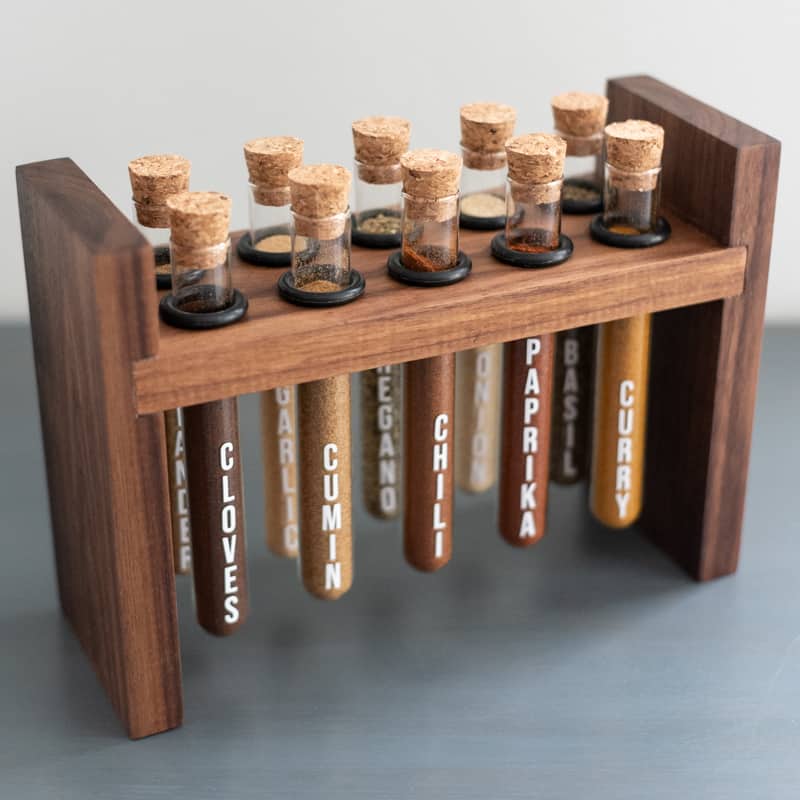

It's easy to pour out an exact measurement into a teaspoon or tablespoon, unlike those plastic jars with the sprinkle lid. I also keep these tiny spoons on hand to scoop out smaller quantities.

Don't forget to download the free woodworking plans to build your own!


Christine
Thursday 28th of February 2019
What a clever way to display your spices! You are quite the little wood worker girl! Nicely done. I LOVE this idea.
Amy
Tuesday 26th of February 2019
This is so awesome! And that walnut wood is gorgeous! Great job!
Lisa
Tuesday 26th of February 2019
Such a fun way to display spices on the countertop! This would make a great Christmas present!
Anam
Tuesday 19th of February 2019
This is such an interesting take on organizing spices. Looks Beautiful.
Brittany Goldwyn
Monday 18th of February 2019
This is so freaking cute. I love that you could put your loose spices you buy by the weight in baggies in these. Hate buying big things of spices and having them go bad!