
How to Build a Whirligig
Updated: Jun. 20, 2023
Folk art whirligigs fashioned from scraps of wood and metal have been popular for hundreds of years. In fact, George Washington bought some for his grandchildren during his trip back to Mt. Vernon after winning the Revolutionary War. You, too, can build this marching, spinning red-white-and-blue whirligig.

Introduction
It can be built with common hand tools, a jigsaw and drill. Parts for creating the movement mechanism can be purchased at any well-stocked hardware store. Follow our patterns (just trace or iron them on), or make your own. Tinkering is part of the tradition and pleasure of crafting whirligigs.
Places to Watch Your Step When Learning How to Make a Whirligig
The photos will guide you through the basic steps for how to make a whirligig. As you work, use extra care in these areas:
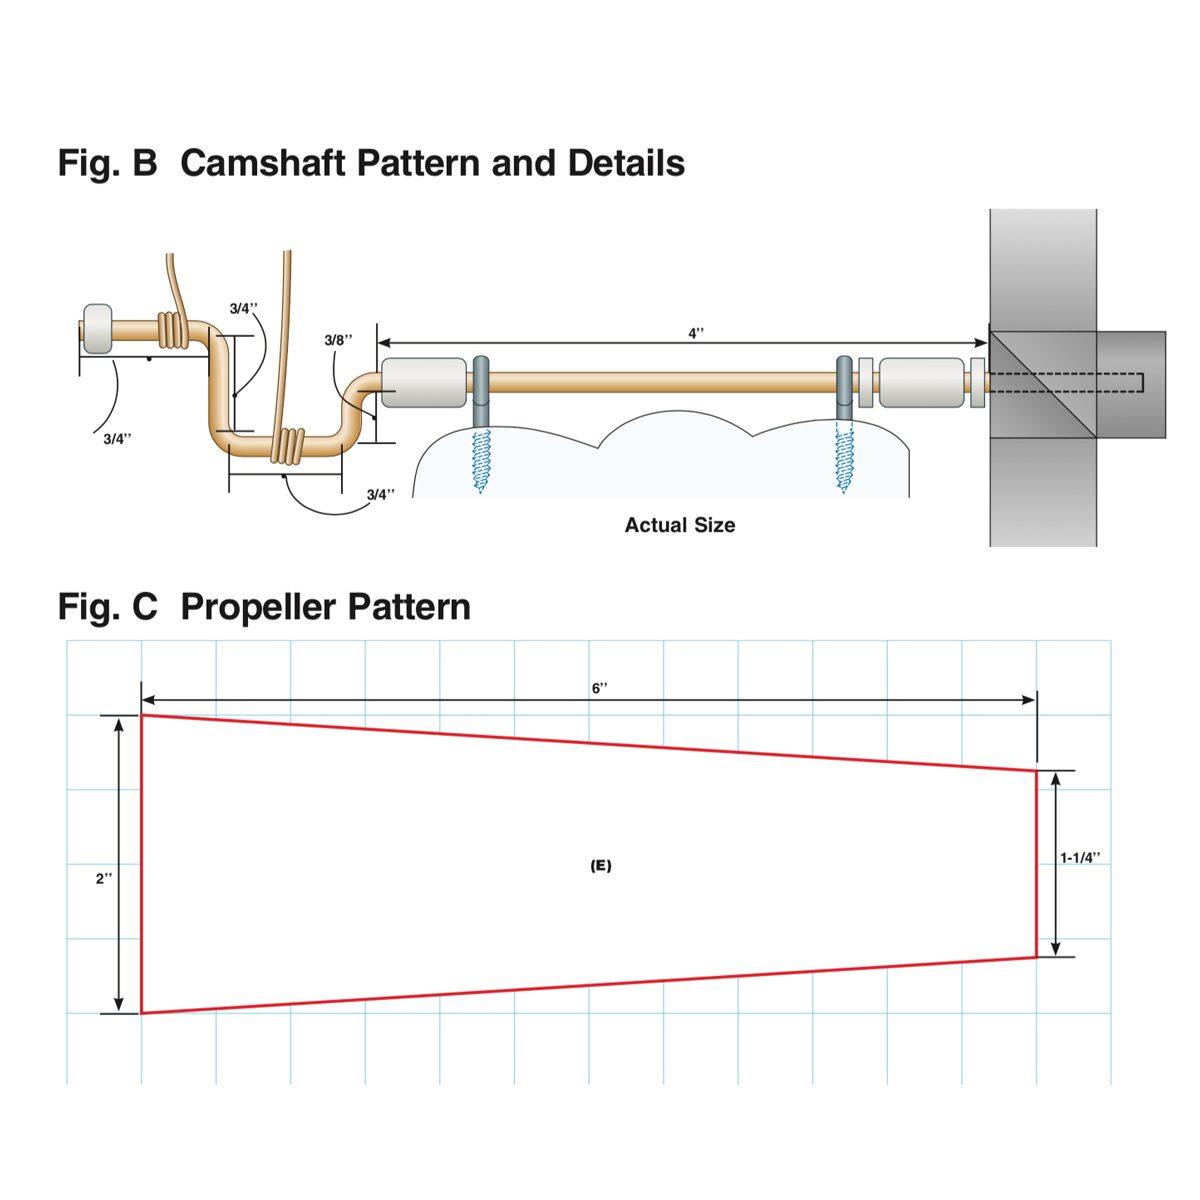
Cutting the propeller arms (D) is the trickiest woodworking of the project. Use a fine-toothed saw to make kerfs for the dadoes where the arms cross and for the four angled faces where the propellers are attached (Photos 1 and 2), then carefully use a chisel to remove the waste.
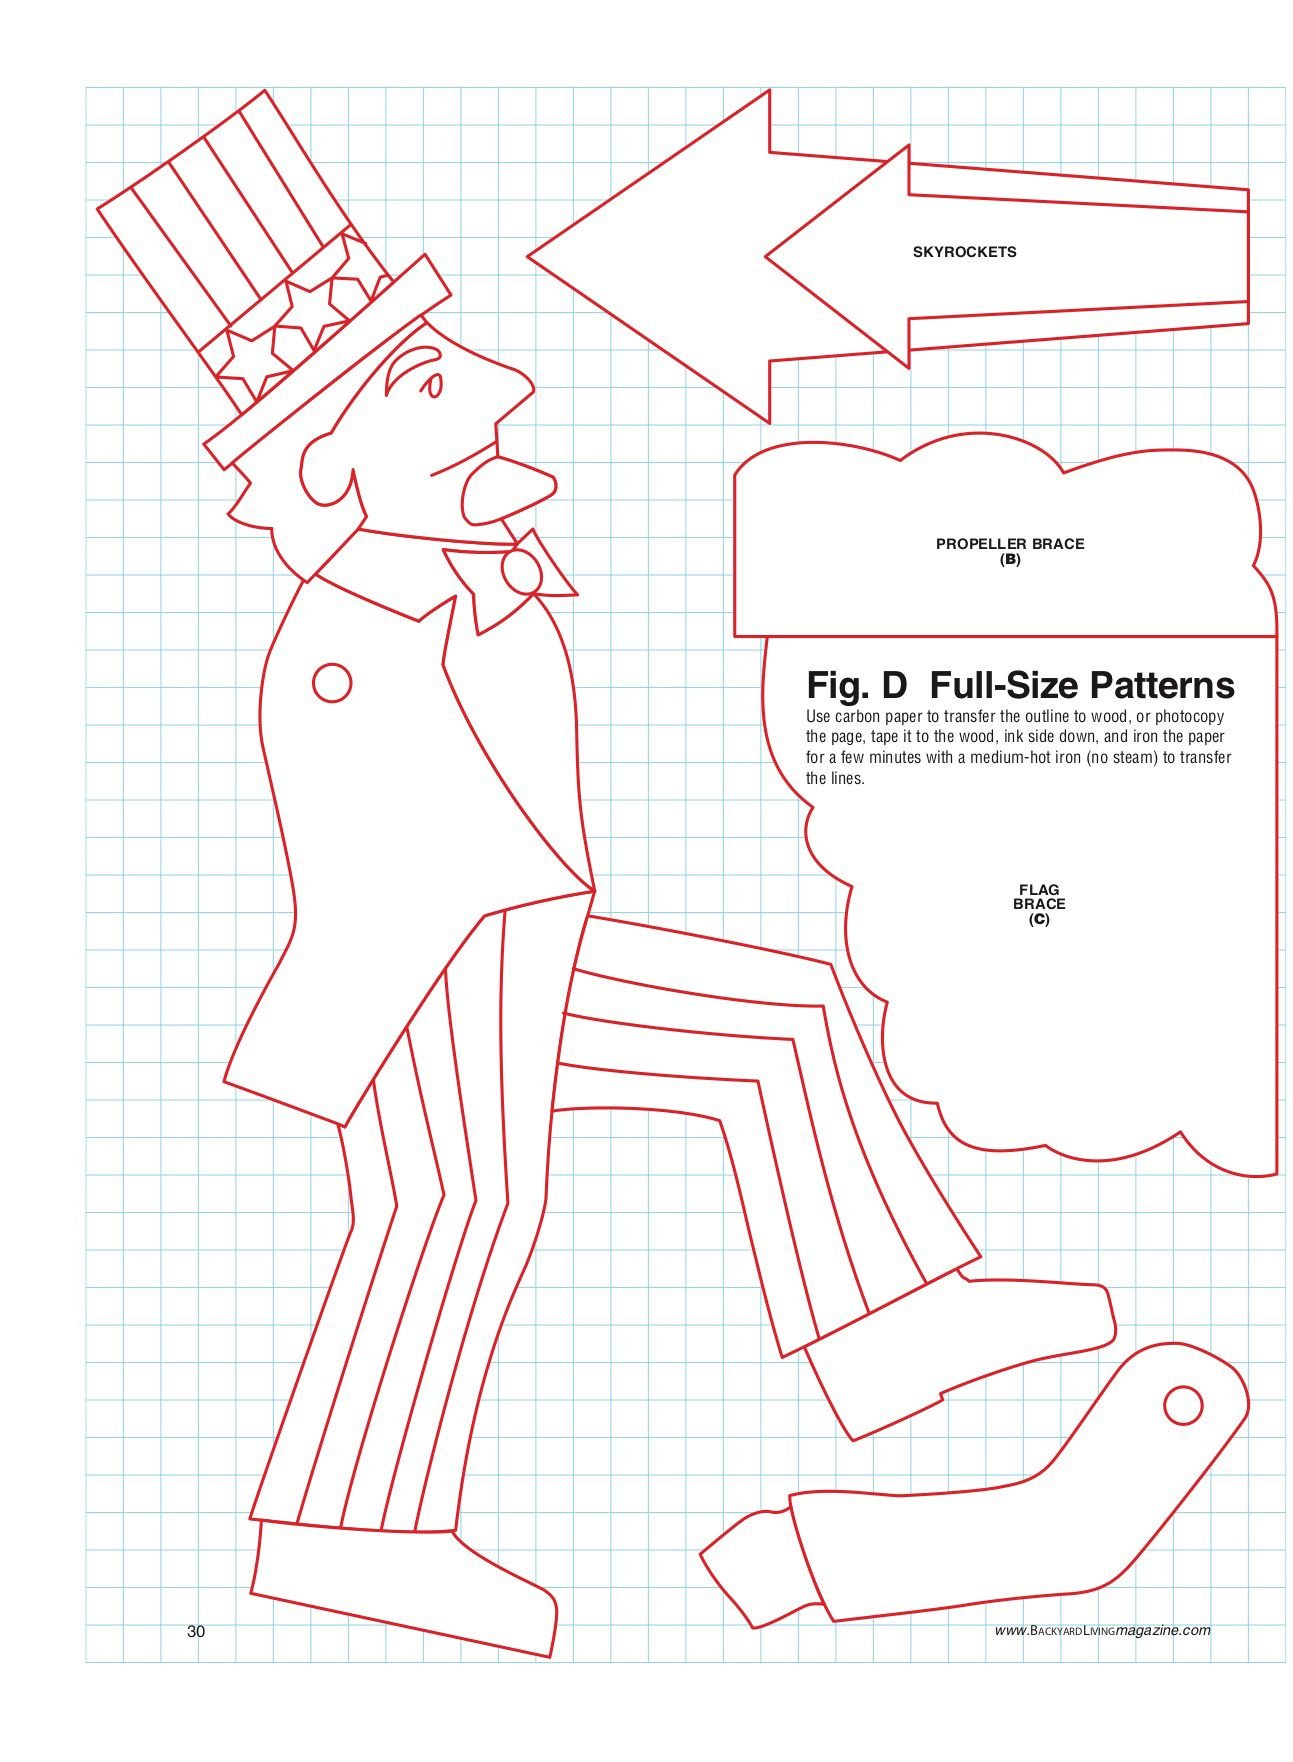
Use knot-free lumber for all of the wood parts, including Uncle Sam; it’s stronger, easier to cut and looks better when painted than wood with knots.
If you have access to a drill press, use it for drill- ing the pivot holes through Uncle Sam’s shoulders and chest. Or have someone sight the drill bit to help you keep the bit square to the wood.
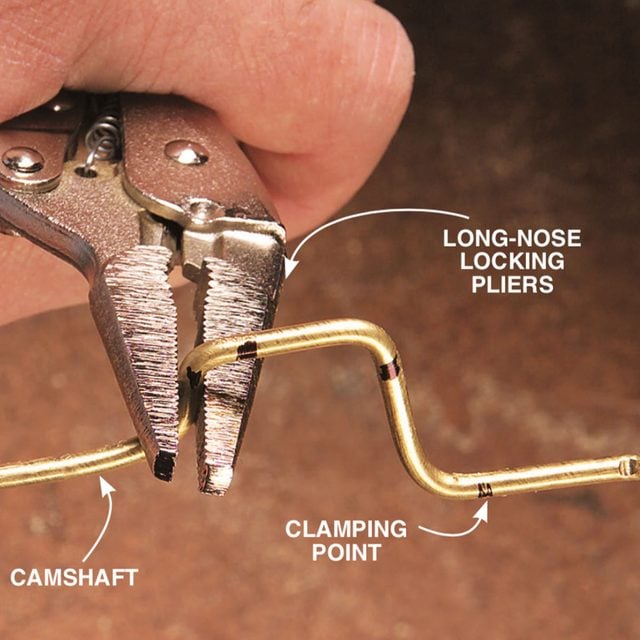
After securing the two push rods to the camshaft.
Finishing Touches
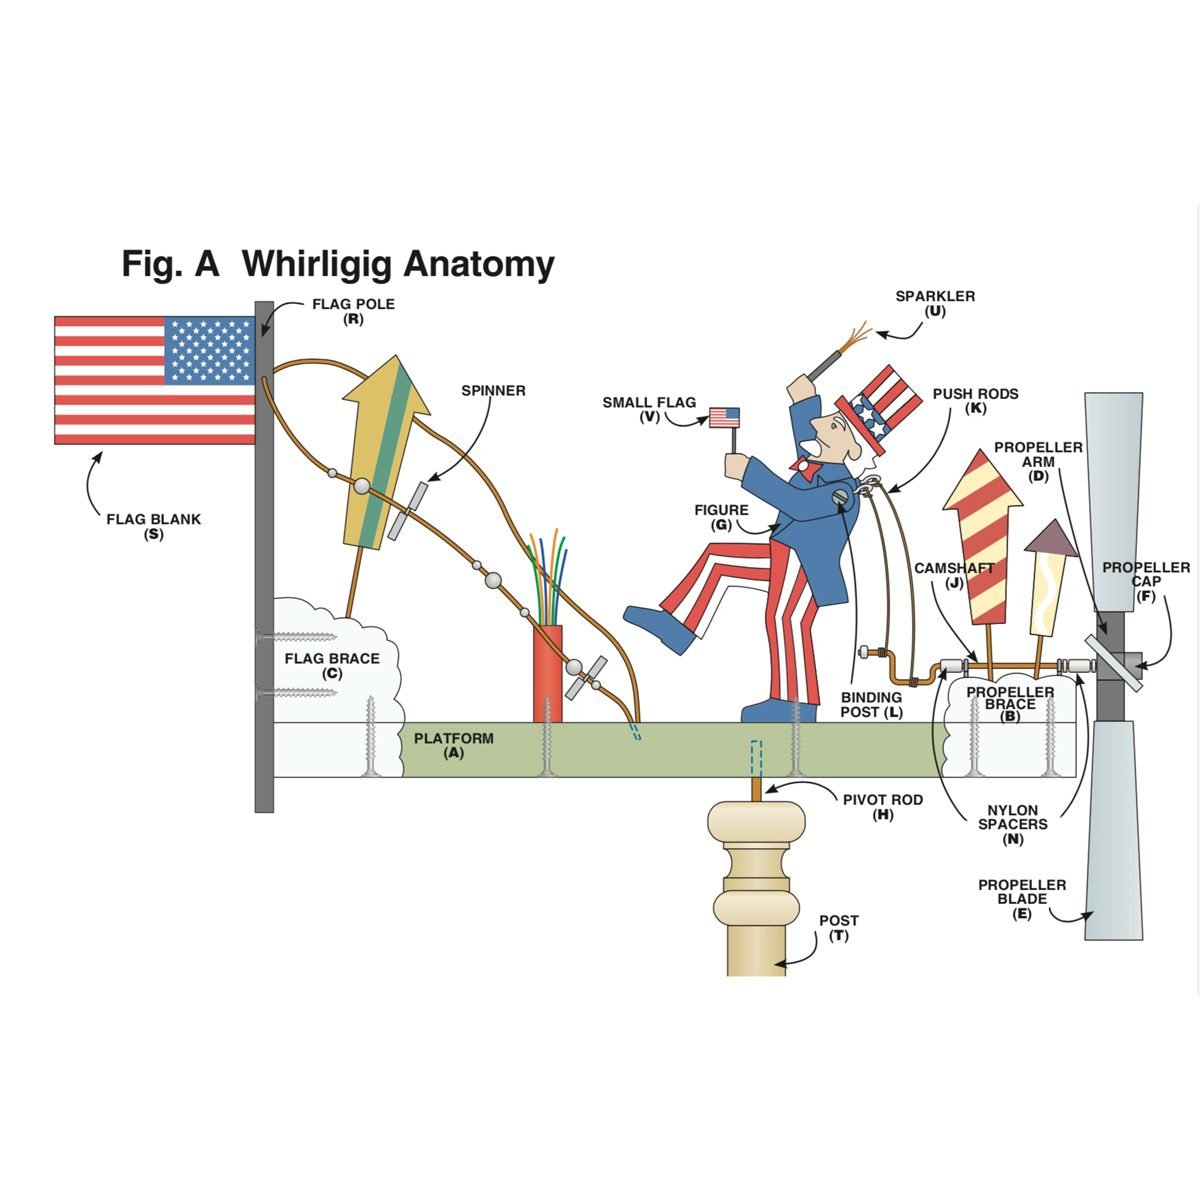
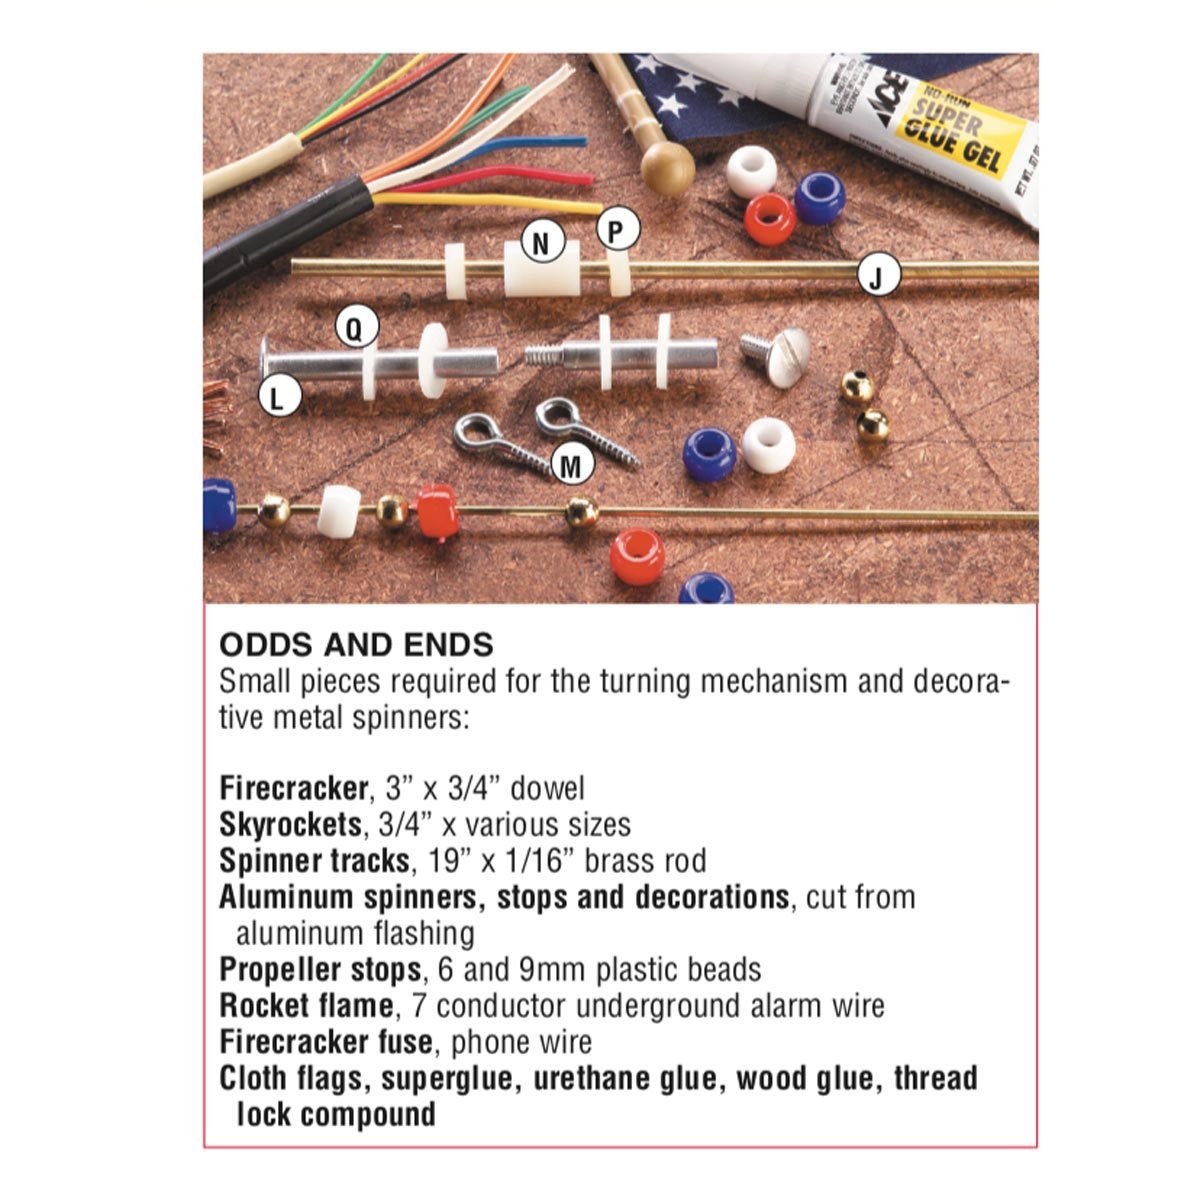
Drill holes in Uncle Sam’s hands and attach the flag and sparkler. Screw the firecracker to the platform and set the rockets on short lengths of 1/8-inch rod, with colored wire for the flames
Drill a 1/4-inch hole in the platform (Fig. A) for the pivot pin. Putting most of the weight of the whirligig in the back makes it function as a weather vane. Ream the hole out a bit; the 1/4-inch pin should be snug, but the whirligig should still spin easily. Insert the pin two inches into a post and set it up in the yard or on a deck.
For extra action, add the aluminum spinners. Cut them out with a tin snips and make the bends using a long-nose pliers. Place them on brass rods, then superglue several beads before and after each spinner, leaving a 4-inch space for the spinners to slide along as the wind blows.
For color, add beads before and after each spinner. Drill 3/4-inch-deep holes into the platform and the flag-pole, and push in the brass rods.
Coat the flag and any unpainted areas with exterior polyurethane. Then turn on the wind.
15 Patriotic Outdoor Decorations Perfect for Summer Parties
PDF links for how to make a whirligig
Project step-by-step (8)
Make the Propeller Arms

The first step in how to make a whirligig is to cut out dadoes in centers of propeller arms (D), then temporarily put the arms together and mark diagonal cuts where blades are attached. Blades must all tilt the same direction. Set arms in a 45-degree notch cut into a 2×6 and make cross-cuts every 1/4 inch, using 2×6 as a depth guide. Break away pieces and clean up saw kerfs with chisel.
Build the Propeller

Cut blades (E) with jigsaw and smooth with sandpaper (see Fig. C). Center one blade on an arm, drill the first screw hole, remove blade, apply wood glue, and then screw blade to arm. When the four blades are attached, glue arms together.


