Two Hour DIY Workbench (Free Plans!)
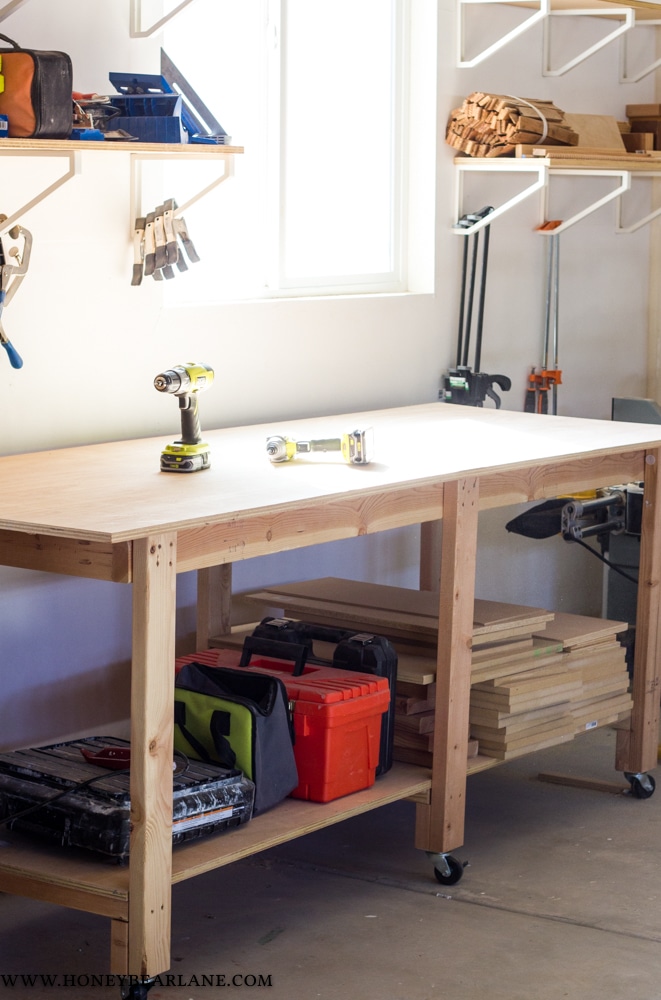
Need a DIY workbench? Here’s one I built in two hours and really anyone can build it. It might take you a little longer but the gist is that it’s pretty easy and straightforward.
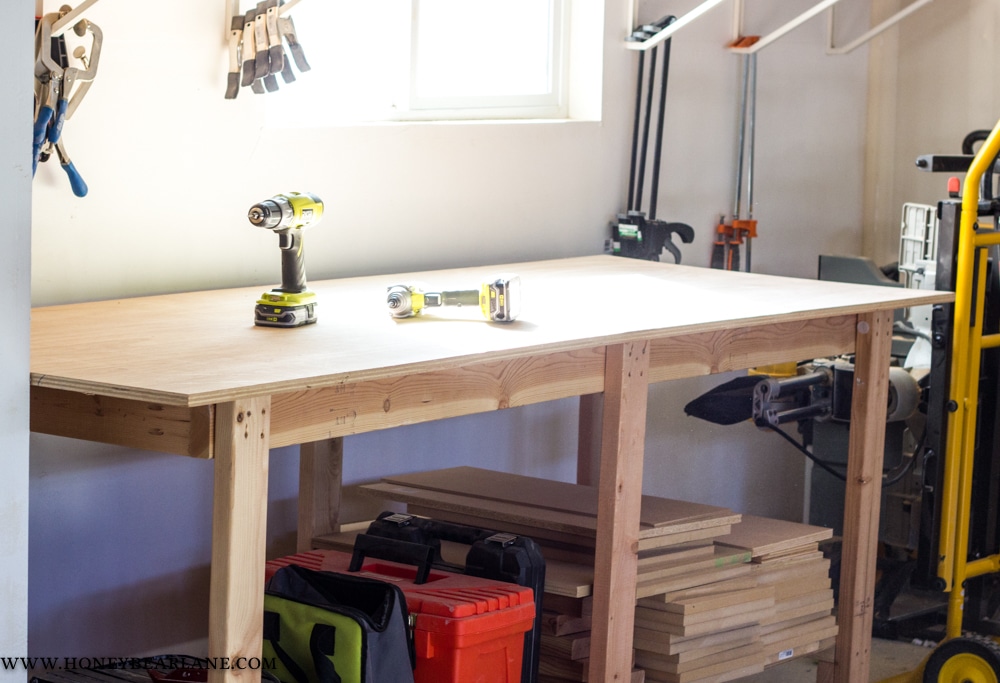
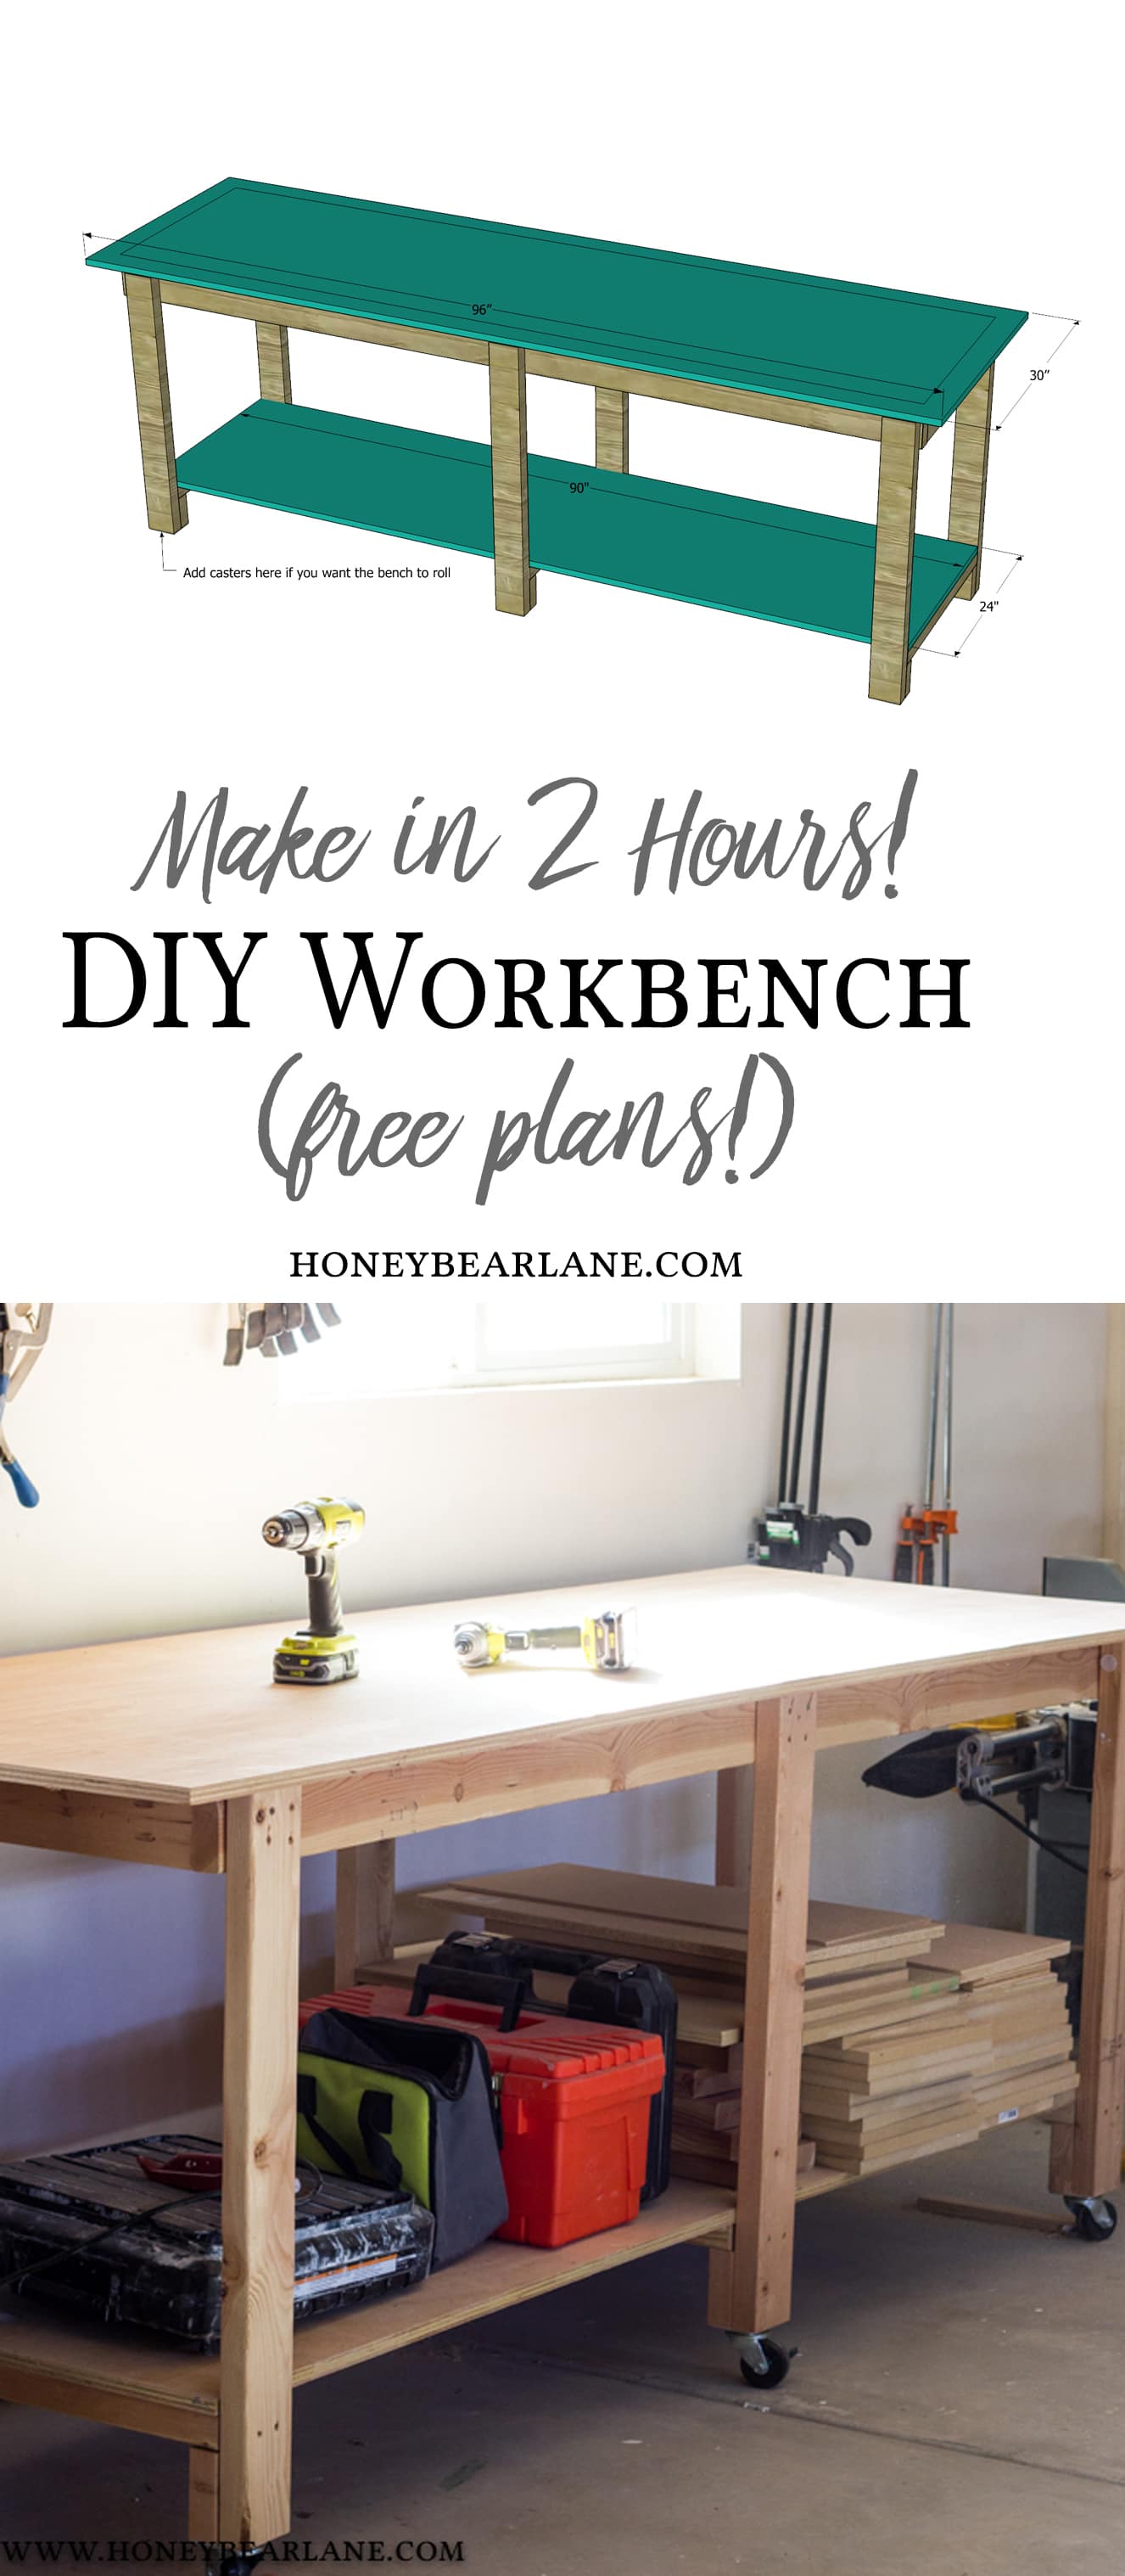
I built this to also be able to move around the garage, so it has wheels. And I made it tall enough and wide enough to be a catch table for my table saw if I need to rip some long pieces without having to catch them myself. It has a shelf underneath that is deep enough to hold a lot of stuff. I actually started with an old extra shelf I had from some storage shelves I built awhile ago so this entire plan is based off that. You’ll notice the lengths for my bench is 90″ which is about 7.5 feet (The custom size for this particular storage shelves). If you want to save yourself some work and cutting, just make yours the full 8 ft and then you can just buy and use 8 ft wood boards as is. This DIY workbench is not fancy, but it’s easy and quick and does the job. Plus it was super nice to be able to use that extra storage shelf instead of wasting it.
Supply List (affiliate links):
- 8 2x4x8
- 2 4×8 3/4″ plywood
- 2 1/2″ self-driving wood screws
- 2 1/2″ brad nails
- 8 swivel casters (optional)
Cut List (*option to leave all 90″ cuts at 96″ for a full 8 ft workbench):
- (2) 2×4: 90″
- (4) 2×4: 21″
- (6) 2×4: 32 3/4″
- (6) 2×4: 4″
- (3) 2×4: 24″
- (2) 90×24″ plywood
- (1) 96×30″ plywood
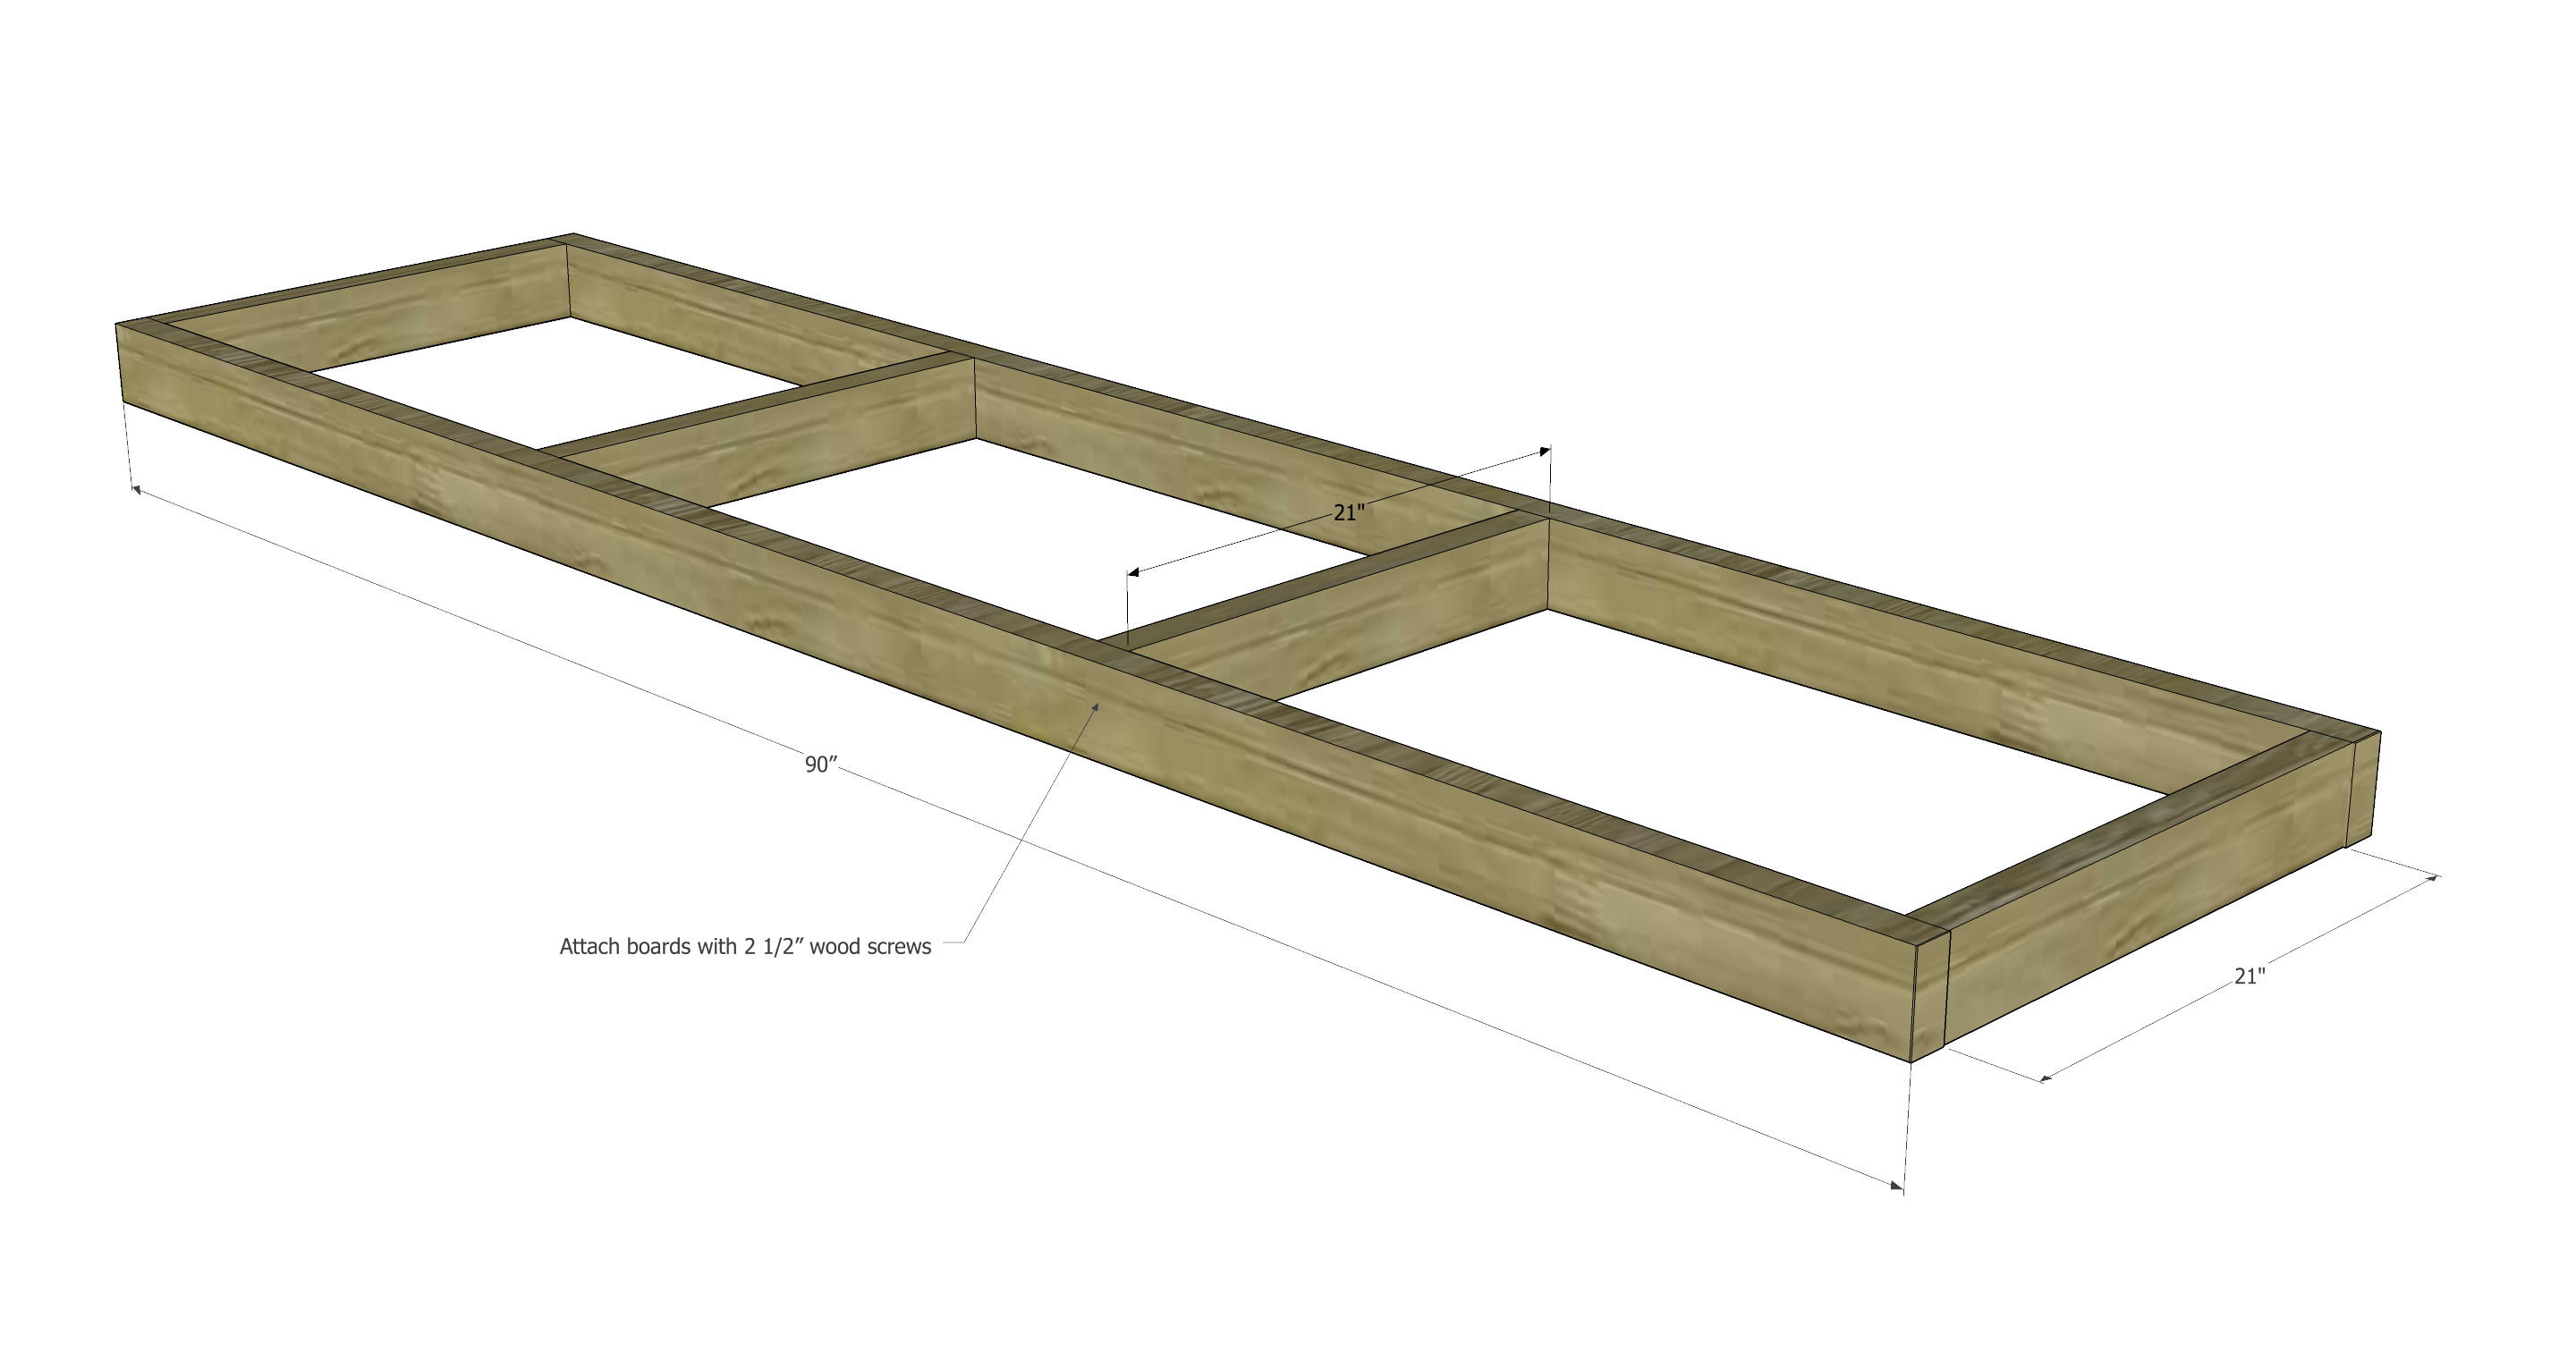
Step 1: Take your 2×4’s and construct a frame with 2 1/2″ self-driving wood screws, a simple butt joint.
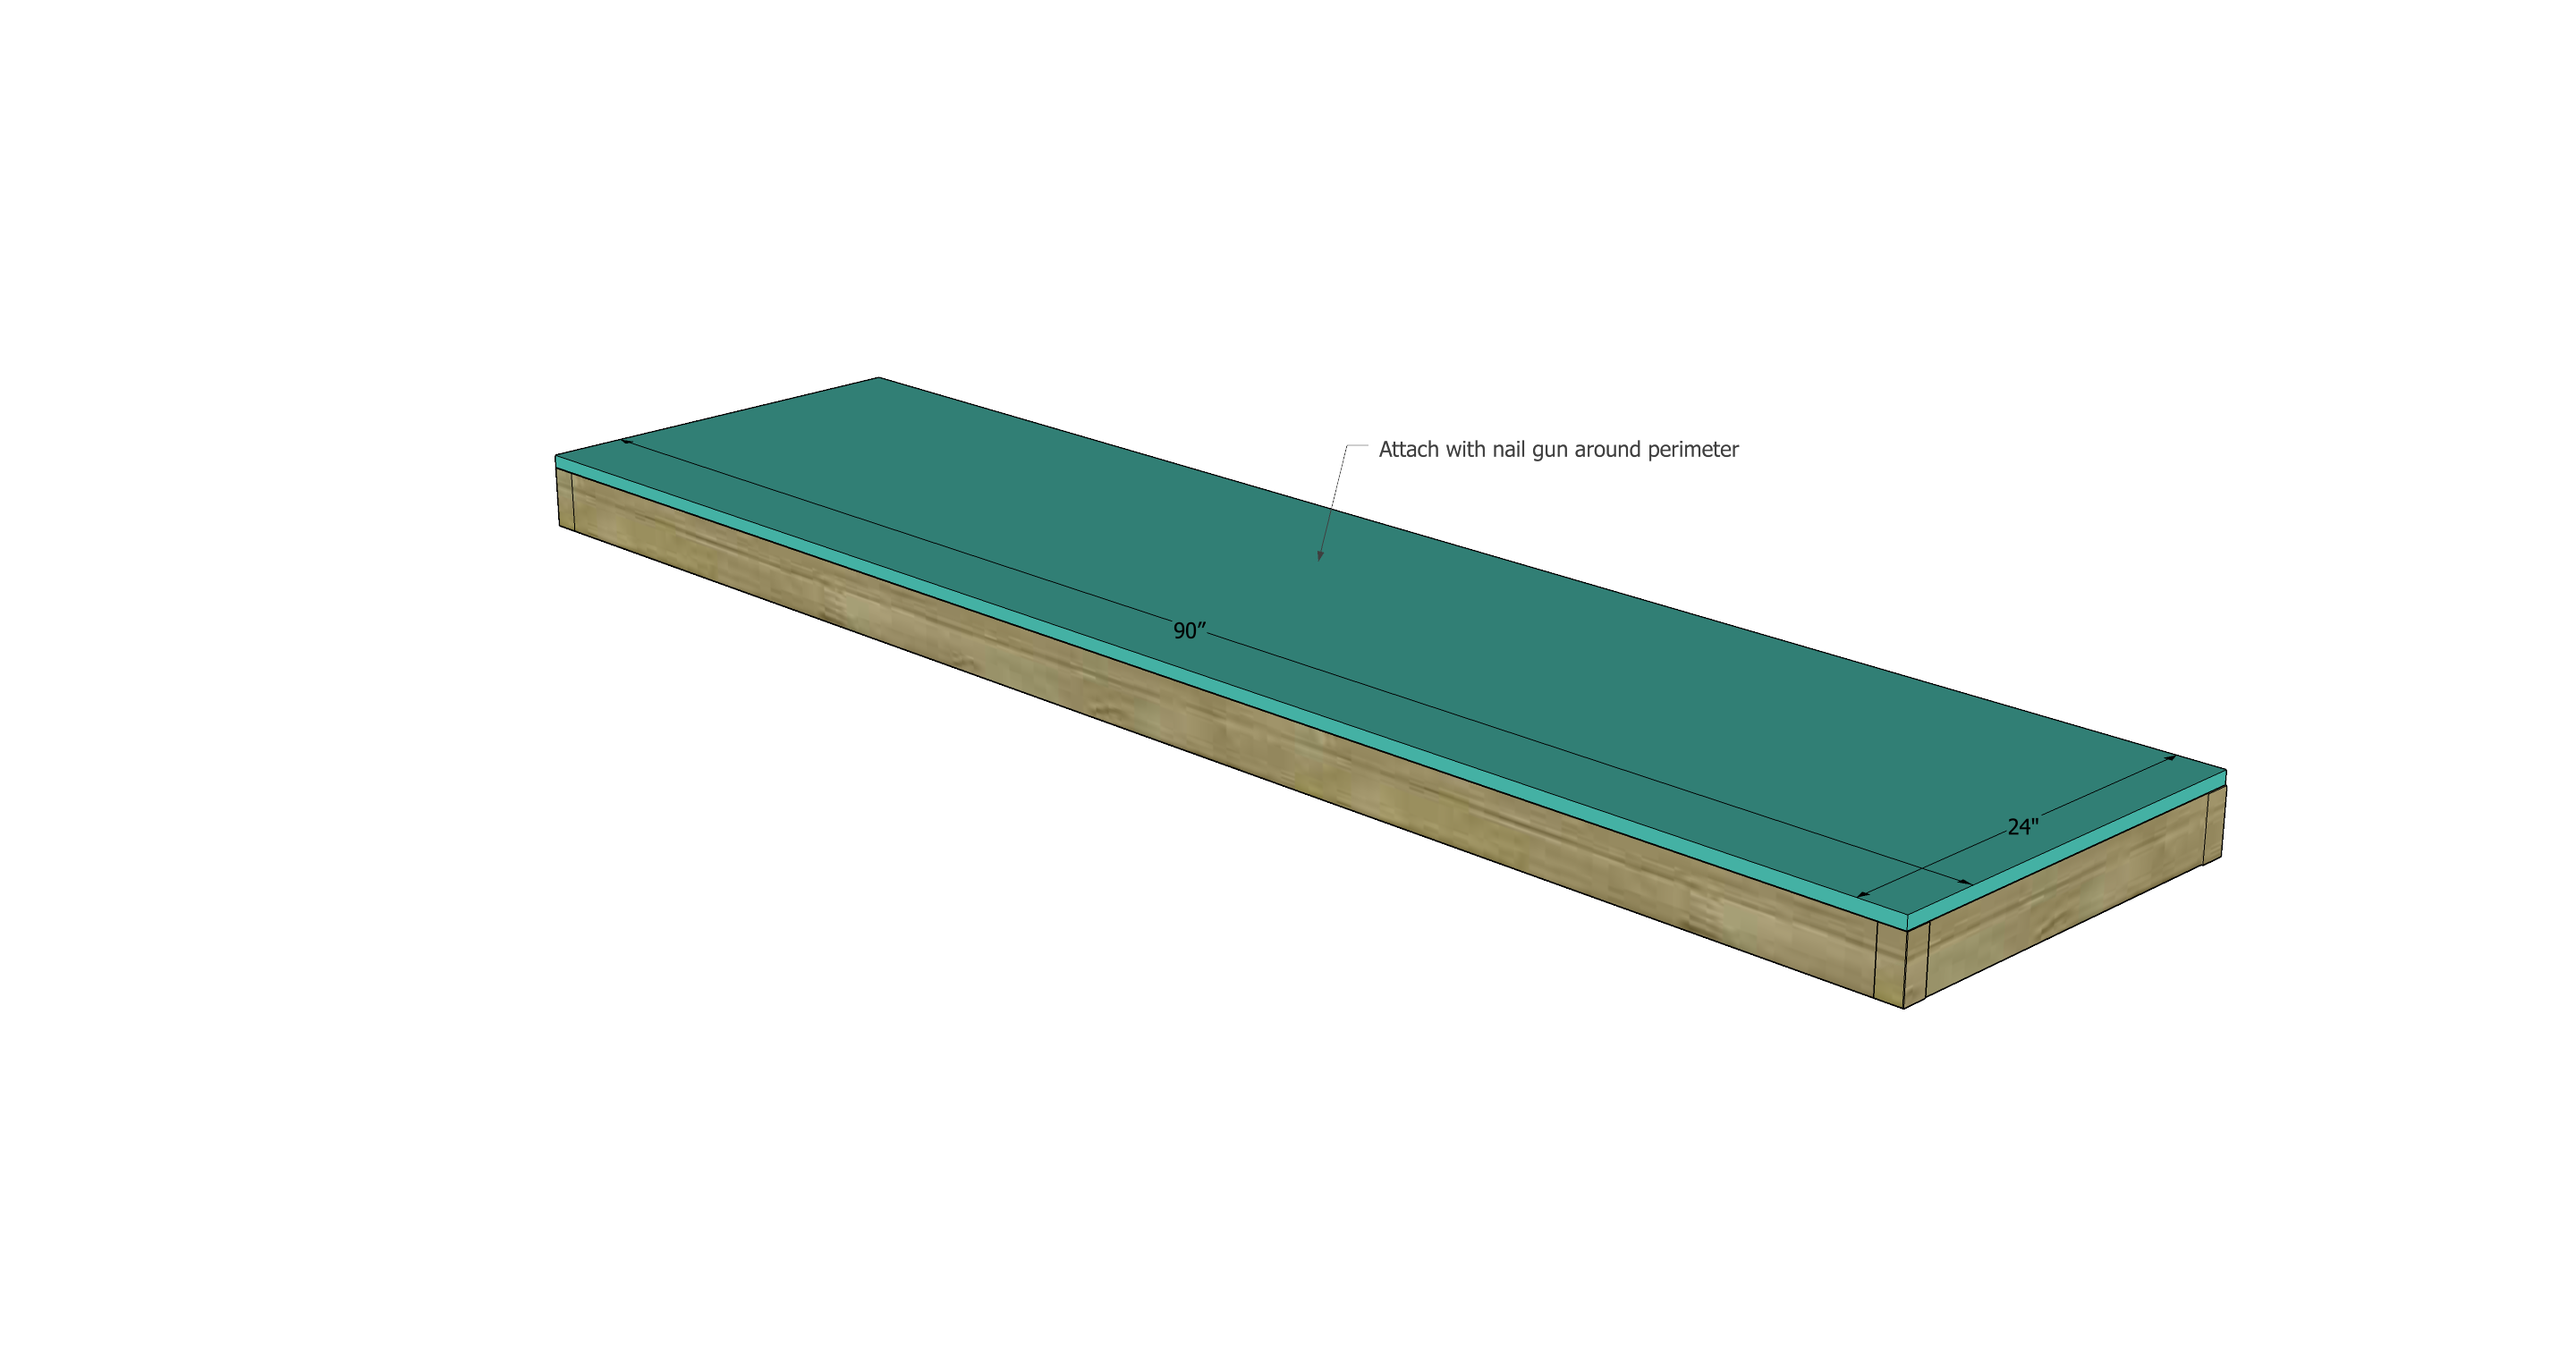
Step 2: Add a basic top to your frame, cut 90″x24″. You can have the hardware store rip the 4×8 board in half because you’ll use the other half for the bottom shelf.
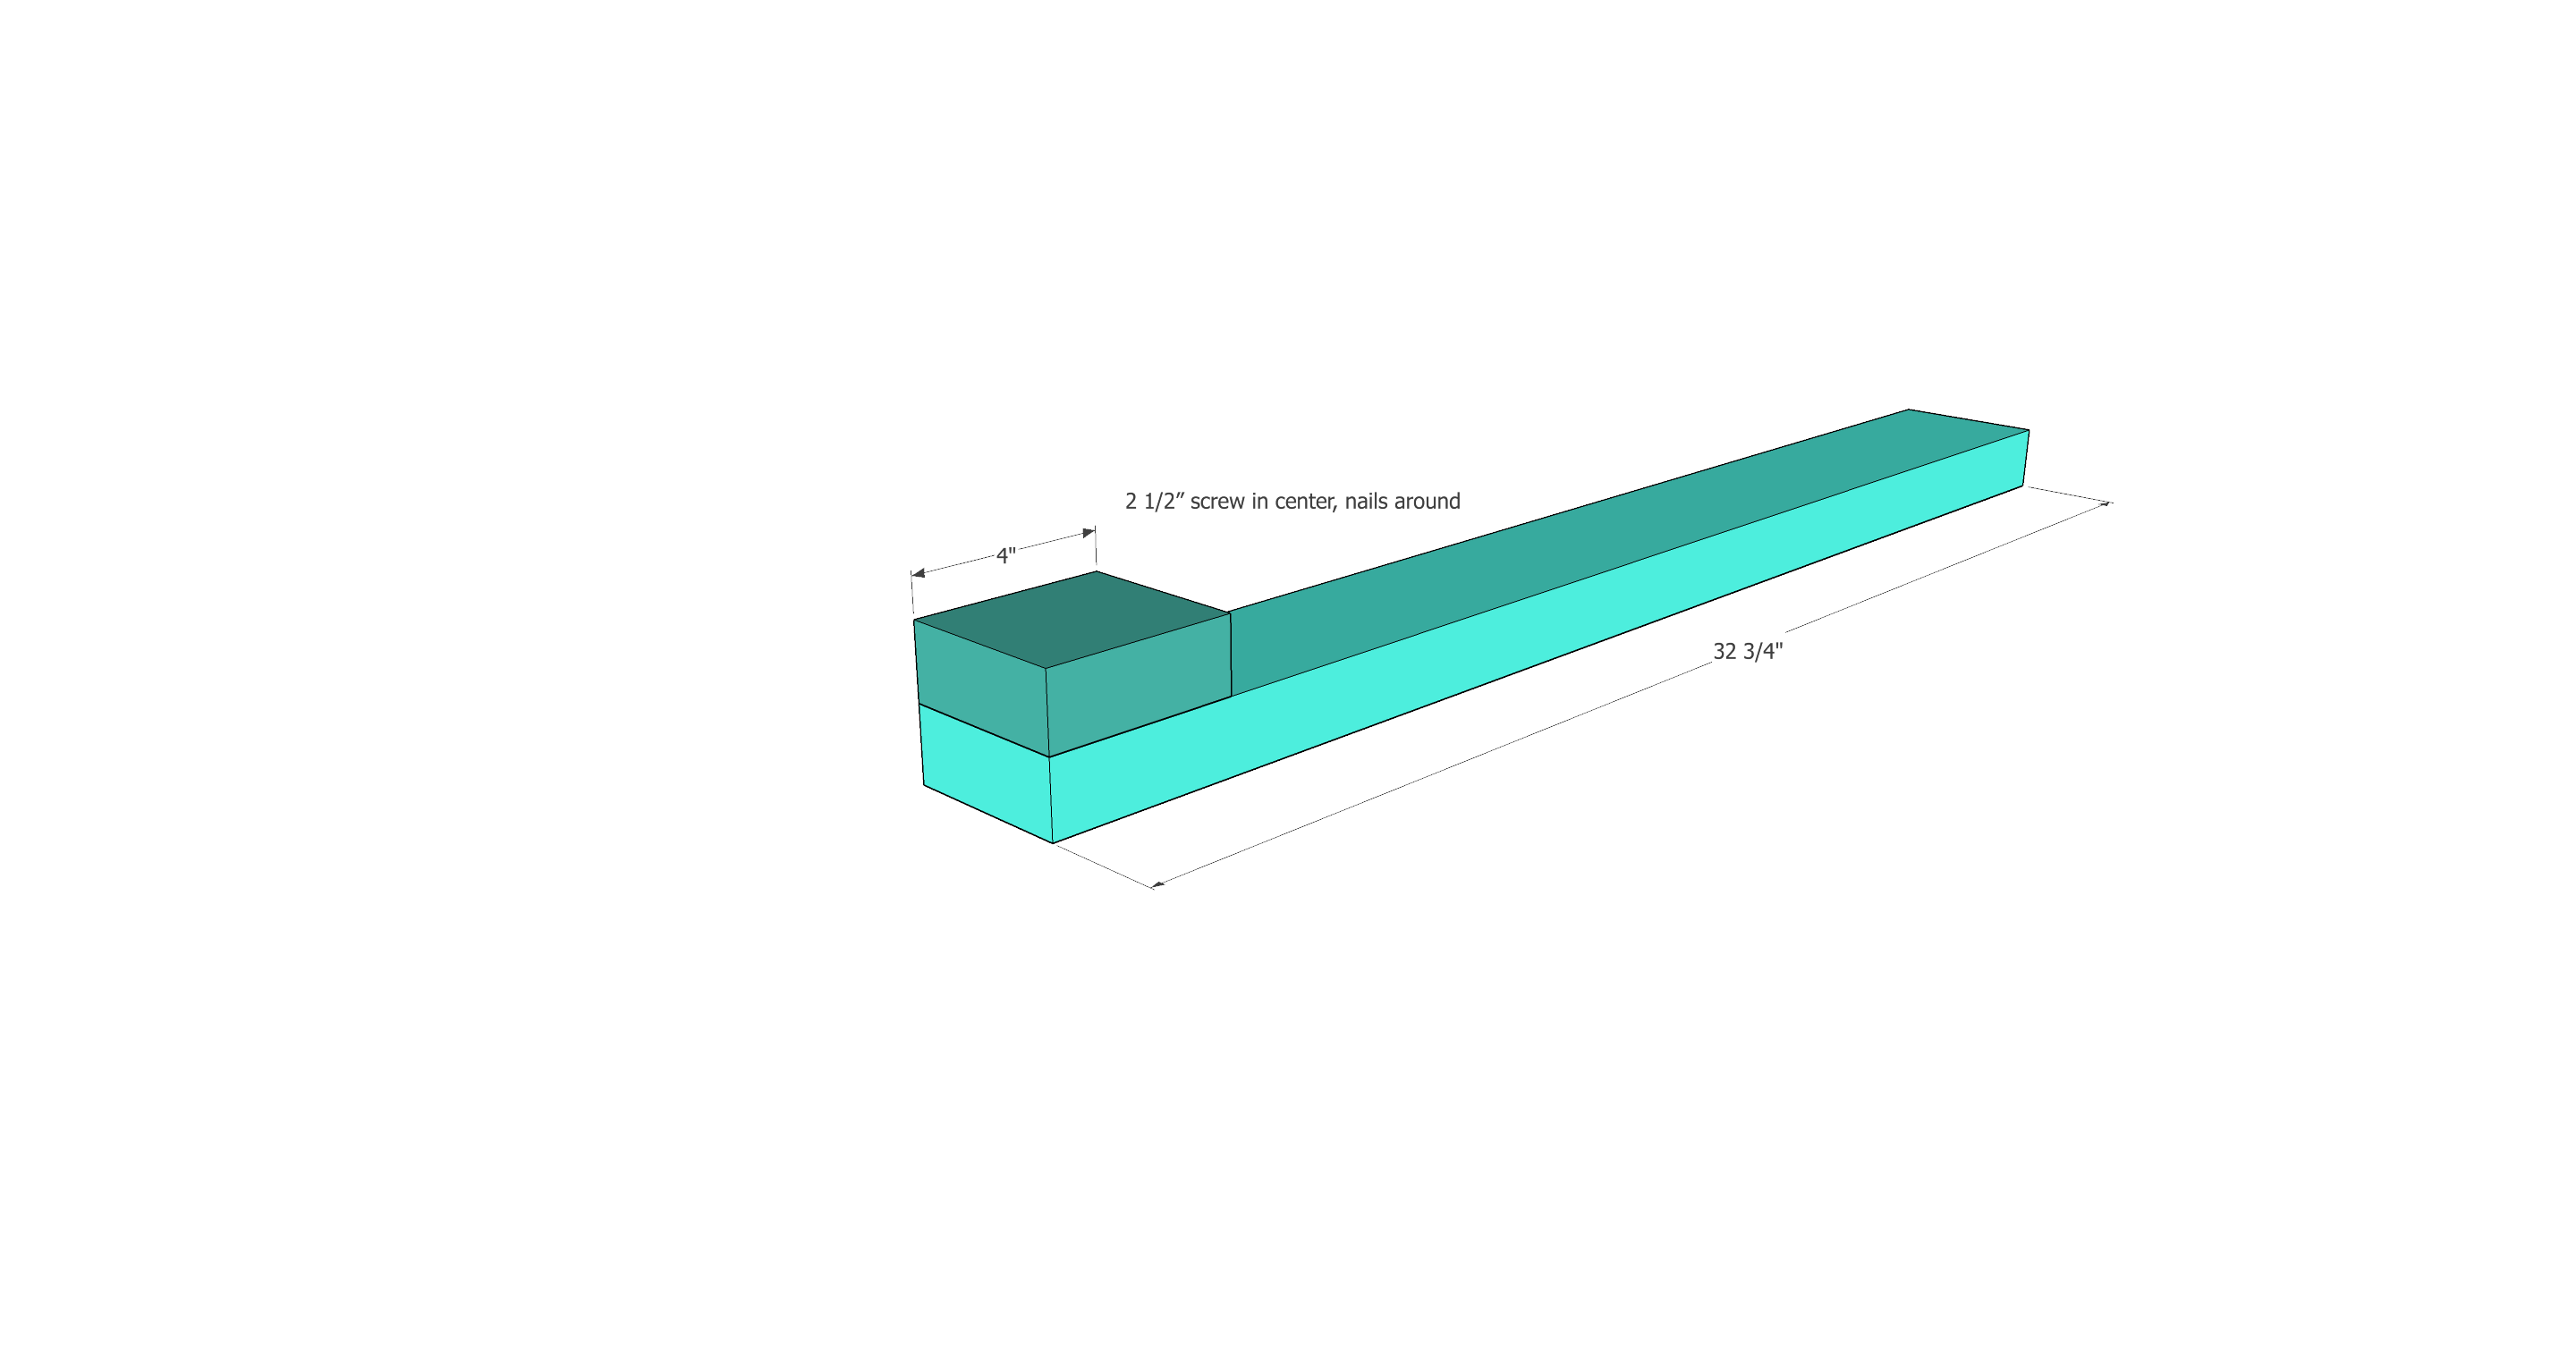
 Step 3: Construct six legs by screwing a small 4″x3.5″ block to a 32 3/4″ 2×4. Just put one 2 1/2″ screw in the center of the block, careful not to split the wood and shoot 2 1/2″ nails into the four corners of the block. The small block acts as a support for the stretcher boards as well as making the base of the legs wide enough for casters to be mounted to.
 Step 4: Flip your tabletop and screw on the six legs by screwing 2-4 self driving 2 1/2″ wood screws into the apron of the tabletop.
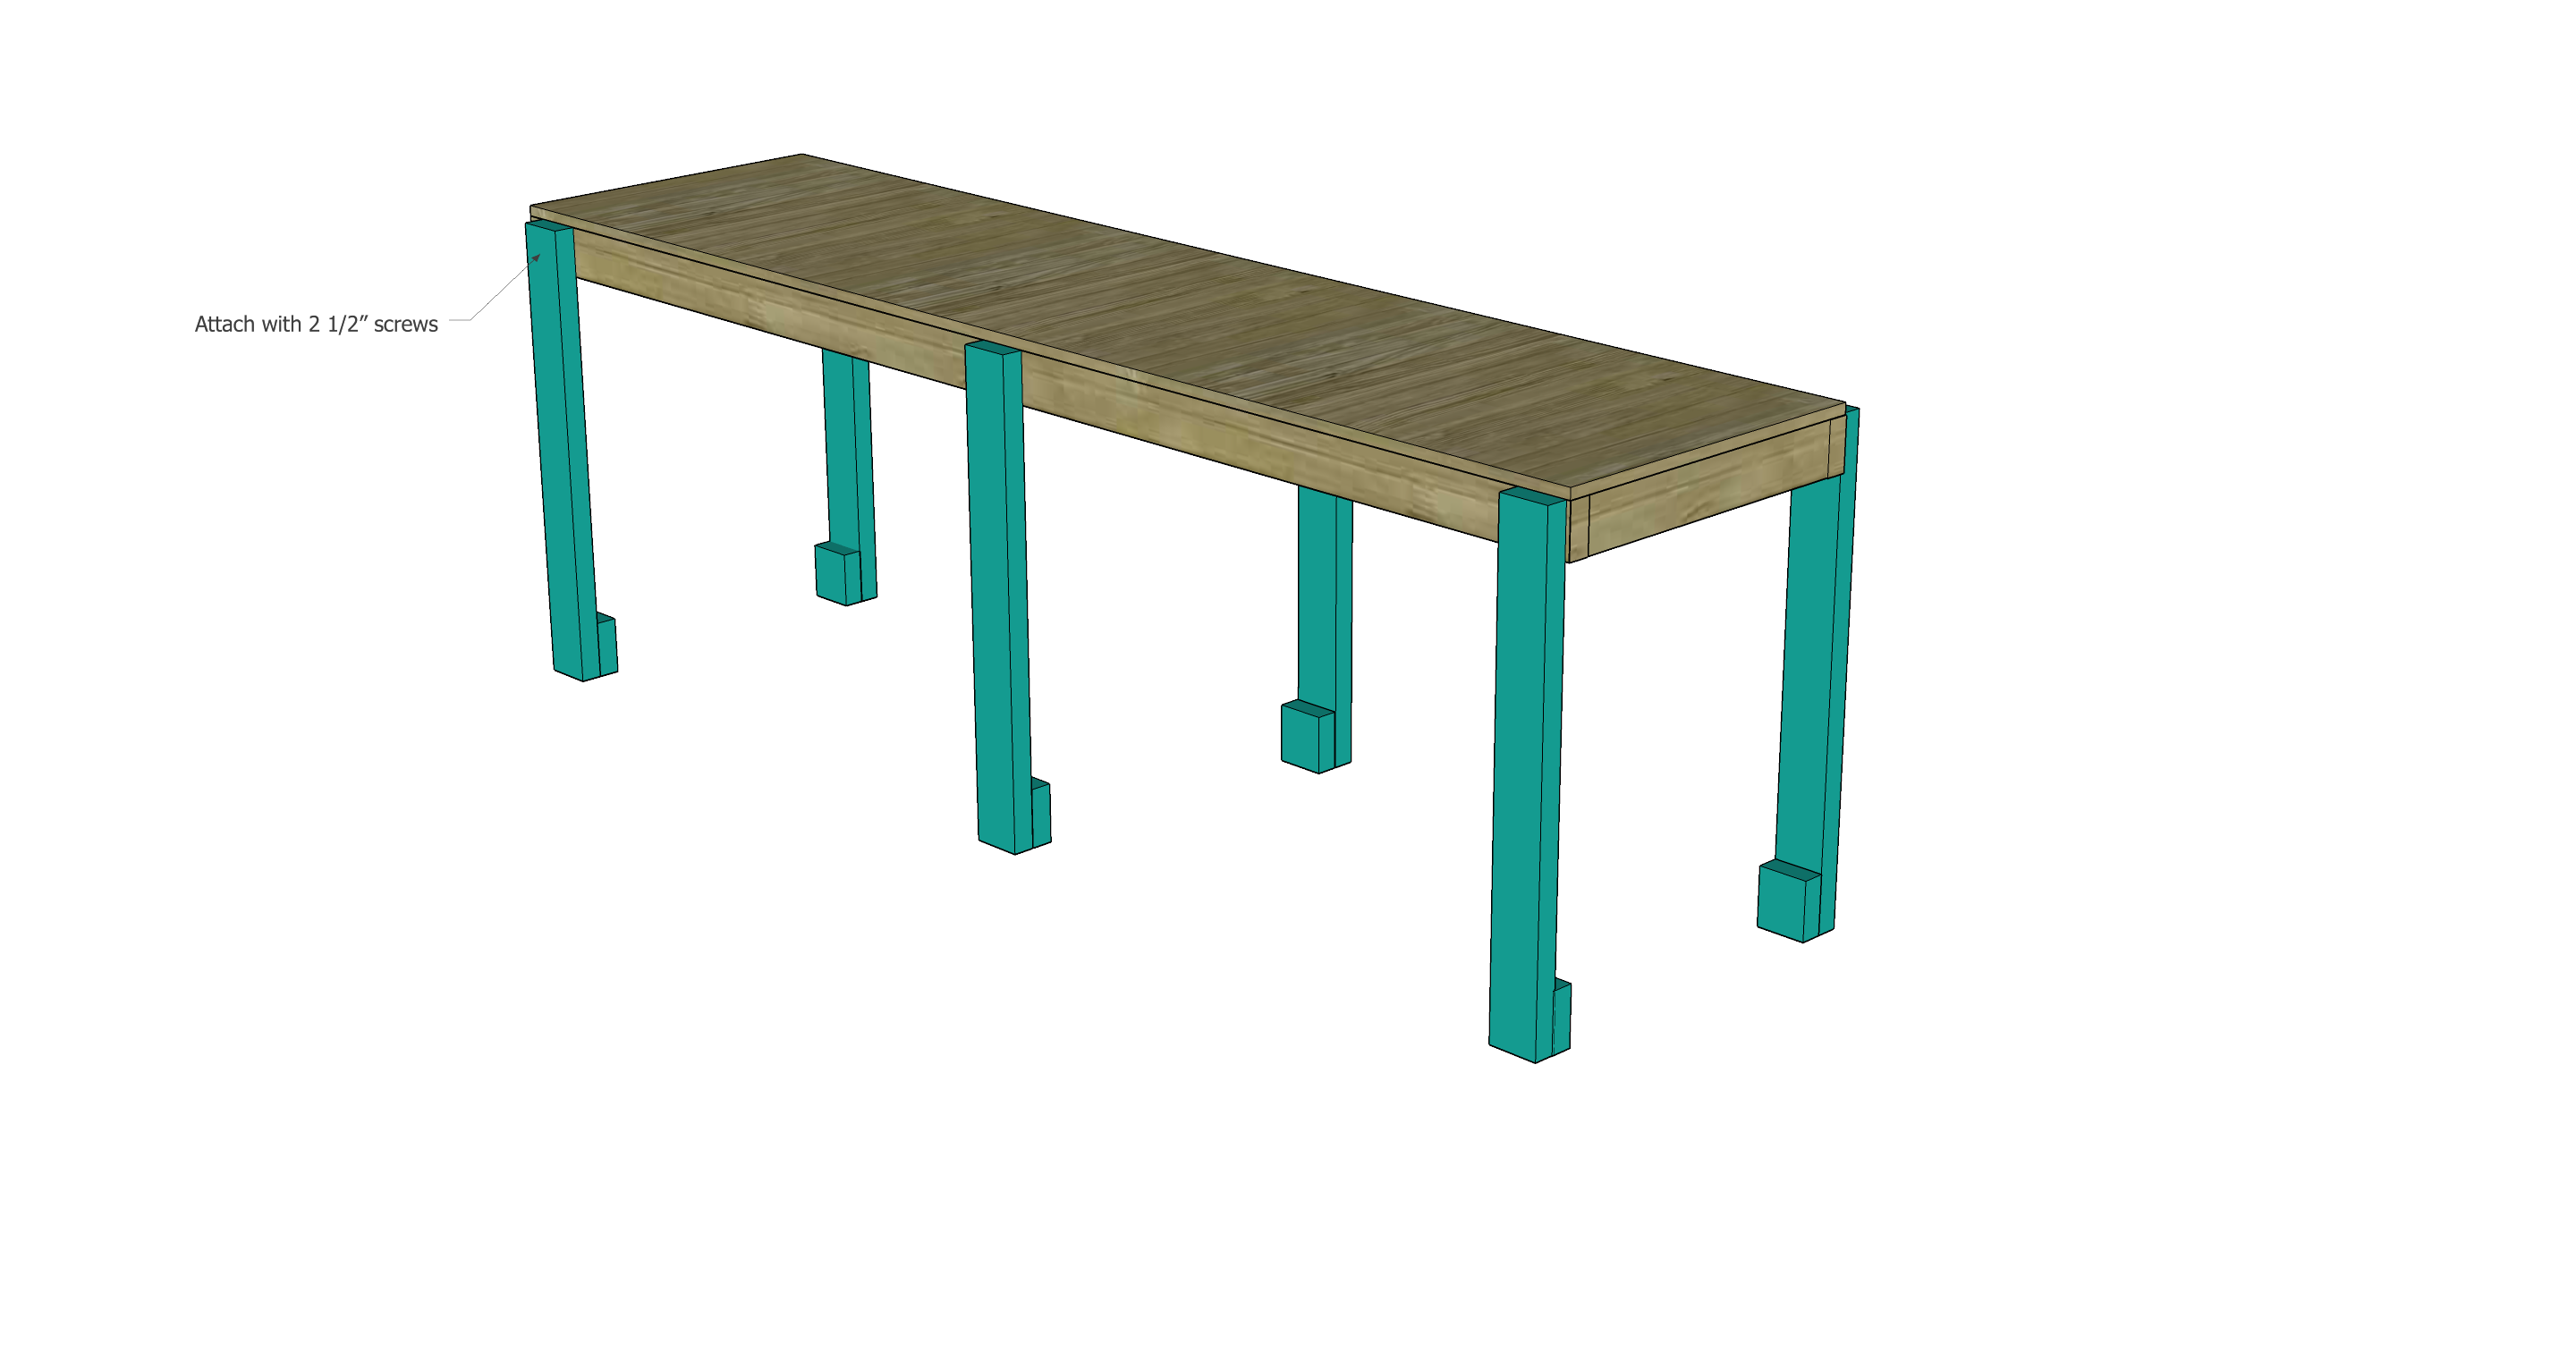 Step 5: Add a stretcher board across each pair of legs, securing with nails.
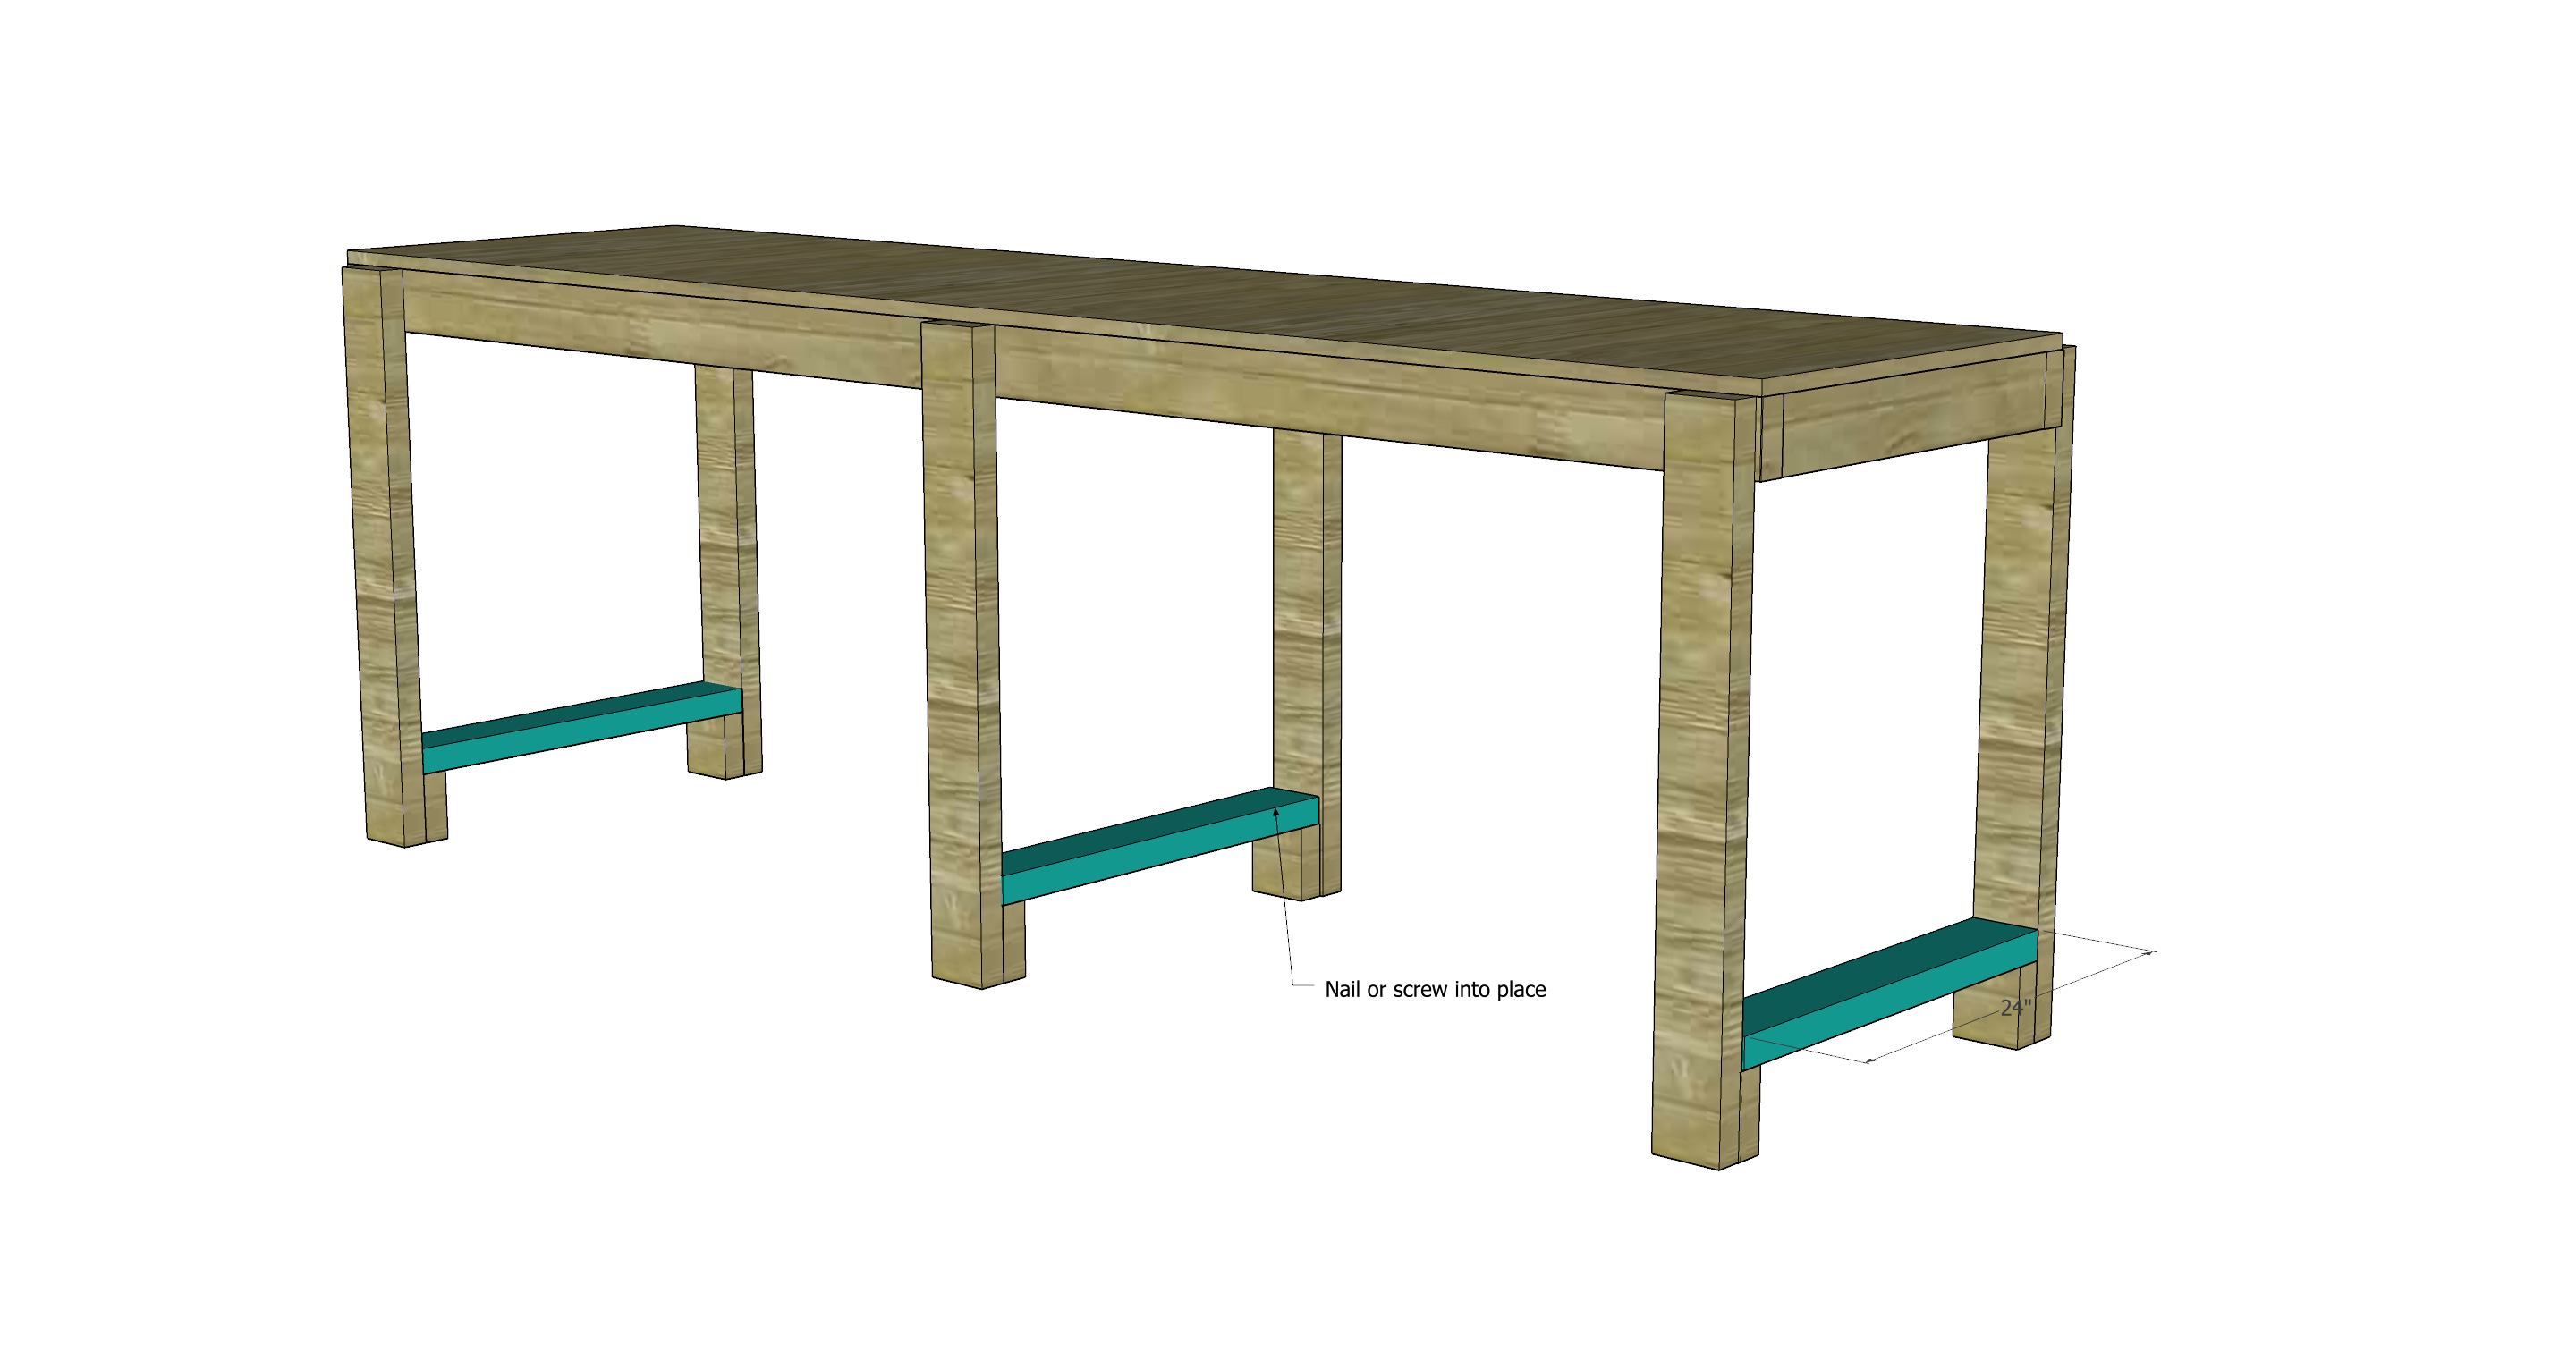
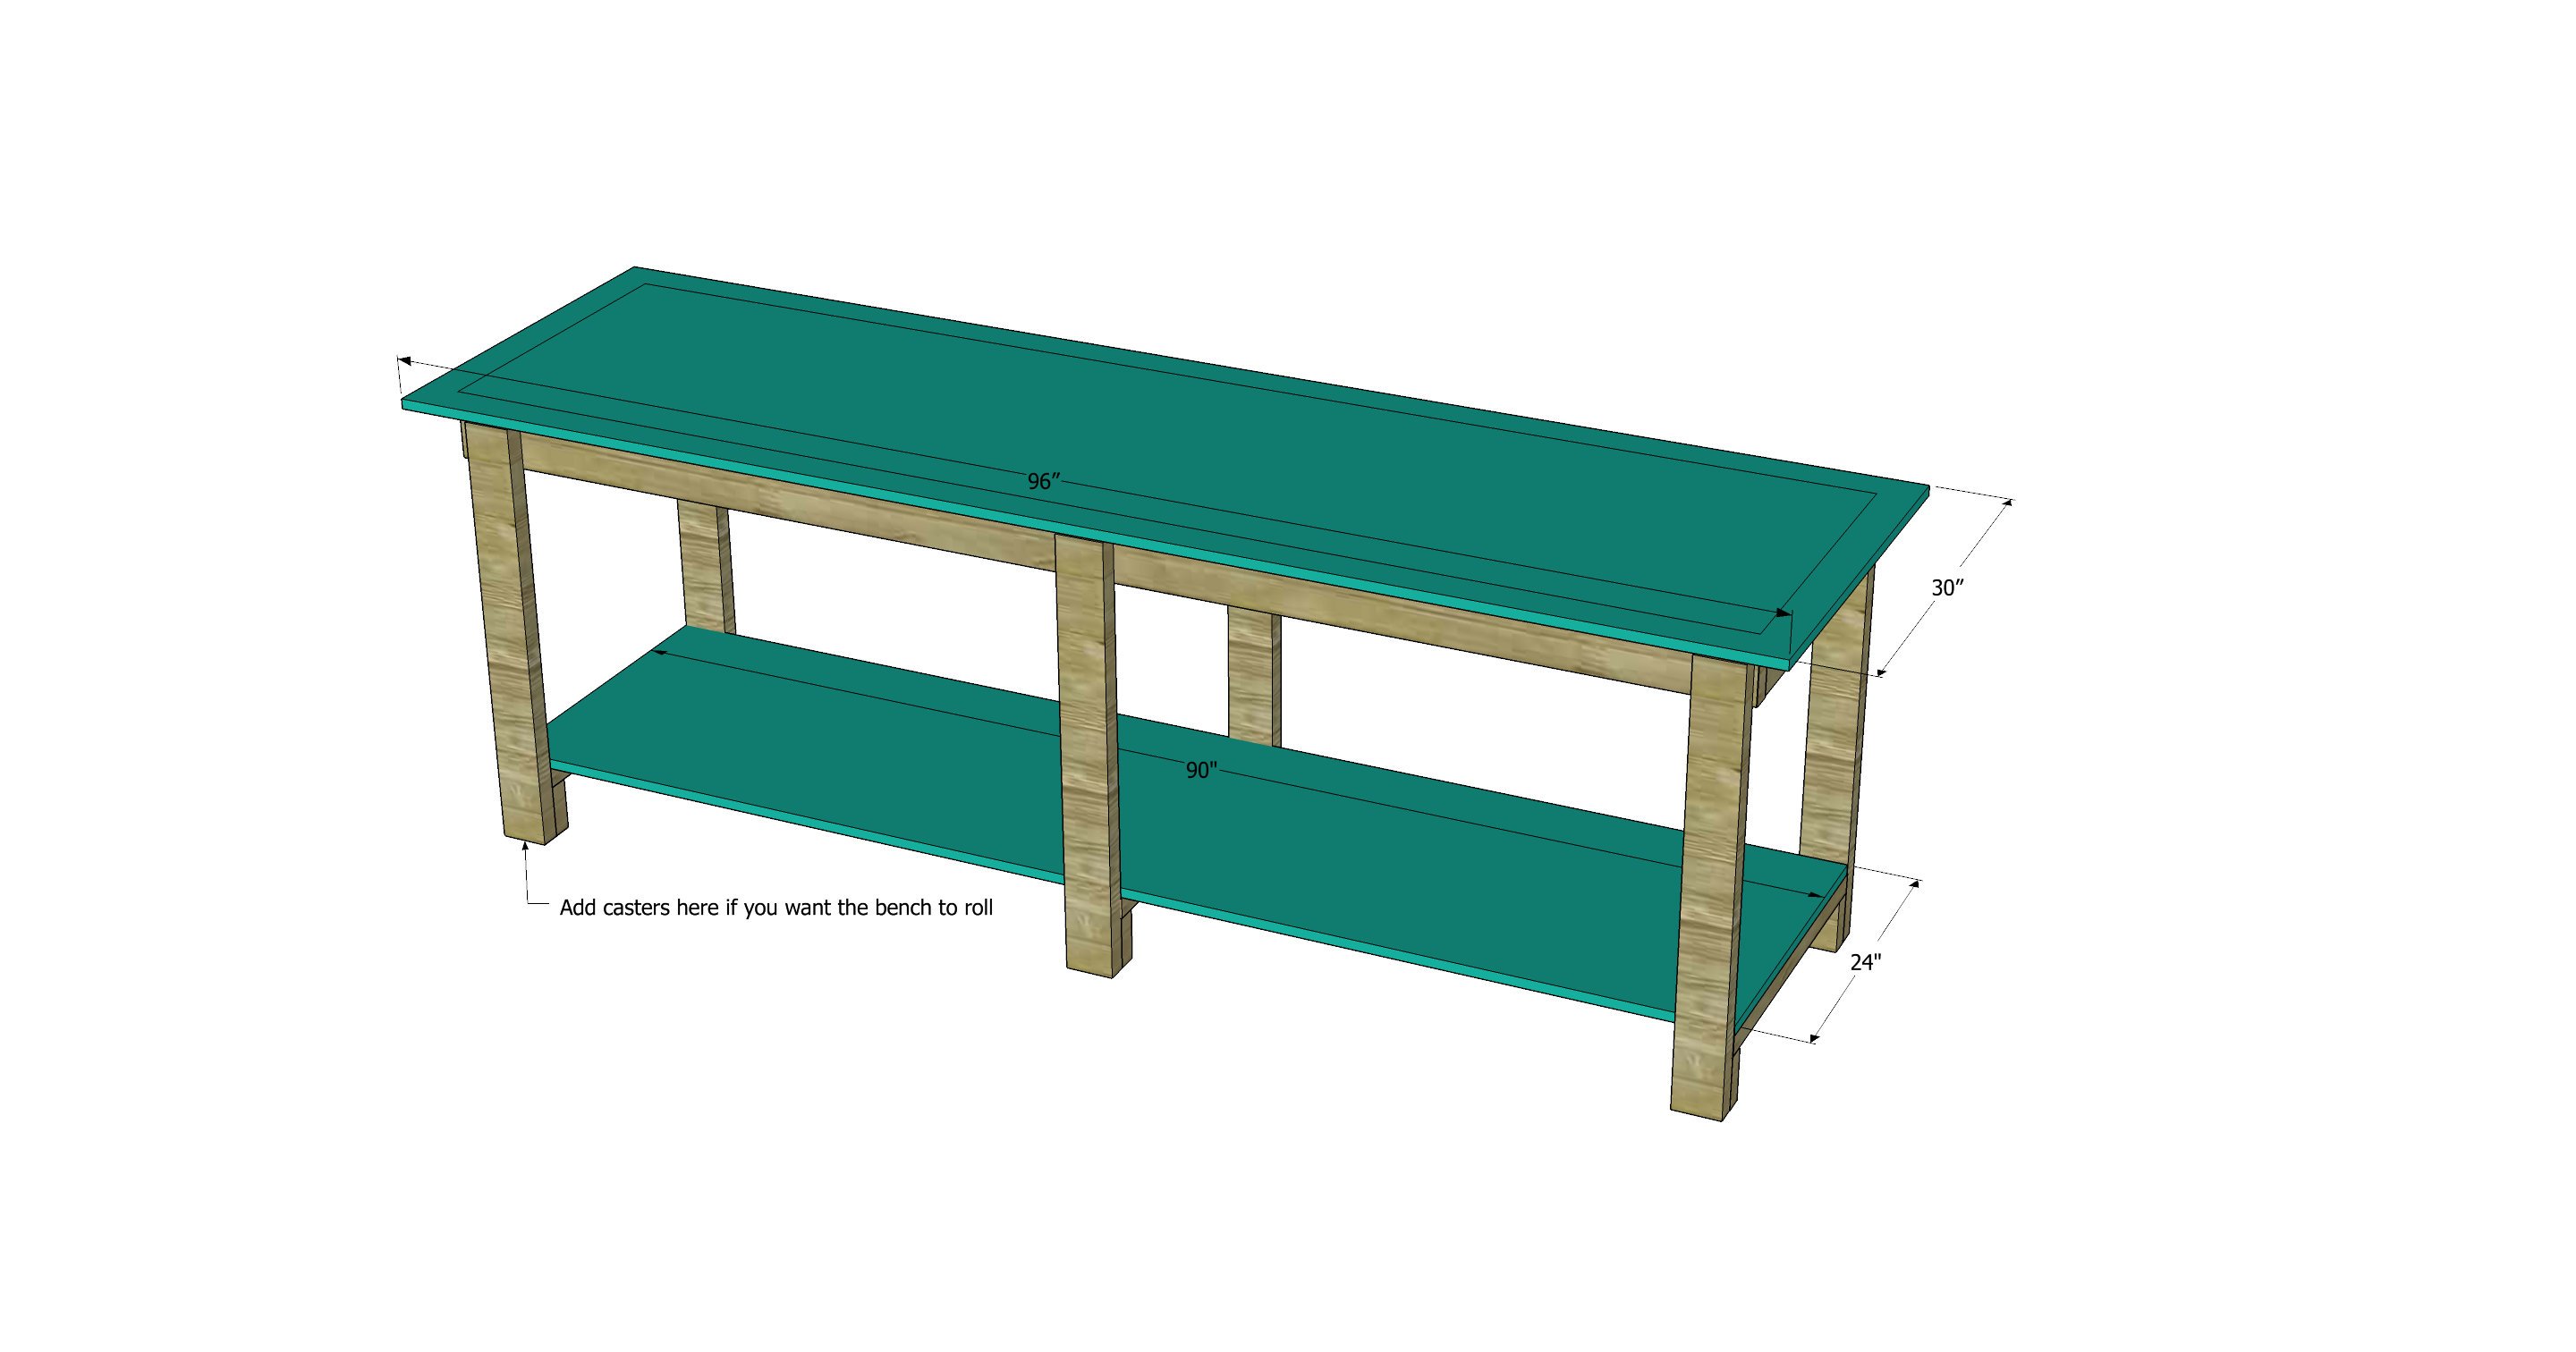
Step 6: Add a wider tabletop to finish with an offset of 3″ all around, unless you want it to butt up flat against the wall–then leave one long side flush and make the tabletop 3″ less wide. Add a shelf below 24″x90″. Nail both into place. Add casters to the bottom of each leg if you want the bench to be moveable. Make sure the end casters have breaks.
That’s it! You have a workbench now. Whip out another one and you have a a full workshop space!
My workshop isn’t like magazine photo worthy…maybe someday it will be that pretty. But there are always more important projects that need to get done, am I right? Pin this post for later when you’re ready to build your DIY workbench!
Please place a print button on here. I am sure many people would like it.
I like examining and I conceive this website got some genuinely utilitarian stuff on it! .
How did you attach the table top?
I just nailed it down. The plywood itself is heavy enough it shouldn’t need much more.
I think you only need ONE of the 90×24 – I bought the two you have on the list – and I’m not seeing it. FYI 🙂
One of the 90×24 pieces is the top of the unit, under the 96×30 tabletop.
I would love to know program you use to design your furniture!
I use the free version of Sketchup. It takes a little getting used to but is a great program!
Where do I get the “free plans”?
This is beautifully done and looks to be very well made. Thank you for the pattern and taking the time to post your project. 🙂
Per the instructions, the bottoms of the legs will have a 4″x4″ surface area. The Finnhomy 3″ casters linked in the parts list have 5/16 bolt holes that are 3″ apart at center. Is that going to be too close to the edges of the legs? Would like more info on how you attached the casters if you have time.
Thanks!
I don’t see the “free plans” link ??
I’m not a carpenter – I’ve done approximately zero woodworking. I altered the design a bit, but even through quite a few wonky spots, it seems stable. I couldn’t find self drilling screws and didn’t have a nail gun, so I drilled pilot holes for both. Thanks so much for providing this for me. I couldn’t find a single table online that was as big as I wanted, and they were all so pricy. I appreciate your help in allowing me to make my own