Hey friends! I am SO excited to share these table plans today! I love this dining table! We love the look of a big, chunky pedestal but they can be PRICEY! So, we decided to come up with our own! We are thrilled with how beautiful it turned out! Our good friends (who also happen to be our producers) just moved here. They bought an older, outdated ranch home and have spent the last several months turning it into a glam farmhouse. It’s gorgeous! They have truly done an amazing job, and now we get to go in and build all their furniture! How fun 🙂 So, this is episode 2 of the Alvarez series! Before we get started, be sure to check out the DIY Farmhouse Pedestal Table video HERE or below!
How pretty is she now??

DIY Farmhouse Pedestal Table – The Plans
I’ll walk you through it here, and be sure to download and print the FREE PLANS by clicking HERE!
And because you will all ask 😉 here are links to all the goodies we used!
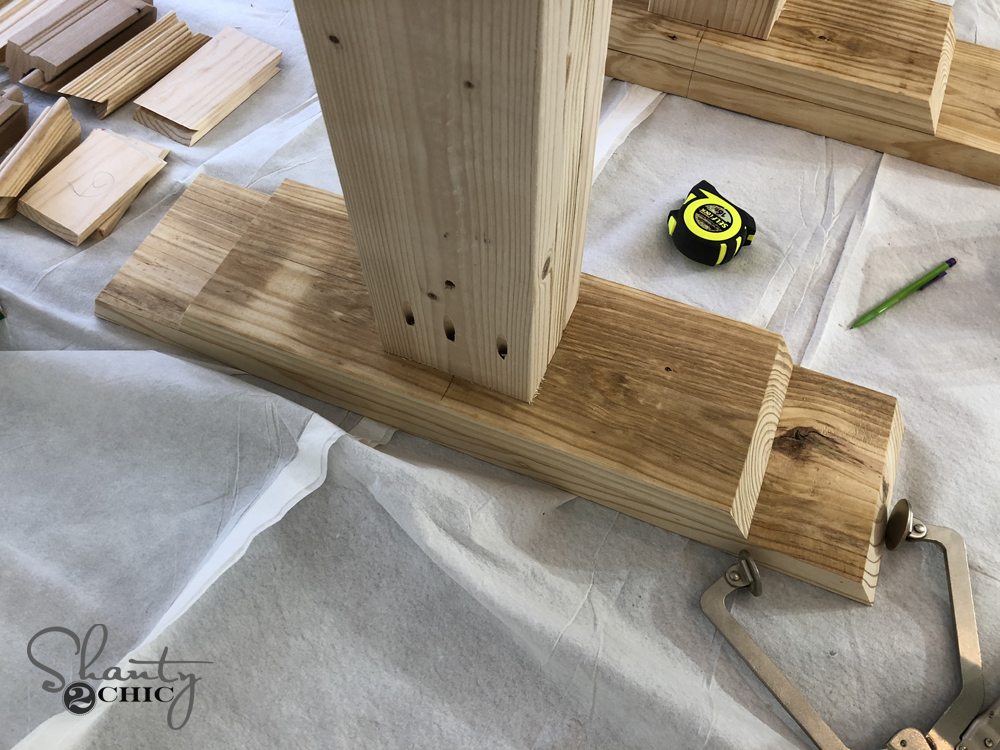
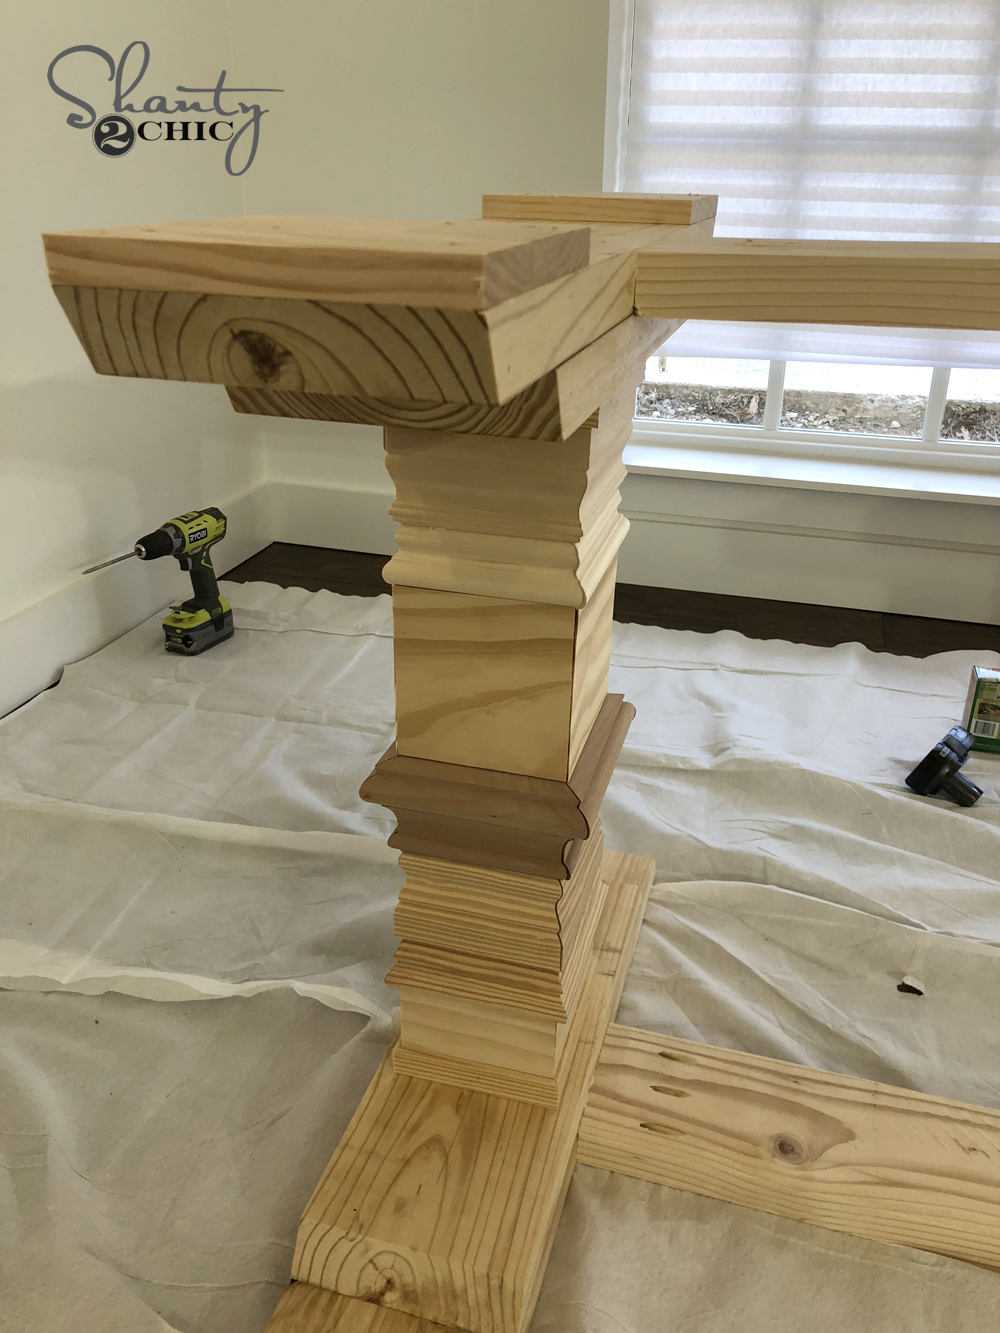
DIY Farmhouse Pedestal Table – Feet Assemblies
Start by building 4 feet assemblies. These are 2×8 framing boards that we ripped to 7” with our table saw. You don’t have to rip them with this plan, but it will change the dimensions just a bit. These are 30˚ angles on each board. Attach the small piece on top and center of each larger piece using lots of wood glue and 2.5” Spax or wood screws.

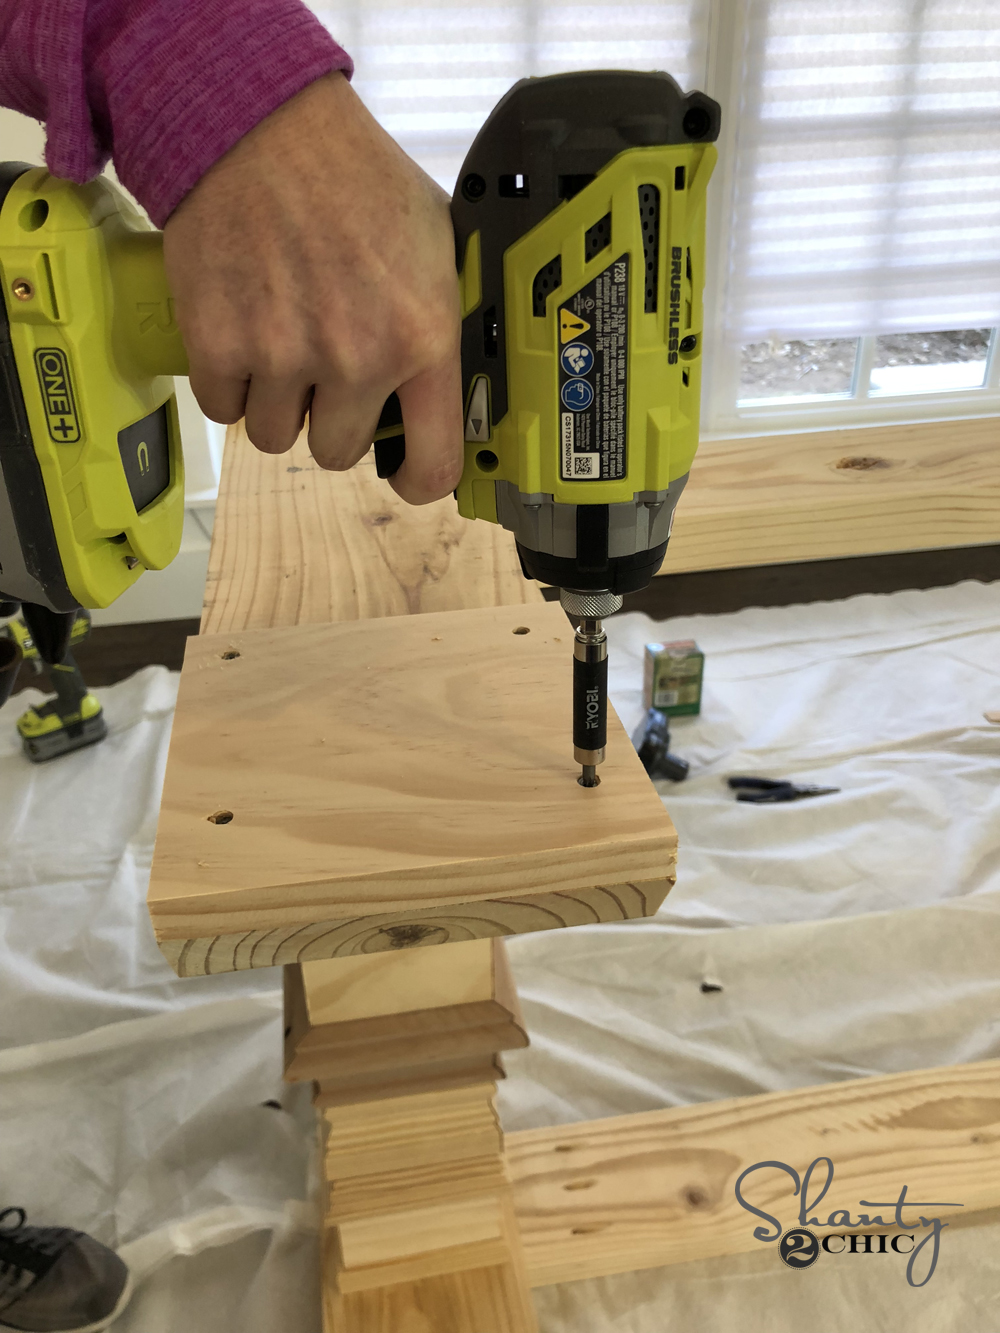
DIY Farmhouse Pedestal Table – Leg Assemblies
Now attach the first of the 6 leg boards to 2 of the leg assemblies. Attach it centered on both and use wood glue and 2.5” pocket hole screws through the 1.5” pocket holes. The leg boards are just 2×6 boards that we didn’t rip down. They will be covered with trim and we wanted to keep the legs as large as possible, so no need to rip these boards.

Now attach the other 2 boards the same way. They will sit flush against the middle leg board and you will attach them with 2.5” pocket hole screws through the 1.5” pocket holes. The pocket holes will face the outside on both sides. Be sure to use lots of wood glue in between each leg as well.

DIY Farmhouse Pedestal Table – Foot Pads
Now add the footpads. These are 1×8 boards that will sit the table off the ground a bit. It will give it stability and we love the look! Attach each footpad using wood glue and 1.5” Spax or wood screws.
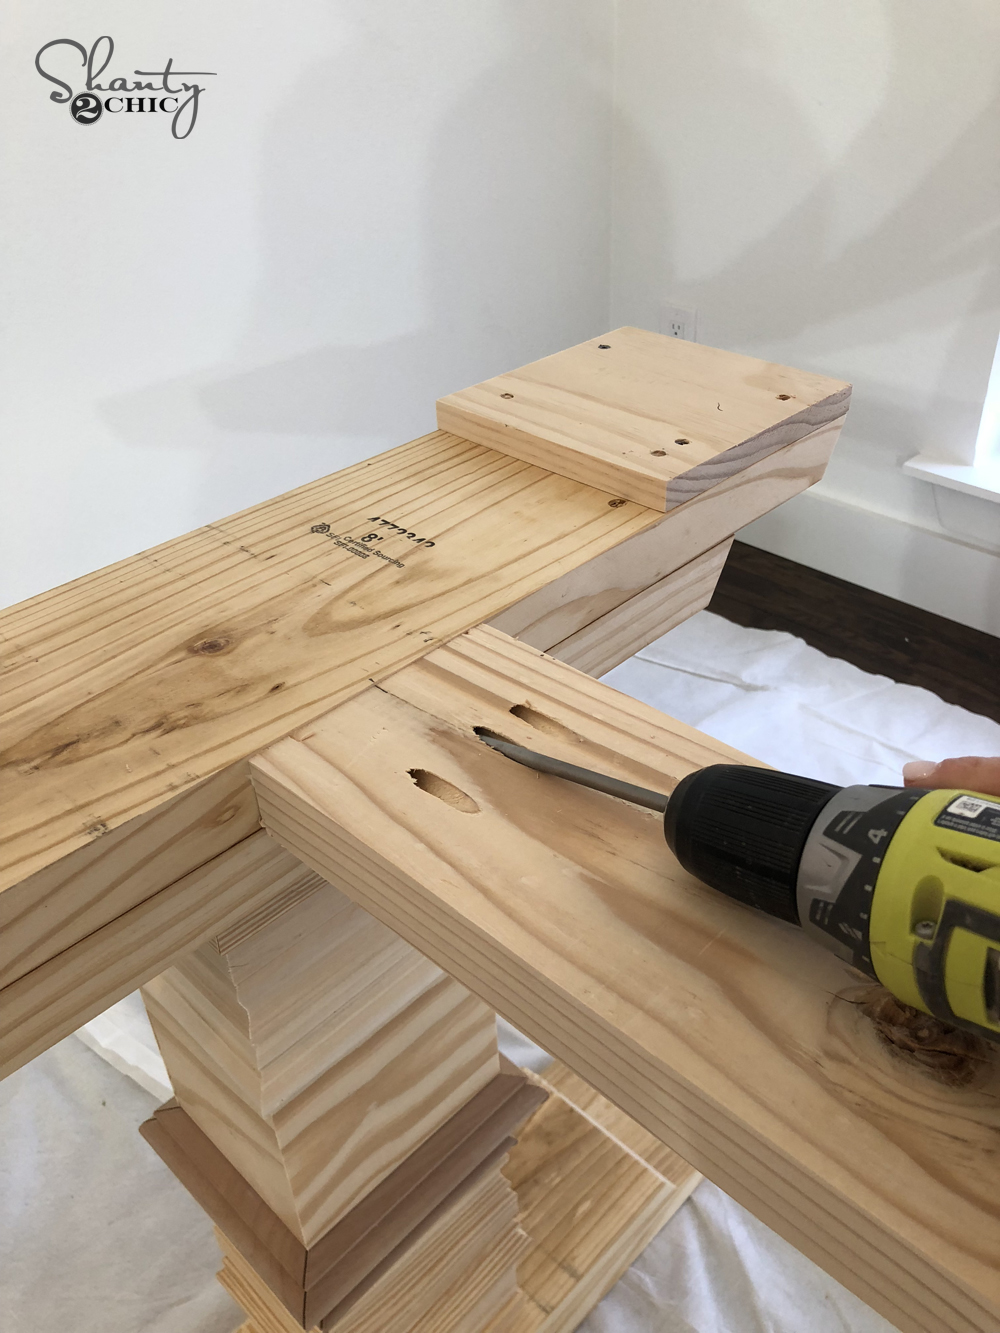
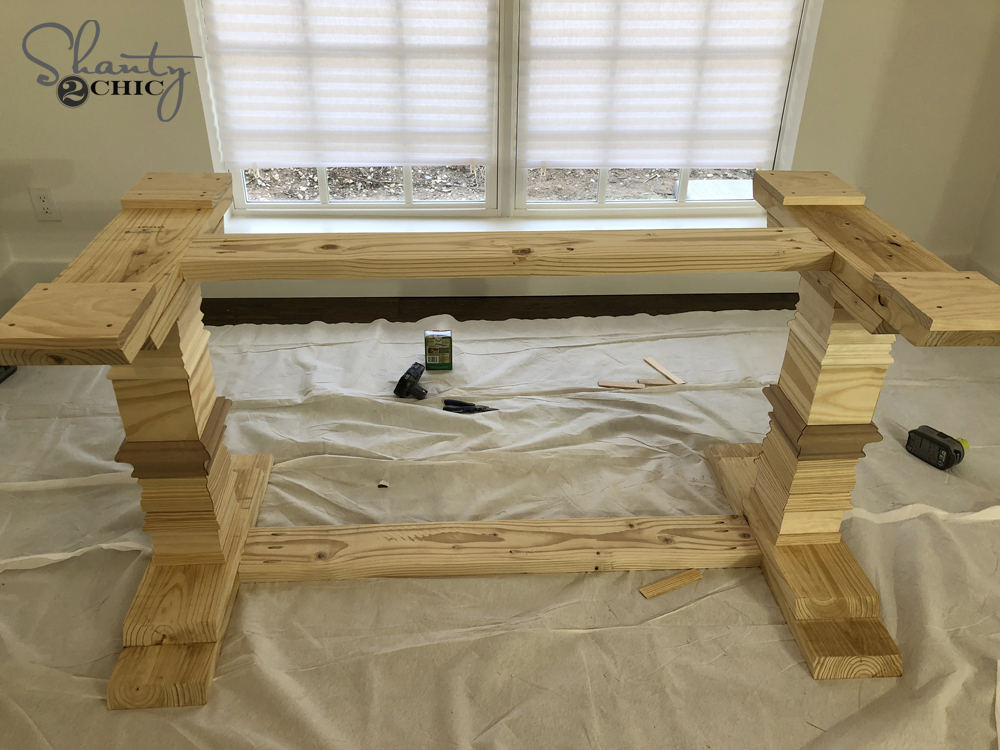
DIY Farmhouse Pedestal Table – Attach Runners
Attach both runners next. These are 2×6 boards that we ripped to 5”. The top runner will have 1.5” pocket holes that face up, and the bottom runner will have 1.5” pocket holes that face down. Attach both runners to the center of each leg assembly using wood glue and 2.5” pocket hole screws.

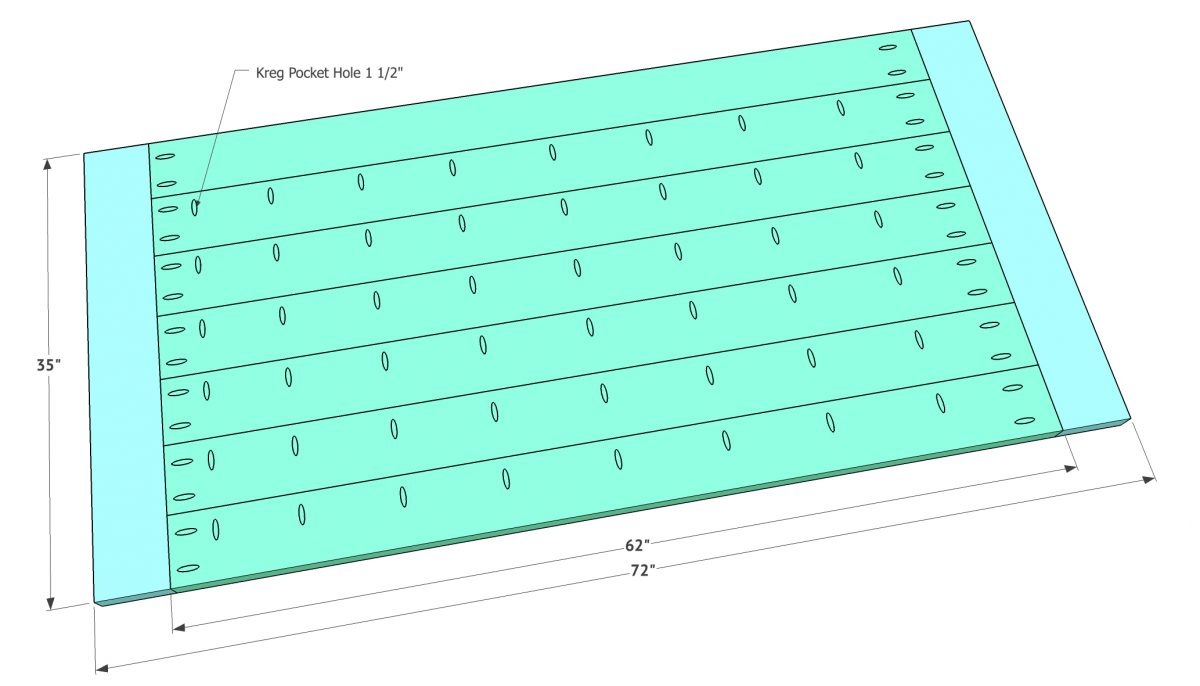
DIY Farmhouse Pedestal Table – Build The Top
Now build the top! These are also 2×6 boards that we ripped down to 5”. All but one of the longer plank boards will have 1.5” down one long side. All of the longer plank boards will also have 1.5” pocket holes on each short end. Attach the planks together using 2.5” pocket hole screws. Then, measure and cut the bread boards and attach them with the same screws through the end of each plank.
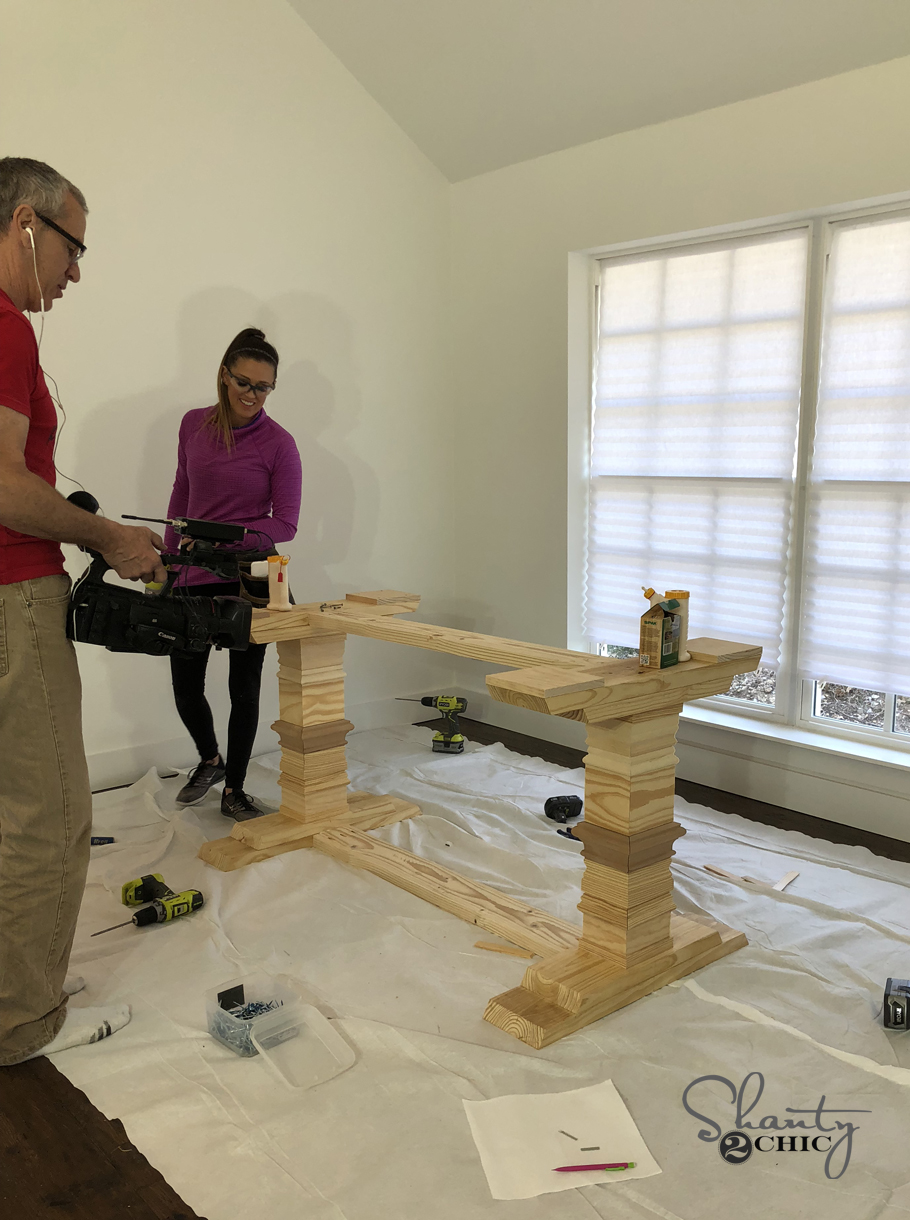
Attach the top of the table to the base with 3” Spax screws and wood glue through the top feet assemblies and the top runner and into the table top. Then, it’s time for the fun part! TRIM! You can have fun with this part. Go as basic or as ornate as you want. Starting at the bottom, attach different types of casing trims and baseboard trims around each leg. Work your way up until you have covered the 2×6 leg boards completely. Attach the trim using wood glue and a pin or brad nailer and wood glue. Be sure to watch our video on tips for this part!
And one more time… How cute is this baby? You can have fun with the trim! We used mainly base moldings, casings and chair rails, but the options are really limitless on this part! You can also go with primed MDF trim to save on the cost. Remember to check out the video for tips on cutting and attaching the trim.

I’m looking to build this table for my wife to be used in our kitchen. This will replace table that is currently 7feet by 45in. Could I build the same pedestal base and simply make the table top longer and 2 boards wider? This would also give more leg room on the ends of the table. Your thoughts? I’m worried about supporting the bread boards.
ur gay
Where did you get the couch/bench?
I have heard in the past that using rigid connections (like pocket holes) between tabletop and table legs can result in cracking or splitting when the wood expands and contracts from season to season. Is that a potential concern with this design?
Absolutely fantastic article, thanks for sharing this.
I have similar experience as I have spent the last few years designing and constructing handmade snooker tables.
It’s a very rewarding job once you have completed all the work.
Keep up the great work 🙂
????????
????????
Use the plans at www. WoodworkPlans.info for this project like I did – highly recommended you check those out too. They are detailed and super easy to read and understand unlike several others I found online. The amount of plans there is mind-boggling… there’s like 16,000 plans or something like that for tons of different projects. Definitely enough to keep me busy with projects for many more years to come haha ????????
Can you include the actual name of the trim/moulding/casing used? I went yesterday to look at ones I liked and it was over whelming. Plus I had four littles running around. LOVE this!
Did you end up purchasing the trim/molding? This is the only step left for me, and I found to trim to be extremely expensive. Curious to know if you found it elsewhere cheaper.
Hi Nicoal,
Where/ and what did you end up using for the casing??
I just cannot figure this part out?
?
Hi Amanda!
What casing/trim did you end up using?
I’m in the same predicament… please give me details of where you got it!
Thanks a bunch!
Even though this is a hard job for beginners, it can be fulfilling to see the result, you just have to get the tools needed to make it…
Has anyone done this with a wider top?! I need mine to be about 4 wide. I’m guessing you’d just extend your legs so that they’d reach the edges of the top? I don’t want It to be top heavy.
I bought the material today, started cutting for the pedestals. I should have checked the math first but 21+21+30+30= 102 which is 8.5’ not 8’. These should have been 2x8x10s. Also the 30 degree cut did not work for me. I set my miter saw to 30 degrees but I am no longer 30” long however I am 27” on the short end and 28.5” on the long end. Maybe that is just me and I did it wrong. I love this table and hopefully it comes out looking fantastic! Thank you for the plans.
The diagram reflects a 45 degree angle but the photos show a 30 degree cut. I believe that’s where you encountered your issue.
I wish I had read your comment before I bought my lumber, because I am short on the 2x8s as well. Back to the store for me, I guess. I’m new to the table saw and have done a bit of practicing on the 30 degree cuts and it does take some practice. I won’t get a chance to work on this again until next weekend, but I’m looking forward to having this in my dining room!
I wish I seen you comment as well. I’m cutting now and just realized the same thing. ???
What color chalk paint did you use for this? When I use the link above it doesnt link to the color.
I would love to use this as a desk. Can you help me with a 4′ by 2′.plan or do you have plans for that? Thanks
I mean 4’ by 30”. Thank you
I love the pedestals as well. Its definitely something I would like in my own home
I would like to build this but with the overall table size of 42″ x 72″. Would it be possible for you to provide me the adjusted amounts for the supplies? Thank you!
I love this and plan to build it. Did you use the stain on the pedestal and then go over it with white chalk paint? Is there a how to video on “how to do this?” 🙂 love you guys!
There is a video at the top of the page.
Help – more specifics about how to cut the trim around base?! I’ve ruined a LOT so far. . . 45 outside corner but they are all coming up too short. When making the cut blocks, what are the tricks?
Wondering the same… I wish they would actually provide responses to any of these comments.
how is the distressing done on the pedestals? is that a function of using the chalk paint or something done with sanding?
love this table. the pedestals look great!
That is absolutely beautiful. I built your X based table a few years ago but am in need of a change so I think this will be my next project. What color did you stain the top?
The stain is listed near the top of the page ?