Simple parts and construction allow you to put this sled together in an afternoon
By Sue Mey
Cut by Leldon Maxcy
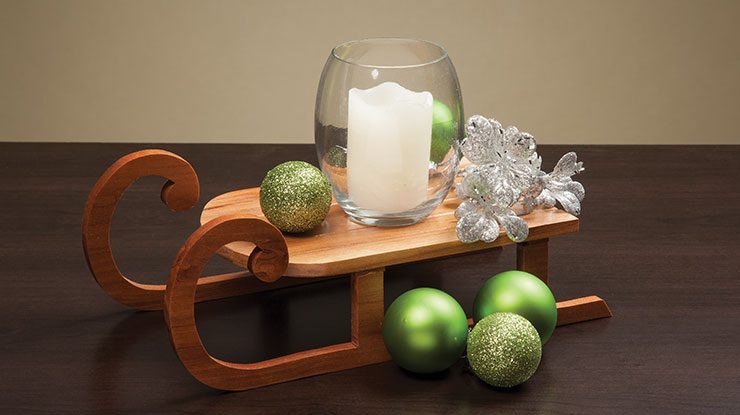
Dress your holiday table up with this simple but attractive sled. The shapes are easy to cut, and you can stack-cut the runners. (For more on stack cutting, see Scroll Saw Basics.)
Making the Sled
Cut the wood to size and attach the patterns. Cut the supports. For the seat, cut the perimeter first, and then cut the individual slats. Stack the wood for the runners if desired. Drill the indicated holes for the runners if you plan to add the optional dowel supports, and then cut the runners. Sand all of the pieces smooth.
Glue and clamp the supports to the tops of the runners. Then, glue and clamp the slats to the supports with about 1/32″ (1mm) of space between the slats. Allow the glue to dry and then add the optional dowel supports if desired. Apply a clear spray finish.
Materials:
- Cherry, 3/8″ (1cm) thick: seat, 5″ x 7-1/2″ (12.7cm x 19.1cm); runners, 2 each 3-3/4″ x 10-1/2″ (9.5cm x 26.7cm)
- Cherry, 1/8″ (3mm) thick: supports, 2 each 5/8″ x 5″ (1.6cm x 12.7cm)
- Dowels, 1/4″ (6mm) dia.: optional supports, 5 each 5″ (12.7cm) long
- Spray adhesive
- Sandpaper
- Wood glue
- Finish: clear spray
Tools:
- Scroll saw blades: #3 reverse-tooth
- Clamps
Sleigh Pattern
Click here to download the pattern.
About the Author

Sue Mey lives in Pretoria, South Africa. To see more of her work, including a wide variety of patterns and pattern-making tutorials available for purchase, visit www.scrollsawartist.com.
 For more fun scroll saw projects, subscribe to Scroll Saw Woodworking & Crafts magazine. To receive patterns, articles, and updates in your e-mail inbox, subscribe to our FREE newsletter.