

This step by step woodworking project is about diy wall mounted bottle opener with cap catcher plans. If you are looking for an unique project with a strong character, take a look over my plans and detailed tutorial. I have designed this wood bottle opener so you can make one under 10 dollars in just a few hours. You can install the wood opener outdoor or in your man cave and it will look equally nice. See my other chalkboard project for more DIY inspiration.
We recommend you to invest in the best materials you could afford. Therefore, you should buy weather-resistant lumber, such as pine or cedar. Always take accurate measurements before adjusting the size of the components at the proper size. Drill pilot holes trough the components before inserting the wood screws, to prevent the wood from splitting. See all my Premium Plans in the Shop.
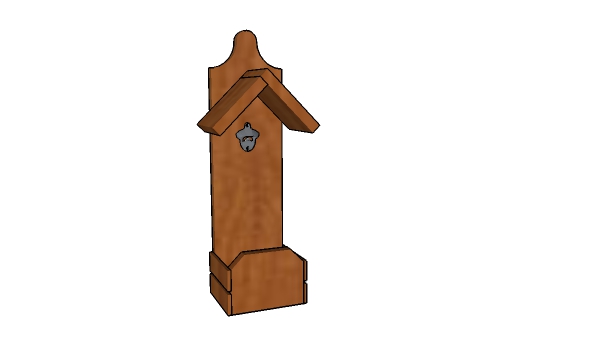
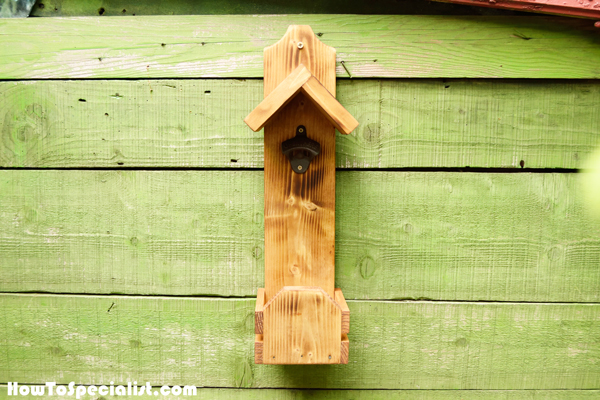
Made from this plan

Building a wood bottle opener
Materials
- A – 1 piece of 1×6 lumber – 20″ long, 1 piece – 4 1/4″ long FRAME
- B – 1 piece of 1×6 lumber – 3 1/2″ long BOTTOM
- C – 4 pieces of 1×2 lumber (1/4″ thick) – 5″ long SIDES
- D – 2 pieces of 1×6 lumber – 4 1/2″ long ROOF
- 1 piece of 1×6 lumber – 6′
- 1 pieces of 1×2 lumber (1/4″ thick) – 6′
- bottle opener, torch
- 1 1/2″ brad nails, 3/4″ brad nails
- stain, glue
Tools
- Safety gloves, glasses
- Miter saw, jigsaw
- Chalk line, tape measure, spirit level, carpentry pencil
- Drill machinery and drill bits
Time
- One Day
DIY Wood Bottle Opener with Cap Catcher

Make sure you check out this tutorial with step by step instructions and easy to follow diagrams, if you want to learn how to build this rustic wall mounted bottle opener.
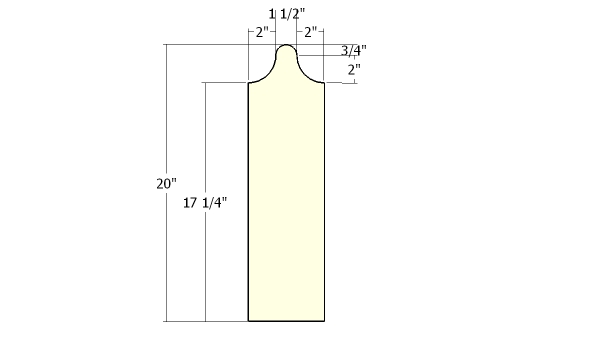
Building the back for the wall mounted opener
The first step of the project is to build the back for the bottle opener. Mark the cut lines on the 1×6 slats and make the curved cuts with a jigsaw.
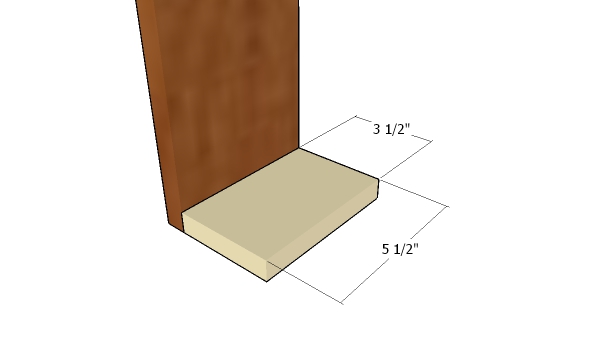
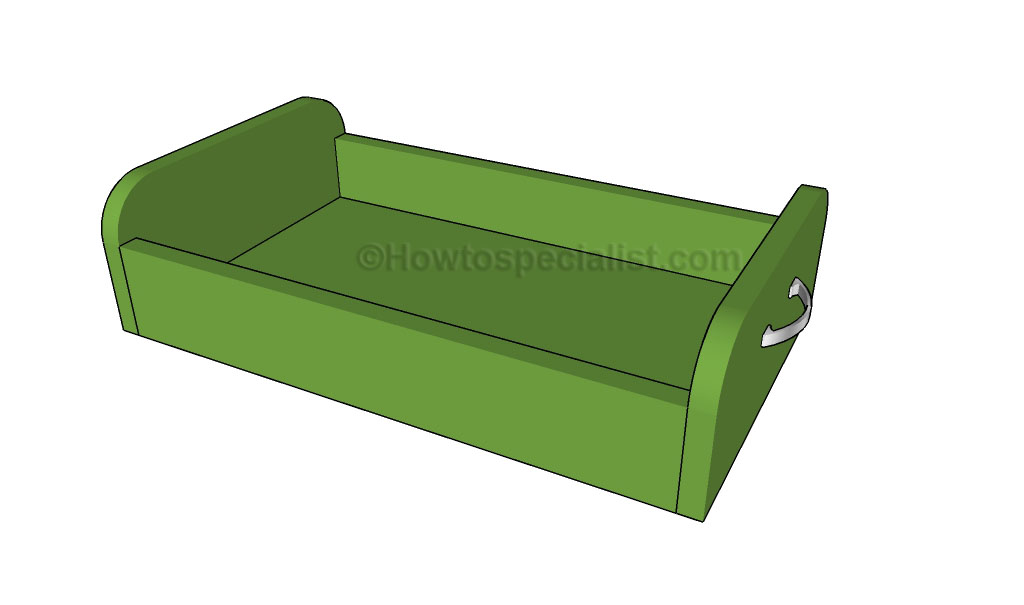
Attaching the bottom
Next, attach the bottom component to the back of the opener.
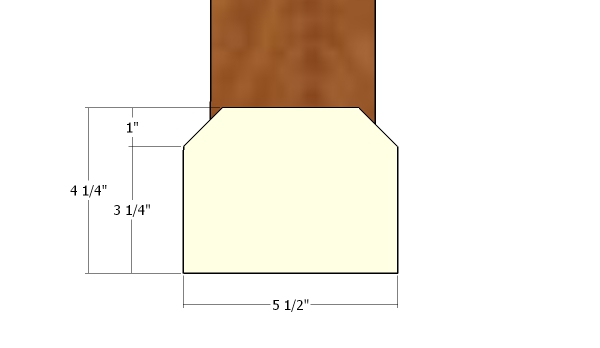
Fitting the front piece
Cut the front face for the cap catcher and secure it to the bottom using glue and 1 1/2″ brad nails. Align the edges flush and make sure the corners are square.

Fitting the side slats
Fit 1×2 slats to the sides of the tray (1/4″ thick). Use glue and 3/4″ brad nails to lock the strips of wood into place,
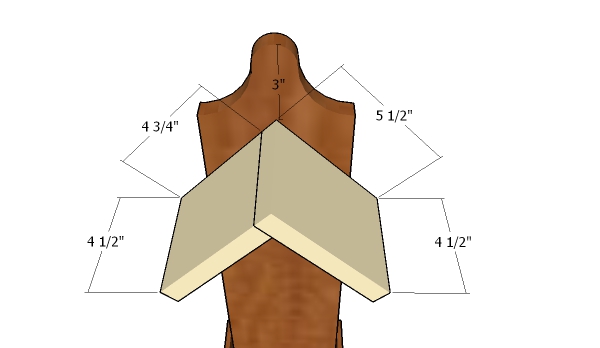
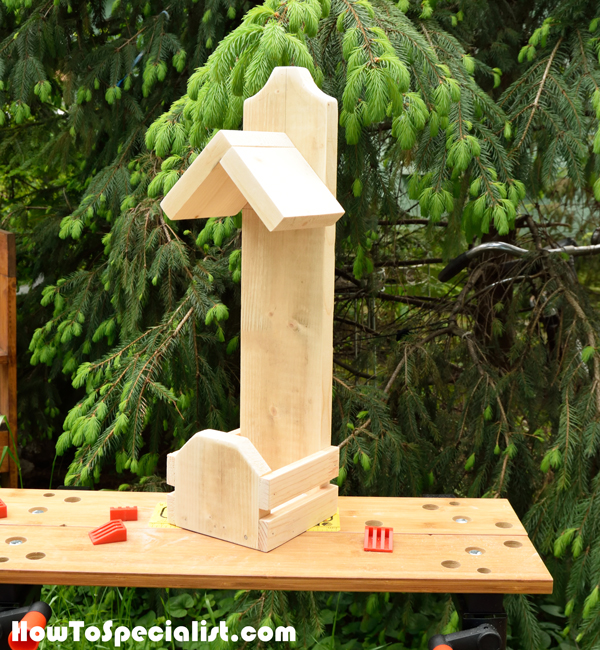
Fitting the roof
Assemble the roof and attach it to the back support.
DIY Bottle Opener with Catcher Plans
Install the bottle opener and apply the finish to the wood to enhance the look of the components and to protect them from decay.
How to build a wall mounted bottle opener
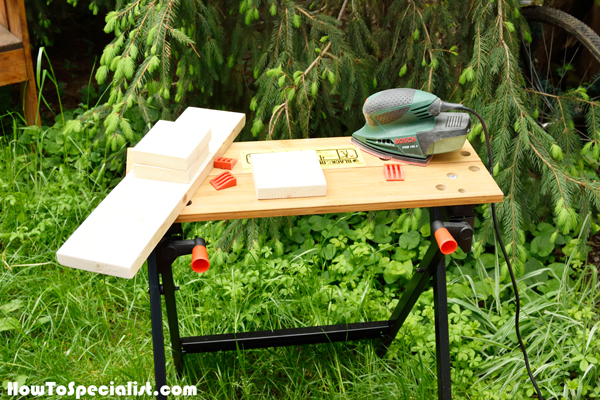
First of all, I cut all the components to size using the above plans. I used my detail sander to smooth the edges and to even out the surface. As you can see, I built this project in my backyard using the Black and Decker folding workbench. It was a great helper and I saved a lot of time while enjoying the fresh air.
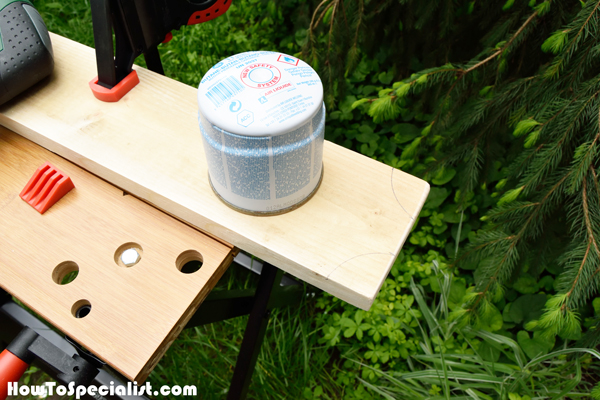
Next, I marked the cut lines on the back support using a can I had lying around. You can use any round object you have when drawing the cut lines.

Next, I used my jigsaw to make the curved cuts, making sure the blade goes exactly over the cut lines. I use a saw blade with fine teeth and I also adjusted the speed of the jigsaw to a lower gear. These little details are essential if you want to get a clean cut without chips.
I applied waterproof glue to the joints to enhance the bond of the components. I used my finger to spread the glue evenly on the surface.
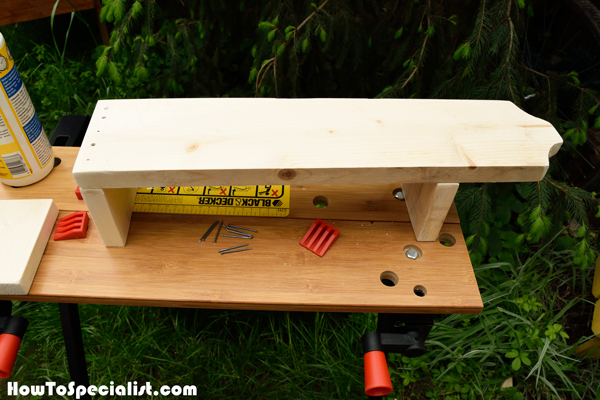
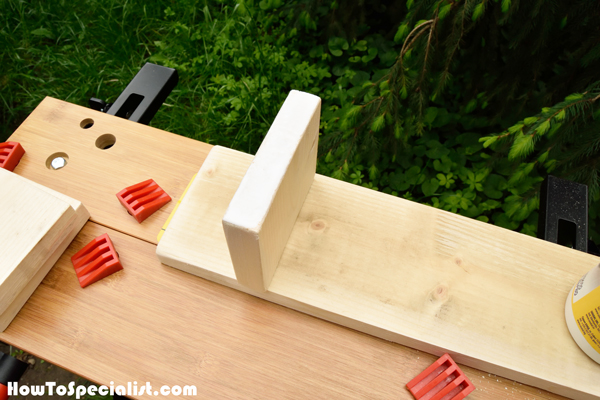
Next, I attached the back to the bottom slat using 1 1/2″ brad nails and a hammer. If you have a nail gun you can use it and save some time. Make sure the corners are square and check if the edges are flush before inserting the nails. I used a scrap piece to support the opposite end of the back component while inserting the nails.
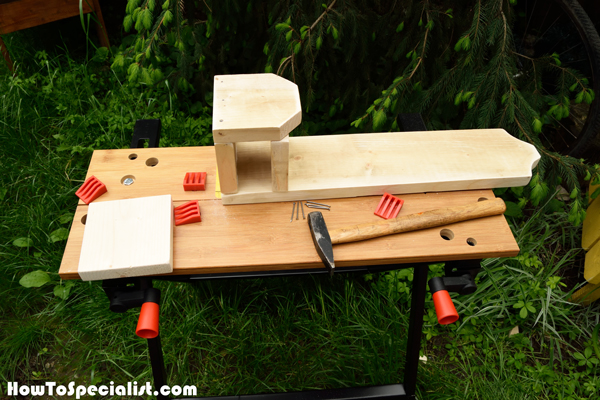
Afterwards, I attached the front of the cap catcher to the bottom components. I used 1 1/2″ nails and glue to secure the component into place.

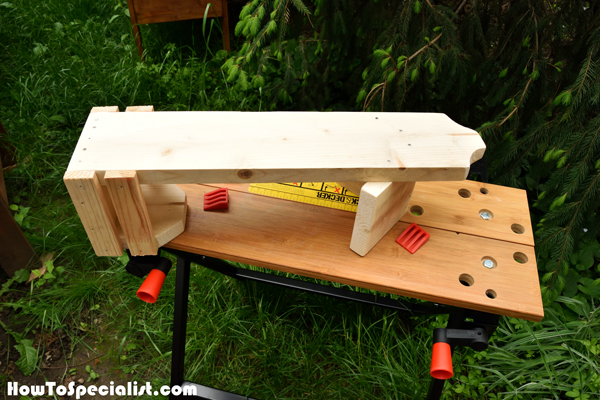
Next, I had to install the side wood strips to the cap catcher so I added glue first.

I used 3/4″ brad nails to secure the 1×2 strips of wood (1/4″ thick) to the frame of the bottle opener. Make sure you place a piece of 1/4″ plywood between the strips of wood to create even gaps between the components.
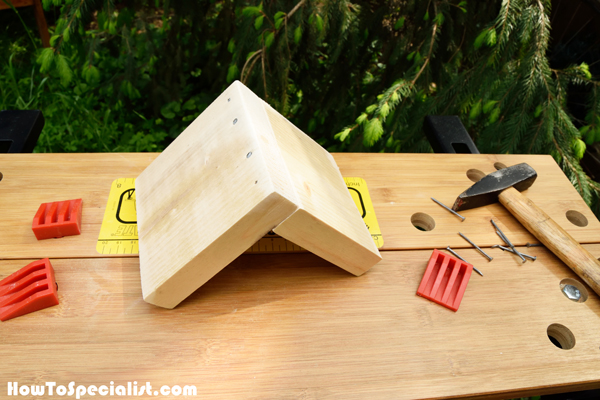
I assembled the roof for the wall mounted bottle opener before attaching it into place. I used glue and 1 1/2″ nails to lock the two slats together, making sure the angle is 90 degree.
Then, I centered the bottle opener to the roof and locked it into place with 1 1/2″ nails. You can easily adjust the location of the roof to suit your needs. Just make sure the top of the roof goes along the middle of the back support.
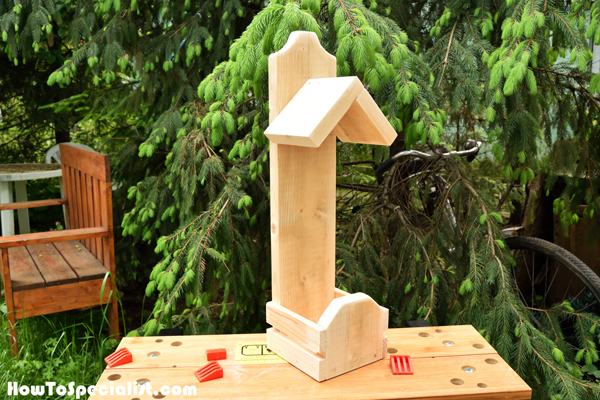
After assembling the bottle opener, I used the detail sander to smooth the edges and to make sure the surface was even and had no dents. I personally, love the rustic look of the project and I can’t wait to finish the wood.
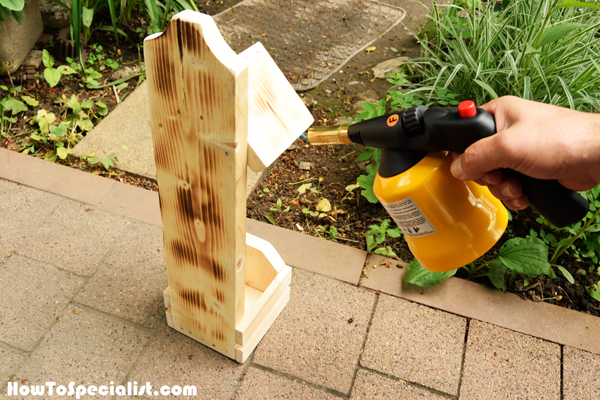
For the finish I decided to try something new and experiment a little with a gas torch I had bought. You can burn the whole surface with torch or you can just touch a few spots where to highlight the wood grain. If you are new to this technique, I recommend you to practice on a scrap piece.
Using the torch will add more character to the bottle opener. As you can notice, burning the wood highlights grain.
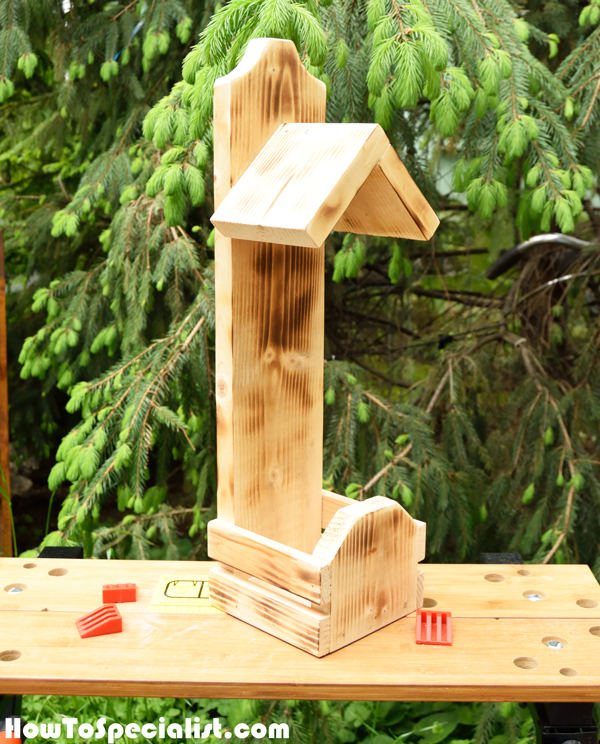
After burning the wood, I applied two coats of stain (the color is teak). In addition, I sealed the finish with clear lacquer. I used two screws to secure the bottle opener to the back support. You can adjust the position of the opener to suit your needs.
If you are looking for a cool gift idea, you should consider making this diy bottle opener. You can open beer or soda bottles and it would look equally good indoor or outdoor.
All in all, this project cost me 10 dollars to make, considering I already had the stain, the glue and the nails. It was a great and fun two hour project that challenged me to come with an design unlike anything else out there. I designed this wood beer bottle opener with cap catcher so you can make it from a few pieces of scrap wood. If you like my rustic bottle opener, don’t forget to SHARE it on Facebook and Pinterest.
Thank you for reading our project about how to make a wall mounted wood bottle opener and I recommend you to check out the rest of the projects. Don’t forget to LIKE and SHARE our projects with your friends, by using the social media widgets. SUBSCRIBE to be the first that gets our latest projects.

