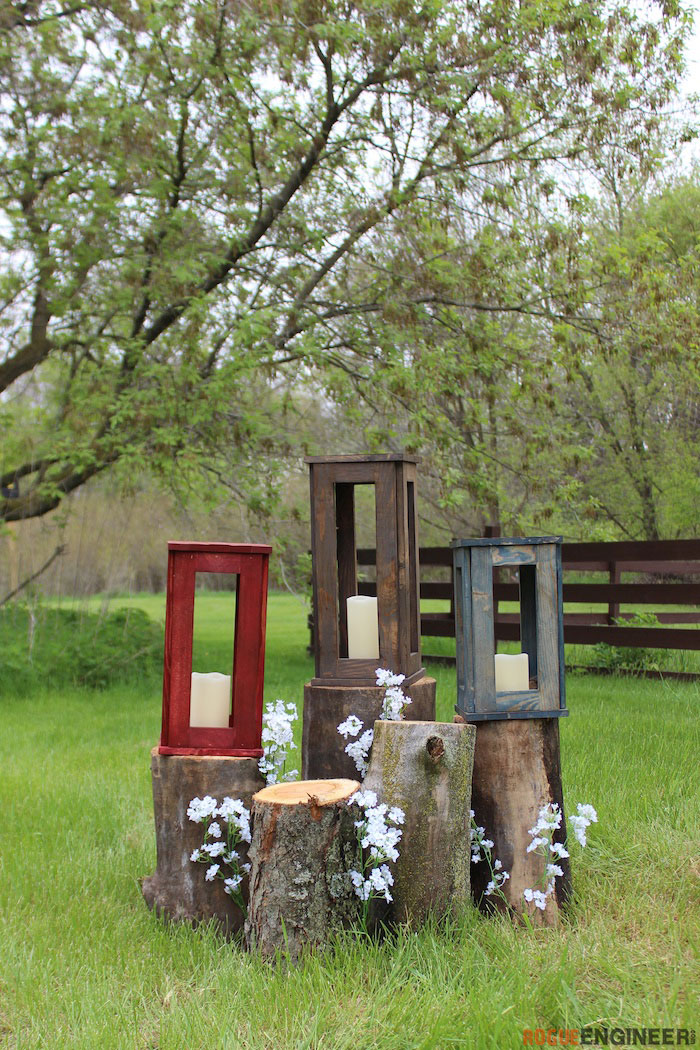
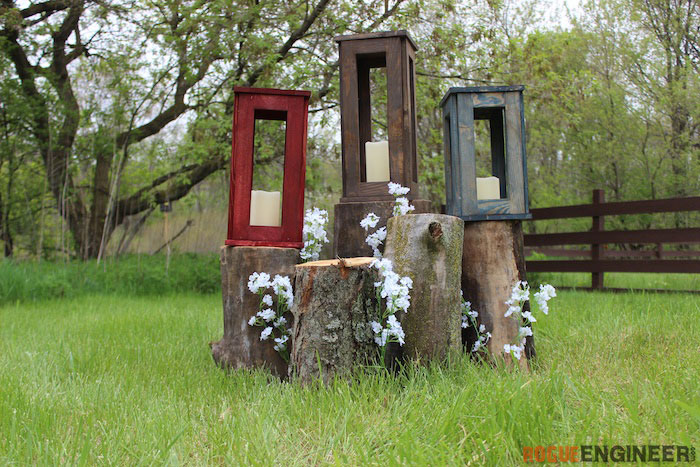

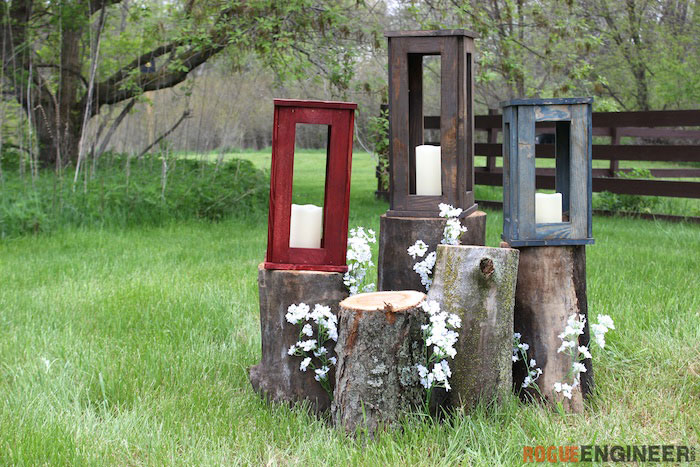
Jamie recently visited the Boxwood Store in downtown Dexter, Mi. It’s a small boutique store with great rustic farmhouse charm. She feel in love with the store and the store owner, Mandy. While she was there she was inspired to make these awesome outdoor lanterns. We call them the Boxwood lantern! Best part is you can make 1 lantern out of 1 2×4 for the price of $3!
For sneak peeks of our upcoming projects be sure to follow me on Facebook and Instagram. Also, follow me on Pinterest to get tons of projects plans from all around the web!
Required Tools
Materials
Disclosure: The links provided in the “materials” and “required tools” sections are affiliate links. If you would like to support our site and help keep our content free come find out more about how we can make money with no extra cost to you.
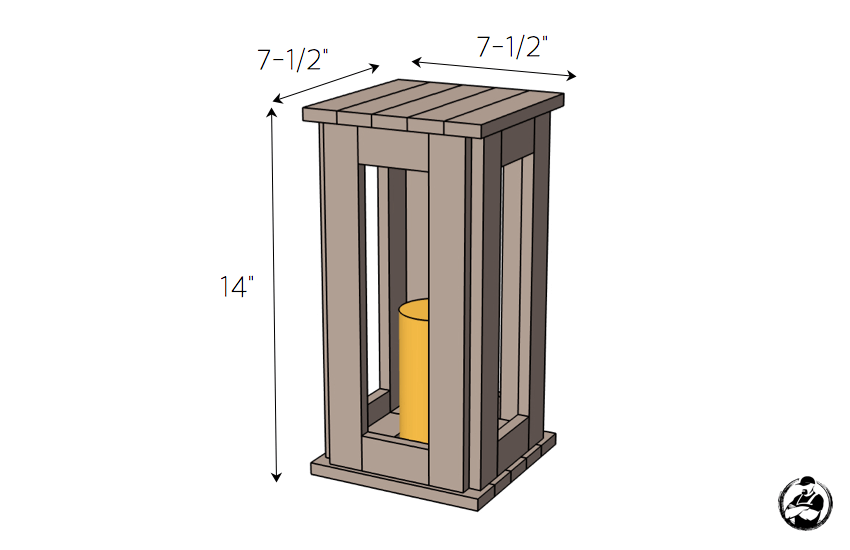
Dimensions
How to build a Wooden Lantern
If you decide to take on this project I highly recommend you download the printable PDF below to have with you during the build. To do so just click the button below and subscribe to get weekly updates. In return I’ll instantly email you the PDF for free! It’s a win-win.
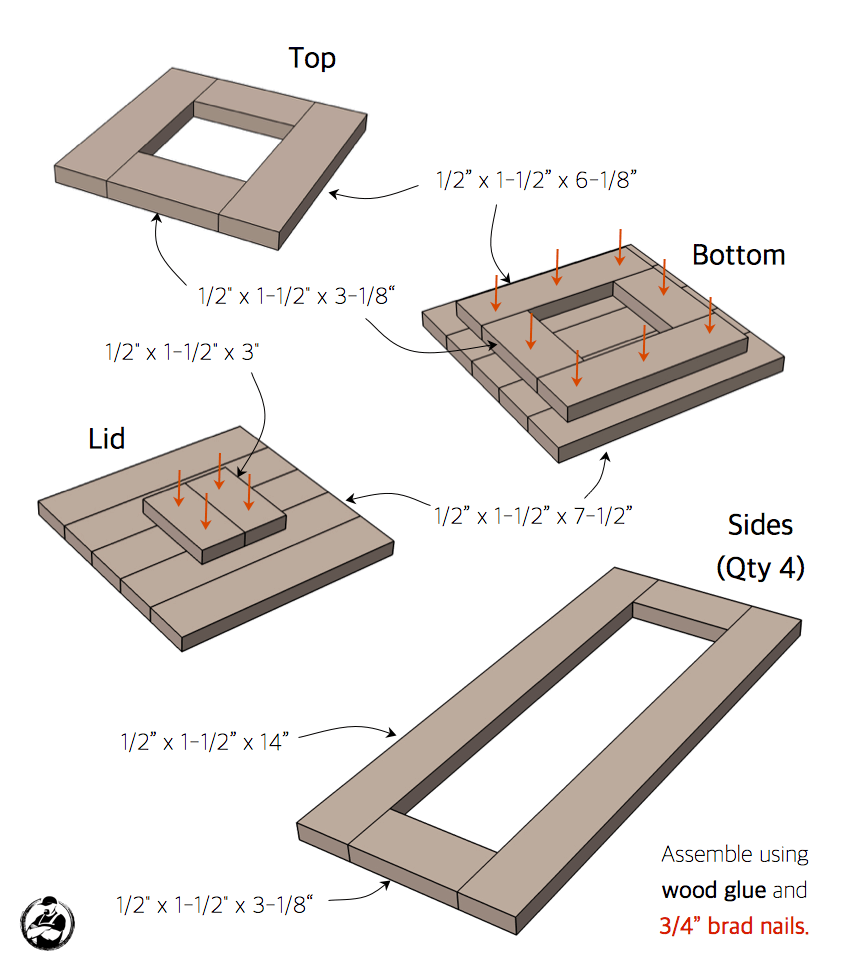
Step 1: Cut 1/2″ thick boards from 2×4
Using a table saw, rip four 1/2″ thick boards from a 2×4.

Then using your table saw or miter saw cut the boards down to the following lengths.
- 2 @ 3″
- 12 @ 3-1/8″
- 4 @ 6-1/8″
- 10 @ 7-1/2″
- 8 @ 16″ (Total height minus 1″)
Note: 17” is the height of my tallest lantern (16” sides plus 1/2” thick top and bottom. The sides for the others were 12″ and 14”. Select a height you want and cut your side boards accordingly.

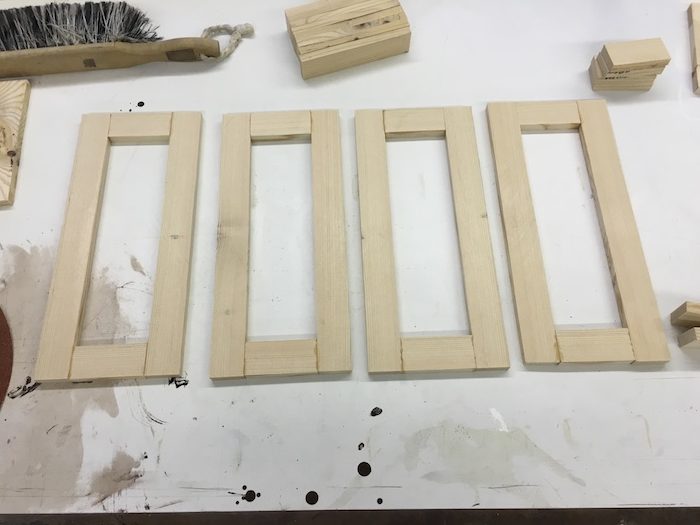
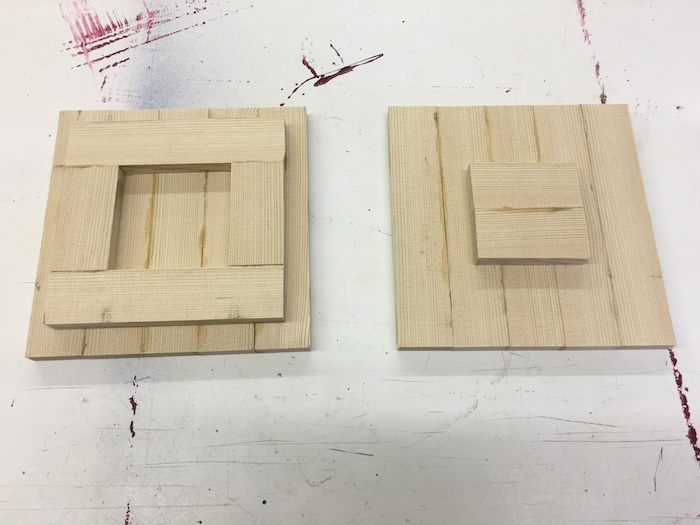
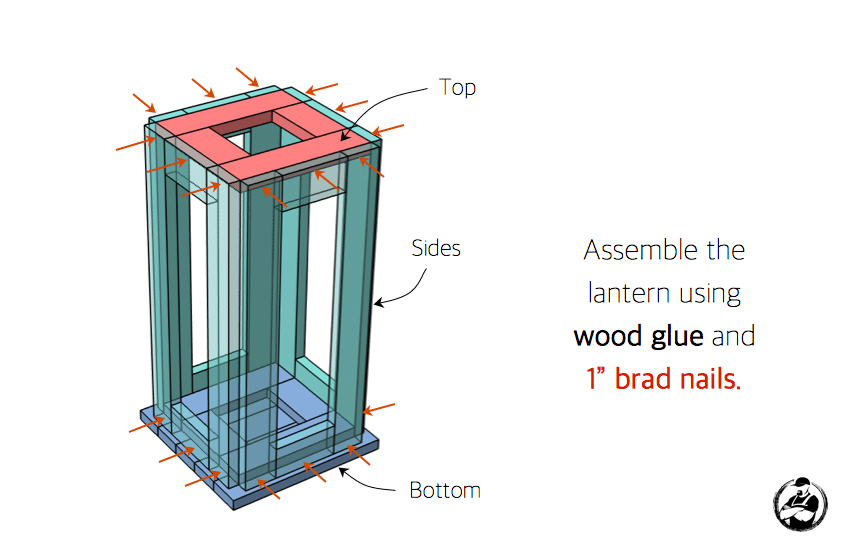
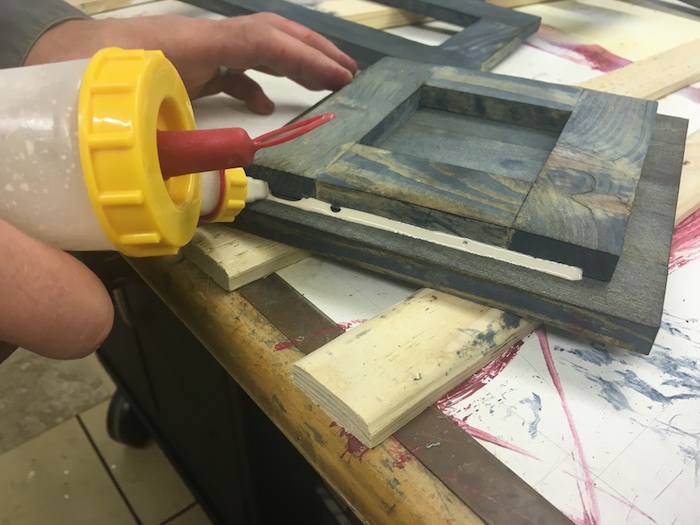
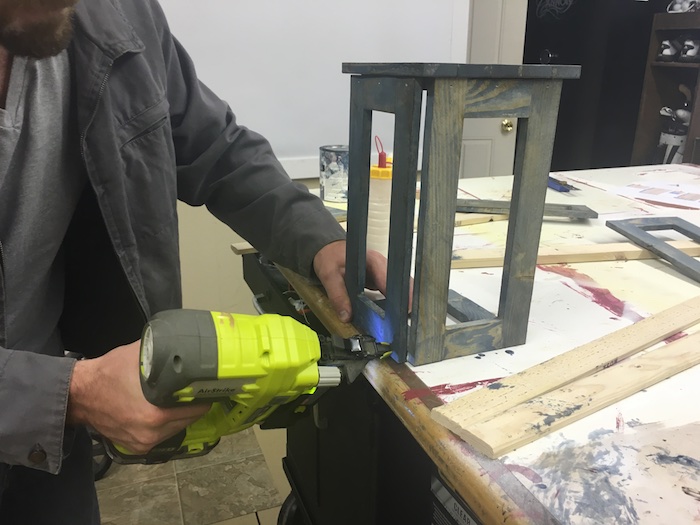
Step 2: Glue and nail together Top, Bottom, Sides and Lid
Step 3: Finish and Assemble Lantern
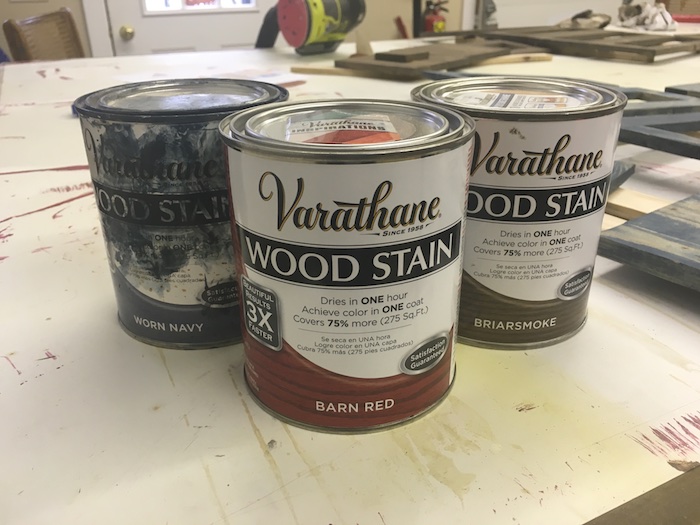
Since we made three lanterns we decided to stain them in different colors. Below are the stain colors we chose. After the stain dries, spray the lantern with a satin polyurethane.
Questions? Comments?
As always, if you have any questions don’t hesitate to comment below and especially don’t forget to post pictures of your finished products in the comments! ENJOY!