Learn how to build this DIY Farmhouse Bathroom Vanity with free plans by Shanty2Chic! This is an easy build that only requires a few tools!
This room has been in the works longer than I care to admit, but I finally got around to finishing it and I LOVE THE RESULTS! Check out my oldest son’s new bathroom and his new farmhouse bathroom vanity!
As always, I will share the entire build with you here, and you can download and print our free plans by clicking HERE!
Now to build the vanity! This really isn’t a difficult build…. If you can get the angle cuts down, the rest is very basic.
DIY Farmhouse Bathroom Vanity
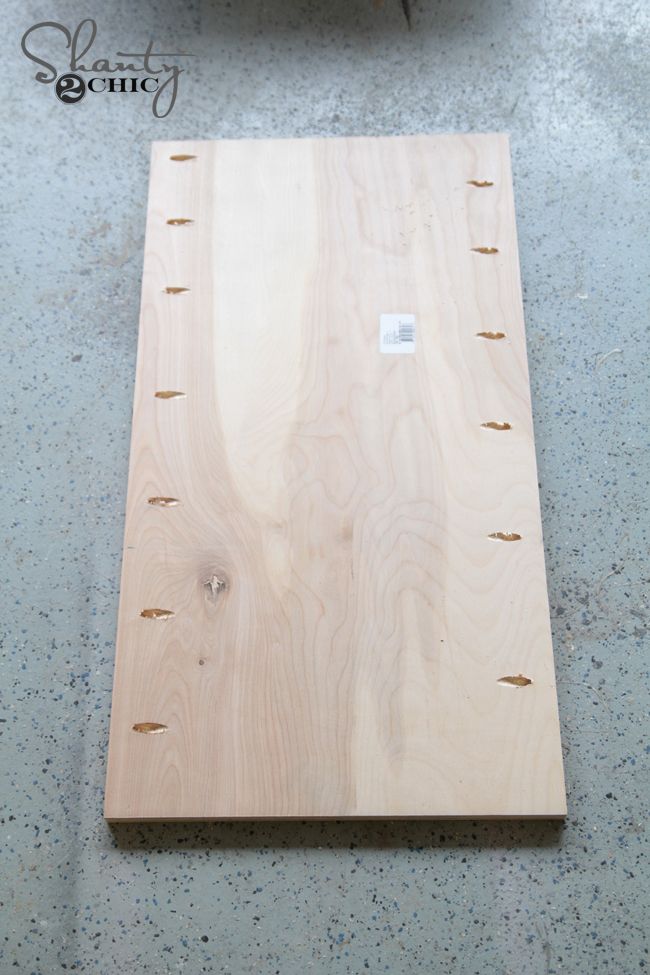
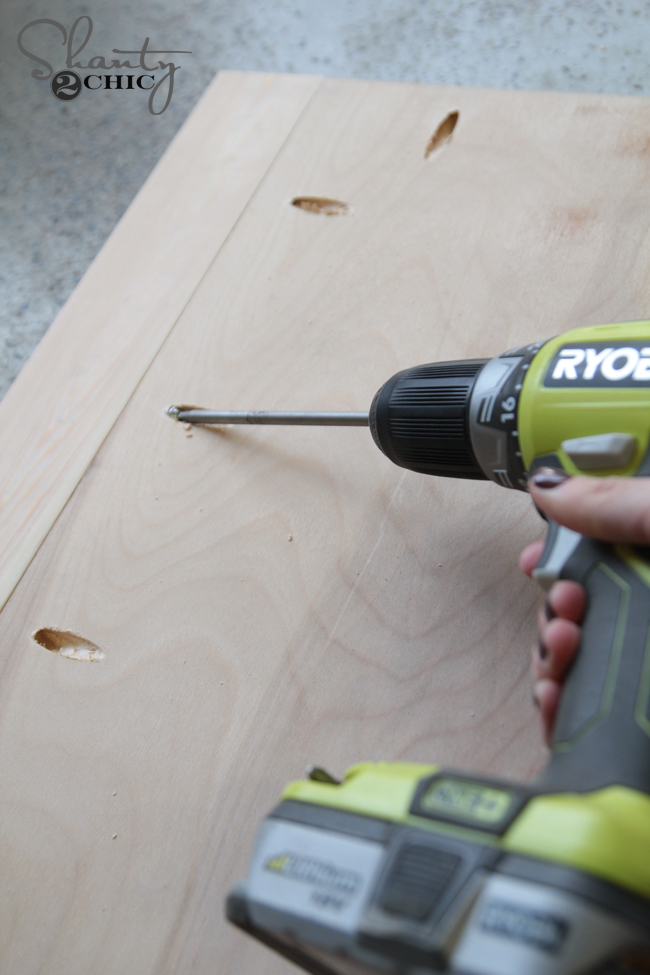
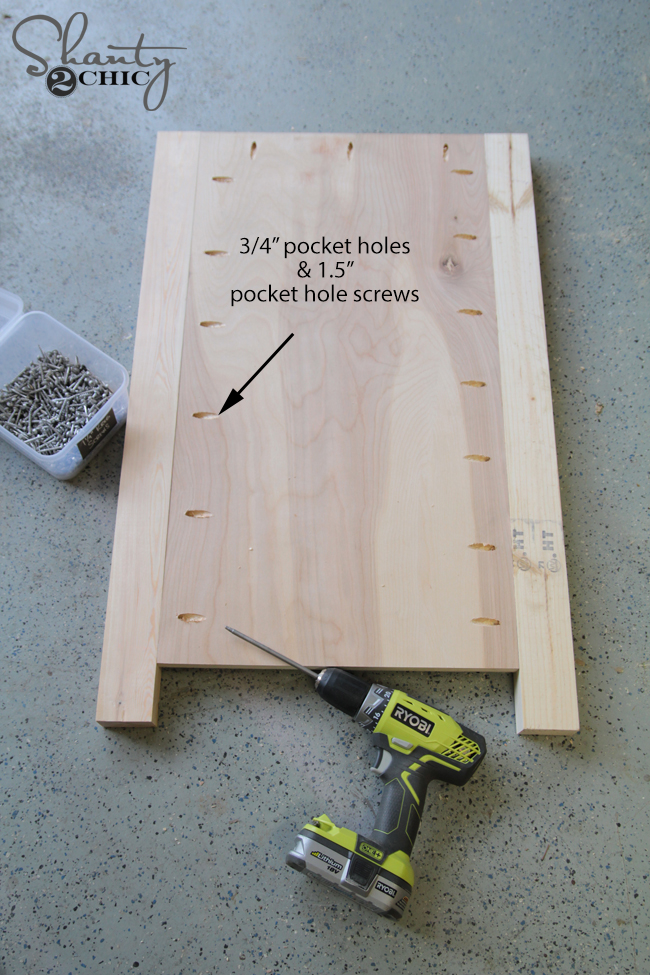
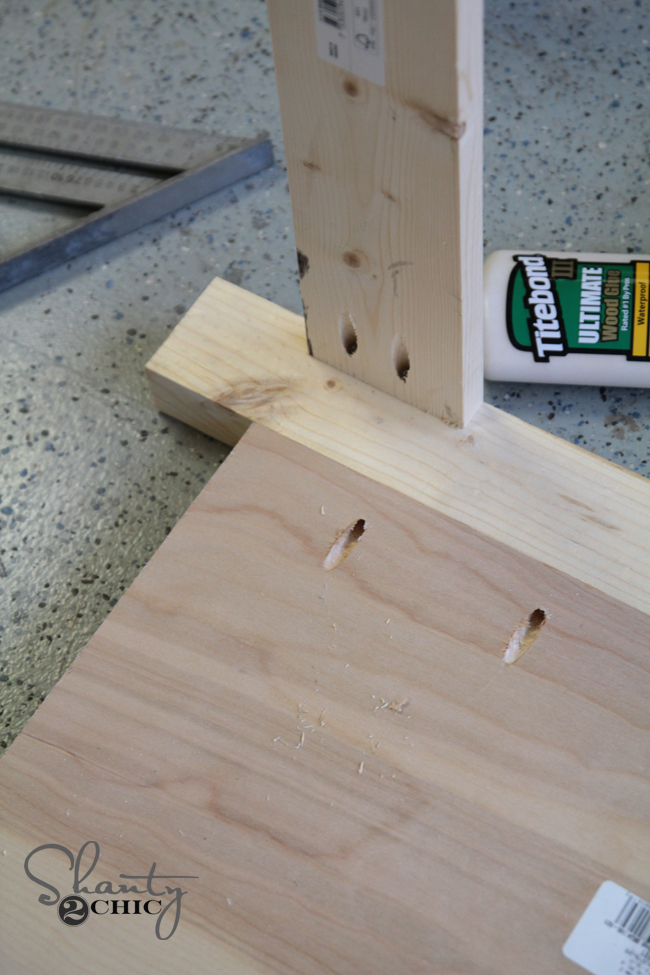
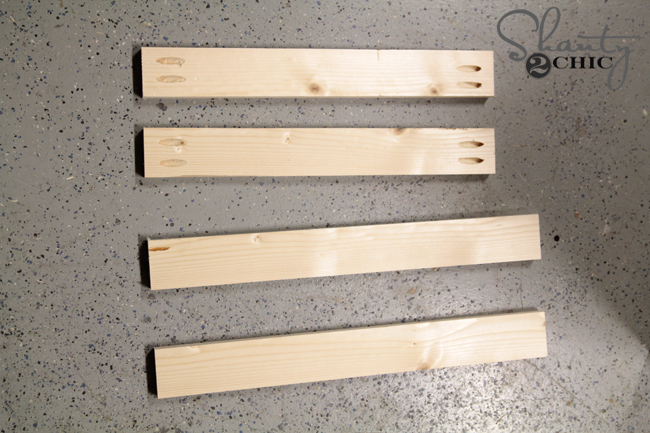
I started by building two sides. These are constructed out of 3/4″ Purebond Plywood. This type of plywood is sold in big 4’x8′ sheets, and we have the guys at Home Depot rip it down into smaller boards to fit in the car. Then, we cut those boards to exact size using our miter saws or table saws. I cut mine to size and then added 3/4″ pocket holes down the sides and top. The top pocket holes will be used attach the wood countertop. If you are doing just a drop in sink top/countertop with no wood below it, you can skip those pocket holes.
Next, I cut and attached the legs. These are made of 2×3 boards. Rather than just purchasing 2×3, we like to purchase 2×4 and cut the rounded edges off to make it a very square 2×3. You do this by running each end through a table saw. I love the look!
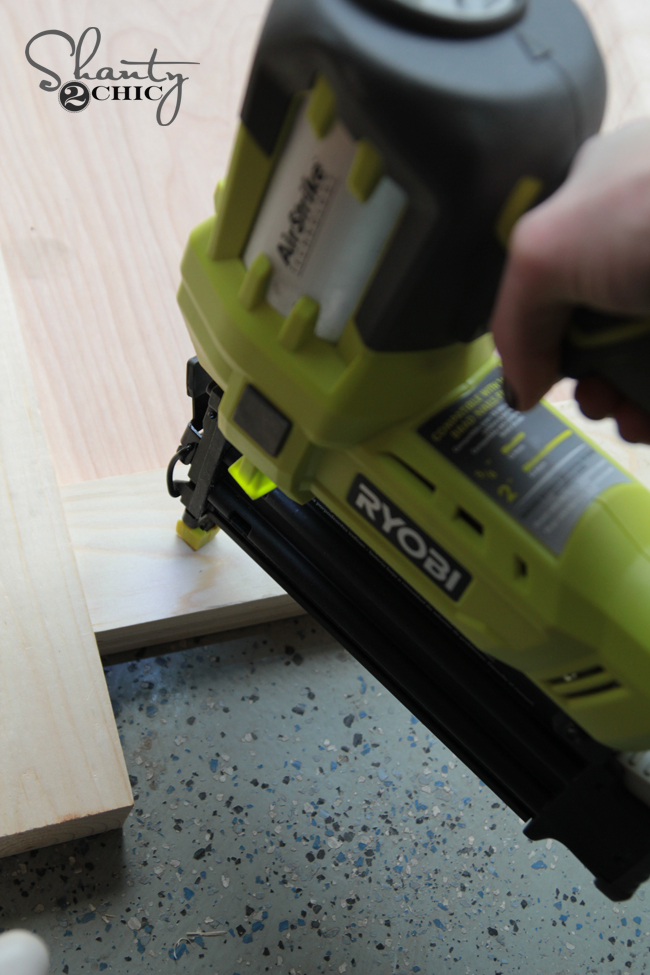
After attaching both legs, I added the X trim pieces. I used 1/2″ craft boards for this part. They can usually be found by the 1x pine boards at the hardware store. I used pine for this part as well. I found the easiest way to get these angles was by laying the board down on the side of the vanity and drawing where my cuts should go.
I attached each board using my Ryobi 18v brad nailer with 3/4″ nails and wood glue beneath each board.
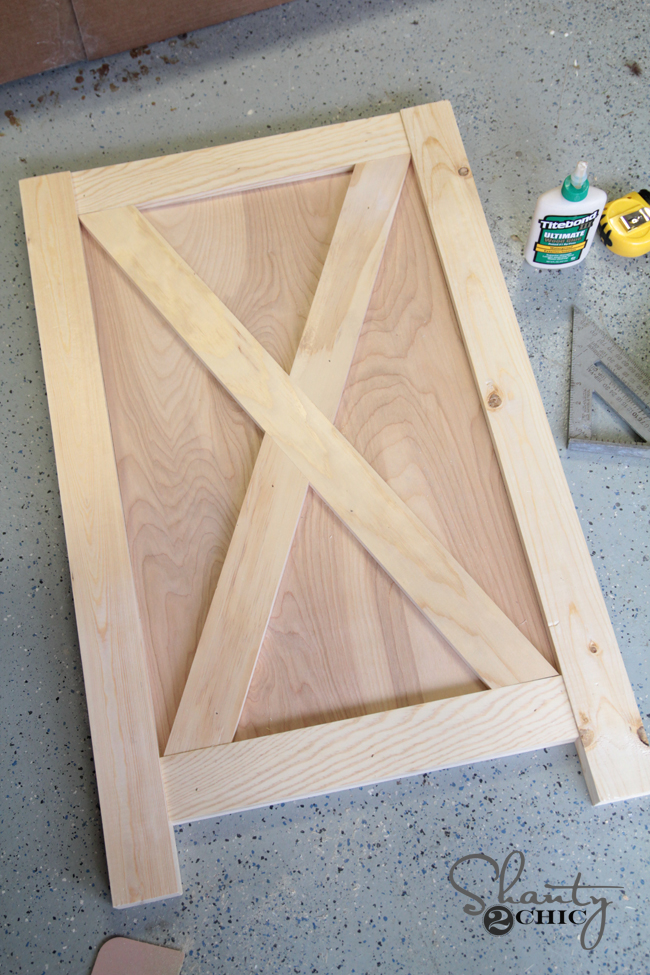
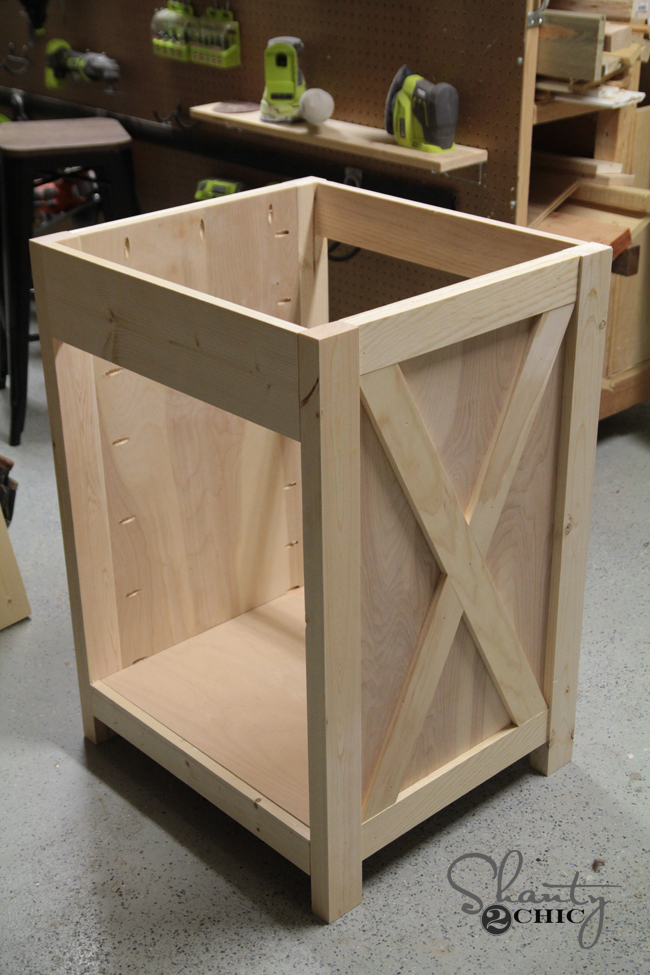
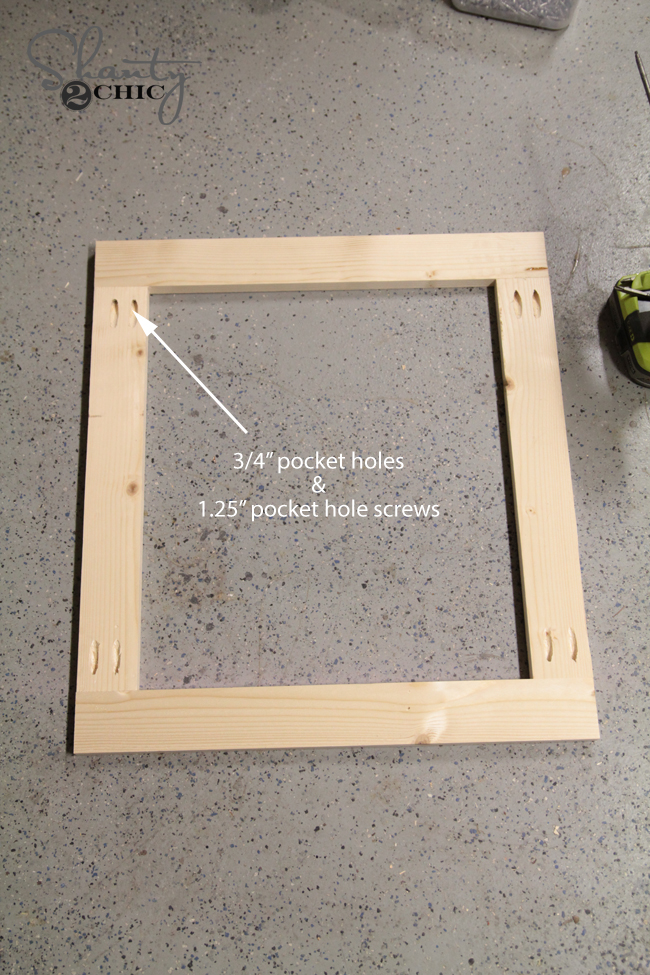
After building both sides, I attached them with the front and back frame pieces. These will also be attached using 3/4″ pocket holes and 1.25″ pocket hole screws.
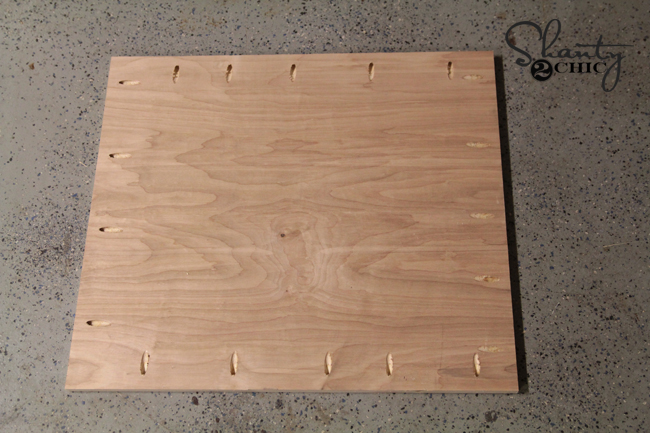
The base of the vanity is also Purebond. I added 3/4″ pocket holes around the base of the whole thing before attaching to the inside of the cabinet.
Here she is ready for her door!
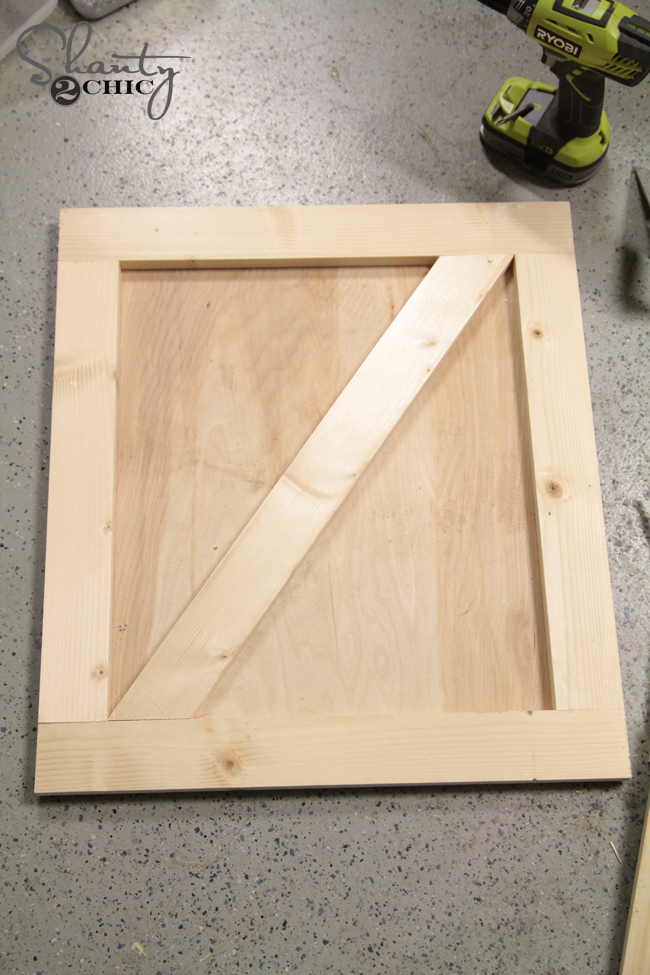
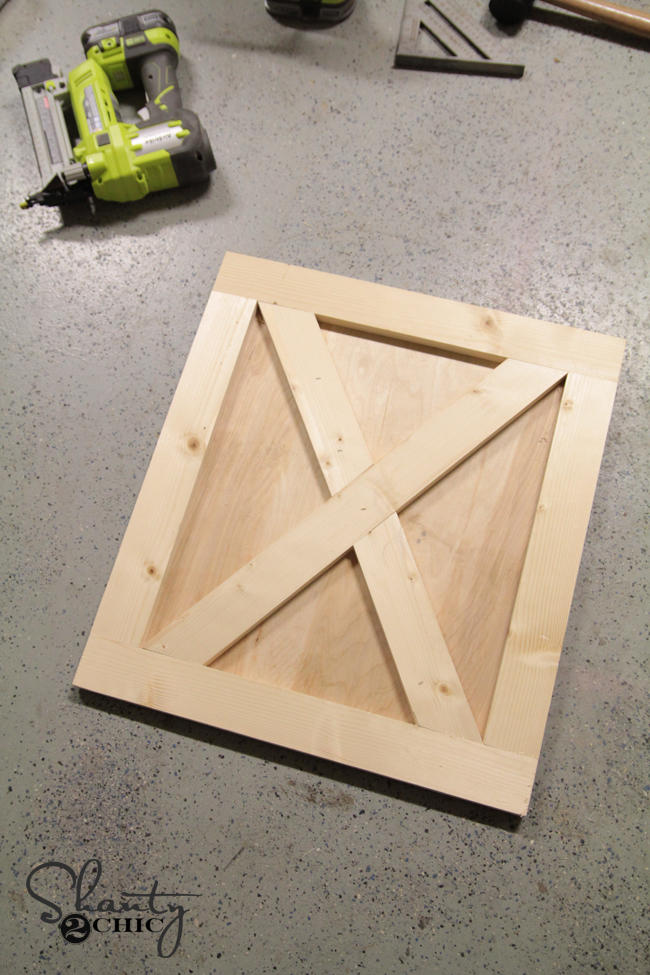
I cut the door pieces to size on this part, and then added 3/4″ pocket holes to both ends of each shorter board.
Then, I made a frame with those 4 boards using 1.25″ pocket hole screws.
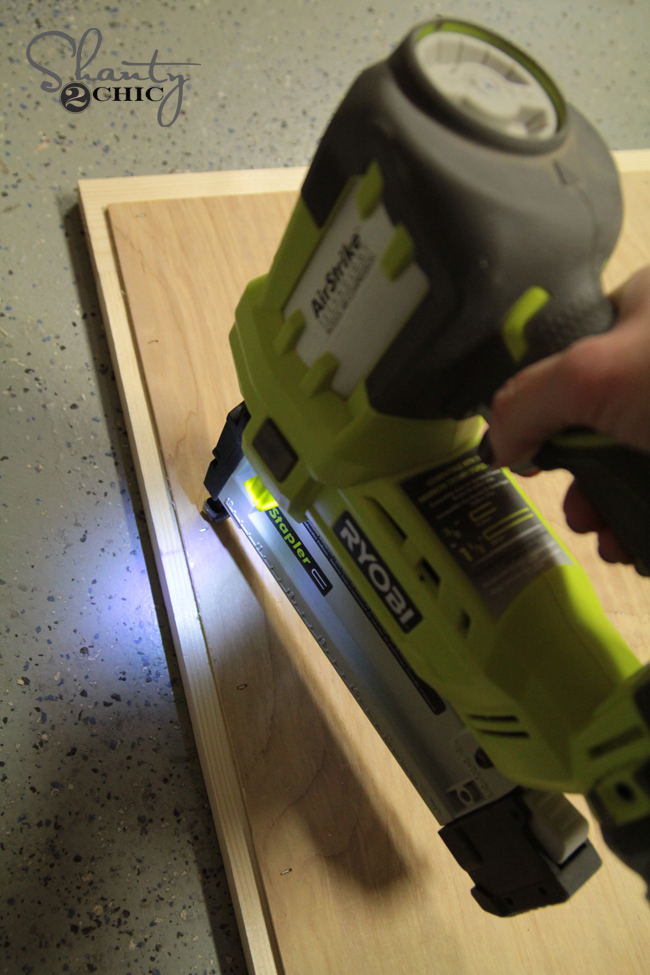
The backing is 1/4″ Purebond plywood. I attached this using wood glue and 3/4″ staples with my Ryobi 18g stapler.
Next, I added the X detail using the same method I did on the sides by marking where my cuts would be.
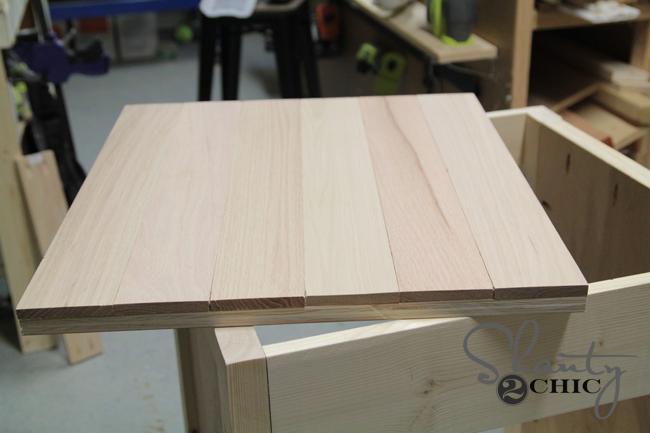
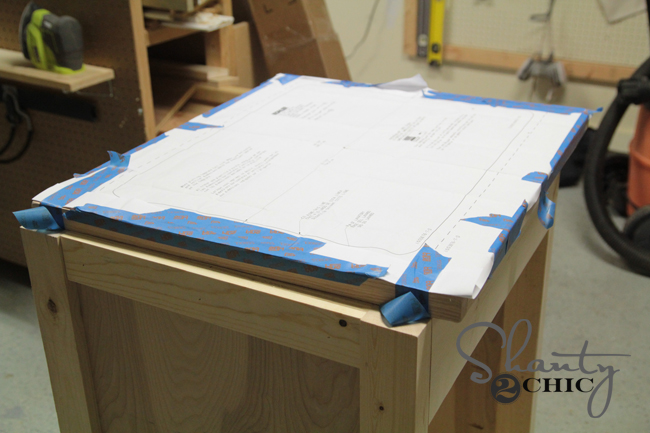
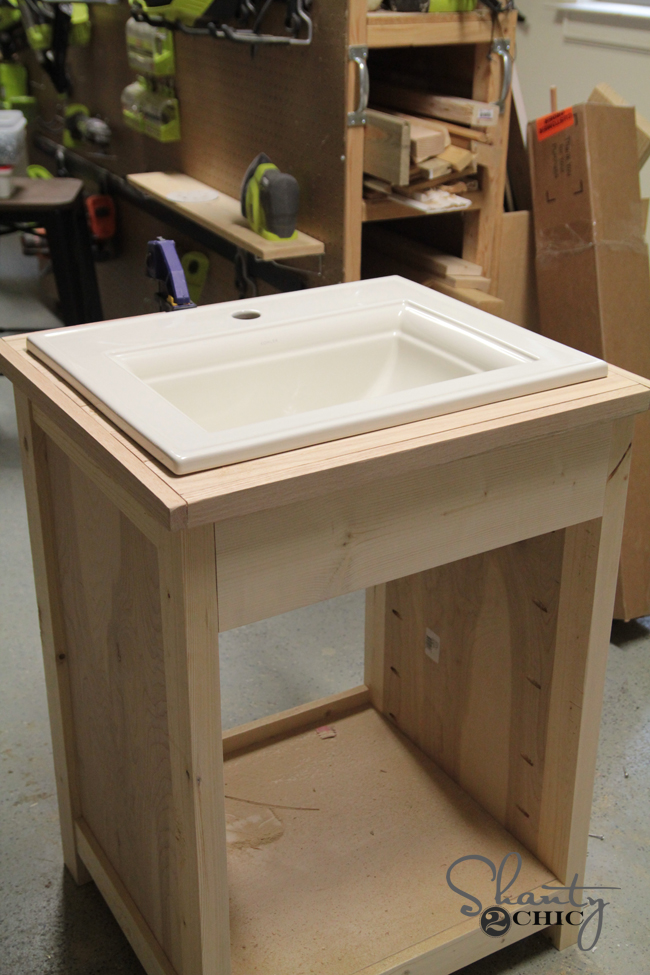
Now for the top! Again, yours may just be a drop in top similar to what I used on my last vanity. If so, you won’t need the wood top I am about to show you. I built mine by starting with a piece of 3/4″ Purebond plywood cut the size of the countertop I wanted minus 1.25″ all around.
Then, I planked the top with 1/2″x 4″ oak boards. I used wood glue and nails to hold these in place.
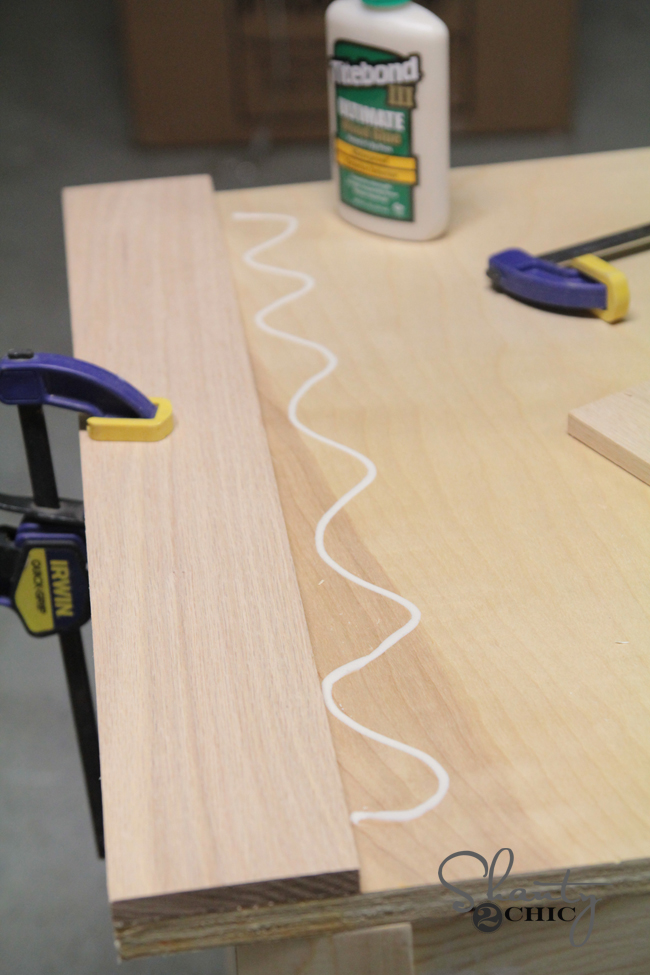
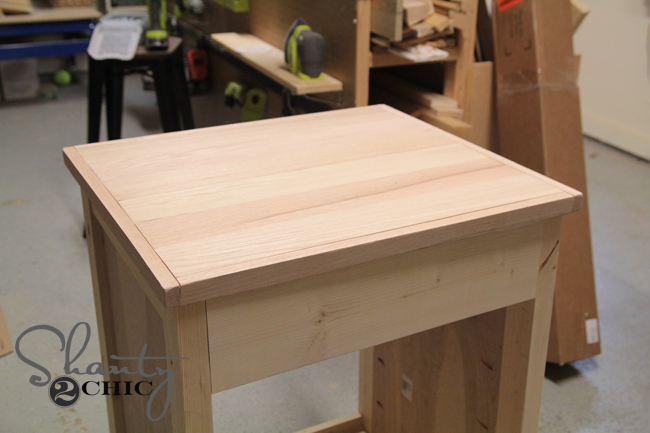
I trimmed the outside of the countertop with 1×2 oak boards.
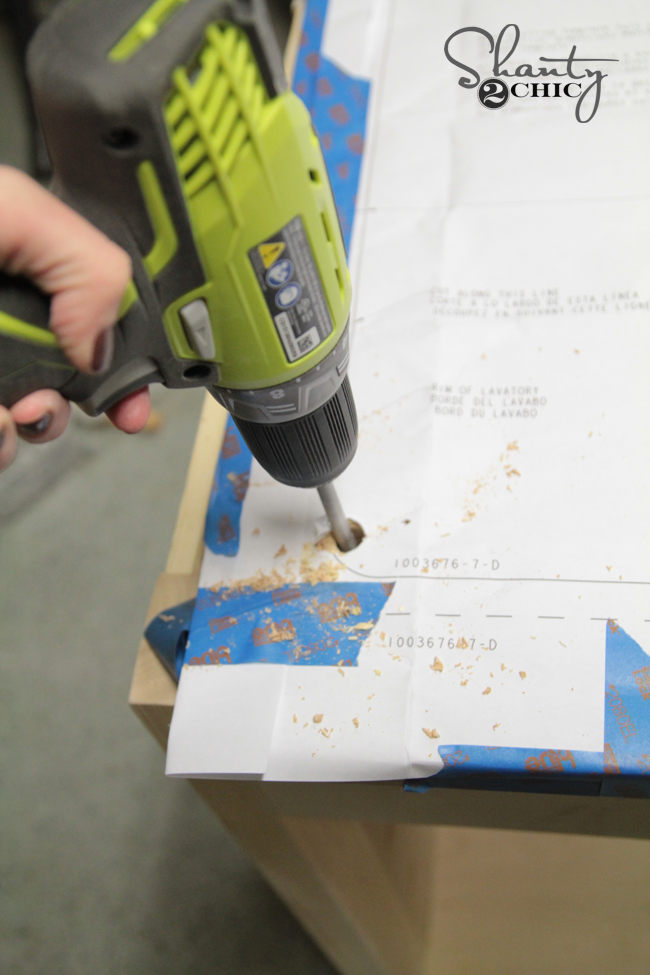
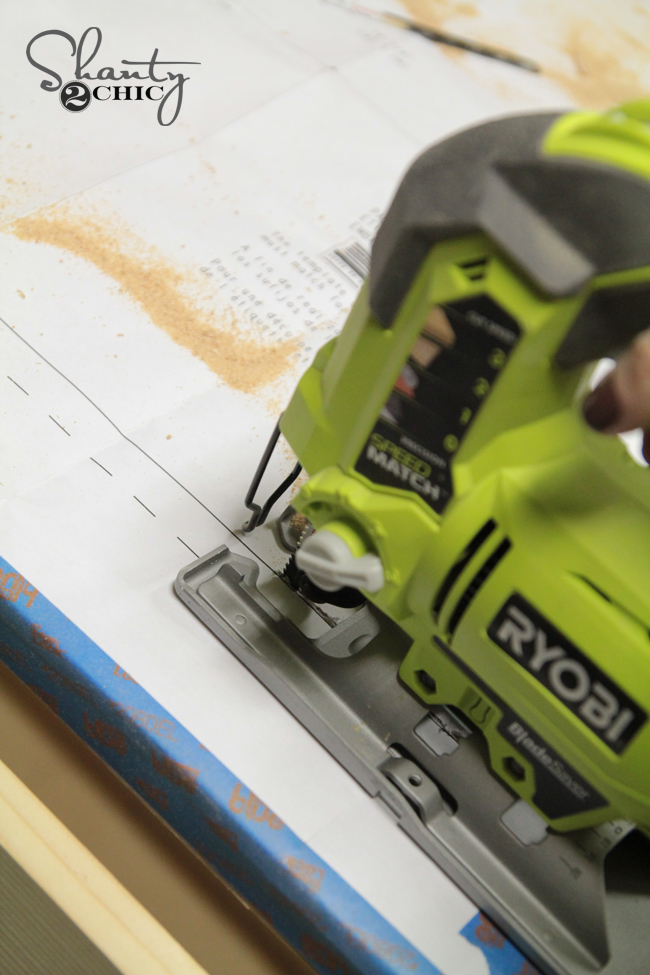
Next, I laid my sink template on top and used my Ryobi jigsaw to cut along the line for the sink.
To do this, I started by making a pilot hole with my drill. This will allow me to drop my jigsaw blade into it to start my cut.
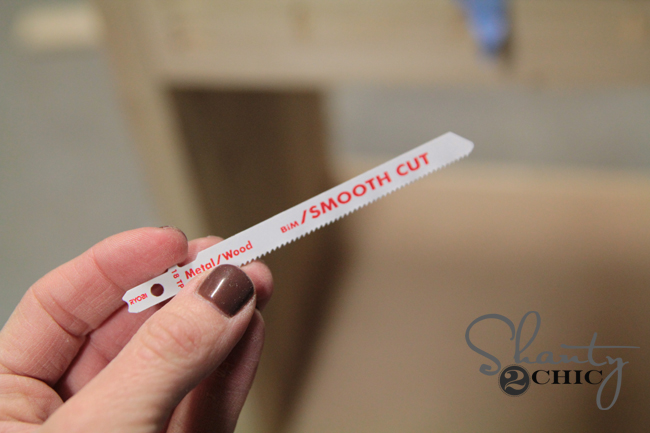
This is the blade I used…
Then, I just cut around the line.
Then, I made sure it fit!
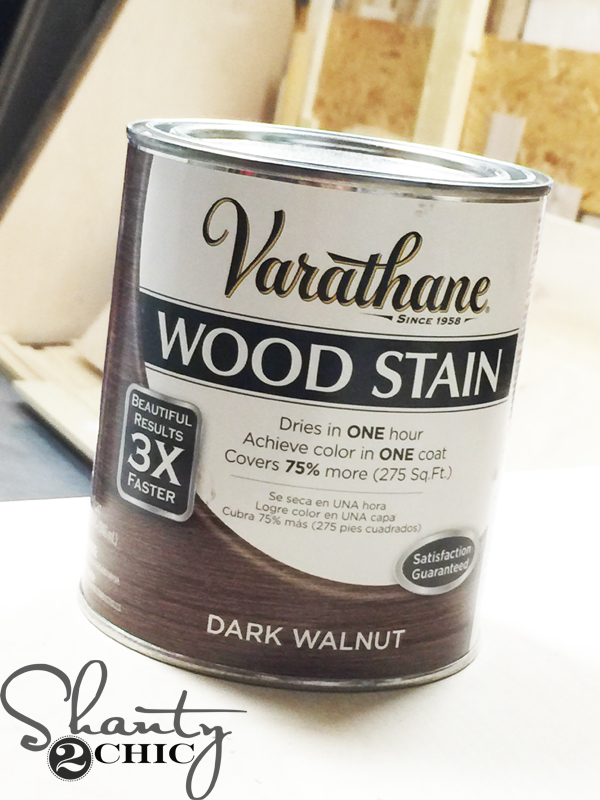
I stained the countertop with Varathane Dark Walnut stain.
After it dried, I added two coats of Varathane Triple Thick Poly.
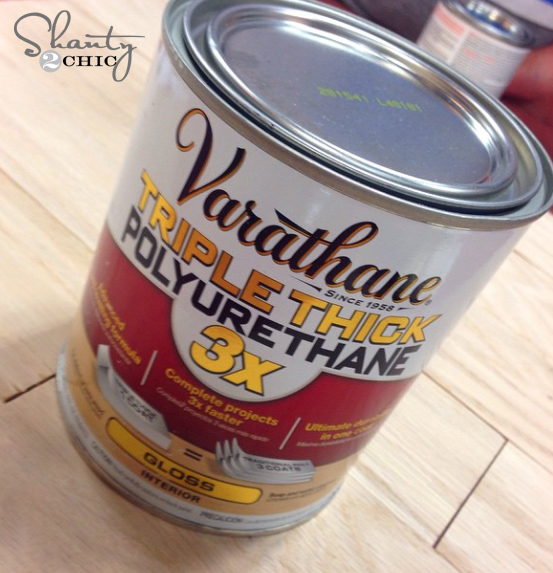
This says GLOSS BUT I used Satin!
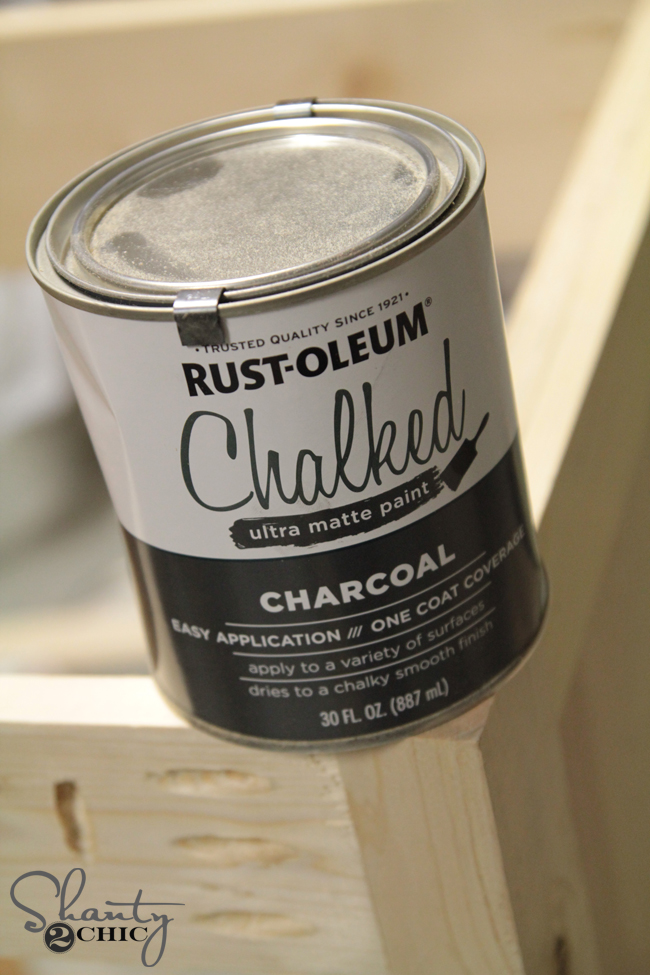
I painted the entire cabinet with Varathane Chalked paint in Charcoal and then lightly sanded my edges to distress it a bit. I also added one coat of Triple Thick to the cabinet base.
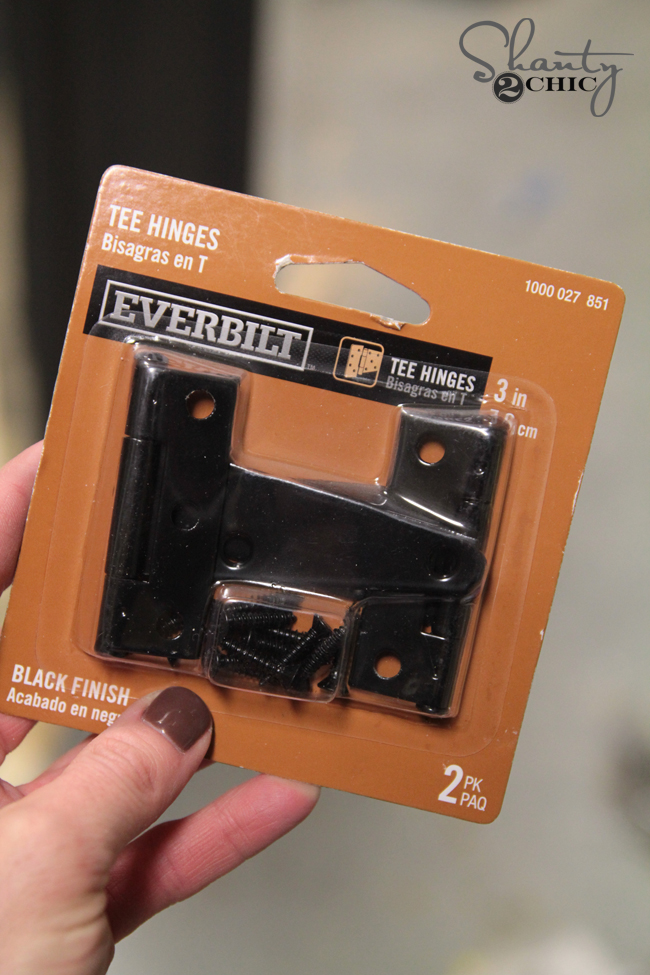
These are the hinges I used to attach the door. They are from Home Depot.
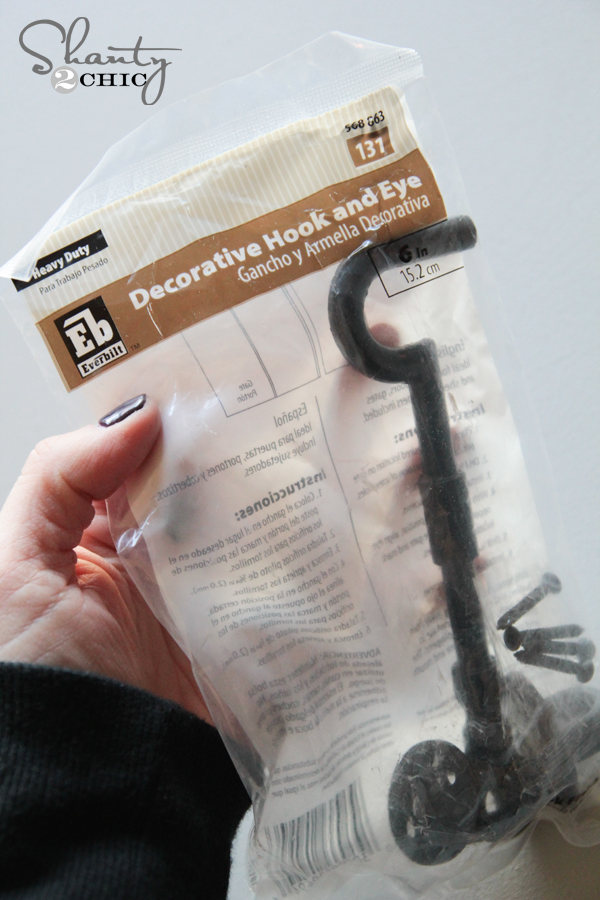
And this is what I used for the door latch, also from Depot!
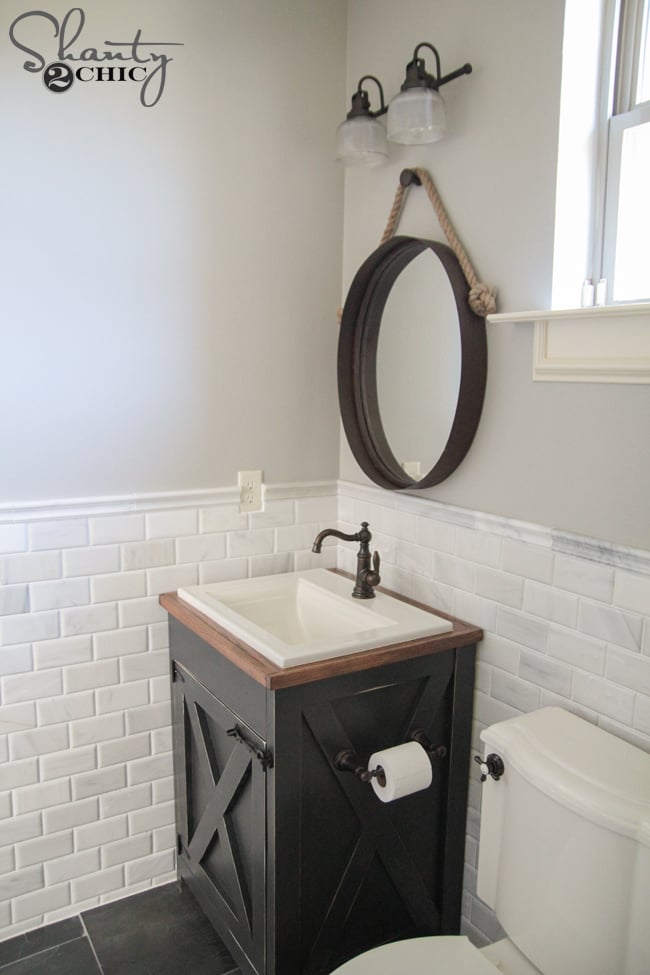
Here it is all finished up!
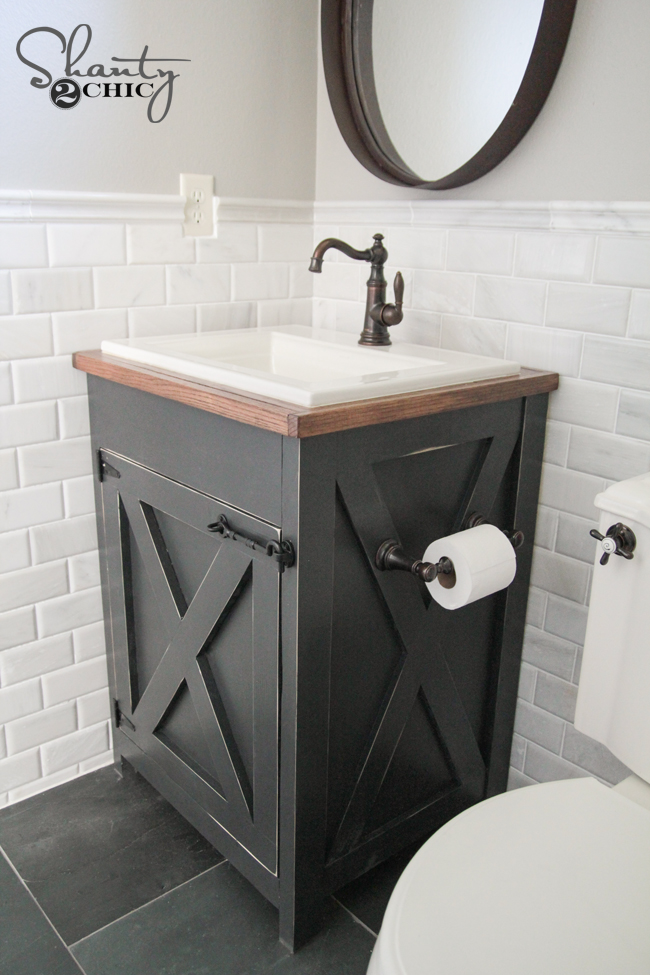
How pretty is the faucet guys? I worked with Moen on the finish out of this space. The faucet is a Weymouth Oil Rubbed Bronze one-handle bathroom faucet.
I’ve also had a ton of questions about the tank lever. It is also a Moen Weymouth tank lever in oil rubbed bronze.
And the Weymouth paper holder has become a game changer in my house. This design is amazing! It makes changing the toilet paper roll so much easier… It’s the little things 😉
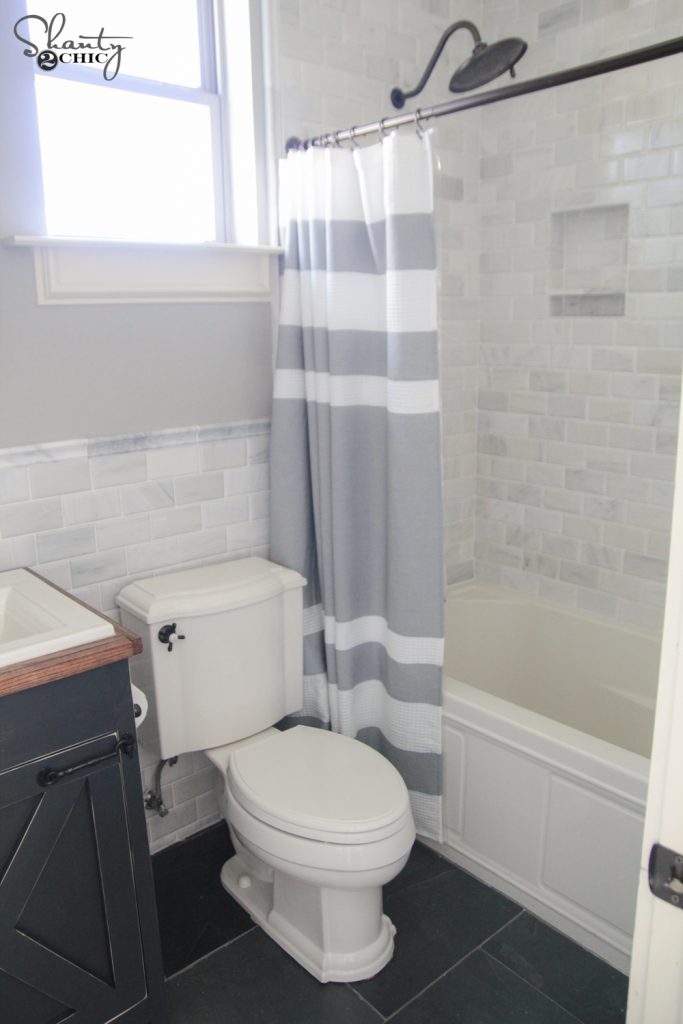
I worked with one of our favorite brands for this part. I found all of the tile for the bathroom at The Tile Shop! Below I will link to each tile so you can find it on their site.
Adoni Black Slate Floor TileParagraph
And now for the rest of the goodies! This vanity is designed to fit a drop-in sink. I found mine on Wayfair. I wanted something that covered most of the countertop to keep my son from getting too much water on the wood. HERE is the drop-in sink I found.
The amazing mirror and light are also from Wayfair.
The shower faucet is also from the Weymouth collection.
LOVE the light and it’s price tag!
Progress Lighting Archie Light
I also found his shower curtain and curtain rod on Wayfair!
Whew. That was a mouthful. 🙂 Hope you like it as much as we do!
Let me know if you have any questions at all!


What paint did you use on the bathroom wall?
Very nice piece. Savings in the construction, definitely. I couldn’t believe how much the faucet was however. Cheapest I saw is $470. Ouch. The tank lever and paper holder tie it all together nicely. Those go for another $85 and $115. Anyone have a recommendation of decent dupes? This look would go great in a rental I’m updating.
How do you cut the plywood without splintering the edges?
track saw
Do you have a cutlist?
LOVE IT! You had your “FAVE brand of sunglasses” for 6.99 on your instagram stories…but I can’t swipe up for some reason 🙁 what brand are they?
What color is the sink?
This is perfect – just what I was looking for. Thank you for sharing! What are the measurements of the piece once it’s all put together? My space is tricky. TY!
This is great! I would want to make a double vanity similar to this!
Sorry if I missed it…..Where did you purchase the light and mirror?!?!? LOVE THIS!!!! In the middle of my bathroom redo and this is exactly what I’m looking for. Do you have an approximate cost for this project?
Thanks,
Jessie
Hi, what paint color did you use for the walls and trim?? Thanks so much!!
I love this vanity! How easy do you think it would be to double the size? I need countertop space badly in my bathroom!
The entire room is perfect. I love the choice of colors and the vanity build is truly unique. Your son is one lucky dude! Debbie’s request for a tutorial on doors resonates with me, although I’m not terrified of them. I would be interested to see if you have ideas that would simplify the process of attaching the door in the cabinet. Thanks for the plans and the pictures!
Your bathroom looks great, can you tell me how and what did you use to hang your mirror.
Looks awesome! Do you ever have problems with the legs of your furniture being slightly off, like one being just a little too short, creating a wobble? Any tips on how to fix this or prevent this? Or is it just about being very accurate with the legs?
If you cut the legs all at the same time you shouldn’t have to worry about them being different lengths.
That entire space is amazing. I really need to get some wood to make one for my little bathroom. Here’s where my intimidation lays. Doors and hinges. Seriously…what could be so scary about either of those????? Getting the door to fit the space with out binding, and making sure I have the correct measurements. And the hinges….Those innocent little pieces of metal, have hung me up on a few projects. I have sat and stared at them for days, afraid to get started. Its getting them in the right spot the first time so the dang door opens and closes properly. Do you ladies think that someday, you might be able to do a tutorial with tons of pictures, like you already do, on building that door and hinge placement so there is no binding.??? Or even just the hinges.That is seriously more scary then a door. ( i know it should be self explanatory, but this kid needs visual) I honestly went on line to look for a tutorial , and found nothing. Do you put a spacer in between the wood, do you just eye ball it, do you have someone else make the holes so its their fault it doesn’t open and close. There has to be an easier way to get that little task done with out loosing sleep.
This is by far, my favorite place to visit. You gals are awesome!
Debbie.
LOVE! ???? Any idea on an approximate price for the vanity itself?