
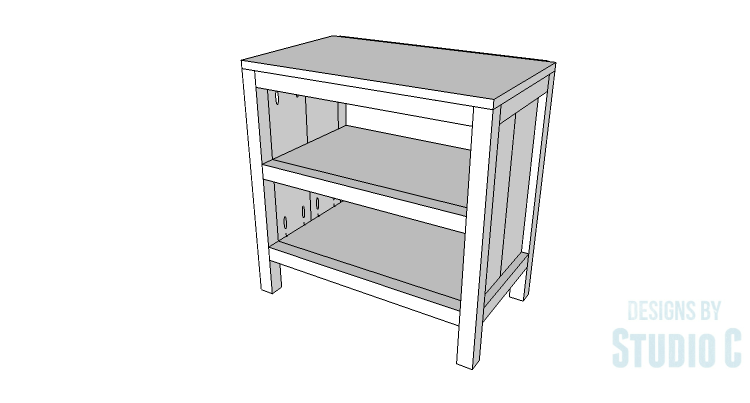
DIY Plans to Build Hannah’s Nightstand
An Easy to Build Table with Storage
When I built a new bed for my daughter, I figured she might need a new nightstand to go along with it! The DIY plans to build Hannah’s Nightstand feature two open shelves with a roomy top. The nightstand is 24″ tall making it the perfect height to store an alarm clock, a book, and a media device!

Materials:
- 1-1/4″ pocket hole screws (<– affiliate link!)
- 2-1/2″ pocket hole screws
- 1-1/4″ brad nails
- Edge banding
- Wood glue
- Sandpaper (100, 150, 220 grits)
- Finishing supplies (primer & paint, or stain, sealer)
Lumber:
- 1 – 1×6 at 6′
- 3 – 2×2 at 6′
- 1 – 2′ x 2′ sheet of 1/4″ plywood
- 3 – 2′ x 2′ sheets of 3/4″ plywood
Cut List:
- 4 – 2×2 at 23-1/4″ – Legs
- 4 – 2×2 at 11″ – Side Framing
- 2 – 1×6 at 16-1/4″ – Side Panels (I used beaded tongue and groove planks in the example)
- 3 – 2×2 at 21″ – Front Stretchers
- 2 – 3/4″ plywood at 12-1/2″ x 21″ – Shelves
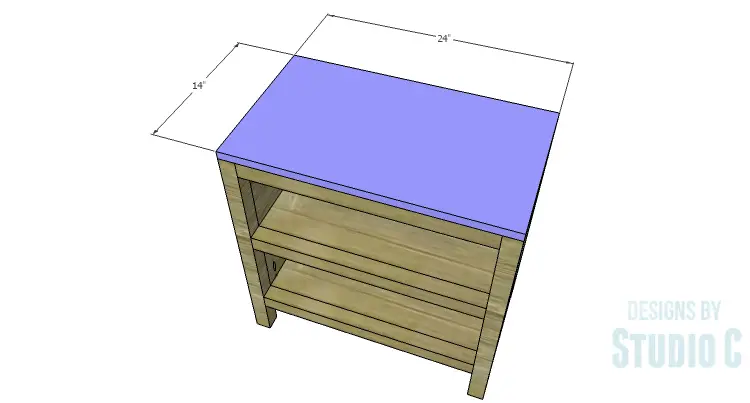
- 1 – 3/4″ plywood at 14″ x 24″ – Top
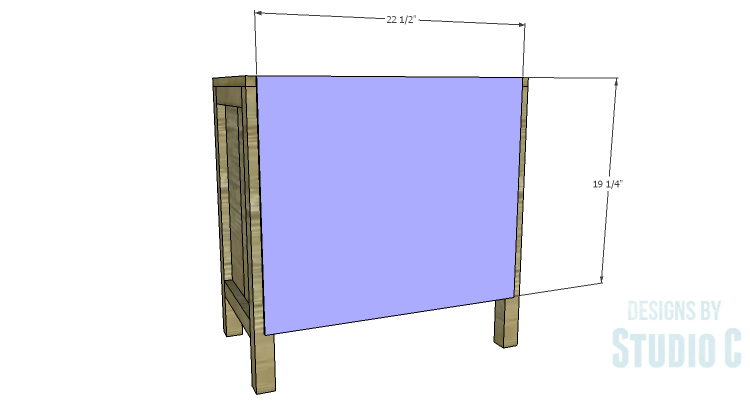
- 1 – 1/4″ plywood at 19-1/4″ x 22-1/2″ – Back

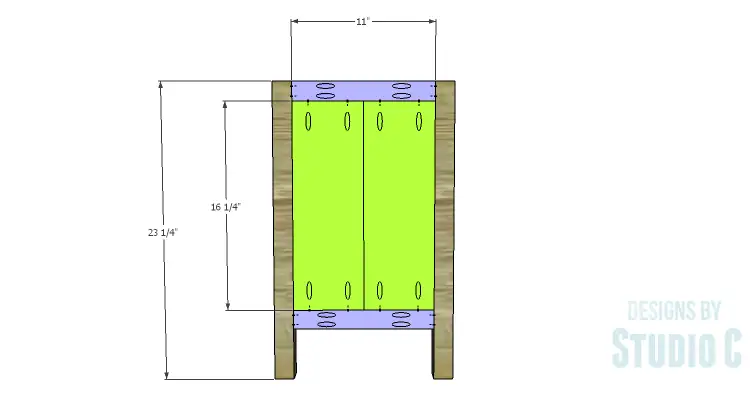
Step One
Cut the pieces for the legs, side framing, and the side panels. With the pocket hole jig set for 1-1/2″ material, drill pocket holes in each end of the framing pieces.
Set the pocket hole jig for 3/4″ material and drill pocket holes in each end of the side panel pieces. Secure the planks to the framing pieces using glue and 1-1/4″ pocket hole screws. The back faces of the planks will be flush with the back faces of the framing pieces.
Secure the panel and framing assembly to the legs using glue and 2-1/2″ pocket hole screws.
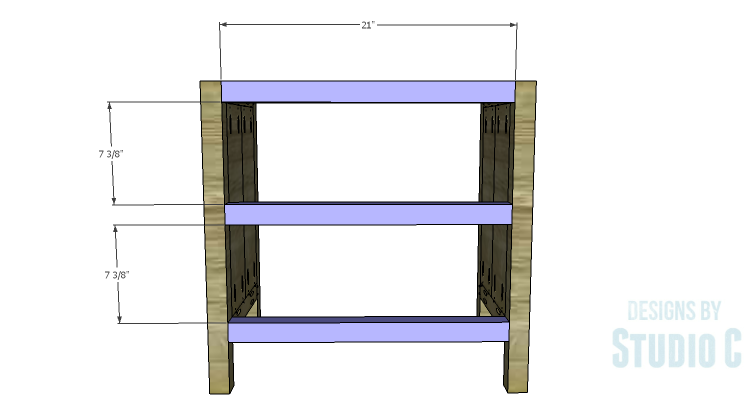
Step Two
Cut the pieces for the front stretchers. Set the pocket hole jig for 1-1/2″ material and drill pocket holes in each end. Secure the stretchers to the front legs as shown in the drawing.
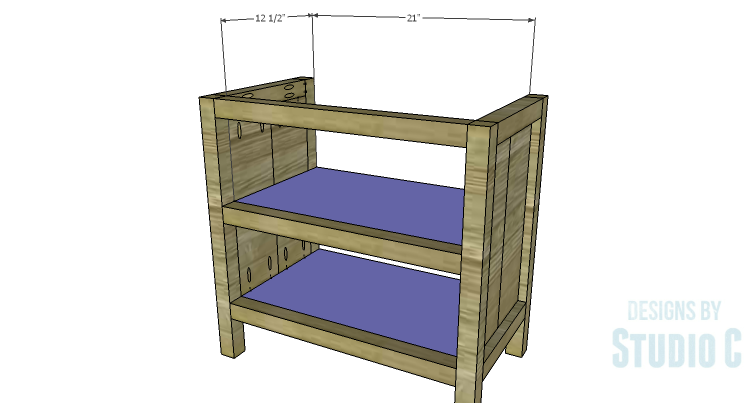
Step Three
Cut the pieces for the shelves. Set the pocket hole jig for 3/4″ material and drill pocket holes in each side edge and one long edge of each piece. Secure the shelves to the front stretchers and side panels using glue and 1-1/4″ pocket hole screws. The top face of the shelves will be flush with the top face of the stretchers.
Step Four
Cut the piece for the top. If using edge banding, it will be applied to the exposed edges of the top piece prior to assembly. Secure the top using glue and 1-1/4″ brad nails. The top is flush with the cabinet on all sides.
Step Five
Cut the piece for the back. Secure the back using glue and 1-1/4″ brad nails.
Finish as desired.
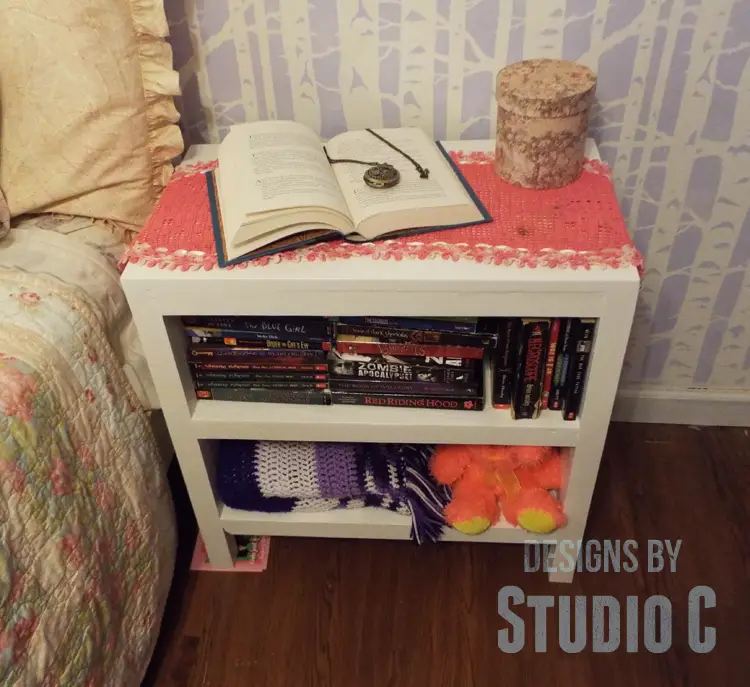
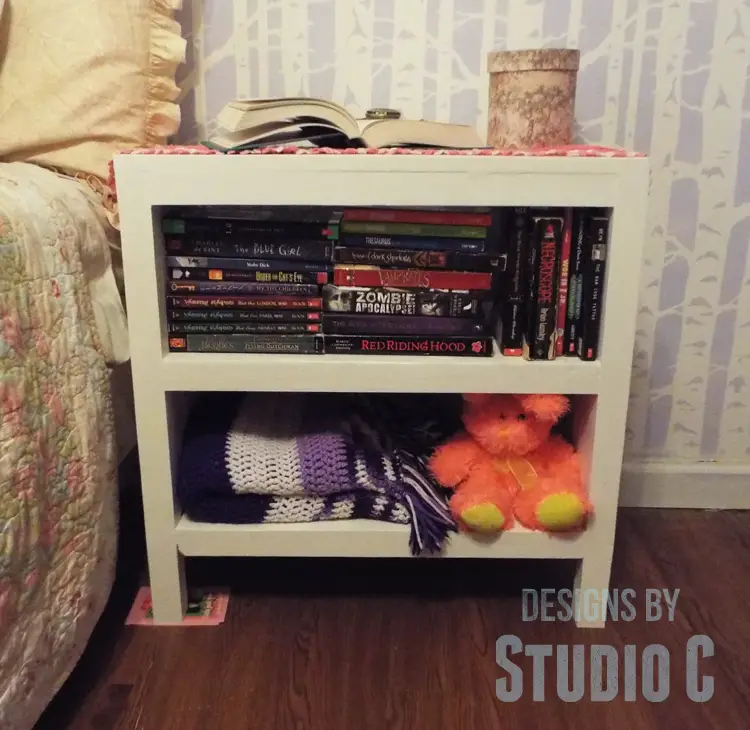
This table can be used as an end table in a living room or any room where a small table with storage would be useful! Have any questions about the DIY plans to build Hannah’s Nightstand? Leave a comment below!