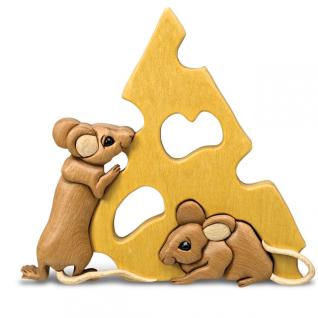
Mice and cheese intarsia makes a great beginner project
Basic design featuring a pair of mice is ideal for beginners
This fun little project is a great way to build your intarsia skills.
The cheese is simply rounded over, allowing you to concentrate on shaping the mice.
The tails are added as overlays and rest on top of the other intarsia pieces. Choose a durable wood, such as sycamore or maple, for the tails.
Be careful when shaping the thin tails to avoid breaking them. Attach the tails to a piece of scrap wood with double-sided tape to add support while shaping and use a rotary power carver for tight areas. Apply wood hardener to the tails for additional strength.
After the cutting and shaping is complete, tack the intarsia pieces together with cyanoacrylate (CA) glue. Then trace around the assembled project and cut the backing board. Be sure to cut the open areas for the holes in the cheese in the backing board. Attach the intarsia to the backing board. When dry, apply a coat of spray varnish to the project and let it dry overnight. Then attach a mirror-style hanger to the back.
For more projects like this, check out Kathy Wise’s new book, Intarsia Woodworking for Beginners, available from Fox Chapel Publishing.
Attachments
Mice and Cheese Pattern