
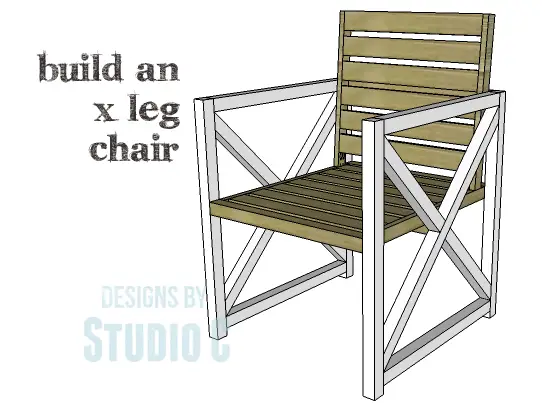
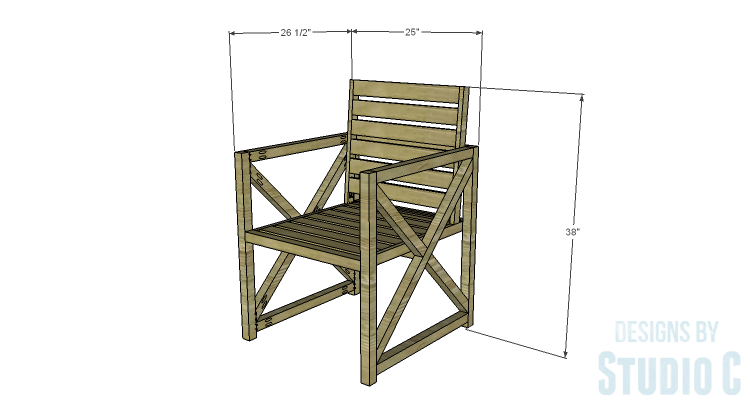
DIY Plans to Build an X Leg Chair
A Fabulous Easy to Build Chair for the Outdoors
This easy to build chair can actually be used indoors or outdoors. The DIY plans to build an X Leg Chair feature side frames with an X detail, a slatted seat, and a slatted back. This chair would be fabulous with cedar as the seat and back, with treated pine framing that can be painted once the lumber dries. Several of these chairs can be built in a weekend!
Materials:
- 1-1/4″ pocket hole screws for outdoor use (<– affiliate link!)
- 2-1/2″ pocket hole screws for outdoor use
- 1-1/4″ screws for outdoor use
- 3″ screws for outdoor use
- Wood glue
- Sandpaper (100, 150, 220 grits)
- Finishing supplies (primer & paint, or stain, sealer)
Lumber:
- 2 – 1×2 at 6′
- 4 – 1×3 at 8′
- 5 – 2×2 at 8′
Cut List:
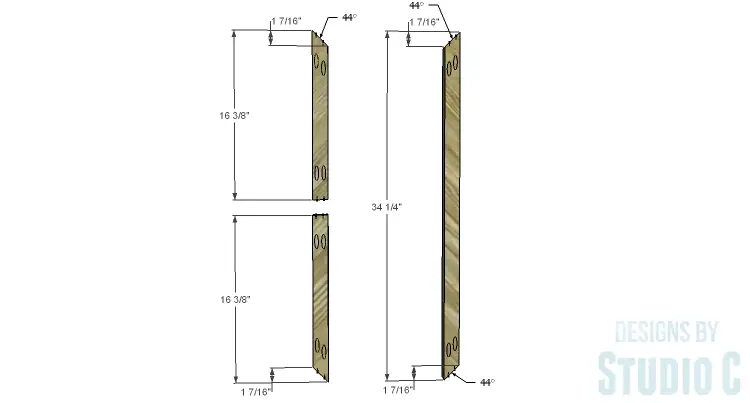
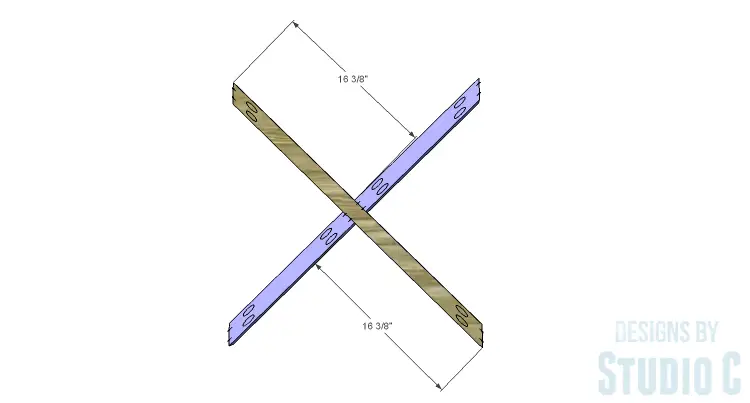
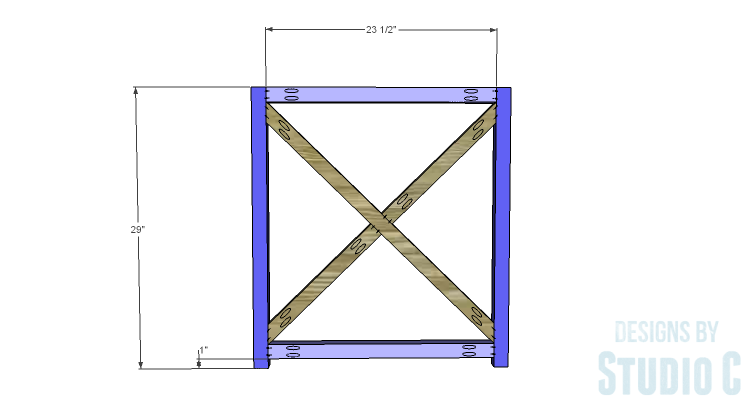
- 4 – 2×2 at 16-3/8″ – X Detail
- 2 – 2×2 at 34-1/4″ – X Detail
- 4 – 2×2 at 23-1/2″ – Side Framing
- 4 – 2×2 at 29″ – Side Framing
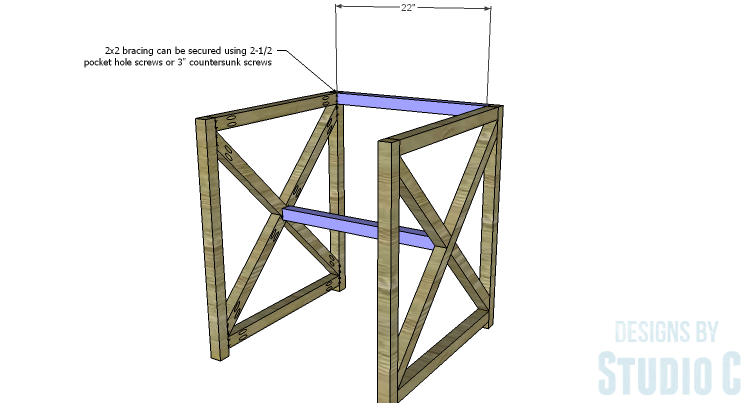
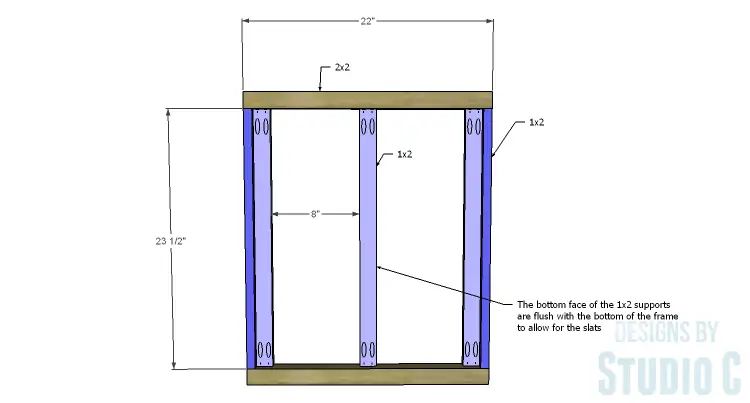
- 2 – 2×2 at 22″ – Bracing
- 2 – 2×2 at 22″ – Seat Framing
- 5 – 1×2 at 23-1/2″ – Seat Framing
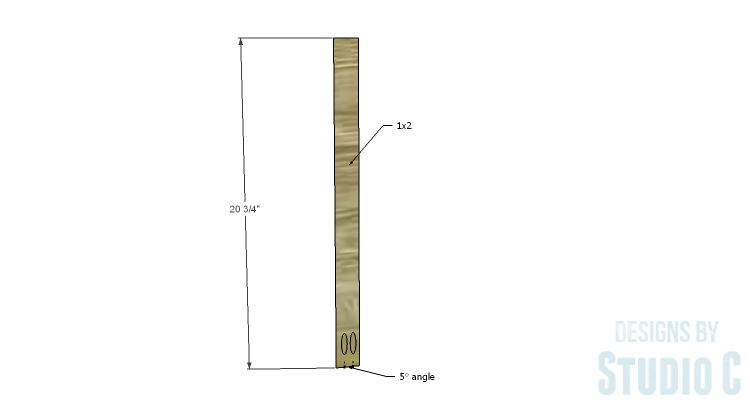
- 2 – 1×2 at 20-3/4″ – Side Back
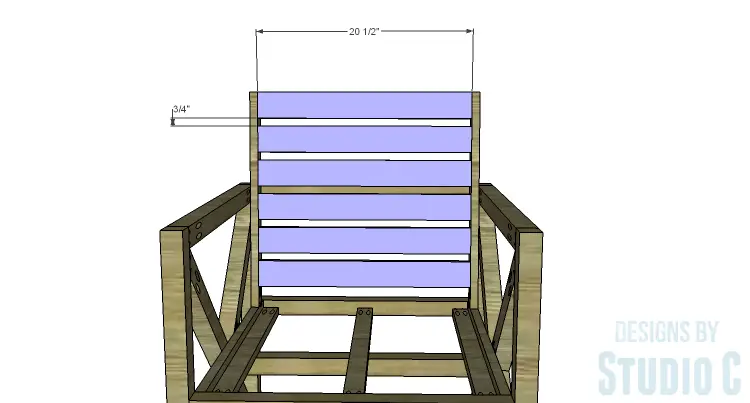
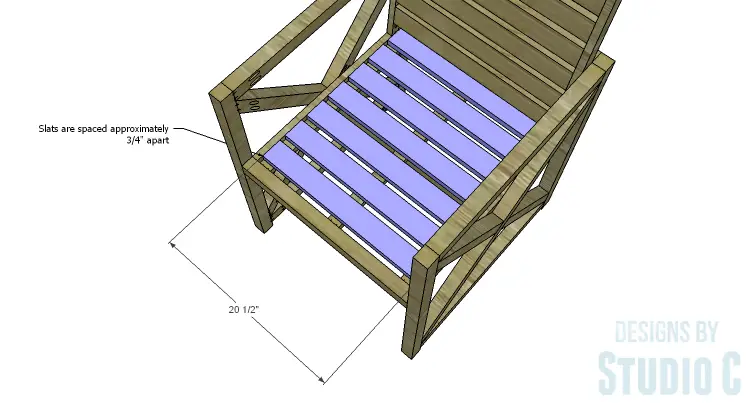
- 13 – 1×3 at 20-1/2″ – Back Slats & Seat Slats
Step One
Cut the pieces for the X detail. Cut the angles at 44° as indicated in the drawing. With the pocket hole jig set for 1-1/2″ material, drill pocket holes in the pieces as shown. Assemble the X using glue and 2-1/2″ pocket hole screws.
Cut the pieces for the side framing. Drill pocket holes in each end of the shorter pieces. Assemble the side framing using glue and 2-1/2″ pocket hole screws. Insert the X detail securing in place using glue and 2-1/2″ pocket hole screws.
Step Two
Cut the pieces for the bracing. The bracing will be secured between the two side frames at the top edge of the back and at the center of each X. The pieces can be secured using 2-1/2″ pocket hole screws or countersunk 3″ screws.
Step Three
Cut the pieces for the seat frame. Set the pocket hole jig for 3/4″ material and drill pocket holes in each end of the 1×2 pieces. Secure the 1×2 side pieces on end to the 2×2 pieces using glue and 1-1/4″ pocket hole screws.
Secure the 1×2 support pieces using glue and 1-1/4″ pocket hole screws. The side supports can be further secured to the side of the seat frame using countersunk 1-1/4″ screws. The bottom face of the supports will be flush with the bottom edge of the frame.
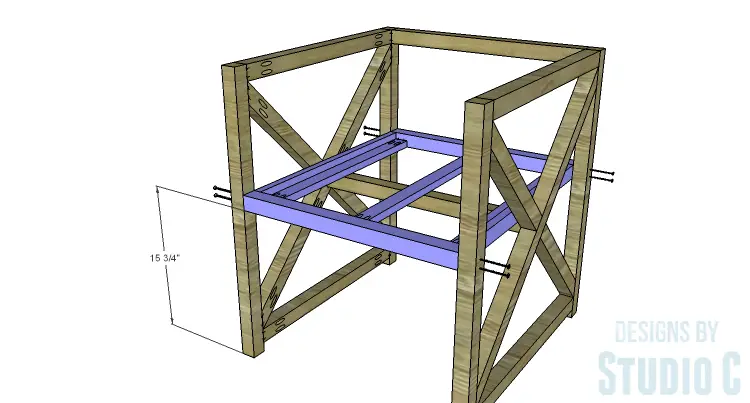
Secure the seat frame to the side frames using countersunk 3″ screws through the front and back legs into the seat frame. The seat frame will rest directly on the bracing piece between the X detail.
Step Four
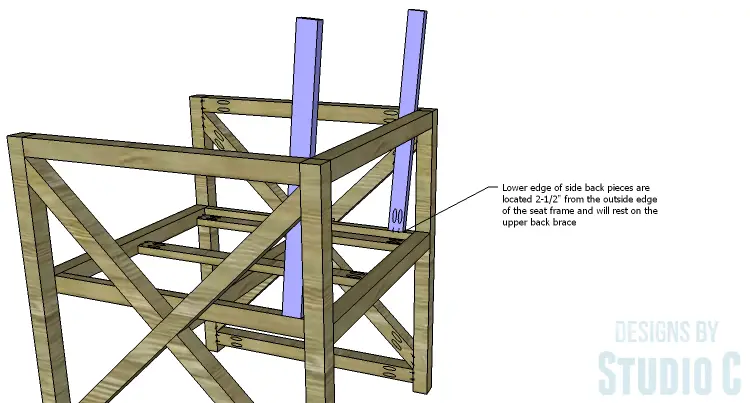
Cut the pieces for the side back. Cut a 5° angle in the lower edge of each piece and drill pocket holes in this edge treating the pieces as a left and a right. Secure the side back pieces to the seat frame using glue and 1-1/4″ pocket hole screws. The pieces will be positioned 2-1/2″ from the back edge of the seat frame and will rest on the upper bracing piece.
Step Five
Cut the pieces for the back slats and drill pocket holes in each end. Secure the slats to the side back pieces using glue and 1-1/4″ pocket hole screws spacing the pieces 3/4″ apart. The front face of the slats will be flush with the front face of the side back pieces. The top edge of the top slat will be flush with the top edges of the side back.
Step Six
Cut the pieces for the seat slats. The seat slats will be spaced 3/4″ apart and will be secured to the supports in the seat frame using glue and countersunk 1-1/4″ screws.
Finish as desired.
The entire chair can also be built from plain untreated pine as long as it is used indoors or on a covered porch area. have any questions about the DIY plans to build an X Leg Chair? Leave a comment below!
Originally posted 2015-05-27 08:00:18.
[…] Try this fabulous plan as your next project: Build an X Leg Chair. […]