
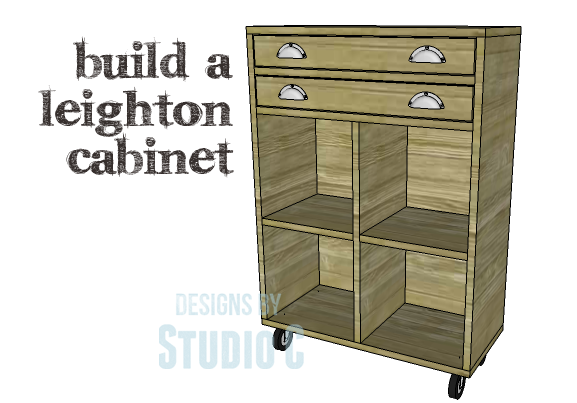
DIY Plans to Build a Leighton Rolling Cabinet
A Rolling Cabinet Perfect for Storage in Any Room!
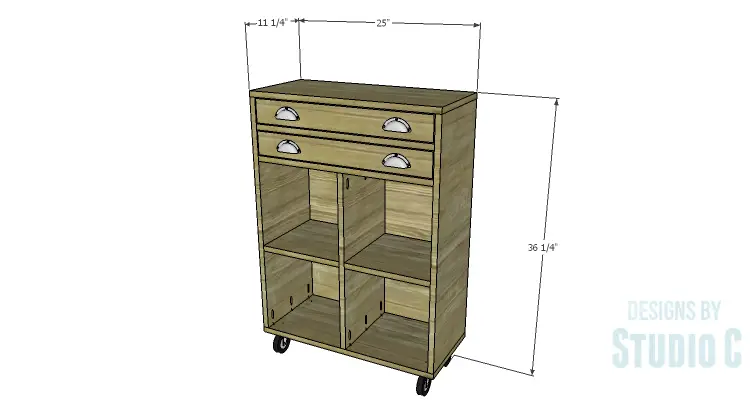
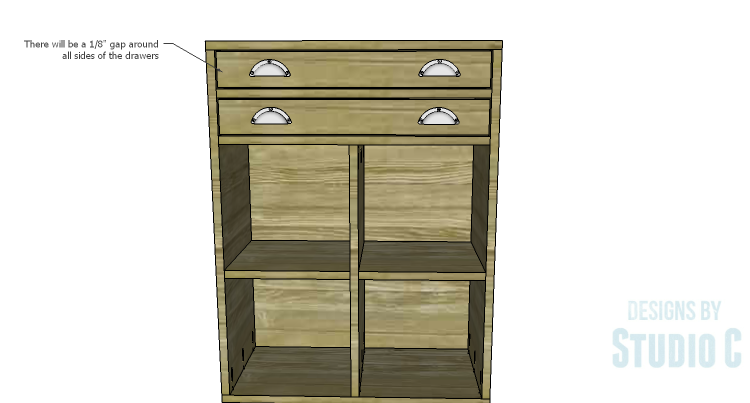
Hey there! This amazing cabinet is packed with awesome features all in one. The DIY plans for the Leighton Rolling Cabinet include four cubbies and two drawers on top, making it the perfect storage solution for books, toys, and art supplies for the little ones! And guess what? It’s super easy to build (because you know I always like to keep things simple) and you can have it finished in just one weekend.
Materials:
- 1-1/4″ pocket hole screws (<– affiliate link!)
- 1″ brad nails
- 2 sets of 10″ ball bearing drawer slides
- Cabinet pulls
- 4 – 4″ casters
- Wood glue
- Sandpaper (100, 150, 220 grits)
- Finishing supplies (primer & paint, or stain, sealer)
Lumber:
- 2 – 1×4 at 6′
- 1 – 1×10 at 4′
- 1 – 1×12 at 6′
- 2 – 1×12 at 8′
- 1 – 4′ x 4′ sheet of 1/4″ plywood
Cut List:
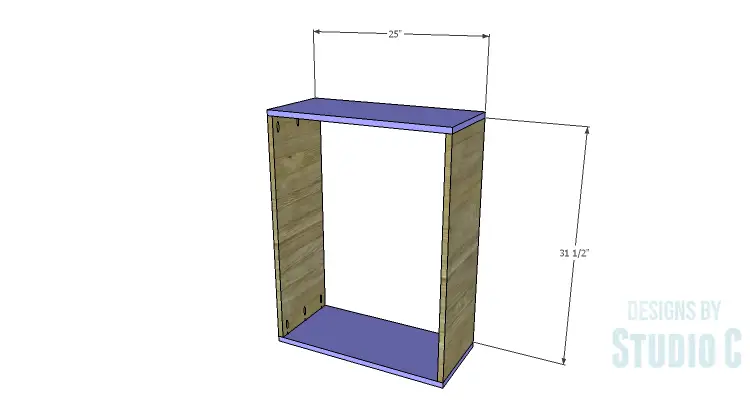
- 2 – 1×12 at 25″ – Cabinet Top & Bottom
- 2 – 1×12 at 31-1/2″ – Cabinet Sides
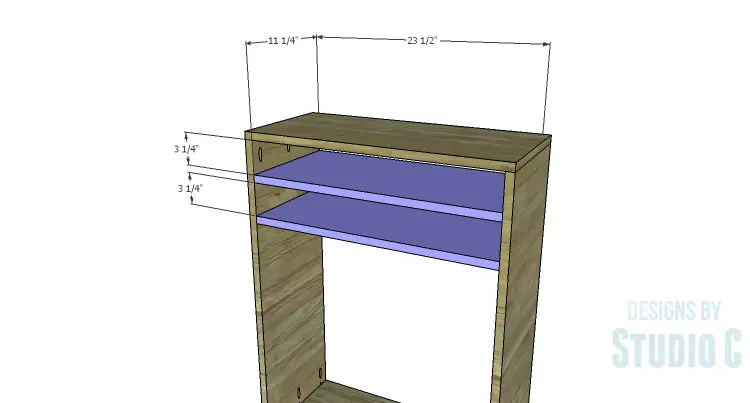
- 2 – 1×12 at 23-1/2″ – Drawer Shelves
- 1 – 1×12 at 23-1/2″ – Lower Shelf
- 1 – 1×12 at 23-1/2″ – Divider
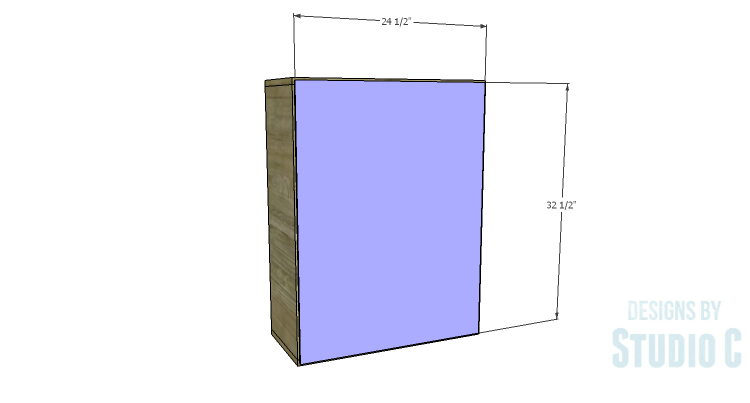
- 1 – 1/4″ plywood at 24-1/2″ x 32-1/2″ – Back
- 2 – 1×10 at 21″ – Drawer Bottoms
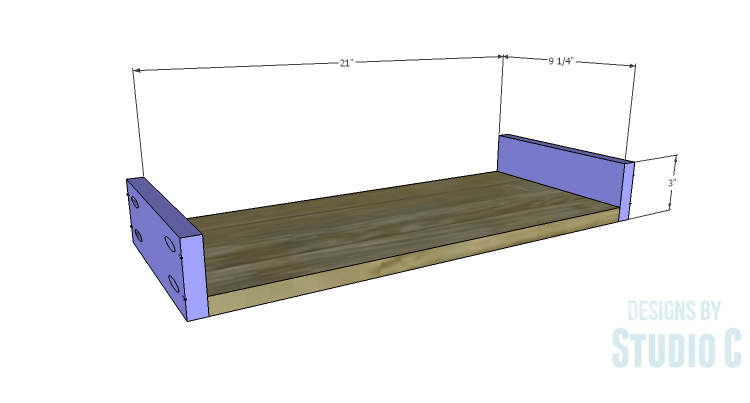
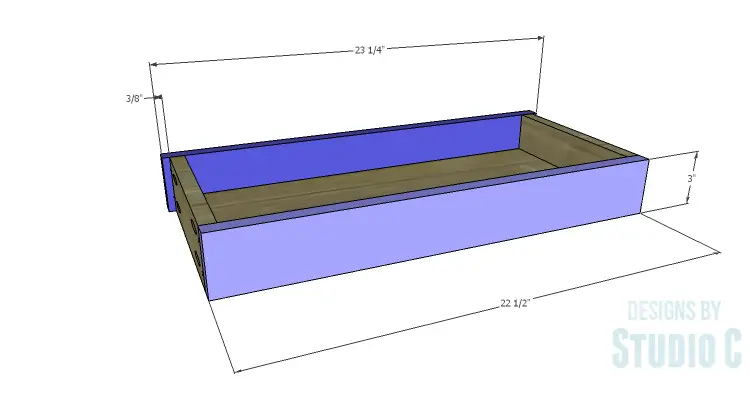
- 4 – 1×4 (ripped to 3″ wide) at 9-1/4″ – Drawer Sides
- 2 – 1×4 (ripped to 3″ wide) at 22-1/2″ – Drawer Back
- 2 – 1×4 (ripped to 3″ wide) at 23-1/2″ – Drawer Front
Step One
Cut the pieces for the cabinet. With the pocket hole jig set for 3/4″ material, drill pocket holes in each end of the side pieces. Secure the sides to the top and bottom using glue and 1-1/4″ pocket hole screws.
Step Two
Cut the pieces for the drawer shelves and drill pocket holes in each end. Secure the drawer shelves to the sides of the cabinet using glue and 1-1/4″ pocket hole screws. It may be easier to install the uppermost drawer shelf first, the work your way down!
Step Three
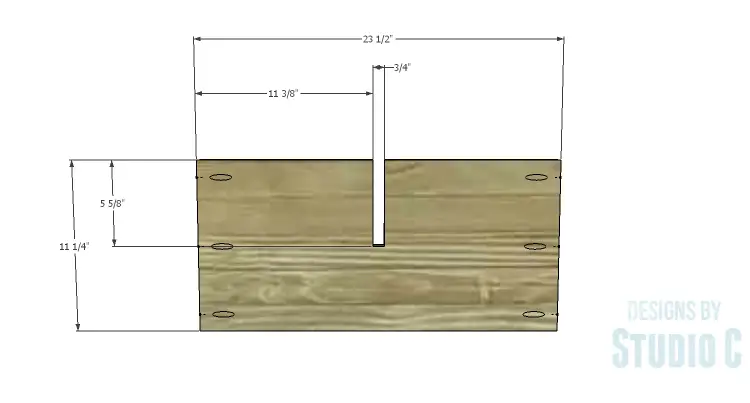
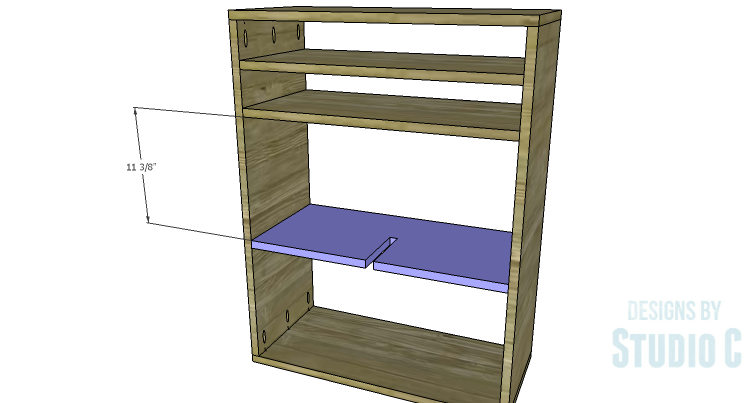
Cut the piece for the lower shelf and drill pocket holes in each end. Cut the notch using a jigsaw. Secure the lower shelf to the sides of the cabinet using glue and 1-1/4″ pocket hole screws.
Step Four
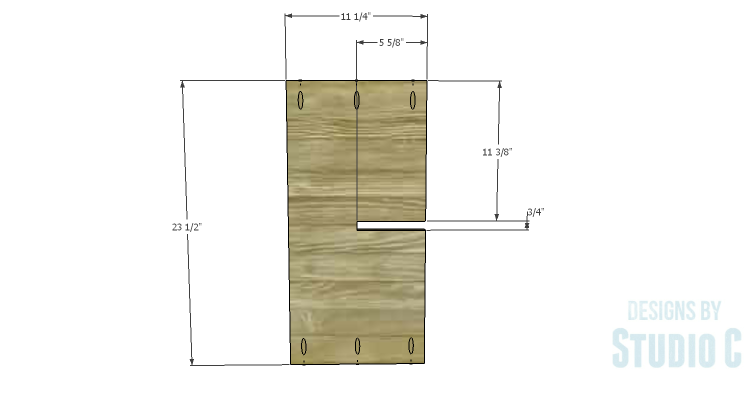
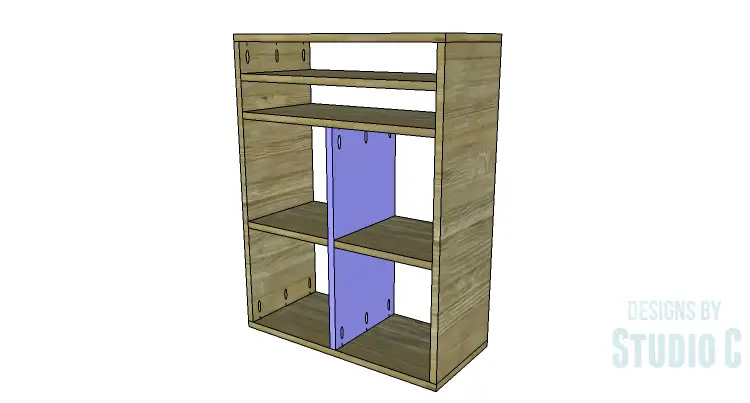
Cut the piece for the divider and drill pocket holes in each end. Cut the notch using a jigsaw. Secure the divider to the bottom of the cabinet and the underside of the shelf directly above using glue and 1-1/4″ pocket hole screws.
Step Five
Cut the piece for the back. Secure the back to the cabinet using glue and 1″ brad nails.
Step Six
Cut the pieces for the drawers. Drill pocket holes in each end of the sides as well as all four edges of the bottom pieces. Secure the sides to the bottom using glue and 1-1/4″ pocket hole screws, then install the front and back in the same manner. Note that the front will overhang each side of the drawer box by 3/8″.
Install the drawer slides according to the manufacturer’s installation instructions, locating them ¾” back from the front edge of the sides. This easy tutorial on how to install drawer slides will be helpful! Make any necessary adjustments.
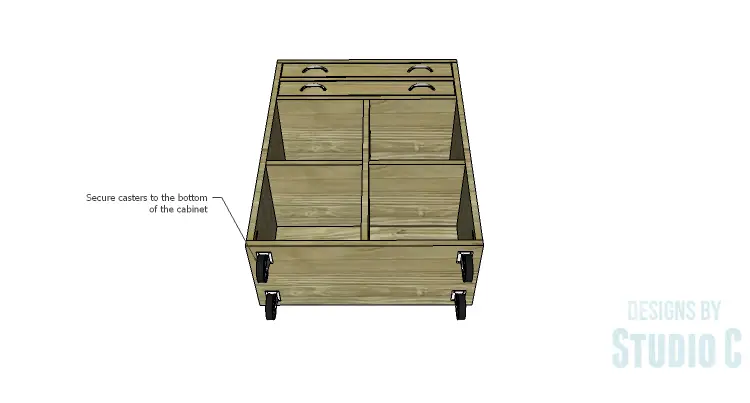
Install the drawer pulls and the casters.
Finish the cabinet as desired!
This cabinet will be a welcome addition to any craft room to store supplies, as well as in a shop to store tools! have any questions about the DIY plans to build a Leighton Rolling Cabinet? Leave a comment below!
Originally posted 2015-02-24 08:00:07.