

Introduction: Folding Sewing Box - for Beginners


This project could be as easy or as complicated as you want. It really suits all ability levels. I'm a beginner without a table saw, router, or the ability to do flashy joints, so the version pictured is very much a beginners' version.
The good news for beginners is that it's a fairly forgiving project. You're essentially making five open topped boxes, so it's nothing but right angles, and any minor corrections can be made along the way.
Step 1: Starters
(all measurements in MILLIMETRES)
I used a board 13mm thick so...
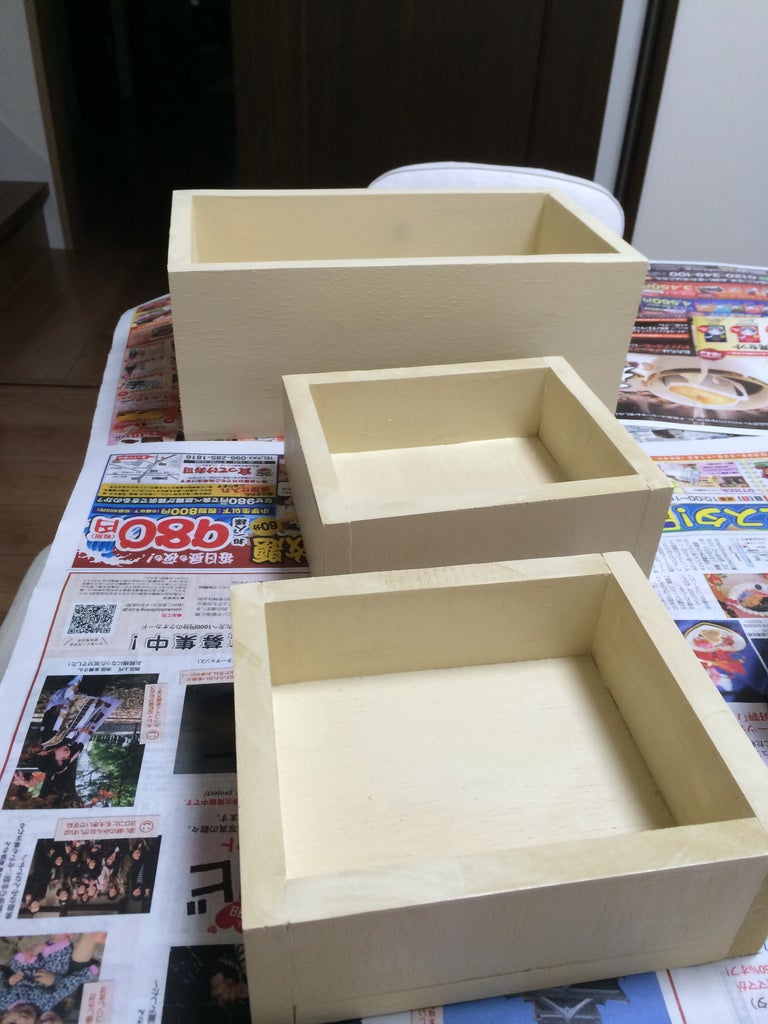
For bottom drawer
i. Base 300 x 150
ii. Ends 150 x 100 (x2)
iii. Front and back 300 x 113 (x2)
This makes the bottom drawer quite tall. You may want to reduce the height a bit.
For other drawers
i. Base 150 x 150 (x4)
ii. Ends 150 x 50 (x8)
iii. Fronts and backs 150 x 63 (x8)
For tops
176 x 150 (x2)
You'll also need knobs for the top (x2), handles for the sides, and 12 support arms.
Beginner tip (alternatively, Learn from my mistakes) -
Depending on what finish you've decided on, and what wood you've chosen, you might want to be careful to ensure the grain is going the same way on all pieces. My wife decided she wanted it painted, so it wasn't really an issue, but for more prominent grains and varnished finishes, it certainly would be.
Step 2: Bottom Drawer
I've chosen to put the boxes together this way for two reasons. Because of a lack of advanced tools and ability, and because I didn't want any nails or screws showing. Mainly the ability thing, though.
So the end pieces are glued, and nailed from underneath. You might want to drill guide holes first to avoid splitting, if you have a drill bit small enough. The front and back are then glued into place.
Step 3: Drawers

Just repeat the process - nail from underneath and glue everywhere else.
Step 4: Starting the Finish


This is where you stack it all together and find where it isn't true. And then you start sanding.
Once you're happy with it, time to apply the finish. For this one, my wife chose cream paint.
Step 5: Assembling Side Supports


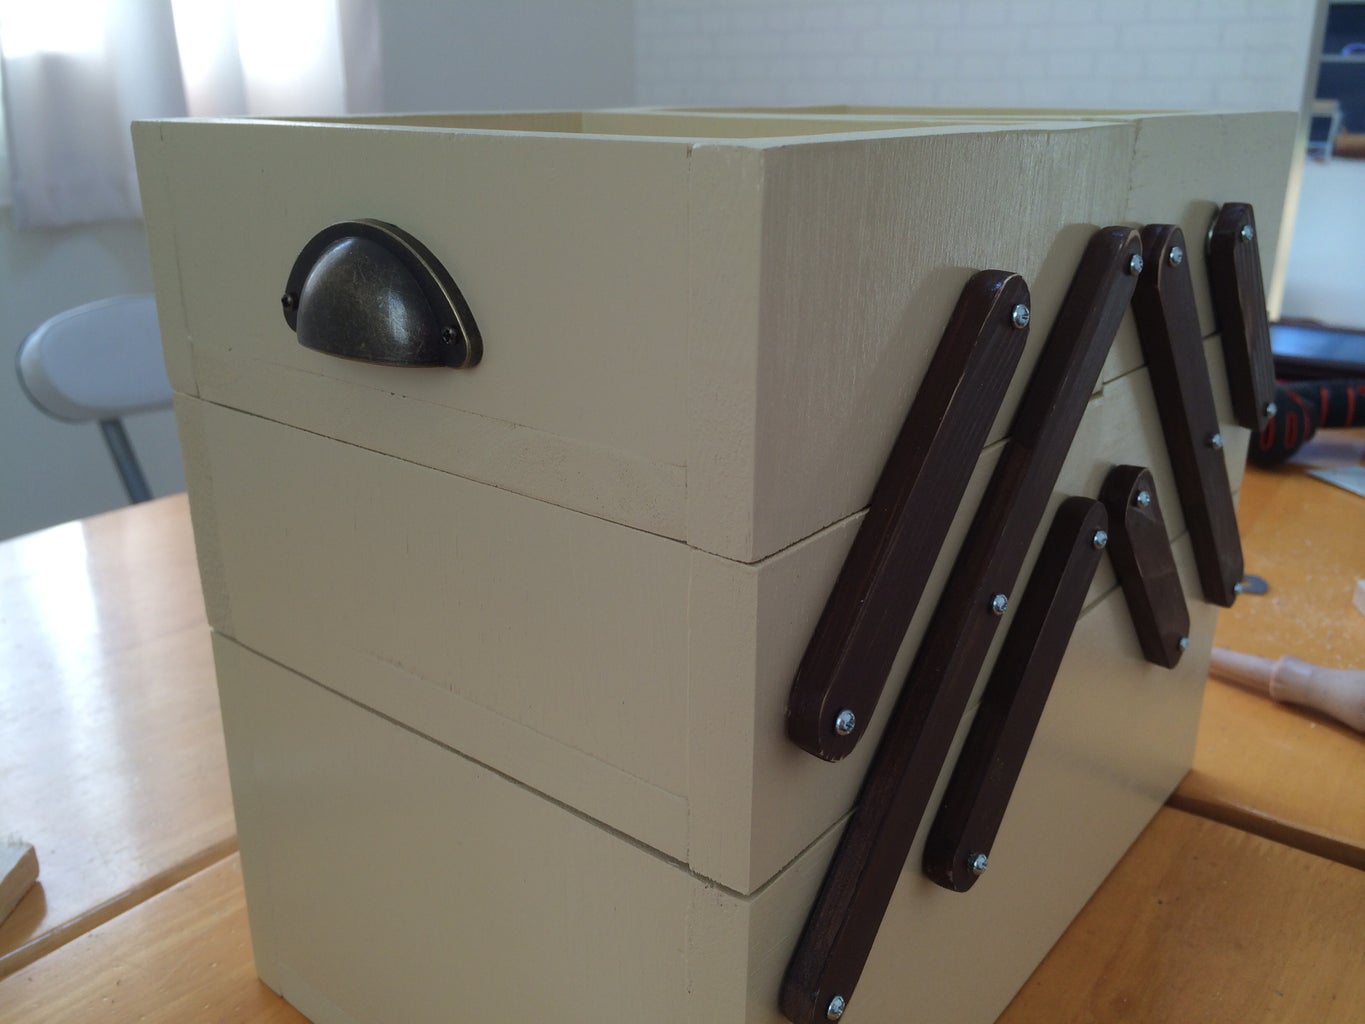
Each side of each set of drawers needs three diagonal supports enabling the drawers to be folded in and out.
Math is where it usually falls apart for me. So this bit's great fun, as you can imagine.
The 'outside' arms are the same length (supporting two drawers each), the central one longer (supporting all three). The measurements in the picture refer only to the drill points. The arms themselves should be several millimetres longer.
I painted the arms brown to contrast with the cream of the boxes. When I sanded the first coat, they had a worn, vintage look that I liked so I left them like that.
Assemble as per plan. This is extremely screwupable (technical term), so concentrate while you do this in a distraction-free environment. Perhaps put washers between the arms and the boxes.
Then add the end handles.
Step 6: Bonus Stage


You might be thinking about a handle, and most examples I've seen of a sewing box do have a handle extending up from the bottom drawer, over the top and down to the other side of the bottom drawer.
Yeah, about that... I'm a bit concerned that the wood used here is a bit soft. Plus I'm going to have to fabricate a handle myself. Something I don't fancy at all. The box is big enough without giving it even more height. Plus I think it hinders access to the bottom drawer.
So instead it's going to be a two-hand lift. Slightly less convenient, but never mind. And for that purpose, I'm adding feet under the corners so you can slide fingers underneath.
Then it's just adding the hinges and handles and knobs and it's ready.


