
Here’s a Halloween project that’s just right for serving hot party treats.
Whether you’re dishing devilishly spicy cheese dip or some steaming witches brew, this two-tone Jack-O’-Lantern Trivet will help keep hot serving ware from damaging other surfaces. It’s made of two contrasting layers of wood. The 1/4-in.-thick top layer with routed details forms the trivet face. A neutral-colored, blonde hardwood such as beech, maple or birch works well for this layer—especially if you dye it orange as we do here. A 1/2-in.-thick bottom lamination creates a sturdy base while it accentuates the cutout features. Select a dark hardwood such as walnut for this layer. Here’s how to make the trivet.
Step 1: Download and print out a copy of the PDF Jack-O’-Lantern Trivet template attached to this article.
Step 2: Prepare two wood blanks for the project, planing them both to the correct thickness. Select blanks that are about the same size as the template sheet to give you plenty of room to work when routing the face details. You’ll want to keep the base of the router stable as you work.
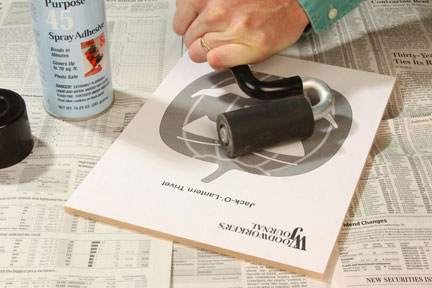
Step 3: Affix the paper template to your 1/4-in.-thick top blank with spray mount adhesive. Use a J-roller or a soft cloth to press the paper firmly into place. (see Photo 1).
Step 4: There are two machining options for cutting out the eyes, nose, mouth and eyebrows of the Jack-O’-Lantern: a scroll saw or a router. For this project, we’ll be using Dremel’s Trio tool, which looks like a jigsaw but functions like a trim router. If you use the Trio or a comparable trim router, mount your template blank to a piece of scrap MDF or other sheet material with pieces of double-sided tape to help minimize tearout on the bottom face. Clamp the backup board to your workbench.
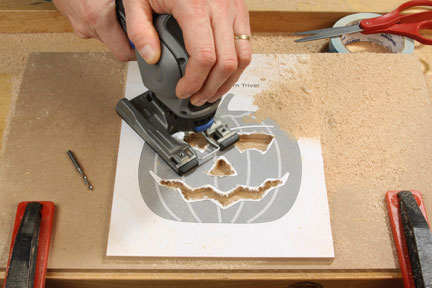
Step 5: Install a 1/4-in. straight bit in your Trio or trim router, and set the cutting depth to 5/16 in. Start the tool, and slowly plunge the bit down into the middle of the first cutout area with the edge of the base held firmly against the template. Rout away the waste carefully, leaving a little waste next to the template layout lines (see Photo 2). “Rough out” the eyes, nose and mouth now.
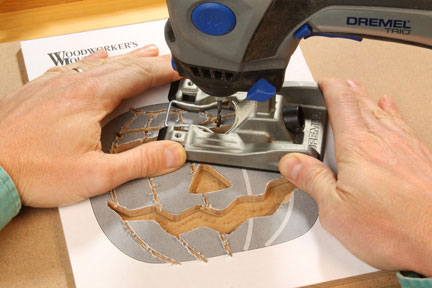
Step 6: Switch to 1/8-in.-diameter straight or spiral bit, and set the cutting depth to 5/16 in. again. Clean away the rest of the waste from the cutout areas, working up to the layout lines. Once these areas are defined, raise the bit so it’s only cutting about 3/16 in. into the wood and rout the eyebrows. Work slowly and carefully to keep these deep cuts on course. When those are finished, raise the bit to 1/8 in., and rout the pumpkin’s shallow groove details (see Photo 3).
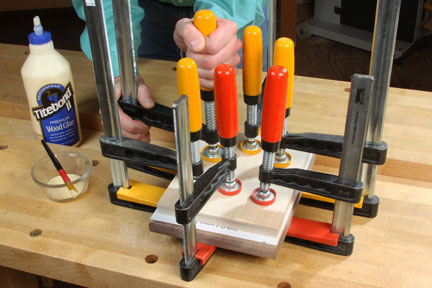
Step 7: Spread a thin layer of glue on the back of the template blank, stopping the glue short of the cutout areas. Glue and clamp the template to the bottom walnut lamination. Use a piece of scrap sheet stock to act as a caul for pressing the template down uniformly (see Photo 4).
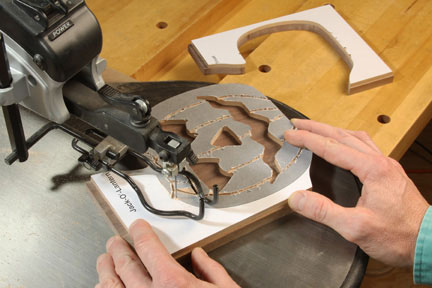
Step 8: When the glue cures, unclamp the assembly and cut out the trivet on your band saw or scroll saw (see Photo 5).
Step 9: Remove the template pattern and sand the trivet’s face smooth. One easy way to do this is to soak the surface with mineral spirits, which will soften the adhesive. Peel the paper off, and wipe it with more solvent to remove any residual glue.
Step 10: Sand the project edges smooth. The Dremel Trio makes this task easier, because it comes with a small sanding drum accessory and sanding sleeves (see Photo 6). Or, you could smooth the broader curves on a disc sander, then switch to sandpaper wrapped around a dowel to finish the inside curves next to the trivet’s stem.

Step 11: Ease the outside edges of the trivet with a 1/8-in. roundover bit in your Trio or trim router (see Photo 7). Be especially careful when routing the edges along the stem to keep the tool on solid footing. You may want to round over the stem with a file if you are unsure of your routing skills. Sand the edges smooth, as well as the entire project, up through the grits to 180.

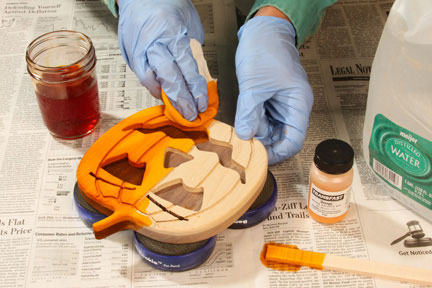
Step 12: You could leave your Jack-O’-Lantern in the natural wood tones and skip right to a topcoat, but orange aniline dye makes a fitting and colorful end to this project. Mix the dye powder with hot, distilled water, according to the instructions on the dye container. While it dissolves, wipe your trivet down with distilled water to raise the wood grain. When it dries, sand off the raised grain lightly with 220-grit sandpaper. This step will prevent the wood grain from raising again.
Step 13: Wear gloves to apply the dye, and wipe it liberally all over the project (see Photo 8). Let it soak in for a minute or two, and blot away the excess with a dry cloth. Let the dye dry thoroughly.
Step 14: Topcoat your trivet with a heat-resistant finish, such as wipe-on or thinned oil-based polyurethane. Avoid lacquer or shellac, as they don’t fare well when subjected to high heat.
When the varnish cures, your trivet is ready for a Halloween party or holiday display. Apply felt tabs to the back face, if you wish, to keep it from scratching furniture surfaces.


