
DIY Plans to Build a Pickett End Table
An Easy-to-Build Stylish End Table with Drawers
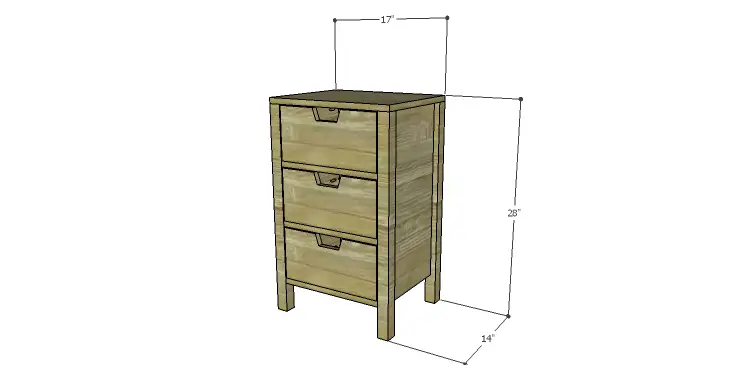
This little end table is so super-cool! The DIY plans to build a Pickett end table feature three drawers which slide on their own shelves – which means there is no drawer slide installation (or in my case no cursing!). A coat of paste wax can be applied to the bottom of each drawer and each shelf to help the drawers slide smoothly. This quick build can be completed in a weekend!

Materials:
- 1-1/4″ pocket hole screws (<– affiliate link!)
- 1-1/4″ brad nails
- Edge banding, optional
- Wood glue
- Sandpaper (100, 150, 220 grits)
- Finishing supplies (primer & paint, or stain, sealer)
Lumber:
- 2 – 2×2 at 6′
- 1 sheet of 3/4″ plywood
Cut List:
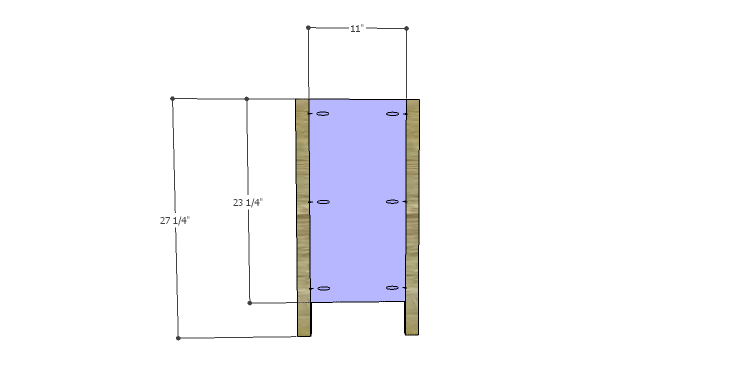
- 4 – 2×2 at 27-1/4″ – Legs
- 2 – 3/4″ plywood at 11″ x 23-1/4″ – Side Panels
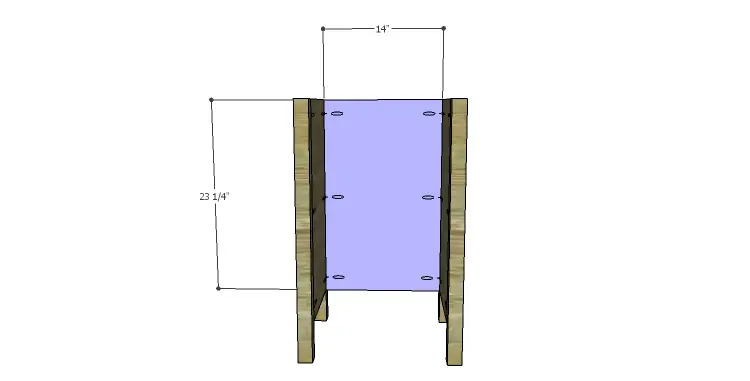
- 1 – 3/4″ plywood at 14″ x 23-1/4″ – Back
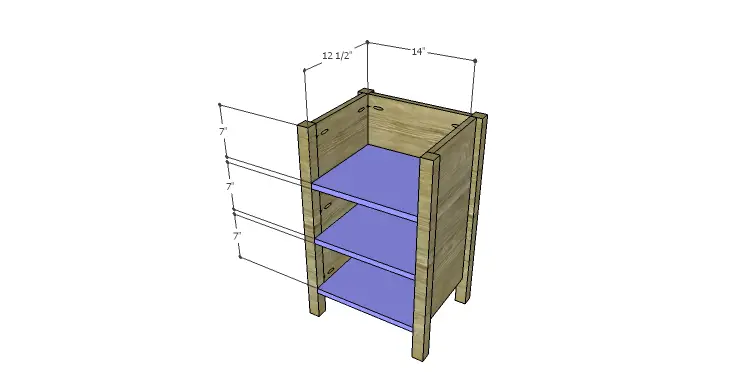
- 3 – 3/4″ plywood at 12-1/2″ x 14″ – Shelves
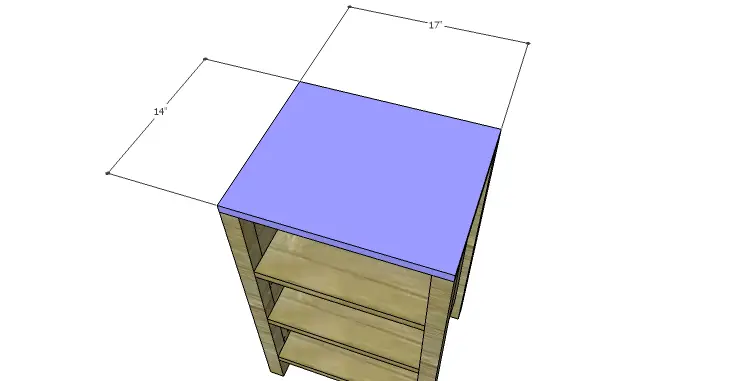
- 1 – 3/4″ plywood at 14″ x 17″ – Top
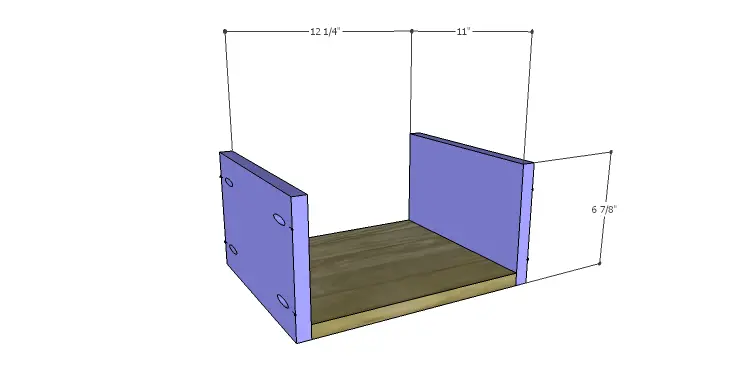
- 3 – 3/4″ plywood at 11″ x 12-1/4″ – Drawer Bottoms
- 6 – 3/4″ plywood at 6-7/8″ x 11″ – Drawer Sides
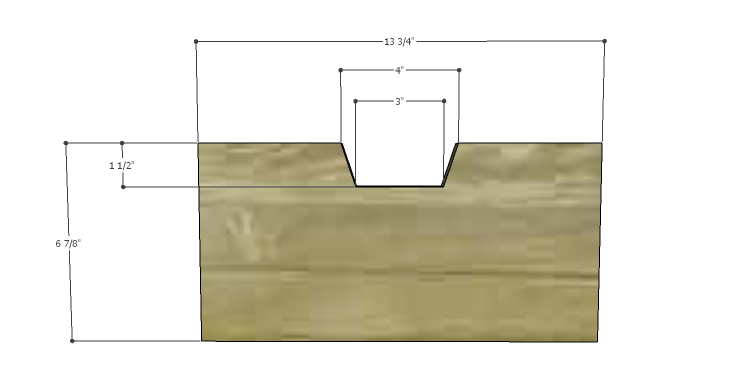
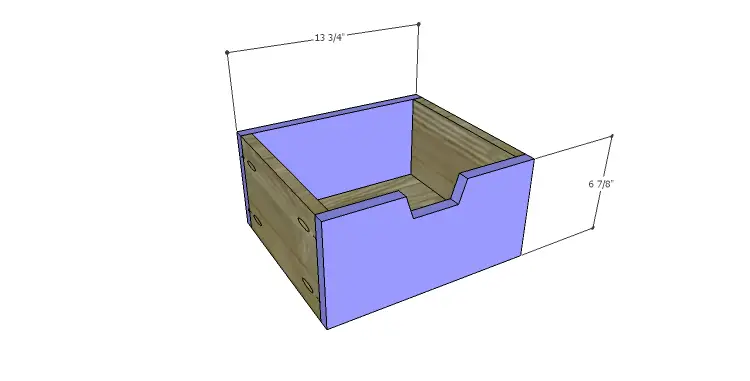
- 6 – 3/4″ plywood at 6-7/8″ x 13-3/4″ – Drawer Fronts
Step One
Edge banding will be applied to the exposed edges of the plywood prior to assembly.
Cut the pieces for the legs and the side panels. With the pocket hole jig set for 3/4″ material, drill pocket holes in each longer edge of the panels. Secure the panels to the legs using glue and 1-1/4″ pocket hole screws. The back face of the panels will be flush with the inside faces of the legs.
Step Two
Cut the piece for the back and drill pocket holes along each longer edge. Secure the panel to the legs using glue and 1-1/4″ pocket hole screws. The back face of the panel will be flush with the inside faces of the legs.
Step Three
Cut the pieces for the shelves and drill pocket holes in the side and back edges. Secure the shelves to the sides and back using glue and 1-1/4″ pocket hole screws. It may be easier to start with the uppermost shelf and work down to the bottom. A close-quarter drill or a right angle drill attachment may be used.
Step Four
Cut the piece for the top. Secure the top to the cabinet frame using glue and 1-1/4″ brad nails through the top into the legs, side panels, and back panel.
Step Five
Cut the pieces for the drawers. Cut the notch in the drawer fronts as shown using a jigsaw or a bandsaw.
Drill pocket holes in each end of the side pieces, as well as all four edges of the bottom. Assemble the drawer a shown by securing the sides first using glue and 1-1/4″ pocket hole screws, then secure the front and back.
Finish as desired, then apply a coat of paste wax to the bottom of the drawers and the top of the shelves to help them slide a bit easier in the openings!
The end table would look really great with a dark stain finish and a faux bone inlay created by using white paint and a stencil. It would also look great in a brightly painted finish! Have any questions about the DIY plans to build a Pickett end table? Leave a comment below or contact me at cher {at} designsbystudioc {dot} com!
[…] end table has plenty of style as well as storage in three large drawers. Here are the free woodworking […]