
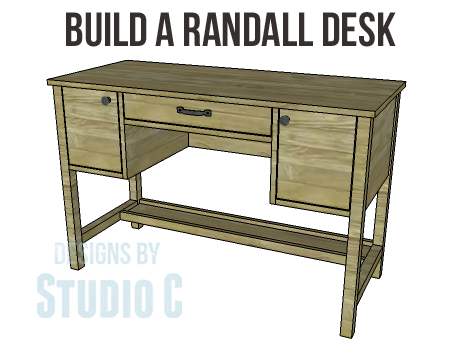
The Randall Desk Plans
How To Build the Randall Desk – Free Plans With Step-by-Step Directions
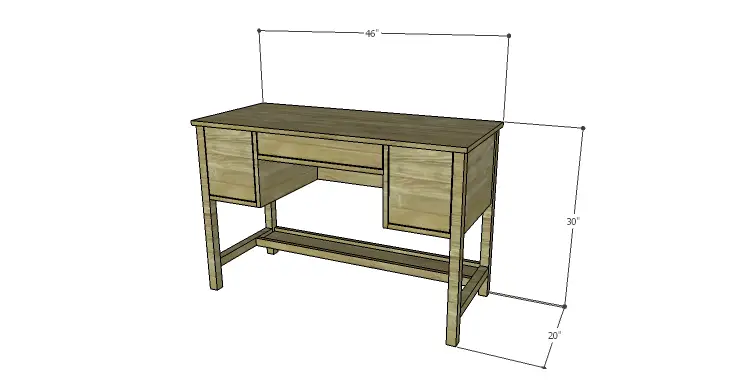
Now this desk is cool, and maybe your student will think so, too! The Randall desk plans feature a center pencil drawer, a cubby on each side with a door and a shelf, plus a lower shelf! How cool is that? This is an easy plan, and the completed piece can be finished any way you like! Plywood with edge banding can also be substituted for the boards in the lumber list – this keeps the wood species cohesive and cuts the cost down considerably!
Materials:
- 1-1/4″ pocket hole screws (<– affiliate link!)
- 2-1/2″ pocket hole screws
- 1-1/4″ brad nails
- Edge banding, optional
- 1 set of 16″ Drawer slides
- 2 sets of hinges
- 3 – Cabinet pulls
- Wood glue
- Sandpaper (100, 150, 220 grits)
- Finishing supplies (primer & paint, or stain, sealer)
Lumber:
- 1 – 1×2 at 4′
- 1 – 1×2 at 6′
- 1 – 1×3 at 6′
- 2 – 2×2 at 8′
- 1 – 4′ x 4′ sheet of 3/4″ plywood
- 1 – 4′ x 8′ sheet of 3/4″ plywood
Cut List:
- 4 – 2×2 at 29-1/4″ – Legs
- 2 – 3/4″ plywood at 12-1/2″ x 16″ – Side Panels
- 2 – 2×2 at 16″ – Lower Side Stretcher
- 1 – 3/4″ plywood at 12-1/2″ x 42″ – Back Panel
- 2 – 1×2 at 42″ – Back Stretcher & Lower Shelf Side
- 1 – 3/4″ plywood at 5-1/2″ x 42″ – Lower Shelf
- 2 – 3/4″ plywood at 10″ x 18-1/4″ – Cubby Bottom
- 2 – 3/4″ plywood at 12-1/2″ x 18-1/4″ – Cubby Sides
- 2 – 3/4″ plywood at 10″ x 16-3/4″ – Cubby Shelves
- 1 – 1×2 at 21-1/2″ – Front Stretcher
- 1 – 3/4″ plywood at 20″ x 46″ – Top
- 1 – 3/4″ plywood at 14-1/2″ x 19″ – Drawer Bottom
- 2 – 1×3 at 14-1/2″ – Drawer Box Sides
- 2 – 1×3 at 20-1/2″ – Drawer Box Front & Back
- 1 – 3/4″ plywood at 3-1/2″ x 21-1/4″ – Drawer Front
- 2 – 3/4″ plywood at 9-1/4″ x 11-1/2″ – Doors
Step One
Edge banding will be applied to the exposed edges of the plywood prior to assembly!
Cut the pieces for the legs, the side panels, and the lower side stretchers. With the pocket hole jig set for 1-1/2″ material, drill pocket holes in each end of the lower side stretchers. Secure to the legs using glue and 2-1/2″ pocket hole screws. A close-quarter drill or right angle drill attachment may be necessary if it is too tight to use a regular drill. Orient the pocket holes so they face down and will not have to be filled.
Set the pocket hole jig for 3/4″ material and drill pocket holes in each side edge of the side panels. Secure to the legs using glue and 1-1/4″ pocket hole screws. The outside face will be flush with the outside face of the legs.

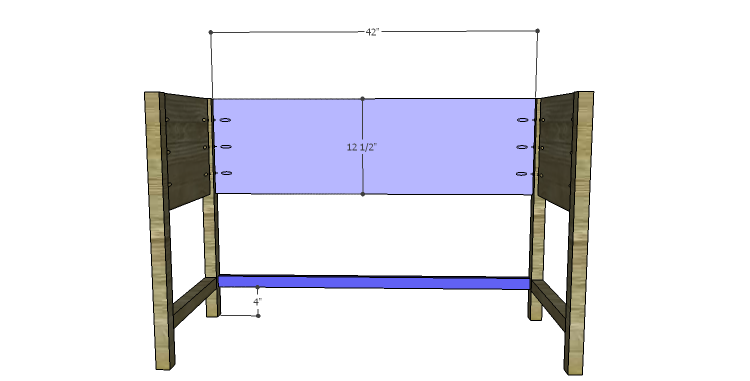
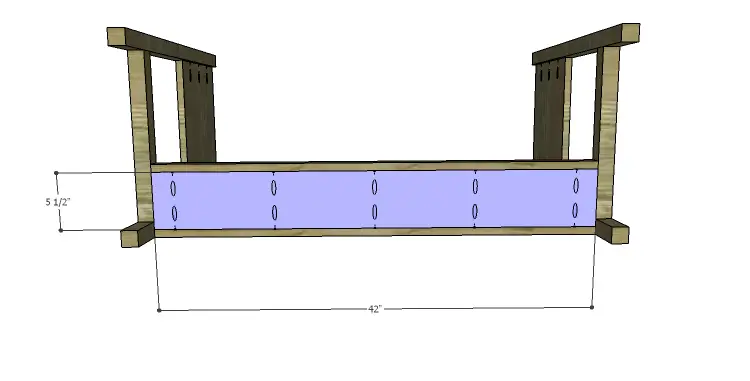
Step Two
Cut the pieces for the back, back stretcher, and lower shelf side. Drill pocket holes in each end of the stretcher and shelf side pieces, as well as the sides of the back panel. Secure the back and the back stretcher to the legs using glue and 1-1/4″ pocket hole screws. The outside faces of each piece will be flush with the outside faces of the legs.
Secure the shelf side to the lower side stretchers as shown and secure using glue and 1-1/4″ pocket hole screws.
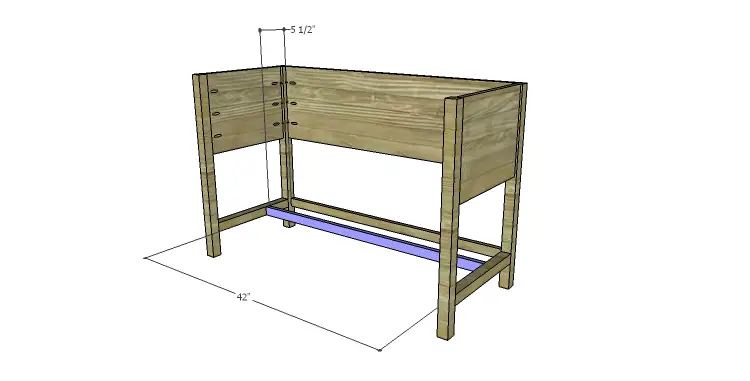
Step Three
Cut the piece for the lower shelf and drill pocket holes in each long edge. Secure to the back stretcher and lower shelf side using glue and 1-1/4″ pocket hole screws. The bottom face of the shelf will be flush with the bottom edge of the stretcher and shelf pieces.
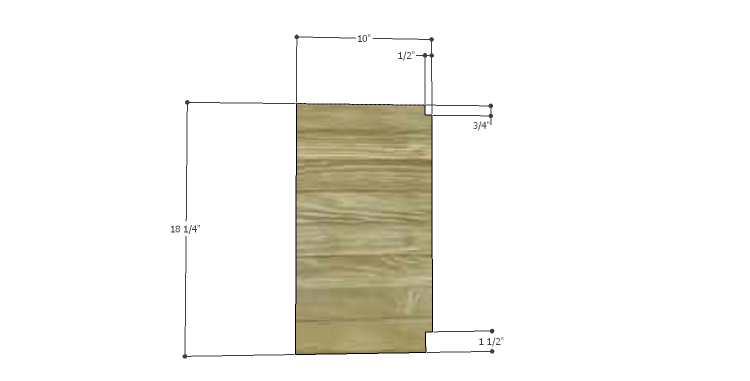
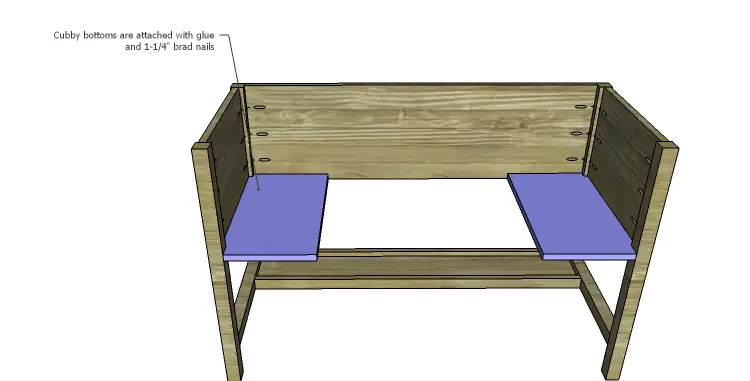
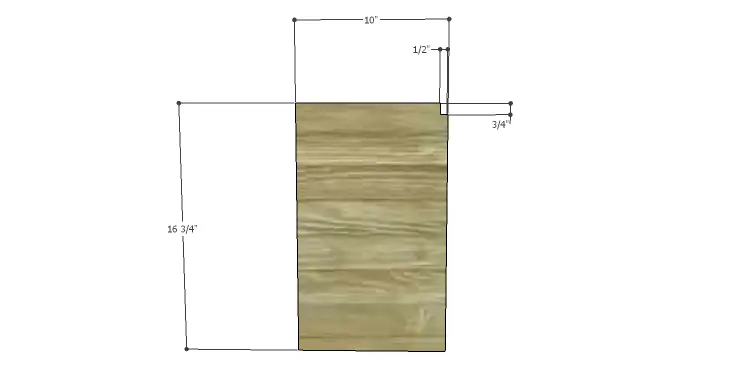
Step Four
Cut the pieces for the cubby bottoms and cut the notches using a jigsaw. Position the bottom pieces so that the bottom face is flush with the bottom edge of the back and sides. Secure in place using glue and 1-1/4″ brad nails.
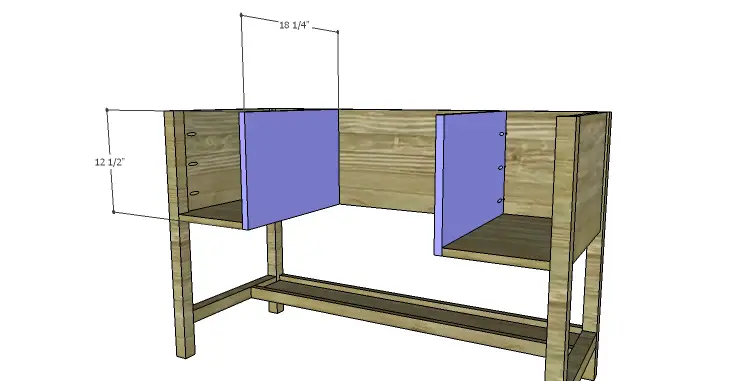
Step Five
Cut the pieces for the cubby sides and drill pocket holes along the back edge. Secure the pieces to the back using glue and 1-1/4″ pocket hole screws. Add a few brad nails through the sides into the bottom to further secure it.
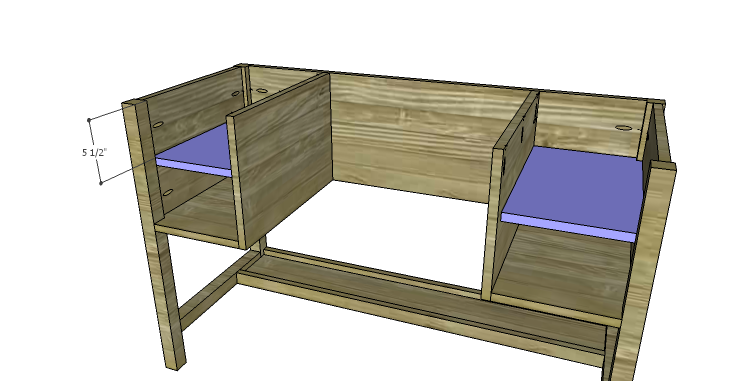
Step Six
Cut the pieces for the shelves and cut the notches using a jigsaw. Position the shelf inside the cubbies locating them flush with the back (which will make them approximately 1-1/2″ back from the front edge of the legs), and secure in place using glue and 1-1/4″ brad nails.
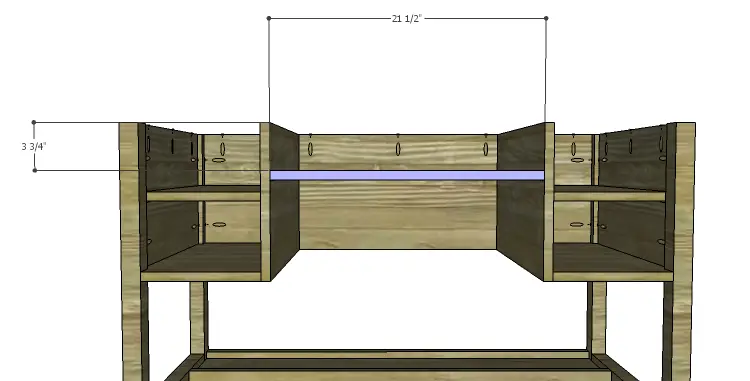
Step Seven
Cut the piece for the front stretcher and drill pocket holes in each end. Secure to the cubby sides using glue and 1-1/4″ pocket hole screws.
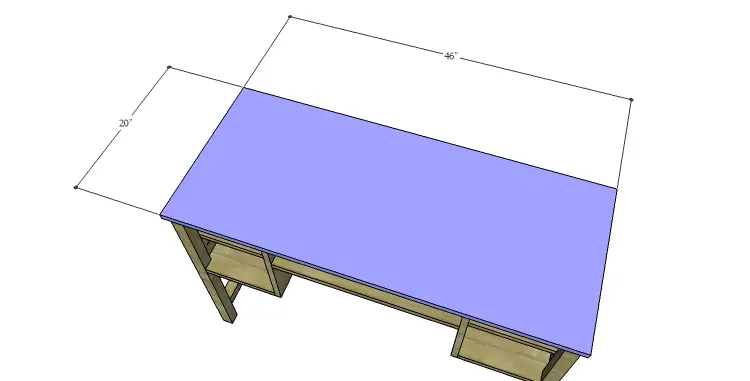
Step Eight
Cut the piece for the top. The top will overhang by 1/2″ on all sides. Secure in place using glue and 1-1/4″ brad nails through the top into the sides, back, and cubby sides.
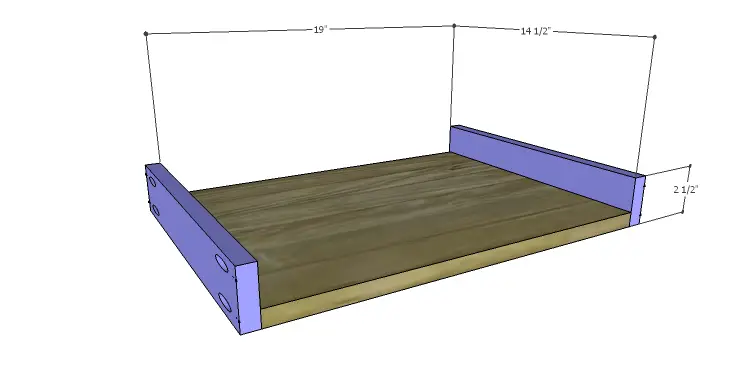
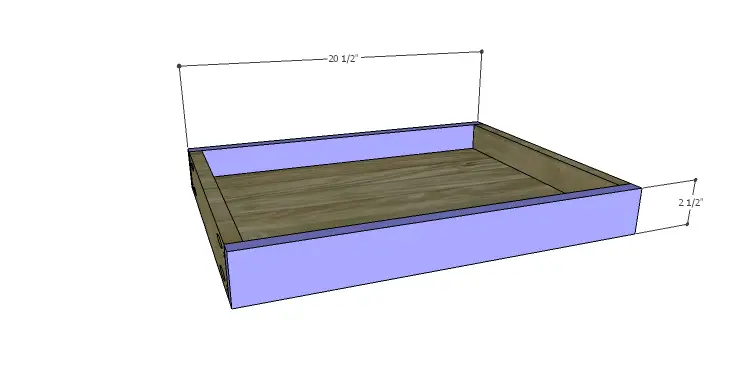
Step Nine
Cut the pieces for the drawer box. Drill pocket holes in all four edges of the bottom as well as each end of the sides. Assemble the drawer box as shown using glue and 1-1/4” pocket hole screws. Install the drawer slides according to the manufacturer’s installation instructions, locating them ¾” back from the front edge of the sides. This easy tutorial on installing drawer slides will be helpful. Make any necessary adjustments.
Step Ten
Cut the piece for the drawer front. Mark the position for the drawer pull and drill the holes. Shim the drawer front in the opening – there will be a 1/8” gap around all sides – then drive screws through the holes for the drawer pulls into the drawer box. Open the drawer, and secure the drawer front using countersunk 1-1/4” screws from the inside. Remove the screws from the holes for the drawer pull then finish drilling the holes. Install the drawer pull. Take a look at this tutorial on installing drawer fronts.

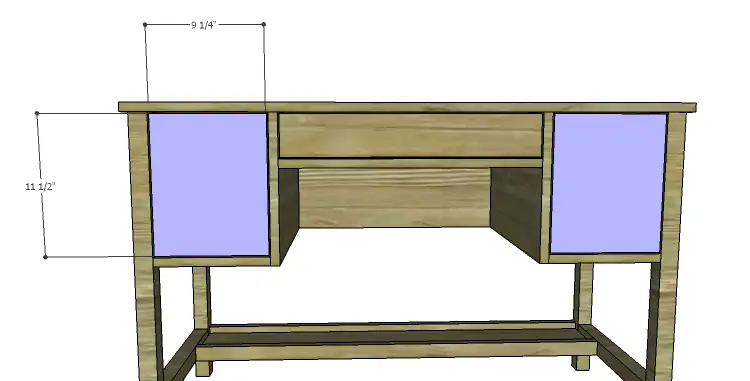
Step Eleven
Cut the pieces for the doors. There will be a 1/8″ gap around all sides of the doors in the opening. Install the hinges on the doors, then install the doors in the openings. Install the cabinet pulls.
Finish as desired!
The lower shelf would be the perfect place to store electronic devices that are charging – which also keeps them off the desk so that your student won’t be distracted! Have any questions about the Randall desk plans? Leave a comment below or contact me at cher {at} designsbystudioc {dot} com!
Originally posted 2014-08-06 08:00:14.