
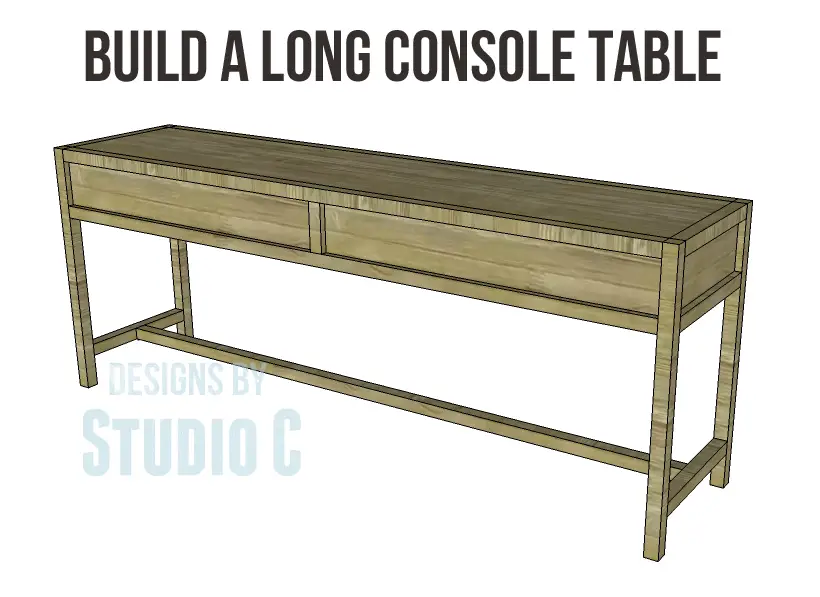
Build a Quick and Easy Table Using the Long Console Table Plans
An Easy to Build Console Table
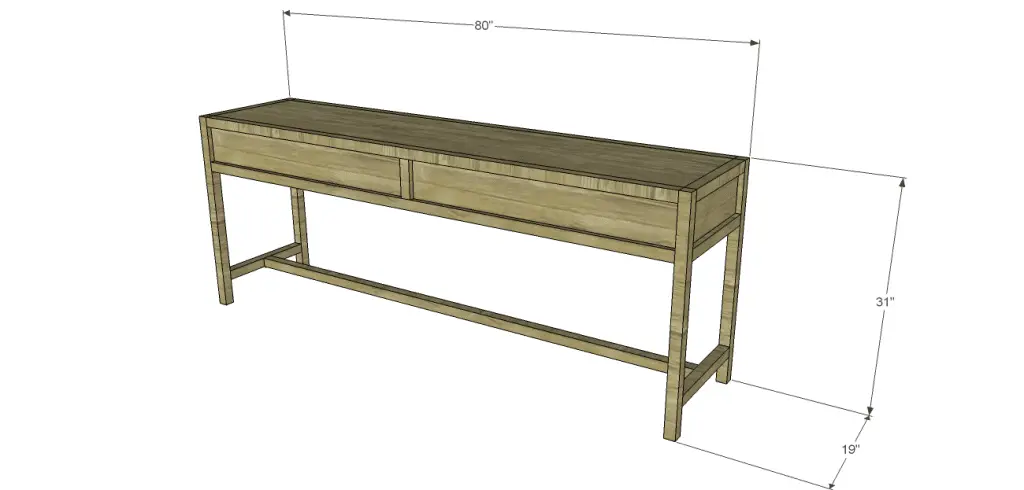
Looking for a quick weekend project? New to woodworking and want to start with a basic plan that is not so Plain Jane? Look no further than the Long Console Table Plans! The plans are super-simple and can be finished in a variety of ways for many different looks! The table itself is very long (pun intended) without drawers but would be easy to shorten with just a few changes to the length!
Materials:
- 1-1/4″ pocket hole screws (<– affiliate link!)
- 2-1/2″ pocket hole screws
- Wood glue
- Sandpaper (100, 150, 220 grits)
- Finishing supplies (primer & paint, or stain, sealer)
Lumber:
- 7- 2×2 at 8′ (or 4 – 2×4 at 8′ cut in half)
- 1 sheet of 3/4″ plywood
Cut List:
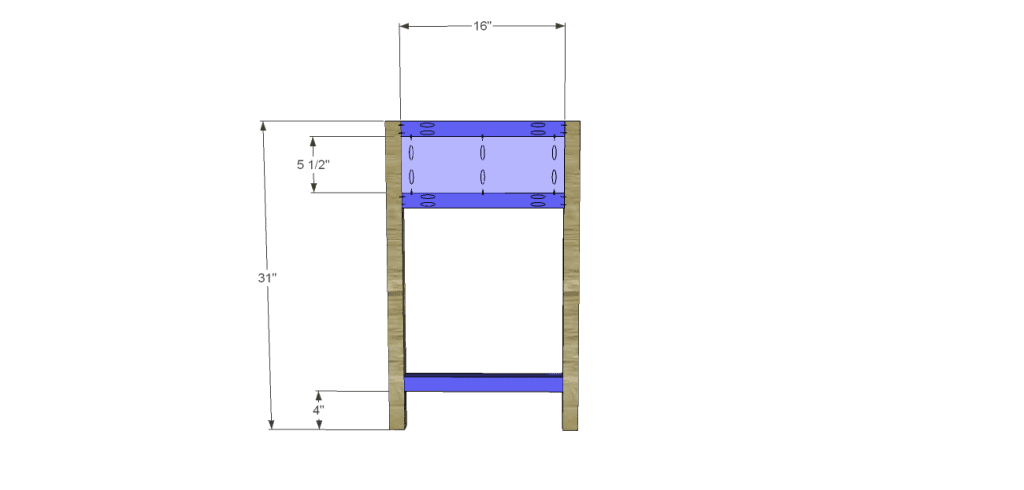
- 4 – 2×2 at 31″ – Legs
- 6 – 2×2 at 16″ – End Frames
- 2 – 3/4″ plywood at 5-1/2″ x 16″ – End Frame Panels
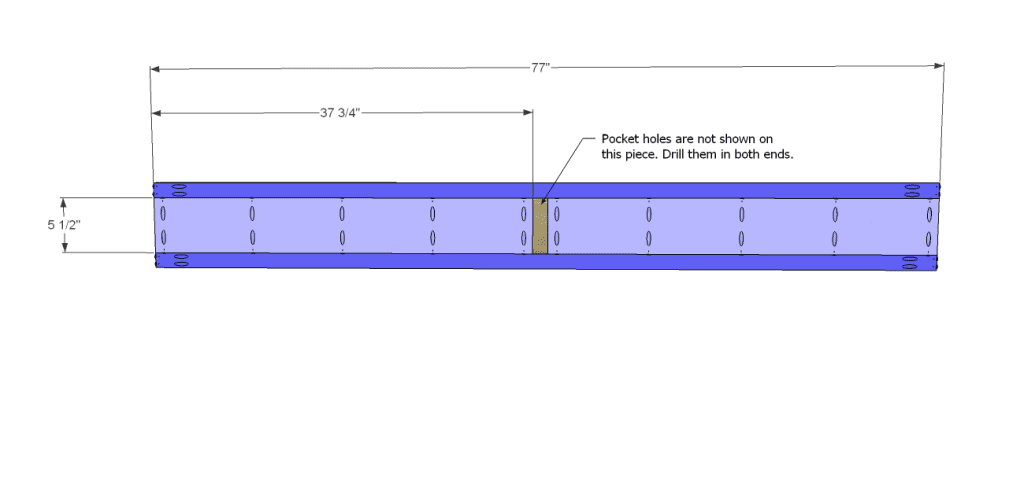
- 5 – 2×2 at 77″ – Side Frames
- 2 – 2×2 at 5-1/2″ – Side Frames
- 4 – 3/4″ plywood at 5-1/2″ x 37-3/4″ – Side Frame Panels
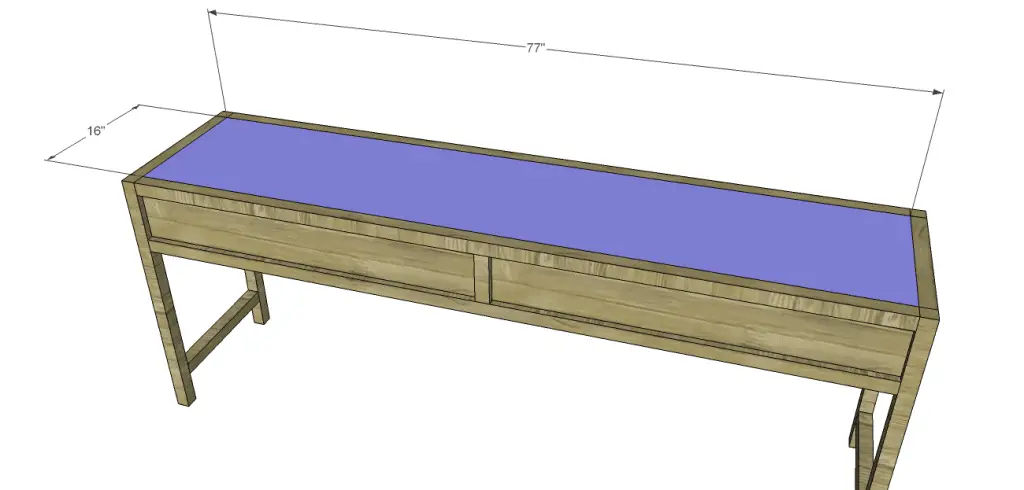
- 1 – 3/4″ plywood at 16″ x 77″ – Top
Step One
Cut the pieces for the legs, the end frames, and the end frame panels. With the pocket hole jig set for 1-1/2″ material, drill pocket holes in each end of the frame pieces.
Set the pocket hole jig for 3/4″ material and drill pocket holes in each long edge of the panels. Secure the frame pieces to the panels as shown using glue and 1-1/4″ pocket hole screws. The back face of the panels will be flush with the inside face of the frame pieces.
Secure the panel assemblies and the lower frame piece to the legs using glue and 2-1/2″ pocket hole screws. Orient the pocket holes on the lower frame piece so they face down and won’t have to be filled.
Step Two
Cut the pieces for the side frames and the side frame panels. Set the pocket hole jig back to 1-1/2″ material and drill pocket holes in each end of the frame pieces, including the two shorter pieces. (Pocket holes are not shown on these pieces in the drawing.)
Set the pocket hole jig for 3/4″ material and drill pocket holes in each long edge of the panels. Attach the shorter frame piece to the longer frame pieces using glue and 2-1/2″ pocket hole screws, then secure the panels as shown using glue and 1-1/4″ pocket hole screws. The back face of the panels will be flush with the inside face of the frame pieces.
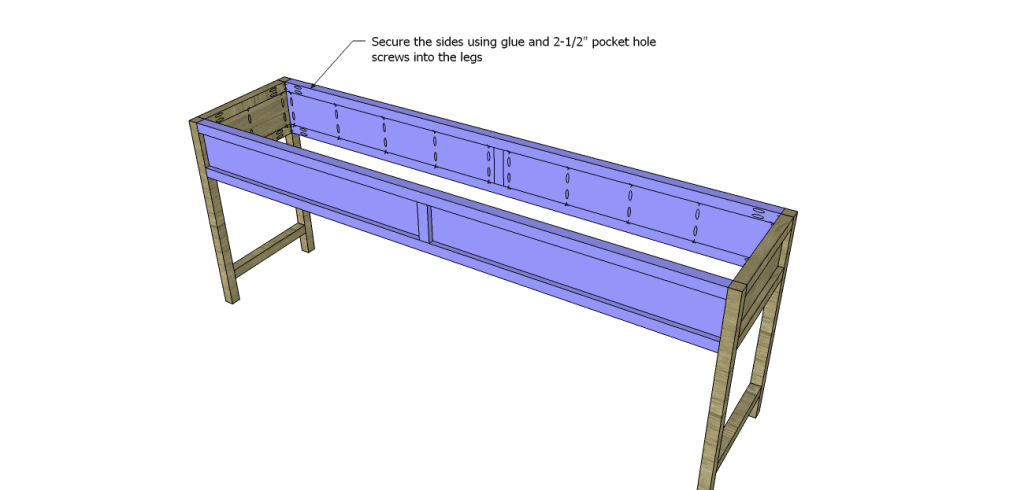
Step Three
Secure the side panel assemblies to the end panel assemblies using glue and 2-1/2″ pocket hole screws.
Step Four
Cut the piece for the top and drill pocket holes in all four edges. Secure to the upper frame pieces using glue and 1-1/4″ pocket hole screws. The top face of the top will be flush with the top face of the upper frame pieces.
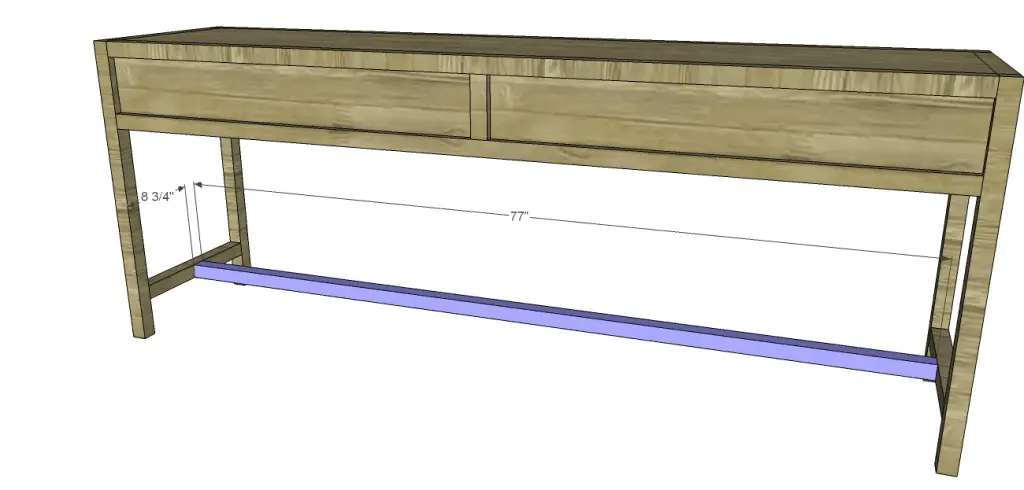
Step Five
Cut the piece for the lower stretcher. Set the pocket hole jig for 1-1/2″ material and drill pocket holes in each end. Secure to the lower end frame pieces as shown using glue and 2-1/2″ pocket hole screws. Orient the pocket holes on the lower frame piece so they face down and won’t have to be filled.
Finish as desired.
The table built from the Long console table plans will be really awesome with a two-tone paint finish, or maybe stenciled and distressed panels… How cool would that be? Have questions? Let me know at cher {at} designsbystudioc {dot} com!
Originally posted 2014-03-17 08:00:19.