
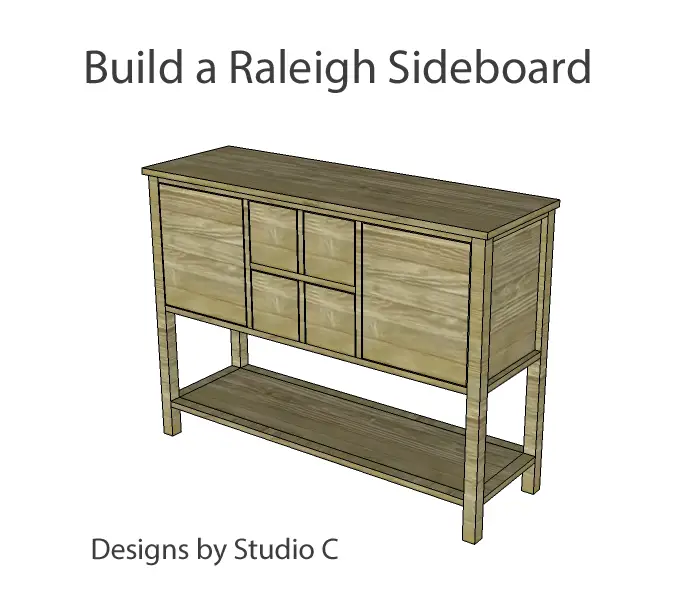
Plans to Build a Raleigh Sideboard
Plans to Build an Elegant Sideboard Perfect for Holiday Entertaining
Hey there! Can you believe the holidays are just around the corner? How about impressing everyone with your amazing DIY skills by building a stunning sideboard? Our Raleigh sideboard plans are just what you need! It comes with four spacious drawers and two large cabinets, ideal for storing all your linens and china. Plus, it’s the perfect setup for a fantastic holiday buffet! And that’s not all – there’s even a roomy shelf at the bottom where you can proudly display your favorite decorations or collection. Get ready to wow your guests this holiday season!
This is another plan that can be finished however you desire – distressed paint, glazed, layered stain, stencils, etc. It is a blank canvas to make entirely your own!
Materials:
- 1-1/4″ pocket hole screws
- 1-1/4″ brad nails
- Edge banding, optional
- 6 cabinet pulls
- 2 sets of hinges
- Wood Glue
- Sandpaper (100. 150, 220 grits)
- Paste wax
- Finishing supplies (primer & paint or stain, sealer)
Lumber:
- 4 – 1×2 at 8′
- 2 – 2×2 at 6′ (or 1 – 2×4 at 8′ ripped in half)
- 1 sheet of 3/4″ plywood (maybe a few 3/4″ plywood scraps, as well!)
Cut List:
- 4 – 2×2 at 33-1/4″ – Legs
- 6 – 1×2 at 11-1/2″ – Side Frames
- 2 – 3/4″ plywood at 11-1/2″ x 15-1/8″ – Side Panels
- 6 – 1×2 at 42″ – Front & Back Stretchers
- 1 – 3/4″ plywood at 15-1/8″ x 42″ – Back Panel
- 2 – 3/4″ plywood at 11-1/2″ x 42″ – Shelves
- 2 – 3/4″ plywood at 13″ x 15-7/8″ – Dividers
- 2 – 3/4″ plywood at 7-3/16″ x 13″ – Drawer Dividers
- 1 – 3/4″ plywood at 13″ x 14-1/2″ – Drawer Shelf
- 1 – 3/4″ plywood at 15″ x 46″ – Top
- 4 – 3/4″ plywood at 5-1/8″ x 11-1/2″ – Drawer Bottoms
- 8 – 3/4″ plywood at 7″ x 11-1/2″ – Drawer Sides
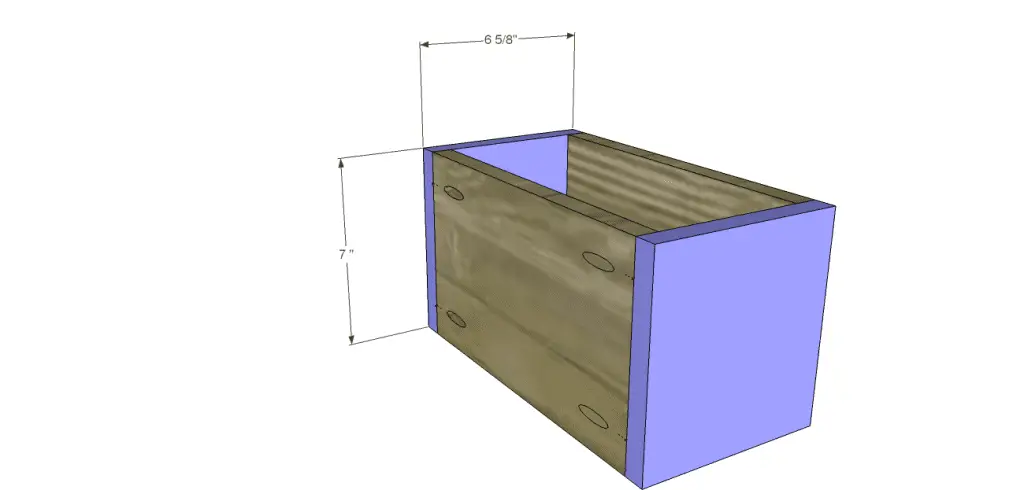
- 8 – 3/4″ plywood at 6-5/8″ x 7″ – Drawer Front & back
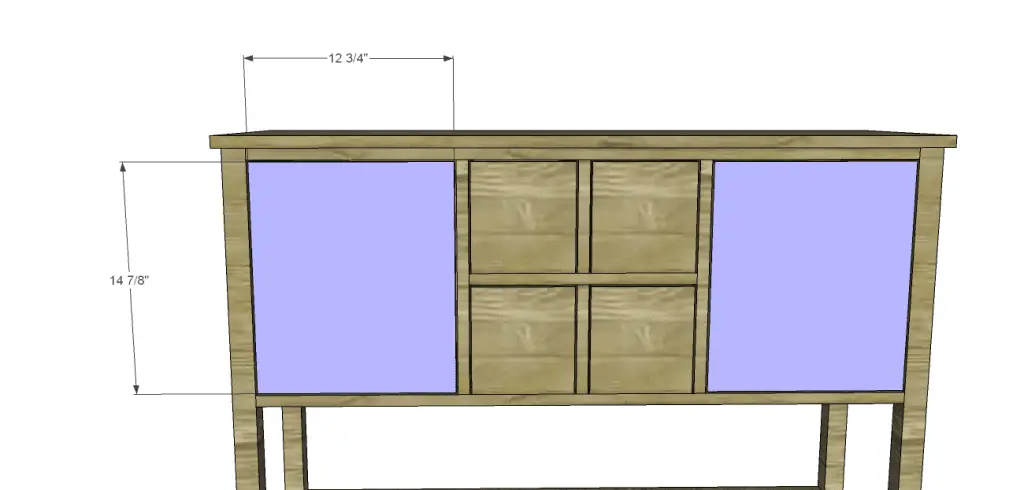
- 2 – 3/4″ plywood at 12-3/4″ x 14-7/8″ – Doors
Notes:
If using edge banding, it will be applied to the exposed edges of the plywood before assembly. It will also be easier to sand each piece prior to assembly.
Step One
Cut the pieces for the legs, side frames, and side panels. With the pocket hole jig set for 3/4″ material, drill pocket holes in each end of the frame pieces, as well as all four edges of the panels. Secure the frame pieces to the legs using glue and 1-1/4″ pocket hole screws. Orient the upper frame piece so the pocket holes face up, and orient the others so the pocket holes face down. This way, they will not be visible and will not have to be filled!
Insert the panel and position it so that the back face is flush with the inside of the frame. Secure in place using glue and 1-1/4″ pocket hole screws.
Step Two
Cut the pieces for the back frame pieces as well as the back panel. Drill pocket holes in each end of the frame pieces, as well as all four edges of the panel. Secure the frame pieces to the legs using glue and 1-1/4″ pocket hole screws. Orient the frame pieces in the same manner as the sides. Secure the panel in the same manner as the side panels.
Step Three
Cut the pieces for the front stretchers and drill pocket holes in each end of each piece. Secure using glue and 1-1/4″ pocket hole screws, again orienting the pieces so that the pocket holes will not be visible.
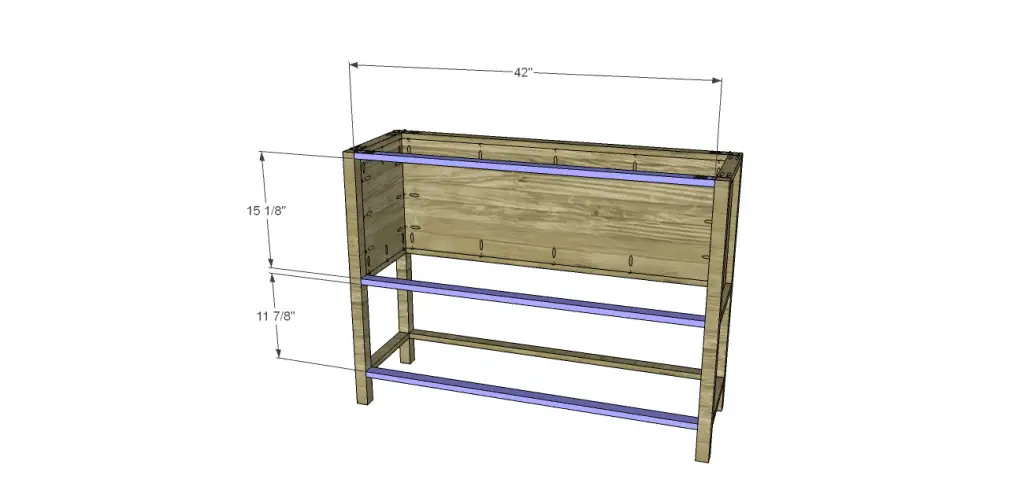
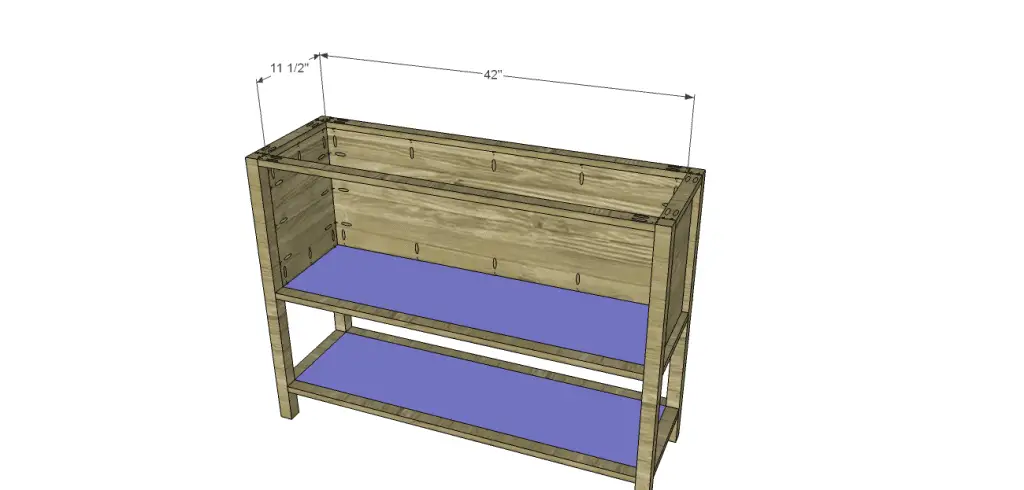
Step Four
Cut the pieces for the shelves and drill pocket holes in all four edges. Position as shown, then secure using glue and 1-1/4″ pocket hole screws.
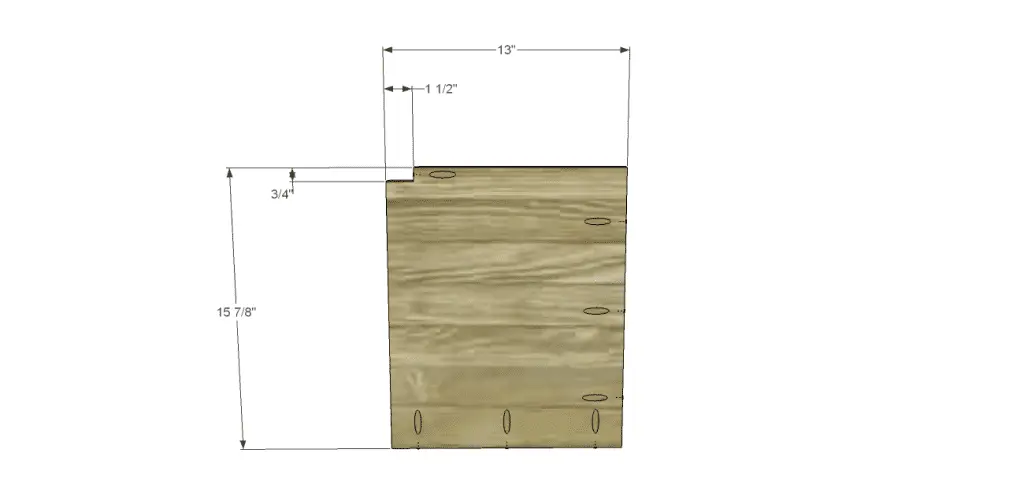
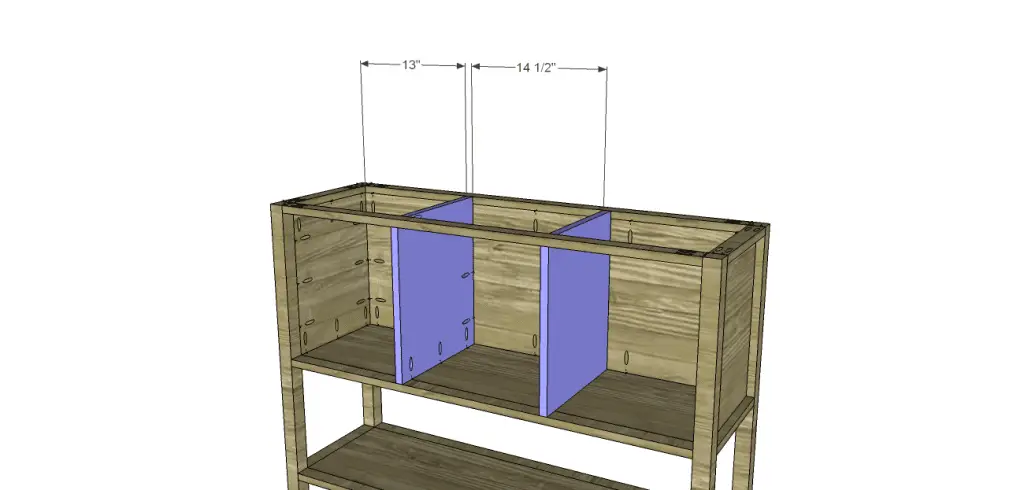
Step Five
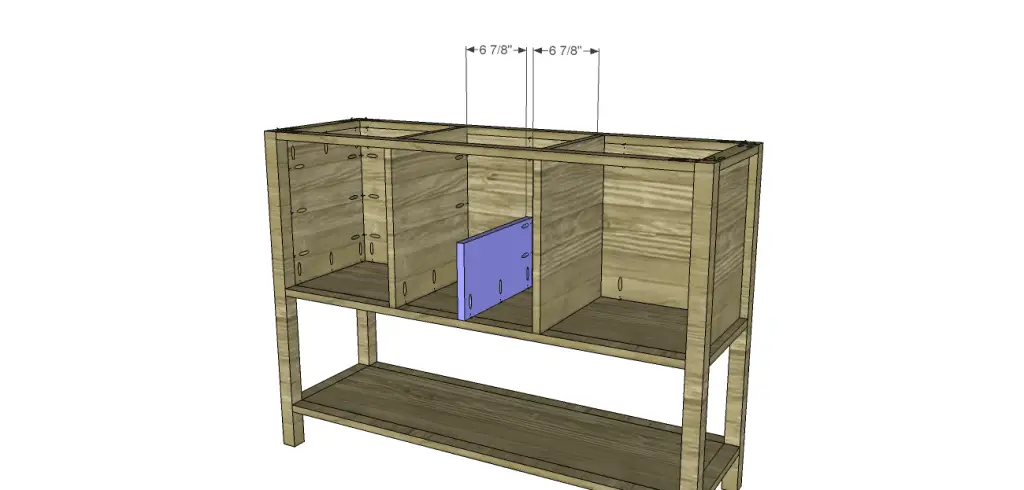
Cut the pieces for the dividers. Cut the notches using a jigsaw or a bandsaw. Drill pocket holes as shown noting that there will be a right and a left piece. This way, the pocket holes are hidden inside the drawer area and won’t be visible. Secure as shown using glue and 1-1/4″ pocket hole screws.
Step Six
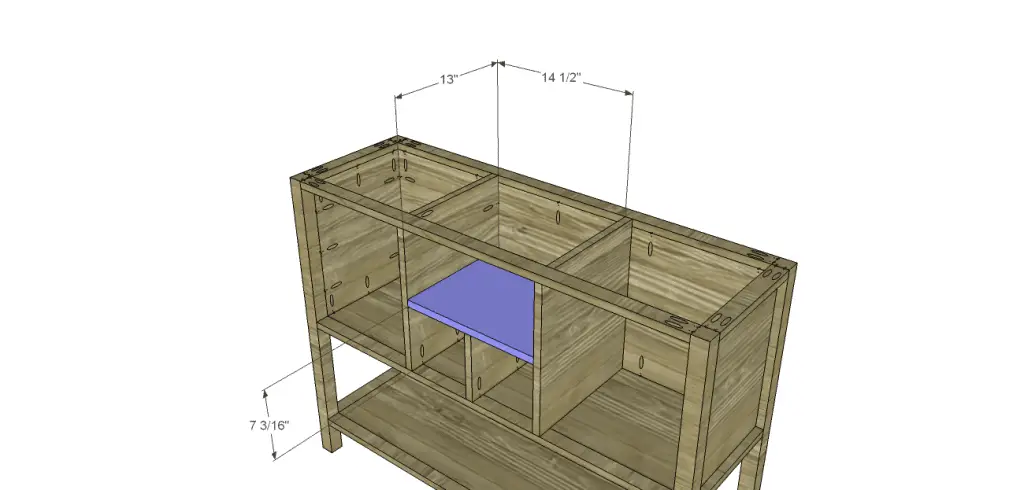
Cut the pieces for the drawer dividers and the drawer shelf. Drill pocket holes in the dividers as shown. Start by securing the lower divider as shown using glue and 1-1/4″ pocket hole screws.
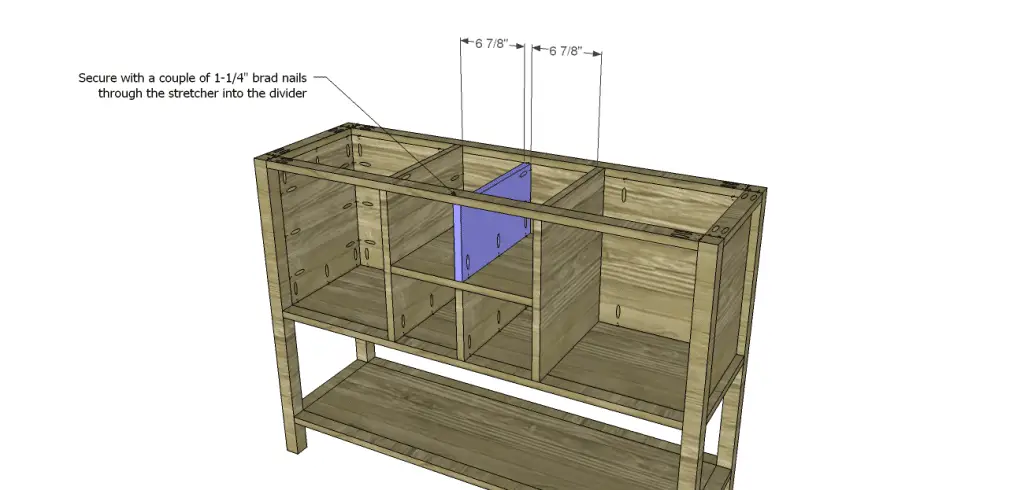
Next, secure the shelf as shown using glue and 1-1/4″ brad nails through the dividers into the side of the shelf, and through the shelf into the lower divider.
Position the upper divider as shown, then secure using glue and 1-1/4″ pocket hole screws. Place a few brad nails through the upper stretcher into the divider to further secure it in place.
Step Seven
Cut the piece for the top. Position it so that 1/2″ overhangs the sides and front. Secure using glue and 1-1/4″ brad nails.

Step Eight
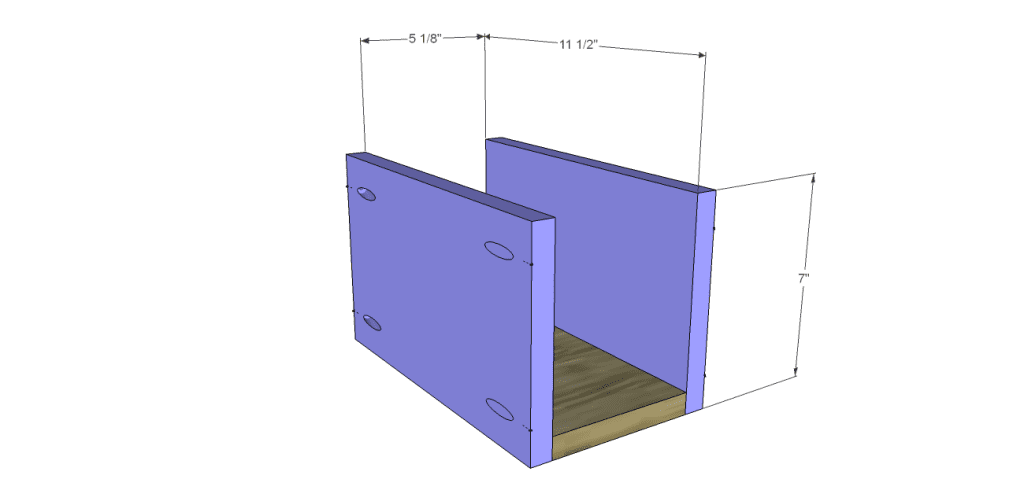
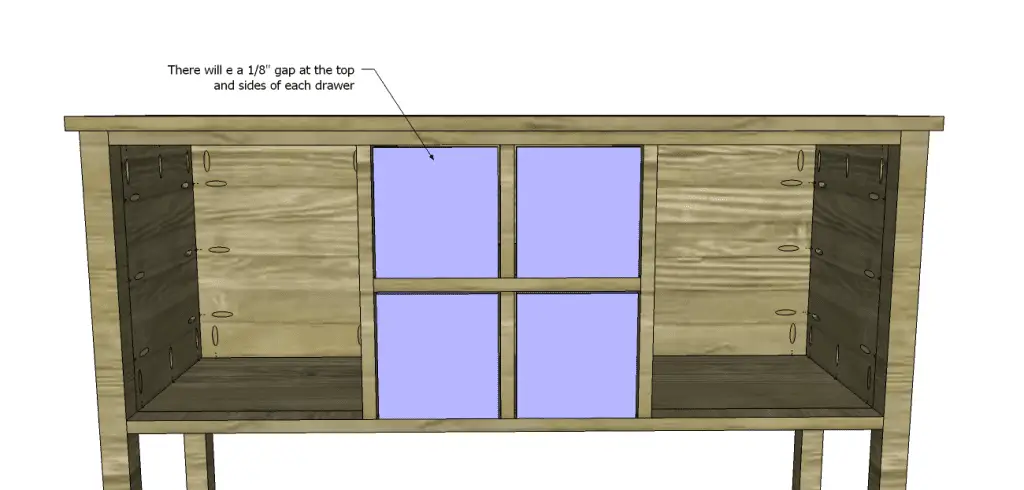
Cut the pieces for the drawer boxes. Drill pocket holes in each end of the sides as well as all four edges of the bottom pieces. Secure the sides to the bottom, as shown, using glue and 1-1/4″ pocket hole screws. Secure the front and back in the same manner. Drill a hole in the center of each front and install a cabinet pull in each drawer.Apply a coat of paste wax to the bottom of each drawer as well as in each drawer opening. This will help the drawers slide smoothly. There will be a 1/8″ gap at the top and sides of each drawer box in the opening.
Step Nine
Cut the pieces for the doors. Install the hinges on the doors, then install the hinges in the cabinet. Locate the position of the cabinet pull and drill a hole (the pull can be positioned anywhere you choose). Install the pull.
Finish as desired! When you build the Raleigh Sideboard, it will last for years to come and will definitely become a family heirloom as well as becoming quite the conversation piece at your next gathering! Have you used my plans to build a furniture piece? Share it with me at cher {at} designsbystudioc {dot} com!
Originally posted 2013-09-16 08:00:09.