
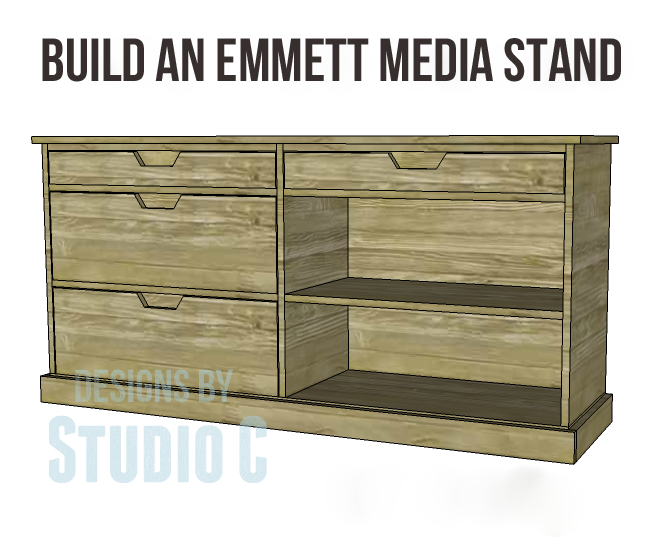
Build an Emmett Media Stand
A DIY Media Stand with Options
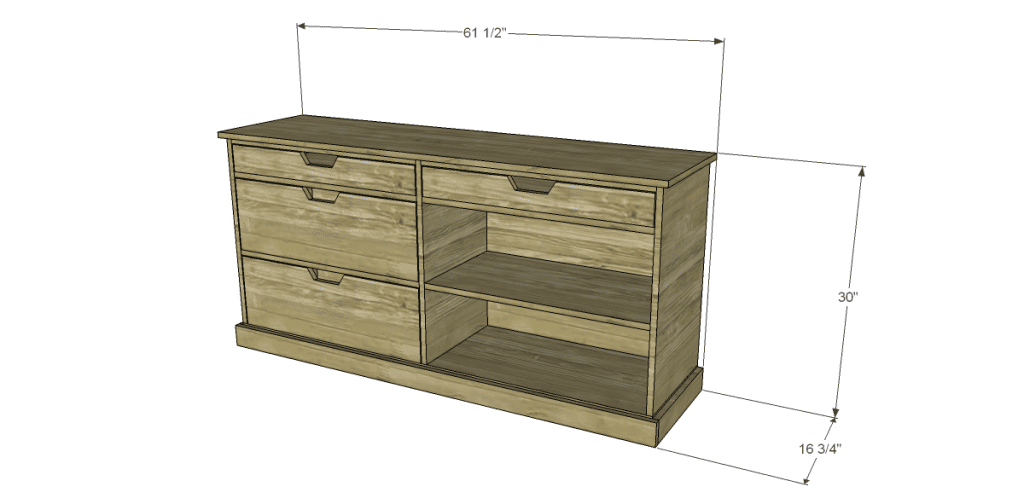
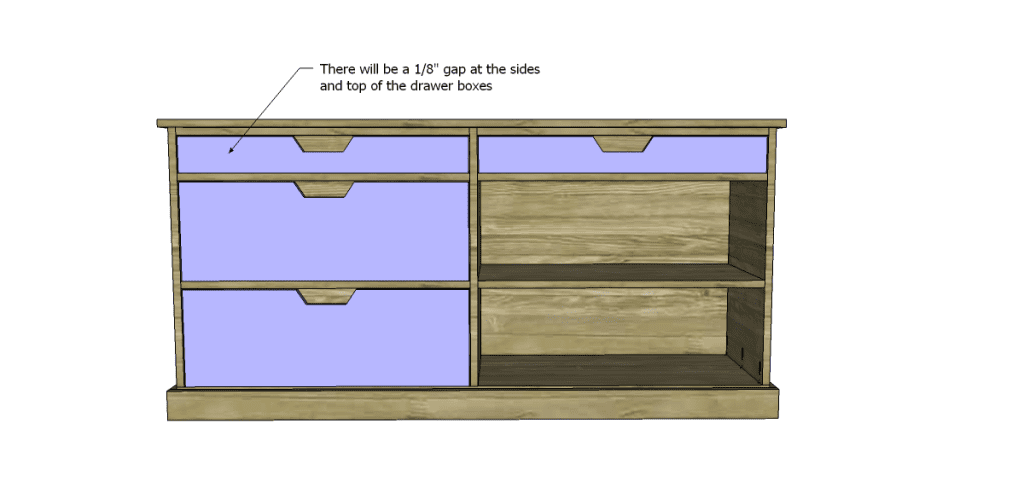
This is a pretty cool media stand… As drawn, the plans to build an Emmett Media Stand feature four drawers and a shelf. There are also a few alternate options for this stand – the drawers can be omitted and it can just have the shelving, a couple more of the larger drawers can be built so that it is full of drawers, or it can be a combination of both in any form! That makes it easy, right? This would be fabulous built in oak plywood (PureBond would be an excellent choice!) with the drawers decorated using the Glue-Resist Technique!
Your own trim can be used on the base – just cut a few boards to the specified length and width, then rout a decorative edge on the top!
Note: Lumber and cut list allow for two small drawers and two large drawers. Adjust the amount of lumber if additional drawers are desired.
Materials:
- 1-1/4″ pocket hole screws
- 1-1/4″ brad nails
- Edge banding for the exposed edges of the plywood, optional
- Paste wax and other finishing supplies
Lumber:
- Two – 1×2 at 8′
- One – 1×3 at 6′
- Two sheets of 3/4″ plywood
Cut List:
- Three – 1×3 at 16″ – Base Frame
- Four – 1×2 at 28-7/8″ – Base Frame
- One – 3/4″ plywood at 16″ x 60″ – Bottom
- Three – 3/4″ plywood at 16″ x 26″ – Sides & Divider
- Two – 3/4″ plywood at 26″ x 28-7/8″ – Back
- Two – 1×2 at 28-7/8″ – Stretchers
- One – 3/4″ plywood at 16-3/4″ x 61-1/2″ – Top
- Four – 3/4″ plywood at 15-1/4″ x 28-7/8″ – Shelves
- Four – 3/4″ plywood at 13-3/4″ x 27-1/8″ – Drawer Bottoms
- Four – 3/4″ plywood at 3-5/8″ x 13-3/4″ – Smaller Drawer Sides
- Four – 3/4″ plywood at 3-5/8″ x 28-5/8″ – Smaller Drawer Front & Back
- Four – 3/4″ plywood at 9-7/8″ x 13-3/4″ – Larger Drawer Sides
- Four – 3/4″ plywood at 9-7/8″ x 28-5/8″ – Larger Drawer Front & Back
- Two – 1×4 (ripped to 3″ wide) at 16″ for a square corner OR 16-3/4″ for a mitered corner – Side Trim
- One – 1×4 (ripped to 3″ wide) at 61-1/2″ (same length with square edge or mitered edge) – Front Trim
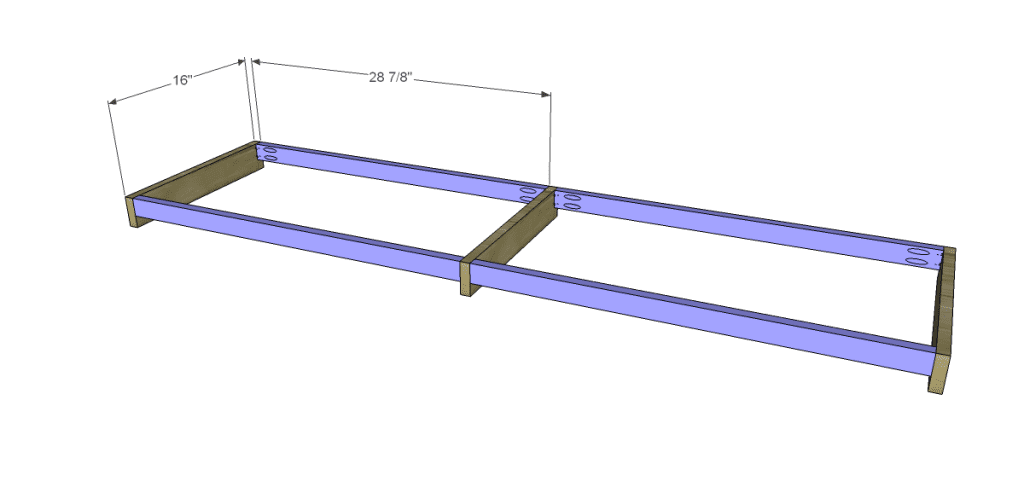
Step One
Cut the pieces for the base. Using a pocket hole jig, drill pocket holes in each end of the 1×2 pieces. Assemble the base as shown using glue and 1-1/4″ pocket hole screws. Each of the 1×2 pieces will be flush with one long edge of the 1×3 pieces. The wider 1×3 pieces will act as feet.
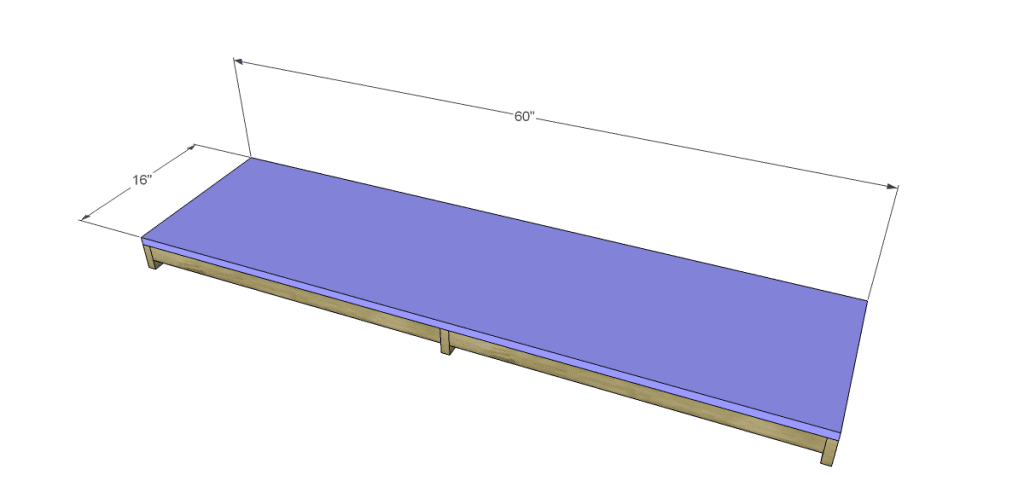
Step Two
Cut the piece for the bottom. If using edge banding, it will be applied before assembly. Secure to the base using glue and 1-1/4″ brad nails through the bottom piece into the base frame.
Step Three
Cut the pieces for the sides and dividers. Drill pocket holes in each of the shorter edges (the top and bottom). Secure the pieces as shown using glue and 1-1/4″ pocket hole screws.
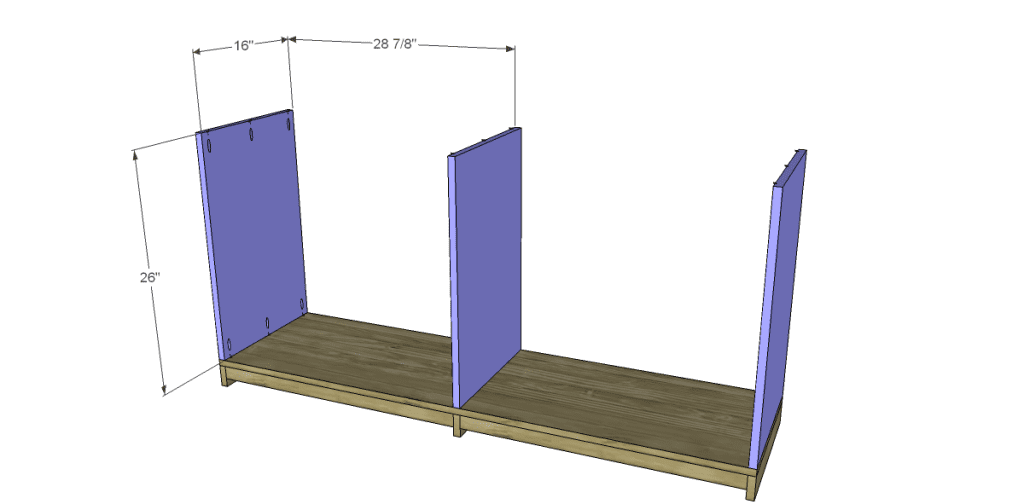
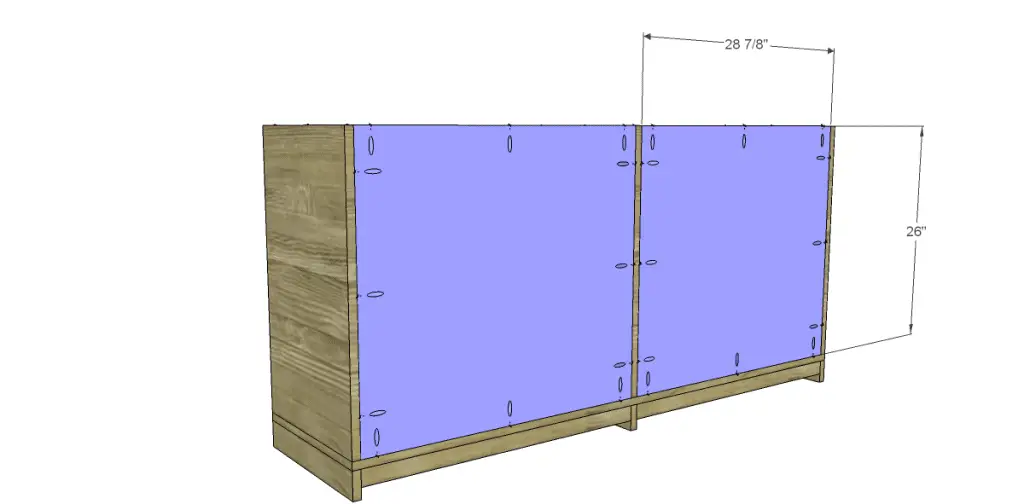
Step Four
Cut the pieces for the back and drill pocket holes in all four edges. Position each piece between the sides and divider as shown, then secure using glue and 1-1/4″ pocket hole screws.
Step Five
Cut the pieces for the stretchers and drill pocket holes in each end. Position as shown (with the pocket holes facing up so they are hidden) then secure using glue and 1-1/4″ pocket hole screws.

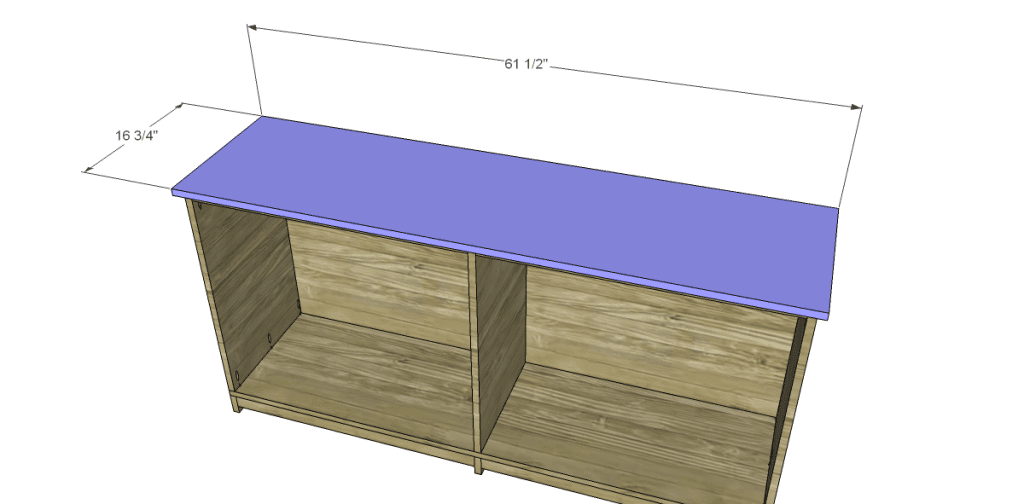
Step Six
Cut the piece for the top. Position the piece so that 3/4″ overhangs the front and sides. Secure using glue and 1-1/4″ pocket hole screws through the upper portion of the sides and back into the underside of the top.
Step Seven
Cut the pieces for the shelves. Drill pocket holes in each shorter edge as well as one long edge. Position in the cabinet as shown, then secure using glue and 1-1/4″ pocket hole screws. I like to cut spacers from scrap wood to make sure each edge of my shelves are spaced evenly!

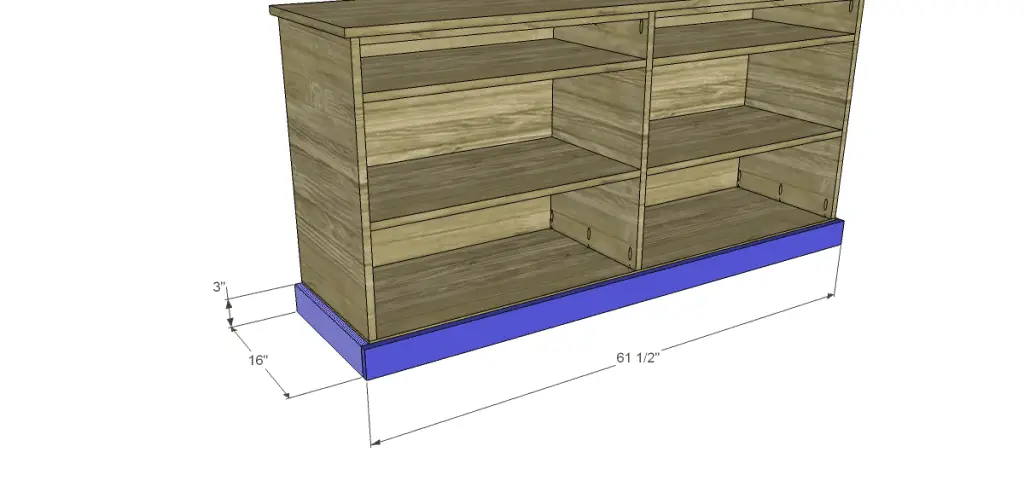
Step Eight
Cut the pieces for the trim. If using a square corner (with a square top edge), cut the side trim pieces at 16″. If using a mitered corner with a routed edge, cut the side trim pieces at 16-3/4″. The front piece will be the same length either way. Attach the side pieces using glue and 1-1/4″ brad nails, then attach the front in the same manner.
Step Nine
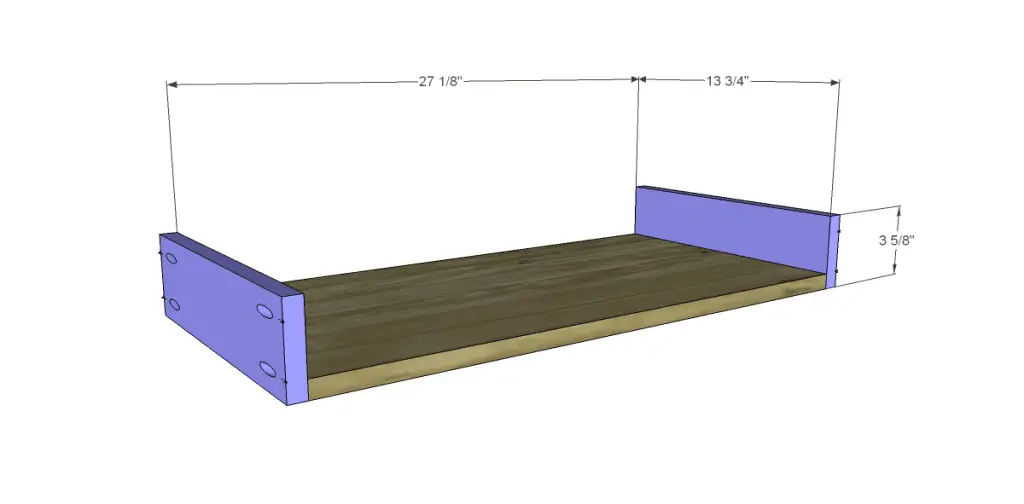
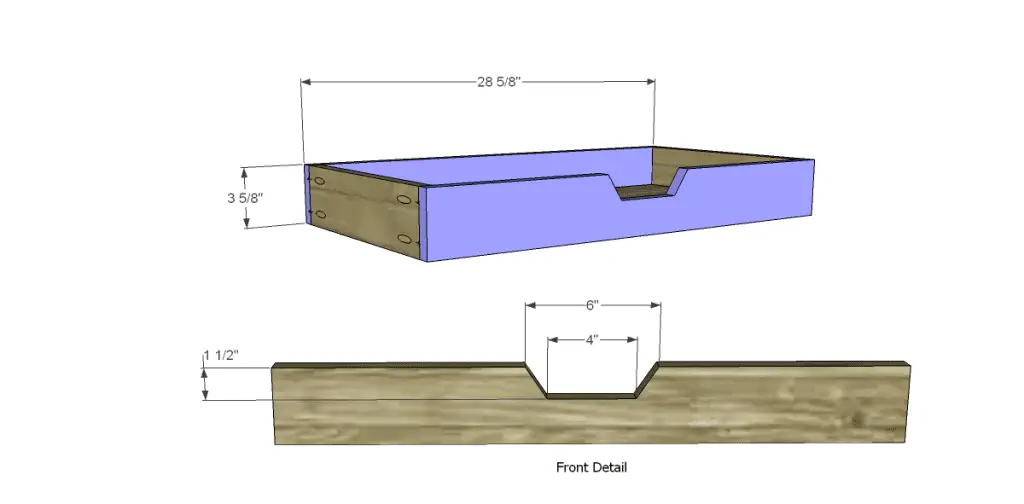
Cut the pieces for the drawer boxes. Cut the notches in the front of each drawer as shown using a jigsaw. Drill pocket holes in each end of the side pieces as well as all four edges of the bottom. Assemble the drawers by securing the sides first using glue and 1-1/4″ pocket hole screws through the bottom into the lower edge of the sides, then attach the front and back using glue and 1-1/4″ pocket hole screws through the bottom and sides.


Finish as desired! To allow the drawers to slide smoothly, apply a coat of paste wax to the bottom of the drawer as well as to the top of each shelf. Let the wax dry, then buff!
The plan to build an Emmett Media Stand is a simple project, and is very easy to construct, and can be an excellent first project! Have questions about the plan? Leave a comment below!
Originally posted 2013-09-04 08:00:53.