This step by step diy woodworking article is about sand box plans. Building a simple sand box doesn’t require a high investment nor complex woodworking techniques. Taking into consideration there are many designs to choose from, we recommend you to study several alternatives, before taking a final decision regarding the project. You could also take a look on the wooden sandbox plans, to see a different approach.
From our experience, we recommend you to use quality materials that are weather-resistant (pressure-treated, pine, cedar). When buying the components, check if the slats are in a good condition and perfectly straight. In addition, when locking them together, we recommend you to drill pilot holes and to countersink the head of the screws. In addition, add waterproof glue to the joints, as to get a rigid frame. See all my Premium Plans HERE.
Projects made from these plans
Cut & Shopping lists
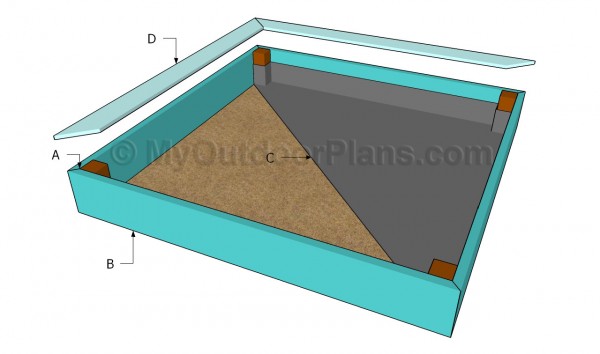
- A – 4 pieces of 4×4 lumber – 9 1/2” long POSTS
- B – 4 piece of 2×10 lumber – 72″ long SLATS
- C – 50 sq ft of landscape fabric LANDSCAPE FABRIC
- D – 4 pieces of 1×6 lumber – 73″ long TRIMS
Tools
![]() Hammer, Tape measure, Framing square
Hammer, Tape measure, Framing square
![]() Miter saw, Drill machinery, Screwdriver, Sander
Miter saw, Drill machinery, Screwdriver, Sander
Time
Related
Building a Sand Box

Building a sand box
Building a simple sand box doesn’t necessarily mean that it has to have a blunt design. On the contrary, even with little effort you can create a sandbox with a nice appearance that will put a big smile of the face of your kid.
Sand box plans

Building the frame of the sand box
The first step of the project is to build the frame of the sand box. As you can see in the plans, you can adjust the size of the frame to your needs, but you should use the carpentry techniques described in the project.
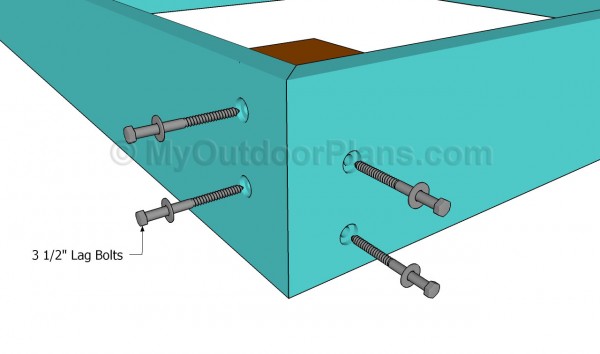
Top Tip: Use a carpentry square to check if the corners are right angled, before driving in the lag screws. Use 2×10 slats and 4×4 corner posts to create a rigid frame.

Attaching the slats
As you can easily notice in the image, you need to drill pilot holes trough the wooden slats and countersink the head of the screws. Leave at least 1″ from the edges, to prevent the wood from splitting and to avoid possible injuries in the sharp edges.
Use a circular saw with a sharp blade to cut the ends of the slats at 45º. In this manner, you will create rigid joints and add style to the sand box.

Installing landscape fabric
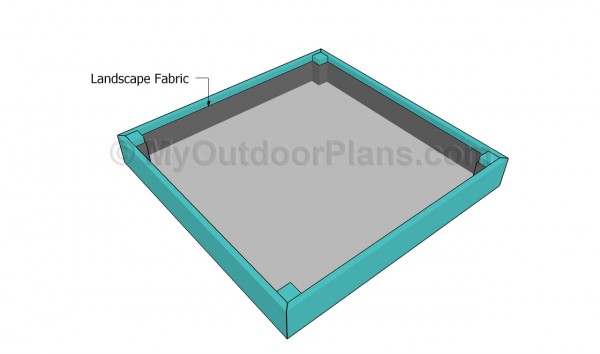
Add a piece of landscape fabric to the interior of the sand box, if you want to protect the wooden components from moisture and to keep the unwanted plants away. Make sure you take accurate measurements, if you want to get a professional result.
Top Tip: You can also attach the fabric to the walls, as in the plans. Use glue or staples to secure the material in place tightly.

Fitting the trims
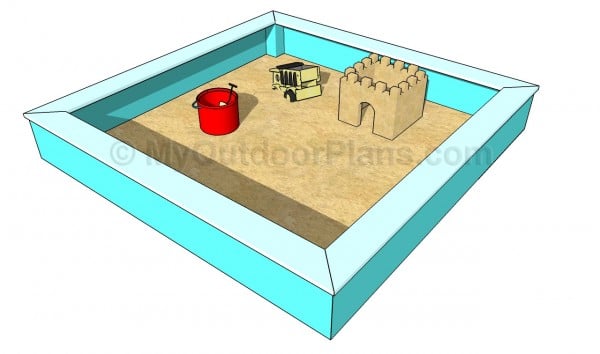
One of the last steps of the woodworking project is to add the 1×6 trims to the top edges of the frame. As you can easily notice in the image, the trims will not only enhance the look of the sand box, but they will also create a support where your kids can sit.
Use a router and a bit to round the exposed edges of the trims, if you want to add style to your woodworking project. Make sure there are no gaps between the trims when fitting them into place.

Sand box plans
Last but not least, you have to take care of the finishing touches. Fill the holes with wood filler and let it dry out for several hours. Next, sand the wooden surface with medium-grit sandpaper vacuum the residues.
Top Tip: We recommend you to apply several coats of protective paint to the wooden components, in order to protect them from decay. Freshen-up the paint every few years.
This project was about sand box plans. If you want to see more outdoor plans, we recommend you to check out the rest of the projects.
EXPLORE MORE IDEAS FOR:
 |
 |
 |
 |
