


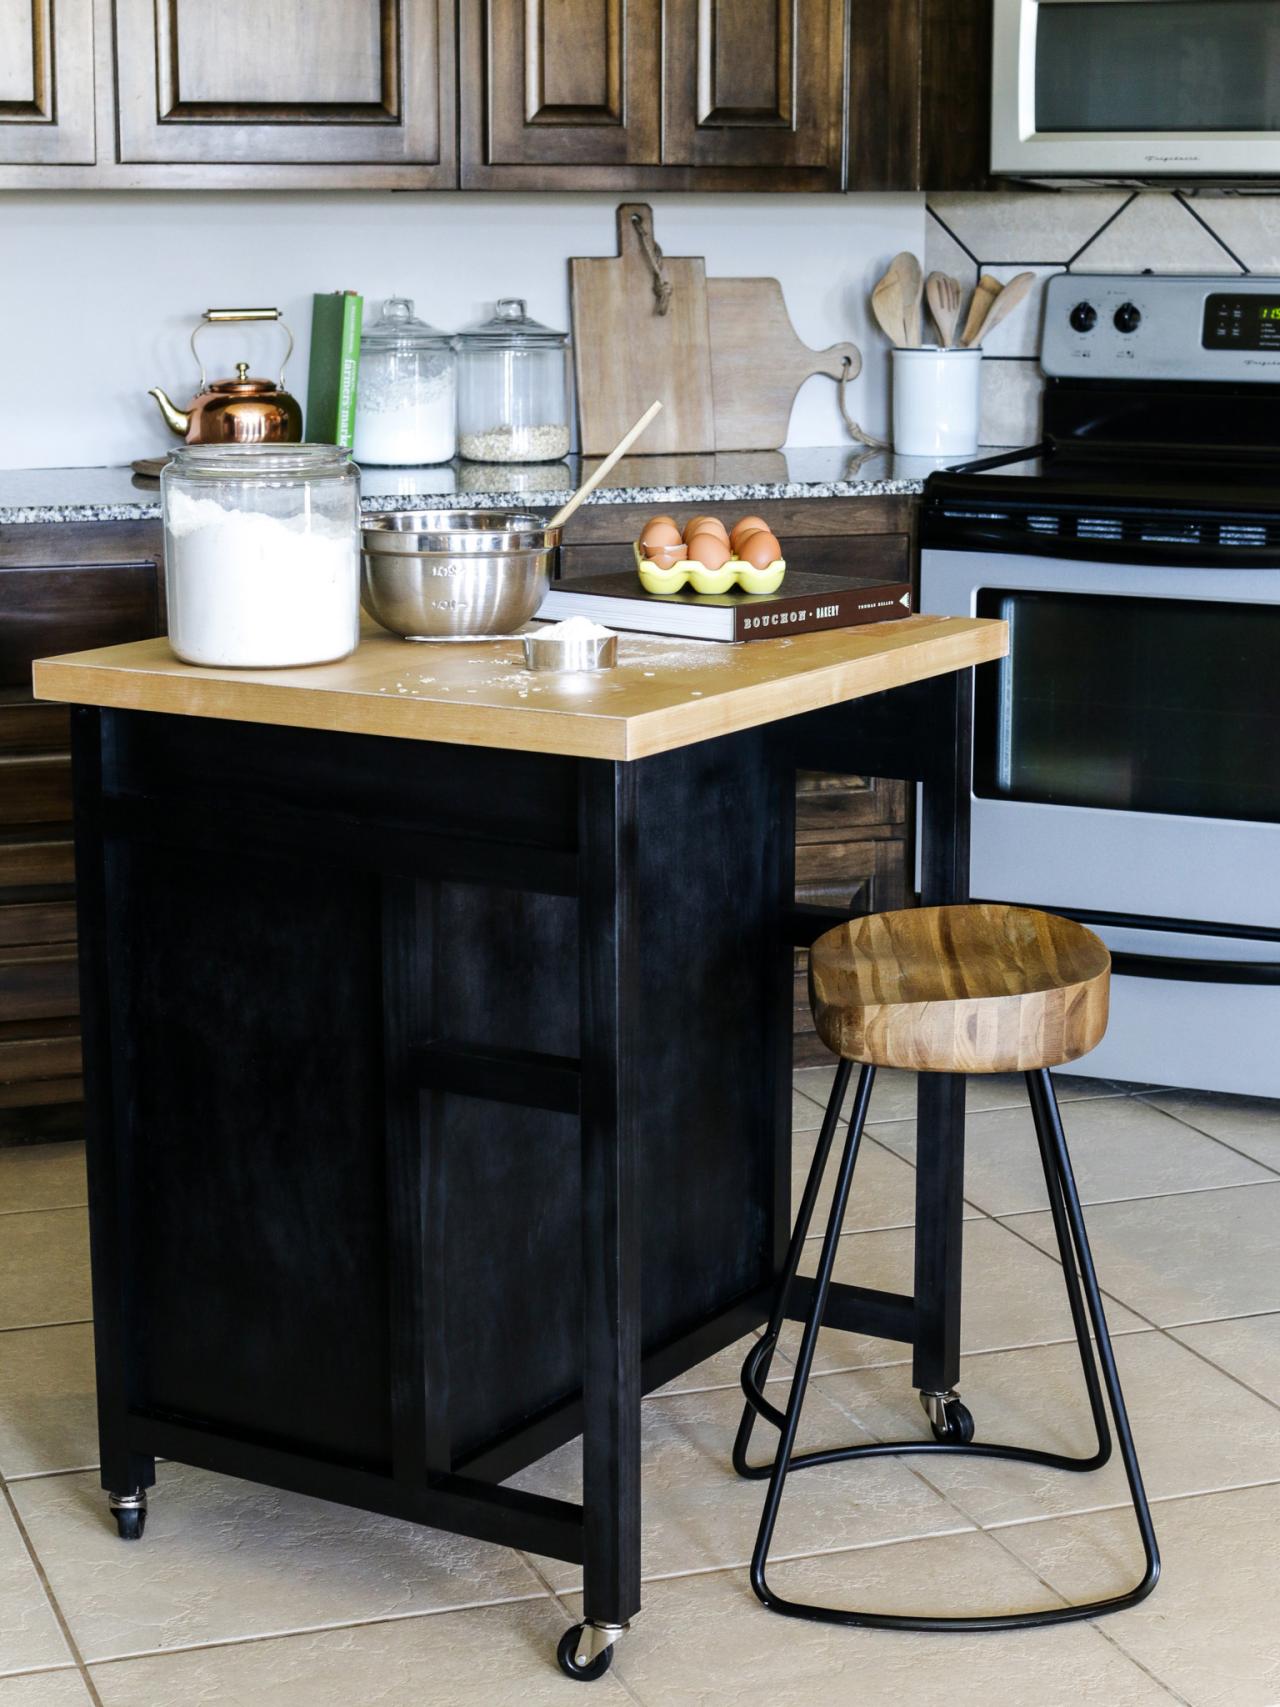
How to Build a DIY Kitchen Island on Wheels
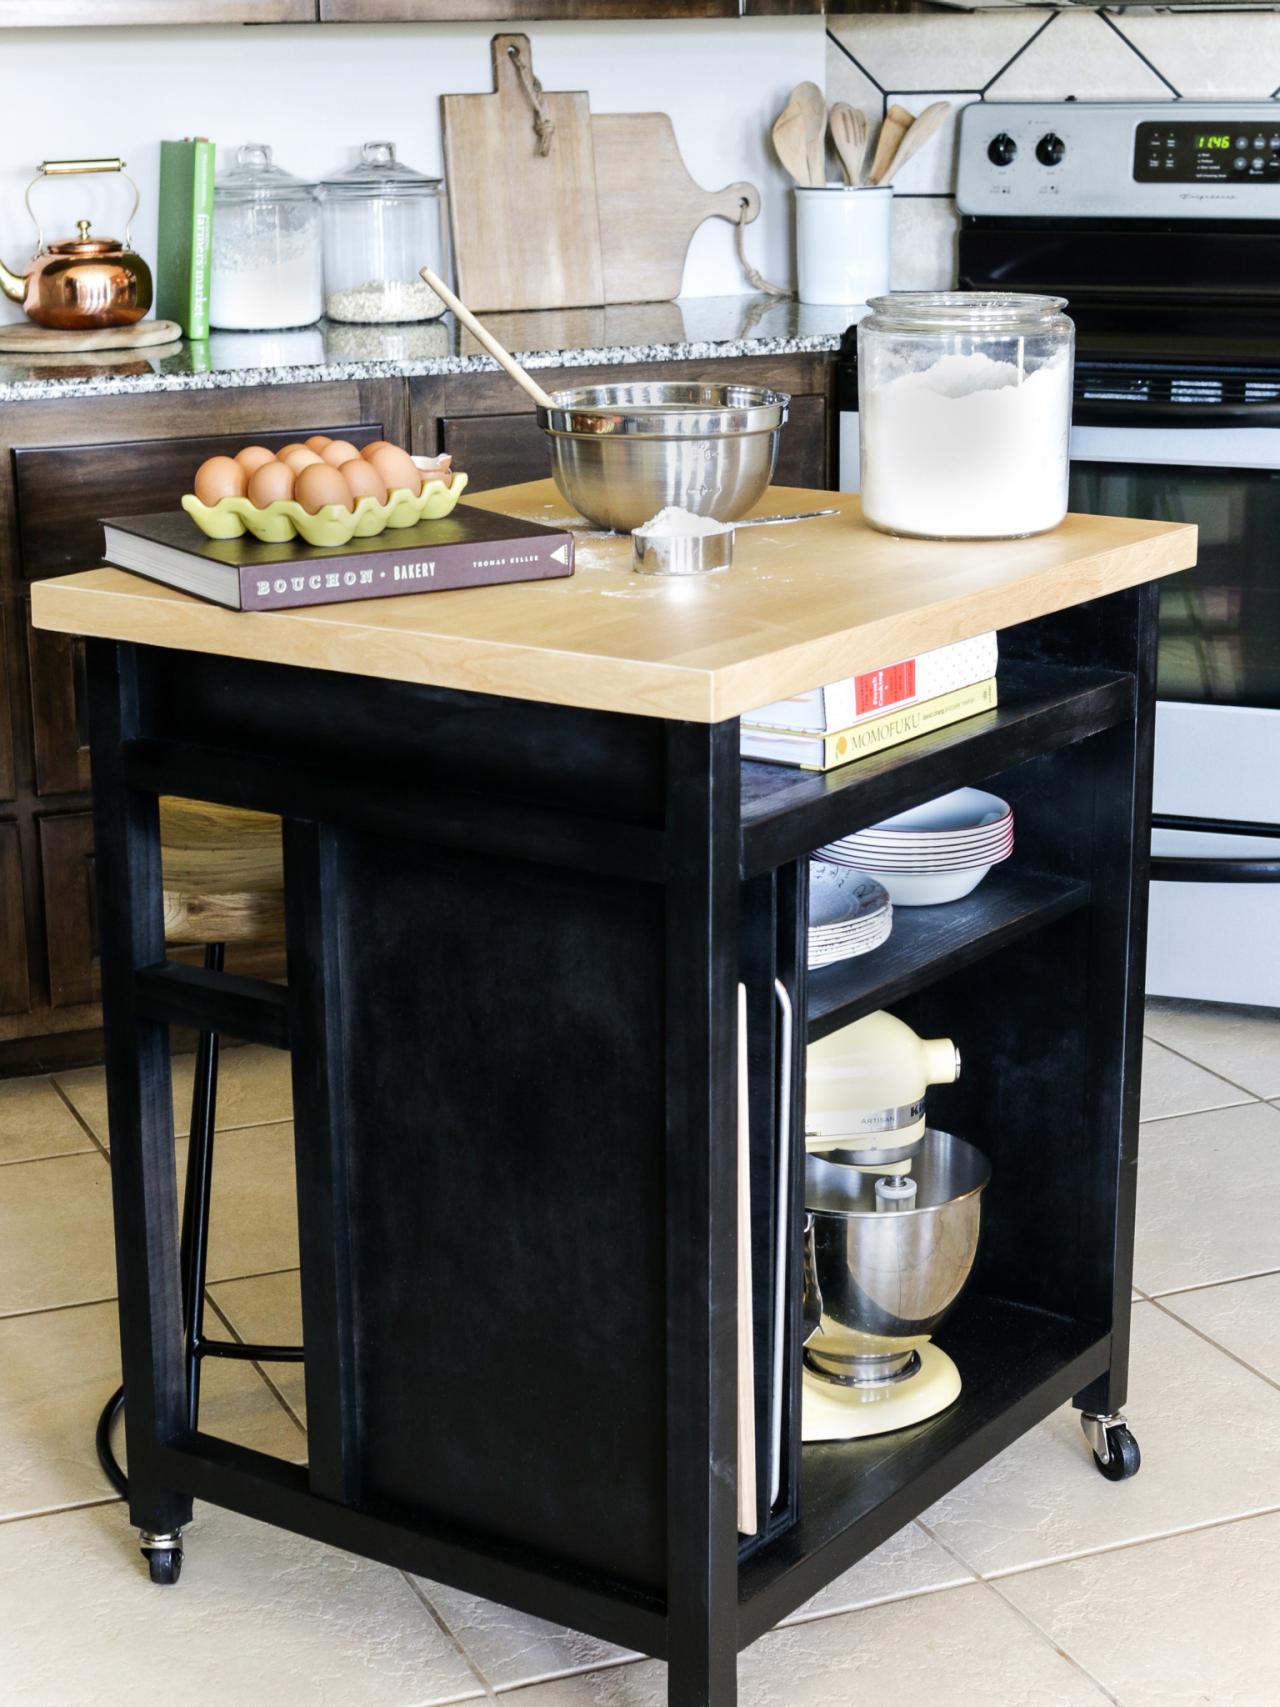
Need some extra workspace in your kitchen? Build a rolling island for added functionality and style. One side stores a stand mixer, sheet pans, cutting boards and more, while the other side allows for extra seating. Perfect for small spaces, this portable kitchen island easily rolls out when you need it and neatly tucks away when you don’t.

Jen Woodhouse
Tools
- tape measure
- carpenter’s square
- pencil
- drill with 5/16” drill bit
- circular saw
- table saw or router with 1/4” channel bit
- pocket hole jig
- mallet
- sander
- clamps
Materials
- (4) 2x2 x 8’ boards
- (1) 1x4 x 8’ board
- (1) 18-1/2" of 1x2 board
- (1) 4’ x 8’ sheet of 3/4” thick plywood
- (1) 2’ x 4’ sheet of 1/4” thick plywood
- (1) 1-1/2” thick butcher block
- (4) 2” swivel casters
- (4) 5/16” tee nuts
- 3/4” veneer edge banding (optional)
- 2-1/2” pocket hole screws
- 1-1/4” pocket hole screws
- wood glue
- wood filler
- 150- and 220-grit sandpaper
Cut List
- (4) 2x2 x 31” (legs)
- (2) 1x4 x 20-5/8” (side aprons)
- (4) 2x2 x 20-5/8” (side rails)
- (2) 2x2 x 22-1/2” (side stiles)
- (2) 2x2 x 6-5/8” (side rail detail)
- (2) 3/4” plywood @ 22-1/2” x 12-1/2” (side panels)
- (1) 3/4” plywood @ 27-1/2” x 24-1/2” (middle wall)
- (1) 2x2 x 24-1/2” (stretcher)
- (1) 3/4” plywood @ 24-1/2” x 12-1/2” (bottom shelf)
- (1) 2x2 x 24-1/2” (bottom shelf trim)
- (2) 1/4” plywood @ 21-1/2” x 12-1/2” (sheet pan dividers)
- (2) 3/4” plywood @ 12-1/2” x 5-1/4” (top/bottom sheet pan grooved pieces)
- (1) 3/4” plywood @ 23-1/4” x 12-1/2” (sheet pan wall)
- (1) 3/4” plywood @ 18-1/2” x 11” (middle shelf)
- (1) 1x2 x 18-1/2” (middle shelf trim)
- (1) 3/4” plywood @ 24-1/2” x 12-1/2” (top shelf)
- (1) 2x2 x 24-1/2” (top shelf trim)
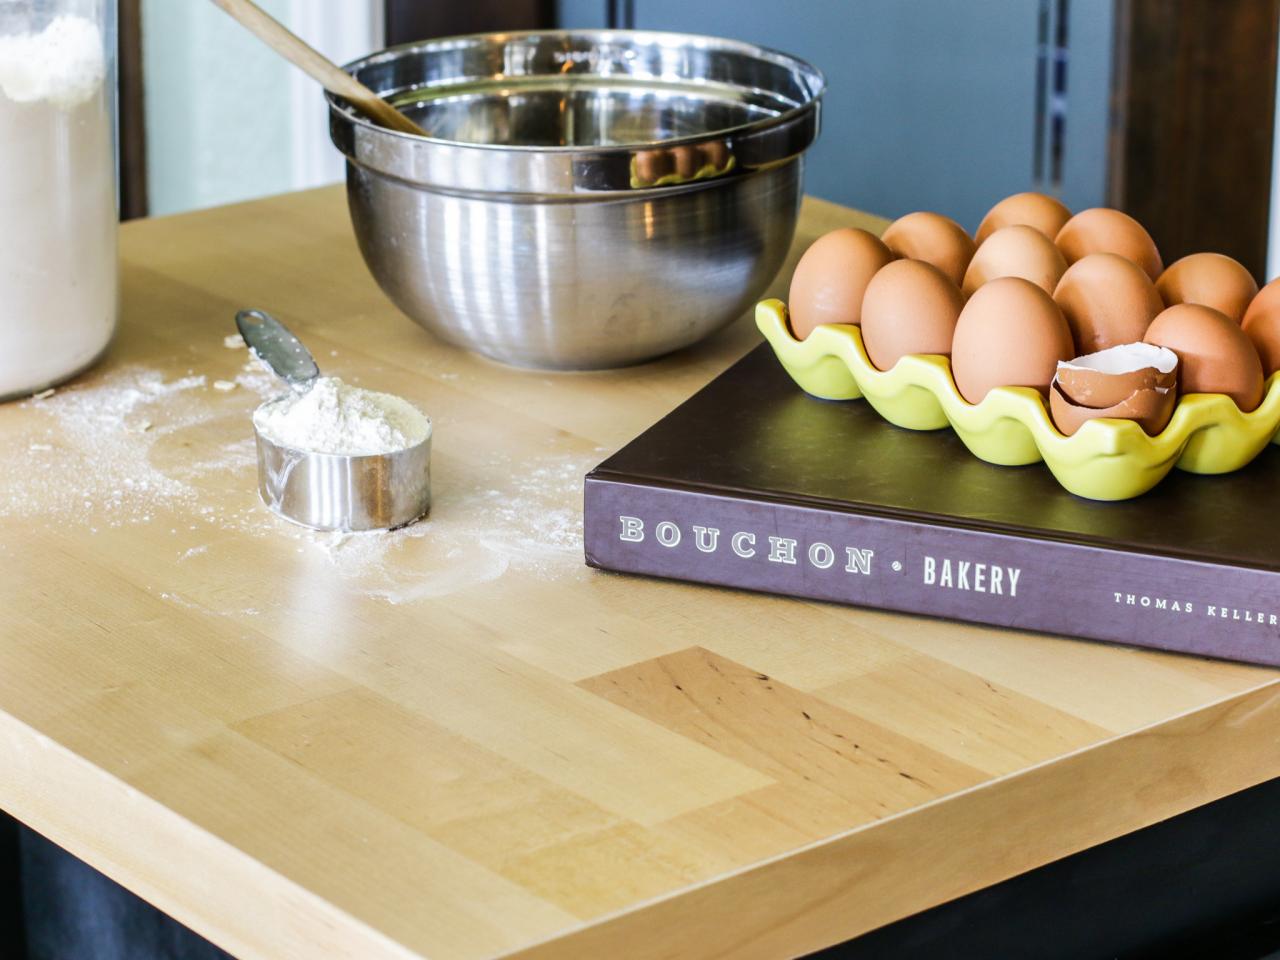
- (1) butcher block @ 29-1/2” x 25-5/8” (top)
For specific dimensions and 3D diagrams, download the PDF building plans at www.JenWoodhouse.com.
Prep the Boards and Build the Side Panels
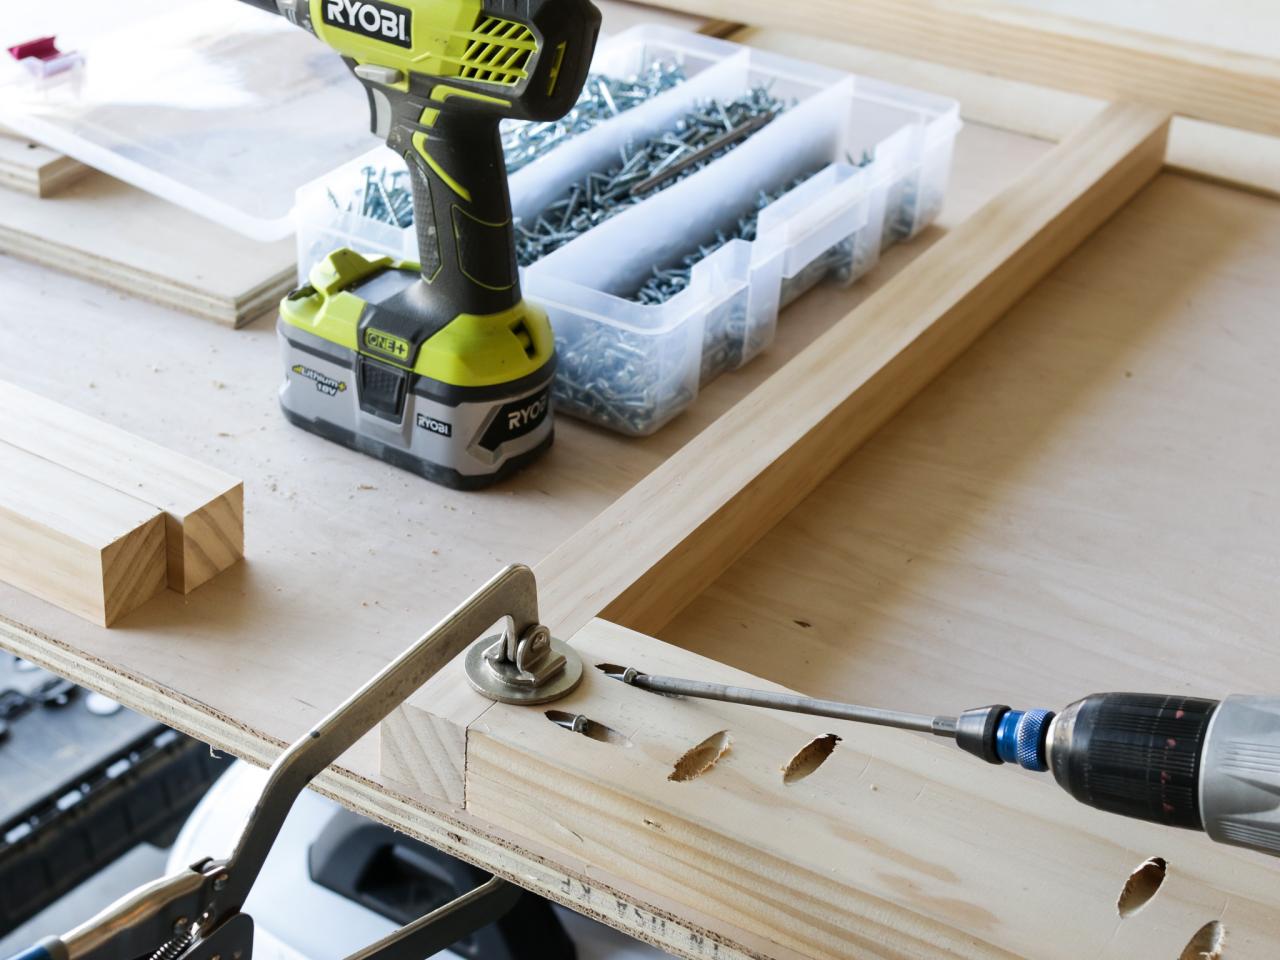
Using the cut list provided, cut the legs, side aprons, side rails and stiles to length. Cut the plywood side panels to size as well. Using a pocket hole jig, drill 3/4" pocket holes into the side aprons and attach them to the legs with 1-1/4" pocket hole screws. In the photo below, I am using a scrap piece of 3/4" thick wood underneath the side apron, so that the side apron will be flush to the interior side of the legs.
Additionally, drill 3/4" pocket holes into all four sides of the plywood side panels. Drill two 1-1/2" pocket holes into the ends the side rails and stiles. Attach the side rails to the legs with 2-1/2" pocket hole screws. Attach the plywood to the side rails and legs with 1-1/4" pocket hole screws. Finally, attach the last stile to the side panel with 2-1/2" pocket hole screws. Measure and cut the side rail detail to length, drill 1-1/2" pocket holes into the ends and attach with 2-1/2" pocket hole screws.
Whenever drilling into 3/4" thick material, adjust the pocket hole jig to the 3/4" depth setting and use 1-1/4" pocket hole screws to attach. When drilling into 1-1/2" thick material, adjust the jig to the 1-1/2" depth setting and use 2-1/2" pocket hole screws to attach.

Jen Woodhouse
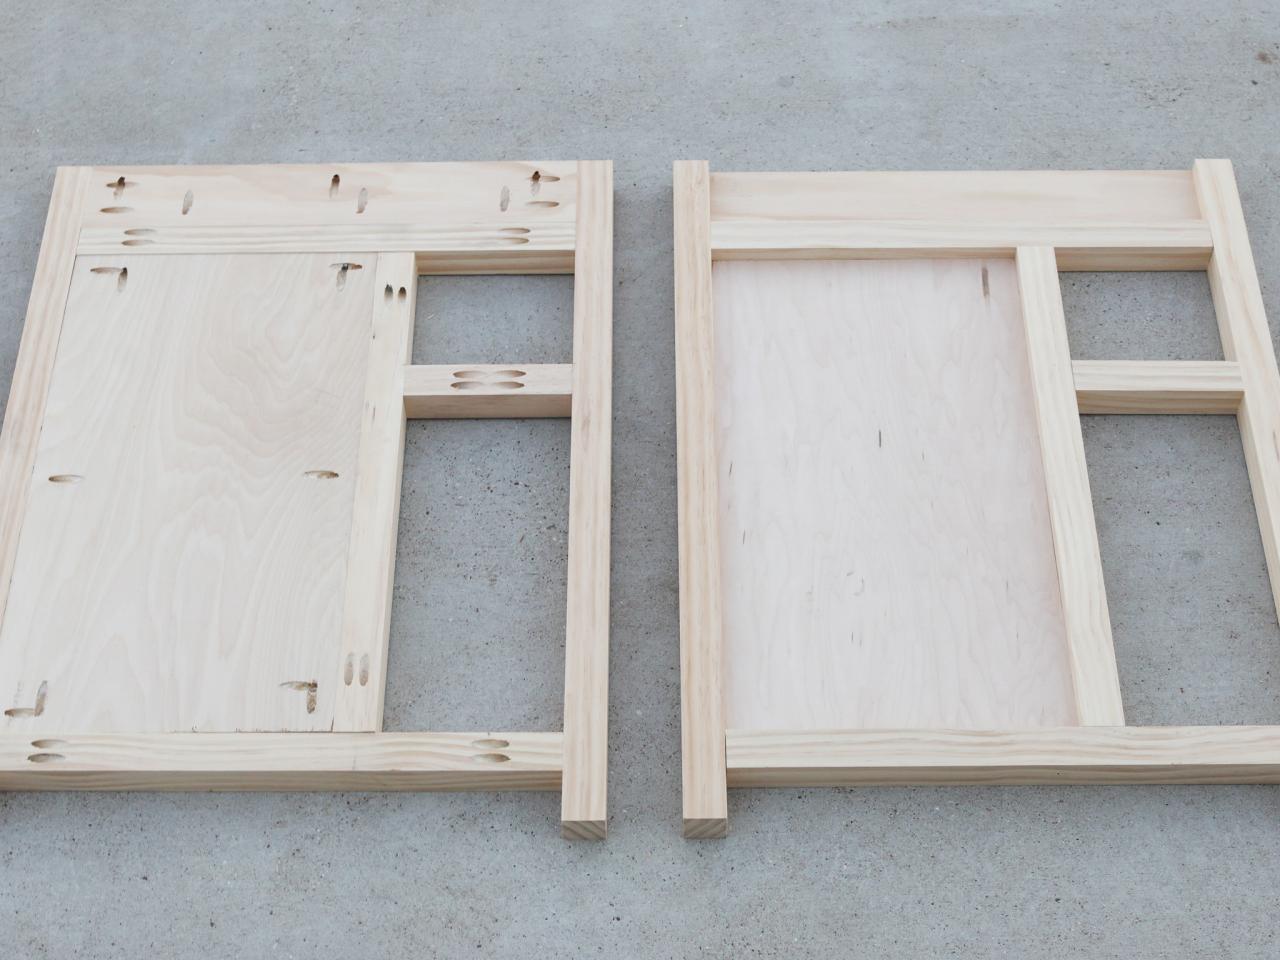
In the photo below, notice that the side apron and plywood side panel are both flush to the interior side.

Jen Woodhouse
Here is the interior and exterior view of the side panels.

Jen Woodhouse
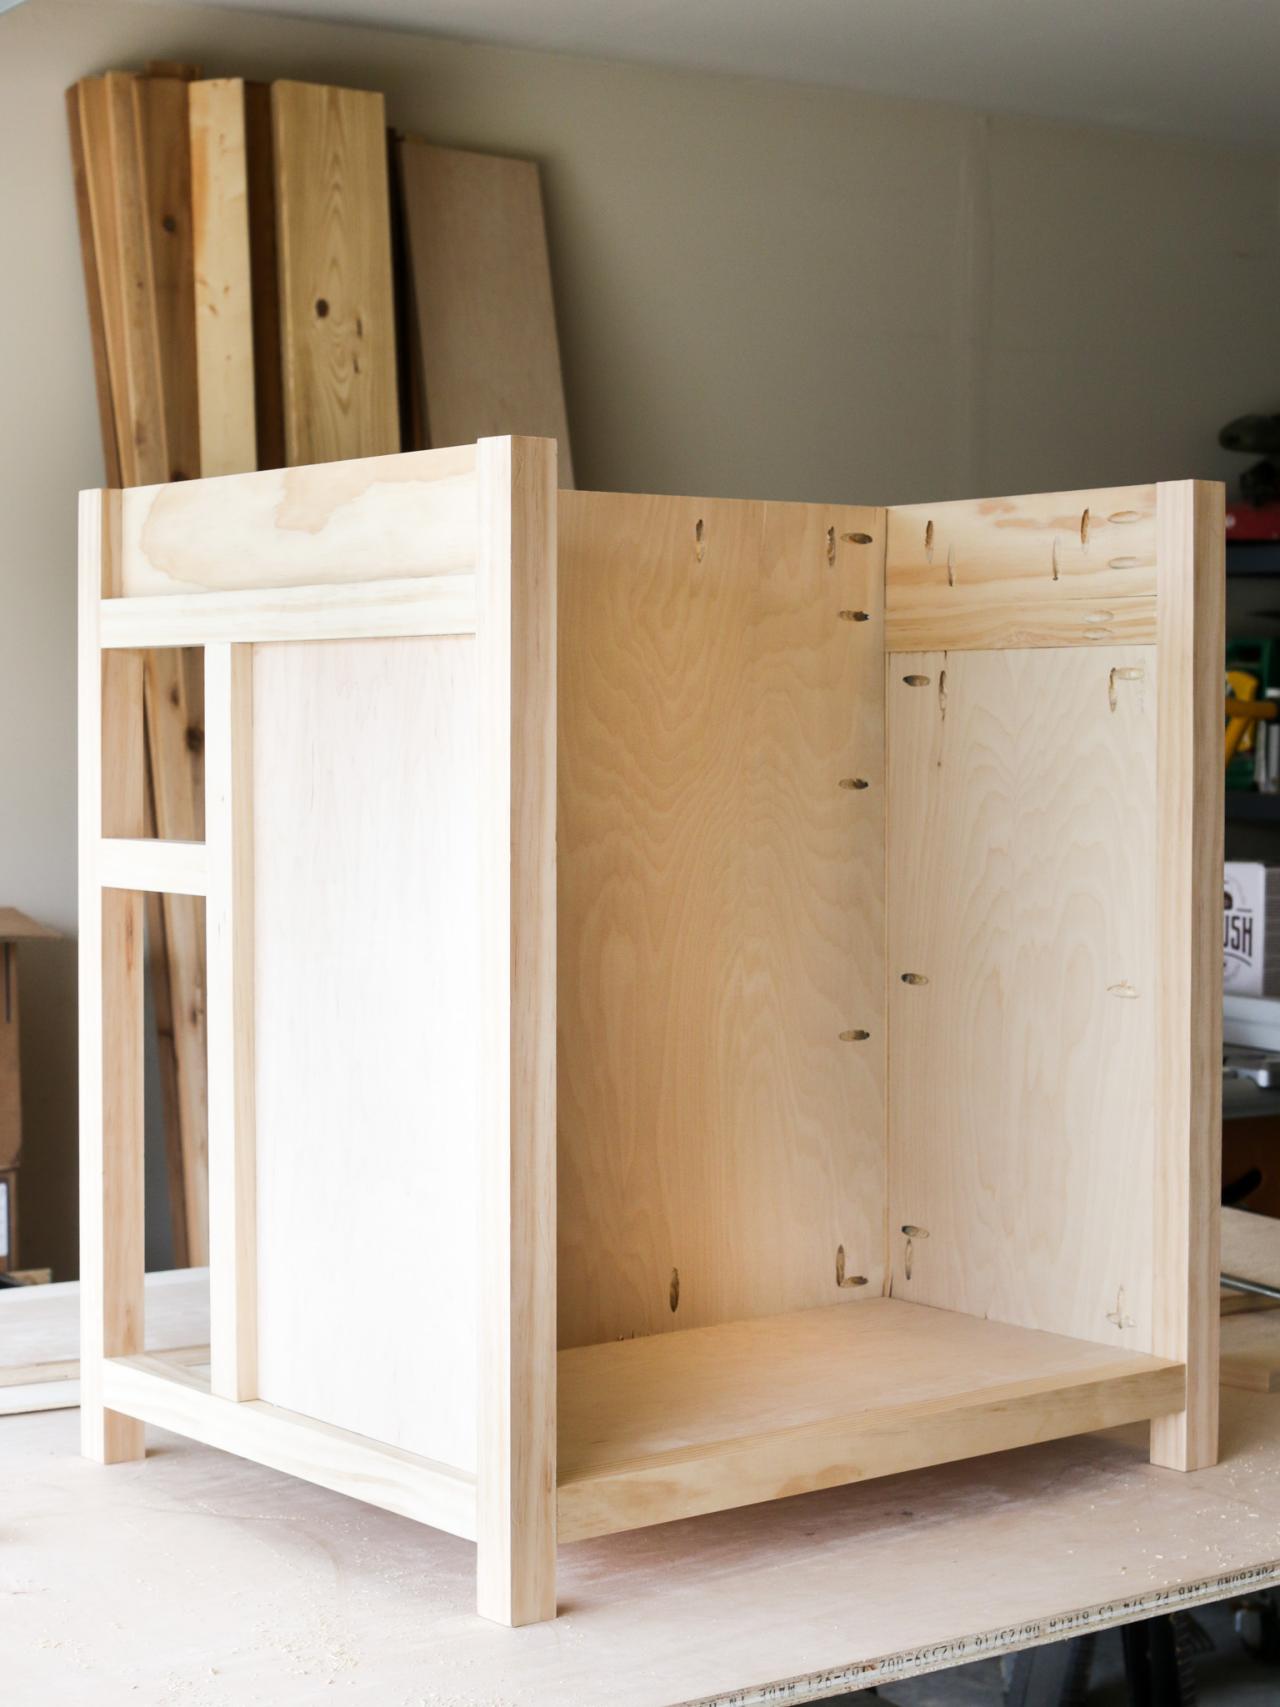
Build the Carcass
Cut the middle wall plywood to size and drill 3/4" pocket holes into the four sides. Attach to the side panels with 1-1/4" pocket hole screws. Cut the bottom shelf to size and drill 3/4" pocket holes into the underside of the shelf. Attach with 1-1/4" pocket hole screws. Cut the 2" x 2" bottom shelf trim to length and drill two 1-1/2" pocket holes into each end. Attach the plywood shelf to the bottom shelf trim with 1-1/4" pocket hole screws and use 2-1/2" pocket hole screws to attach the bottom shelf trim to the legs.

Jen Woodhouse
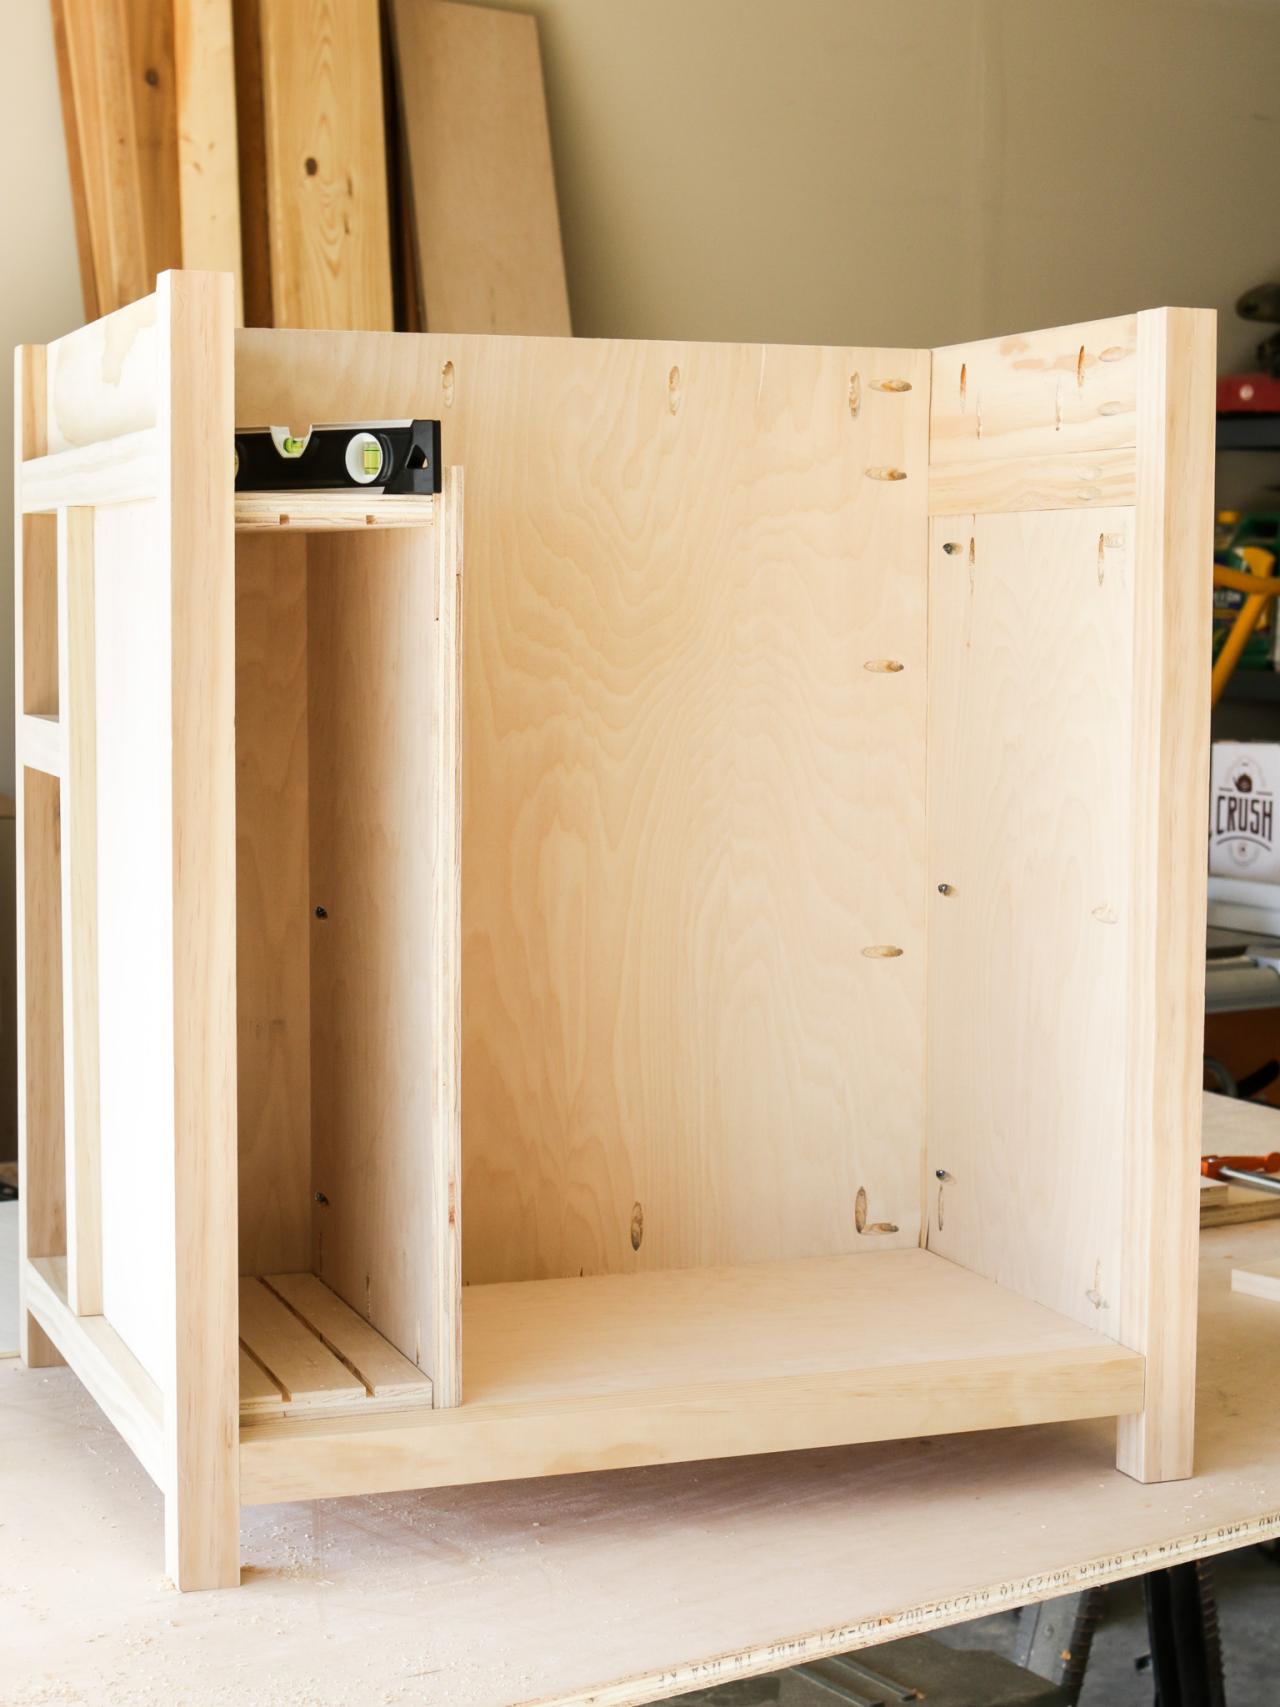
Build the Sheet Pan Storage Space
Cut the sheet pan wall, top/bottom sheet pan grooved pieces to size. Using a router fitted with a 1/4" channel bit, route grooves into the top/bottom sheet pan grooved pieces. You can also accomplish this by doing multiple passes on a table saw. These grooves will allow for the sheet pan dividers to slide into place easily. Attach the bottom sheet pan grooved piece with wood glue and 1-1/4" brad nails. Drill 3/4" pocket holes into the sheet pan wall and attach with 1-1/4" pocket hole screws. Add the top sheet pan grooved piece and ensure that it is level.

Jen Woodhouse

Jen Woodhouse
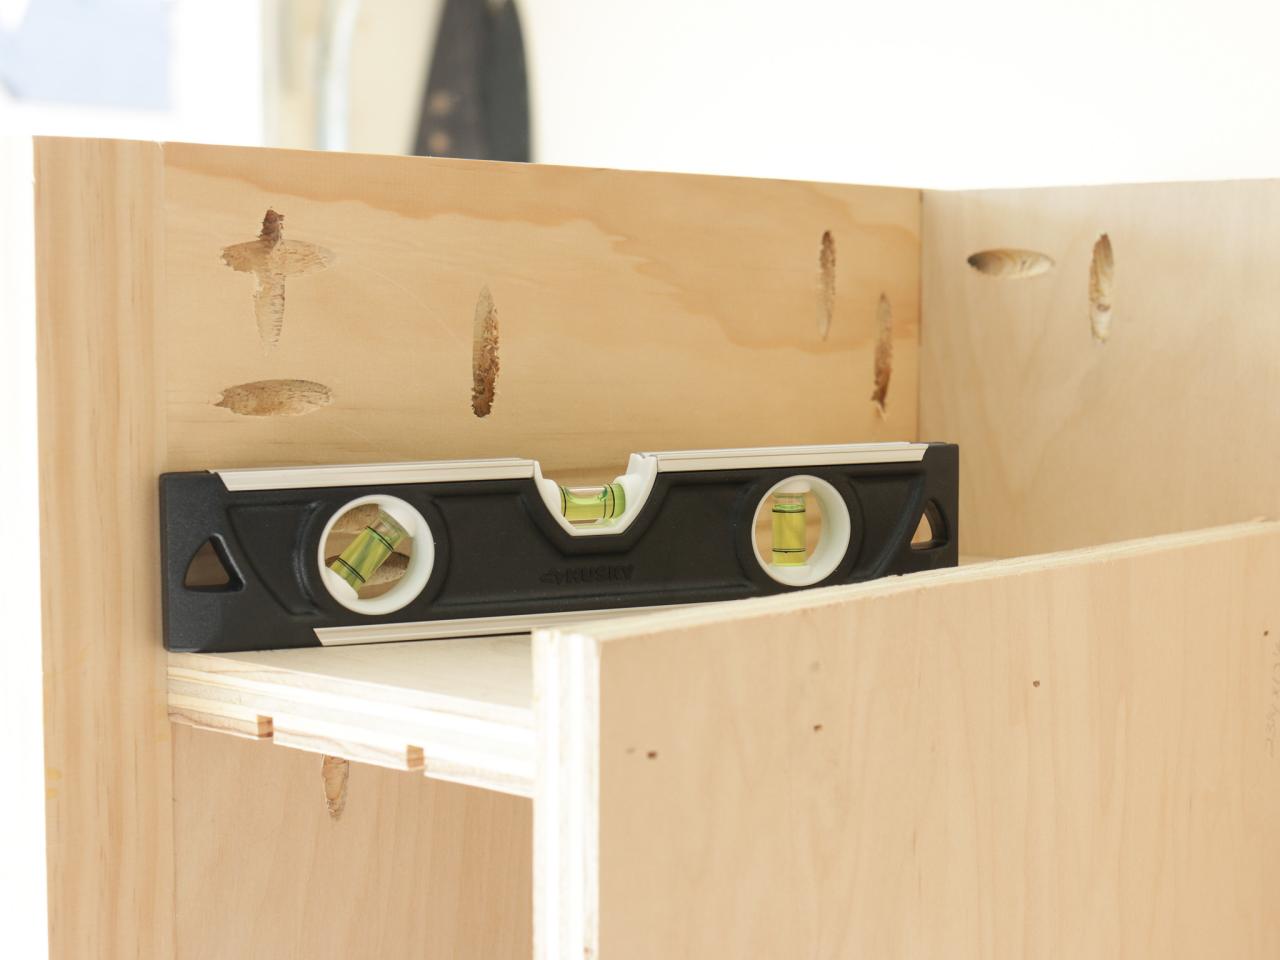
Attach the Middle and Top Shelves
Cut the middle plywood shelf to size and drill 3/4" pocket holes into the undersides. Attach to the carcass with 1-1/4" pocket hole screws. Add the trim with brad nails and pocket hole screws. Check for level.
Cut the 1/4" plywood sheet pan dividers to size. Dry fit to see if items will fit. The stand mixer should fit on the bottom shelf, the sheet pan dividers should easily slide into place, and the top shelf is designed to fit standard rolls of aluminum foil, plastic wrap, and other food storage items.

Jen Woodhouse
Sand, Paint or Stain the Carcass
At this point, you’ll want to sand and paint or stain your island. Sand any splinters or rough edges with 150-grit sandpaper, then move up to 220-grit sandpaper until smooth. Remove the dust and debris with a vacuum and a slightly damp rag, then stain or paint as desired.
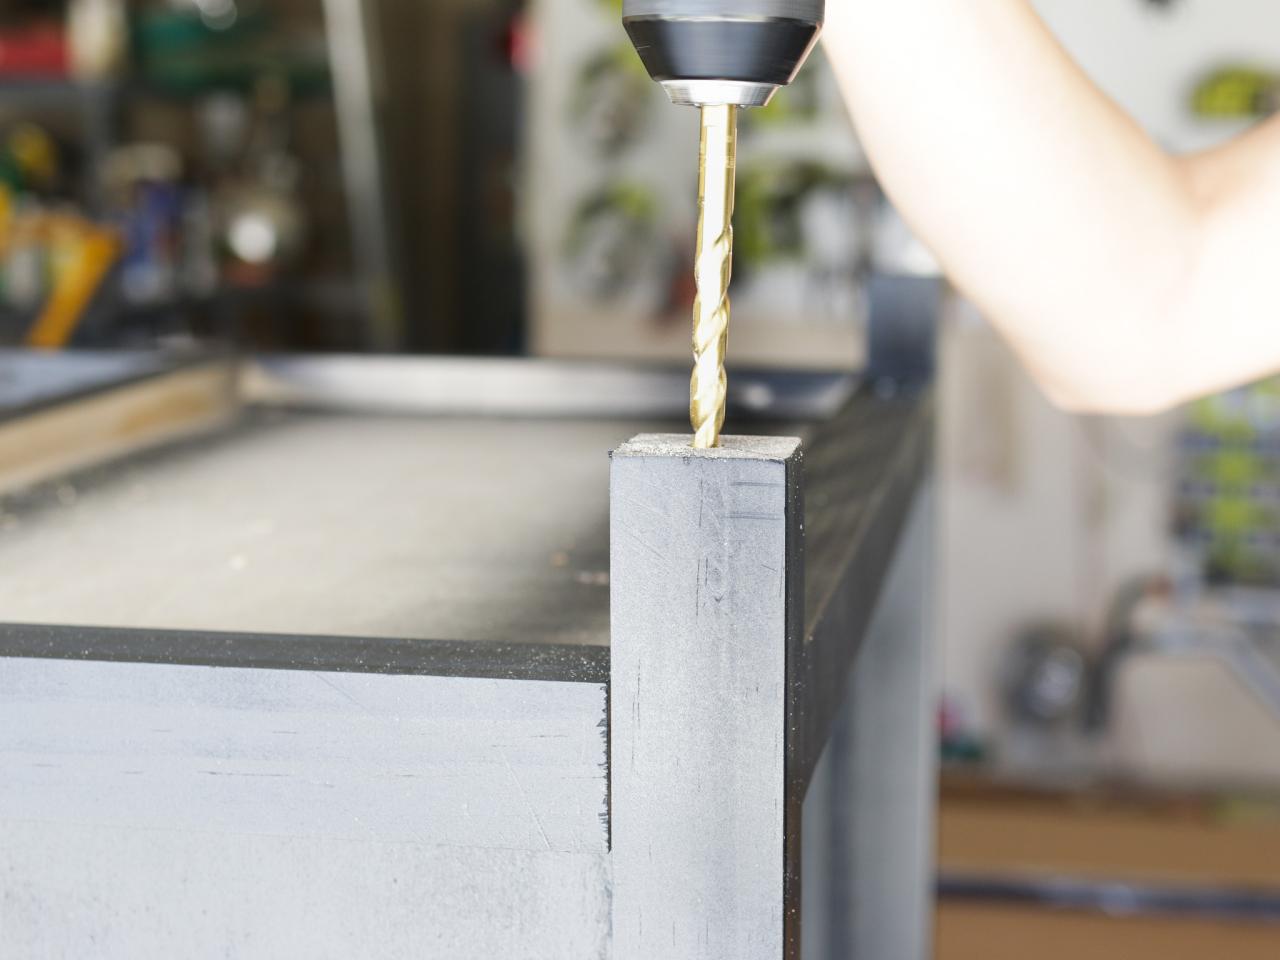
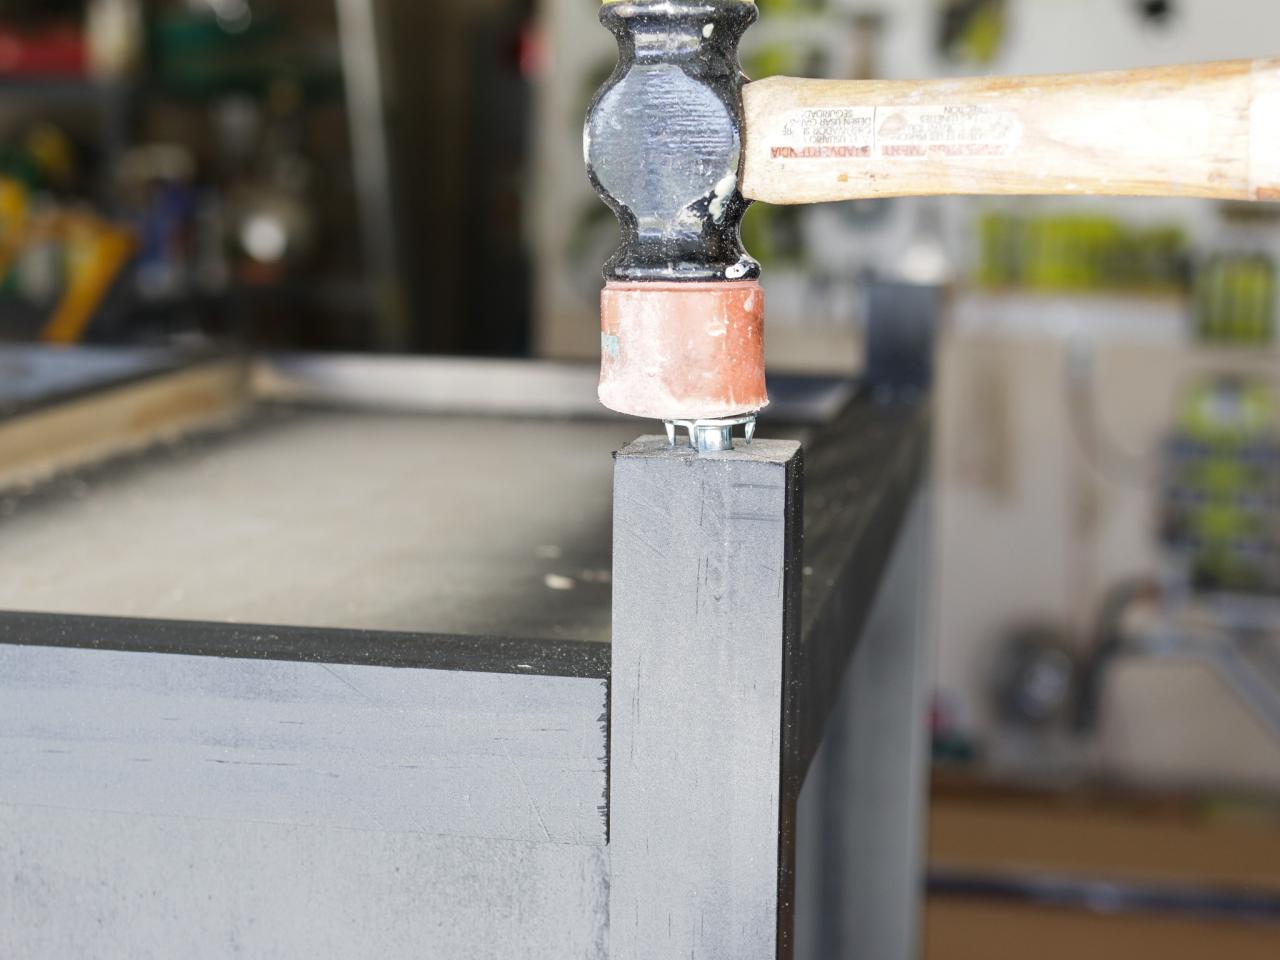
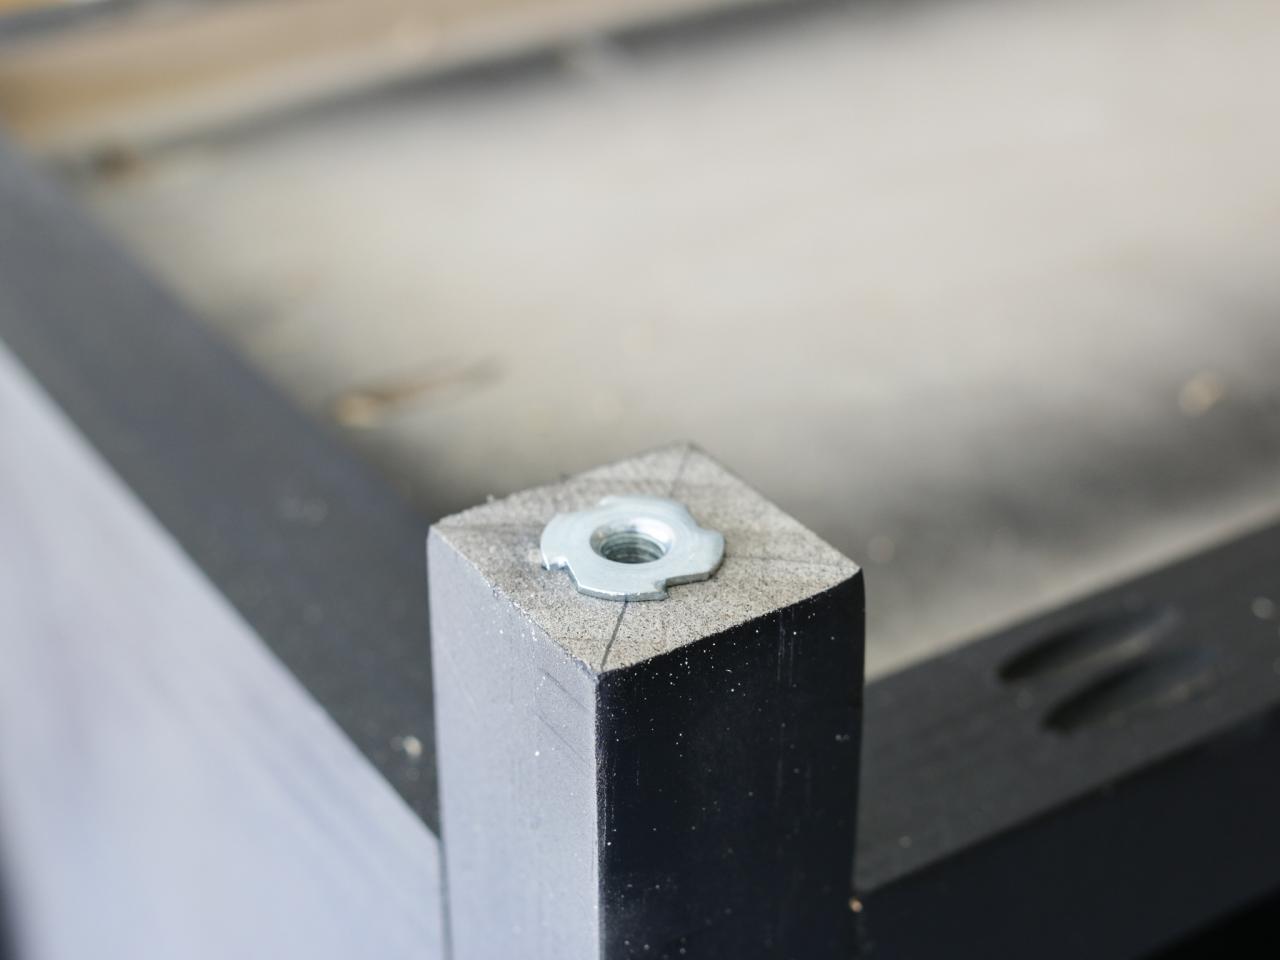
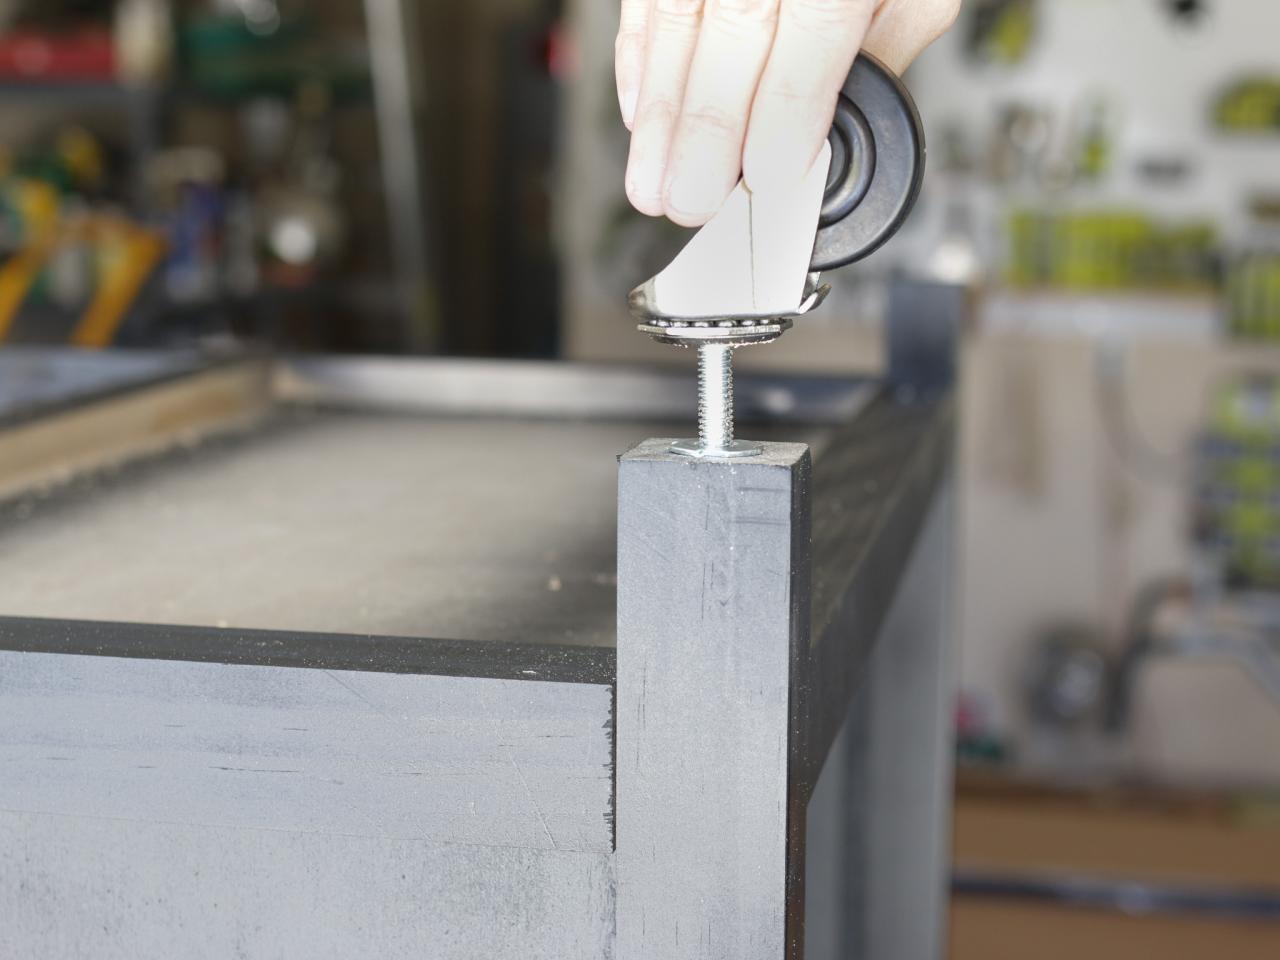
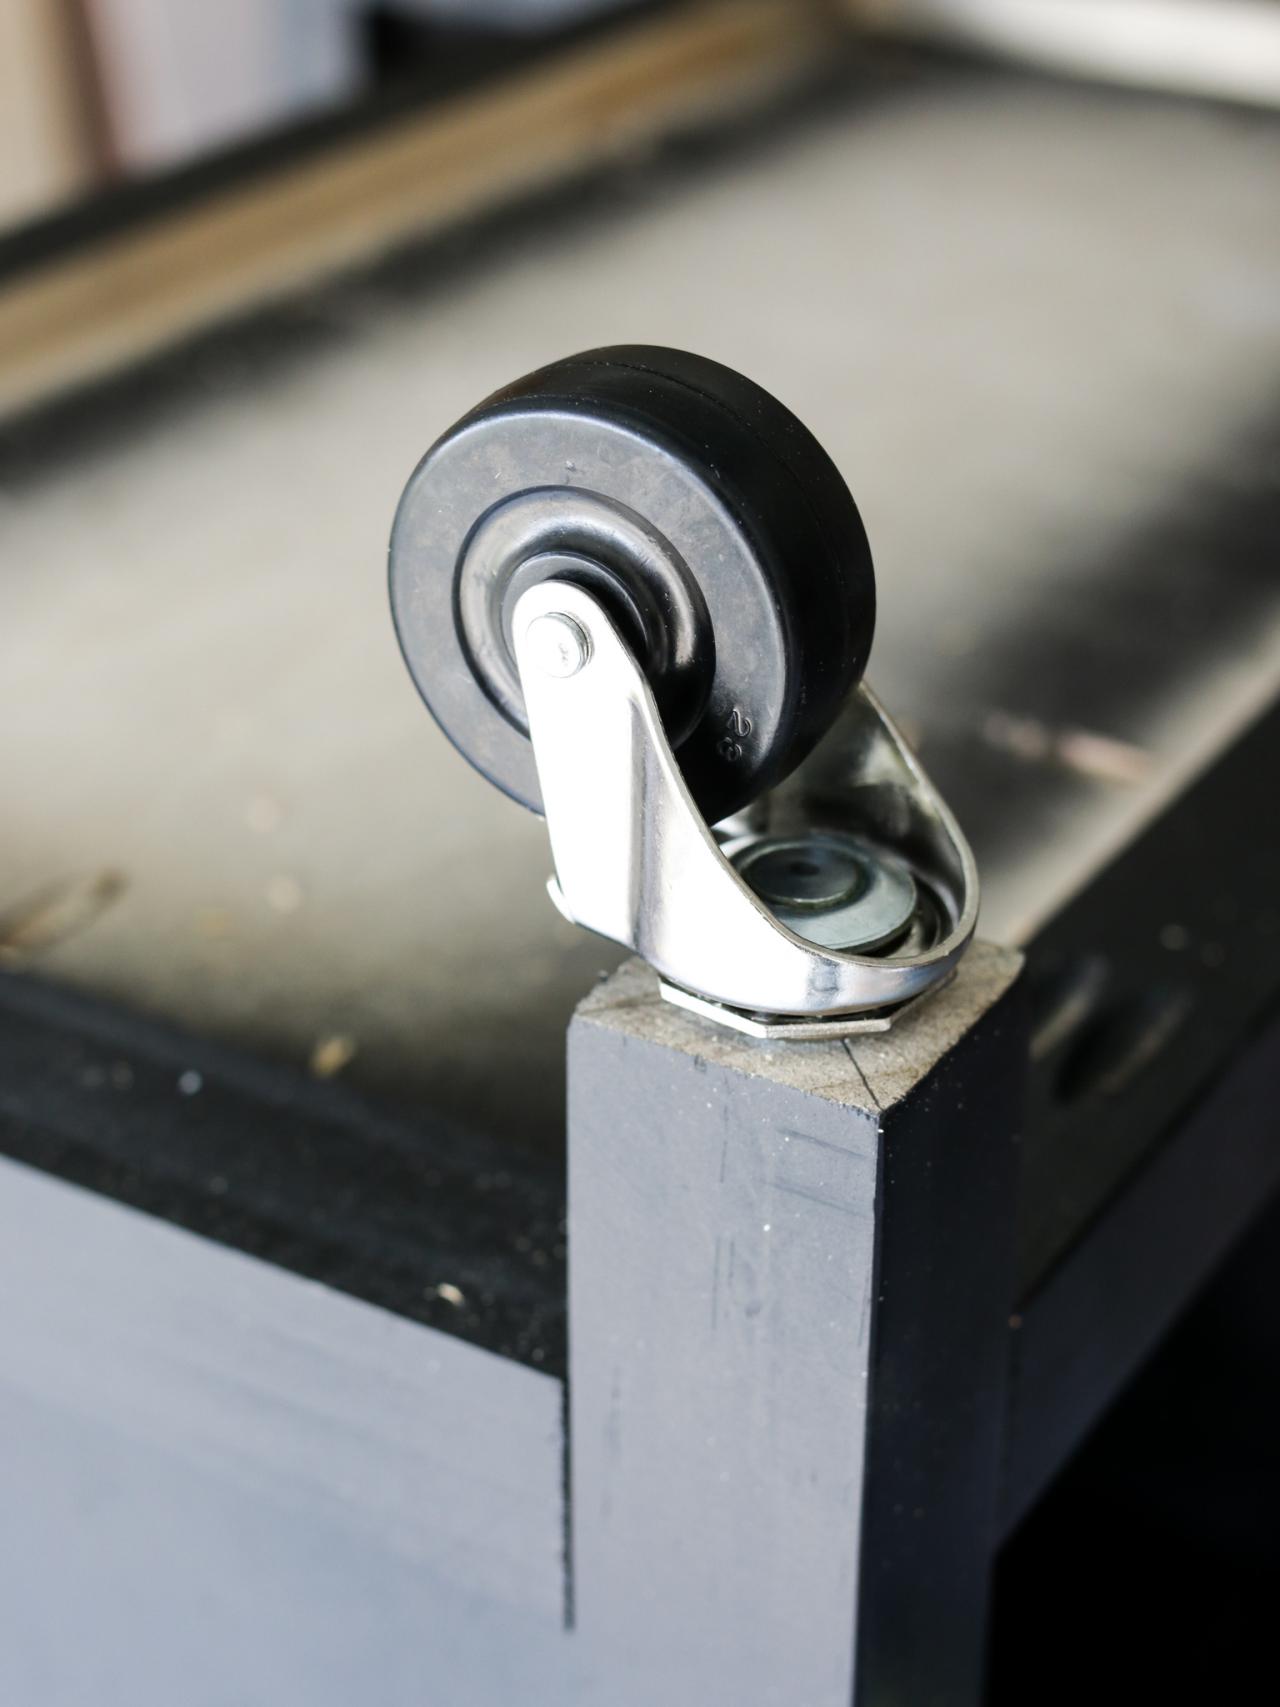
Install the Casters
Using a 5/16" drill bit, drill a hole into the legs. Tap the tee nuts into place with a mallet.

Jen Woodhouse

Jen Woodhouse

Jen Woodhouse
Screw the casters in.

Jen Woodhouse

Jen Woodhouse
Attach the Butcher Block Top
When the stain or paint is fully cured, squeeze wood glue along the top edges of the island. Position the butcher block top over the island, allowing for a 1" overhang on all sides. On the seating side of the island (back), use the 3/4" pocket holes to drive 1-1/4" pocket hole screws upwards into the island top as shown in the photo below. Take care not to drive the screw through the top of the butcher block.
On the storage side of the island (front), drill 2-1/2" pocket holes on the exterior ends of the two legs and attach the butcher block top with 1-1/4" pocket hole screws.

Jen Woodhouse

Jen Woodhouse

Jen Woodhouse

Jen Woodhouse


