

For more great plans click on the banner below.
|
|
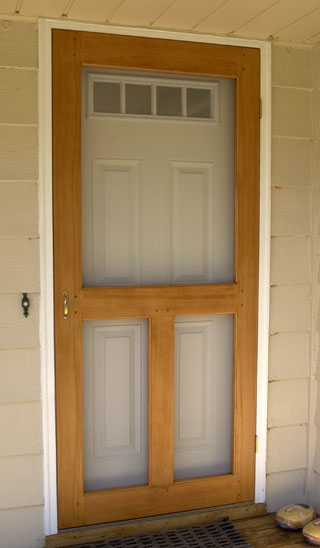 Screen Door
We have been wanting a screen door on our front door for some time now but coming up with the right design took a while. We wanted a screen door that was more like the ones we remembered when growing up rather than some plastic or metal manufactured door. We definitely wanted it to be able to slam and hopefully squeak. We didn't want any fancy closers but instead just an old fashion spring.
The first thing you'll need to know is the size of your screen door. Mine turned out to be 3'0" X 6'0". You'll also have to decide on a design. You can copy ours or come up with your own.
Here's what you'll need:
I made the side and center stile's 4 1/2" wide and the top, center and bottom rail's 5 1/4" wide.
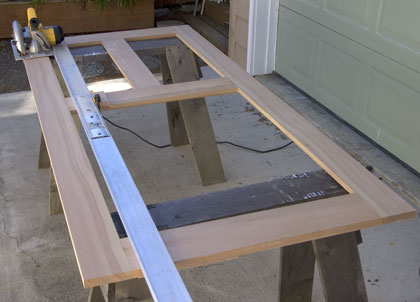
 Opening Dimensions Once you have all your dimensions figured out it's time to start making sawdust. It's important to size your wood so that everything matches up when you assemble it. I used my planer to get all the wood to the same thickness.
 These little 13" planners work great!
It's a good idea to run the edges of the boards over a jointer to true them up. If like me you don't have a jointer I've found that the Frued Glue Line Rip blade
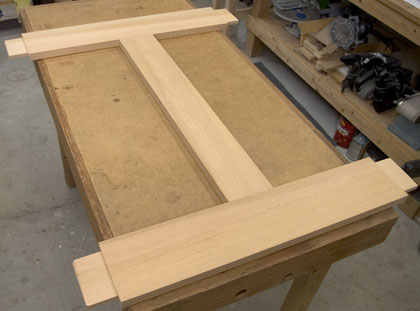
The real work in making this door is the tenon and mortise joints. If you are very careful in your layout and measuring everything will come together perfectly in the end.
 Then I transfer that dimension to my saw blade.

Notice that I'm using the table saw sled that we built from my Table Saw Sled project.
 Next you'll want to cut the cheeks of the tenon's. I like using my Heavy Duty Tenoning Jig.
 I can use it for the narrow side of the cheeks but I needed to add a support board to my tablesaw miter for cutting the wide cheeks.

Again I attached a stop block to get them all exact.

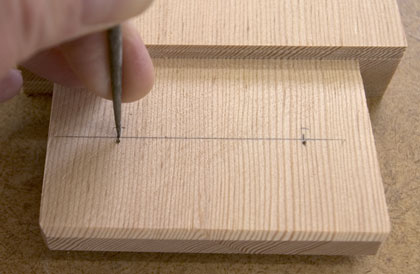
I placed the center of the rule over my mark and then marked each end of the mortise. I continued the line using a small square.
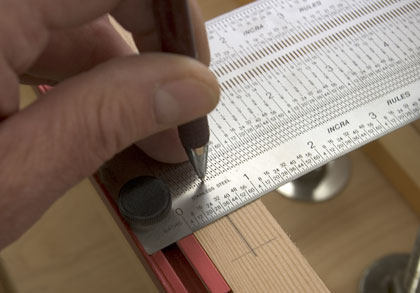
I just place my pencil in a hole on the rule that lines up with my center and then drag the square bar along the edge of the wood. It makes a nice centerline to follow when drilling out the mortise's.

Clean out the mortise's using a sharp chisel.
 Mark the width of the pegs, 3/4" in from each side, on the tenon and transfer them to the mortise.
 Measure 1" in from the edge to the mark and using a forstner bit that matches your dowel, drill through the front of the door and half way through the back of the door.
 Clean out the mortise to make sure that any tear out from the drill is cleaned up.
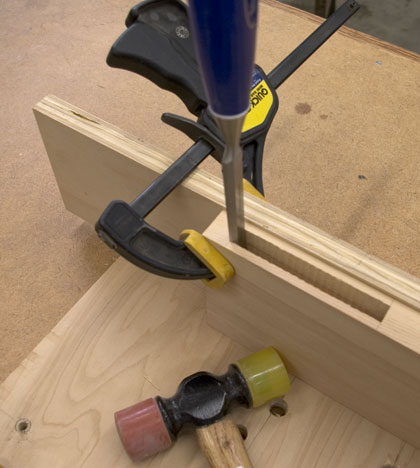
Put the door together and square it up by measuring from corner to corner and then the opposite corners. They should be the exact same measurement. If not "tweak" to door into square.
 To make a draw fit joint, where the pegs will actually pull the door together tightly, mark the hole centers 1/32" inside the point marks from the forstner bit.
Cut 1" pegs from dowel and round over the end that will be driven into the peg holes.

Check for square and clamp the door using bar clamps or pipe clamps.
Install the hinges in the molding and in the door. Check the fit one more time.
 Next I rounded over the outside edge using a 1/4" round over bit in my router.

I used a fence since the wood was too thin to run along the ball bearing of the router bit.

Sand and apply stain and finish before installing the screen and the molding.
 Staple in place all the way around.

Miter cut the molding's to perfectly fit the inside frame of the door.

I used self centering bits to drill the holes through the frames and into the doors.
 Install the spring, handle and latch and you should now have a beautiful screen door that should last for many years. Here's an inside view of the completed door.
 That's about it. We hope you liked this project. If you build it and your friends ask where you got such a clever idea, please tell them that you got it at RunnerDuck.com. |

 Be very accurate when you drill these holes. On wood like fir there is a tendency for the drill bit to drift off the hard part of the grain. Hold the wood tight and use a drill press.
|
The AllAmerican RunnerDuck Review Visit our Blog, www.runnerduckreview.wordpress.com, and sign up to receive notifications when it is updated. Our newsletter is a monthly blog with woodworking projects, crafts, recipes, and more. When you get to our blog just enter your email address and click "Sign Me Up". This is what it looks like:

|