We may earn revenue from the products available on this page and participate in affiliate programs. Learn More ›
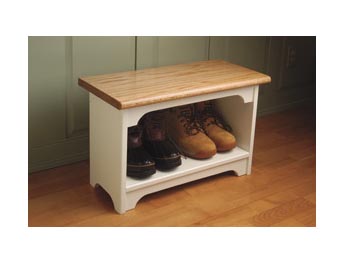
A boot bench provides a comfortable place to sit when you’re putting on or taking off boots and shoes. This handsome, compact bench has a beautiful red-oak top and painted pine base. Store hiking boots, camp mocs and running shoes on the lower shelf.
Measuring about 16 inches high and 24 inches long, the bench will fit nearly anywhere. You can make the bench wider or taller, but 16 inches is a comfortable sitting height for most adults.
The top of the bench is cut from a red-oak stair tread, which is sold at home centers and lumberyards. The 11½-inch by 48-inch tread costs $25-$30 and comes sanded smooth with a rounded bull-nose profile along one edge. Looking for a more affordable alternative? Use a pine stair tread, which costs about $12. You will need a cordless drill/driver with assorted drill bits and screw-driving tips, saber saw, portable circular saw, hammer, tape measure, combination square, Phillips screwdriver, paintbrush and foam-rubber brush.
**What You Need >> **
1 oak stair tread
1 pine one-by-ten, 6 feet
1 pine one-by-four, 6 feet
1¼-inch drywall screws
15/8-inch trim-head screws
2-inch drywall screws
Latex primer and high-gloss paint
Polyurethane varnish
120- and 220-grit sandpaper
1. Begin by cutting the two sides and lower shelf from a pine one-by-ten. Use a one-pound coffee can to trace the outline of the curved feet onto each of the one-by-ten sides. Position the curved outline 1½ inches from the edges and end, as shown in the illustration. Cut out the curved feet with a saber saw, then sand the cut smooth with 120-grit sandpaper.
**2. **Next, cut the apron, base and cleat from a pine one-by-four. Make each part 20½ inches long. Use the coffee can to mark 4-inch-diameter curves onto the apron and base. Cut out the curved shapes with a saber saw. Note that the apron and base were ripped down to 3 inches wide to better match the scale of the bench. However, you could skip this step and use the one-by-four at its full width of 3½ inches.
**3. **Set the apron and cleat between the two sides, and hold them flush with the top. Be sure to inset the apron ¼ inch from the sides to create a shallow reveal. Secure the apron and cleat with 15/8-inch trim-head screws driven through the sides.
4. Use a circular saw to cut the oak stair tread to 24 inches long. Lay the oak top face down and set the partially assembled bench on top. Fasten the bench to the top by driving screws through the apron (2-inch screws) and cleat (1¼-inch screws).
5. Install the lower shelf between the two sides; position it 3 inches from the bottom. Attach the shelf with 15/8-inch trim-head screws. Slide the base piece between the sides and push it tight against the underside of the shelf. As with the apron, inset the base ¼ inch to create a small reveal. Secure the base to the shelf with two 2-inch screws driven up from below.
6. Use wood putty to fill the holes created by the trim-head screws, wait for the putty to dry and sand it smooth. Apply one coat of primer and two top coats of high-gloss paint to all the pine. Use a foam brush to apply a coat of semigloss polyurethane varnish to the top. Allow the varnish to dry, then sand it lightly with 220-grit sandpaper. A second coat will add protection.