


Building a swing arbor is a fun weekend project that can really spruce up the landscape without requiring a lot of out-of-pocket expense. Plus, the project is fairly easy to build, requiring only basic carpentry skills, and can provide years of outdoor enjoyment. The materials for the swing cost about $100, and we completed the project over the course of two afternoons.
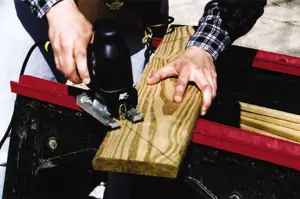
The first step is to cut each of the four 2-by-4 upright support posts to 87 inches. In one corner of each post, cut a 3 1/2-by-1 1/2-inch notch.
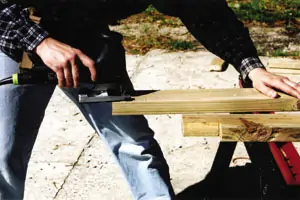
Cut a 3 1/2 x 1 1/2” notch in one corner of each 87” upright support post.
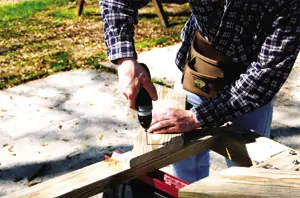
Next, cut two 2-by-4 upright connectors to 15 inches each. Lay two of the 87-inch posts parallel, with the notches of each post facing outward. Lay a 15-inch connector across the support posts, aligning the top of the connector with the bottom of the notches. The sides of the connector should be flush with the outside edges of the uprights. Drill holes through the uprights and connector, attaching the boards with the 1/4-inch carriage bolts. Fasten each post with two carriage bolts.
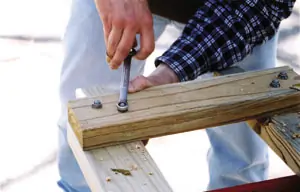
Fasten the 15” top connector with two carriage bolts in each post.
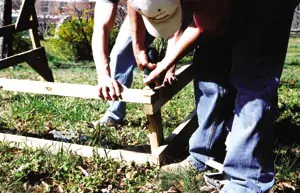
The swing arbor will rest on two “feet.” Cut the two 48-inch lengths from a 2-by-4 to function as the feet. On each foot, measure 16 1/2 inches from each end and mark the face of the board. Align each upright section with a foot, positioning the outside edges of the uprights flush with the lines marked on the face of the feet.

Fasten the main “foot” board to the bottom of the posts with carriage bolts.
Fasten the uprights to the feet with two carriage bolts in each post. The feet should be fastened to the side of the uprights that is opposite from the top connectors.
Cut two 16 1/2–inch foot support pieces, and screw them to the inside of the foot boards (on the same side as the top connector). The support pieces should fit flush with the outside edges of the feet, as well as flush with the upright posts. Cut another 8-inch 2-by-4 support piece for each foot. The 8-inch piece should fit flush between the two uprights, on top of the main foot board and on the same side of the uprights as the top connector.

Add the 16 1/2” foot supports to the outside of the uprights. The ends should be flush with the main foot board.
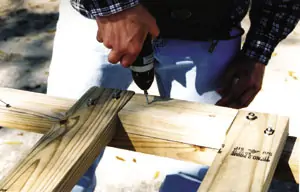
Screw the 8” support piece onto the foot-board between the uprights.
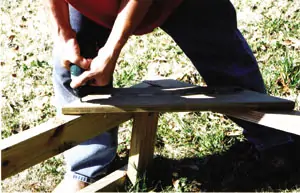
The next step is to create the braces for the corners of the arbor. Cut eight braces from the 1-by-6 boards. Make 45-degree angles at the ends of each brace. The braces should measure 27 inches between the two longest points.
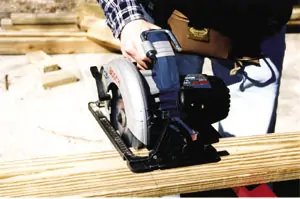
Cut the braces from 1 x 6” lumber.
Cut 45-degree angles in each end of the braces. The braces should measure 27” between the two longest points.
Screw the braces to the inside of each foot structure (on the side with top connector). The braces should be installed flush, running from the inside edge of the upright posts to the bottom edge of the foot pieces. Once the braces are installed, the two side frames are complete.
Install the braces on the inside of each foot section, flush with the inside edge of the uprights and flush with the bottom of the foot.
Connecting the Sides
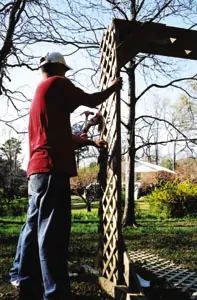
When it’s time to connect the frame components, recruit some help. The long, heavy pieces can be awkward to work with, and you’ll need someone to hold the pieces in place while you fasten them together.
Cut three 2-by-4 connectors to 87 inches. Screw the connectors to the side frames, fitting them into the notches at the top of the side frames. The outside end of each connector should be flush with the outside face of the side frame.
Cut 87” top connectors to join the two side frames. They should fit flush into the notches.
Then add braces to the top of the side frames in the same manner as the bottom. The 45-degree cuts should be flush with the outside face of the side frames, and flush with the top edges of the 87-inch connectors. Do this on both the front and back of the swing-set frame.
Add 1 x 6” braces to the top corners, on both front and rear sides of the frame.
At this point, the frame should be sturdy enough to stand upright. Use a stepladder for better access to the top of the swing-set. Install the third 87-inch connector between the two that are already installed. This third overhead connector should be installed in the center of the two front and back connectors, splitting the difference evenly. Then use the excess 2-by-4 lumber to cut blocking to fit between the top connectors. The blocking will resist twisting and warping.
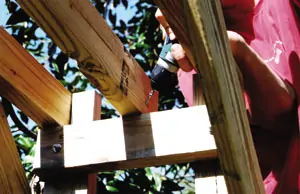
Install a third 87-inch connector centered between the front and rear connectors.
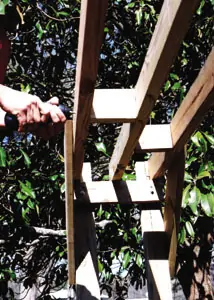
Install blocking cut to fit between the top connectors.
Adding the Lattice
Next, cut the 4-by-8-foot sheet of lattice into three lengths 15 3/4 inches wide. Lattice is thin and tends to shift, which can be a challenge to cut. It will help to snap a chalk line to mark the cut. It’s also a good idea to clamp the lattice sheet on top of a couple of boards spaced about 6 inches from either side of the cut line. This will support the lattice from beneath, preventing it from moving so much while sawing.
Cut each side lattice piece to rest on the top edge of the foot, but covering the rest of the side frame all the way to the edges. Cut the top lattice piece to fit flush with the edges of each side of the frame. Because lattice is thin and splits easily, use 4d galvanized nails to fasten it in place.
Add the lattice to the frame, and then the last step is simply to add the swing itself.
Once the frame is complete, you can anchor the swing arbor in place by boring 5/8-inch diameter holes through the foot pieces, angled 45 degrees to the ground. Drive the rebar through the holes and into the ground. There should be no rebar sticking up through the holes in the foot pieces.
With the swing arbor anchored in place, bore two holes in the top center 2-by-4 and add the screw hooks. You’re now ready to add the bench swing — one purchased from a home store, or one you’ve built yourself — for a pleasant outdoor area for reading and relaxing.
Materials
9 pieces, 2×4” treated lumber,
8′ long
3 pieces, 1×6 treated lumber, 8′ long
1 sheet, 4×8′ treated lattice
16 carriage bolts (1/4×3 1/2”), with nuts and washers
Galvanized deck screws, 2” long
4d galvanized nails
4 pieces 1/2” rebar, 3′ long
2 screw hooks
Tools
Circular saw
Jig saw
Drill/driver
Wrench
Tape measure
Chalk line
Square
Hammer
Stepladder
Goggles
Dust mask
