
Modern Vanity Desk
This post is sponsored by The Home Depot
One night a few weeks ago my daughter was sitting at my son’s desk with a mirror in her hand and I thought, I should build her a desk with a lift up vanity…. So I did!
The top of the desk is painted plywood and the drawer fronts and base are White Oak.
Keep scrolling for the full plans for this build and the full build video below!
Click here for cut list and plans —>Modern Vanity Desk Plans
I started by ripping down all the plywood parts. It’s hard for me to handle such large pieces at the table saw so I prefer to break them down into manageable sizes using a circular saw.
I used the circular saw from the DeWalt 20-Volt Cordless Combo Kit. Besides for the circular saw, this kit also comes with a reciprocating saw, 2 AH battery, charger and a Tough System case. This is a no frills basic kit that is perfect for a job like this, simple effortless ripcuts.
If you work on the go, the Tough Case is great, it holds the tools it comes with and could hold a lot more too. Since it’s a hard case, it could be easily stacked without damaging the tools inside.
I paired this saw with the Diablo Fine Finish saw blade to eliminate any tear out on the fragile plywood veneer. This was the perfect blade for the job. It’s really important to choose the right blade for the right job, Diablo makes other great blades, like their Demo Demon, which it great for rough demo work but would not have been a good choice for this plywood.
Since it’s winter, I have also been wearing these Firm Grip Gloves in the shop, they keep my fingers from freezing while still having control over my tools. I also find them to be great when I am milling up rough lumber, no more splinters!

After ripping the pieces to their final width, I cut them all to their final lengths.

The top of the desk is going to be cut into three sections. Two side boxes that will hold drawers and one middle compartment that will lift up to reveal vanity mirror.
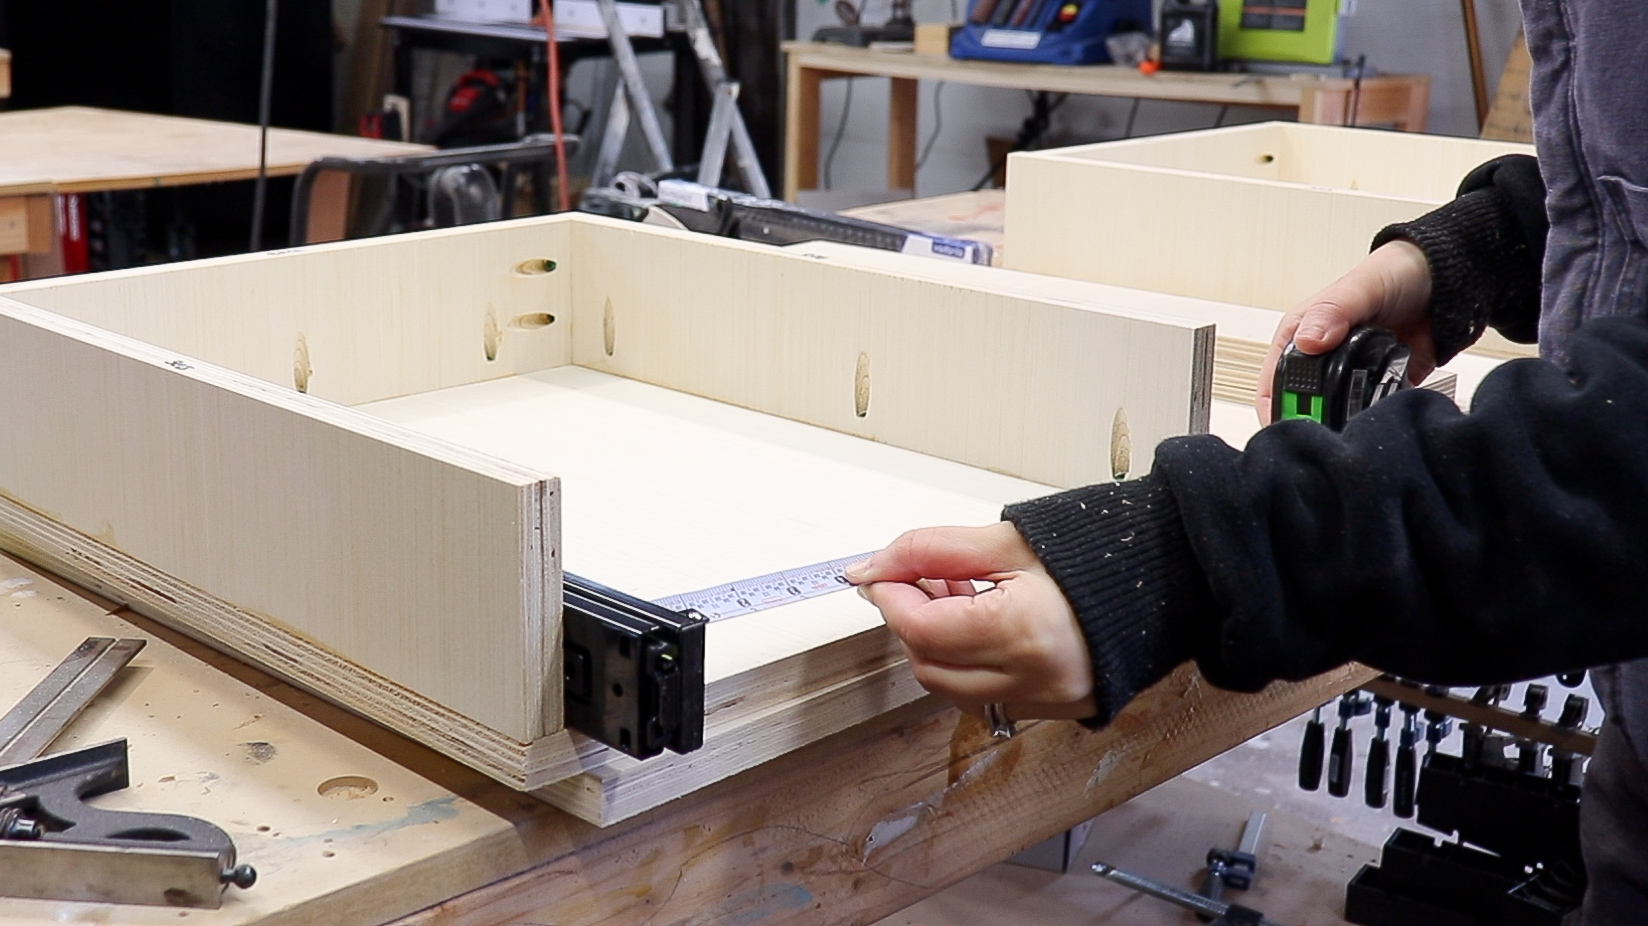
Using the Milwaukee 25 FT. Tape Measure, I marked my cuts to split the top into those three sections.
This tape measure is built super tough, it can withstand an 80 foot drop! Another nice feature is the finger hold. Instead of pressing a button to lock the tape in place, you can simply place pressure with your finger to hold it in place for a moment.

I drilled for pocket holes in all the pieces that would make up the Drawer Boxes.
I got to test out this new pocket hole jig from Armor Tool and its super cool.
It auto adjusts every aspect of it so you never need to remember to adjust for material thickness on the jig or on the bit.
The coolest part is the color coded guide on the side of the jig that corresponds with colored screws armor sells. No more looking up to see what size screw to use!

Then I assembled the boxes that with hold the drawers using the colored screws it recommended on the jig.
In the picture below, the box is actually upside down. I did this on purpose so I can attach the desk bottom from underneath and you wont have any screw holes showing.

Before attaching it to the bottom though, you need to install the drawer slides. If the bottom was attached, you wouldn’t be able to easily reach inside with a drill.
I placed the drawer slides in the box to measure how wide of a drawer I will need.
Then cut the parts to size. (You can also do this at the miter saw.)

Before assembling the drawer, I made a 1/4” groove that started 1/4” up from the bottom on all the pieces. This groove should be about half the thickness of the material.
I did this by making two passes at the table saw.

Then I cut the drawer bottoms to size on a 1/4” thick piece of plywood.

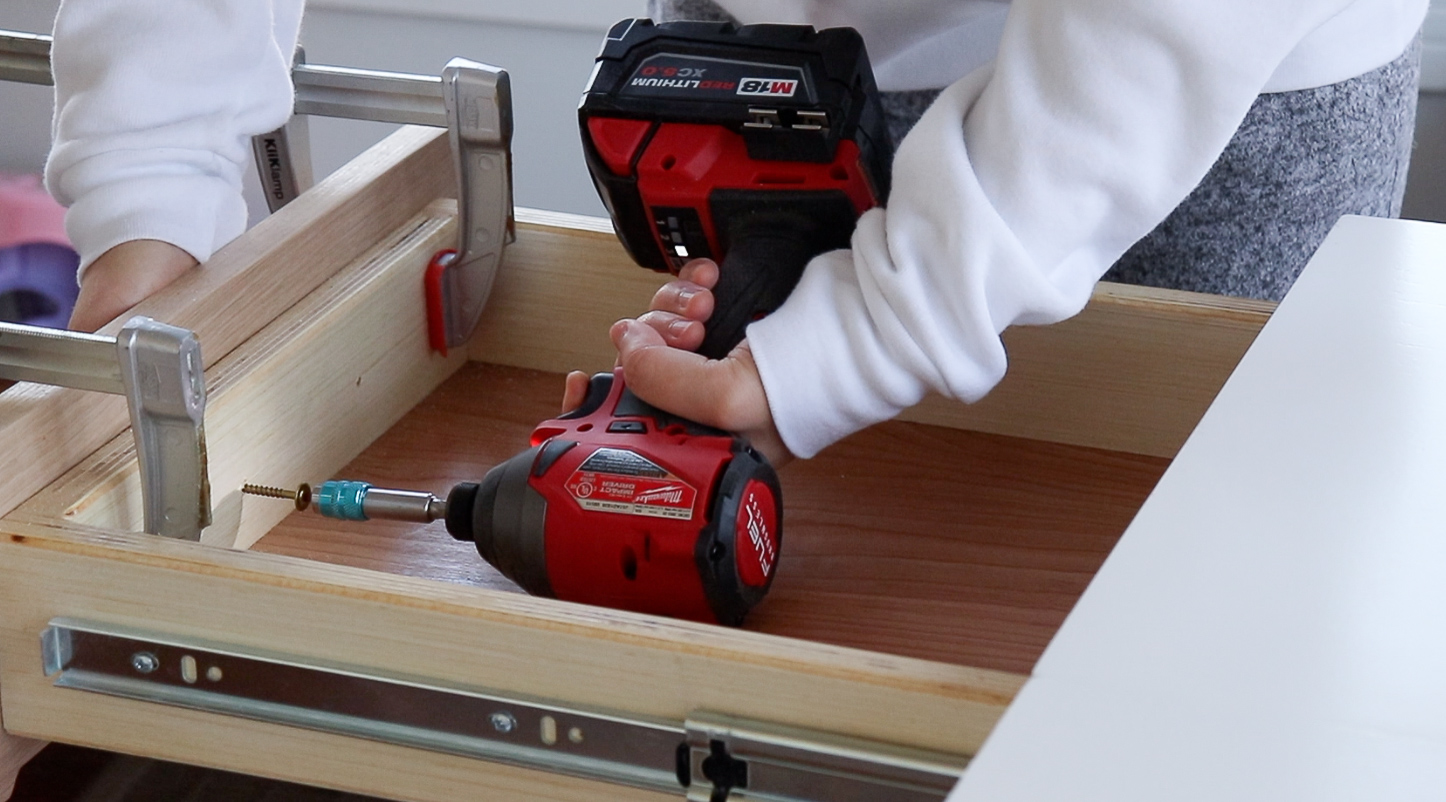
I drilled some more pocket holes then assembled the drawers with the drawer bottom in place.
The pocket holes should be drilled on the front and back pieces of the drawer. The front holes will be covered up by the drawer front you will put on later.

Now that the drawers were built, it’s time to install the drawer slides.
I like to use spacers under the slides to make sure they are evenly placed in the box.
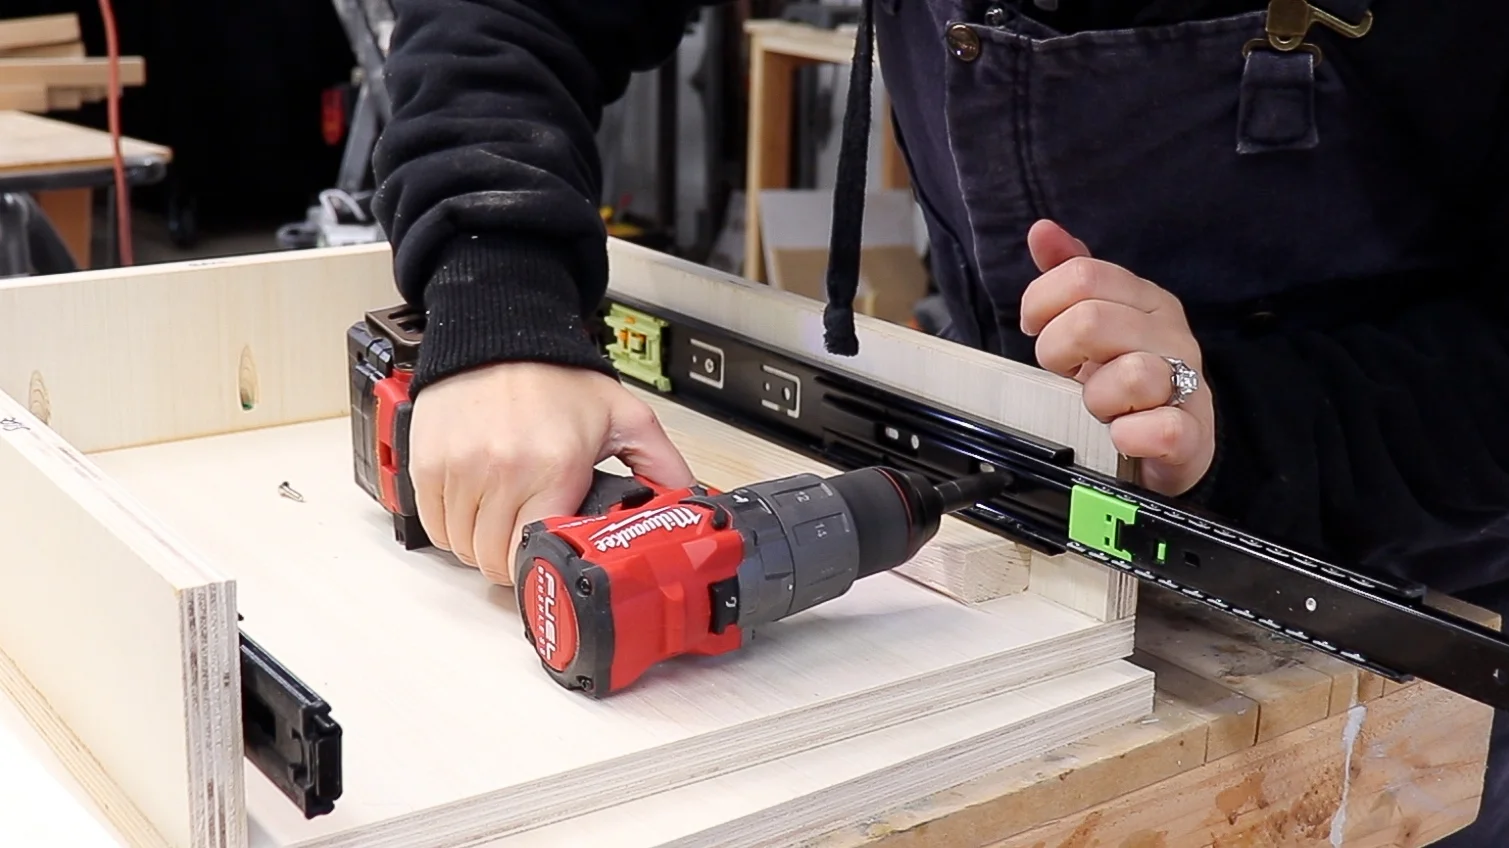
Then I placed the drawer in the drawer box to attach the other part of the slides to it.
I also used spacers here to make sure the drawer was in the right position.
Also note the drawer is upside down. That is because I built the drawer boxes upside down so no screw holes would be showing on the top of the desk.

Now that the drawer slides are installed, I could attach the bottom of the desk.
I flipped everything upside down and put the middle compartment top in place to make sure everything was evenly spaced out. Then glued, predrilled, and screwed both drawer boxes in place.

Next I built the center compartment and attached it to the rest of the desk using glue and screws.

The top of the desk done, now it’s time for the base!
I milled up some 2x2’s from rough White Oak, but you can just purchase 2x2’s and skip this step.
I keep my planer on the “other side” of my shop where I don’t have any good lighting, so I used a Rocket LED Stand Work Light from Milwaukee to light up the space. This light extends to 5’8” tall and collapses to 2’7” to be easily transported or stored away. It's super bright at 1,400 Lumens, it lit up the whole dark side of my shop!
It can be powered two ways, you can plug it in with an extension cord or you can purchase a 12 Volt battery. Only downside is the battery doesn’t charge while it is plugged in.
It’s a great option for lighting in those hard to reach areas and I found it to be great lighting for my videos!

After milling all the pieces, I lined them up to the desk to mark my cuts. This ensures a perfect fit.

Most of these cuts were straight forward but some of them have a 10 degree cut on their ends.

Instead of measuring how long to cut these angled pieces I lined them up to make marks for the cuts.
When you lay out the pieces like this, the exact angle is not needed, as long as you are cutting exactly on your mark, the pieces will fit.

After cutting on the marks, you should get a perfect fit!

I chose to use dowels to join the base using an angled dowel jig I made.
If you aren’t comfortable with dowels, you can use pocket holes on the underside of the bottom pieces and the top of the top pieces so they wont show.

For the parts that didn’t have an angle on them I used a drilling template guide to drill the straight holes for the dowels.
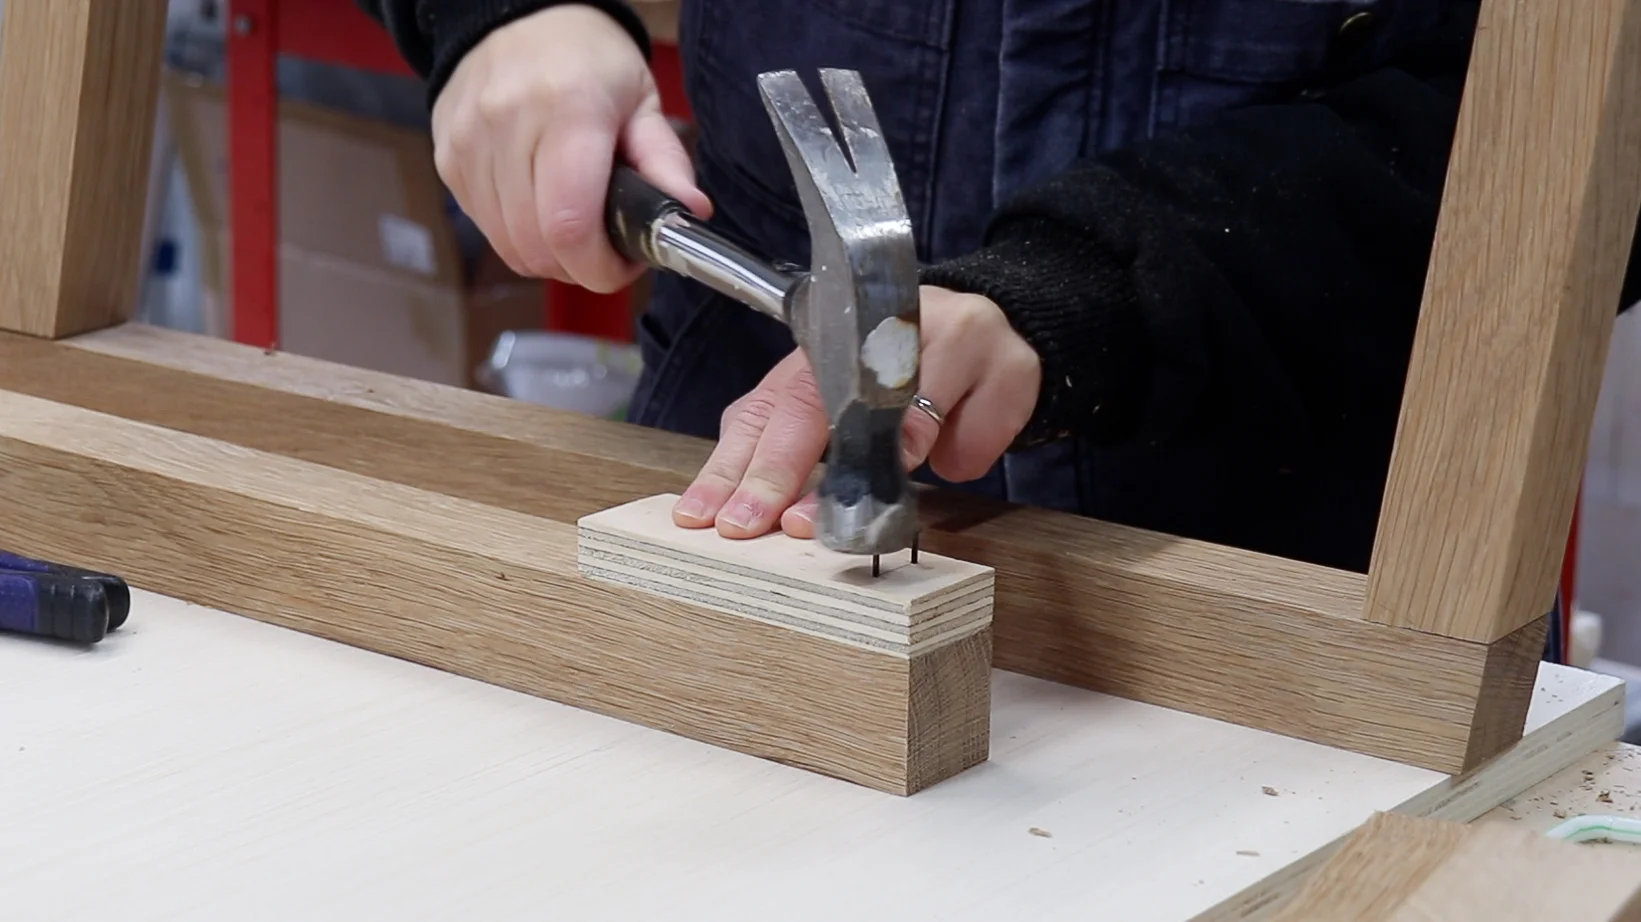
Then I glued and clamped the legs and set them off to dry.
When clamping the angled pieces, its easiest to use a scrap cut off that has the same angle on it so you have a parallel surface to clamp against.

After the glued dried, I drilled for the dowel holes on the legs and stretchers.
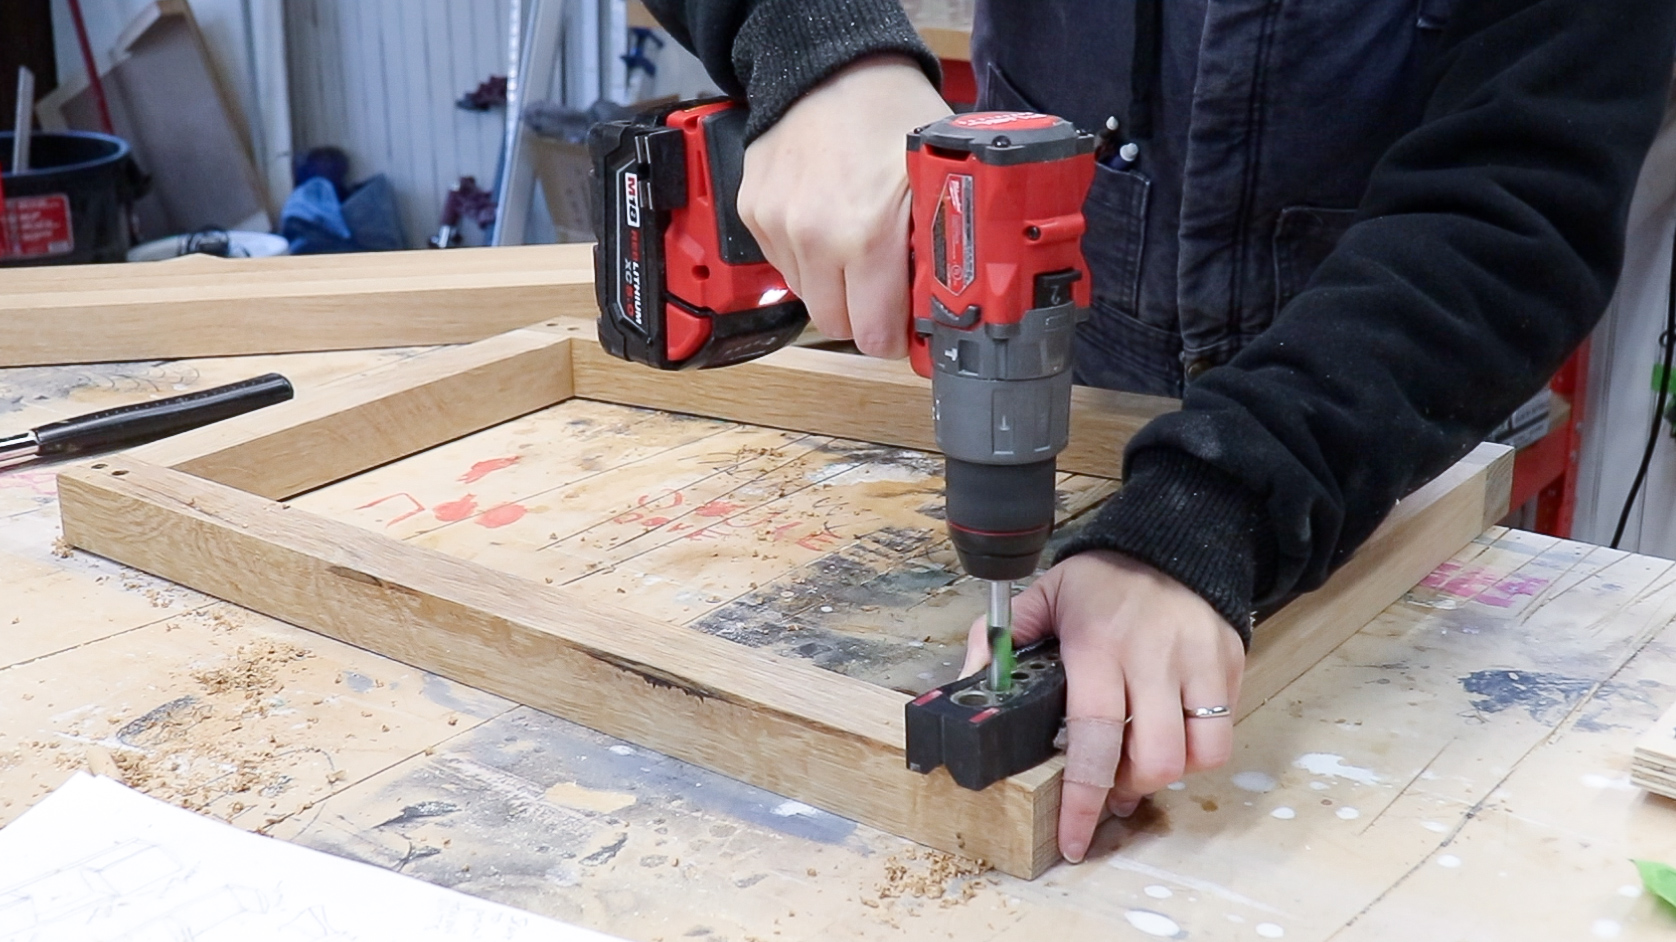
Then glued and clamped that up making sure everything was really square.

While that dried I painted the top of the desk white using a spray gun.

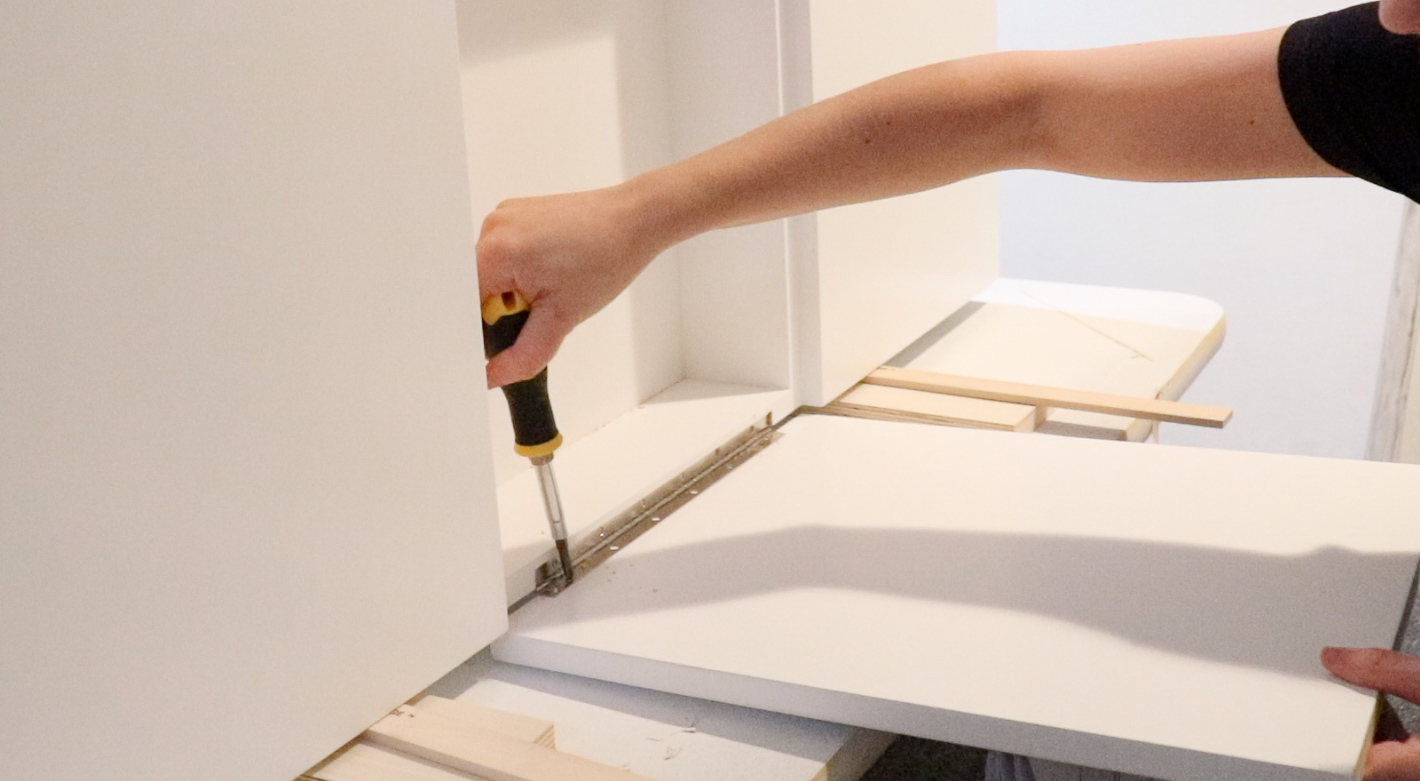
I routed out a groove to hold a piano hinge that will lift up the vanity lid then installed it in place.
I was hoping to be able to use a soft close lid stay but I have trouble finding one that would fit in this small compartment so I will have to swap out this piano hinge for some torsion hinges.
That means I will have to fill in the groove I made for this piano hinge and repaint before installing the new torsion hinges. Oh well…
If you don’t need a soft close hinge, this piano hinge would work fine with regular lid stays.
I cut the drawer fronts to size then took them to the router table with a rounded router bit to make a small groove that will be a hidden drawer pull.

Then I installed the drawer fronts onto the drawers!
To do this, I used hot glue to temporarily hold them in place, then I could pull the drawer open, clamp it to be more secure, then screwed it from the inside.
To secure the front to the lift up lid, I used “L” brackets. I had an oversight and didn’t accommodate for their thickness when building the center compartment.
To solve this, I marked out where the “L” brackets will go and then used a router that was set to the thickness of the bracket.
You can also use pocket holes instead of the “L” brackets, then you can skip this step.

When making the recess for the “L” brackets on the lid front panel, I had to make sure the recess wouldn’t be seen from the top. So I did a plunge cut with my router and chiseled the corners so the brackets would fit.

I put glue on the edge of the plywood top and clamped the front in place.
Note, when I painted the top panel, I used painters tape on this edge so the glue would be able to adhere well to the front.

After the glue set up a bit, I removed the top and screwed the “L” brackets into the recesses I made earlier.

Instead of glass mirror, I decided to use mirrored acrylic. To cut it to size, I used an acrylic cutting tool then snapped it off at the line.

To attach the acrylic mirror to the top, I used double sided mirror tape.
I tried a few different adhesives and they all seemed to eat away at the mirrored backing. There is something called mirror adhesive that I didn’t try, but the bottle said not to use it on acrylic….

To connect the top of the desk to the base, I used figure 8 table top fasteners.
These are my go to connectors for projects like this.
Just drill a small hole with a forstner bit thats the same size as the connectors, then screw them into place on the base.

Then you can place the top on the base and lock that down into the other side of the table top fastener with screws!
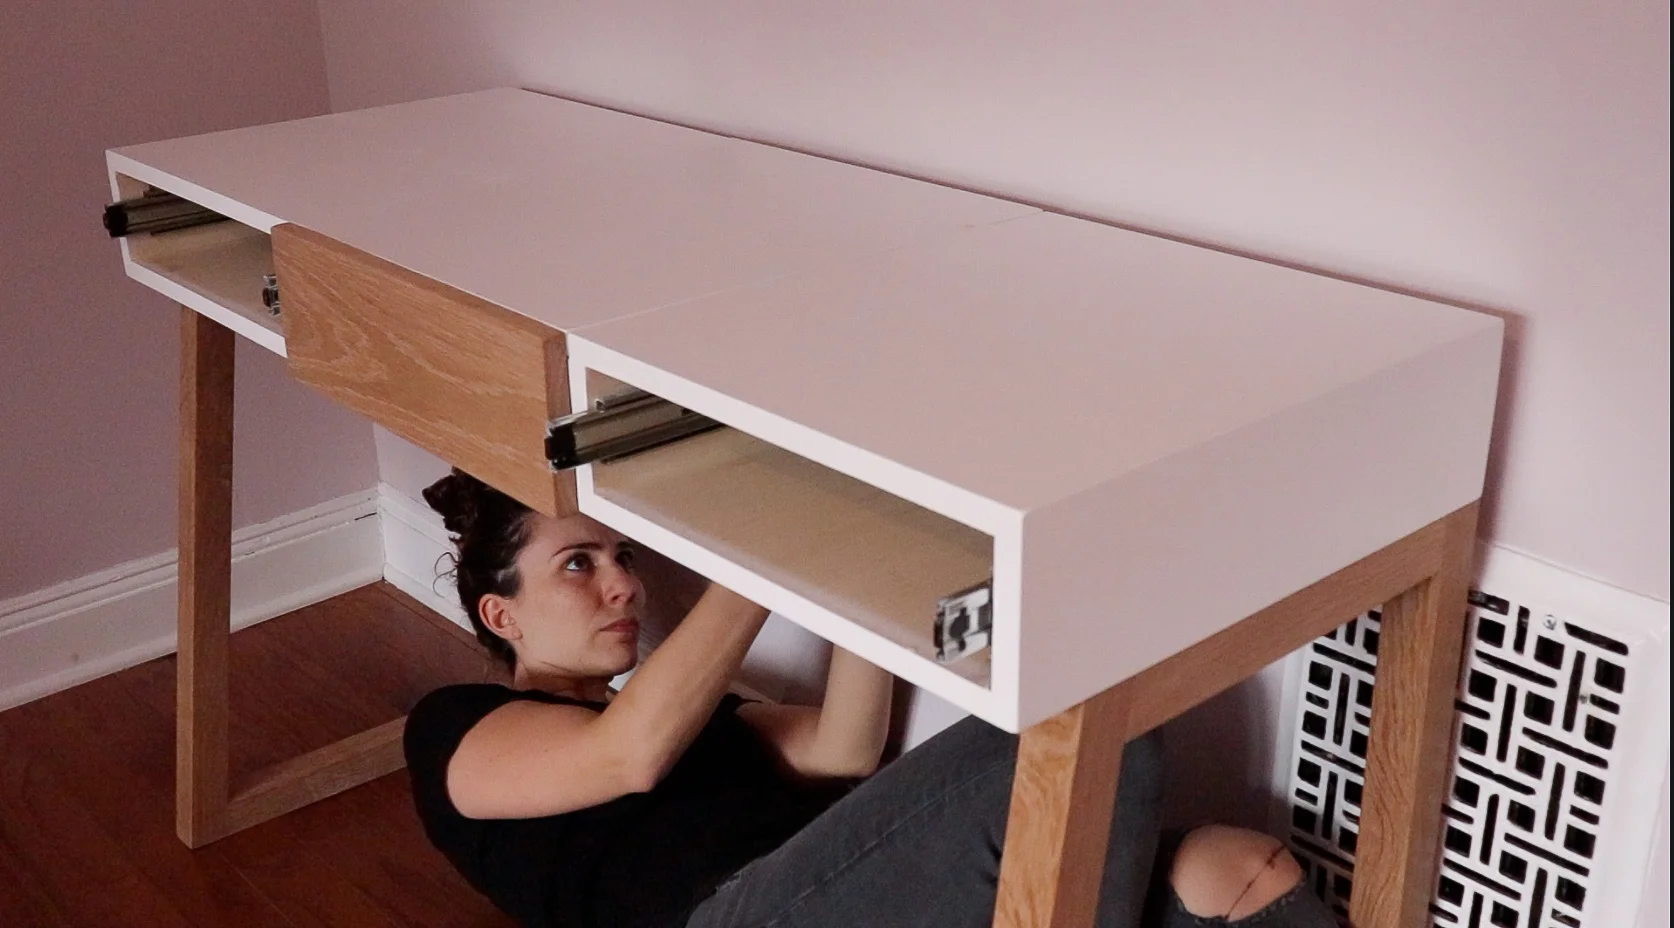
And it’s done!

I’m loving how clean and modern this desk is.

And my daughter is loving all the storage, especially the vanity part! Her reaction when she first saw it was priceless…

I’m really loving how this looks in her room, I especially love it right under a painting that my grandmother made many years ago. Hopefully these handmade items in her room will inspire her to keep creating as she gets older.


I acknowledge that The Home Depot is partnering with me to participate in the ProSpective 2018 Campaign. As a part of the Program, I am receiving compensation in the form of products and services, for the purpose of promoting The Home Depot. All expressed opinions and experiences are my own words. My post complies with the Worth of Mouth Marketing Association (WOMMA) Ethics code and applicable Federal Trade Commission guidelines.