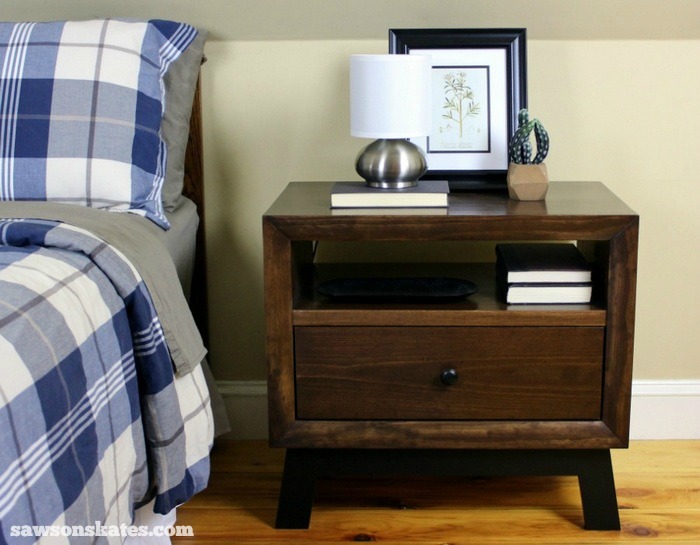
DIY Chunky Solid Wood Retro Nightstand
Do you remember the Wendy’s commercial from the 80s? Oh geez, am I dating myself?! Anyway, in the commercial, the woman demanded to know “Where’s the beef???” Well, I’m here to say I’ve found the “beef” and it’s right here. This nightstand is beefy, and by beefy, I mean HEAVY! It’s made almost entirely of solid wood. Don’t head out for a burger and fries now cuz I’m sharing plans for this chunky retro nightstand!
For your convenience, this post contains affiliate links to supplies or tools I used to complete this project. Purchases made using these links help support the Saws on Skates website and allow me to share more DIY projects. and DIY tips with you. There is no cost to you for using these links. Click here to visit my site policies.
That Wendy’s commercial either reminded you of your childhood or you’re saying “Man, this bald guy is old!” Hey, I’m not old! I still get IDed for adult beverages. Well, not often, but it happens!
OK, are you done laughing at my expense?! Well, here’s something else that may make you laugh. I’ve been building DIY furniture for years, but never really focused any DIY attention on my bedroom. A few years ago I built a headboard, but with the exception of the mattress, all of the other pieces are hand-me-downs. Don’t get me wrong, I like used furniture. But I thought it’s time to upgrade from a college dorm look to a more adult look for my room.
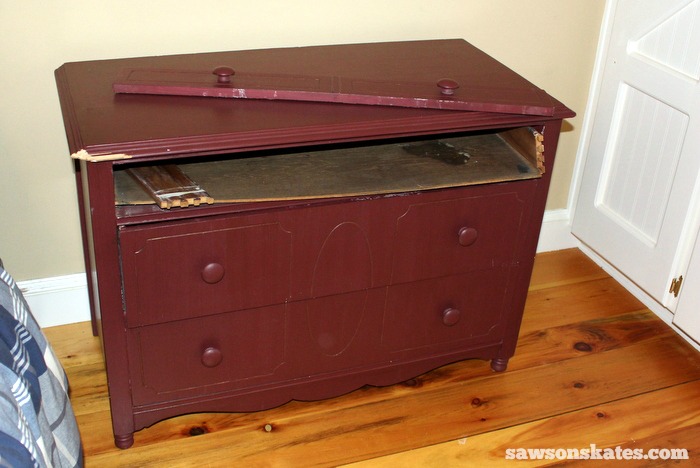
Plus, some of the pieces, like this piece, are getting kinda tired. Yup, the top drawer is broken. I pulled the drawer out and it fell apart in my hands. Oh, and the left corner… that was chewed off by a Greyhound I was fostering!
Recently, I made an attempt to update the look of my dormroom, ummm I mean bedroom. As a fellow DIYer, I’m sure you have built a furniture project and thought “hmmm, looks good, but this isn’t exactly what I wanted.” That’s what happened when I built Mid-Century Modern nightstand.
One of the tricky things about designing furniture for my bedroom is that it’s a loft style bedroom. There’s really only one wall to put the bed on and that’s a knee wall (a short wall that usually comes up to about your knee.)
So while that antique dresser is a cool piece, it looked as if it filled the wall from the floor to the ceiling, making the room feel crowded. The scale of the Mid-Century Modern nightstand was much smaller. In fact, it felt too small for the space so I went back to the drawing board.
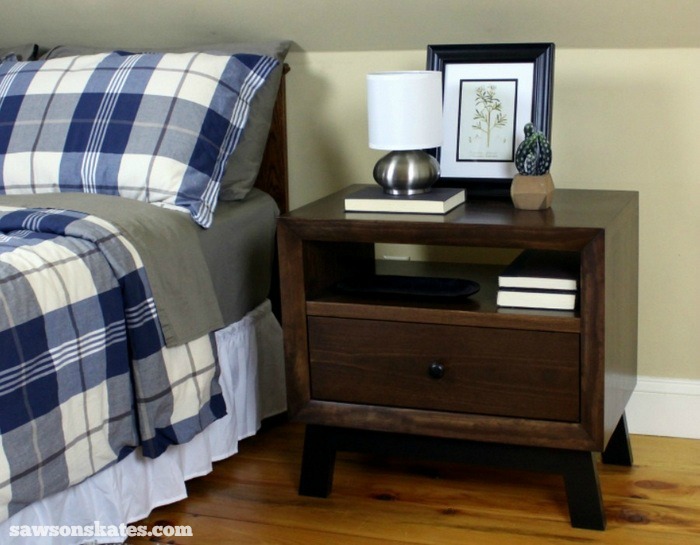
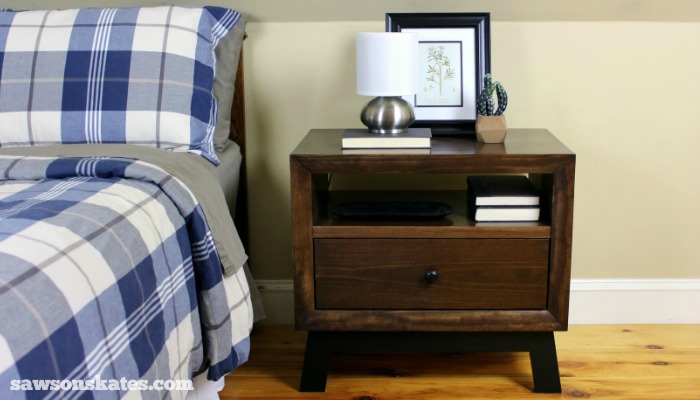
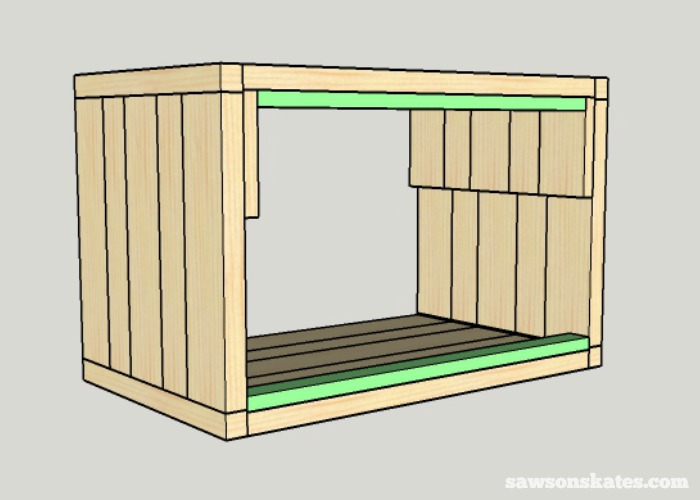
My new nightstand features angled legs, storage shelf and a deep drawer for lots of storage. Window/door casing moulding is used to make the face frame and gives this project a thick, chunky look.

You won’t run out of storage with this nightstand. The shelf is perfect for storing books, magazines, reading glasses, remotes, phones and more.
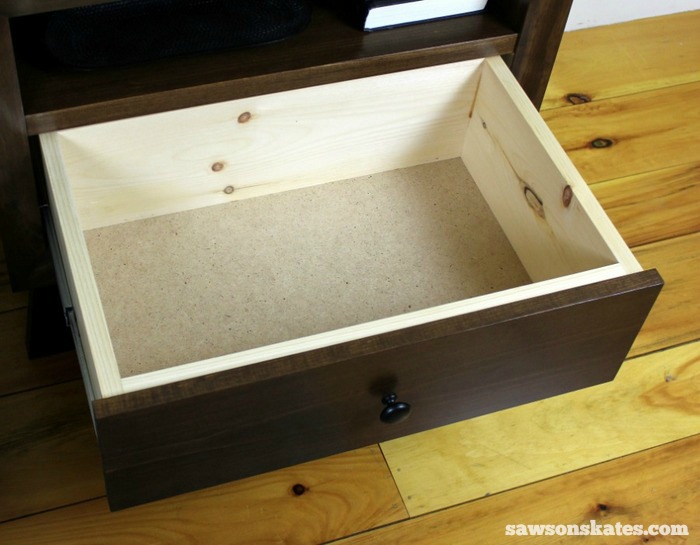
There’s more storage in the deep drawer below the shelf. The bottom of the drawer is made of hardboard and the only part of the chunky retro nightstand that isn’t made of solid wood.
DIY Chunky Retro Nightstand Plan
Supplies
(1) 1x2x6
(2) 1x3x8
(1) 1x4x6
(1) 1x8x8
(3) 5/4x3x8
(4) 5/4x4x8
(1) Pine Casing Moulding 11/16″ x 2-1/2″ x 8′
2’x4′ hardboard
1-1/4″ wood screws
3″ wood screws
1-1/2″ pocket screws
1-1/4″ brad nails
1″ pin nails
14″ Full Extension Ball Bearing Side Mount Drawer Slides
Knob
Elmer’s Wood Glue Max
Rust-Oleum Ultimate Wood Stain – Dark Walnut
Semi-Gloss Polyurethane
Tools
Stanley FatMax Tape Measure
Dewalt Cordless Drill
Kreg Jig
Miter saw
Table Saw
Brad nailer
Pin nailer
Countersink drill bit
Note: For 5/4 material set your Kreg Jig to drill in 1-1/8″ material.
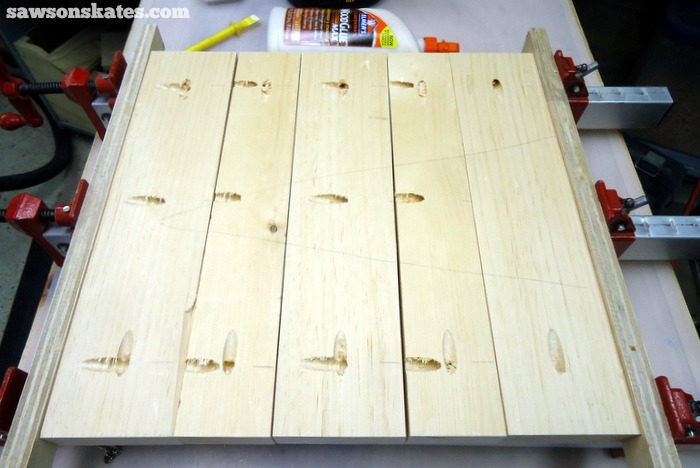
Step 1. Make the Side Panels. Cut 6 pieces of 5/4×4 to 14-1/2″ and 4 pieces of 5/4×3 to 14-1/2″. Drill one pocket hole in each end of the side pieces. Take three of the 5/4×4 pieces and set one in the middle and one on each end. Take two of the 5/4×3 pieces and set them between the 5/4×4 pieces. Mark the locations for pocket holes to join the pieces together. (Hint: I drew a large triangle on the same side as the pocket holes, so it would be easy to reorient the pieces in the same locations). Drill pocket holes at the locations you marked.
Apply glue to the edges of the side pieces, clamp and attach using 1-1/2″ pocket screws. Repeat for the other side panel.
Step 2. Make the Side Rails. Rip a 5/4×4 to 1-1/4″ and cut 4 pieces to 15-1/2″. Apply glue to the rails, clamp to the side panel and attach using 1-1/2″.
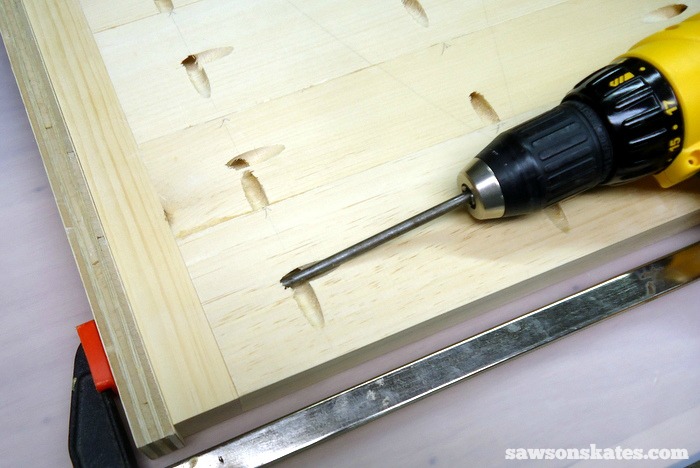
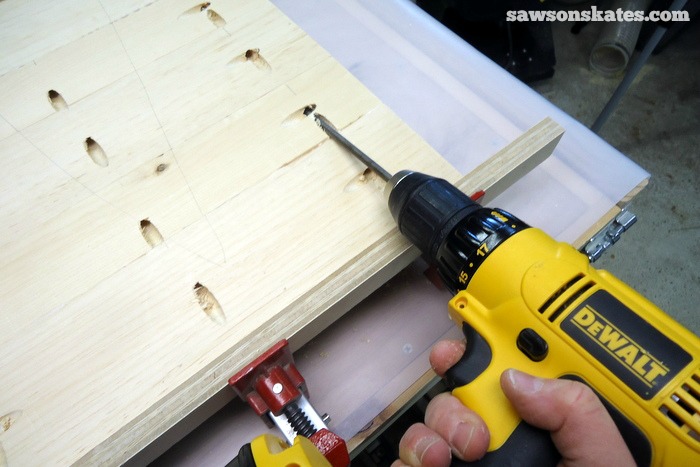
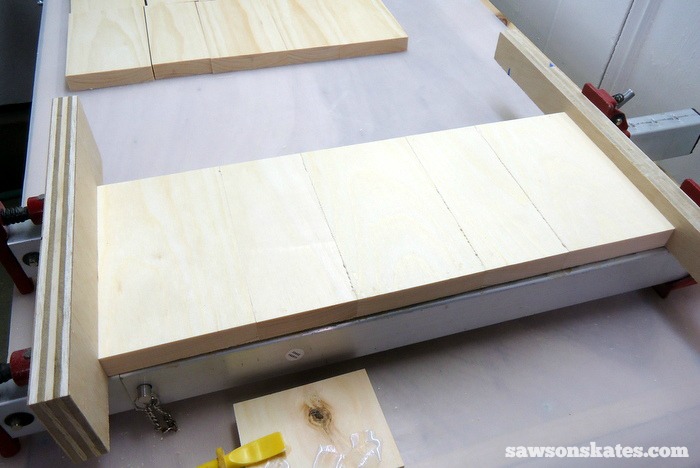
Step 3. Make the Top, Bottom and Middle Panels. Cut 18 pieces of 5/4×4 to 23-5/8″ and 12 pieces of 5/4×3 to 23-5/8″. Drill two pocket holes in each end of the 5/4×4 pieces. Take three of the 5/4×4 pieces and set one in the middle and one on each end. Take two of the 5/4×3 pieces and set them between the 5/4×4 pieces. Mark the locations for pocket holes to join the pieces together. (Hint: I drew a large triangle on the same side as the pocket holes, so it would be easy to reorient the pieces in the same locations). Drill pocket holes at the locations you marked. Apply glue to the edges of the side pieces, clamp and attach using 1-1/2″ pocket screws. Repeat for the other two panels.
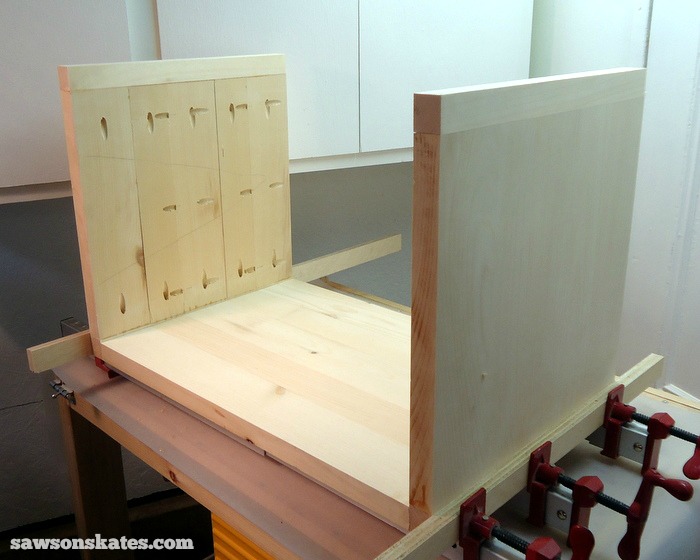
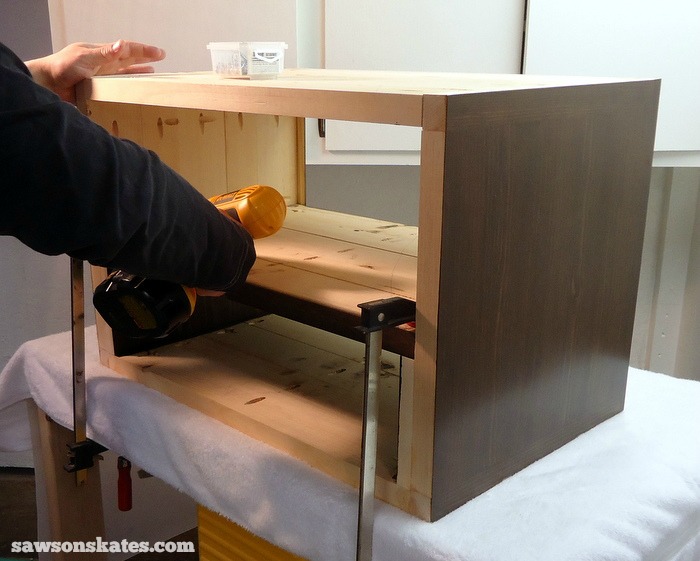
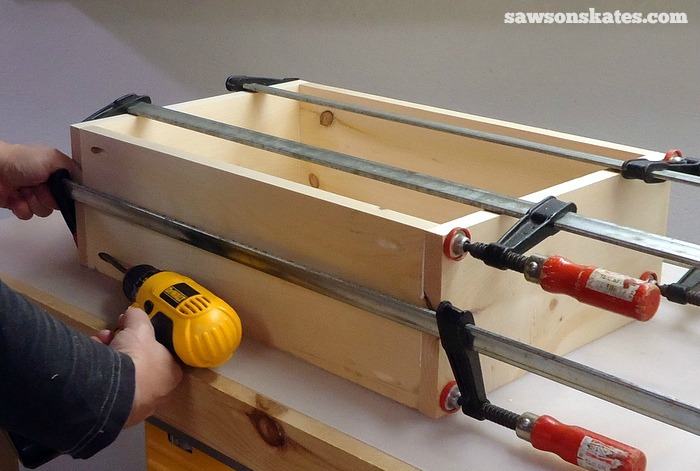
Step 4. Assemble the Carcass. Place the bottom on your workbench. Apply glue to the sides and clamp. Flip over and be sure the bottom is flush with the bottom of the sides. Attach using 1-1/2″ pocket screws. Apply glue to the edges of the top, place in position and be sure the top is flush with the top of the sides. Clamp and attach using 1-1/2″ pocket screws. Do not install the middle panel.
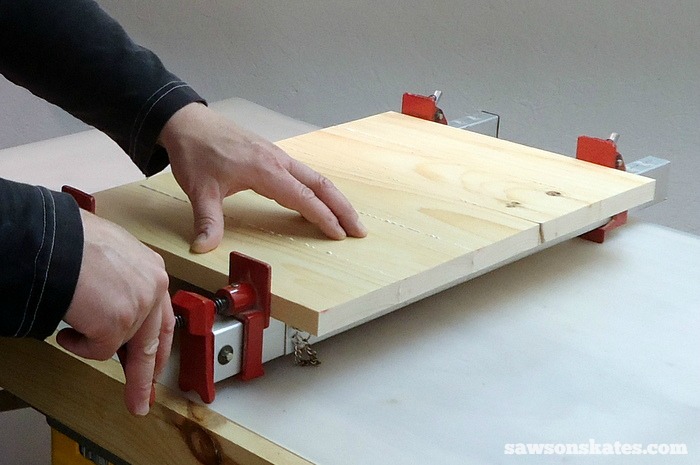
Step 5. Make the Inside Shelf Panels. Cut 6 pieces of 1×4 to 5-3/4″ and 4 pieces of 1×3 to 5-3/4″. Take three of the 1×4 pieces, set one in the middle and one on each end. Apply glue to the edge of two 1×3 pieces, set them between the 1×4 pieces and clamp until dry. Repeat for the other shelf panel.
Step 6. Install the Inside Shelf Panels. Sometimes widths of wood can vary, so it’s a good idea to dry fit the shelf panels making sure they fit properly. Trim to fit if it’s too long. If the shelf panel is too short, place it so that it’s flush with the front of the carcass. Apply glue to the shelf panel, clamp in position and let dry. Repeat for the other shelf panel.
Step 7. Install the Moulding Cleats. Cut 1 piece of 1×2 to 23-5/8″ and 1 piece of 1×2 to 22-1/8″. Apply glue to the 23-5/8″ piece, place at the bottom front of the carcass and attach using 1-1/4″ brad nails. Apply glue to the 22-1/8″ piece, place at the top front of the carcass and attach using 1-1/4″ brad nails.
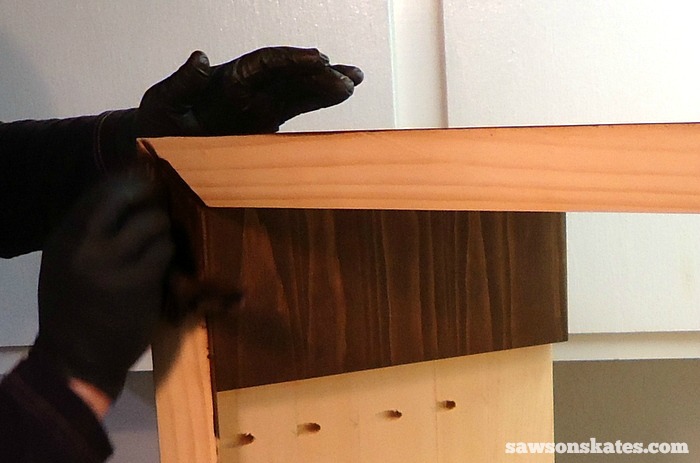
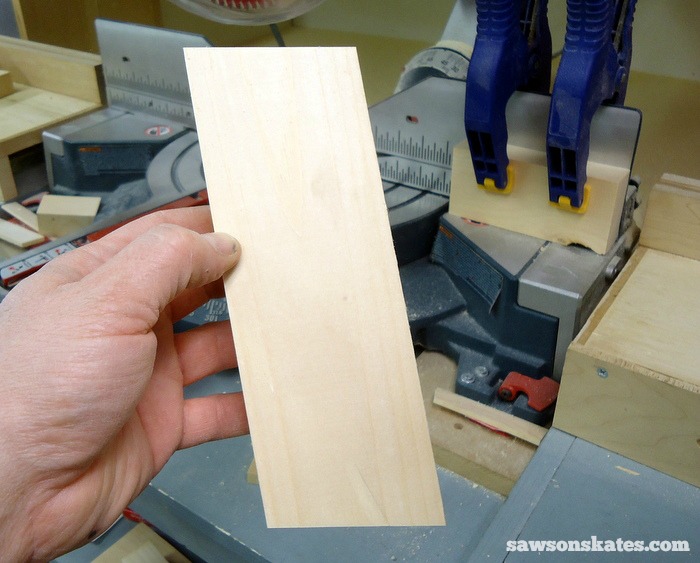
Step 8. Install the Face Frame. Using a table saw, rip the casing moulding to 1-7/8″.
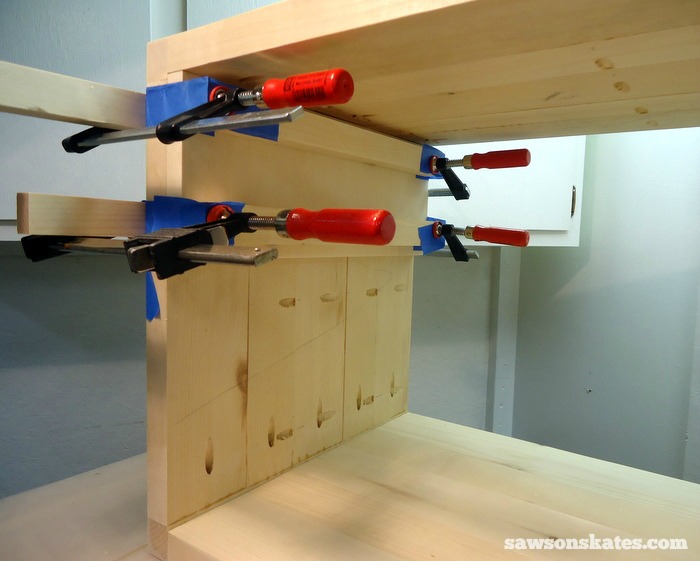
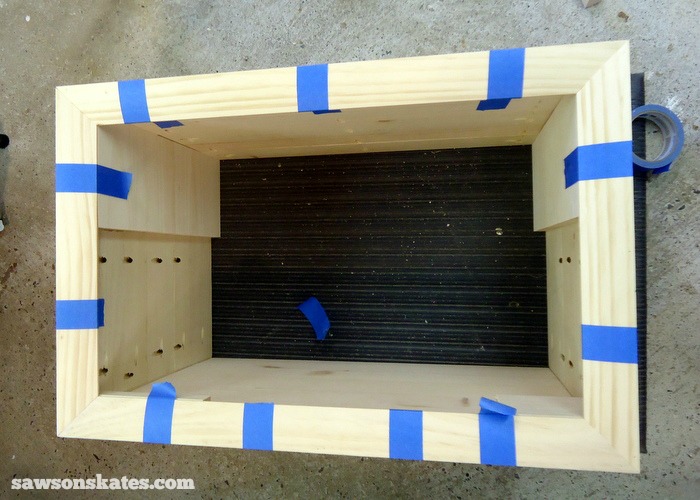
Cut a 45 degree angle on one end of the moulding. Place on the front of the carcass and mark the other end. Cut a 45 degree on your mark. Test fit and adjust if necessary. Apply glue and attach with 1″ pin nails. I also used some painter’s tape to secure the moulding while the glue dried. Cut a 45 degree angle on one end of the moulding. Place against the moulding you just installed and mark the other end. Cut a 45 degree on your mark. Test fit and adjust if necessary. Apply glue and attach with 1″ pin nails. Continue working around the sides until all of the moulding is installed.
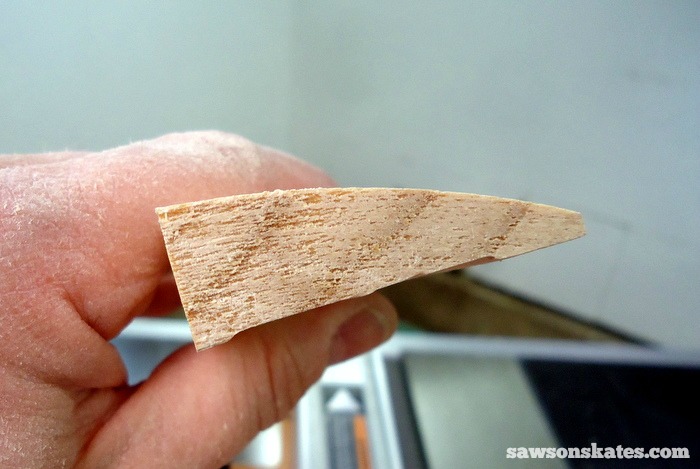
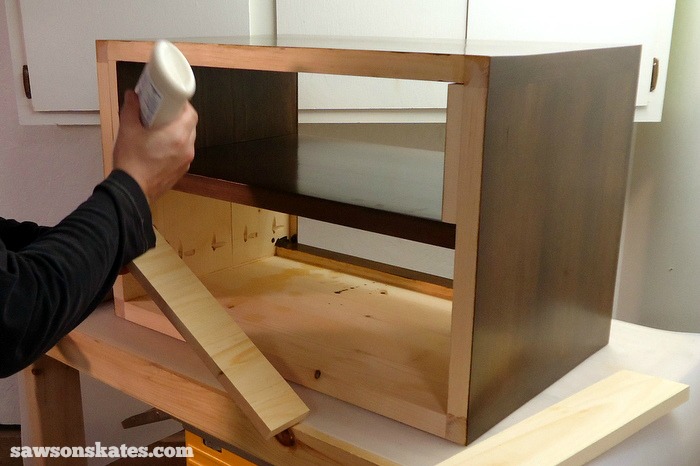
Step 9. Sand, Stain, and Polyurethane. I’m sure you noticed we haven’t installed the middle shelf yet. If we had, it would be very difficult to properly sand, stain and apply polyurethane to the shelf area. Before we go any further, let’s do a little finishing work. There were a few areas on the nightstand with some small gaps, so I whipped up a batch of my two ingredient DIY wood filler and filled the gaps. Then I sanded the nightstand smooth, applied a tea stain and lightly sanded again. Next, I applied my favorite dark walnut stain and three coats of polyurethane.
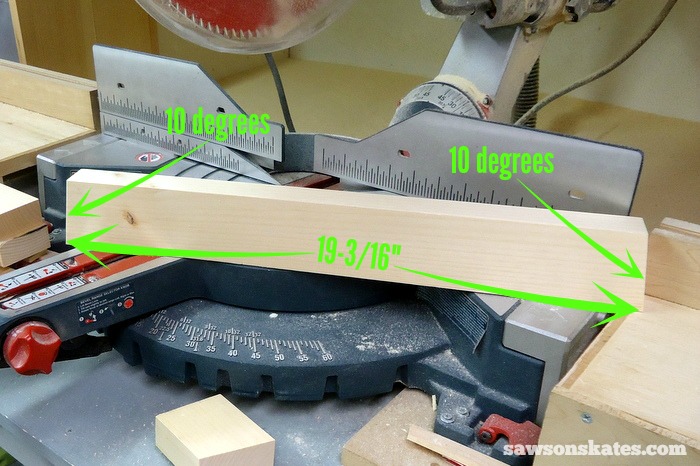
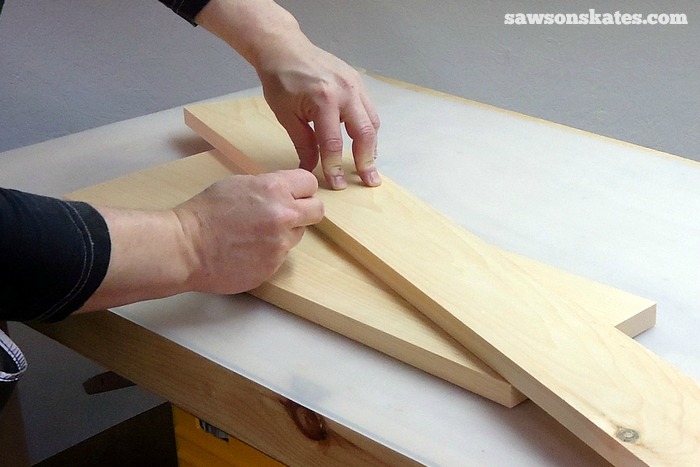
Step 10. Cut the Legs. We can get a head start on the legs, while the stain and poly are drying on the carcass. The legs are made from 5/4×3″ wood with parallel 10 degree angles. To make the angle, set your miter saw to 10 degrees and make a cut. Leave the piece on the saw and measure 7-1/8″ from the edge of the cut you just made. Next, slide the piece so the mark you made corresponds with the saw blade and make the cut. Repeat for the other legs.
Step 11. Cut the Long Leg Stretchers. Cut a piece of 5/4×3 with a 10 degree angle. Measure 19-3/16″ across the bottom and make a 10 degree cut. Drill 2 pocket holes in each end of the stretchers.
Step 12. Cut the Short Stretchers. Cut 2 pieces of 5/4×3 to 11-7/8″ and drill pocket holes in each end.
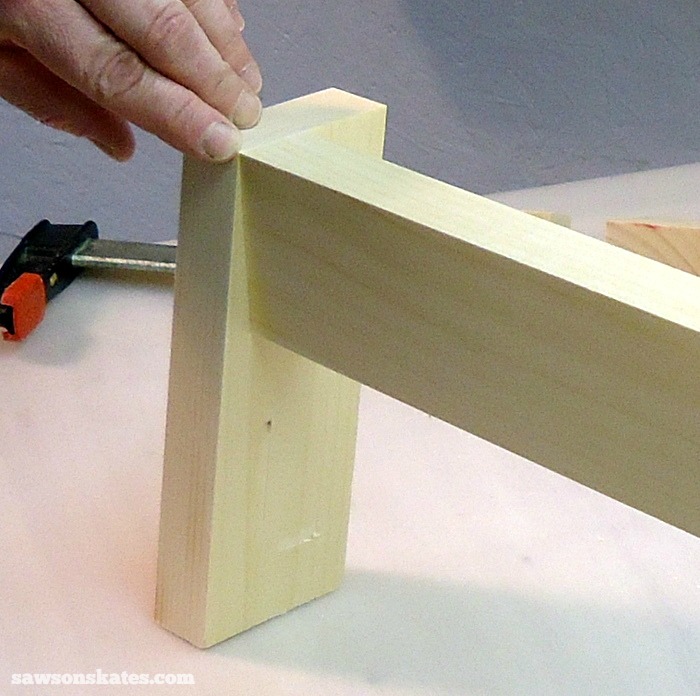
Step 13. Make the Leg Assemblies. Apply glue to the ends of the short stretcher and place on your workbench. Place a leg on each side so that the legs are pointing towards you.
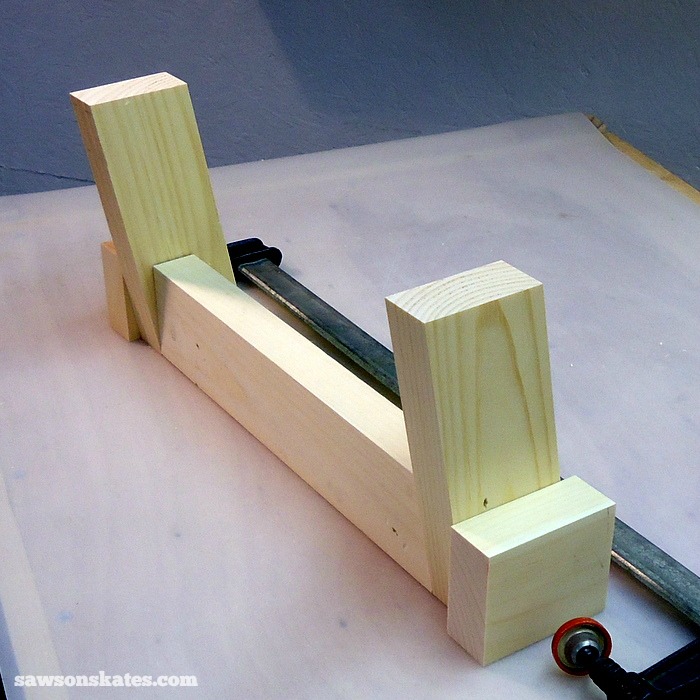
Clamp in position and attach using 1-1/2″ pocket screws. Repeat for the other side.
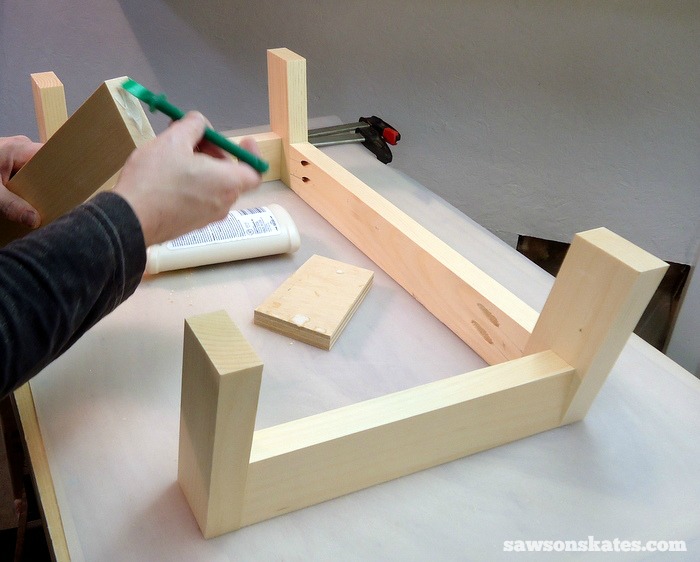
Place the long stretchers and leg sub assemblies on your workbench. Apply glue to the long stretchers, clamp to leg sub assemblies and attach using 1-1/2″ pocket screws. Prime and paint the legs.
Step 14. Install the Middle Shelf. Place the carcass upside down on your workbench. The middle shelf might be tough to get in, so you can apply a little candle wax to each end of the shelf. Slide the shelf in position, clamp to your workbench and attach using 1-1/2″ pocket screws.
Step 15. Make the Drawer Slide Cleats. Cut 3 pieces of 1×4 to 12″ and 2 pieces of 1×3 to 12″. Take the 1×4 pieces, set one in the middle and one on each end. Apply glue to the edge of two 1×3 pieces, set them between the 1×4 pieces and clamp until dry. Once the glue is dry, rip to 2-1/2″ on the table saw.
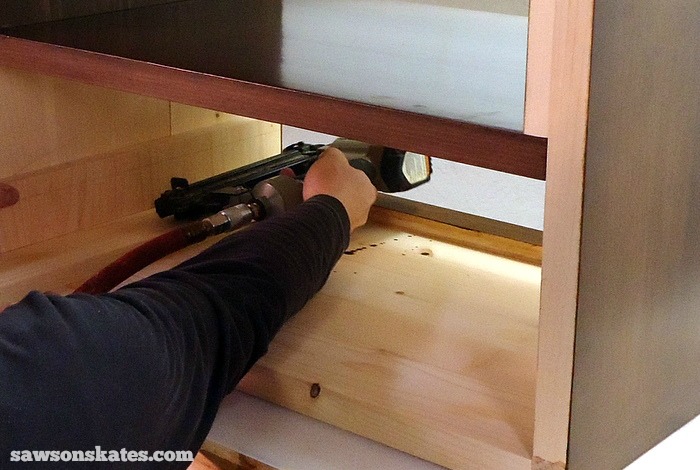
Step 16. Install the Drawer Slide Cleats. Sometimes widths of wood can vary, so it’s a good idea to dry fit the drawer slide cleats making sure they fit properly. Trim to fit if it’s too long. If the drawer slide cleat is too short, place it so that it’s flush with the front of the carcass. Place a scrap piece of 1x wood on the bottom of the carcass. Apply glue to the drawer slide cleat and place on top of the scrap wood.
Attach using 1-1/4″ brad nails. Repeat for the other drawer slide cleat.
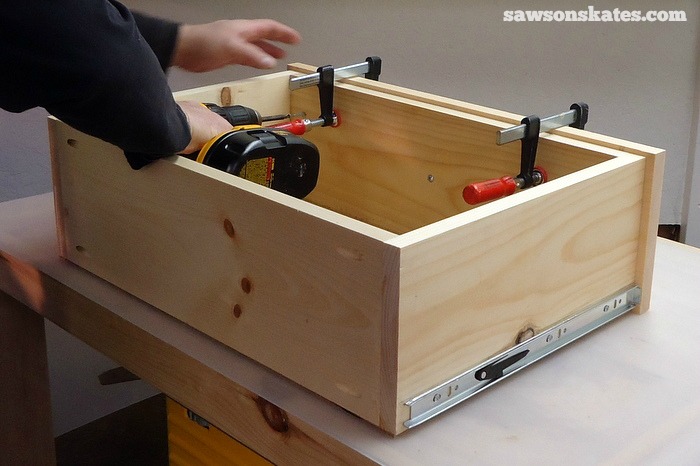
Step 17. Make the Drawer Box. Before making the drawer box, check the instructions of your drawer slides. My drawer slides require 1/2″ space on either side of the drawer box, so my drawer box needs to be 1″ narrower than the carcass opening. Adjust your drawer box dimensions if necessary.
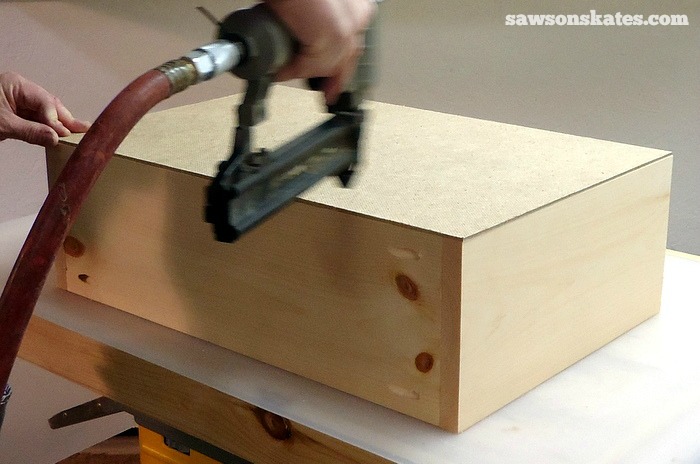
Cut the front and back. Cut 2 pieces of 1×8 to 19-5/8″ and rip to 6-1/2″. Drill pocket holes in each end. Cut the sides. Cut 2 pieces of 1×8 to 14″ and rip to 6-1/2″. Apply glue to the ends of the front and back, place the sides and clamp. Attach using 1-1/4″ pocket screws.
Check the dimensions of the drawer box and cut the bottom from 1/8″ hardboard. My drawer box bottom measured 21-1/8″ x 14″. Apply glue to the drawer, place the bottom and attach using 1/2″ brad nails.
Step 18. Install Drawer Slides. Install the drawer slides according to the manufacturer’s instructions.
Step 19. Make Drawer Front. Measure the drawer area opening. We want 1/8″ clearance on each side of the drawer front, so deduct 1/4″ from your top to bottom dimension and deduct 1/4″ from your side to side dimension. My drawer front measured 21-7/8″ x 6-7/8″. Adjust your drawer front if necessary. Cut a 1×8 to 21-7/8″ and rip to 6-7/8″.
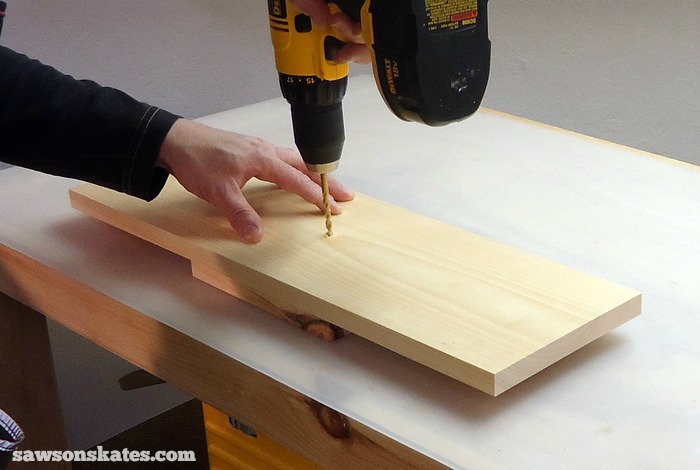
To determine the knob location, use a straight edge to draw a line from corner to corner.
Drill a hole slightly larger than the screw that came with your knob.
Place a few pieces of scrap 1/8″ hardboard on the bottom of the drawer opening and each side.
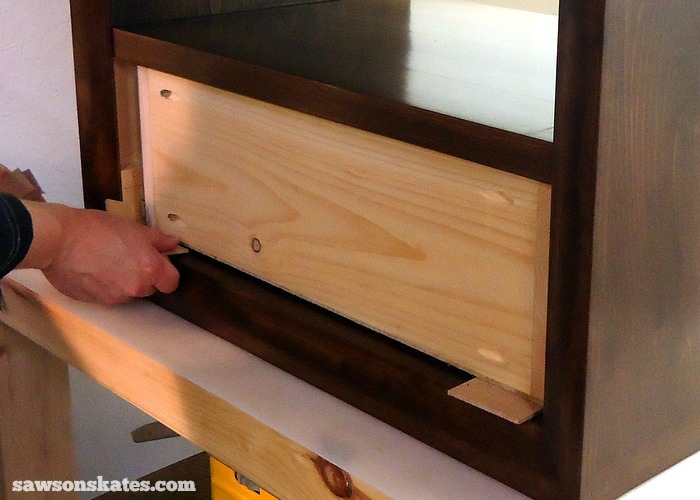
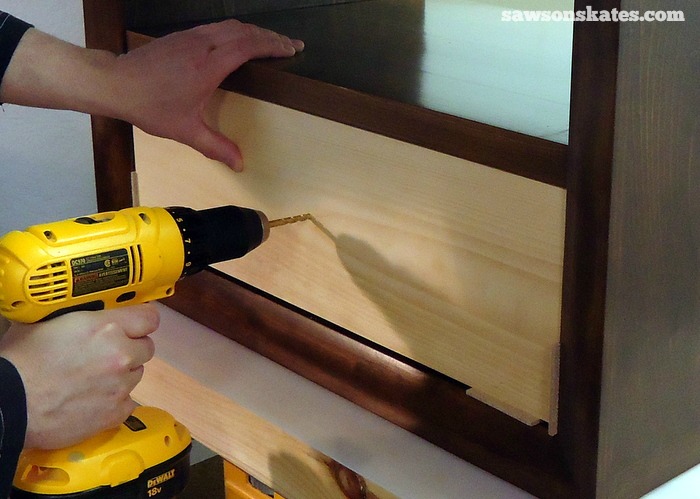
Place the drawer front in position and drill a hole through the drawer front into the drawer box. Attach the knob and using the scrap 1/8″ hardboard, be sure the drawer front is centered in the drawer opening.
Remove the drawer, drill countersink holes and attach the drawer box to the drawer front using 1-1/4″ wood screws. To finish the drawer front I sanded it smooth, applied a tea stain and lightly sanded again. Next, I applied my favorite dark walnut stain and three coats of polyurethane.
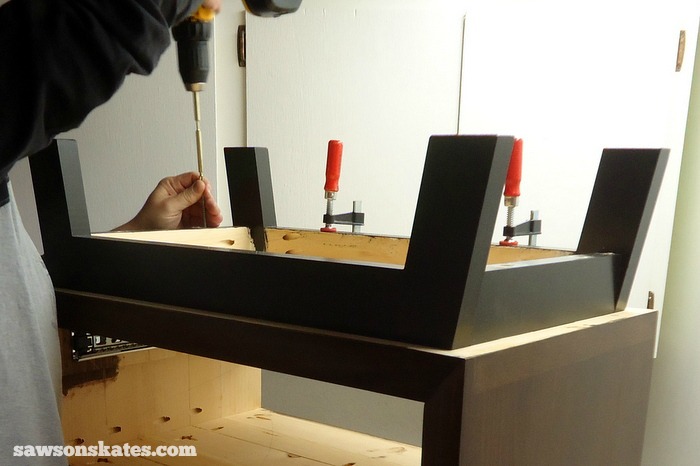
Step 20. Attach the Legs. Center the legs on the carcass and clamp in position. Drill countersink holes in the leg stretchers and attach using 3″ wood screws.
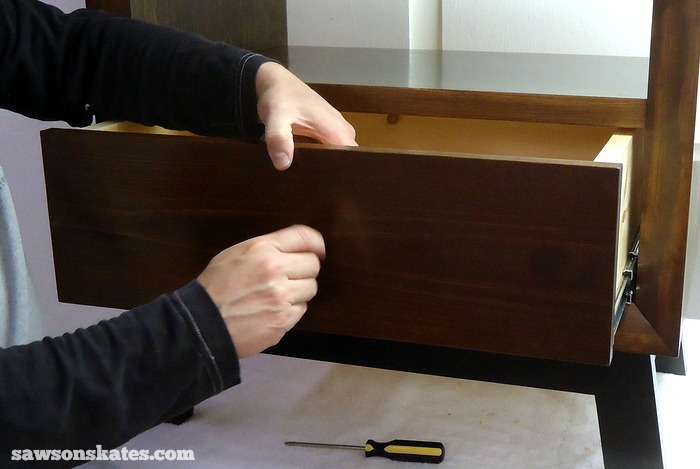
Step 17. Reinstall the Drawer. After the drawer front has been sanded, stained and poly has been applied reinstall it in the nightstand.
Thank you for stopping by to check out my DIY chunky solid wood retro nightstand. If you like this furniture plan, would you please pin it to Pinterest? I’d really appreciate it – thank you!
PIN THIS!


What are the overall dimensions of the finished nightstand?
Hi Kelly – Thank you for stopping by. The nightstand measures approximately 25-7/8″w x 24″h x 16-1/8″d.
I live in a fairly dry environment, especially during winter. In your opinion with this construction technique, is there a high-low chance the wood will crack?
Hi Shane – Thank you for stopping by. I actually didn’t take my own advice about wood movement into consideration when I built this pieces. The way the corners attach to top, bottom and sides could lead to the wood cracking. That said, mine nightstands have not cracked. I think the better thing to do would be to miter the top/bottom/sides and then glue them together.